Irresistible Banana Pudding Poke Cake: Your Easiest Potluck Dessert!
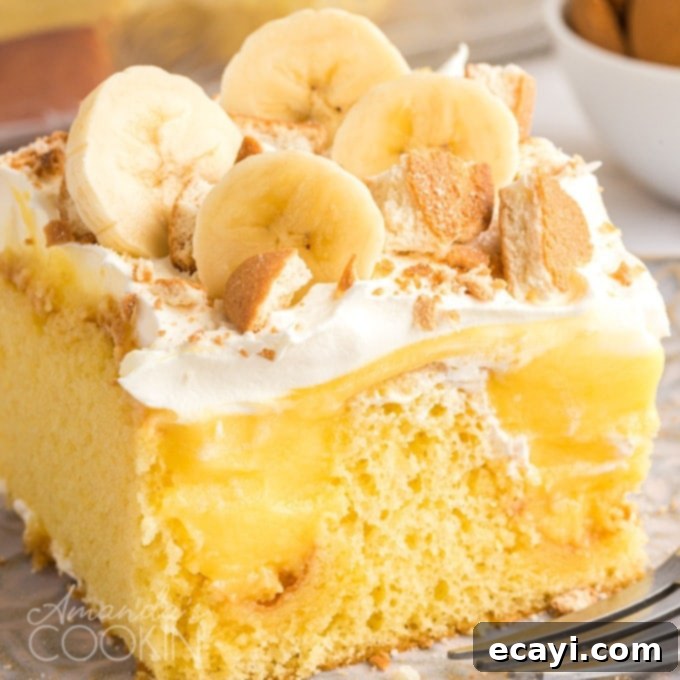
Prepare for a dessert sensation that brings together two beloved classics: moist, fluffy cake and rich, creamy banana pudding. This delightful Banana Pudding Poke Cake is a fun and effortless twist on traditional homemade banana pudding, designed for maximum flavor with minimal fuss. Utilizing a simple cake mix as its base, this recipe transforms into a show-stopping dessert that’s perfect for any occasion. Whether you’re heading to a potluck, hosting a backyard barbecue, or simply craving something sweet and satisfying, this poke cake is guaranteed to be a crowd-pleaser. Its incredible ease of preparation makes it an ideal choice when you need a beautiful and delicious treat without spending hours in the kitchen.
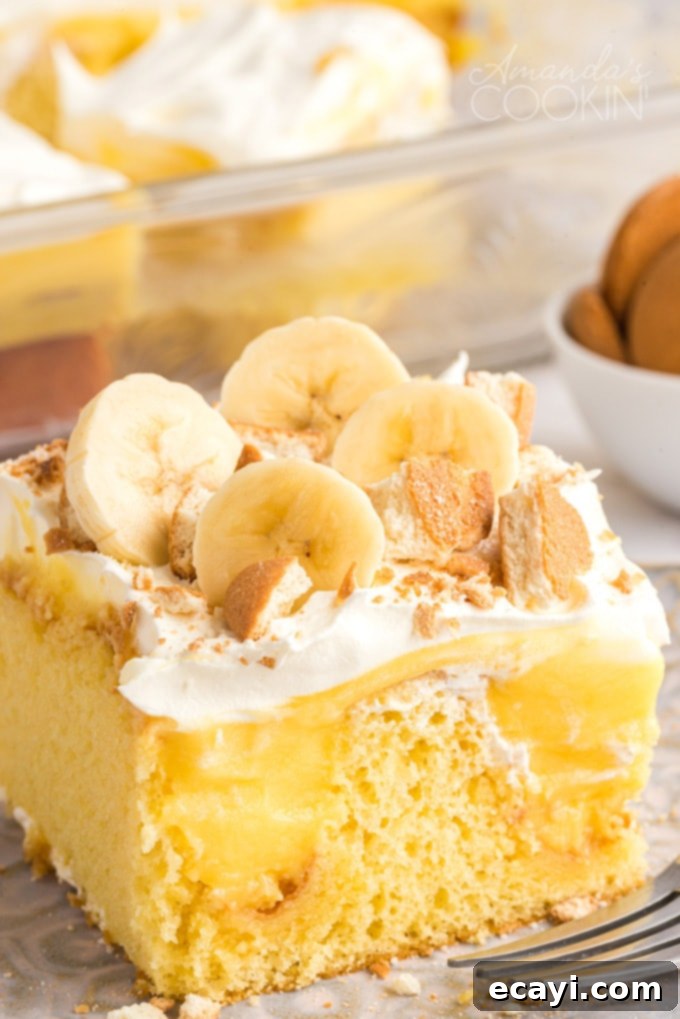
The Allure of Banana Pudding Poke Cake
While I often enjoy the process of baking from scratch, there are times when a convenient, quick, and easy dessert is exactly what’s needed. This Banana Pudding Poke Cake fits that bill perfectly. It’s an affordable dessert that comes together in a flash, making it ideal for unexpected company or last-minute gatherings. The combination of tender cake, infused with a luscious banana pudding, and topped with a cloud of whipped cream and fresh bananas, creates a texture and flavor profile that everyone adores. It’s truly a dessert that tastes like it took all day to make, but only requires a fraction of the time and effort.
RELATED: If you love easy and delicious desserts, you might also like these recipes – Strawberry Cake and Pistachio Pudding Bundt Cake.
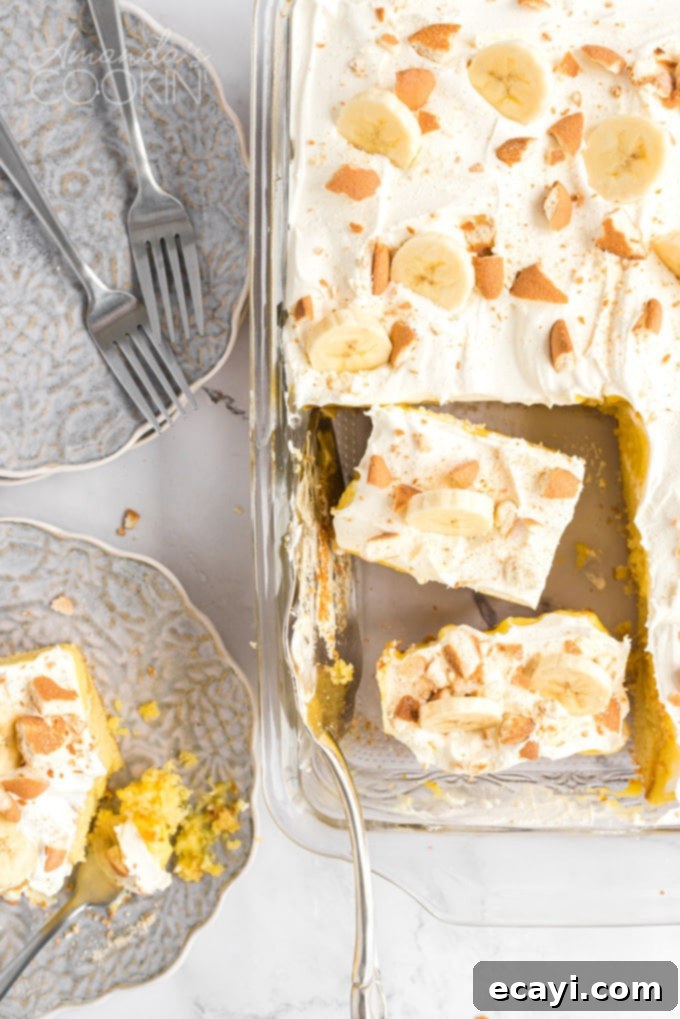
Key Ingredients for Your Delicious Banana Pudding Poke Cake
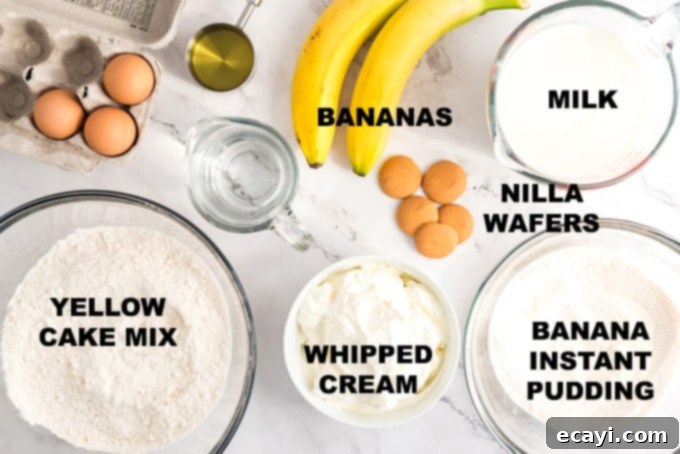
The beauty of this poke cake lies in its simplicity and the readily available ingredients. Here’s a closer look at what you’ll need to create this amazing dessert:
- 1 box yellow cake mix, PREPARED: A standard 15 oz box of yellow cake mix is your secret weapon for convenience. While yellow cake is traditional, you could experiment with vanilla or even white cake mix for a subtle variation. Remember to prepare it according to the package instructions, often requiring eggs, oil, and water. For an even moister cake, consider substituting milk for water and adding an extra egg or a teaspoon of vanilla extract.
- 2 small boxes banana instant pudding mix: Two 3.4 oz boxes (or one 6.4 oz box) of instant banana pudding mix are essential. Ensure it’s “instant” and not cook-and-serve, as the instant variety sets quickly without heating, which is crucial for this recipe’s structure. If banana pudding isn’t your favorite, vanilla instant pudding makes an excellent substitute.
- 2-3 cups cold milk for pudding mix: The quantity will vary slightly based on your pudding mix package, but cold milk is key for helping instant pudding set properly and quickly.
- 1 container frozen whipped topping, or homemade whipped cream: An 8 oz container of thawed frozen whipped topping offers incredible ease. If you prefer a more gourmet touch, freshly made whipped cream (heavy cream, sugar, vanilla) is a fantastic alternative.
- Nilla Wafers, crumbled: These classic vanilla wafers provide the quintessential banana pudding crunch and flavor. You can crumble them coarsely or finely, depending on your preference. If you don’t have Nilla Wafers, shortbread cookies or graham crackers can be a good substitute.
- 2 sliced bananas: Fresh, ripe bananas are non-negotiable for authentic banana pudding flavor and texture. Choose bananas that are yellow with a few brown spots, indicating optimal sweetness.
Essential Kitchen Tools for Baking Success
Having the right tools makes the baking process smooth and enjoyable. Here are the useful kitchen essentials for this banana pudding poke cake recipe:
- 13×9 Baking Dish: This standard size is perfect for sheet cakes and ensures even baking and easy serving for a crowd. Its rectangular shape is ideal for cutting uniform slices.
- Cooling Rack: Essential for allowing your cake to cool evenly after baking, preventing the bottom from becoming soggy. Air circulation is key to a perfectly set cake.
- Electric Mixer: While not strictly required if you have strong arms, an electric mixer (handheld or stand mixer) makes light work of preparing the cake mix and especially the pudding, ensuring a smooth, lump-free consistency.
- Wooden Spoon: The handle of a wooden spoon is surprisingly the best tool for poking the holes in your cake, as its rounded end creates perfect indentations without tearing the cake excessively.
- Mixing Bowls: You’ll need at least one large bowl for mixing the cake batter and another medium-sized bowl for preparing the instant pudding.
- Liquid Measuring Cup: Accuracy in measuring milk for the pudding is crucial for the correct consistency.
- Spatula: A rubber or silicone spatula is useful for scraping down bowls and spreading the pudding and whipped topping smoothly over the cake.
- Knife: For neatly slicing your fresh bananas just before serving.
Expert Tips for the Perfect Banana Pudding Poke Cake
To ensure your banana pudding poke cake turns out perfectly every time, keep these helpful tips in mind:
- Chilling is Key for Pudding: The instant pudding is designed to set quickly, but allowing the cake to chill for at least an hour after pouring the pudding will ensure it fully absorbs into the cake and creates a firm, creamy layer. This step is crucial for an even distribution and prevents the whipped topping from sinking into the cake.
- Timing is Everything for Bananas: To prevent your sliced bananas from turning brown and looking unappetizing, always add them as a garnish just before serving. If you prepare the cake ahead of time, keep the bananas separate and add them at the last minute. A quick spritz of lemon juice on sliced bananas can also help slow down the browning process if you need to prepare them a little earlier.
- Don’t Overbake the Cake: Follow your cake mix instructions carefully, but keep an eye on it. An overbaked cake will be dry and won’t absorb the pudding as well. The cake is done when a toothpick inserted into the center comes out clean.
- Evenly Spaced Holes: When poking holes in the cake, try to make them uniformly spaced, about 1/2 to 1 inch apart. This ensures that every bite of cake is infused with that delicious banana pudding flavor. Wiping the wooden spoon handle periodically prevents cake crumbs from sticking and pulling out larger pieces of cake.
- Storage: Store any leftover banana pudding poke cake covered tightly in the refrigerator for up to 3-4 days. This dessert is best enjoyed fresh, but it holds up well in the fridge.
- Make-Ahead Options: You can bake the cake and chill it with the pudding layer a day in advance. Add the whipped topping, Nilla wafers, and fresh bananas just before serving for the best presentation and taste.
How to Make Banana Pudding Poke Cake
Creating this irresistible dessert is surprisingly simple. Follow these steps for a perfect banana pudding poke cake:
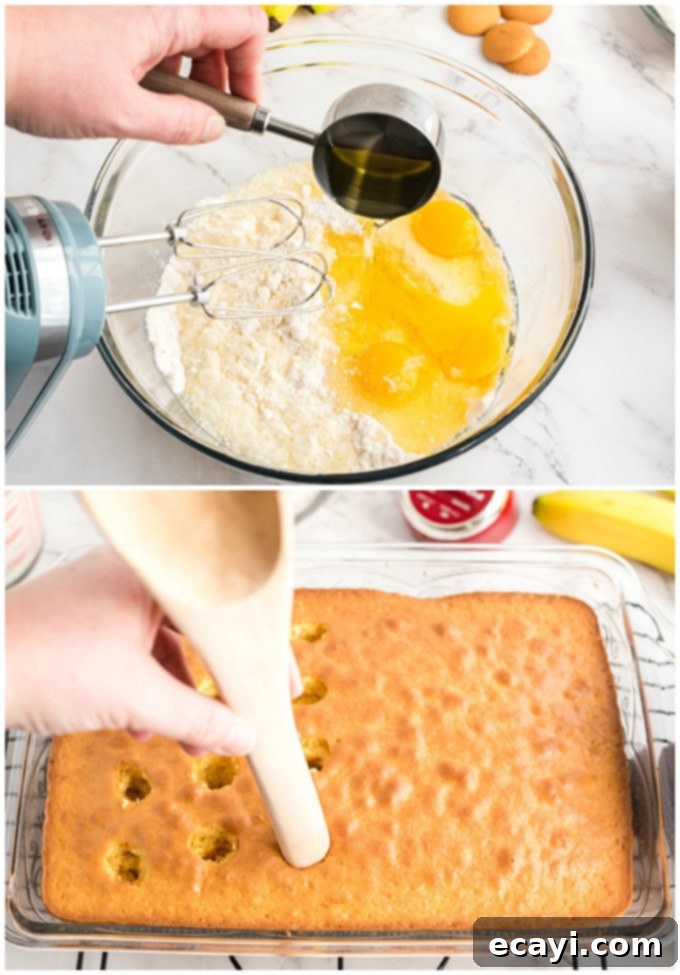
- Prepare and Bake the Cake: First, preheat your oven to the temperature specified on your yellow cake mix box. Prepare the cake batter exactly as directed on the package for a 13×9-inch pan. Pour the batter into your prepared baking dish and bake until golden brown and a toothpick inserted into the center comes out clean.
- Cool the Cake: Once baked, remove the cake from the oven and allow it to cool in the pan for at least 5 minutes. This initial cooling helps the cake set before you begin the poking process.
-

- Poke the Holes: With the handle of a wooden spoon, gently poke evenly spaced holes across the entire surface of the cake. Make sure the holes go almost to the bottom of the cake, about 1/2 to 1 inch apart. To prevent sticking and pulling out lumps of cake, wipe the wooden spoon handle clean between pokes.
- Prepare the Pudding: In a medium-sized bowl, mix together the cold milk and both packets of banana instant pudding mix as directed on the pudding packet. Whisk thoroughly until the pudding begins to thicken, usually within a minute or two.
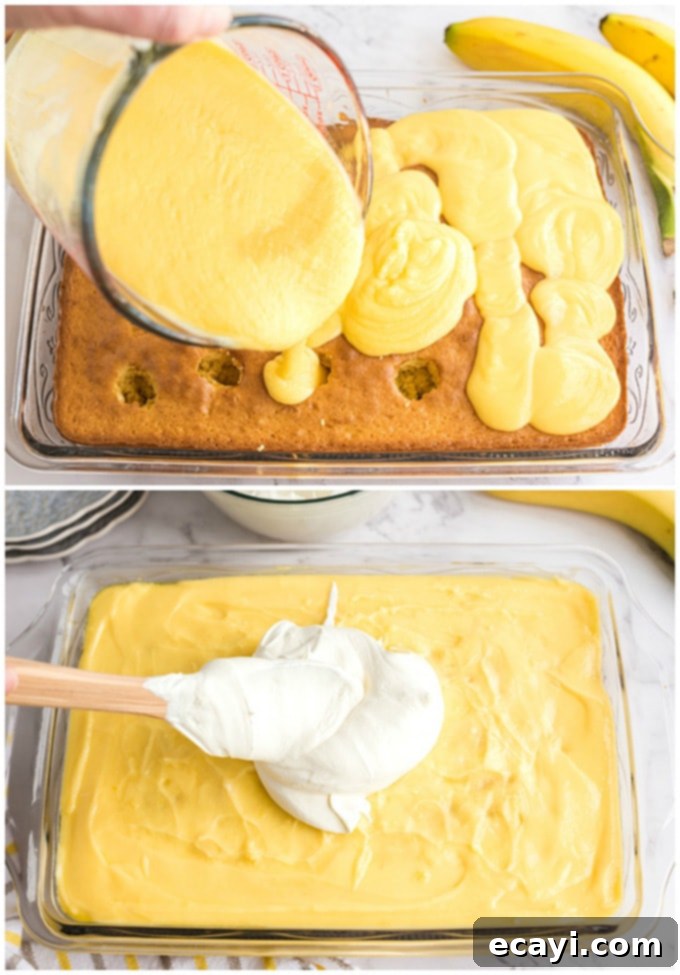
- Pour and Chill the Pudding: Once the cake has fully cooled, pour the freshly mixed pudding evenly over the cake. Use a spatula to gently spread the pudding, ensuring it seeps into all the poked holes and creates a smooth, fully covered surface. Refrigerate the cake for at least 1 hour. This crucial step allows the pudding to set properly within the cake and firm up enough to support the whipped topping.
-

- Add Whipped Topping: Once the pudding layer is set, spread your thawed whipped cream or homemade whipped topping evenly over the entire surface of the pudding.
- Garnish and Serve: Just before you are ready to serve, sprinkle the crumbled Nilla wafers over the top, followed by the freshly sliced bananas. Remember, bananas tend to brown quickly, so this last-minute step ensures the freshest appearance.
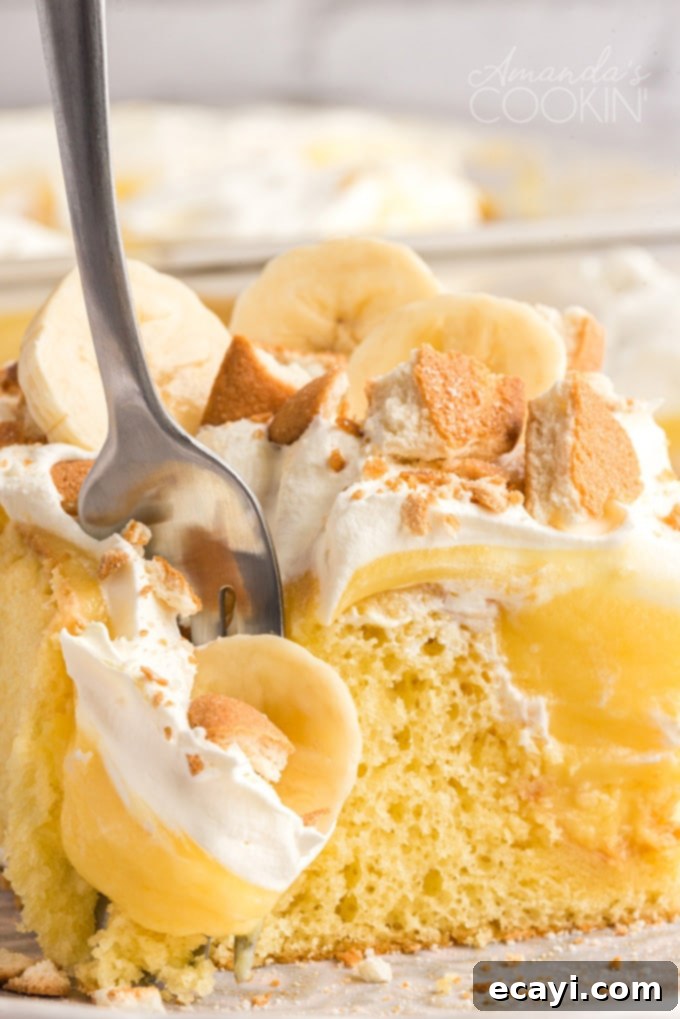
I sincerely hope you enjoy this delightful banana pudding poke cake as much as my family and I do! It’s consistently a huge hit at parties, potlucks, barbecues, and all our holiday gatherings. The combination of moist cake, creamy pudding, and fresh banana flavors is simply irresistible.
More Delicious Dessert Ideas You Will Love
If you’re a fan of easy and delicious desserts, especially poke cakes and banana-flavored treats, you’ll want to explore these other fantastic recipes:
- This lemon curd poke cake is positively lovely, offering a bright and zesty flavor that’s perfect for elegant occasions like a bridal shower or even an afternoon tea.
- If you’re an orange lover like me, this orange poke cake is definitely one you will want to try! Its vibrant citrus flavor is incredibly refreshing.
- This raspberry poke cake is actually one of my personal favorites, and I love how versatile it is; you can easily change out the fruit flavors to whatever you like best.
- For more convenient baking, you can find all my cake mix recipes here, all my poke cake recipes here, and ALL cake recipes here.
- Don’t miss our classic Homemade Southern Banana Pudding! Topped with a delicious meringue layer, this traditional banana pudding is a true Southern comfort food and will undoubtedly be a crowd favorite.
- For a different take on banana dessert, check out this Banana Cream Lush, complete with a decadent Bananas Foster sauce – a layered dessert that’s rich and satisfying.
- Last but certainly not least, you don’t want to miss my all-time favorite Banana Cake recipe. Paired with a luscious vanilla cream cheese frosting, this banana cake is incredibly moist and always a hit at any party or family gathering!
- This Lemon Cheesecake Pudding Dessert is a no-bake dream, offering tangy and creamy layers that come together effortlessly.
- For the ultimate chocolate indulgence, this triple Chocolate Poke Cake is a chocolate lover’s dream come true, packed with intense cocoa flavor.
- Once you sink your teeth into this Easy Banana Cake, topped with a delightful banana-flavored whipped cream frosting, there’s no going back – it’s an instant favorite!
Banana Pudding Poke Cake
Banana pudding poke cake is great for parties and potlucks! A delicious doctored cake mix recipe with creamy instant banana pudding.
IMPORTANT – There are often Frequently Asked Questions within the blog post that you may find helpful. Simply scroll back up to read them!
Print It
Pin It
Rate It
Prevent your screen from going dark
Ingredients
- 15 oz box yellow cake mix PREPARED
- 6.4 oz banana instant pudding mix (2 small boxes)
- 3 cups cold milk for pudding mix
- 8 oz container frozen whipped topping or homemade whipped cream
- 2 large bananas sliced
- 5 Nilla wafers crumbled
Things You’ll Need
-
13×9 baking dish
-
Wire cooling racks
-
Hand mixer
-
Wooden spoon
-
Mixing bowls
-
Liquid measuring cup
Before You Begin
- The instant pudding is very simple to make and will start to set right away. It will set up better and make it easier to apply the whipped cream or whipped topping if after you’ve added it onto the cake, you then chill it in the fridge for about an hour. After you’ve added the whipped topping you can keep the cake covered in the fridge until you are ready to serve it.
- Once you’re ready to serve you can add the crushed wafers and the sliced bananas. If you put the bananas on it too far ahead of time they will eventually start to turn brown.
Instructions
-
Preheat oven to the temperature specified on your cake mix.
-
Make and cook cake as directed on your cake mix box for a 13×9-inch pan.
-
Remove cake from the oven and let it cool in the pan for at least 5 minutes.
-
With handle of a wooden spoon poke evenly spaced holes almost to bottom of cake, about 1/2 to 1 inch apart.
-
If you wipe the wooden spoon handle in between it will help stop it sticking and pulling out lumps of cake.
-
In a bowl mix together the milk and banana pudding as directed on the pudding packet.
-
When the cake is fully cooled pour mixed pudding over the cake and spread evenly over surface to get it into the holes and fully cover the surface of the cake, then refrigerate for 1 hour. This will allow the pudding to set enough to easily add the whipped topping.
-
Spread whipped cream or whipped topping evenly over the pudding layer on the cake.
-
Just before you serve it add crumbled Nilla wafers and then sliced bananas over the top. The bananas will turn black if you cut them too far ahead of time.
Nutrition
Follow on Pinterest @AmandasCookin or tag #AmandasCookin!
The recipes on this blog are tested with a conventional gas oven and gas stovetop. It’s important to note that some ovens, especially as they age, can cook and bake inconsistently. Using an inexpensive oven thermometer can assure you that your oven is truly heating to the proper temperature. If you use a toaster oven or countertop oven, please keep in mind that they may not distribute heat the same as a conventional full sized oven and you may need to adjust your cooking/baking times. In the case of recipes made with a pressure cooker, air fryer, slow cooker, or other appliance, a link to the appliances we use is listed within each respective recipe. For baking recipes where measurements are given by weight, please note that results may not be the same if cups are used instead, and we can’t guarantee success with that method.
This post originally appeared here on Jun 10, 2016.
