Easy Homemade Birthday Cake Rolled Ice Cream: Fun & Festive Dessert!
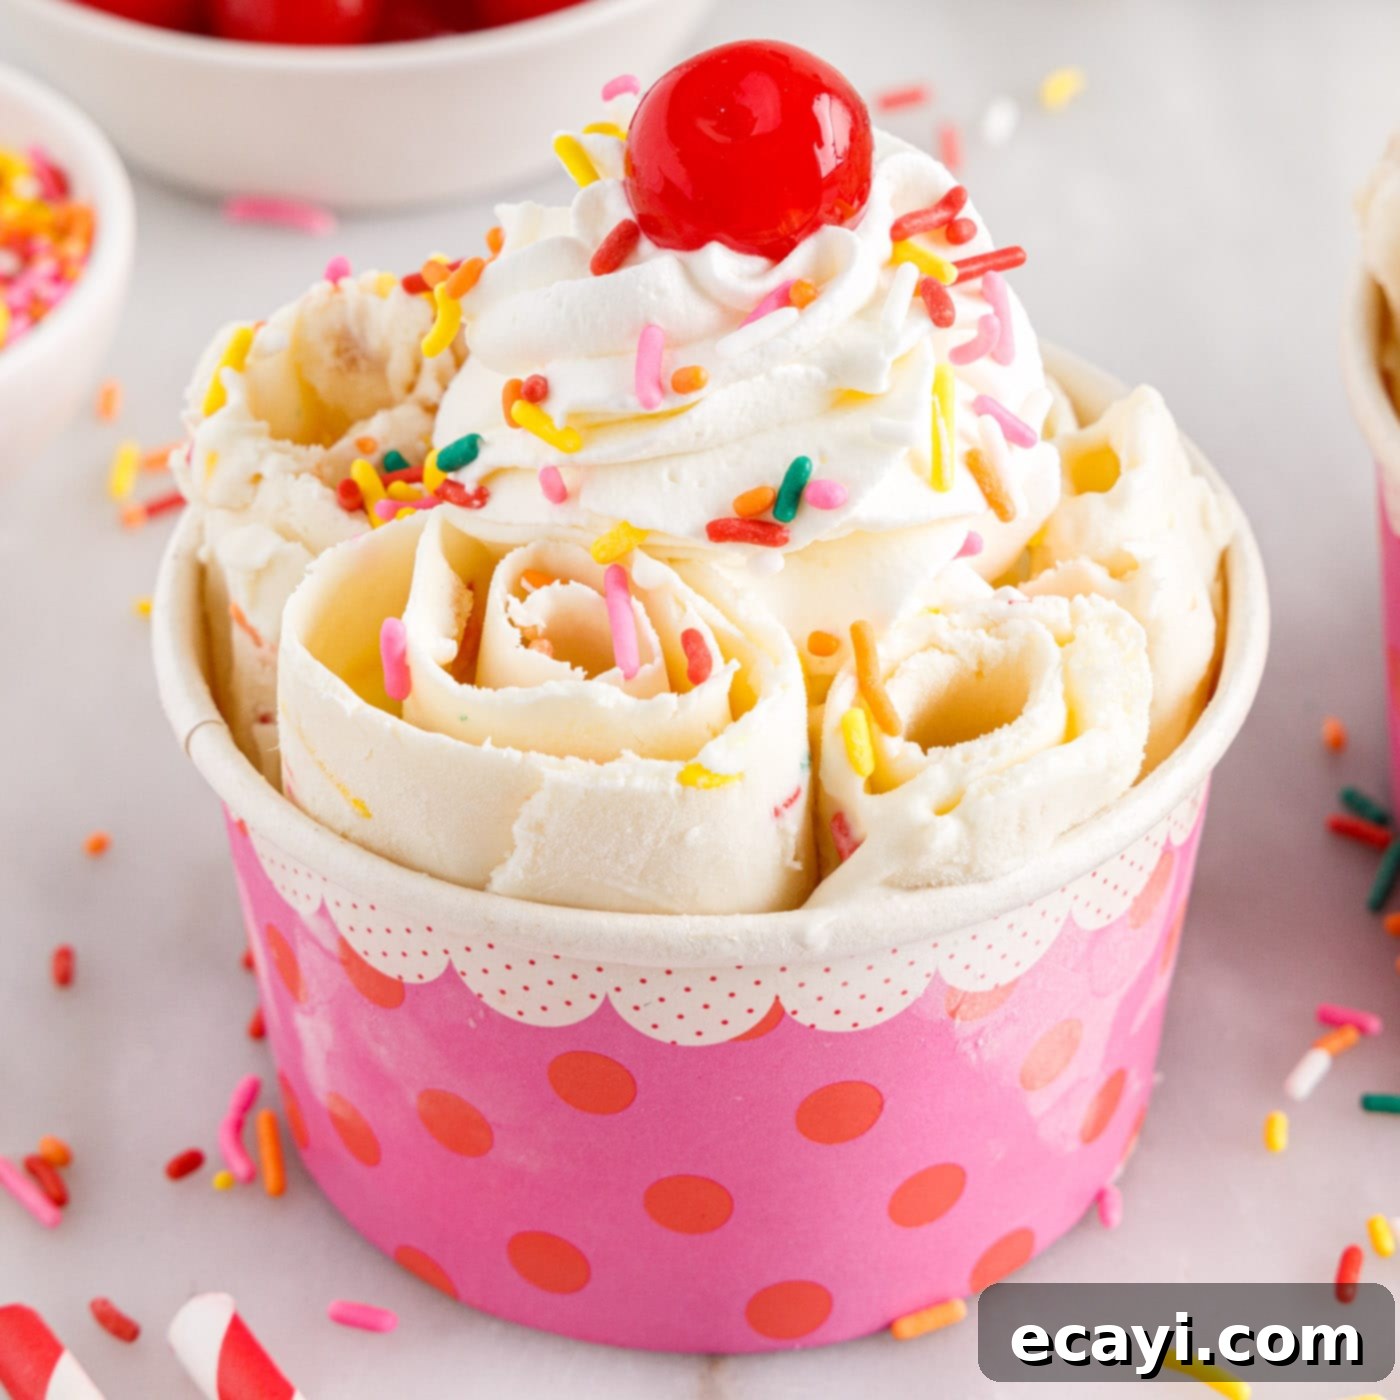
Indulge in the joyful flavors of a birthday celebration with this delightful homemade birthday cake rolled ice cream. It’s a sweet, creamy, and visually appealing dessert swirled with vibrant rainbow sprinkles and luscious chunks of real birthday cake, all nestled within a smooth vanilla ice cream base. This unique treat is not only incredibly delicious but also offers a fun, interactive dessert experience that’s perfect for parties or a special weekend indulgence. Forget about waiting in line at a rolled ice cream shop; you can create this magical dessert right in your own kitchen with surprising ease!
Why This Recipe Is a Must-Try
Making birthday cake rolled ice cream at home might sound intimidating, but it’s actually quite simple, requiring just 6 basic ingredients and a few common kitchen tools. This recipe builds upon our classic rolled ice cream technique, elevating it with the playful addition of colorful Jimmie sprinkles and tender crumbled birthday cake for that irresistible celebratory touch. The beauty of homemade rolled ice cream lies in its fresh taste and the satisfaction of crafting a unique dessert from scratch.
Unlike traditional churned ice cream, the rolled method creates a distinctively smooth and dense texture. The rapid freezing process on a super-chilled pan minimizes ice crystal formation, resulting in a remarkably creamy bite. It’s also incredibly versatile. Much like our popular no-churn birthday cake ice cream, you have the flexibility to include the frosting from your crumbled cake for an extra layer of decadence and moisture, or omit it for a lighter cake flavor. Rolled ice cream is an engaging and unique way to enjoy a frozen dessert, no longer reserved solely for specialty shops. These vibrant rolls are an absolute blast to serve at birthday parties, gatherings, or simply as a fun family activity. Just remember to keep them well-chilled to maintain their perfect consistency!
Essential Ingredients for Rolled Ice Cream Success
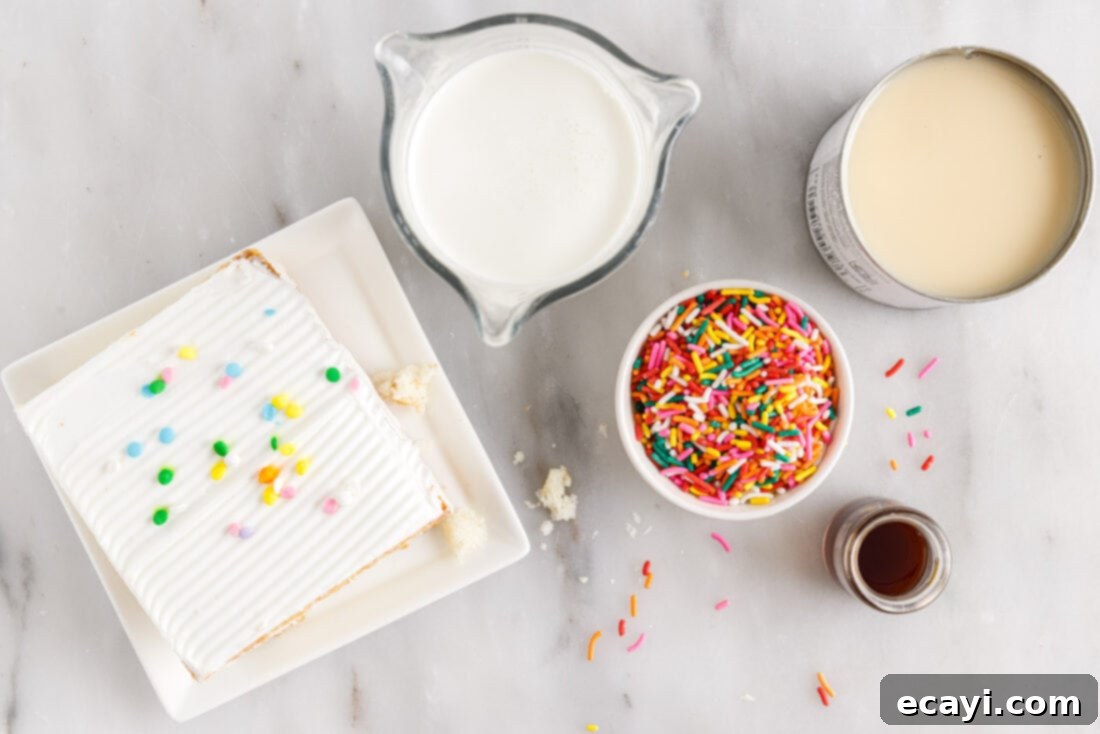
To embark on your rolled ice cream adventure, you’ll need a handful of readily available ingredients. While the full list with precise measurements is provided in the printable recipe card at the end of this post, let’s discuss the key components and how they contribute to this delightful dessert. Sourcing good quality ingredients is always the first step to a truly delicious homemade treat.
Ingredient Spotlight & Smart Substitutions
Understanding the role of each ingredient will empower you to create perfect rolled ice cream every time and troubleshoot any issues that may arise.
The Ice Cream Base: Heavy Cream and Sweetened Condensed Milk
The magic of no-churn rolled ice cream largely depends on the precise ratio of sweetened condensed milk to heavy cream. Heavy cream, with its high-fat content, provides the rich, creamy texture and acts as the structural foundation for the ice cream. Sweetened condensed milk not only provides all the necessary sweetness, eliminating the need for granulated sugar, but also contributes to the smooth consistency by preventing the formation of large, icy crystals. This combination ensures a base that freezes quickly and holds its shape for rolling.
Troubleshooting Tip: The consistency of your base is paramount. If you find that your ice cream is too soft and melts into a puddle before you can even begin to roll it off the pan, it typically means your mixture has too much sweetened condensed milk or not enough heavy cream. To correct this, you’ll need to slightly increase the proportion of heavy cream in your next batch. Conversely, if the ice cream is too brittle and breaks apart rather than rolling smoothly, you need a greater portion of sweetened condensed milk to increase its flexibility and reduce its freezing point. Keep in mind that different brands of sweetened condensed milk can vary slightly in thickness and sweetness, which might subtly affect the final texture. It’s often helpful to stick to a brand you trust once you’ve achieved the desired consistency.
Mix-Ins: Birthday Cake & Sprinkles
The mix-ins are where the “birthday cake” fun truly comes to life! For the cake component, you can use a homemade vanilla or white cake, or even a store-bought slice or cupcake. A single slice of cake or a standard cupcake is usually plenty for this recipe. Crumbled vanilla cake offers a classic flavor, but don’t hesitate to experiment with funfetti cake for an extra burst of color, or even a light chocolate cake for a mocha twist. You can choose to include the frosting from the cake when crumbling it for an extra layer of moistness and sweetness, which creates an even more decadent rolled ice cream. If you prefer a less rich outcome, simply remove most of the frosting before crumbling.
When it comes to sprinkles, the choice is crucial for maintaining vibrant colors. We specifically recommend Jimmie sprinkles (the cylindrical ones) because they are designed not to bleed their color when they come into contact with moisture, unlike many other types of sprinkles. Avoid using nonpareils (the tiny, round, crunchy sprinkles) as they will quickly dissolve and turn your ice cream base into a colorful, muddy mess. If you’re keen on using specialty sprinkles, always perform a quick color-fastness test by wetting a few sprinkles before mixing them into your precious ice cream base.
A pinch of sea salt enhances all the sweet flavors, while pure vanilla extract provides a warm, inviting aroma and classic taste that forms the perfect backdrop for the cake and sprinkles. Always opt for pure vanilla extract over imitation for the best flavor.
Crafting Your Homemade Birthday Cake Rolled Ice Cream
These step-by-step photos and instructions are here to guide you visually through the process of making this delightful recipe. For a convenient printable version, complete with all measurements and instructions, you can Jump to Recipe at the bottom of this post.
- Prepare Your Freezing Surface: The most crucial first step is to get your sheet pan extremely cold. Prior to preparing any ingredients, place a full-size sheet pan with rimmed edges into the freezer. Ensure there is ample space for the sheet pan to sit perfectly level. Allow the pan to chill in the freezer for a minimum of 15 minutes, or ideally, several hours in advance. The colder the pan, the faster your ice cream will freeze and the easier it will be to roll. (Alternatively, if you don’t have space for a full-size pan or want to make smaller batches, you can use several smaller sheet pans, like quarter sheet pans.)
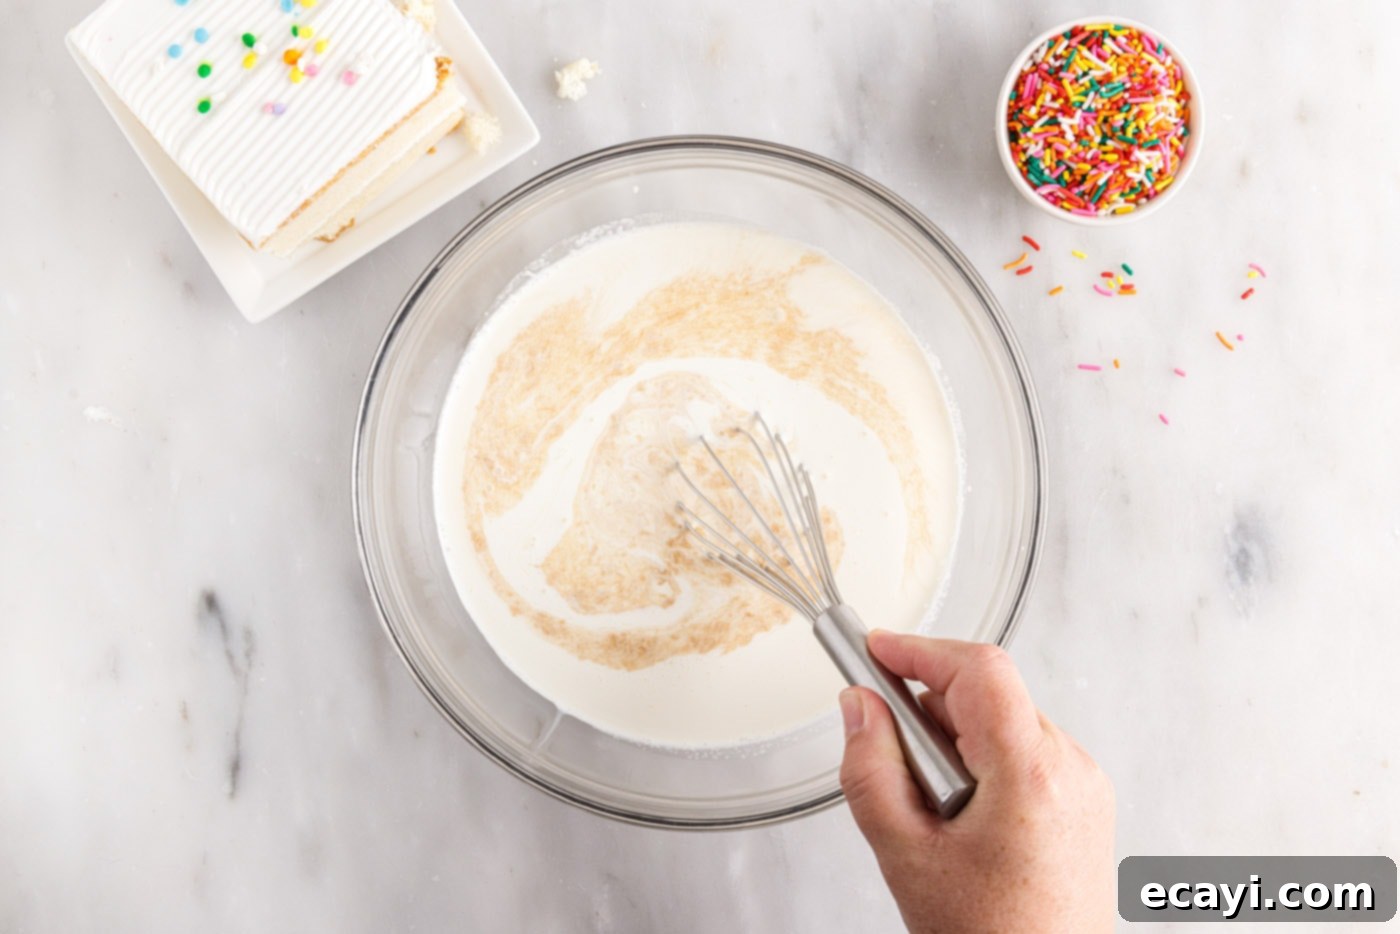
- Whisk the Base Ingredients: In a medium bowl, combine the heavy cream, sweetened condensed milk, a pinch of sea salt, and pure vanilla extract. Whisk these ingredients together until they are thoroughly combined and no streaks of condensed milk are visible. The mixture should be smooth and uniform. This creates the rich, creamy foundation for your rolled ice cream.

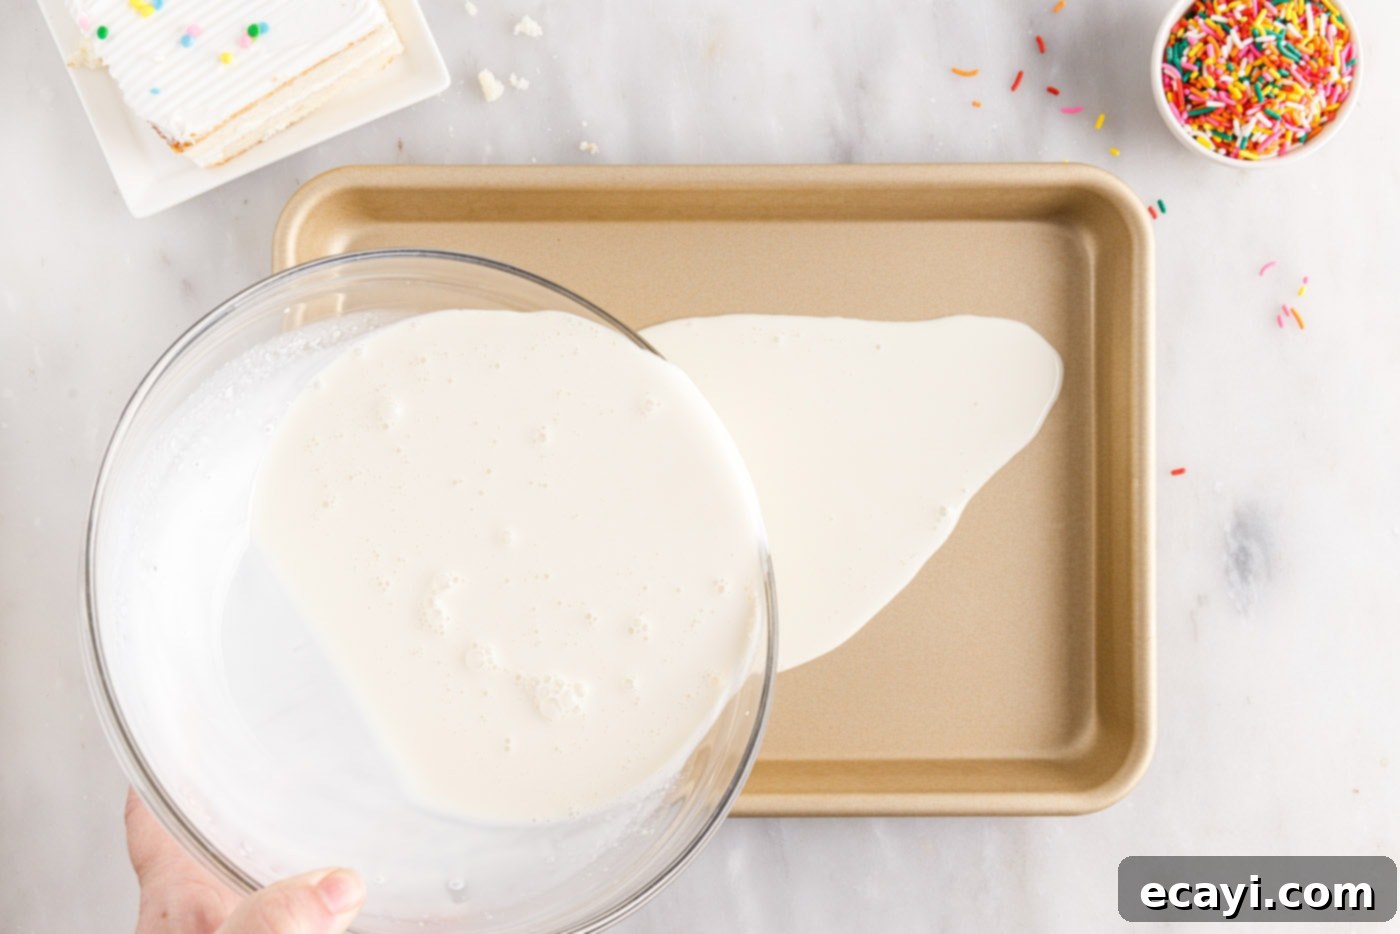
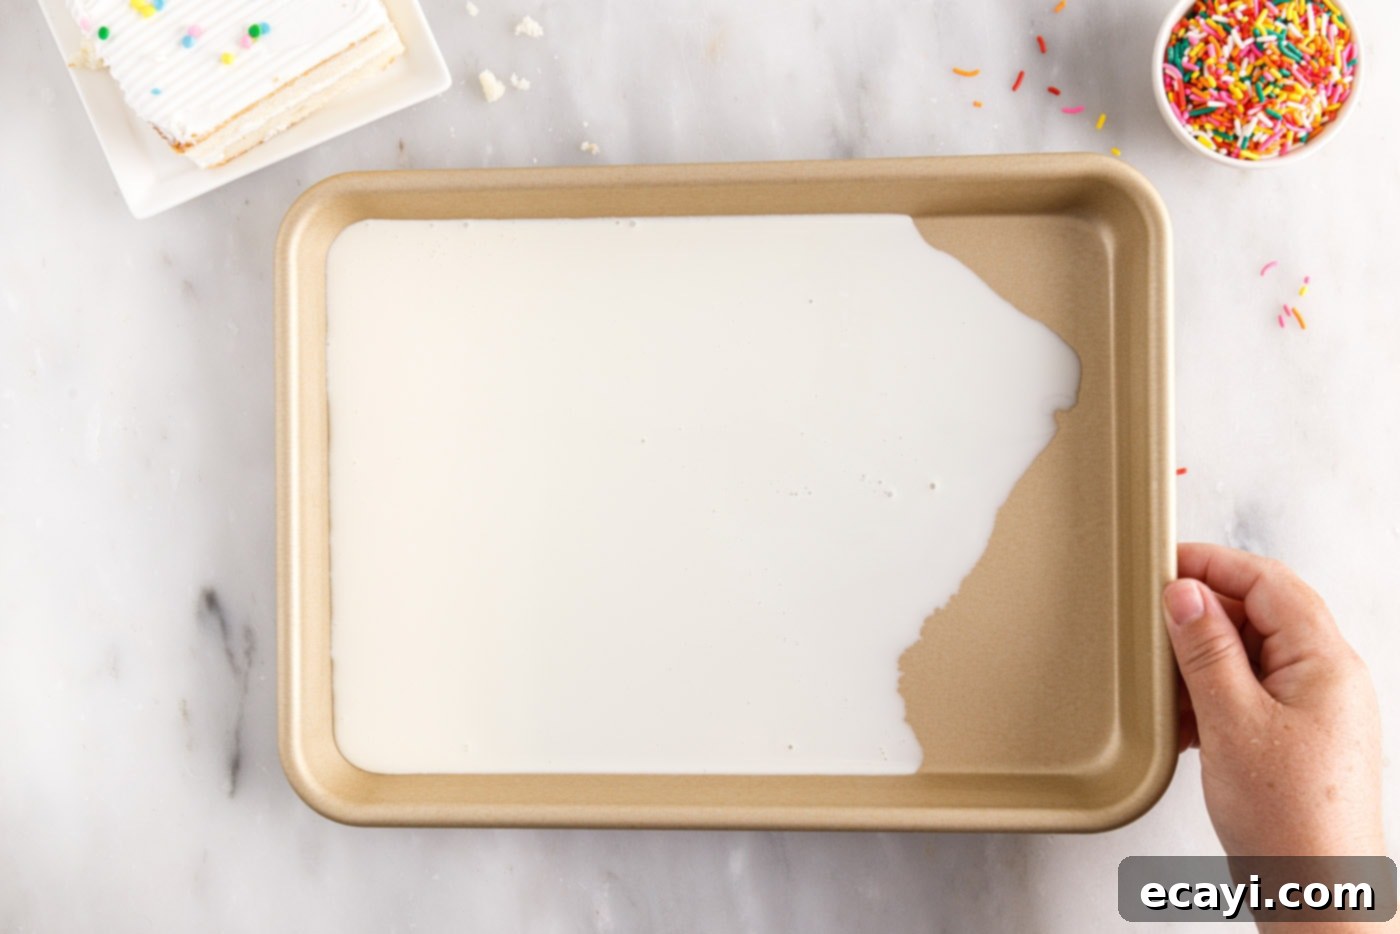
- Pour the Base onto the Chilled Pan: Retrieve your super-cold sheet pan from the freezer. Pour a thin layer of the ice cream base mixture onto the prepared pan. If using smaller pans, pour just enough mixture to evenly coat the entire bottom of each pan. The layer should be no thicker than 1/8 inch. A thinner layer freezes faster and is much easier to work with when rolling.


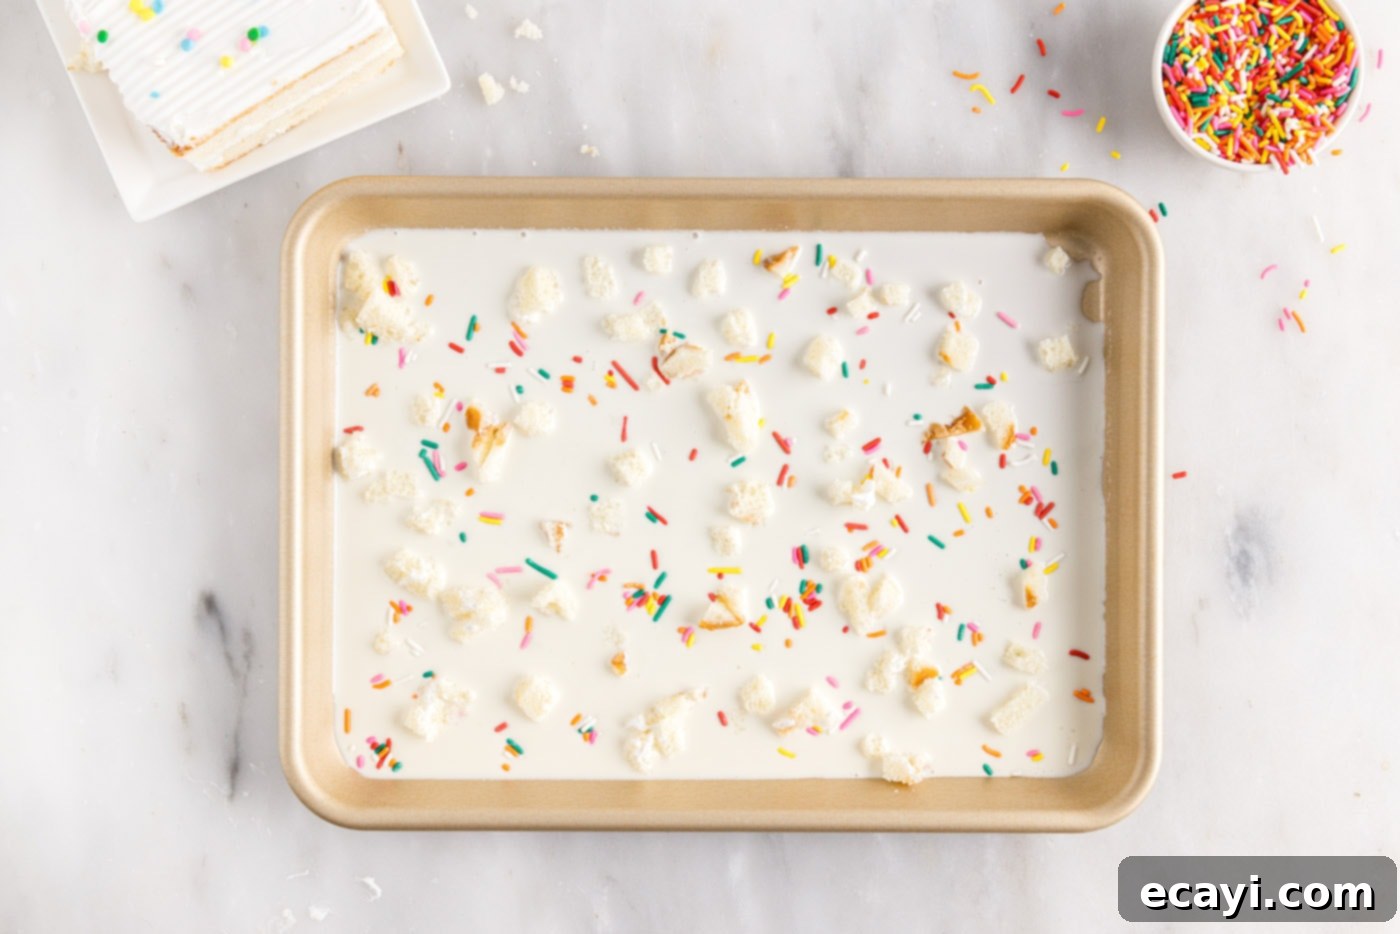
- Add Your Festive Mix-Ins: Now for the fun part! Generously sprinkle the rainbow Jimmie sprinkles over the wet ice cream base. Start with about a tablespoon or so, and add more to your liking – a good rule of thumb is 2-4 tablespoons total, depending on how sprinkle-dense you want your ice cream. Next, crumble a piece of birthday cake or cupcake and scatter these crumbles evenly over the ice cream mixture.
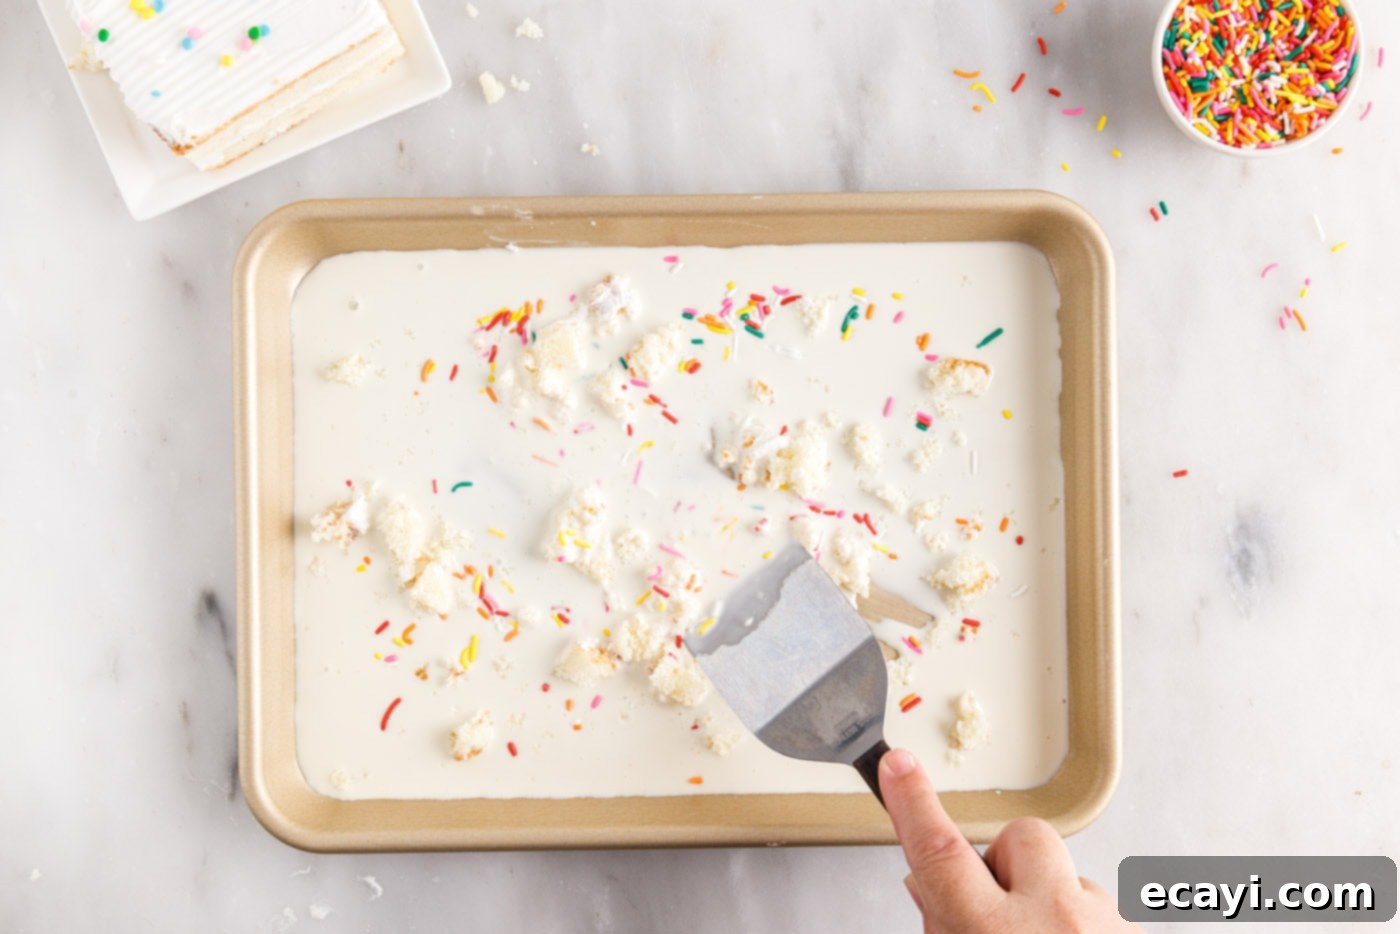
- Incorporate & Redistribute Toppings: To ensure easier rolling, allow the cake crumbles to sit on the ice cream base for a minute or two, letting them soften slightly and soak up a bit of the liquid. Then, using your spatula or a bench scraper, gently mix the sprinkles and cake crumbles into the ice cream base. Redistribute the mixture evenly across the pan, ensuring all toppings are well-integrated and spread thinly. This step helps create a uniform texture and ensures every bite has cake and sprinkles.


- Freeze Until Solid: Place the pan back into the freezer. Allow it to freeze for at least 2-3 hours, or until the ice cream base is completely solid. The freezing time can vary depending on your freezer’s temperature and the thickness of your ice cream layer.
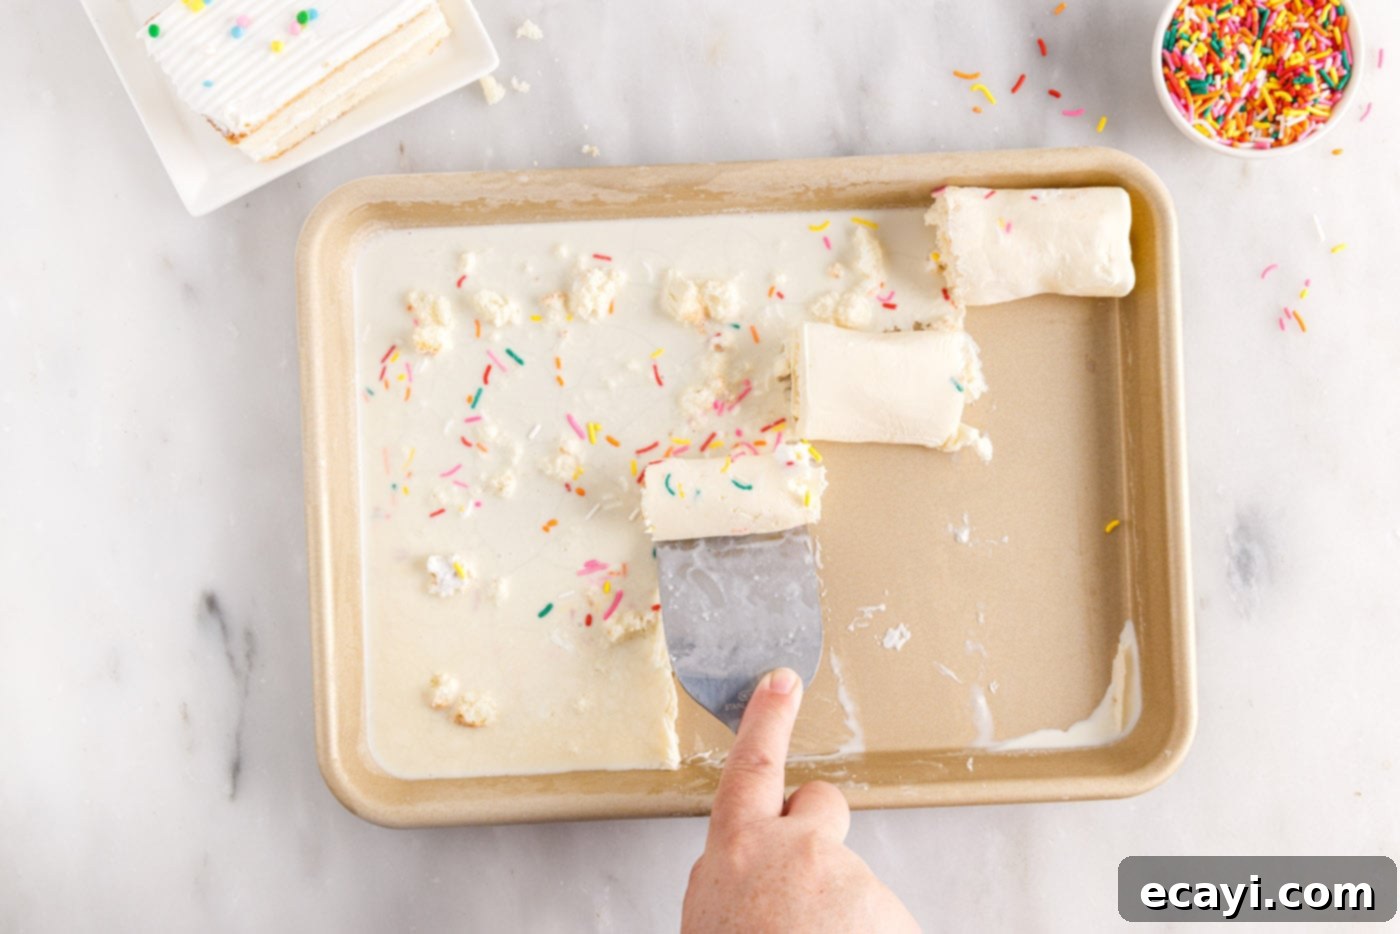
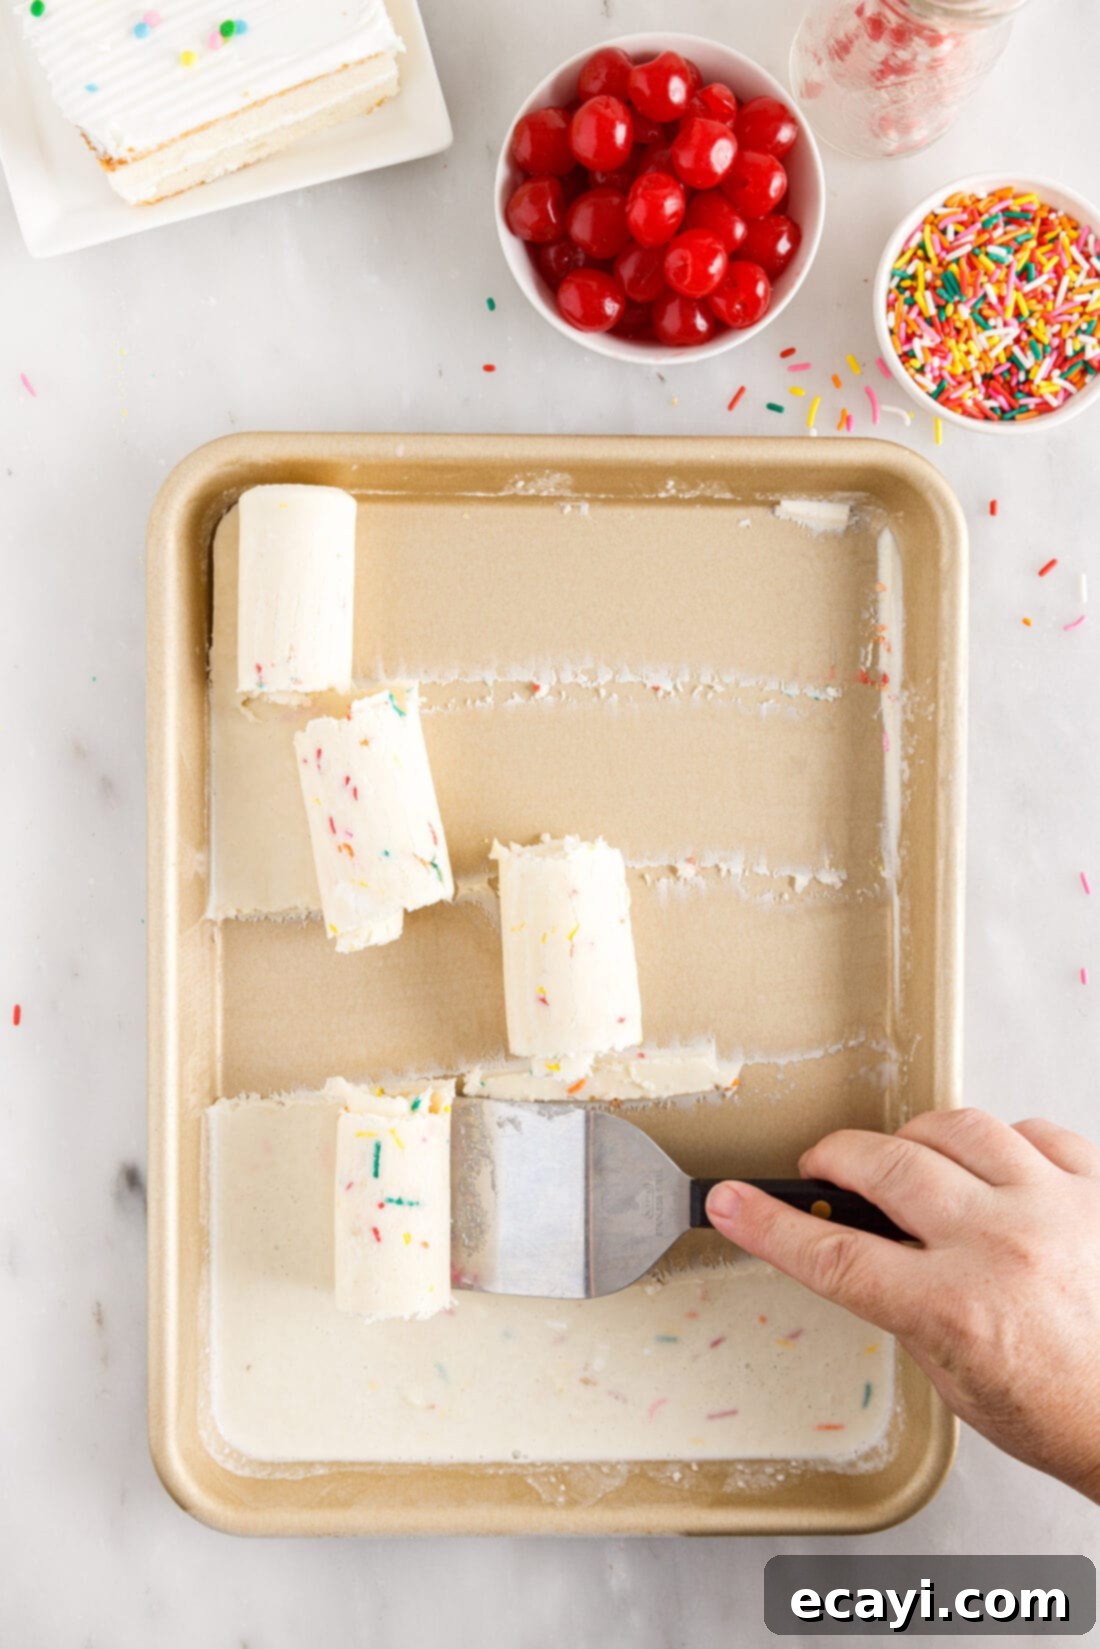
- Roll Your Ice Cream: Once the ice cream is solid, it’s time to roll! Work quickly to prevent melting. Using a 3-inch wide straight spatula or a bench scraper, gently lift one edge of the ice cream. Then, at about a 45-degree angle, glide your spatula firmly but smoothly across the sheet pan, pushing the ice cream away from you to create beautiful, spiraling rolls. The key is consistent pressure and speed. Transfer these freshly made rolls immediately into a paper cup, a small bowl, or your chosen serving dish. If making multiple batches, store the rolled ice cream in the freezer while you work on the rest.

Frequently Asked Questions & Expert Tips for Perfect Rolled Ice Cream
For optimal storage, you have a couple of options. You can either cover the sheet pan tightly with plastic wrap and freeze the unrolled sheet, then roll it just before serving. Or, once you’ve created your rolls, transfer them to an air-tight container, ensuring they are packed snugly to prevent freezer burn. Store in the freezer for up to 1 month. When ready to serve from storage, let them sit at room temperature for a minute or two to soften slightly for the best texture.
The beauty of this recipe is its adaptability. You can use any size metal pan, as long as it has a rim. The most important factor is creating a thin, consistent layer of ice cream base. Pour just enough mixture into the pan to spread a solid layer, no thicker than 1/8 inch (in my experiments, there was no such thing as “too thin”). Freeze this layer, roll it, and then repeat the process with the remaining base mixture. Store any unused base mixture in the refrigerator between pours. I personally found that using quarter sheet pans and working in smaller batches at a time offered the best control and results, especially for beginners.
Several factors can affect successful rolling. First, ensure your pan is *exceptionally* cold – at least 15 minutes, preferably longer, in a deep freezer. Second, the ice cream base consistency is key: if it’s too soft (melts too quickly), you might need more heavy cream next time; if it’s too brittle, add a touch more sweetened condensed milk. Third, work quickly! Rolled ice cream is a race against melting. Your spatula technique also matters: use firm, consistent pressure at a shallow angle. Practice makes perfect!
While this recipe relies on traditional dairy for its rich creaminess, you might be able to adapt it using full-fat coconut cream (chilled, solid part only) instead of heavy cream, and a dairy-free sweetened condensed milk alternative. Be aware that the texture and flavor will be different, and you may need to adjust ratios slightly to achieve the desired rolling consistency.
Beyond your freezer and a metal sheet pan, the most crucial tool is a good quality, wide straight spatula (a bench scraper works wonderfully too). This specialized tool allows for the precise scraping motion needed to form the rolls. Having a sturdy mixing bowl and a whisk is also essential for preparing the base.
Expert Tips for Rolled Ice Cream Success:
- Temperature is Everything: Your freezer and sheet pan need to be as cold as possible. Pre-chill the pan for at least an hour, or even overnight, for the best results.
- Thin Layers are Key: When pouring the base onto the pan, aim for a layer no thicker than 1/8 inch. Thicker layers take too long to freeze solid and are harder to roll.
- Work Quickly: Rolled ice cream melts fast, especially when exposed to warm air. Have all your tools and serving dishes ready before you start rolling.
- Don’t Be Afraid to Practice: The rolling technique takes a little getting used to. Your first few rolls might not be perfect, and that’s completely okay! They will still taste delicious.
- Adjust Sweetness: Taste your ice cream base before freezing. If you prefer it sweeter, you can add a tiny bit more condensed milk (but remember this affects consistency).
Creative Serving Suggestions
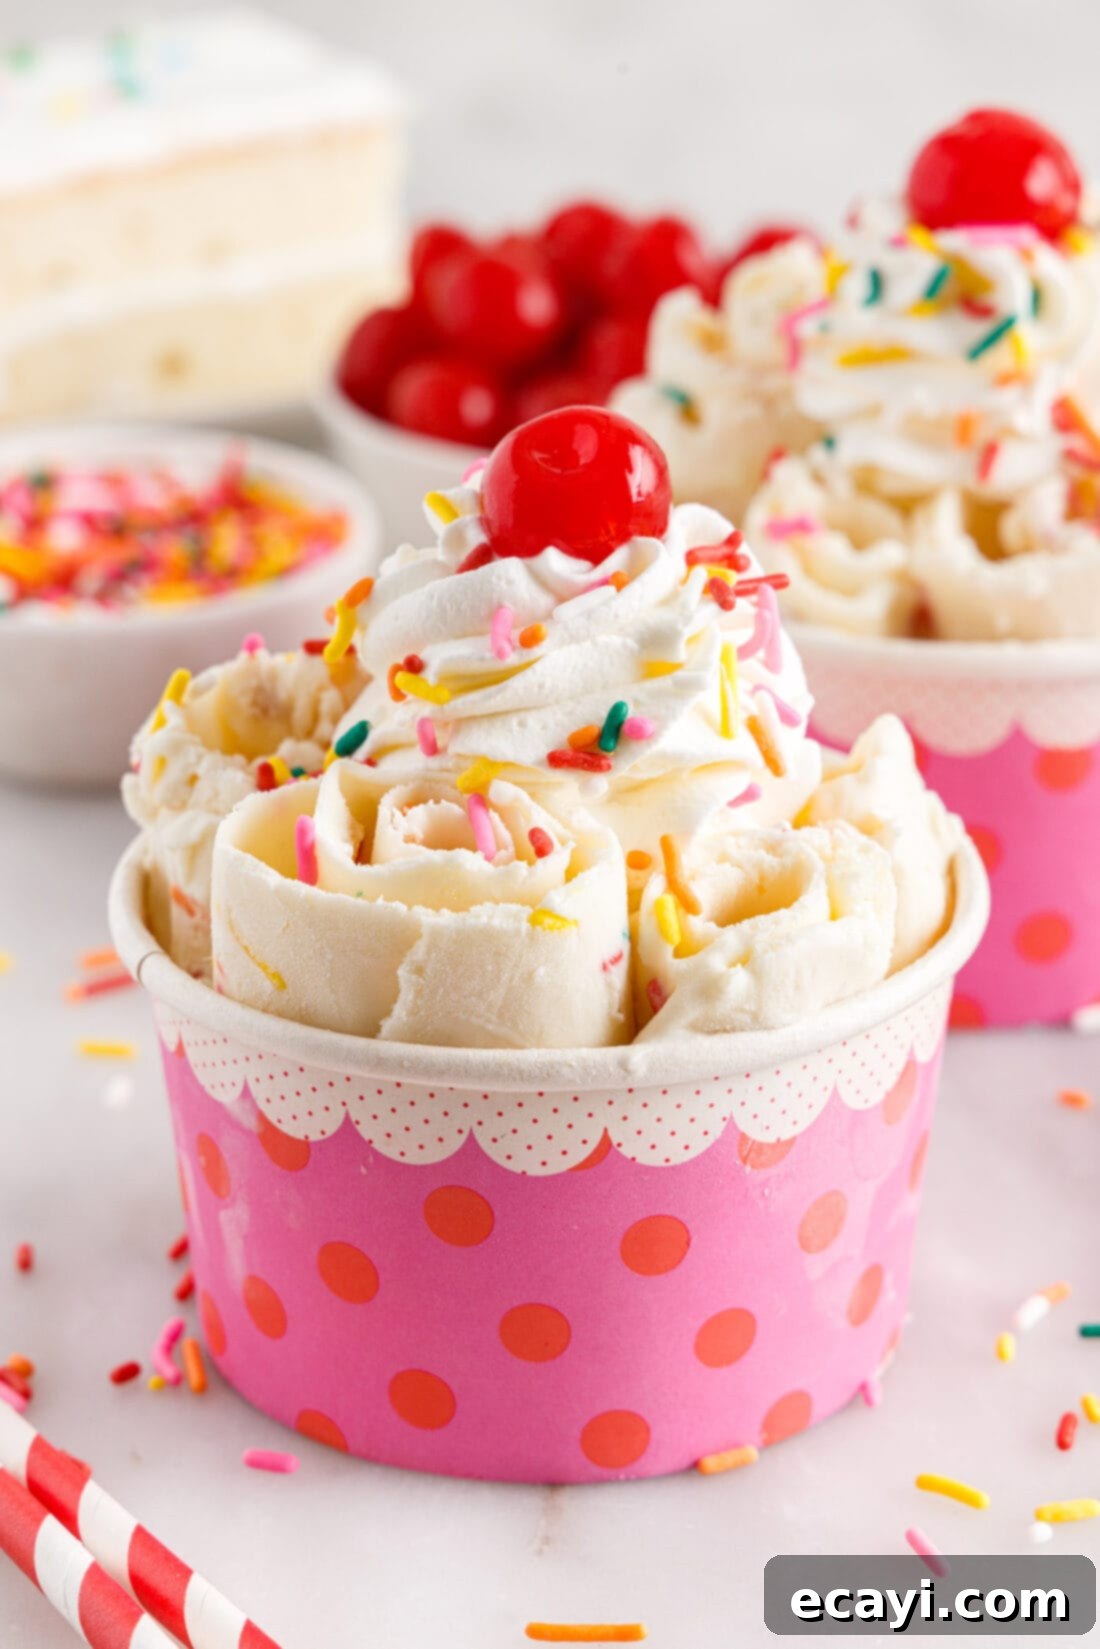
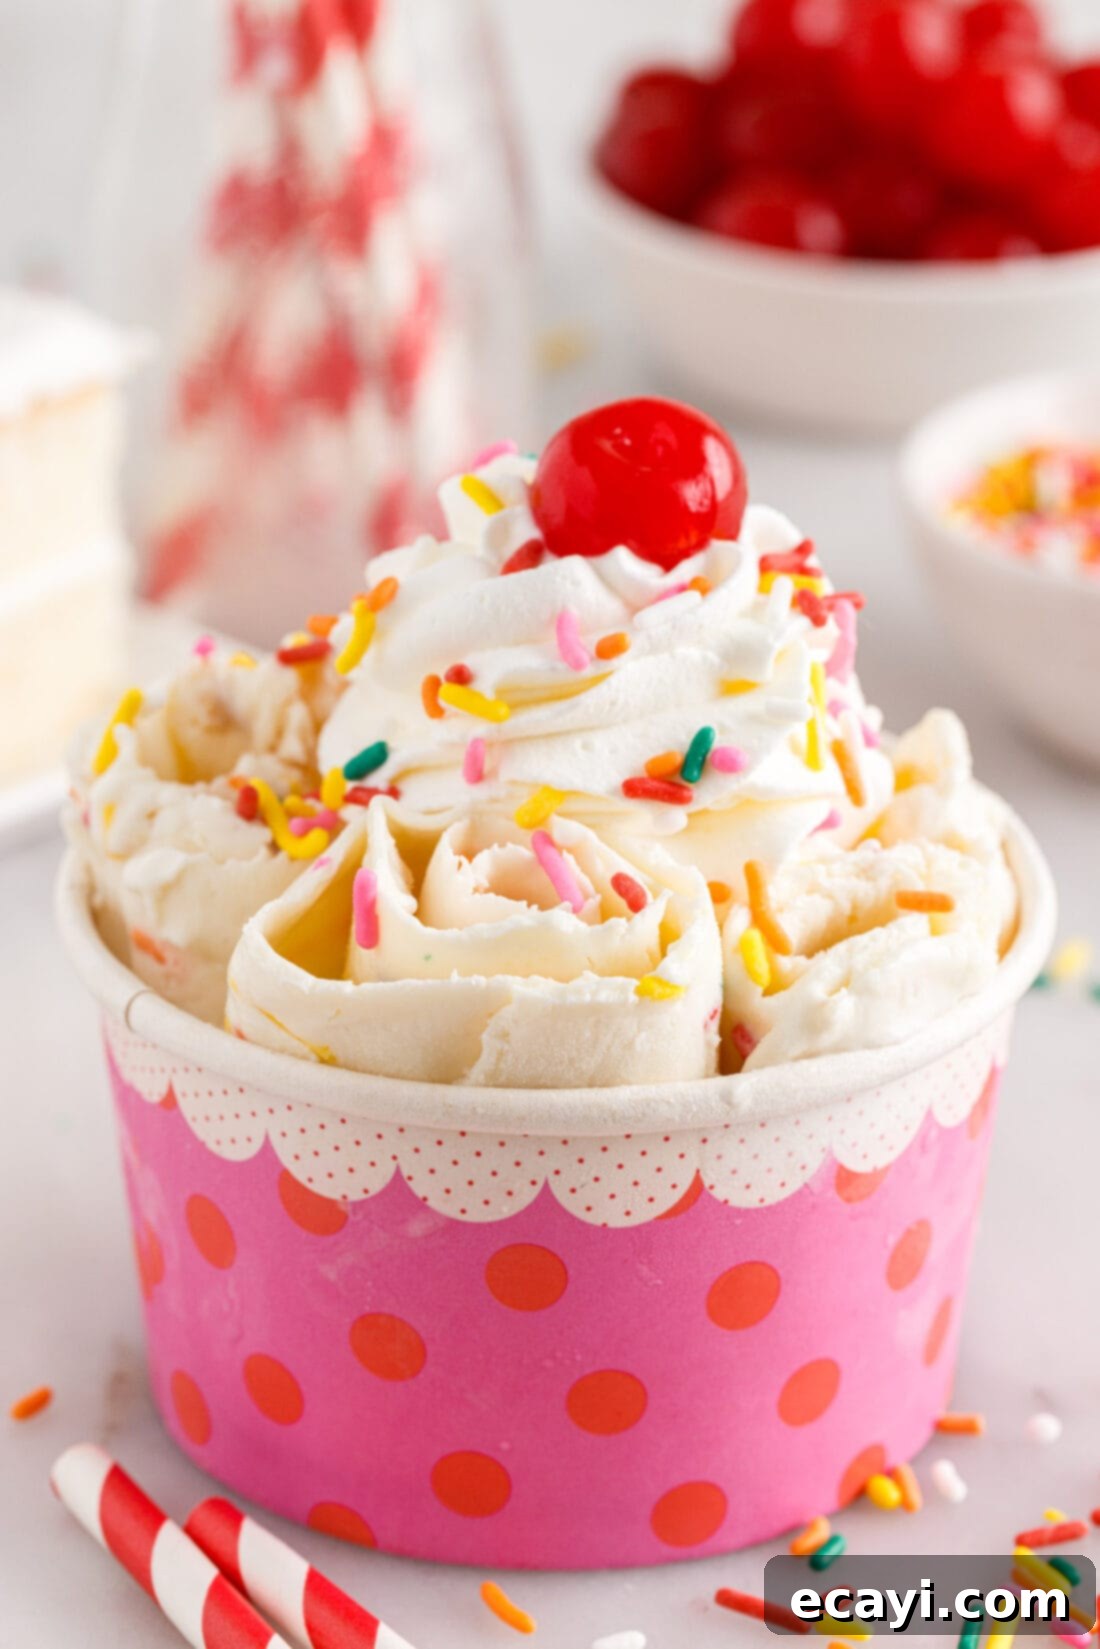
Once your beautiful birthday cake rolled ice cream is ready, the fun continues with serving! These colorful rolls are fantastic on their own, but you can elevate the experience with a few extra touches. Serve them immediately in individual cups or small bowls to maintain their shape. Garnish with optional wafers, a bright maraschino cherry, a dollop of fresh whipped cream, or a generous sprinkle of additional Jimmie sprinkles on top for an extra festive flair.
Remember that rolled ice cream melts relatively quickly due to its delicate texture, so it’s essential to work swiftly during the creation and decorating process. To prevent rapid melting or becoming overly soft, always keep the ice cream in the freezer when you are not actively working with it. If you live in an exceptionally hot or humid climate, or if your indoor temperature isn’t cool enough, you might find the rolling process a bit more challenging. Consider chilling your serving bowls beforehand to help keep your delicious creation cool for longer.
More Delightful Dessert Recipes
If you loved making this fun and festive rolled ice cream, be sure to explore more of our tempting dessert recipes that are perfect for any occasion!
- Funfetti Icebox Cake
- Rocky Road Ice Cream
- Ice Cream Sandwich Cake
- Instant Pot Funfetti Cheesecake
- No Churn Birthday Cake Ice Cream
I love to bake and cook and share my kitchen experience with all of you! Remembering to come back each day can be tough, that’s why I offer a convenient newsletter every time a new recipe posts. Simply subscribe and start receiving your free daily recipes!
Birthday Cake Rolled Ice Cream
IMPORTANT – There are often Frequently Asked Questions within the blog post that you may find helpful. Simply scroll back up to read them!
Print It
Pin It
Rate It
Save ItSaved!
Ingredients
- 2 cups heavy whipping cream
- ⅔ cup sweetened condensed milk
- ¼ teaspoon sea salt
- 1 ½ teaspoons pure vanilla extract
- 3 Tablespoons rainbow jimmie sprinkles you can use 2-4 Tablespoons of sprinkles
- 1 cup vanilla cake crumbled, or white cake. with or without frosting
Things You’ll Need
-
Sheet pan
-
3 inch wide straight spatula
Before You Begin
- No-churn ice cream, including this rolled version, gets its sweetness primarily from sweetened condensed milk, eliminating the need for added sugar. It naturally has a softer set than traditional churned ice cream. Therefore, work quickly when rolling and transferring to a container for immediate serving. You can also roll the ice cream and then store the rolls in the freezer until you are ready to serve.
- Larger chunks of birthday cake in the ice cream can make the rolling process more challenging. For best results, work the cake crumbles into the base a bit more thoroughly, aiming for smaller, more evenly distributed pieces.
- You can utilize any size metal pan with a rim. The trick is to pour just enough base mixture to create a very thin, solid layer (a layer that is “too thin” in experiments rarely exists, as it freezes faster and rolls better). Freeze this thin layer, roll, then repeat with the remaining base. Store any excess base in the refrigerator between batches. I found quarter sheet pans ideal for managing smaller, more controlled batches.
- For sprinkles, it’s highly recommended to use Jimmie sprinkles, as they are specifically formulated not to bleed their vibrant colors when they become wet. Avoid using nonpareils, as their colors will run and can make your ice cream look unappealing. If you choose to use other specialty sprinkles, perform a quick color-fastness test by wetting a few before incorporating them into your ice cream base.
- If you don’t have leftover birthday cake on hand, a single slice of vanilla or white cake, or even a cupcake from your local grocery store, will provide ample cake crumbles for this recipe.
Instructions
-
Prior to preparing the ingredients, place a full-size sheet pan with rimmed edges into the freezer. Be sure there is ample space for the sheet pan to set level. Allow the pan to chill in the freezer for at least 15 minutes up to several hours in advance. (Alternately, you can use several smaller sheet pans.)
-
Whisk together the heavy cream, sweetened condensed milk, salt, and vanilla in a bowl until thoroughly combined.
-
Pour the ice cream base mixture into the prepared pan. If you’d like to use smaller pans, pour just enough of the ice cream mixture to coat the full bottom of the pan. The layer should not be thicker than 1⁄8”.
-
Sprinkle the jimmies over the ice cream base – add a tablespoon or so at a time until you have an amount you like. Crumble a piece of cake or cupcake and scatter the crumbles over the ice cream.
-
To make rolling the ice cream easier, allow the cake crumbles to soften a bit, soaking up some of the liquid. Use a spatula to mix the toppings into the ice cream base and redistribute evenly across the pan.
-
Freeze for at least 2-3 hours, until the ice cream is solid.
-
Working quickly with a 3” wide straight spatula – gently lift the edge of the ice cream and then glide your spatula across the sheet pan to make rolls of ice cream. Transfer the rolls into a paper cup or bowl for serving.
Nutrition
The recipes on this blog are tested with a conventional gas oven and gas stovetop. It’s important to note that some ovens, especially as they age, can cook and bake inconsistently. Using an inexpensive oven thermometer can assure you that your oven is truly heating to the proper temperature. If you use a toaster oven or countertop oven, please keep in mind that they may not distribute heat the same as a conventional full sized oven and you may need to adjust your cooking/baking times. In the case of recipes made with a pressure cooker, air fryer, slow cooker, or other appliance, a link to the appliances we use is listed within each respective recipe. For baking recipes where measurements are given by weight, please note that results may not be the same if cups are used instead, and we can’t guarantee success with that method.
