Spooktacularly Easy Vampire Sandwich Cookies: The Ultimate Halloween Treat Recipe
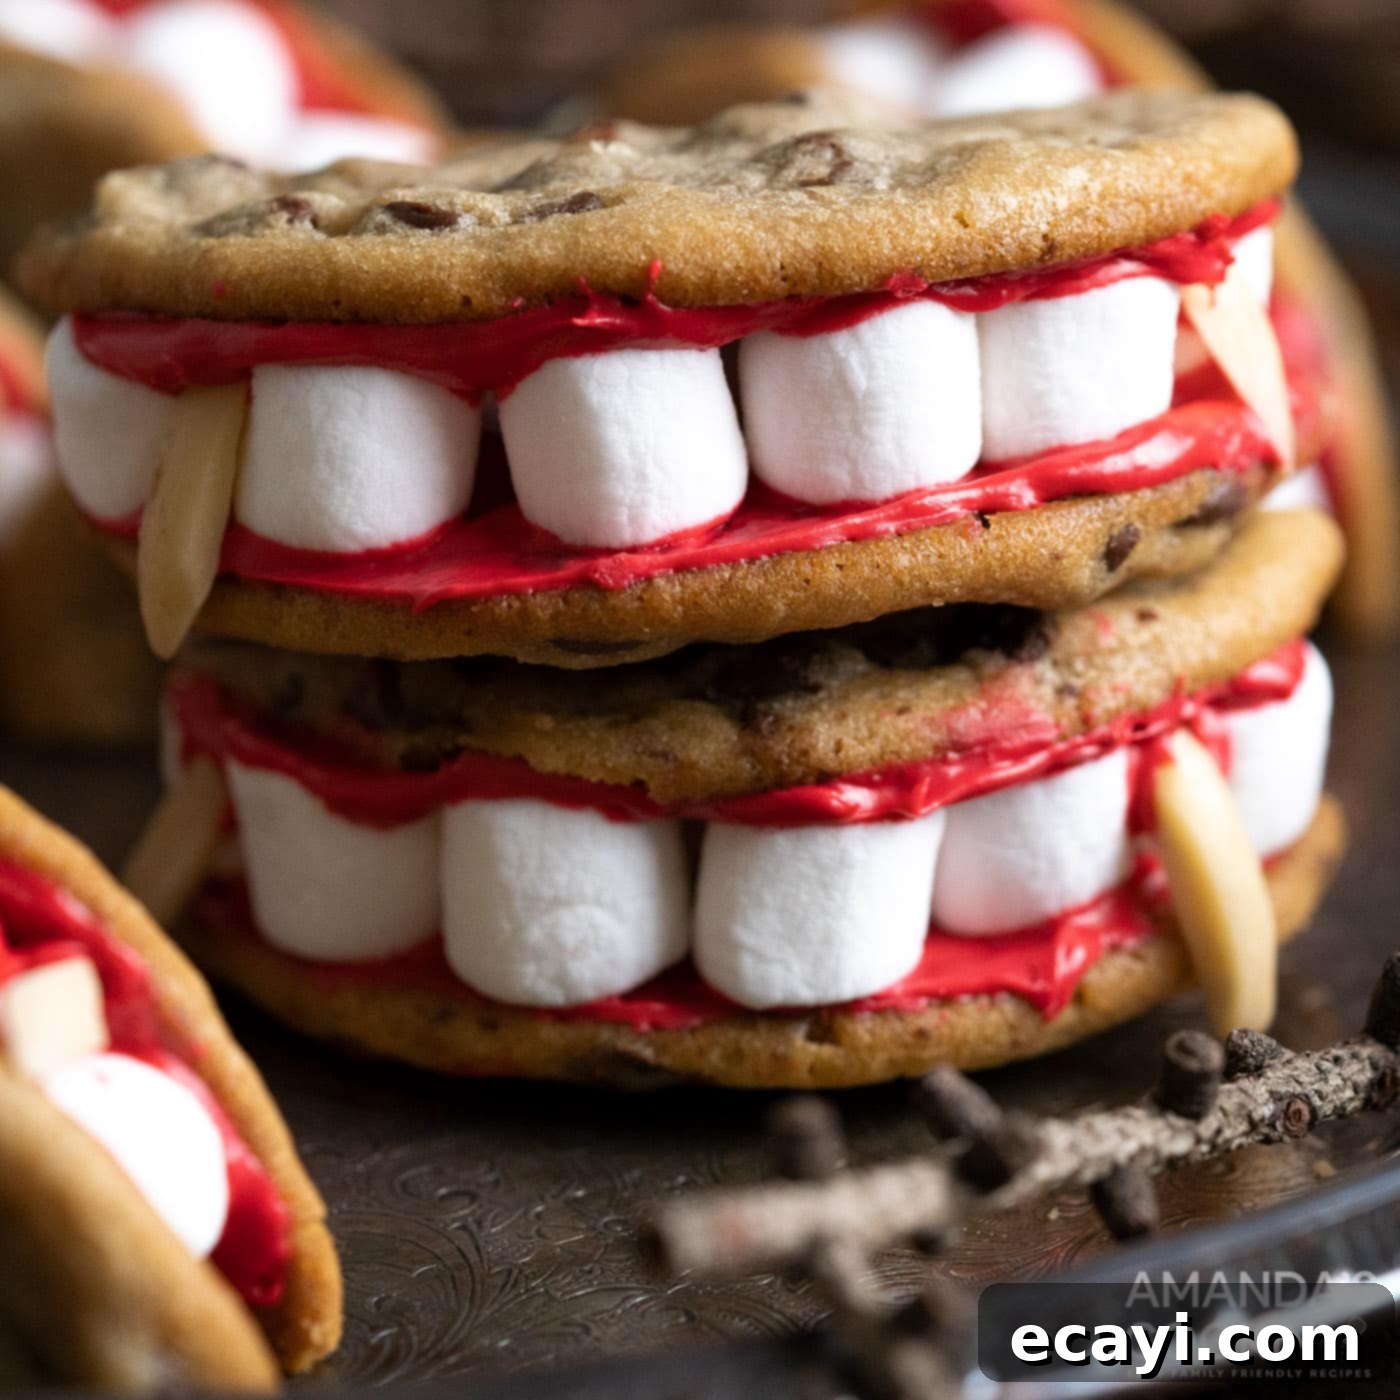
Get ready to sink your teeth into the most charmingly spooky treat this Halloween season! These Vampire Sandwich Cookies, also affectionately known as “Dracula’s Dentures,” are not only frightfully delicious but also incredibly simple to whip up. Imagine soft, chewy chocolate chip cookies transformed into a ghastly grin, complete with mini marshmallow teeth and menacing slivered almond fangs, all held together by a vibrant smear of “bloody” red frosting. Perfect for school parties, haunted gatherings, or a fun baking activity with the kids, these delightful cookies are guaranteed to be a hit. No complicated baking skills needed – just a dash of creativity and a craving for something sweet and spooky!
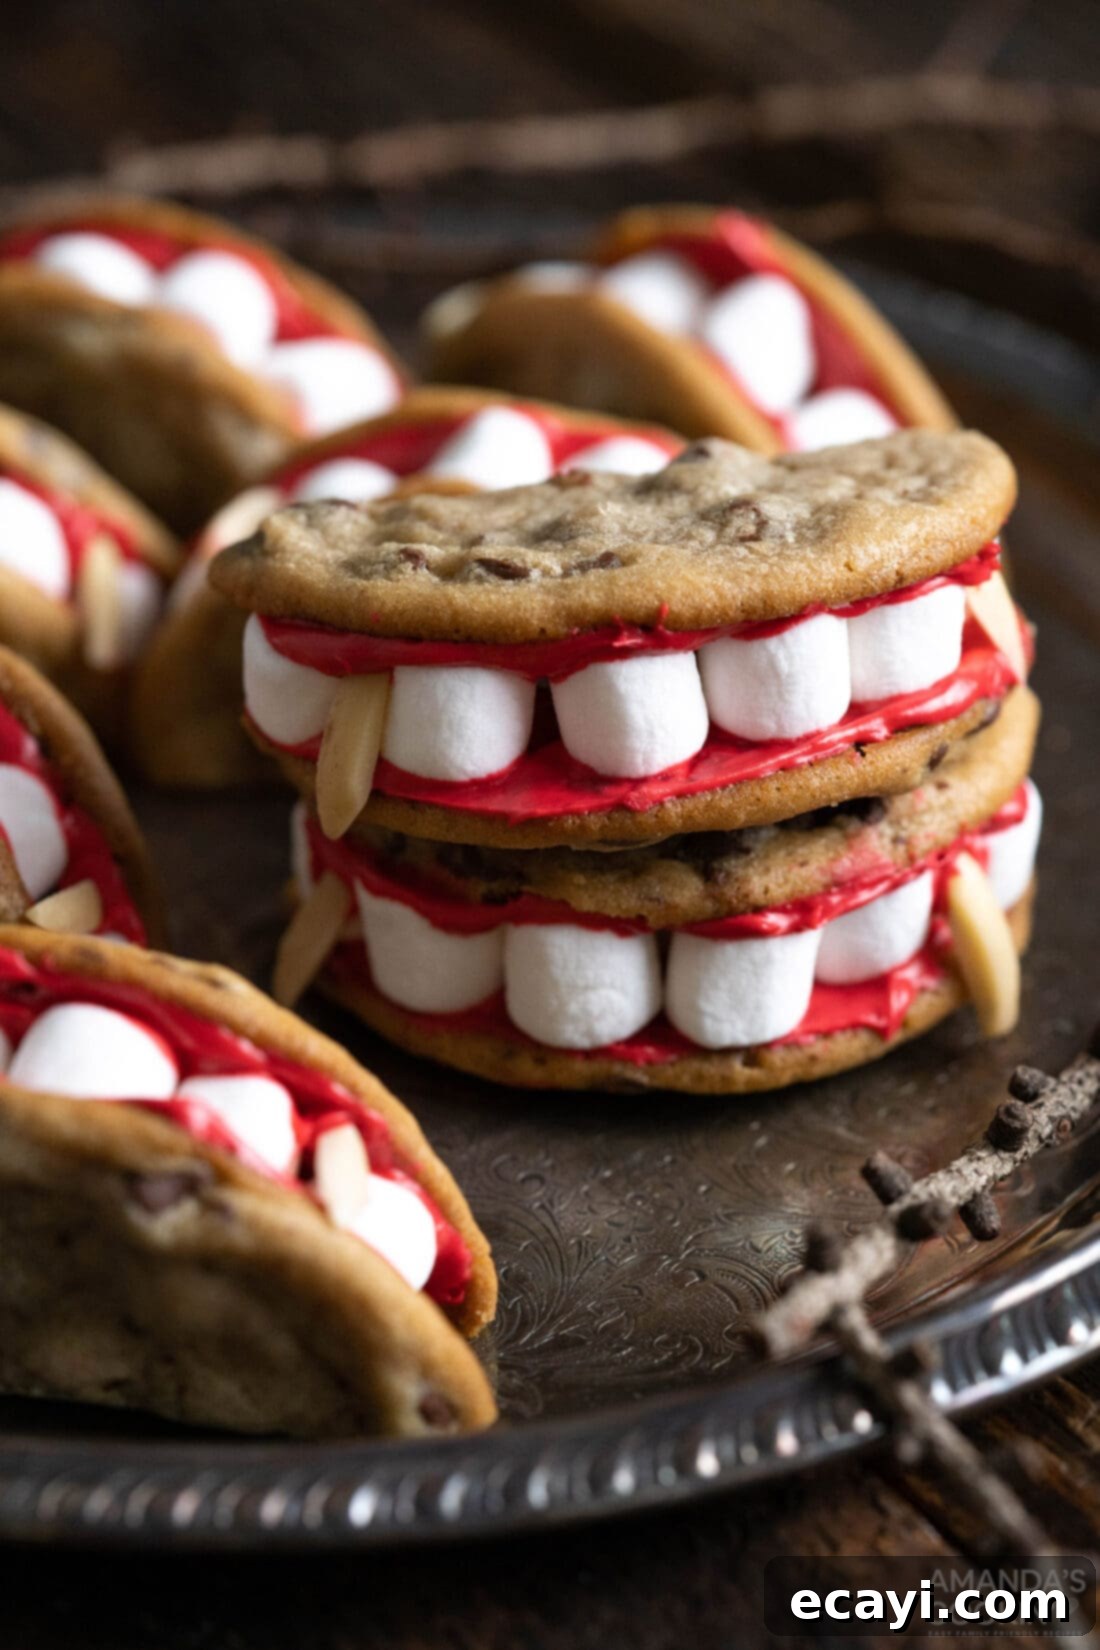
Why This Easy Vampire Cookie Recipe Works Every Time
This recipe for Vampire Sandwich Cookies stands out as a Halloween favorite for several compelling reasons. First and foremost, its simplicity is unmatched. By leveraging a tube of store-bought chocolate chip cookie dough, you drastically cut down on preparation time, making it accessible even for novice bakers or those with busy schedules. This means less time in the kitchen and more time enjoying the festive fun!
If you prefer a homemade touch, you can certainly use your favorite chocolate chip cookie recipe, but the beauty of this treat lies in its adaptability and speed. The concept itself is brilliantly clever and highly visual, instantly evoking the playful horror of Halloween. Kids and adults alike will delight in the whimsical “denture” design, which adds a unique and memorable element to any Halloween spread.
Furthermore, it’s a fantastic recipe for involving children in the kitchen. They can help with assembly, carefully placing marshmallows for teeth, and adding the slivered almond fangs, fostering creativity and a love for baking without the complexities of from-scratch cookie making. The combination of chewy cookies, sweet frosting, and soft marshmallows with a slight crunch from the almonds creates a delightful texture and flavor profile that makes these cookies as tasty as they are fun to look at. Whether you call them vampire cookies or Dracula’s dentures, they promise a ghastly good time!
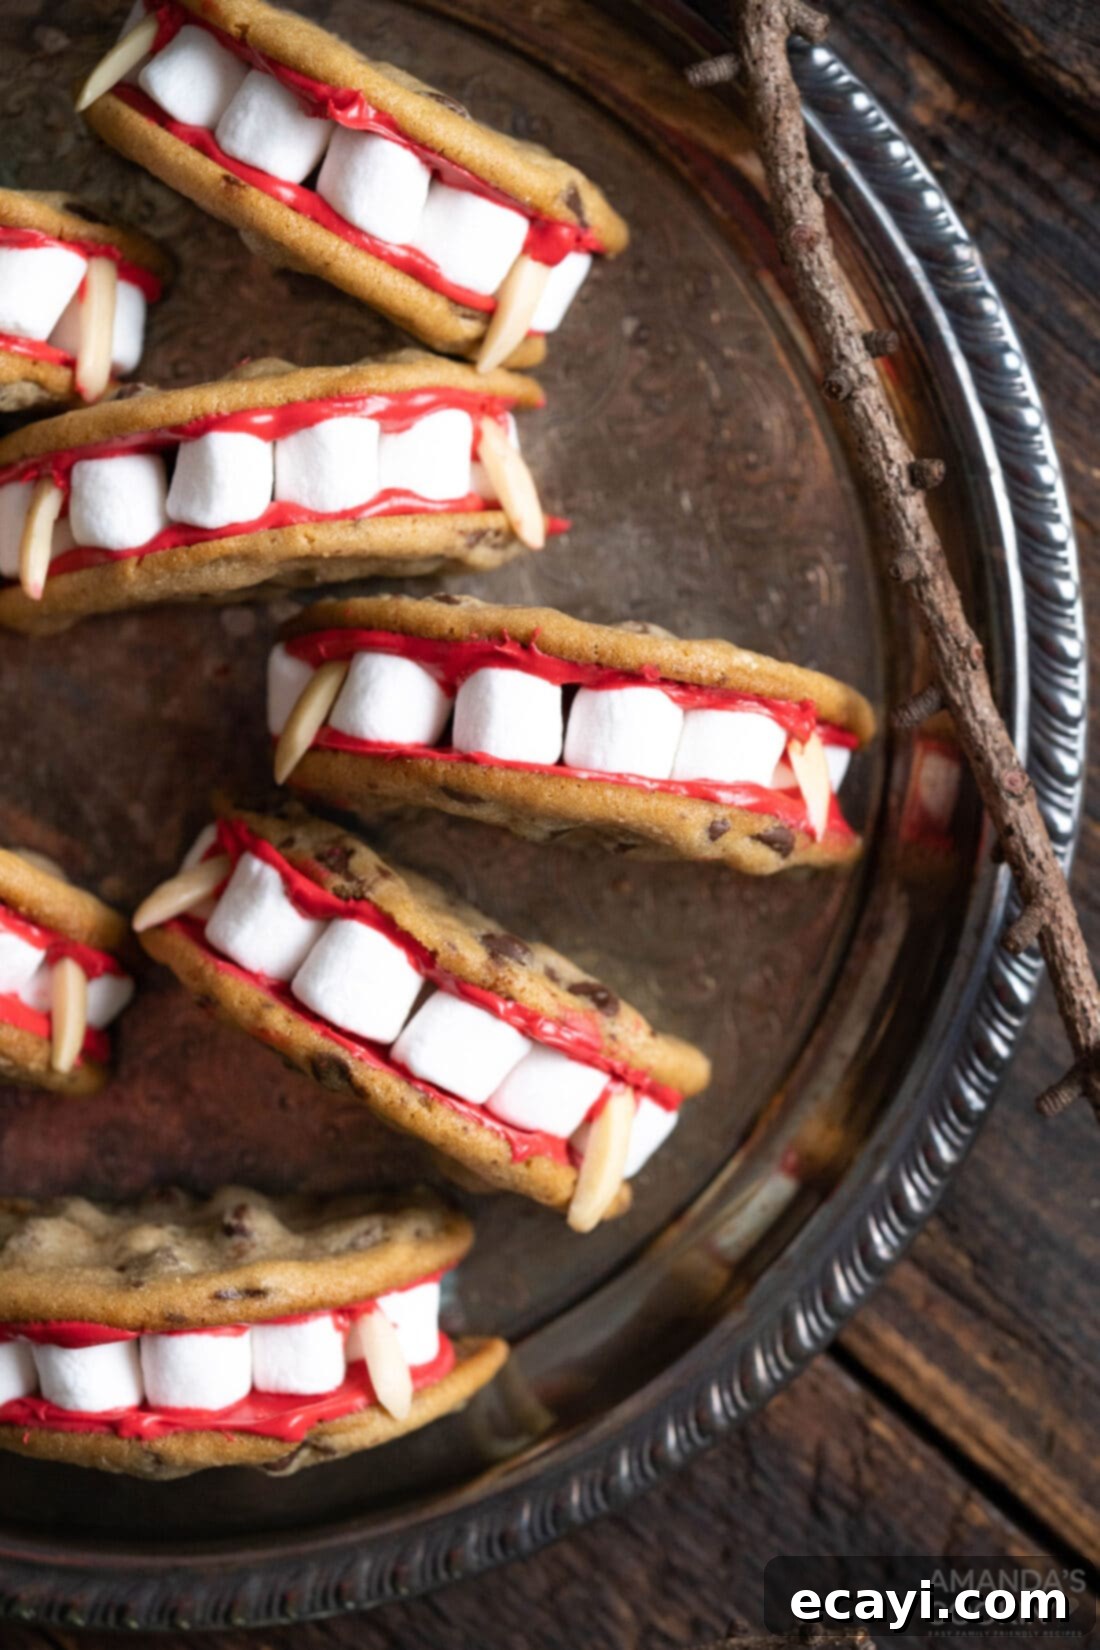
Essential Ingredients for Your Spooky Vampire Treats
Creating these frightfully fun Vampire Sandwich Cookies requires just a handful of easily accessible ingredients. You’ll find a complete list of measurements and detailed instructions in the printable recipe card at the very end of this post. For now, let’s dive into what you’ll need to gather:
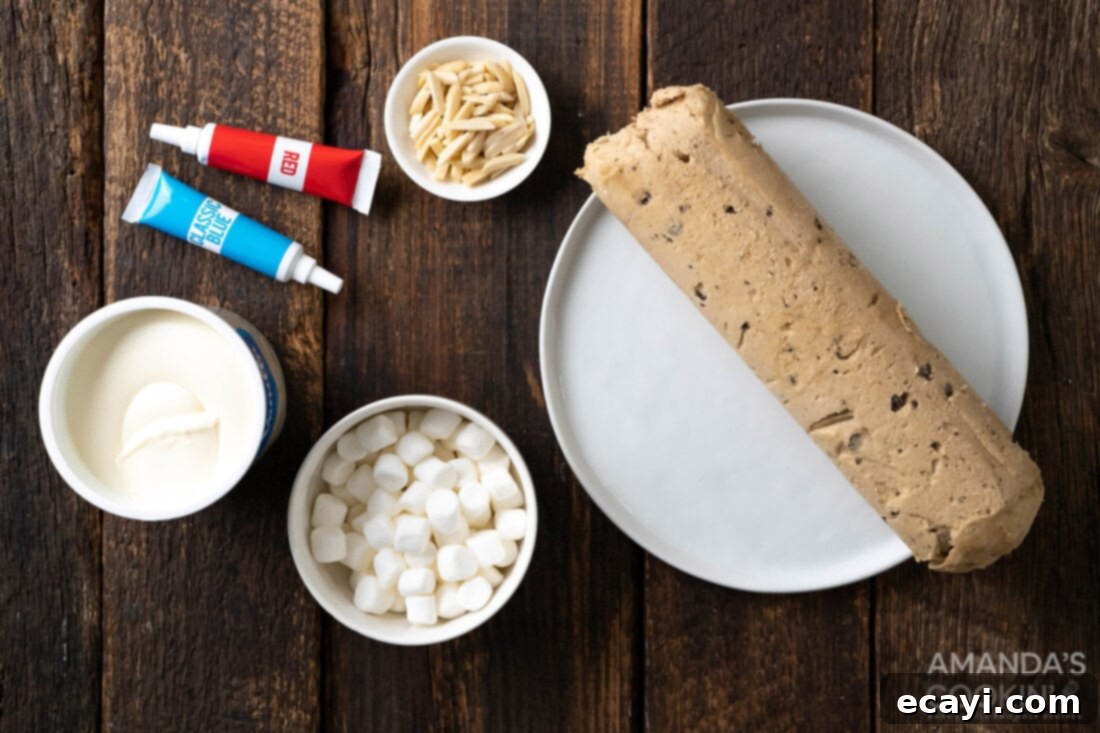
Ingredient Information & Creative Substitution Ideas
Understanding each ingredient and its role will help you craft the perfect batch of spooky cookies. Plus, we’ve got some great substitution ideas if you want to get creative or need to work with what you have on hand.
Cookie Base: Store-Bought or Homemade
COOKIE – The foundation of our Vampire Sandwich Cookies can be either a readily available tube of store-bought chocolate chip cookie dough or your cherished homemade chocolate chip cookie dough. Using premade dough offers a fantastic shortcut, allowing you to focus on the fun decorating part without the extensive prep work of mixing and chilling dough from scratch. If opting for store-bought, ensure you pick a good quality brand for the best texture and flavor. Read the package instructions carefully for baking temperatures and times, as they can vary.
If you’re a purist and prefer to bake from scratch, any soft and chewy chocolate chip cookie recipe will work wonderfully. Just make sure the cookies are fully cooled before cutting and decorating. Don’t feel limited to chocolate chip cookies, though! You can unleash your creativity by experimenting with other cookie bases. Peanut butter cookies, oatmeal cookies, or even plain sugar cookies would provide a delicious canvas for these spooky dentures. Just remember that the cookie needs to be sturdy enough to be cut in half and hold its shape once assembled.
Bloody Red Frosting: The Ghoulish Adhesive
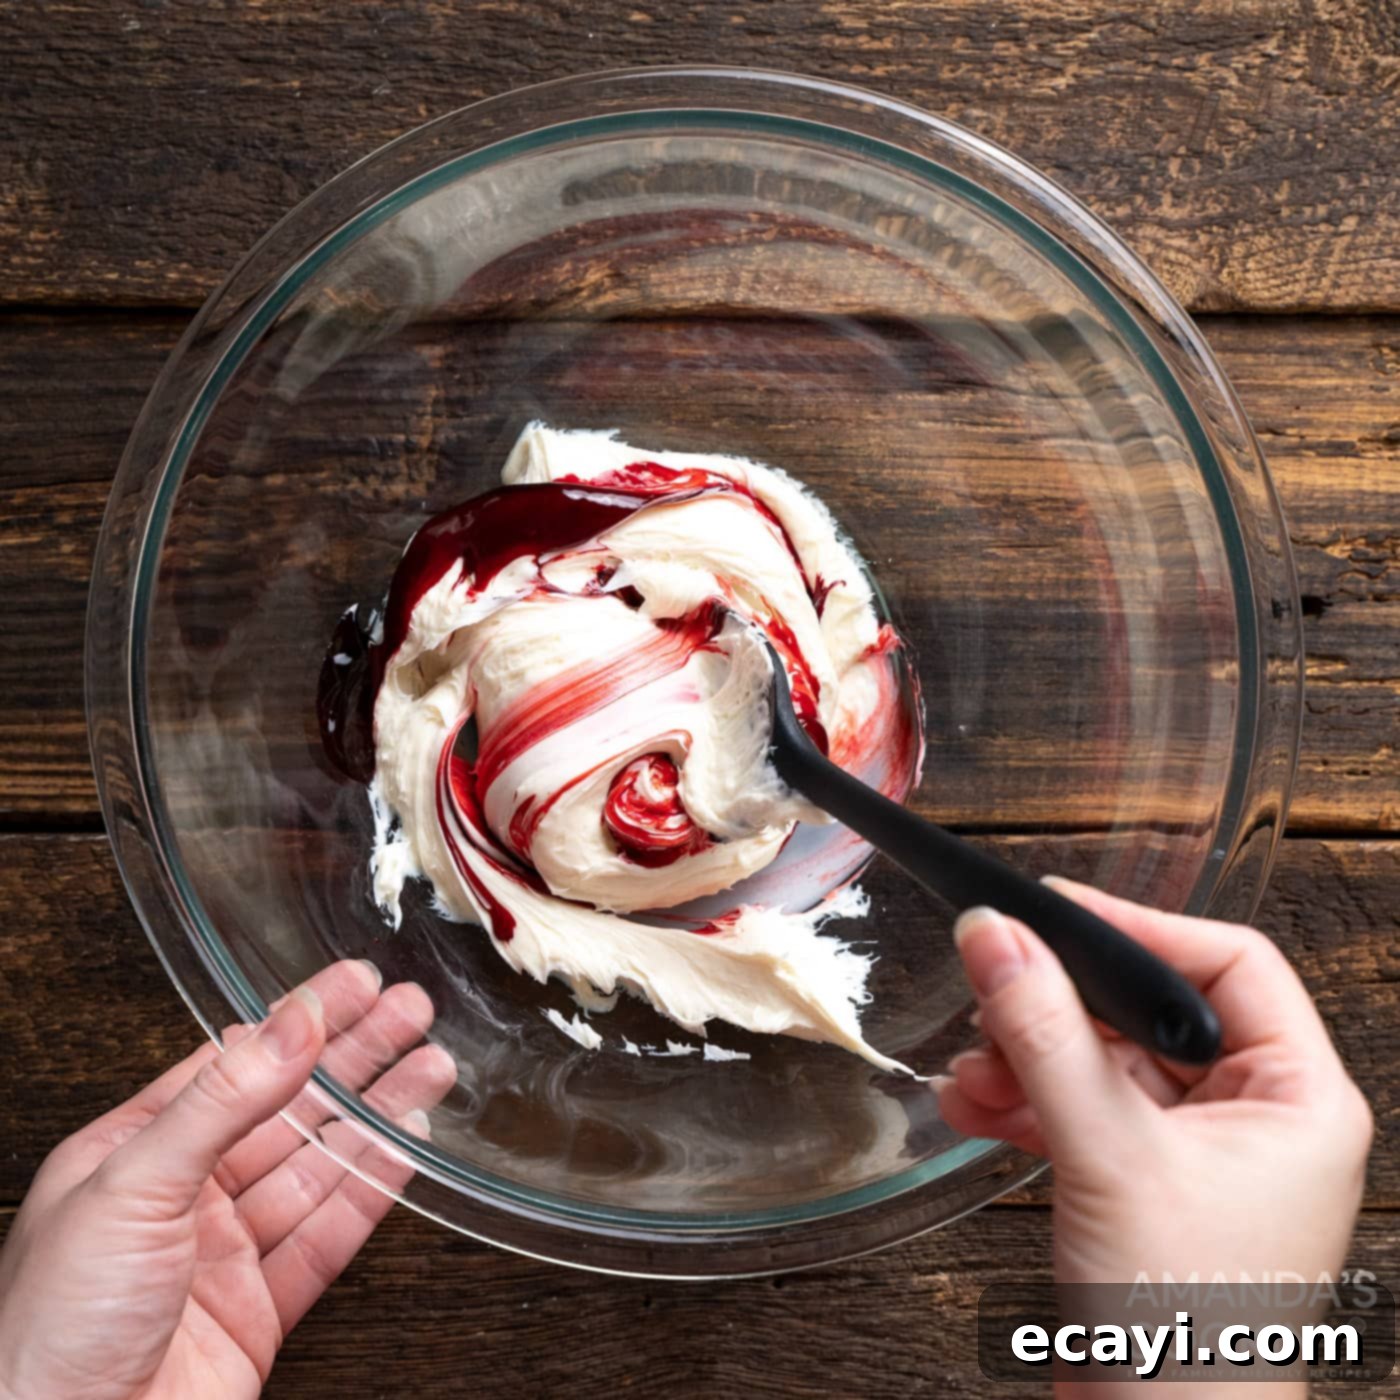
FROSTING – Vanilla frosting serves as both the “glue” for your gruesome teeth and the “bloody” smear that gives these cookies their signature vampire look. While a tub of store-bought vanilla frosting is incredibly convenient and works perfectly, you can also opt for a homemade vanilla buttercream if you prefer. The key is transforming it into a vibrant, blood-red hue. For this, we highly recommend using red gel food coloring. Gel food coloring provides a much more intense and concentrated color than liquid food coloring, meaning you’ll need less of it to achieve a deep, rich red, without significantly altering the frosting’s consistency or flavor. Start with a small amount (about two tablespoons) and gradually add more, mixing thoroughly until you reach your desired shade of blood-red. For an extra ghoulish touch, a tiny drop of black or blue food coloring mixed into the red can create a darker, more ominous “dried blood” effect, but be careful not to overdo it!
Marshmallow Teeth: Soft & Spooky
MINI MARSHMALLOWS – Mini marshmallows are the perfect choice for creating those eerie, adorable vampire teeth. Their soft, pliable texture and small size make them ideal for lining the curved edge of the cookie halves. You’ll arrange a row of mini marshmallows along the “gum line” to form the top and bottom sets of teeth. The frosting acts as an excellent adhesive, ensuring they stay firmly in place. While mini marshmallows are recommended for their size, if you only have larger ones, you can carefully snip them into smaller pieces using clean kitchen shears, but this might be more time-consuming. The goal is to create a slightly uneven, yet charmingly spooky, set of dentures that look both scary and sweet.
Slivered Almonds: The Essential Fangs
SLIVERED ALMONDS – To complete the vampire transformation, slivered almonds are used to craft those iconic sharp fangs. Their pointed shape makes them a natural fit for this purpose. You’ll carefully insert two slivered almonds into the mini marshmallow teeth on each “denture” set. A little trick to ensure they stay put is to dip one end of each almond into the red frosting before placing it. This helps them adhere better and also gives the impression that the fangs are stained with “blood.” If you have allergies or can’t find slivered almonds, don’t fret! You can get creative with alternatives. Small, pointed pieces of white chocolate, sunflower seeds (if carefully chosen for shape), or even small triangles cut from white fruit leather could work in a pinch, though the almonds truly give the most authentic fang-like appearance.
Step-by-Step Guide: How to Make Vampire Sandwich Cookies
These step-by-step photos and instructions are here to help you visualize how to make this recipe. You can Jump to Recipe to get the printable version of this recipe, complete with precise measurements and instructions at the bottom.
-
Prepare and Bake Cookies: Begin by preheating your oven to 350°F (175°C), ensuring it’s at the optimal temperature for even baking. Line two large baking trays with non-stick silicone baking mats (like Silpat) or parchment paper. These liners are crucial for preventing your cookies from sticking and for easy removal. If using store-bought cookie dough, scoop out the dough into uniform 1.5-tablespoon sized balls. Consistency in size is important to ensure all cookies bake evenly and that your “dentures” are a matching pair. Arrange the dough balls on your prepared baking trays, leaving enough space between each for them to spread slightly during baking.

-
Bake to Golden Perfection: Bake the cookies for approximately 12 to 15 minutes, or until their edges turn a beautiful golden brown. The center should still be slightly soft, as this contributes to a wonderfully chewy cookie. To ensure even baking, especially if your oven has hot spots, remember to rotate the baking trays once halfway through the baking process. This helps prevent one side from overbaking while the other remains undercooked. Keep a close eye on them, as baking times can vary slightly depending on your oven.
-
Cool the Cookies: Once baked, remove the cookies from the oven and allow them to cool on the baking trays for about 10 minutes. This initial cooling period allows the cookies to set and firm up, making them less prone to breaking when handled. After 10 minutes, use a thin metal spatula to carefully transfer the warm cookies to a wire rack. Let them cool completely on the wire rack. Cooling fully is essential before frosting, as warm cookies will melt your frosting and make assembly messy.
-
Repeat if Necessary: If you have more cookie dough to bake, repeat the baking process described in steps 1-3 until all your cookies are baked and cooled. This ensures you have a full batch of uniform cookies ready for assembly.
-
Prepare Red Frosting: Now for the fun, ghoulish part! In a large bowl, combine your vanilla frosting with the red gel food coloring. Start with about two tablespoons of gel coloring and mix thoroughly. Gel colors are highly concentrated, so a little goes a long way. Continue to add more red food coloring, a small amount at a time, until you achieve a deep, rich, blood-red color that screams Halloween. Mix until the color is consistent throughout the frosting, ensuring there are no streaks of white. You can even add a tiny drop of blue or black to get a deeper, more realistic “blood” shade if desired.

-
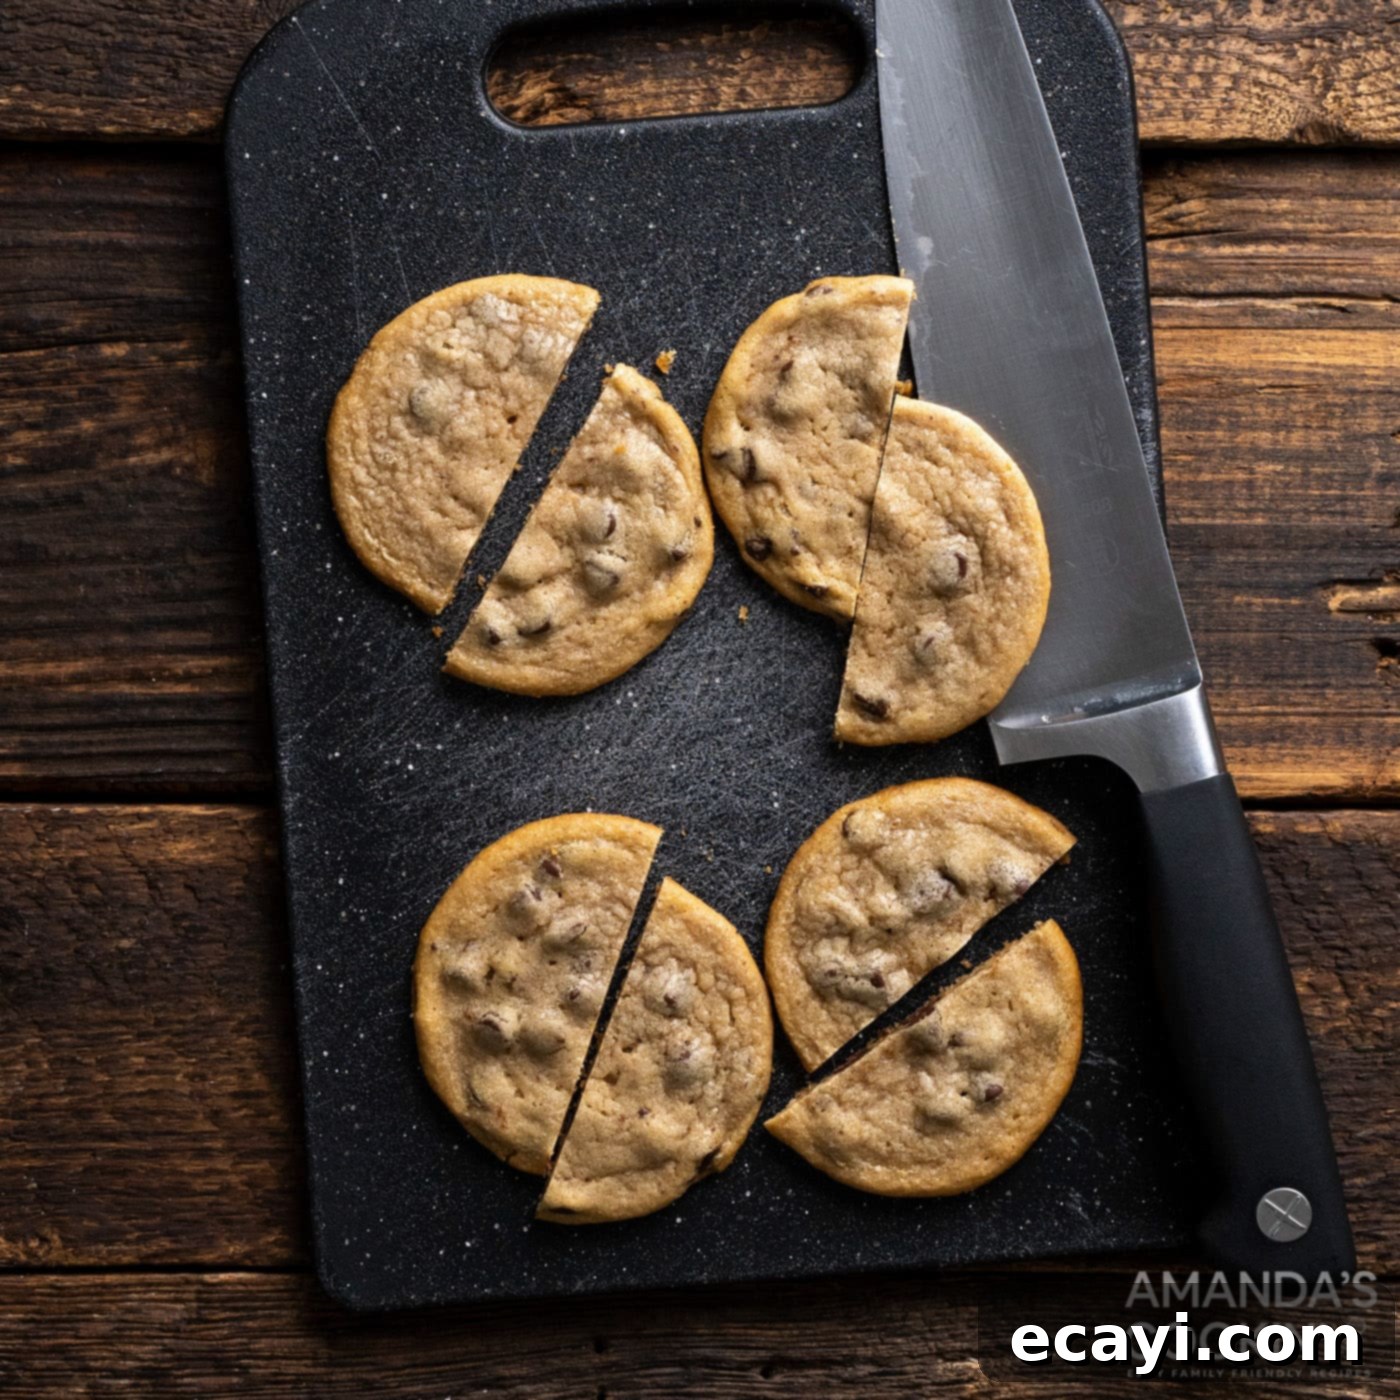
Cut and Frost Cookies: With your cookies cooled, it’s time to transform them. Carefully cut each cookie in half using a sharp knife. You’ll want to cut them in a wavy or jagged line to mimic the look of gums. Be gentle to avoid crumbling. Once cut, take one half of a cookie and spread a generous layer of your vibrant red frosting onto the flat, cut side. Repeat this for all cookie halves.

-
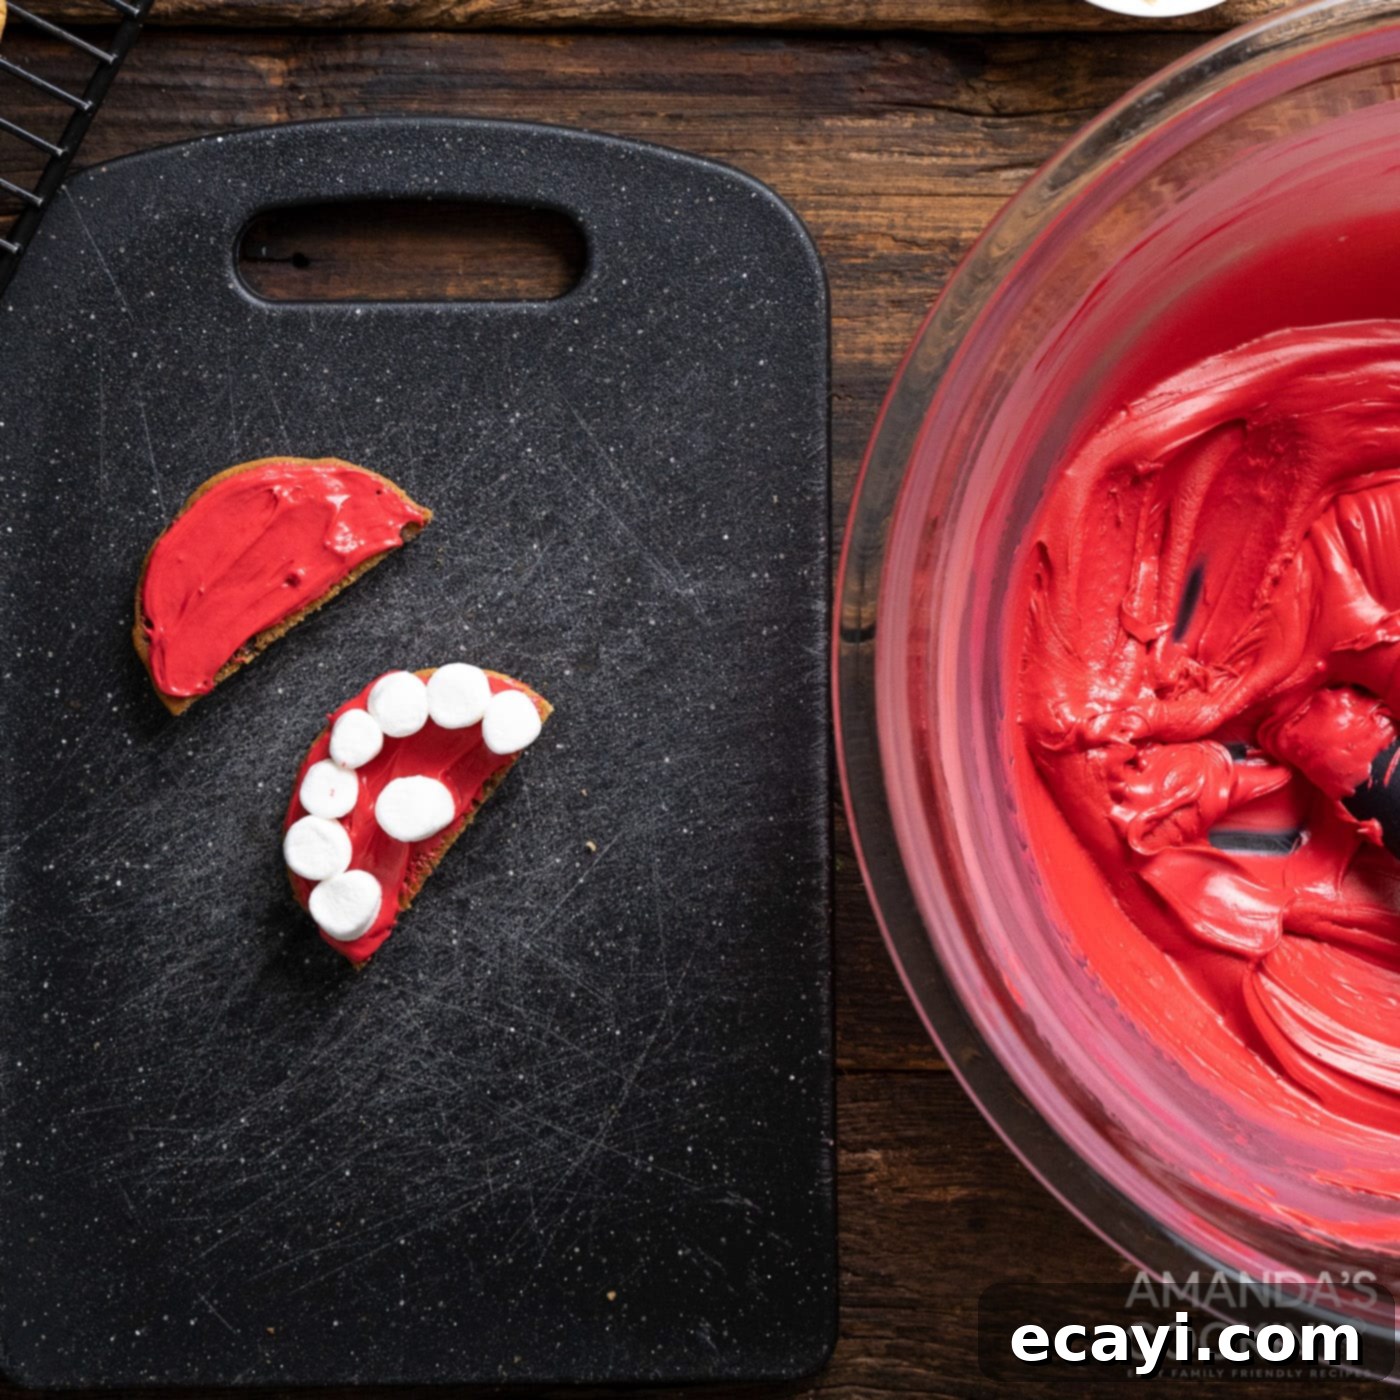
Assemble Marshmallow Teeth: Now, assemble the “dentures.” For one half of a cookie (which will be either the top or bottom “jaw”), arrange approximately 6 mini marshmallows along the curved, outer edge. These will serve as the front teeth. Then, place 1 additional mini marshmallow on the straight, cut side, positioning it slightly inwards to create a more realistic tooth arrangement. Take another frosted cookie half and gently place it on top, creating a sandwich. You should have two rows of marshmallow teeth facing each other, with the red frosting “gums” exposed in the middle. Repeat this process for all cookie pairs.

-
Add the Fangs: The final touch: the fangs! Carefully insert two slivered almonds into the mini marshmallow teeth of each assembled “denture.” Position them so they look like menacing vampire fangs. To help the almonds adhere better and add to the bloody effect, dip one side of each slivered almond into the red frosting before inserting it into the marshmallows. This small detail truly brings the vampire aesthetic to life, making your cookies look delightfully spooky and ready to “bite”!
Frequently Asked Questions & Expert Tips for Vampire Cookies
Absolutely! These Vampire Sandwich Cookies can be prepared a day in advance, making them perfect for party planning. To ensure they stay fresh and spooky, assemble the cookies completely, then store them in a single layer in an airtight container or a ziptop bag. Keep them in a cool, dry place at room temperature. If you live in a particularly humid environment, storing them in the refrigerator might be a better option to prevent the cookies from becoming soggy or the frosting from getting too soft. Just be aware that refrigeration can sometimes slightly alter the texture of cookies, making them a little firmer.
If slivered almonds are unavailable or if there are nut allergies, you can get creative with alternatives! Small, pointed pieces of white chocolate chips or even tiny triangles cut from a sturdy fruit leather could work. The goal is to mimic the pointed fang shape. Just make sure whatever you use is food-safe and easy to insert into the marshmallows.
Yes, you can certainly use homemade vanilla buttercream frosting instead of store-bought. Ensure your homemade frosting is thick enough to hold its shape and support the marshmallows and almonds. A good buttercream recipe will typically yield the perfect consistency for this purpose.
For the most vibrant, blood-red color, gel food coloring is your best friend. Liquid food coloring can thin out your frosting and won’t give as intense a color. Start with a small amount of gel and gradually add more, mixing well after each addition, until you achieve the desired deep red shade. A small touch of black or dark blue gel coloring can deepen the red for a more sinister, realistic “blood” look, but use sparingly!
This recipe is fantastic for involving kids! They can help with spreading the frosting (under supervision), arranging the mini marshmallows for teeth, and carefully placing the slivered almond fangs. It’s a wonderful way to encourage their creativity and get them excited about Halloween baking. Just be mindful of sharp knives if they are helping to cut the cookies, and supervise closely during assembly.
Store any leftover cookies in an airtight container at room temperature for up to 2-3 days. If refrigerated due to humidity, allow them to come to room temperature for about 15-20 minutes before serving for the best texture and flavor. The marshmallows might get a bit chewier if refrigerated, but they will still be delicious!
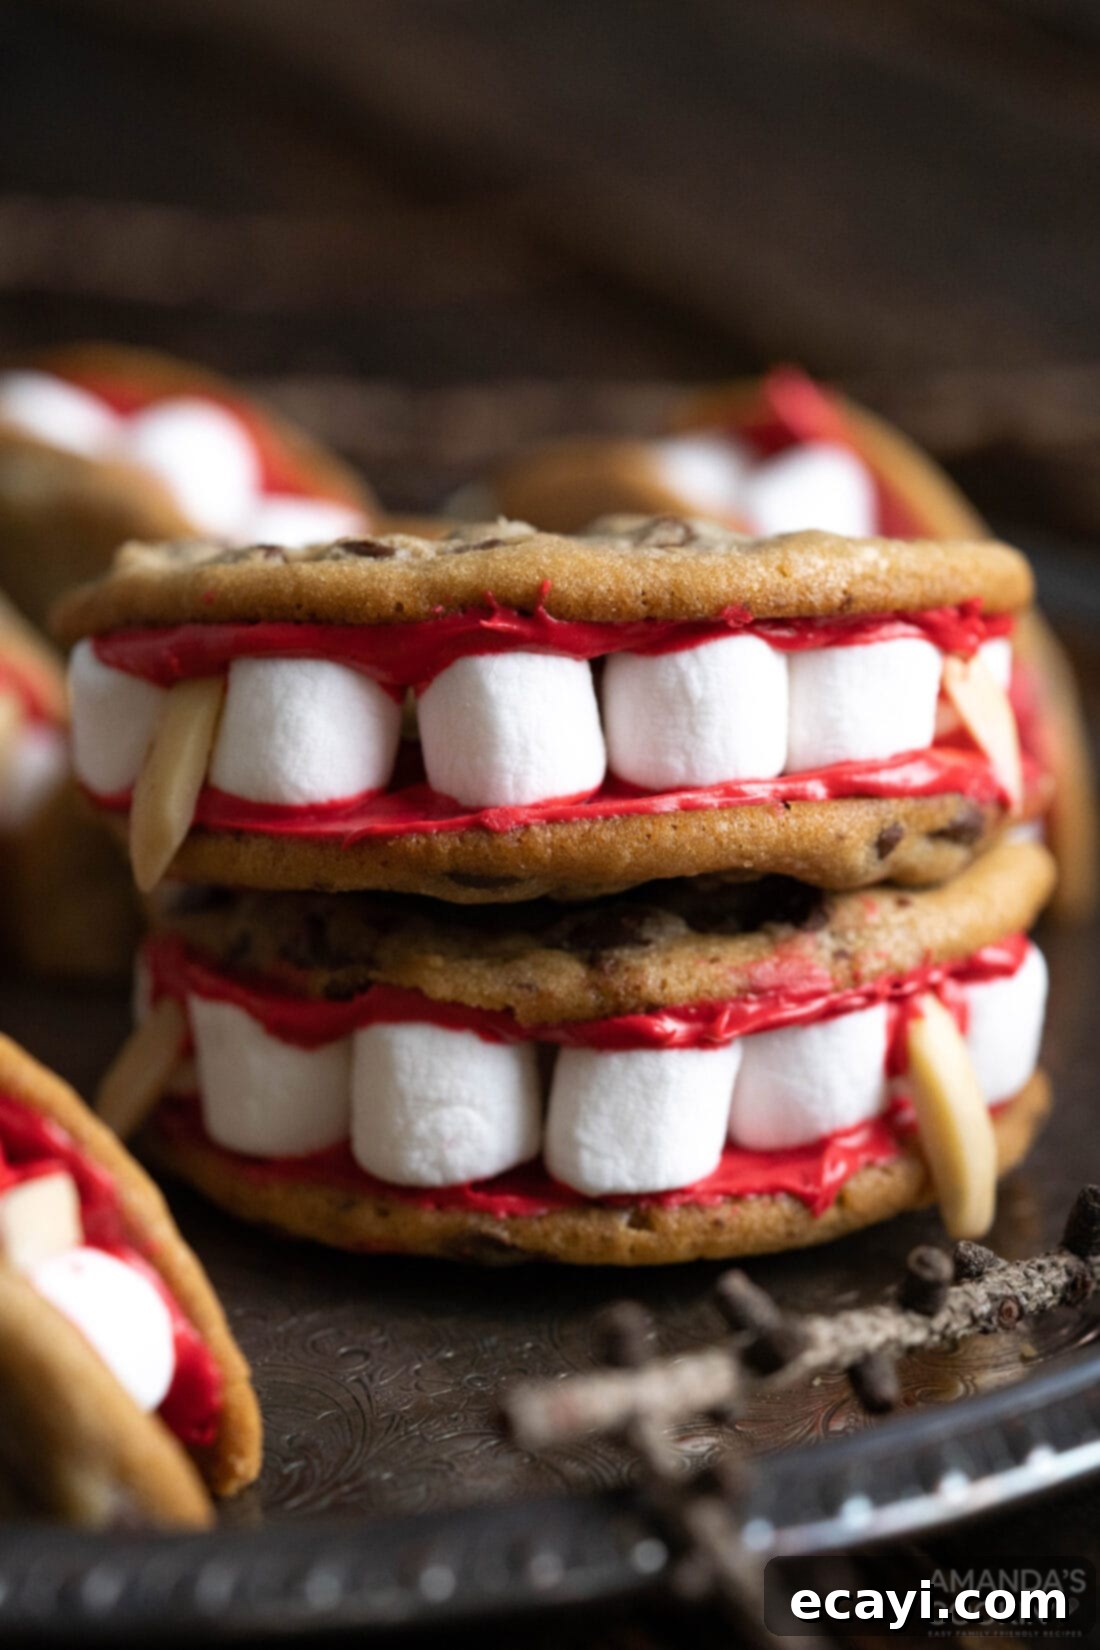
Serving Suggestions for Your Halloween Treat
These eye-catching Vampire Sandwich Cookies are guaranteed to be the star of any Halloween gathering! Arrange them dramatically on a dark platter or a “spooky” themed tray to enhance their ghoulish charm. They make fantastic conversation starters and are sure to bring smiles (and maybe a few shivers) to your guests. For a thoughtful party favor or a special treat for trick-or-treaters (if individually wrapped), simply tuck a couple of these “Dracula’s Dentures” into clear cellophane baggies and tie them with a festive Halloween ribbon. Keep and serve your vampire cookies at room temperature in a dry, cool place to maintain their optimal texture and appearance. Pair them with other Halloween-themed beverages like “witch’s brew” punch or “bloody” lemonade for a complete and festive spread that will impress all your fright-night visitors!
More Ghoulishly Good Halloween Recipes
Looking for more spooky treats and creepy culinary delights to complete your Halloween menu? We’ve got you covered! Explore some of our other favorite Halloween recipes that are just as fun, creative, and delicious:
- Ghost Brownies
- Witch Finger Cookies
- Halloween Candy Apples
- Marshmallow Frankensteins
- Jalapeno Popper Mummies
- Frankenstein Rice Krispie Treats
- Frankenstein Margarita
I love to bake and cook and share my kitchen experience with all of you! Remembering to come back each day can be tough, that’s why I offer a convenient newsletter every time a new recipe posts. Simply subscribe and start receiving your free daily recipes!

Vampire Sandwich Cookies
IMPORTANT – There are often Frequently Asked Questions within the blog post that you may find helpful. Simply scroll back up to read them!
Print It
Pin It
Rate It
Save It
Saved!
Prevent your screen from going dark
Course:
Dessert, Halloween
Cuisine:
American
28
sandwich cookies
1 hour
225
Amanda Davis
Ingredients
-
30 oz chocolate chip cookie dough 1 tube (store-bought or homemade) -
16 oz vanilla frosting -
2 Tbsp red gel food coloring more as needed for vibrant color -
2 ½ cups mini marshmallows -
2 Tbsp slivered almonds
Things You’ll Need
-
Cookie sheets
-
Parchment paper or silicone baking mats
-
Wire cooling rack
-
Mixing bowl
-
Sharp knife
Before You Begin
- To make larger “dentures” or bigger cookies, simply scoop larger cookie dough balls. Note that you may need to adjust the cook time, and you will likely need more mini marshmallows and frosting to accommodate the increased size.
- For a darker, more realistic “blood” color for your frosting, add a tiny drop of black or dark blue gel food coloring along with the red. Mix well until desired shade is achieved.
Instructions
-
Preheat the oven to 350F (175°C). Line 2 large baking trays with silpat liners or parchment paper. Scoop the cookie dough into 1.5-tablespoon sized balls and arrange them on the prepared baking trays, leaving enough space for spreading.
-
Bake the cookies until they are golden along the outside and slightly soft in the center, about 12 to 15 minutes. Rotate the trays once halfway through for even baking.
-
Let the cookies cool on the trays for 10 minutes to set. Then, use a thin metal spatula to transfer the cookies to a wire rack to finish cooling completely. This prevents breakage and frosting from melting.
-
If using more cookie dough, finish baking the remaining cookies using the same method.
-
In a large bowl, mix together the vanilla frosting and 2 Tbsp of red gel food coloring. Add more red or a tiny drop of blue/black coloring as needed, mixing until you achieve your desired vibrant blood-red color.
-
Carefully cut each cooled cookie in half, creating a jagged edge to mimic gums. Spread a generous layer of the red frosting onto the flat, cut side of each cookie half.
-
For half of the frosted cookie halves (your “bottom jaws”), arrange 6 mini marshmallows along the curved outer side for teeth. Place 1 additional mini marshmallow on the straight, cut side. Top with another frosted cookie half (“top jaw”) to form the sandwich, with the red frosting and marshmallows visible.
-
To create the fangs, place 2 slivered almonds into the mini marshmallow teeth for each set of dentures. For better adhesion and a bloody effect, it helps to dip one side of each slivered almond in the red frosting first before inserting.
Nutrition
Calories: 225cal |
Carbohydrates: 33g |
Protein: 1g |
Fat: 9g |
Saturated Fat: 3g |
Polyunsaturated Fat: 1g |
Monounsaturated Fat: 1g |
Cholesterol: 5mg |
Sodium: 130mg |
Potassium: 11mg |
Fiber: 1g |
Sugar: 25g |
Vitamin A: 1IU |
Calcium: 3mg |
Iron: 1mg
Tried this Recipe? Pin it for Later!
Follow on Pinterest @AmandasCookin or tag #AmandasCookin!
The recipes on this blog are tested with a conventional gas oven and gas stovetop. It’s important to note that some ovens, especially as they age, can cook and bake inconsistently. Using an inexpensive oven thermometer can assure you that your oven is truly heating to the proper temperature. If you use a toaster oven or countertop oven, please keep in mind that they may not distribute heat the same as a conventional full sized oven and you may need to adjust your cooking/baking times. In the case of recipes made with a pressure cooker, air fryer, slow cooker, or other appliance, a link to the appliances we use is listed within each respective recipe. For baking recipes where measurements are given by weight, please note that results may not be the same if cups are used instead, and we can’t guarantee success with that method.
