Spooktacular Mini Candy Corn Cheesecakes: Your Perfect Halloween Dessert Recipe
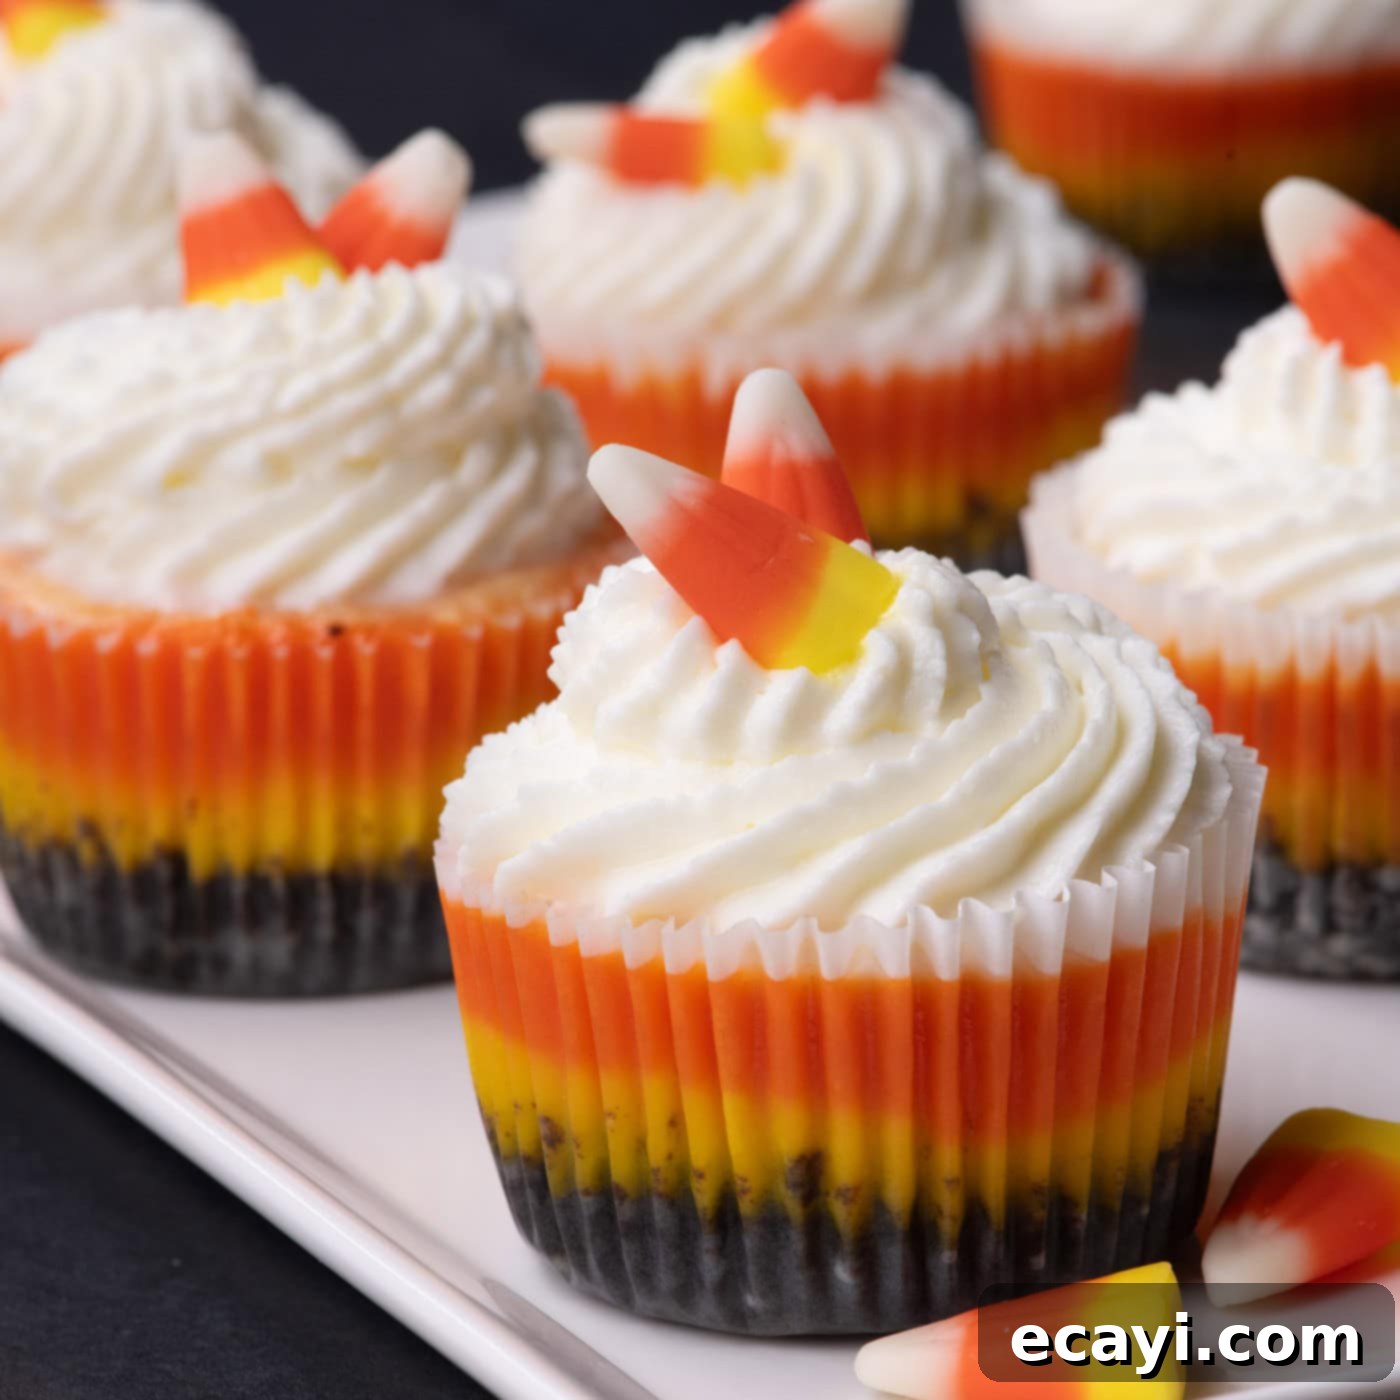
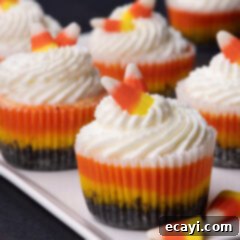
Step into the festive spirit of Halloween with these incredibly charming and irresistibly creamy Mini Candy Corn Cheesecakes! These delightful treats capture the iconic look of candy corn with vibrant yellow and orange layers, all resting on a rich Oreo cookie crust. While they don’t taste like traditional candy corn (which is often a point of contention for many!), they deliver a classic vanilla cheesecake flavor that everyone adores. They are the perfect, eye-catching addition to any Halloween party spread or a fun family activity to make during the spooky season.
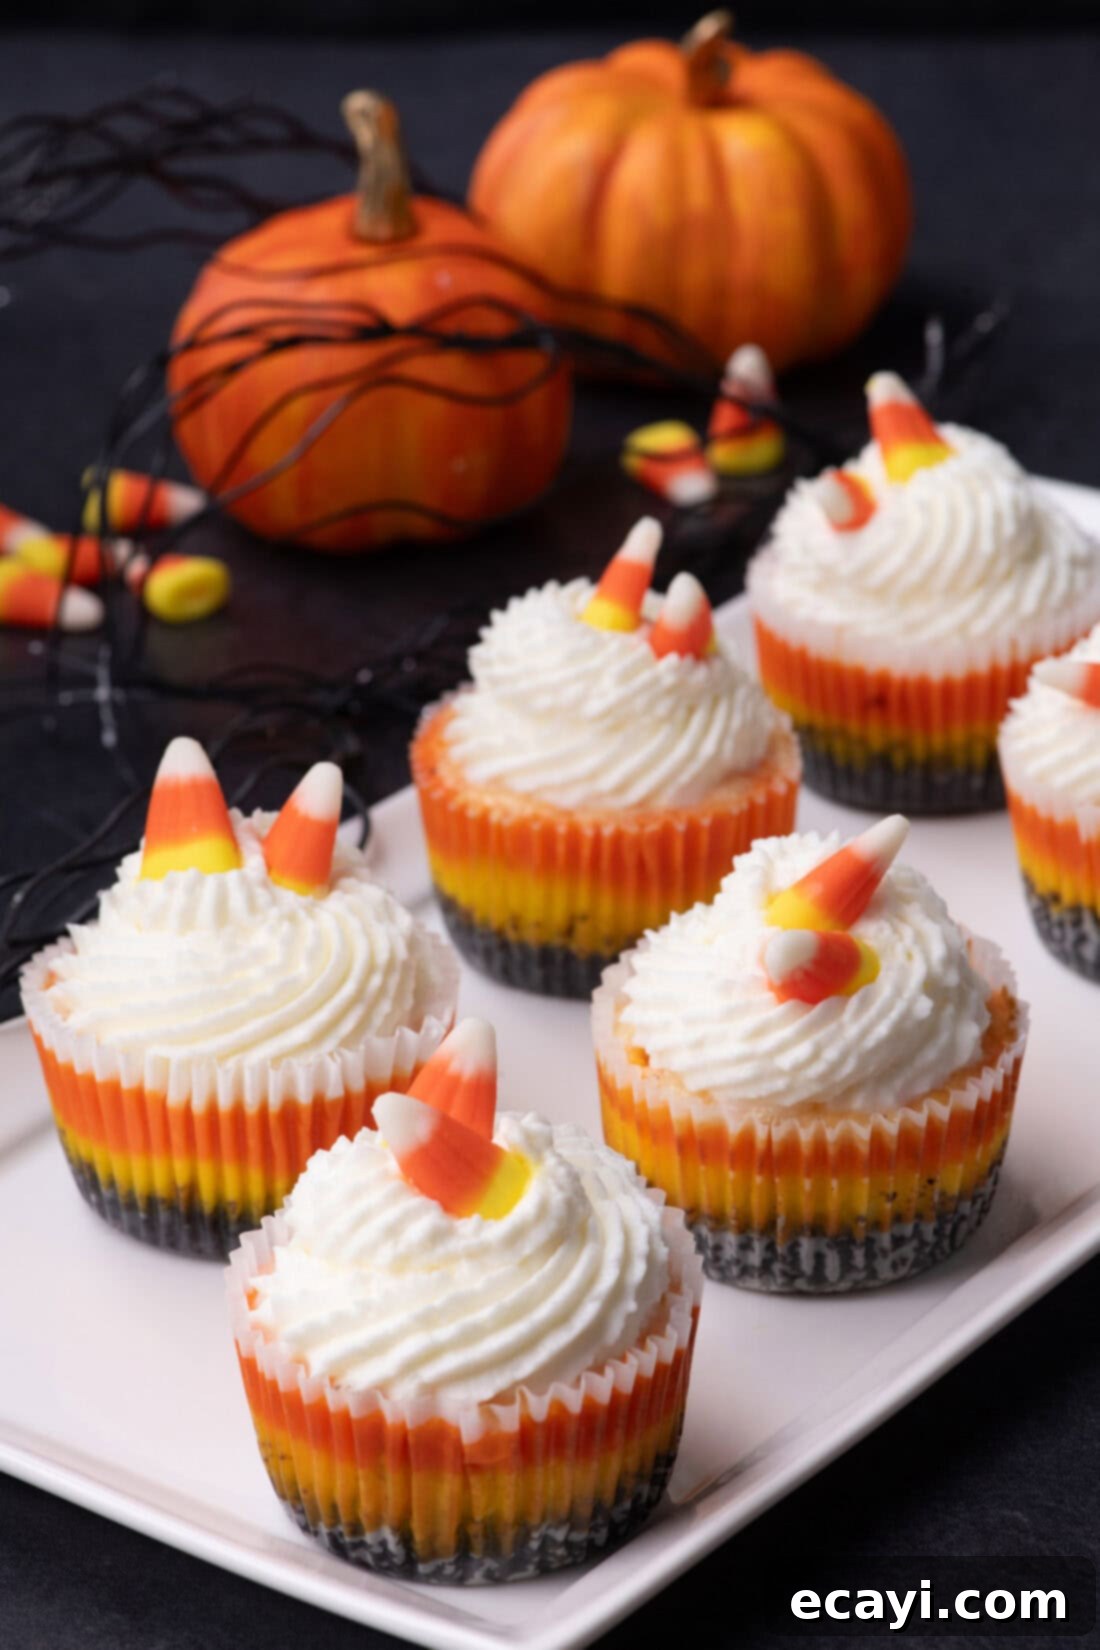
Why This Recipe Is a Halloween Must-Have
These mini candy corn cheesecakes are more than just a dessert; they’re a festive experience! They beautifully blend classic cheesecake creaminess with a playful Halloween aesthetic, making them a standout treat. Here’s why this recipe deserves a spot on your holiday menu:
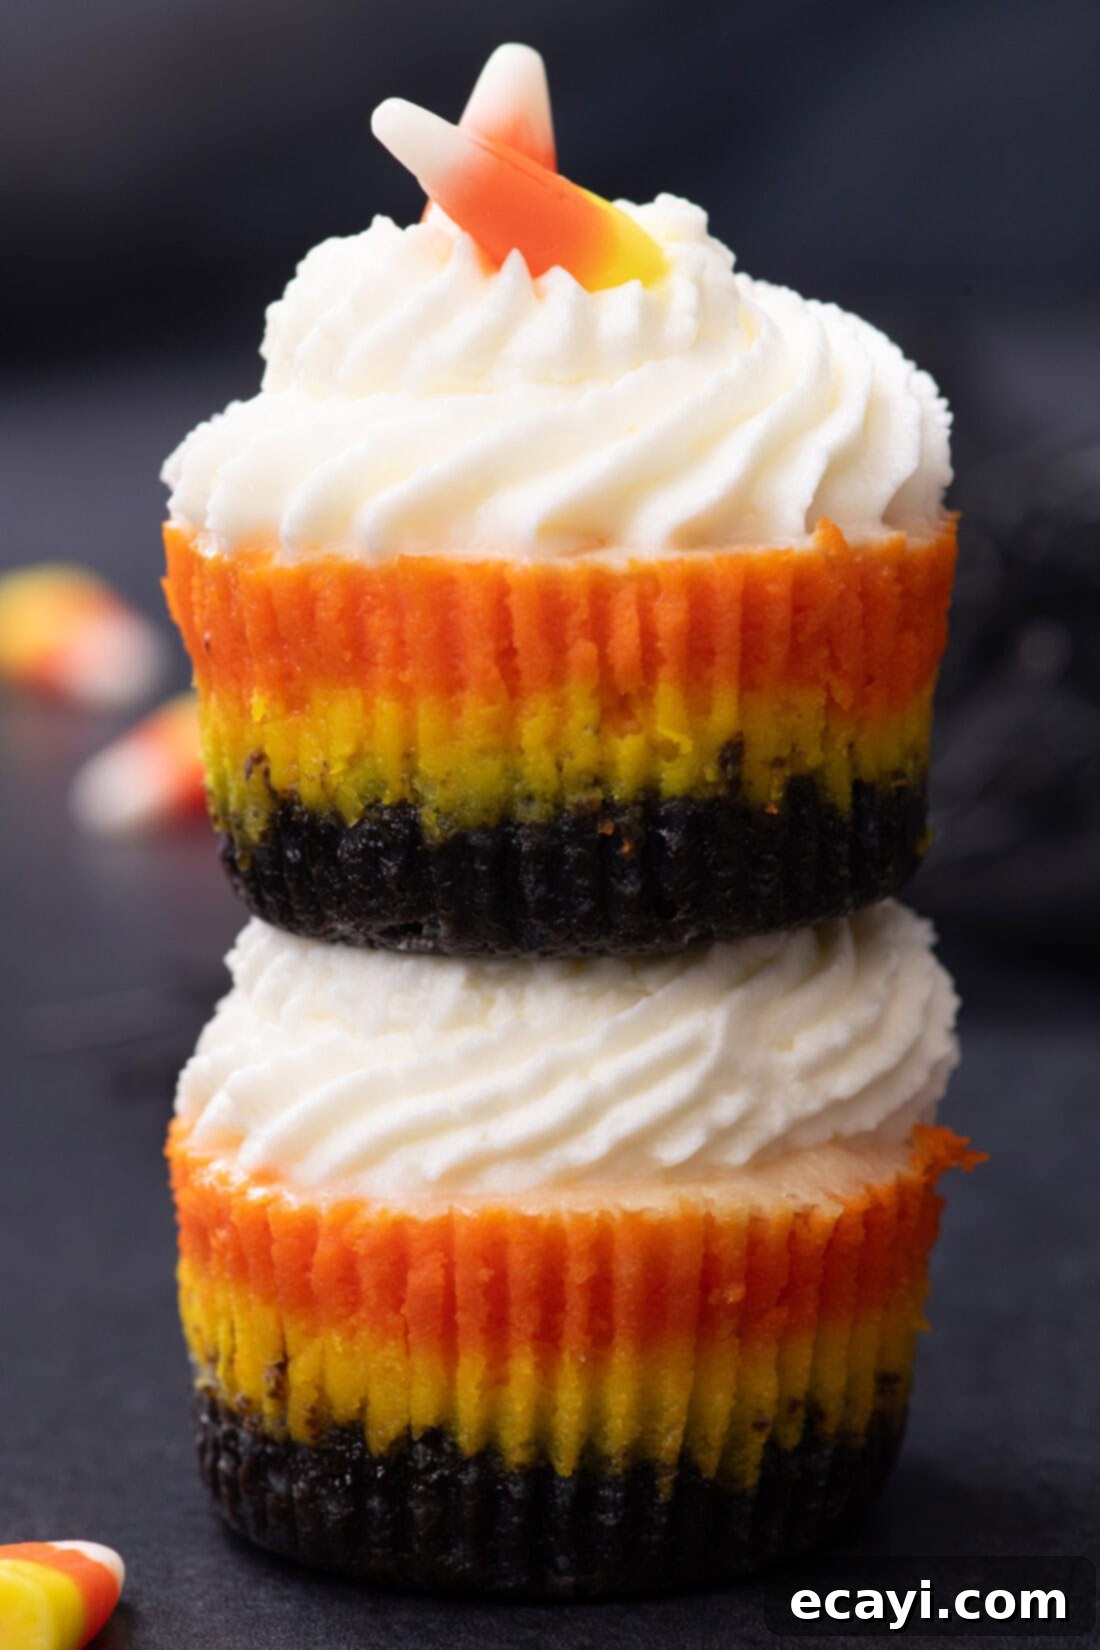
- Visually Stunning: The vibrant yellow, orange, and white layers perfectly mimic the beloved (or reviled!) candy corn, creating an immediate visual appeal that’s perfect for Halloween. They look much more elaborate than they are to make!
- Perfect Portions: Baked in cupcake liners, these cheesecakes offer individual servings, making them ideal for parties. No need for slicing or extra plates – guests can easily grab and enjoy.
- Creamy Vanilla Bliss: Forget the waxy taste of actual candy corn. These mini cheesecakes are pure vanilla indulgence, featuring a smooth, rich, and tangy cheesecake filling that everyone loves. Even those who typically shy away from candy corn will be delighted by the flavor profile.
- Irresistible Oreo Crust: A buttery, crunchy Oreo cookie crust provides a wonderful textural contrast to the silky cheesecake filling. It’s a simple base that adds immense flavor and holds everything together beautifully.
- Surprisingly Simple: Despite their layered appearance, these cheesecakes are straightforward to prepare. With clear instructions, even novice bakers can achieve impressive results.
- Make-Ahead Friendly: You can prepare the cheesecakes a day or two in advance, freeing up precious time on the day of your Halloween gathering. Just add the whipped cream and candy corn garnish right before serving.
They bring a touch of playful spookiness to your Halloween spread without being overtly gory, ensuring they appeal to all ages. The final touch of piped whipped cream and a single candy corn on top ties the whole festive look together, transforming a simple dessert into a holiday centerpiece.
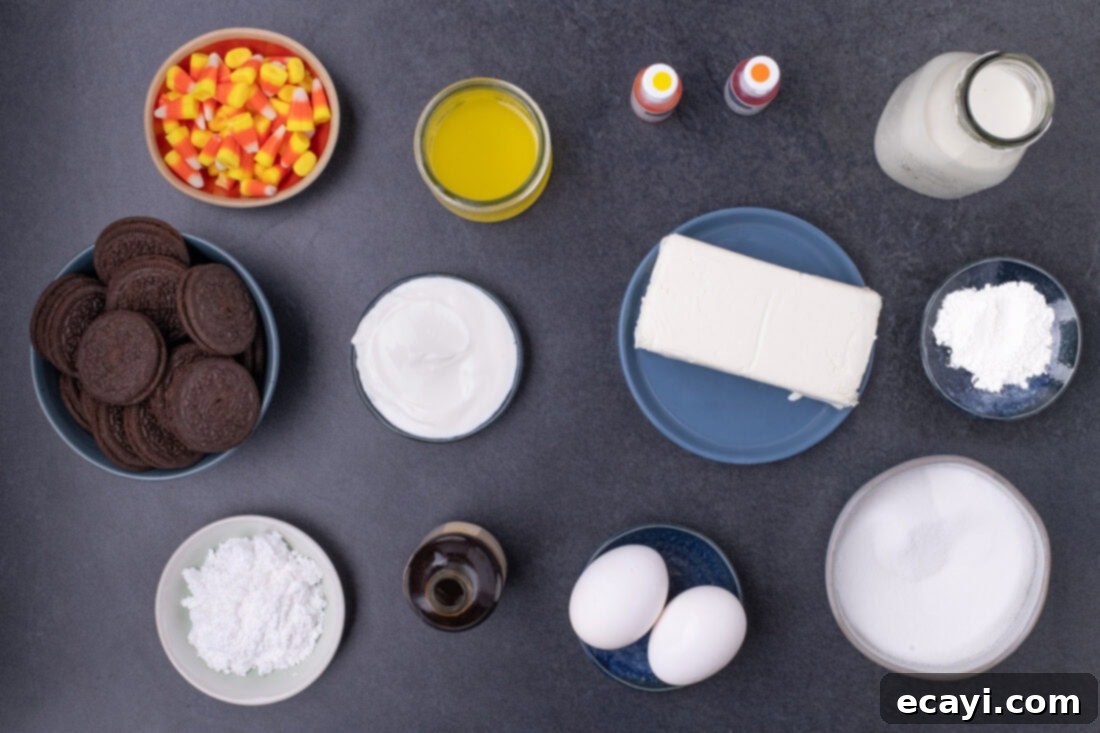
Essential Ingredients for Your Mini Candy Corn Cheesecakes
Gathering your ingredients is the first exciting step to creating these festive Halloween treats. You’ll find a complete list of measurements and detailed instructions in the printable recipe card located at the very end of this post. For now, let’s highlight the key components you’ll need to create these mini masterpieces.
Ingredient Spotlight & Expert Tips
Understanding the role of each ingredient and how to best prepare them will ensure your cheesecakes turn out perfectly every time.
For the Oreo Crust:
- Oreo Cookies: Opt for regular Oreo cookies, not the “Double Stuf” variety. There’s no need to remove the creamy filling; in fact, it contributes to the crust’s moisture and helps it bind together beautifully.
- Crumb Texture: Aim for very fine crumbs when processing the Oreos. The finer the crumbs, the more compact and stable your crust will be, preventing it from crumbling when you bite into the cheesecake. Any large cookie chunks can make the crust uneven and difficult to flatten.
- Melted Butter: The melted butter acts as the binder for your Oreo crumbs. Ensure it’s fully incorporated into the crumbs until the mixture resembles wet sand – this indicates it will press and hold its shape well.
For the Cheesecake Filling:
- Cream Cheese: Always use brick-style, full-fat cream cheese for the best texture and flavor. It provides the necessary richness and structure that low-fat versions simply cannot replicate. It’s crucial that the cream cheese is at room temperature. This is paramount for achieving a smooth, lump-free batter. Cold cream cheese will result in a clumpy filling and an overmixed cheesecake, which can lead to cracking. To speed up the softening process, slice your brick of cream cheese into smaller cubes and let it sit on the counter for 30-40 minutes.
- Sour Cream: Full-fat sour cream adds a delicate tang and extra creaminess to the cheesecake, complementing the sweetness and richness of the other ingredients. Like cream cheese, using it at room temperature will help it blend seamlessly into the batter.
- Granulated Sugar & All-Purpose Flour: These provide sweetness and a bit of structural integrity to prevent cracking.
- Vanilla Extract: Use a good quality vanilla extract for the best flavor. It’s the primary flavor in this cheesecake!
- Eggs: Large eggs should also be at room temperature to ensure they incorporate smoothly without overmixing the batter. Add them one at a time and mix *just* until combined to avoid incorporating too much air, which can cause cracks.
- Gel Food Coloring: For the most vibrant and true candy corn colors (yellow and orange), gel food coloring is highly recommended over liquid food coloring. Gel colors are concentrated, so you need only a few drops to achieve intense hues without altering the cheesecake’s consistency. Liquid food coloring can thin the batter and may not provide the desired intensity.
How to Make Mini Candy Corn Cheesecakes
These step-by-step photos and instructions are designed to help you visualize each stage of making this recipe. For a convenient printable version, complete with precise measurements and full instructions, simply Jump to Recipe at the bottom of this page.
- Preheat your oven to 325°F. Line two standard 12-capacity muffin pans with cupcake liners. Using liners will make it much easier to remove the finished cheesecakes and serve them cleanly.
- To prepare the Oreo crust, place the entire Oreo cookies (filling included) into a food processor. Pulse until the cookies are reduced to a very fine crumb, ensuring no large chunks remain. Add the melted butter and continue pulsing until the mixture achieves the consistency of wet sand, indicating the butter is evenly distributed.
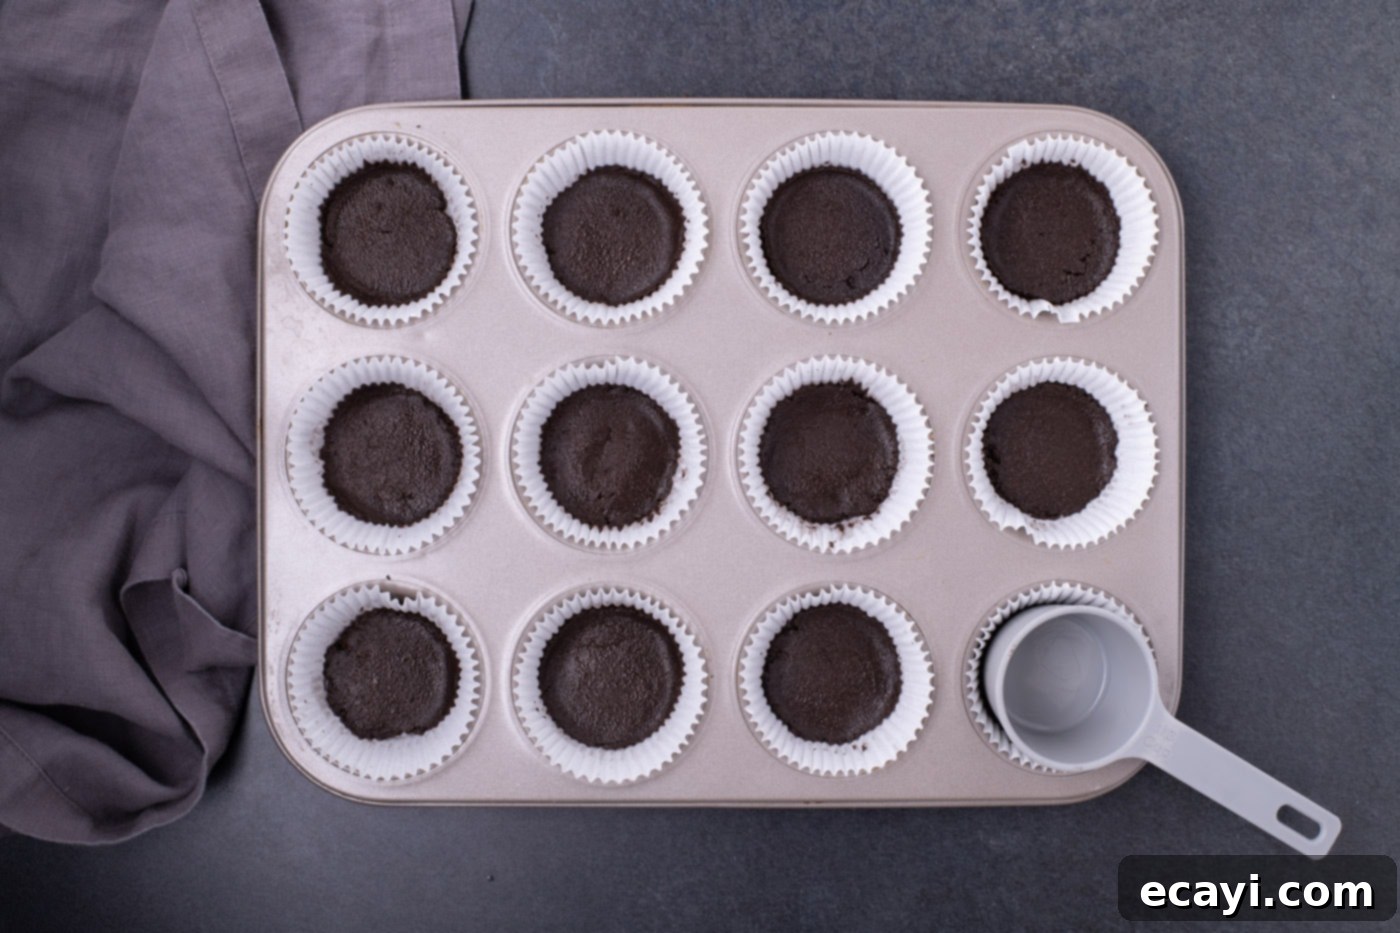
- Using a 1-tablespoon cookie scoop, portion the buttery Oreo crumbs evenly into each cupcake liner. Then, use the bottom of a small measuring cup or a tart tamper to firmly flatten the crumbs into a compact, even layer at the bottom of each liner. This creates a solid base for your cheesecake.

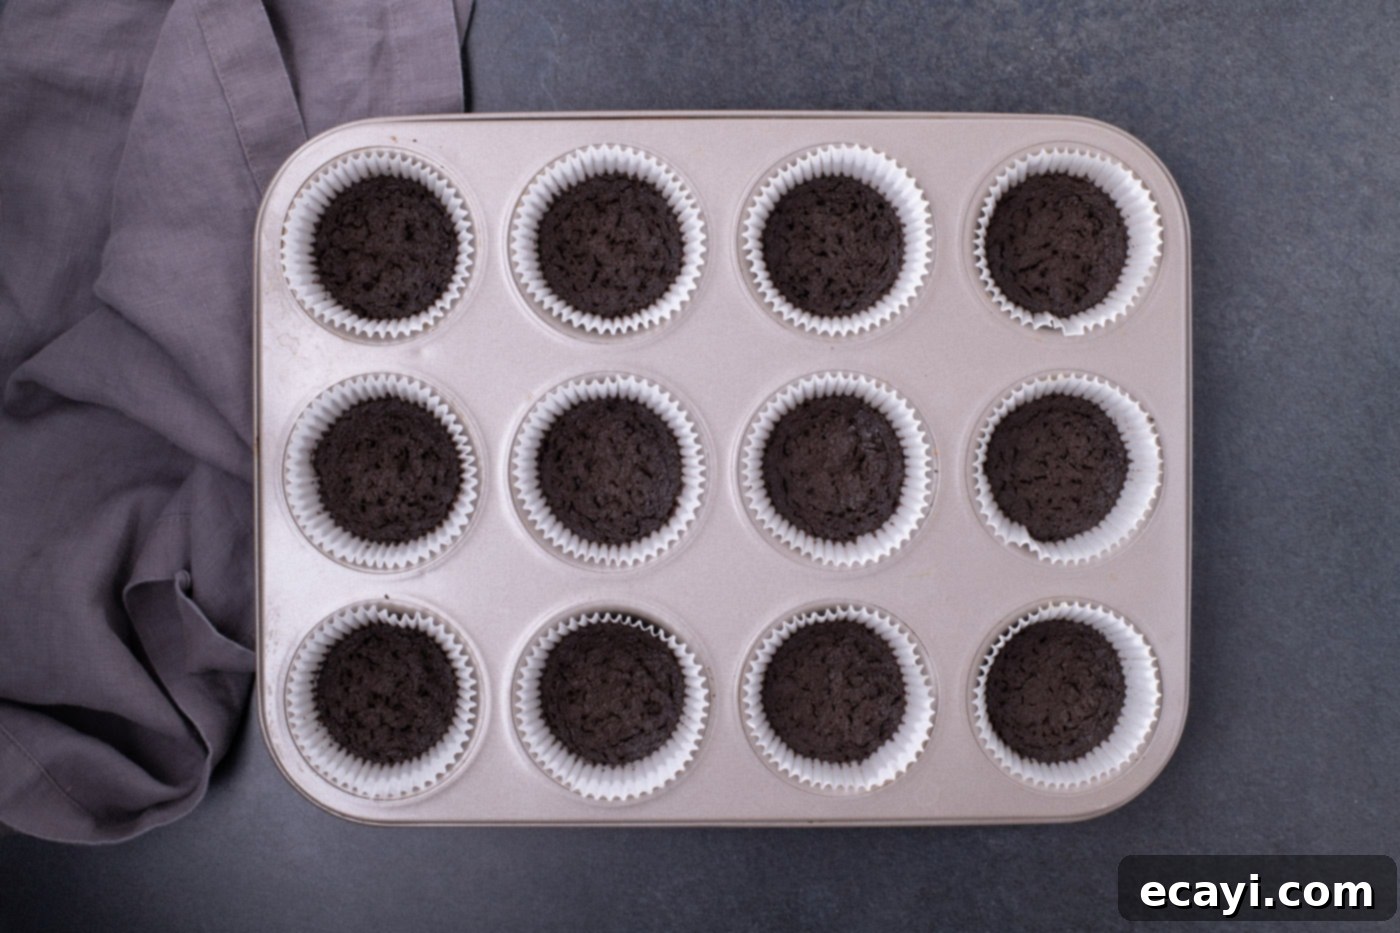
- Bake the crusts for 5 to 8 minutes, or until they appear set and slightly fragrant. This brief baking time helps to solidify the crust and prevent it from becoming soggy. Remove from the oven and set aside to cool completely while you prepare the cheesecake filling.

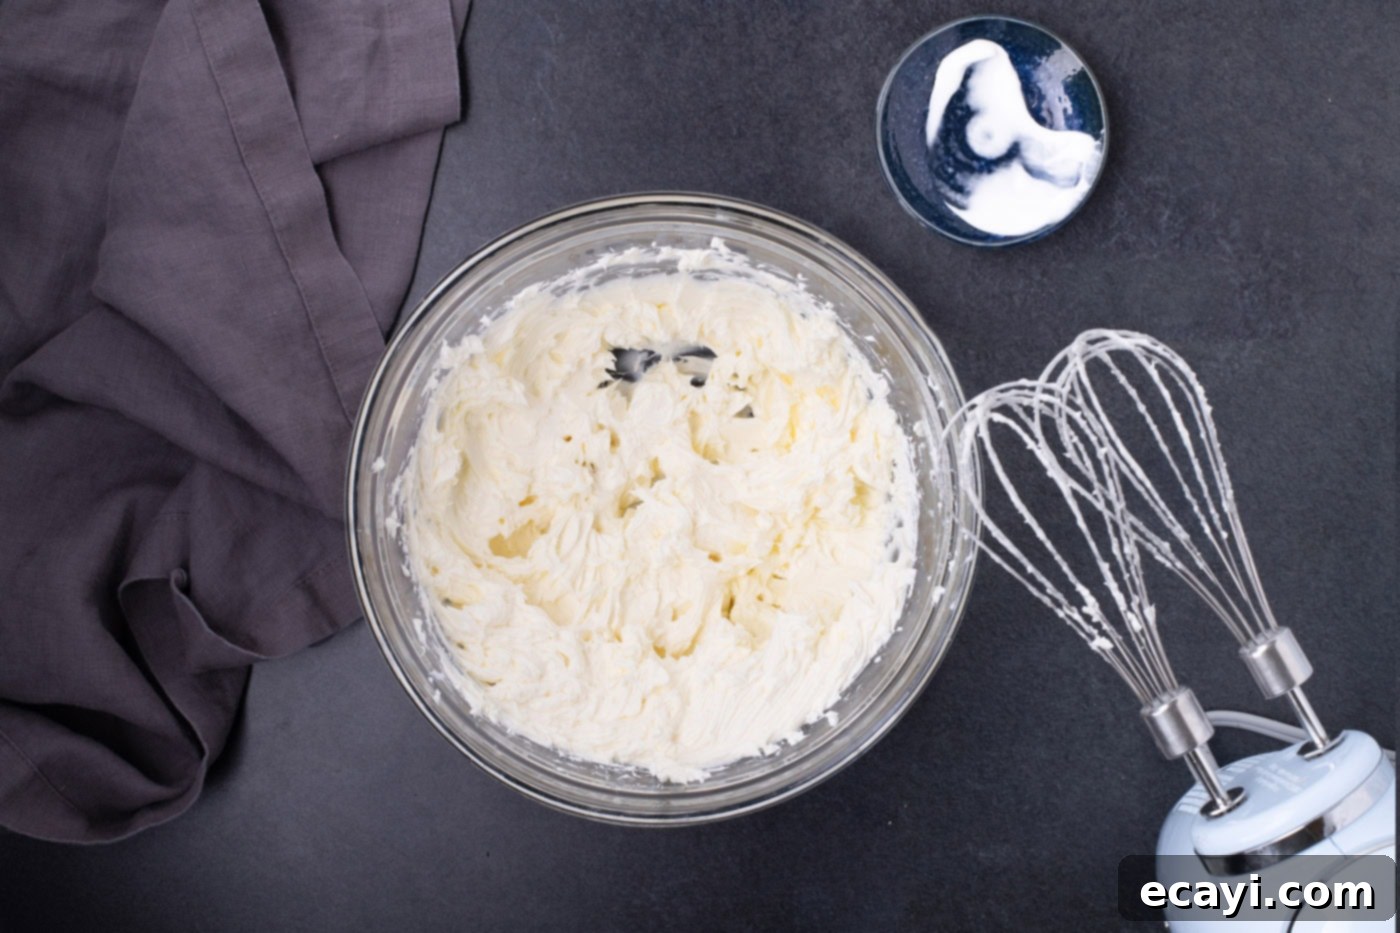
- In a large mixing bowl, using a hand mixer, beat the room temperature cream cheese and sour cream until the mixture is light, smooth, and fluffy. Ensure there are no lumps of cream cheese remaining.

- Add the granulated sugar and all-purpose flour to the cream cheese mixture. Gently stir them in using a wooden spoon or a soft silicone spatula until just combined. Overmixing at this stage can incorporate too much air, which can lead to cracks in your finished cheesecakes.
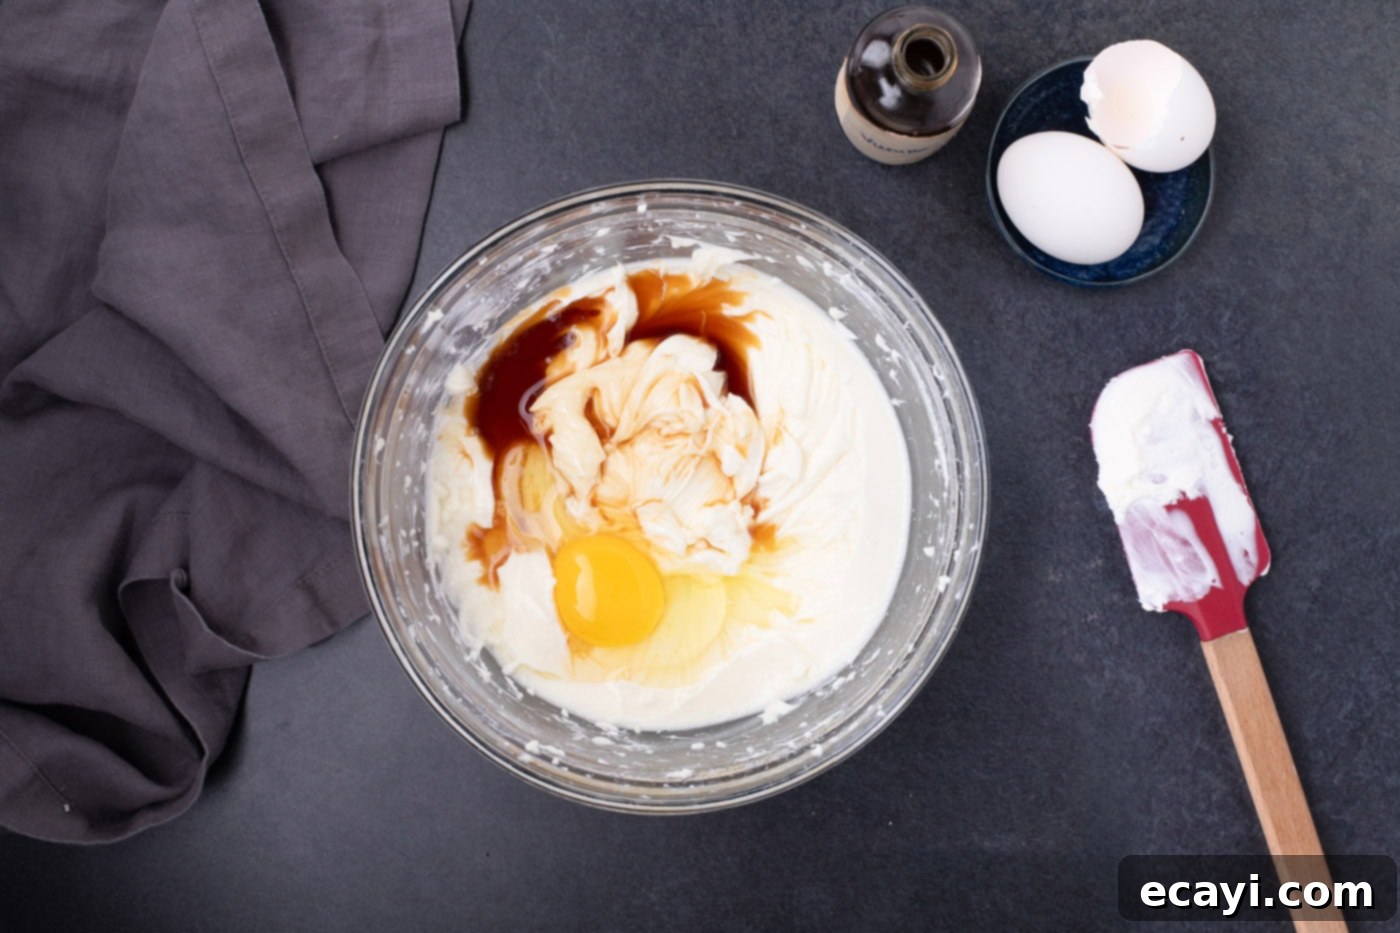
- Stir in the vanilla extract, followed by one egg at a time. Mix gently until each egg is *just* incorporated into the batter. It’s crucial not to use the hand mixer for this step; hand-mixing helps prevent excessive air from being incorporated, which is key to avoiding cheesecake cracks and sinking.

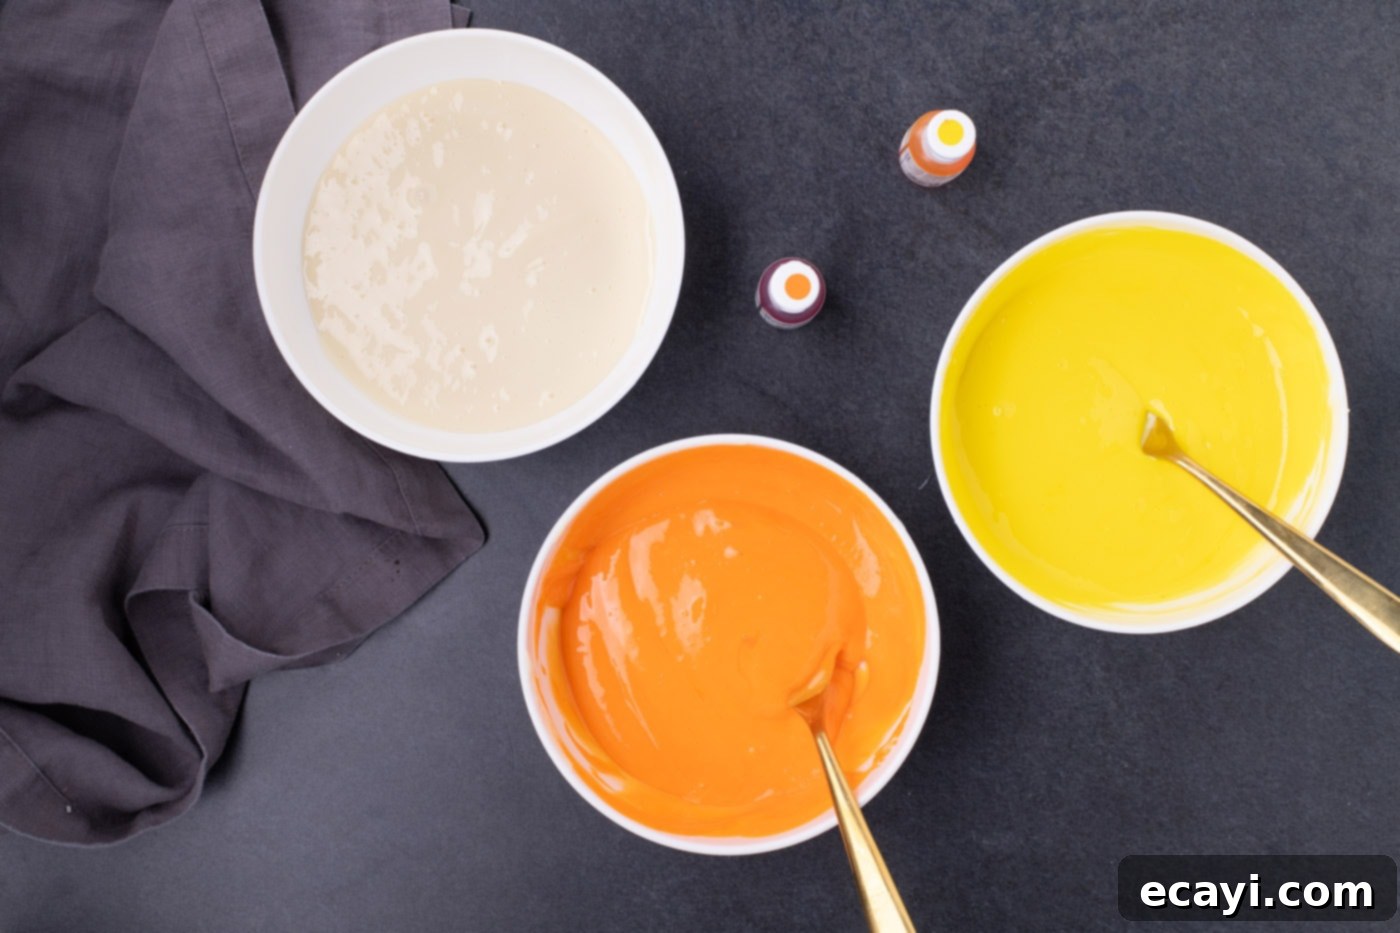
- Divide the cheesecake filling into three separate bowls for coloring:
- Transfer ¾ cups of the filling to the first bowl and add 3 drops of yellow gel food coloring.
- Transfer 1 cup of filling to the second bowl and add 3 drops of orange gel food coloring.
- The remaining 1 ¼ cups of filling goes into the third bowl, which will remain its natural cream color.
- Carefully stir the food coloring into the yellow and orange bowls until the color is uniform and well combined. If you desire a darker or more intense shade, add additional drops of gel food coloring one at a time, mixing thoroughly after each addition until you achieve your preferred vibrant hue.

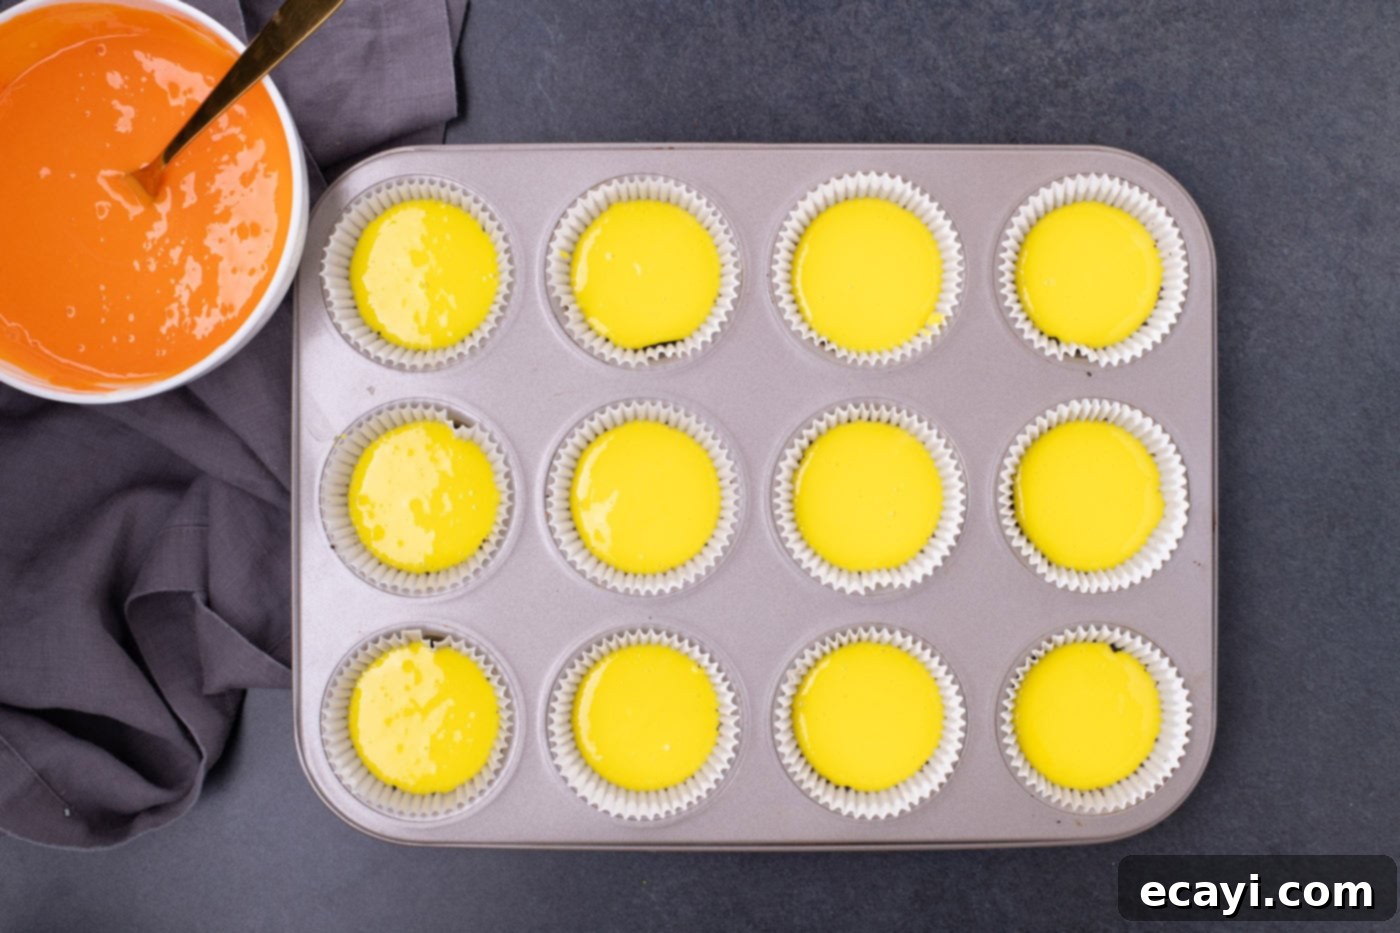
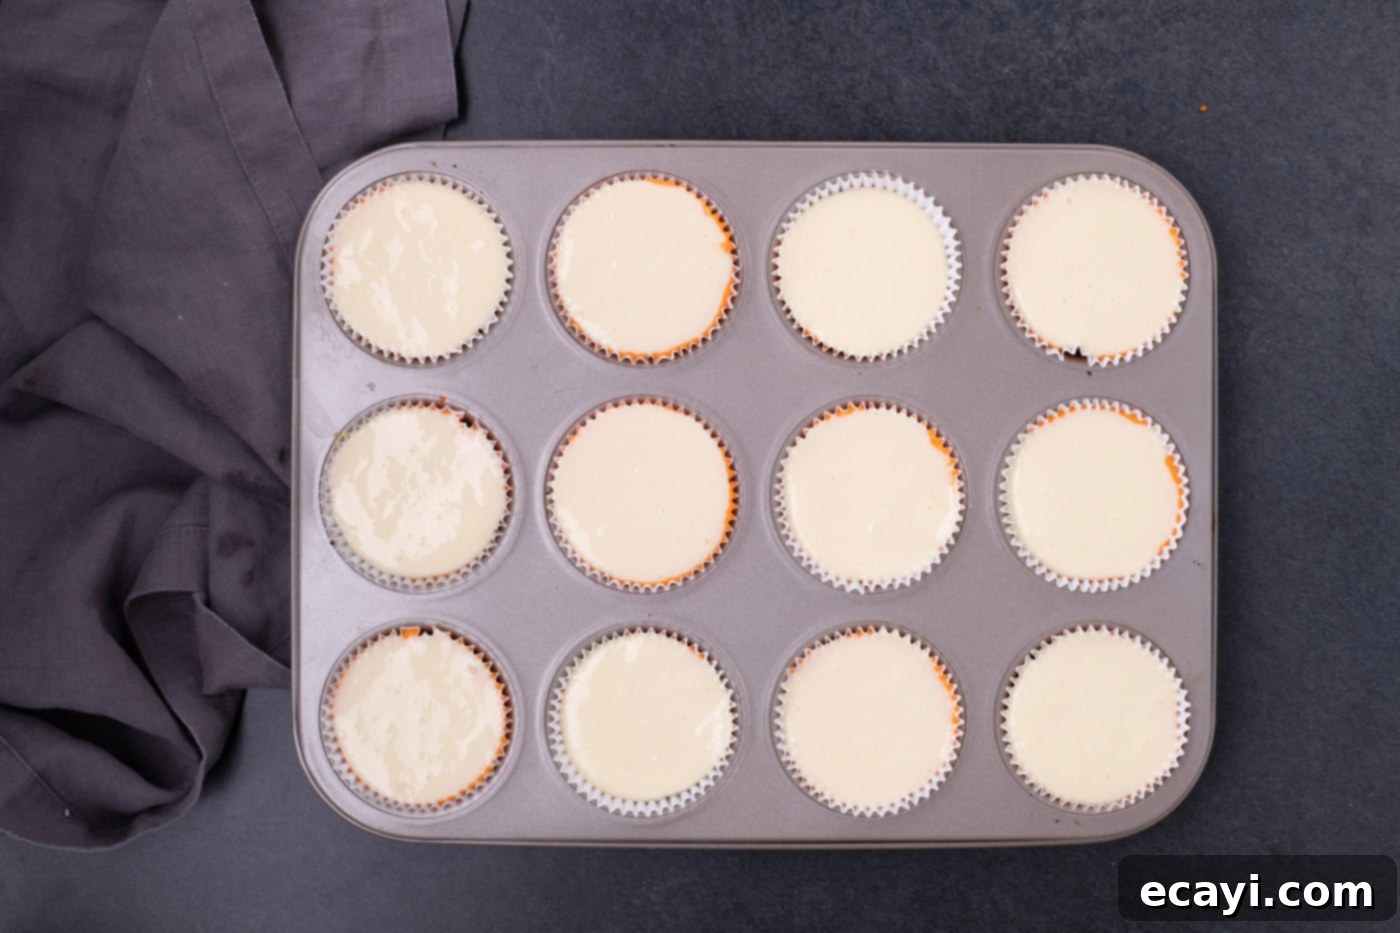
- Now, it’s time to layer! Place a heaping teaspoon of the yellow-tinted cheesecake filling onto the cooled Oreo crust in each cupcake liner. Gently spread it to cover the crust evenly.

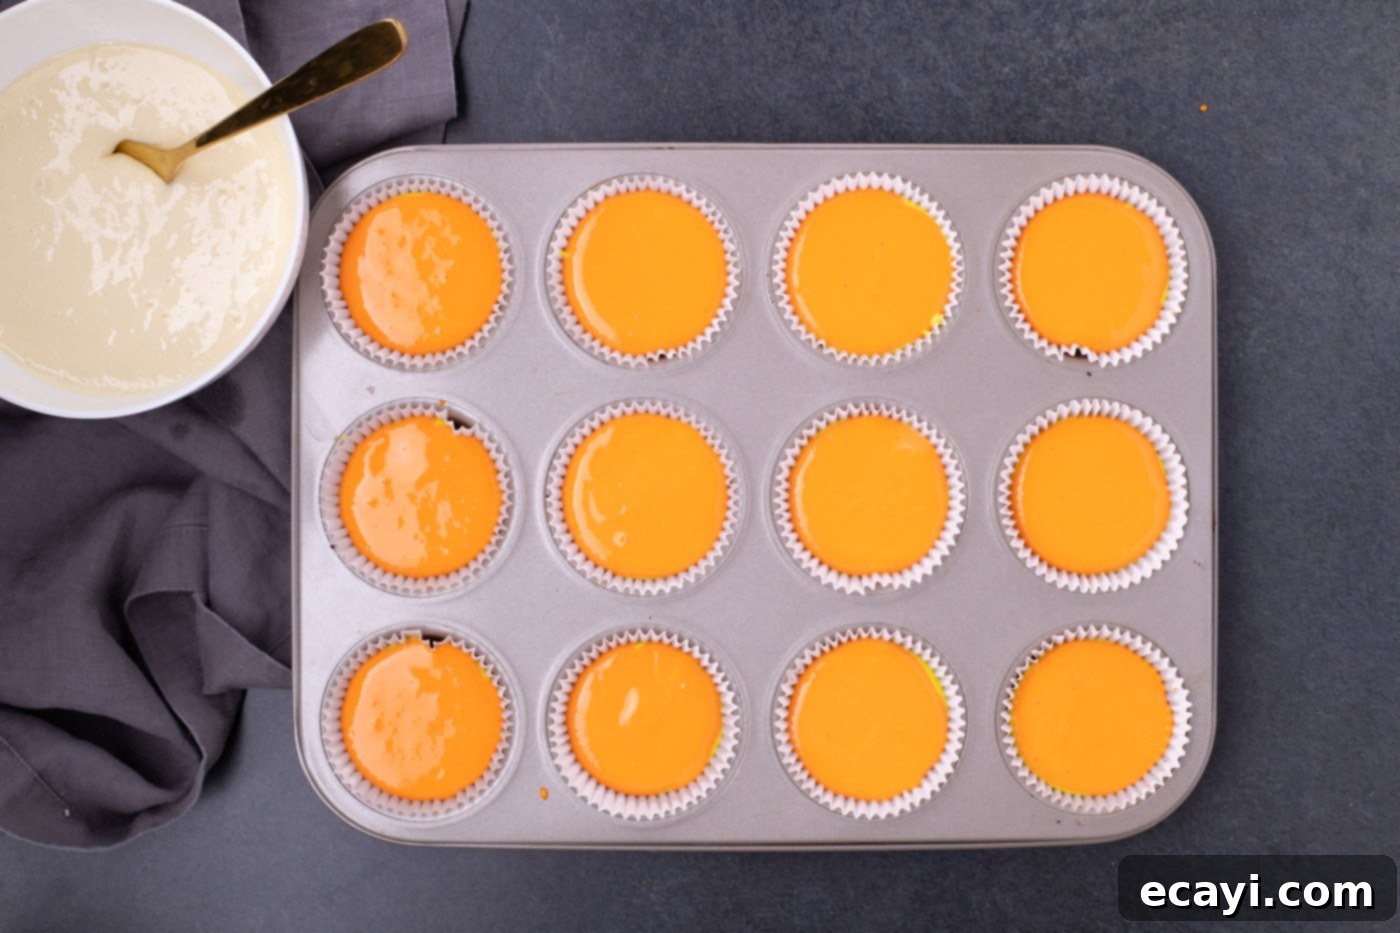
- Next, carefully spoon 1 tablespoon of the orange cheesecake filling on top of the yellow layer in each cup. Finally, top each with 2 tablespoons of the cream-colored filling. Try to keep the layers as neat as possible to achieve that distinct candy corn look.


- Place the muffin pans onto a larger baking sheet (this will help catch any potential spills and ensure even heat distribution). Bake on the middle oven rack for approximately 15-20 minutes, or until the edges of the cheesecakes are set and slightly puffed, but the centers still have a slight jiggly movement when gently shaken. It is absolutely critical not to overbake cheesecakes, as this is a common cause of cracking.
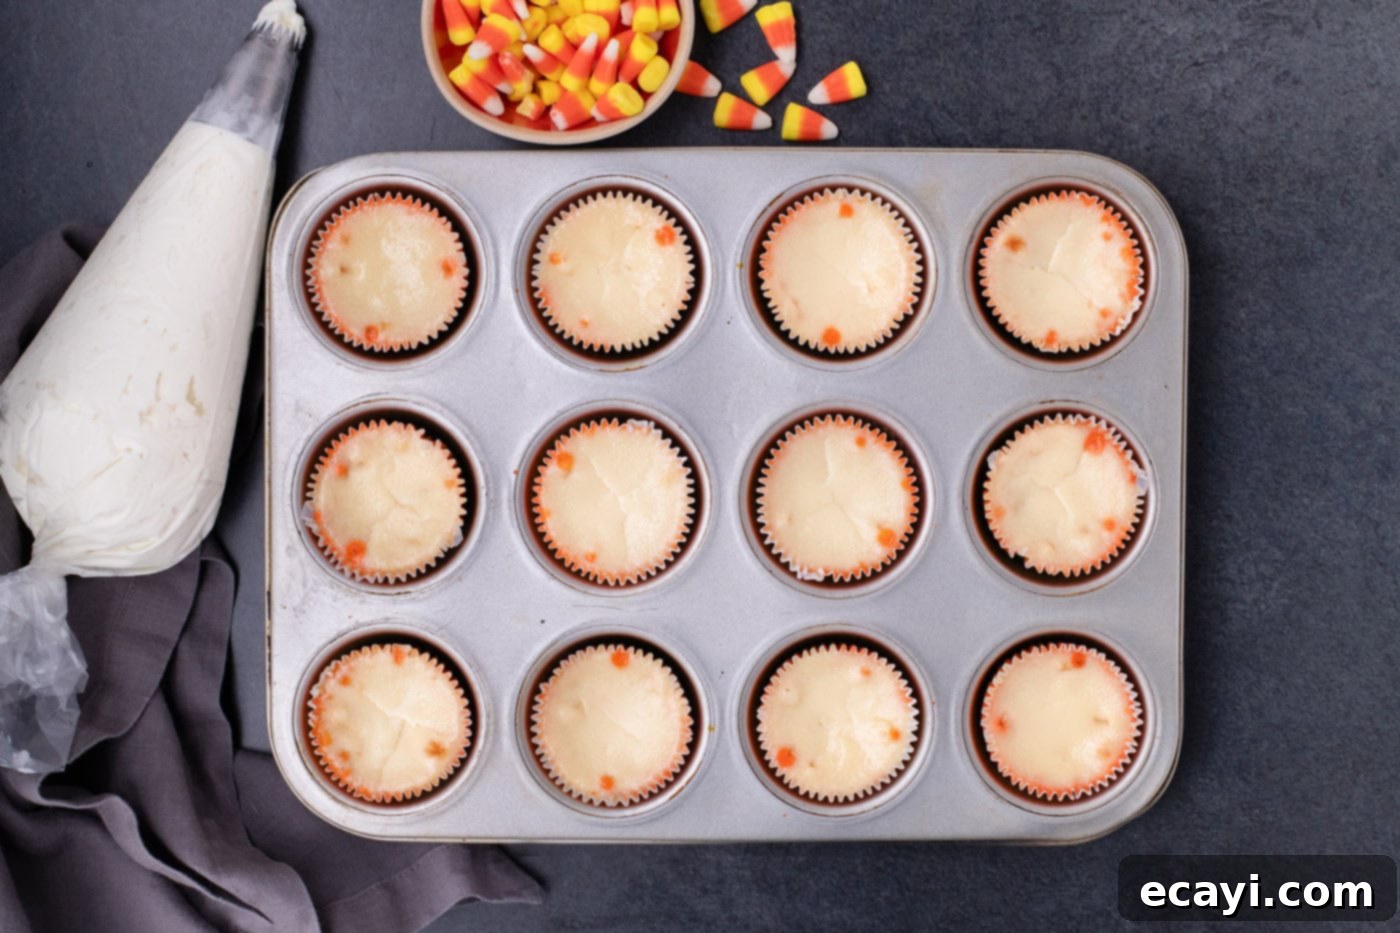
- Once baked, turn the oven off immediately. Prop the oven door ajar (about 3 inches) and leave the cheesecakes inside for a full hour. This slow, gradual cooling process is essential; it allows the cheesecakes to set fully and cool down slowly, which is crucial for preventing them from sinking in the middle or cracking on the surface due to a sudden temperature change.

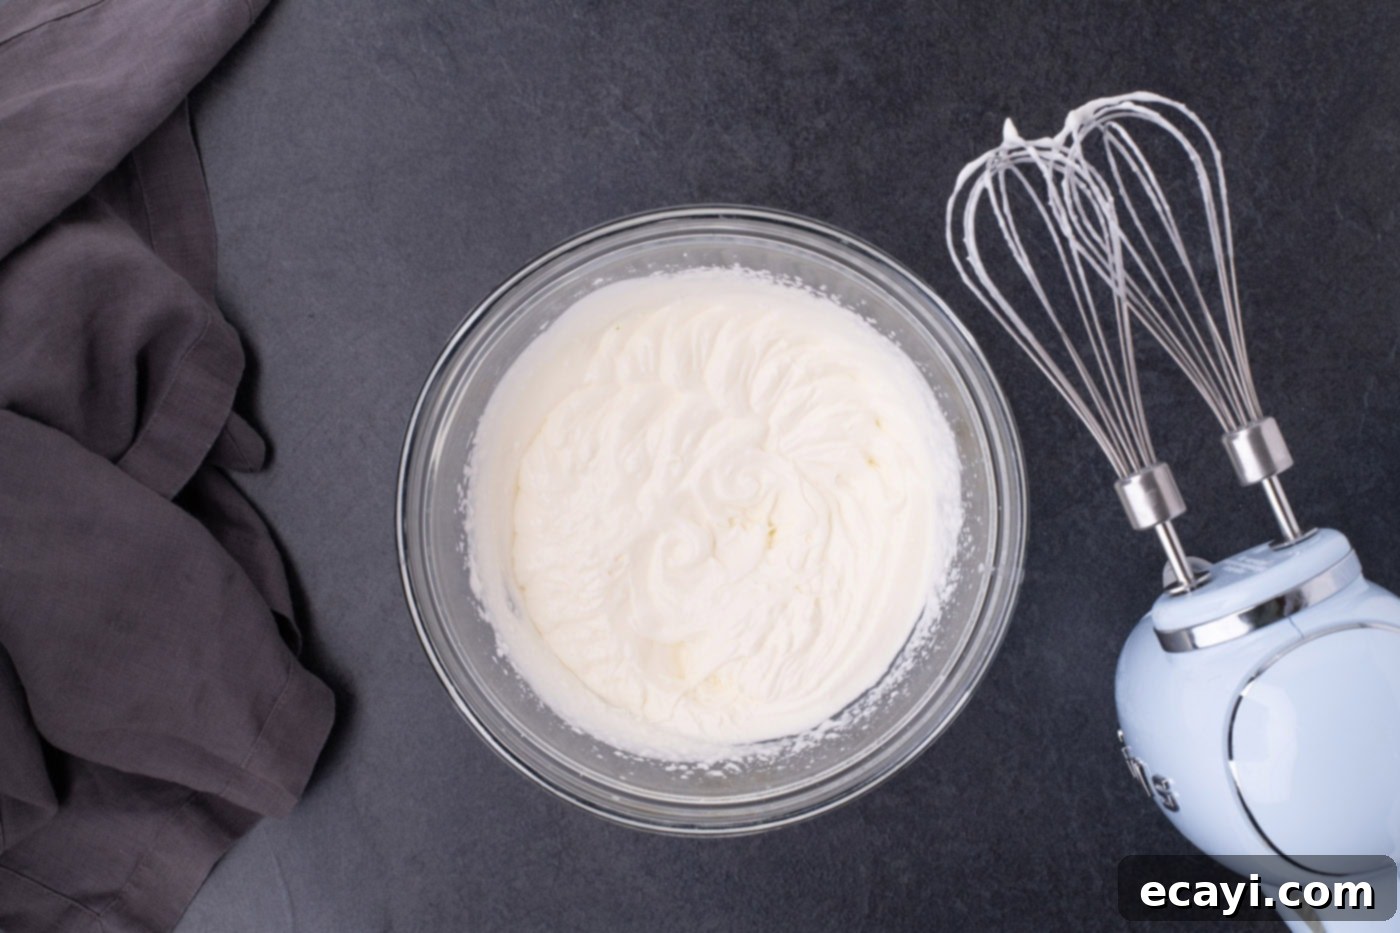
- While the cheesecakes are in their slow cooling phase, prepare the whipped cream. In a chilled mixing bowl, combine the cold heavy cream and powdered sugar. Using a hand mixer, start beating at a low speed to gradually build volume, then increase the speed to medium-high. Continue beating until soft, airy peaks form. Be careful not to overbeat, or it will turn into butter.

- Transfer the prepared whipped cream into a pastry bag fitted with your desired decorative tip (or simply use a ziplock bag with one corner snipped off). Refrigerate the whipped cream until you are ready to garnish the cheesecakes.
- After the hour in the turned-off oven, remove the muffin pans and place them on a wire rack to cool completely to room temperature. Once cooled, if not serving immediately, transfer the cheesecakes (still in their liners) to an airtight container and store them in the refrigerator. Cheesecake is best served well chilled.
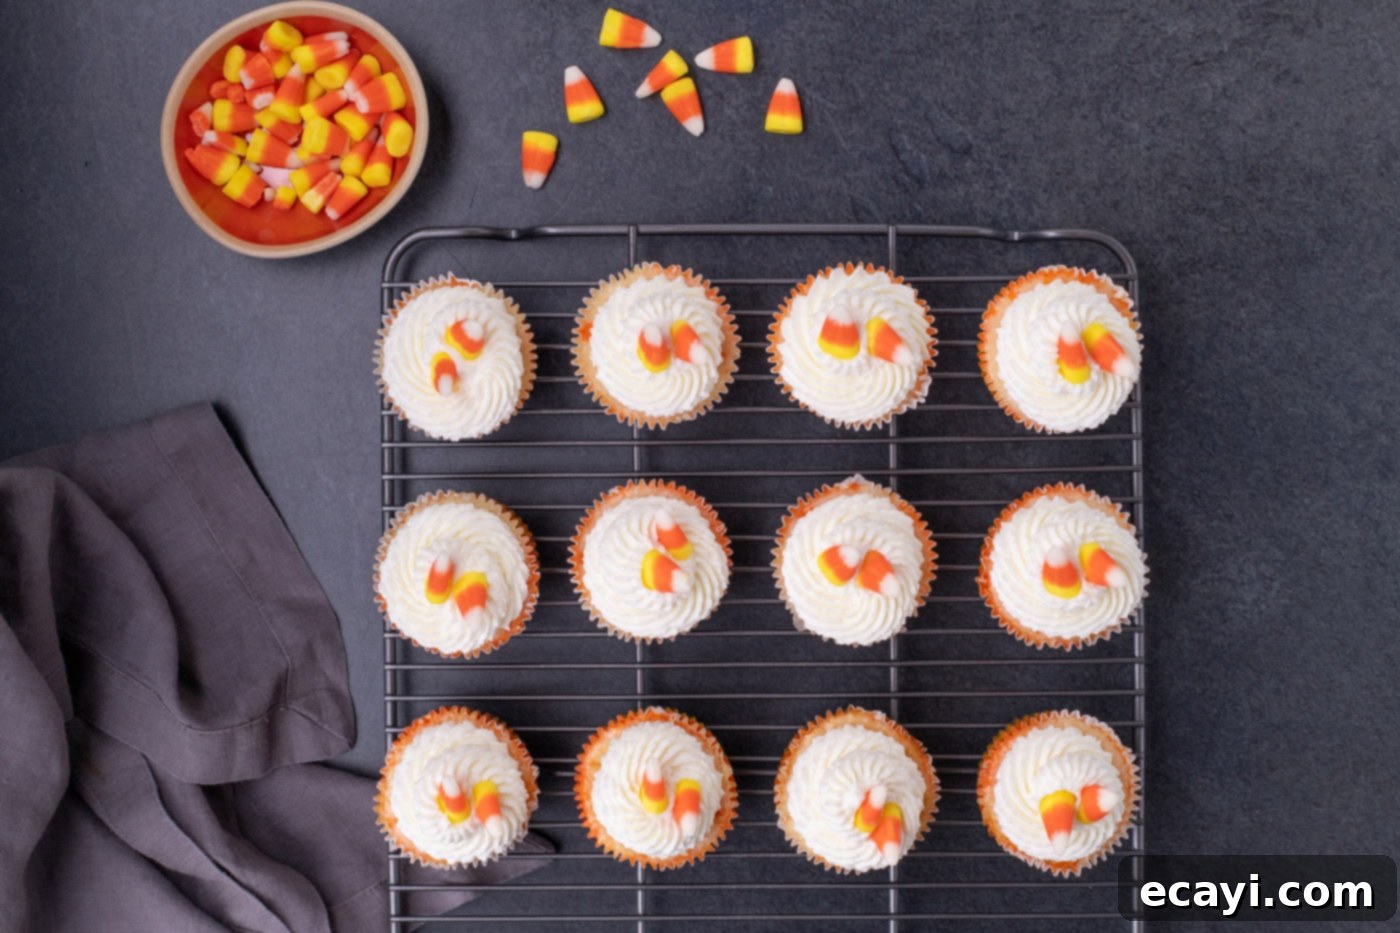
- Just before serving, retrieve the chilled cheesecakes. Pipe a generous swirl of the prepared whipped cream onto the top of each cheesecake. Finish by placing a single piece of candy corn artfully on top of the whipped cream, completing the festive candy corn illusion.

Frequently Asked Questions & Expert Tips for Cheesecake Success
Yes, these delightful mini candy corn cheesecakes freeze exceptionally well, making them a fantastic make-ahead option! If you plan on freezing them, it’s best to wait until just before serving to add the whipped cream topping. Once the cheesecakes are fully cooled to room temperature and then thoroughly chilled in the refrigerator, place them in a single layer in an airtight freezer-safe container. You can freeze them for up to 2 months. When you’re ready to enjoy them, thaw the cheesecakes overnight in the refrigerator, then top with freshly piped whipped cream and candy corn.
Determining doneness in cheesecakes can be tricky, but there’s a simple trick. You should turn off your oven when the edges of the cheesecakes are slightly puffed up and appear set, but the very center still has a slight, delicate jiggle. It shouldn’t be liquid, but a gentle wobble is perfect. The residual heat in the oven, combined with the slow cooling method (leaving them in the turned-off oven with the door ajar for an additional hour), will allow the cheesecakes to finish setting beautifully without overbaking, which often leads to cracking.
While a tiny hairline crack occasionally happens and can easily be hidden by whipped cream, preventing significant cracking and deflation is achievable with a few key practices:
- Oven Temperature Accuracy: The most common culprit for cracking is an oven that’s too hot. Every oven can vary, especially older models. Invest in an inexpensive oven thermometer to ensure your oven is truly heating to the correct temperature (325°F for this recipe).
- Avoid Overmixing: Overmixing the cheesecake batter, especially after adding the sour cream and eggs, incorporates too much air. These air bubbles expand during baking, then collapse upon cooling, leading to cracks and a sunken center. Use a hand mixer only for the initial cream cheese and sour cream mixture, then switch to a wooden spoon or spatula for the remaining ingredients, mixing just until combined.
- Gradual Cooling is Key: Sudden temperature changes are detrimental to cheesecakes. The crucial step of turning off the oven and leaving the cheesecakes inside with the door propped open for an hour allows them to cool down slowly and gently. This gradual transition helps the delicate structure set without stressing it, minimizing the risk of cracks and preventing the center from sinking.
- Room Temperature Ingredients: Ensure all dairy ingredients (cream cheese, sour cream, eggs) are at room temperature. This helps them combine smoothly and evenly without requiring excessive mixing.
To maintain their freshness and delicious texture, store your mini candy corn cheesecakes in an airtight container in the refrigerator. They will keep well for 4-5 days. These cheesecakes can easily be prepared the day before you plan on serving them, allowing you to enjoy a stress-free celebration. However, for the best presentation and texture, I highly recommend making and piping on the whipped cream topping (and adding the candy corn garnish) shortly before you intend to serve them. This prevents the whipped cream from deflating or absorbing odors from the fridge.
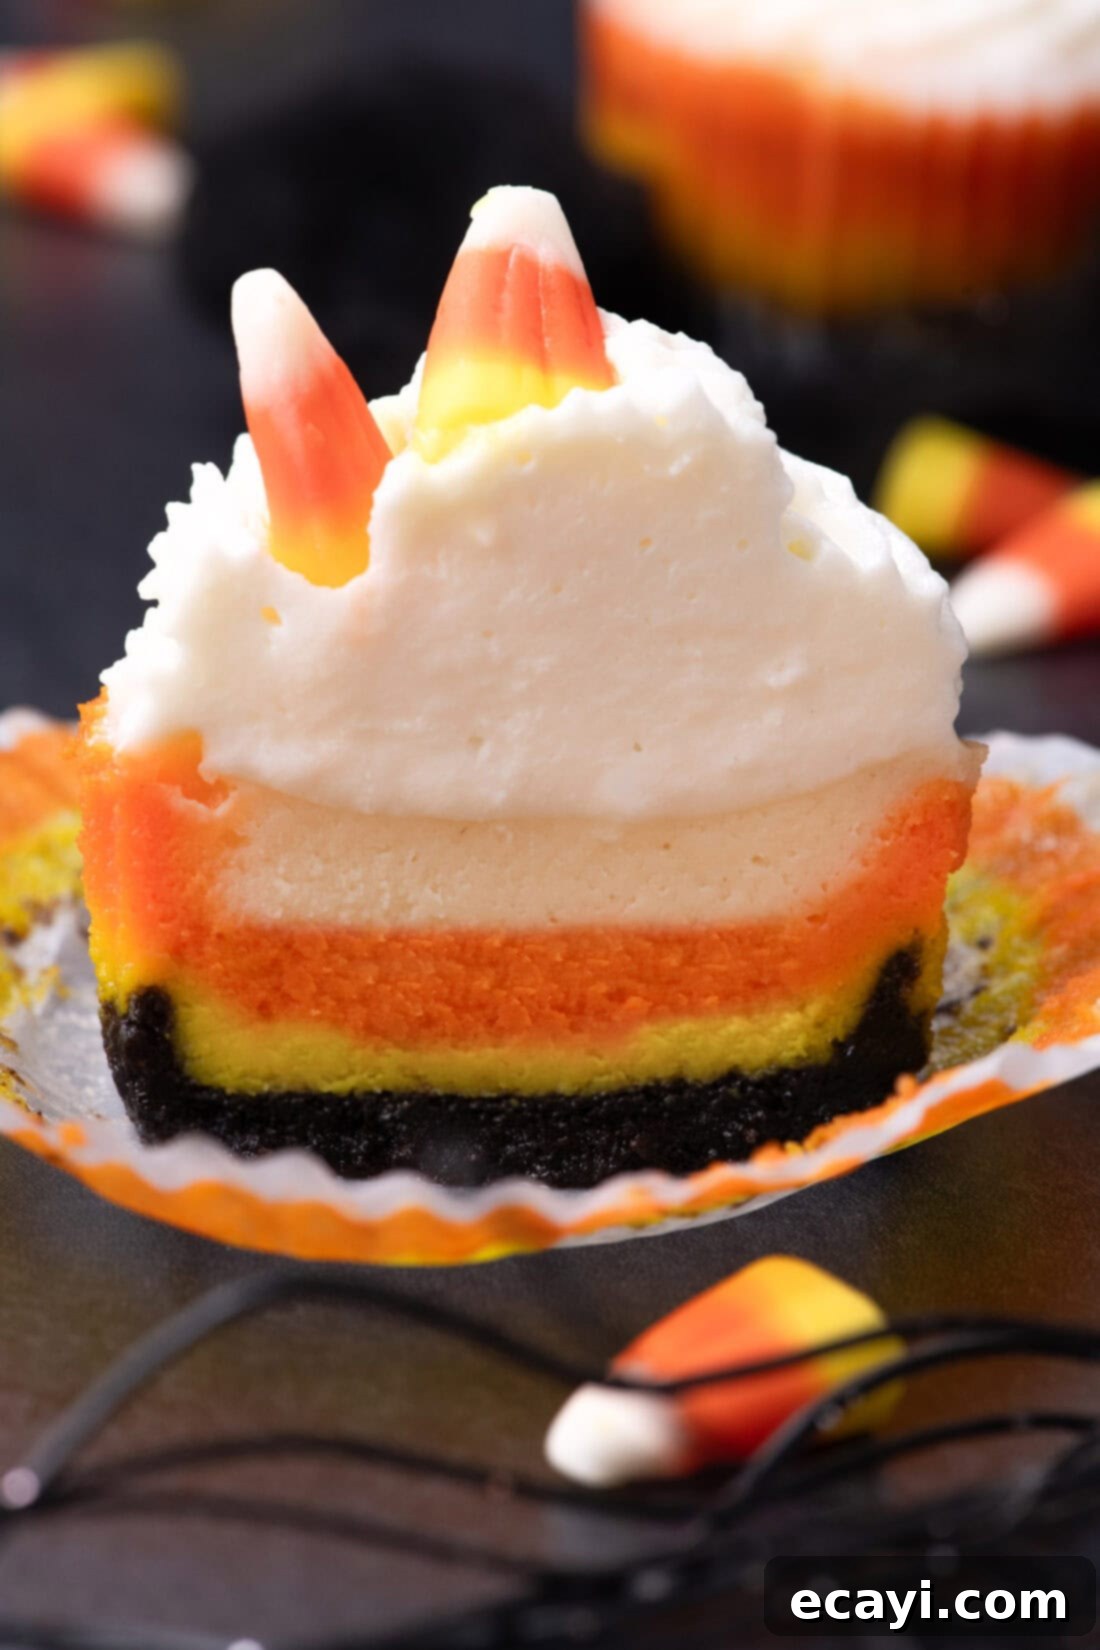
Serving Suggestions for Your Festive Treats
The beauty of these mini candy corn cheesecakes lies in their self-contained charm! The perfect serving is simple yet elegant: a beautiful, swirling piping of fresh whipped cream on top, crowned with a single, classic piece of candy corn. For an extra touch of seasonal flair, you could also sprinkle a few Halloween-themed sprinkles or some finely chopped chocolate for added texture. Serve them chilled to enjoy their creamy, refreshing texture fully.
More Spooktacular Halloween Recipes to Try
If you’re planning a Halloween feast or simply looking for more fun and festive treats, explore these other fantastic recipes that are sure to delight your guests:
- Halloween Dirt Cups: A classic, fun, and easy treat with layers of pudding, Oreos, and gummy worms.
- Halloween Candy Apples: Crisp apples dipped in a vibrant, sugary coating – a timeless Halloween favorite.
- Candy Corn Jello Shots: A colorful and spirited treat for adult Halloween parties.
- Jalapeno Popper Mummies: Savory, spicy, and adorable appetizers perfect for a Halloween gathering.
I genuinely love to bake and cook, and my greatest joy comes from sharing my kitchen experiences and successful recipes with all of you! Remembering to check back for new culinary adventures can sometimes be a challenge, which is why I offer a convenient newsletter. Each time a new recipe posts, it’s delivered straight to your inbox. Simply subscribe here to start receiving your free daily recipes and never miss a delicious update!
Mini Candy Corn Cheesecakes
IMPORTANT – There are often Frequently Asked Questions within the blog post that you may find helpful. Simply scroll back up to read them!
Print It
Pin It
Rate It
Save It
Saved!
Prevent your screen from going dark
Course:
Dessert
Cuisine:
American
20
servings
2 hours
5 minutes
210
Amanda Davis
Ingredients
Oreo Crust
-
16
Oreo cookies
regular. Do not use Double Stuf -
½
cup
unsalted butter
melted
Cheesecake Filling
-
16
ounces
cream cheese
at room temperature -
¼
cup
full fat sour cream -
¾
cup
granulated sugar -
2
Tablespoons
all purpose flour -
2
teaspoons
vanilla extract -
2
large
eggs -
gel food coloring
in yellow and orange. We used Americolor Yellow (#107) and Orange (#113)
Things You’ll Need
-
2 Muffin pan
12-cup capacity -
Food processor -
1 Tablespoon cookie scoop -
Hand mixer -
Mixing bowls
Before You Begin
- There is no need to remove the Oreo filling when making the crust, in fact, it helps add moisture to the mixture. Try to get the Oreo crumbs as fine as possible without any cookie chunks remaining. The finer the crumb, the better it will hold its shape and prevent crumbling.
- Use room temperature brick-style, full-fat cream cheese for best results. To help cream cheese come to room temperature quicker, slice it into cubes and allow it to rest on the counter for 30-40 minutes. This ensures a smooth, lump-free batter.
- You should turn the oven off when the cheesecakes are slightly puffed up around the edges but still have a gentle wiggle in the middle. Keeping them in the turned-off oven for an additional hour with the door ajar will ensure they finish setting slowly and prevent cracks and sinking.
Instructions
-
Preheat the oven to 325°F (160°C) and place cupcake liners in two 12-capacity muffin pans.
-
Place the Oreo cookies in a food processor and pulse until they resemble a fine crumb. Add the melted butter and continue pulsing until it has the texture of wet sand.
-
Using a 1-tablespoon cookie scoop, portion the Oreo crumbs among the cupcake liners. Using the bottom of a measuring cup, flatten them out firmly.
-
Bake for 5 to 8 minutes (or until the crust has set). Set aside to cool completely while making the filling.
-
In a large mixing bowl, beat the room temperature cream cheese and sour cream with a hand mixer until fluffy and smooth.
-
Stir in the granulated sugar and all-purpose flour using a wooden spoon or soft silicone spatula until just combined.
-
Stir in the vanilla extract and then add the two large eggs one at a time, mixing gently until just combined after each addition. (Do not use the hand mixer for this step to avoid incorporating air.)
-
Transfer ¾ cups of the cheesecake filling to a first bowl and add 3 drops of yellow gel food coloring. Transfer 1 cup of filling to a second bowl and add 3 drops of orange gel food coloring. Transfer the remaining 1 ¼ cups of filling to a third bowl, leaving it cream-colored.
-
Stir the food coloring into the yellow and orange bowls until well combined and a uniform color is achieved. If a darker shade is desired, add more food coloring drops and mix.
-
Place a heaping teaspoon of the yellow filling onto the cooled Oreo crust in each cupcake liner, spreading it gently to create the first layer.
-
Place 1 tablespoon of the orange filling on top of the yellow layer. Finally, top each with 2 tablespoons of the cream-colored filling to complete the candy corn layers.
-
Set the muffin pans on a baking sheet and bake on the middle rack for 15-20 minutes, or until the centers of the cheesecakes are still slightly jiggly. Do not overbake to prevent cracking.
-
Turn the oven off and leave the door ajar for 1 hour to allow the cheesecakes to set and cool down slowly. (This crucial step prevents sinking and cracking).
-
While the cheesecakes are cooling, prepare the whipped cream by combining chilled heavy cream and powdered sugar. With a hand mixer, beat at low speed, then increase to medium/high until soft peaks form.
-
Place the whipped cream in a pastry bag (or a ziplock bag with the corner cut) and refrigerate until needed.
-
Remove the muffin pans from the oven and place them on a wire rack to cool completely to room temperature. If not serving immediately, store them in an airtight container in the fridge.
-
Just before serving, pipe the cheesecakes with the chilled whipped cream and garnish each with a piece of candy corn.
Expert Tips & FAQs
- Store them in an air-tight container in the refrigerator for 4-5 days. They can easily be made the day before you plan on serving them, but for the freshest look, make and pipe the whipped cream shortly before serving.
- Freezing Instructions: If you plan on freezing these mini cheesecakes, hold off on adding the whipped cream until after thawing. Place the fully cooled and chilled cheesecakes in an air-tight container and freeze for up to 2 months. To serve, thaw them overnight in the refrigerator, then top with freshly made whipped cream and candy corn.
Nutrition
Serving:
1
cheesecake
|
Calories:
210
cal
|
Carbohydrates:
16
g
|
Protein:
3
g
|
Fat:
15
g
|
Saturated Fat:
8
g
|
Polyunsaturated Fat:
1
g
|
Monounsaturated Fat:
4
g
|
Trans Fat:
0.2
g
|
Cholesterol:
55
mg
|
Sodium:
117
mg
|
Potassium:
66
mg
|
Fiber:
0.3
g
|
Sugar:
12
g
|
Vitamin A:
492
IU
|
Vitamin C:
0.03
mg
|
Calcium:
31
mg
|
Iron:
1
mg
Tried this Recipe? Pin it for Later!
Follow on Pinterest @AmandasCookin or tag #AmandasCookin!
The recipes on this blog are tested with a conventional gas oven and gas stovetop. It’s important to note that some ovens, especially as they age, can cook and bake inconsistently. Using an inexpensive oven thermometer can assure you that your oven is truly heating to the proper temperature. If you use a toaster oven or countertop oven, please keep in mind that they may not distribute heat the same as a conventional full sized oven and you may need to adjust your cooking/baking times. In the case of recipes made with a pressure cooker, air fryer, slow cooker, or other appliance, a link to the appliances we use is listed within each respective recipe. For baking recipes where measurements are given by weight, please note that results may not be the same if cups are used instead, and we can’t guarantee success with that method.
