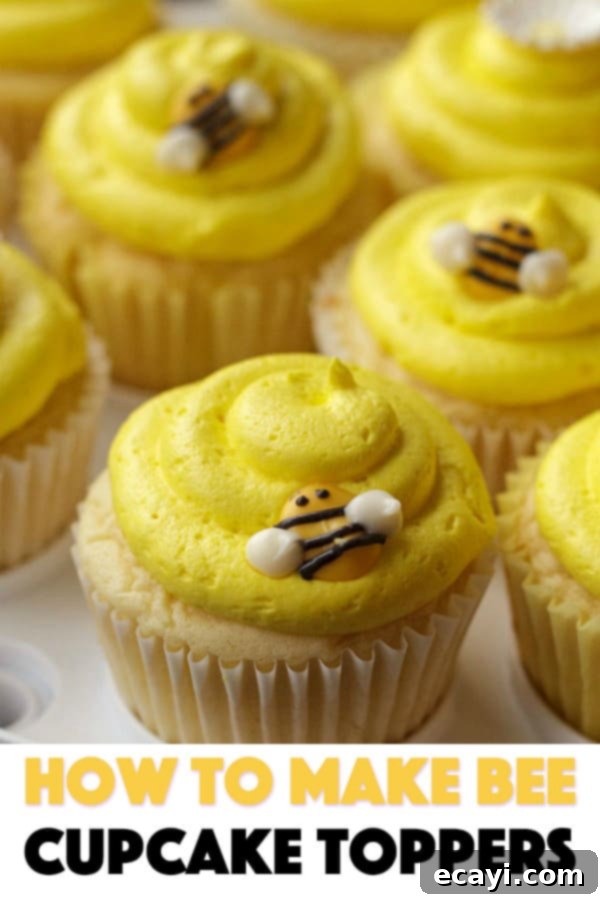
Buzz-Worthy Bites: Easy DIY Homemade Bee Cupcake Toppers for Sweet Celebrations
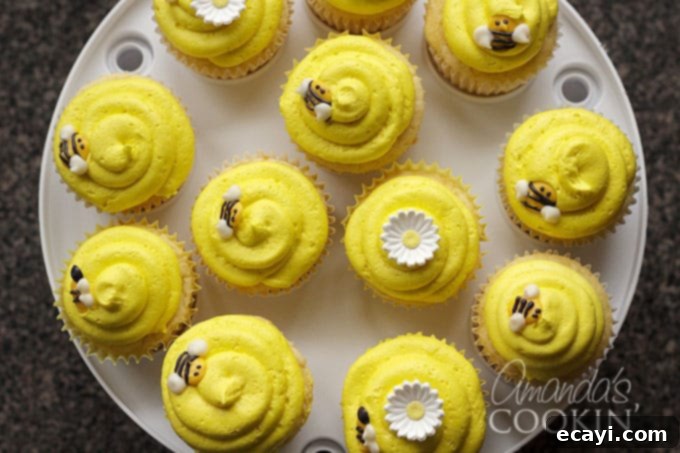
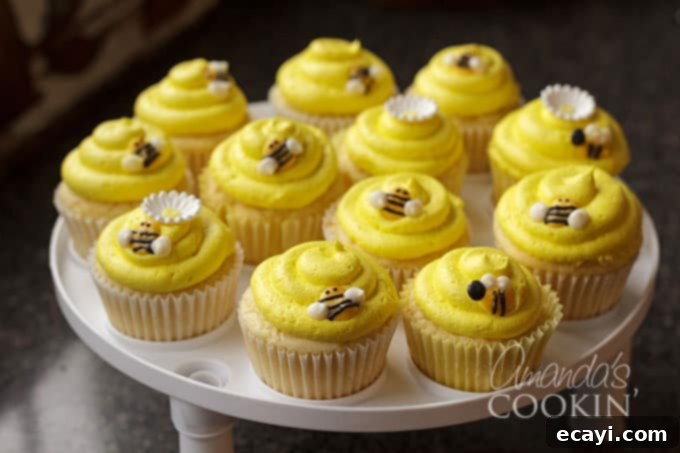
Recently, my wonderful daughter, Kristen, played a key role in hosting a delightful bridal shower for her dear friend, Lynette. Lynette has an undeniable love for all things bees – her home is adorned with charming bee-themed keepsakes and decorative items. Knowing this, Kristen was determined to create beautiful, yellow-frosted bee cupcakes, complete with adorable, sweet little bee cupcake toppers that would perfectly match the bride-to-be’s passion.
The Great Bee Topper Hunt: A Story of DIY Success
Weeks before the bridal shower, Kristen had spotted some incredibly cute edible bee cupcake toppers at local craft stores like JoAnn’s and even at Walmart. With her own oven being a bit temperamental, the plan was to come to my house the day before the shower to bake the cupcakes. This seemed like a straightforward approach, until the inevitable happened.
I received a frantic phone call from Kristen. Her voice was laced with disappointment and a touch of panic. “Mom, I can’t find the bee cupcake toppers anywhere!” she exclaimed. She had visited four different stores – JoAnn’s, Walmart, and several others – only to come up empty-handed. It was a classic pre-party crisis, and she was understandably upset, fearing her vision for Lynette’s special day was falling apart. But I immediately knew we had a perfectly viable solution: we would make them ourselves! This wasn’t just about saving the day; it was an opportunity to add an even more personal, homemade touch to the celebration.
Why Make Your Own Bee Cupcake Toppers?
While store-bought decorations offer convenience, crafting your own bee cupcake toppers comes with a myriad of benefits. Firstly, it allows for complete customization. You can tailor the size, shape, and expression of your bees to perfectly fit your theme or the personality of the guest of honor. Secondly, it’s often more cost-effective, especially when you need a larger quantity. Candy melts are relatively inexpensive, and you might already have some of the basic tools on hand. Thirdly, there’s immense satisfaction in creating something beautiful with your own hands. The personal touch added to a celebration, knowing the effort and love put into each little bee, makes the dessert table truly special and memorable. Finally, it’s a creative outlet! You get to experiment and bring a unique flair that no mass-produced item can replicate.
Gather Your Supplies: Everything You Need to Make Bee Cupcake Toppers
Fortunately, I had a stash of yellow and white candy melts from a previous party, which was a huge relief! Kristen only needed to pick up a bag of black candy melts. While I prefer using a piping bag with specific tips for consistency and control, don’t fret if you don’t have them. A simple plastic zipper-top bag can work wonders, especially for finer details like bee stripes and eyes. Here’s a detailed list of what you’ll need to get started on your adorable edible bees:
- Waxed paper: Essential for a non-stick surface that allows your candy melts to set easily and be removed without damage.
- Cutting board: Provides a stable, portable surface for your waxed paper, making it easy to move your creations as they set.
- Piping bags and coupler: For precise control when piping the larger shapes of the bee bodies and wings. If using, a coupler allows you to change tips easily.
- Wilton #1A tip (for frosting cupcakes): A round tip for piping smooth, generous swirls of buttercream.
- Wilton #7 tip (for bee bodies and wings): A medium-sized round tip, perfect for creating the main shapes of your bees.
- 2 gallon-sized plastic zip top bags (for stripes, eyes, etc.): These are fantastic for piping fine details. A tiny snip off the corner creates an instant piping tool.
- Scissors: For snipping the corner of your plastic bags.
- Candy melts: You’ll need specific colors to bring your bees to life: yellow for the bodies, white for the wings, and black for stripes, eyes, and heads.
Crafting Your Own Buzz: A Step-by-Step Guide to Bee Cupcake Toppers
Let me begin by stating that I am not a professional cake decorator. That truly is an art form, one that commands my utmost respect. The sheer talent and precision displayed by skilled decorators are nothing short of amazing! My approach here was a bit more improvisational, born out of an “emergency” situation, but I honestly believe the results were fantastic. Kristen was thrilled, and every guest at the bridal shower absolutely adored them. In my book, that’s a resounding win!
Prep Your Workspace:
- Choose a sturdy surface: Use a large cutting board. This allows you ample space to arrange your bee toppers and makes it easy to move them as they set, preventing smudges or damage.
- Cover with waxed paper: Lay a sheet of waxed paper smoothly over the cutting board. This crucial step ensures your candy melt bees won’t stick and can be gently peeled off once fully set.
Making the Bee Bodies (Yellow Candy Melts):
- Prepare the piping bag: Secure the Wilton #7 tip onto your piping bag using a coupler. This tip is ideal for creating the main shapes of the bee bodies.
- Fill with candy melts: Add a generous handful of yellow candy melts into the piping bag. Close the open end securely; a rubber band or plastic clip works perfectly to prevent spills.
- Melt the candy: Place the bag with candy melts into the microwave. Heat on full power for short 30-second intervals. After each interval, remove the bag and thoroughly massage it to distribute the heat and help the melts liquefy evenly. Continue this process until the candy is completely smooth and melted, with no lumps. Be careful not to overheat.
- Pipe the bee bodies: On your waxed paper, pipe various shapes for your bee bodies. You can create small circles for an overhead view of a bee or elongated ovals for a side profile. Aim for consistent sizes to ensure uniform toppers. Don’t worry if they aren’t perfect; handmade charm is part of their appeal!
Adding Stripes, Eyes, and Heads (Black Candy Melts):
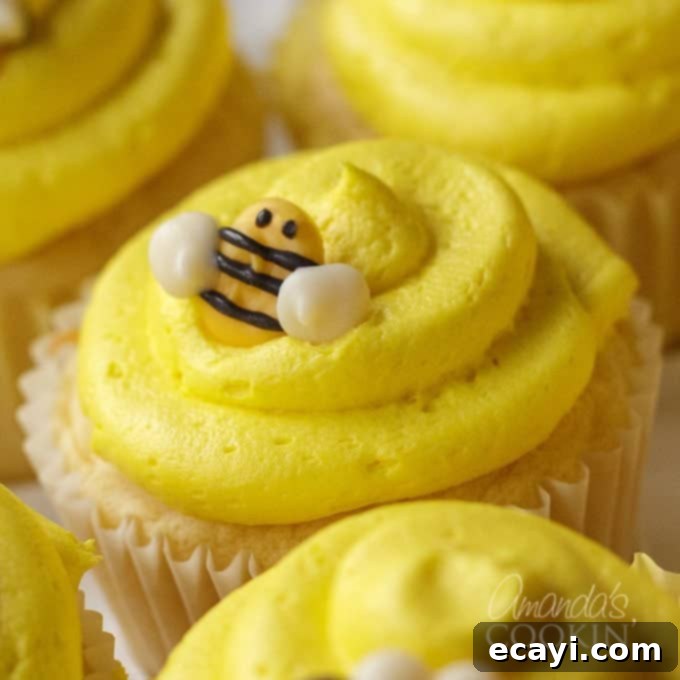
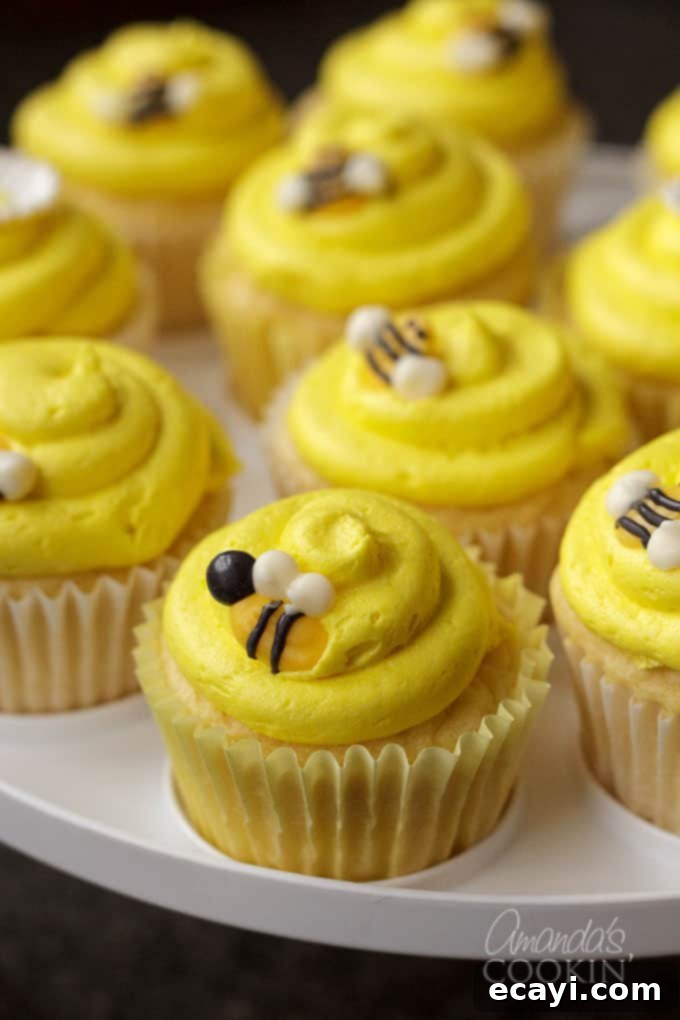
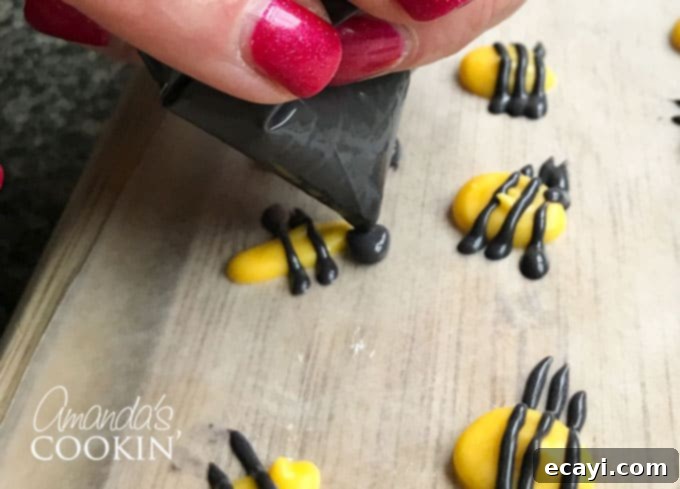
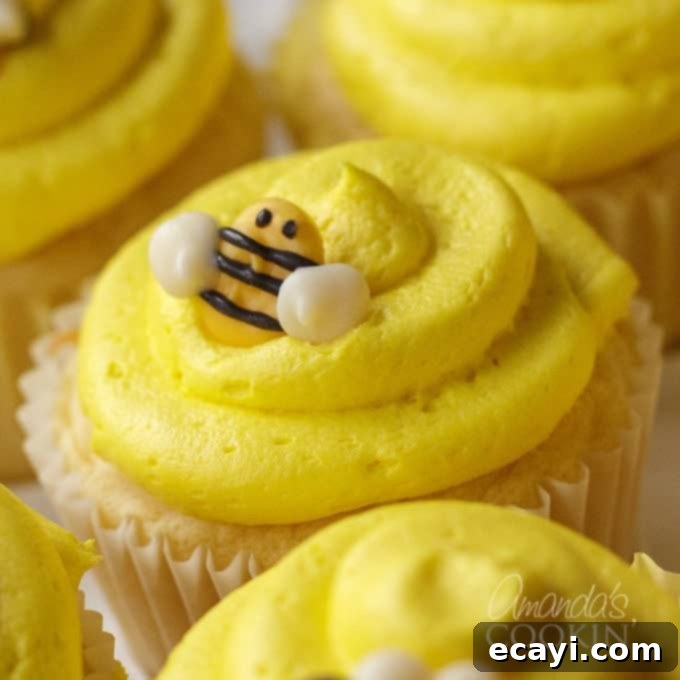
To add character and detail, we’ll create two distinct bee shapes: the ovals will become side-view bees with a round black head, while the round bees will feature an overhead view with two cute little eyes.
- Prepare black candy melts: Add a handful of black candy melts to a gallon-sized zip-top bag. Do not zip the bag shut just yet.
- Melt the black candy: Place the bag with candy melts into the microwave* and heat on full power for 30-second intervals. Massage the bag thoroughly between each heating session until the candy is completely melted and smooth.
- Snip the corner: Using scissors, snip a tiny corner off the bag. Start with a very small snip; you can always make the hole bigger, but you can’t make it smaller! This fine opening is perfect for delicate lines.
- Pipe the stripes: Carefully pipe thin stripes across the yellow bee bodies. For the oval bees, leave space at one end for the head.
- Add eyes: To the round bee bodies (the overhead view), pipe two small dots at one end to create adorable eyes.
- Create heads for oval bees: For the oval bodies, cut the hole in your plastic bag a little bit bigger (or use a fresh bag with a slightly larger snip) and pipe a small, neat circle at one end to form the bee’s head. Ensure it slightly overlaps with the yellow body so they stick together.
- Clean up excess: Once the melted black candy has started to set (it won’t be fully hard yet), gently use a small knife or toothpick to break off any black stripes that extend awkwardly past the body edges. This provides a cleaner finish.
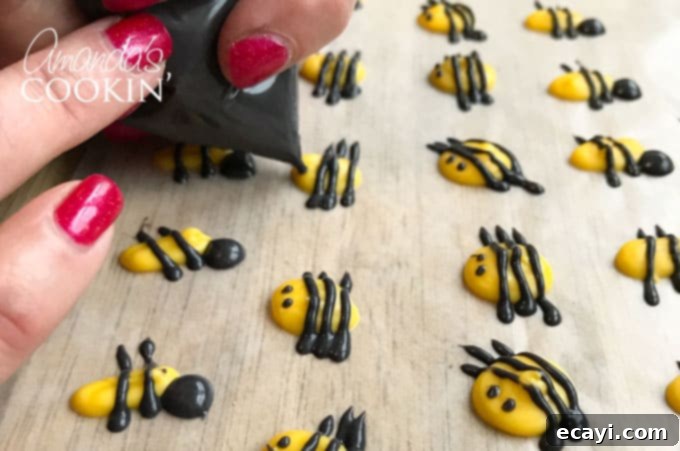
*A note on melting in plastic bags: I personally haven’t encountered issues with melting candy melts in zip-top plastic bags in the microwave for short intervals. However, if you prefer or are concerned about plastic in the microwave, you can melt the candy melts in a glass bowl using the same 30-second interval method. Once melted, carefully transfer the candy to the plastic bag using a rubber spatula.
Adding Delicate Wings (White Candy Melts):
Now for the final touch that truly brings these bees to life!
- Prepare white candy melts: Place the #7 tip on a clean piping bag using a coupler. Add a handful of white candy melts to the bag and secure the open end with a rubber band or clip.
- Melt the white candy: Microwave the bag in 30-second intervals, massaging between each, until the white candy melts are completely smooth and free of lumps.
- Pipe wings for oval bees: For your oval (side-view) bee bodies, pipe two small, slightly overlapping circles near the black head. These should gently intersect with the head and body to ensure they adhere securely once set, creating the illusion of delicate wings.
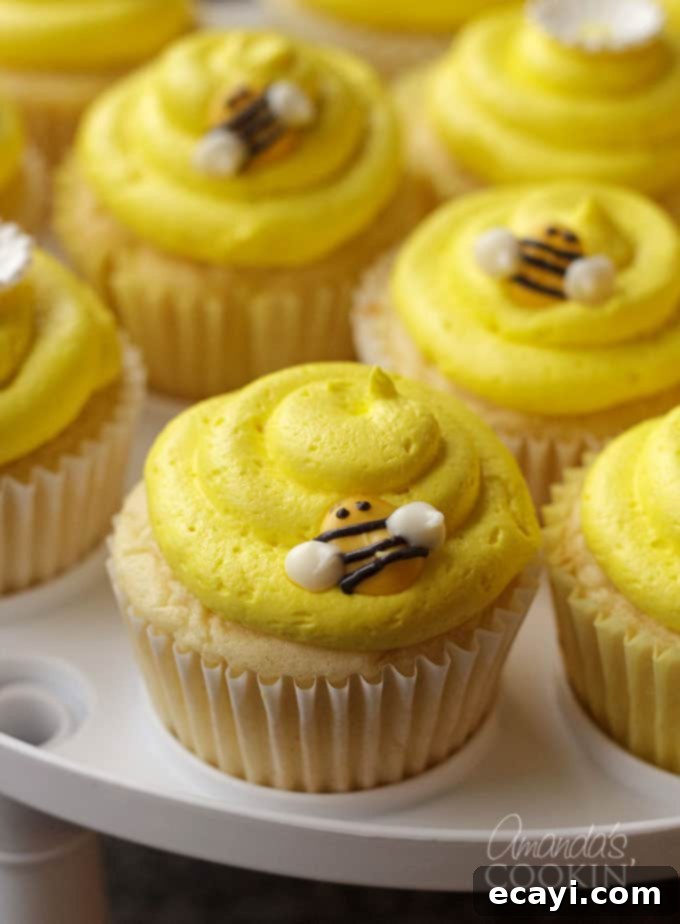
- Pipe wings for round bees: For the round (overhead-view) bee bodies, pipe one small circle on each side of the body. These should also slightly overlap with the yellow body to ensure a good attachment.
- Allow to set completely: This is a crucial step! Allow all the melted candy to set completely hard before attempting to lift them from the waxed paper. This prevents breakage and ensures crisp shapes. You can even place the cutting board in the refrigerator for 5-10 minutes to speed up the setting process.
Hint: If you’re making a batch of 10 or more bees, by the time you finish piping the last bee, your first few bees should already be firm and ready to be gently peeled off the waxed paper. This process is quite efficient once you get into a rhythm!
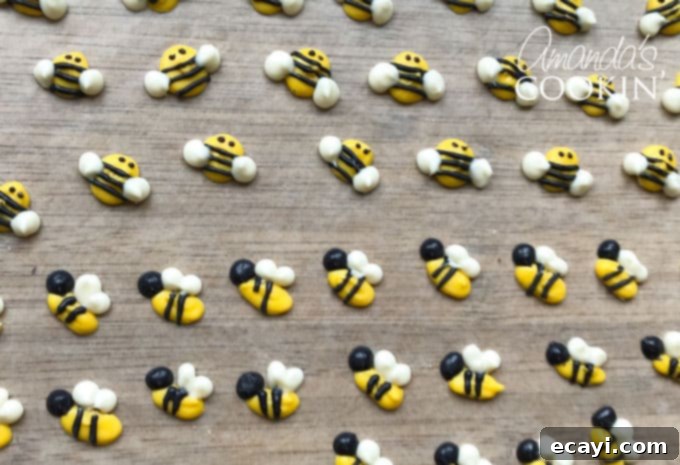
These adorable toppers are one of the designs I drew inspiration from. I particularly loved the whimsical nature of the side-view bees! I can’t seem to find the other specific inspiration image I had saved, but these capture the essence beautifully.
The Perfect Canvas: Cupcakes and Frosting
Once your charming bee toppers are complete and safely set, it’s time to prepare their delicious foundation! For the cupcakes themselves, you have complete freedom. Feel free to use any of our beloved cake and cupcake recipes that you particularly enjoy. If time is of the essence or you prefer a simpler route, a good quality cake mix works perfectly too! However, I must admit, this classic white cake recipe has always been a personal favorite of mine for its moist texture and delightful flavor, making it an excellent choice for any celebration.
Crafting the Sunny Yellow Buttercream Frosting:
A bright, vibrant yellow frosting creates the perfect backdrop for your little bees. This recipe yields a smooth, creamy buttercream that’s a joy to pipe.
- 1 cup unsalted butter, softened to room temperature
- 3 cups powdered sugar, sifted (sifting is key for a lump-free frosting!)
- 2-3 tablespoons heavy whipping cream (start with 2, add more if needed for consistency)
- 1 teaspoon pure vanilla extract
- Yellow gel food coloring (gel provides vibrant color without thinning the frosting)
- Cream the butter: In the bowl of a stand mixer fitted with the paddle attachment (or using a hand mixer), beat the softened butter on medium speed until it is light, fluffy, and creamy, usually for about 2-3 minutes. This incorporates air and makes for a lighter frosting.
- Gradually add powdered sugar: With the mixer on low speed, slowly add the sifted powdered sugar, one cup at a time, allowing it to incorporate fully after each addition. Once all the sugar is added, increase the speed to medium-low until the mixture starts to come together into a thick paste.
- Add liquids: When the mixture begins to thicken, pour in 2 tablespoons of the heavy whipping cream and the pure vanilla extract.
- Beat and color: Beat the frosting on medium-high speed for 1 minute. At this point, add about 1/4 teaspoon of the yellow gel food coloring. Continue mixing, observing the intensity of the yellow. If you desire a deeper, brighter yellow, add more food coloring in tiny increments until you achieve your desired hue.
- Achieve perfect consistency: Scrape down the sides and bottom of the bowl with a spatula to ensure everything is well combined. Beat the frosting for one more minute on medium speed until it is completely homogenous, smooth, and fluffy. Only add the 3rd tablespoon of cream if the frosting feels too stiff or dry to pipe easily. The goal is a spreadable, pipeable consistency.
Icing Your Cupcakes: The Final Touch:
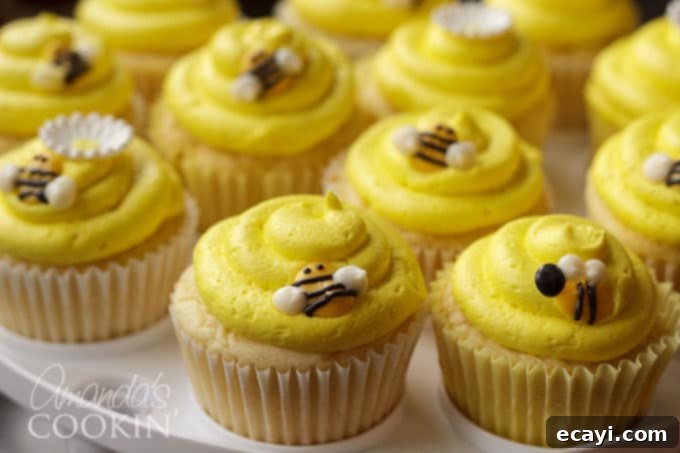
- Prepare piping bag for frosting: Scoop your beautifully yellow buttercream frosting into a piping bag that has been fitted with a coupler and the Wilton #1A tip. This large round tip creates a satisfying, generous swirl.
- Start piping: Begin piping from the outer edge of each cupcake, applying steady pressure to create a continuous tube of icing.
- Work inwards: Continue piping in a circular motion, gradually working your way towards the center of the cupcake, building up the frosting into a delightful swirl.
- Decorate with your bees: Immediately after frosting, carefully place your homemade bee cupcake toppers onto the yellow buttercream. You can arrange them in different positions for added visual interest.
A Special Thanks and More Sweet Inspiration!
I simply must extend a huge thank you to my dear friend, Meaghan, from The Decorated Cookie. She was an absolute lifesaver, answering countless questions via text message and offering invaluable advice. Her expertise truly helped make these toppers a success! Be sure to check out her adorable Bee Chocolate Pops for more sweet inspiration!
If you’re as fond of cute, themed treats as we are, then you’ll definitely want to explore some of my other fun dessert creations! Don’t miss my charming heart-shaped cupcakes, which are absolutely perfect for Valentine’s Day or any romantic gesture. And for a truly delightful Easter surprise, check out my whimsical Bunny Butt Cupcakes – they’re always a crowd-pleaser and bring smiles to everyone’s faces. Happy decorating!
