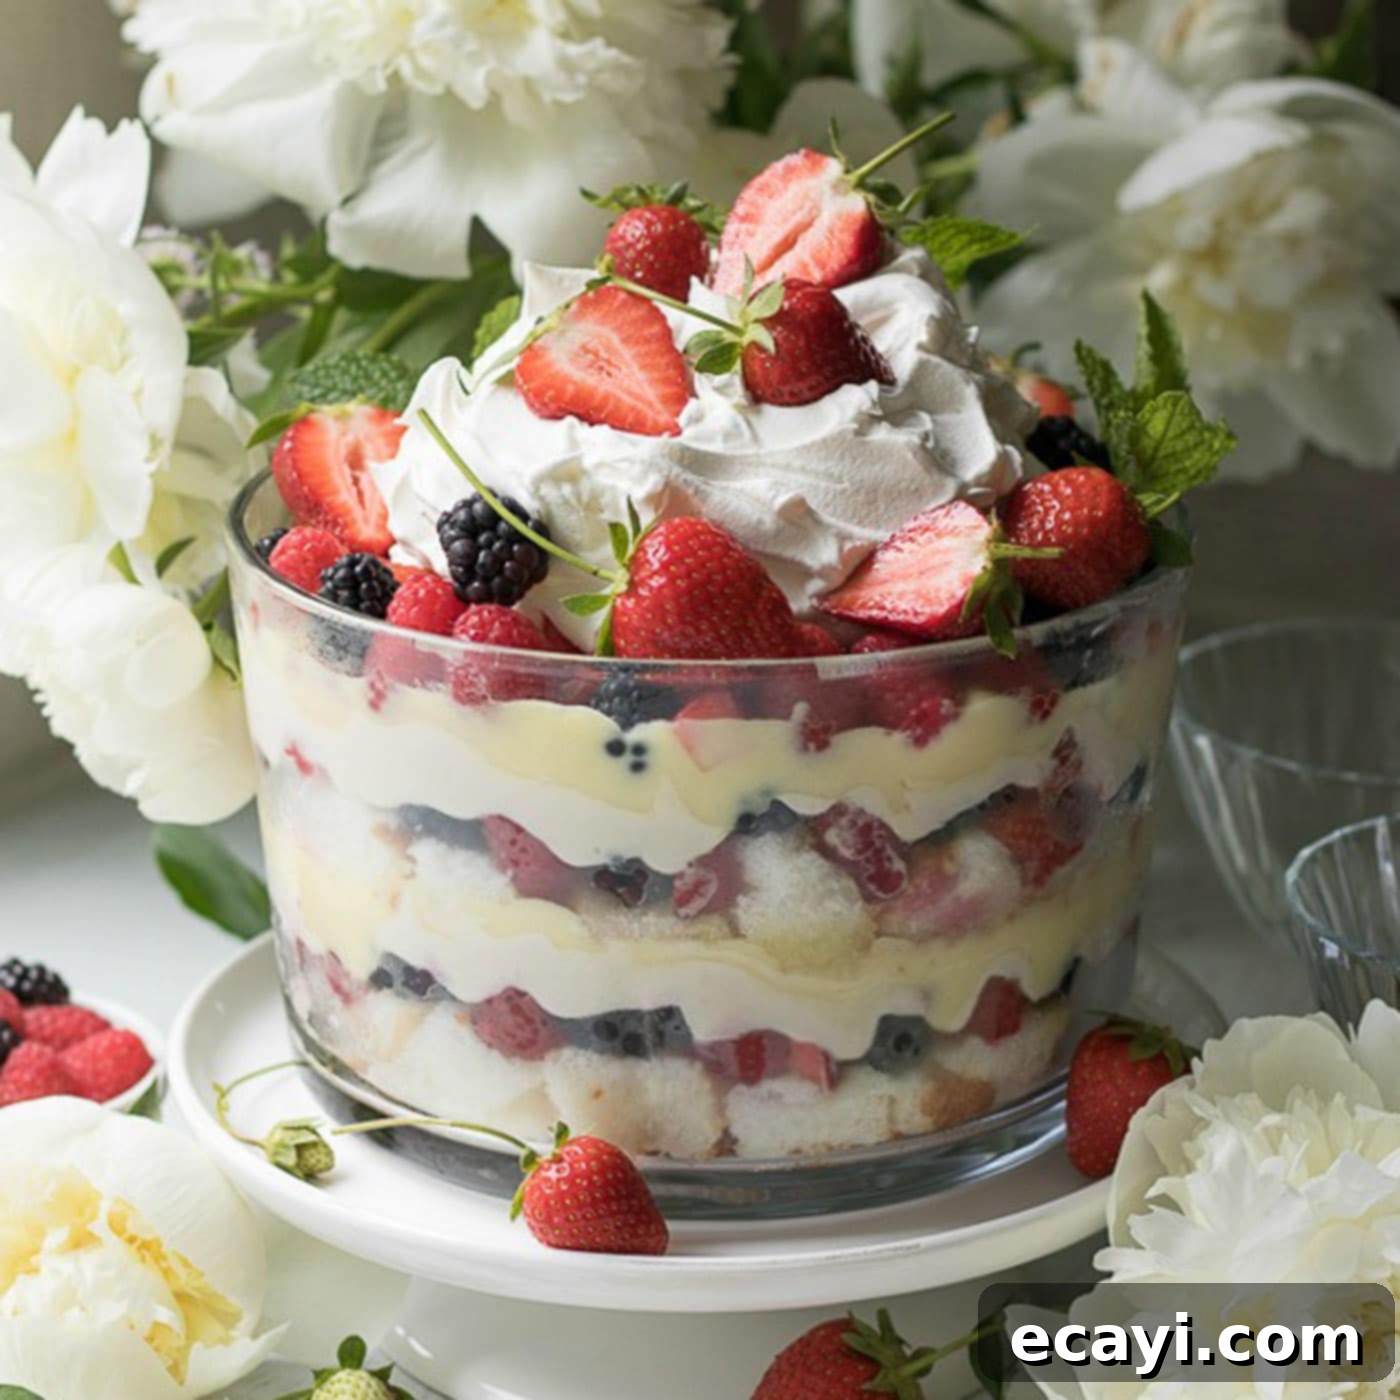
Ultimate Mixed Summer Berry Trifle: Easy, Layered, & Perfectly Refreshing
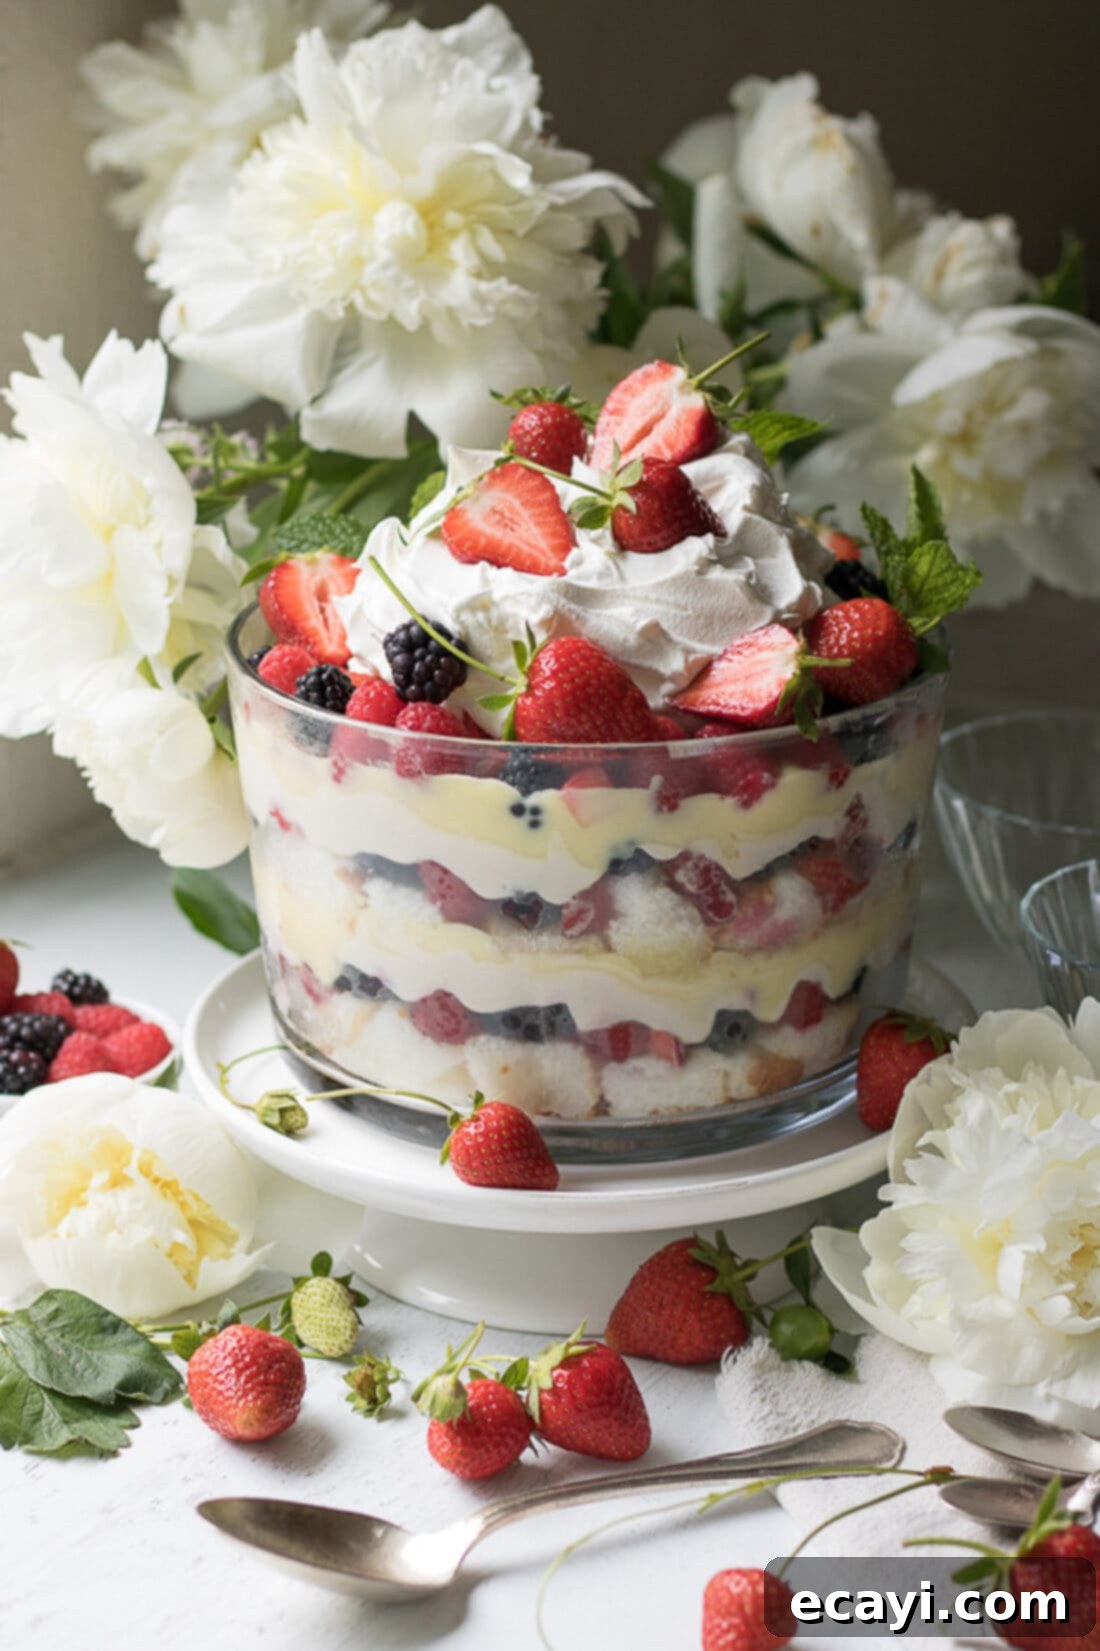
This mixed summer berry trifle recipe is a truly delightful and show-stopping dessert, perfect for any warm-weather gathering. It elegantly layers light and airy angel food cake with a luscious sweet cream cheese mixture, smooth vanilla pudding, and an abundance of fresh, vibrant mixed berries. Each spoonful offers a harmonious blend of textures and flavors, culminating in a creamy whipped topping generously adorned with even more berries, creating a visually stunning presentation that’s as delicious as it is beautiful.
One of the many advantages of this recipe is its make-ahead convenience. You can assemble the trifle in advance, allowing the flavors to meld beautifully, and simply add the final toppings of whipped cream and fresh berries just before serving to maintain their pristine appearance and texture. While this trifle is a clear favorite, we sometimes find ourselves torn between its allure and our equally beloved Strawberry Shortcake Trifle!
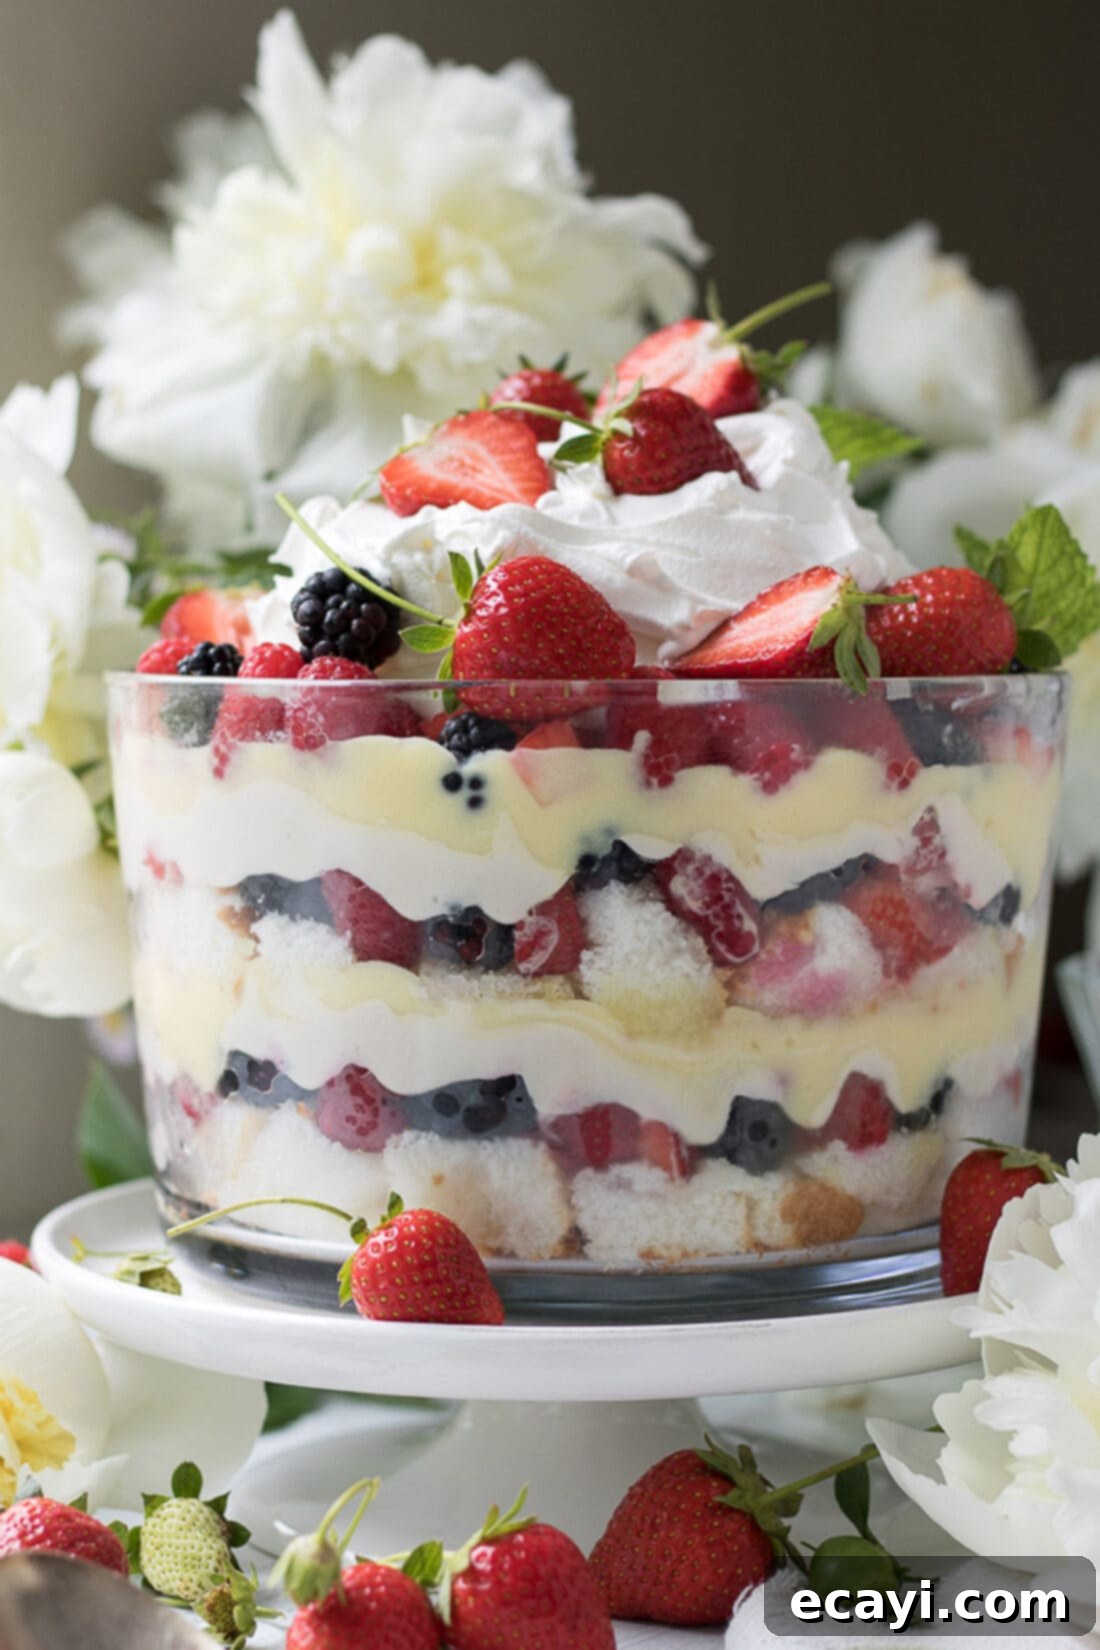
Why a Mixed Berry Trifle is Your Go-To Summer Dessert
Trifles have a rich history, known for their beautiful layered appearance and the delightful combination of cake, fruit, custard, and cream. Our mixed berry trifle takes this classic concept and elevates it with the peak-season bounty of summer berries, making it an undeniable star for any occasion. Fresh berries are incredibly abundant during the summer months, offering a natural sweetness and vibrant color that makes them the perfect choice for festive party desserts.
Imagine bringing this exquisite trifle to a Memorial Day cookout or making it the centerpiece of your 4th of July party! With its stunning red, white, and blue hues (especially if you incorporate blueberries), it’s not just a dessert; it’s a patriotic statement. This vibrant dessert truly embodies the spirit of summer, offering a refreshing and relatively light option compared to heavier baked goods. It’s no wonder it’s one of our absolute favorite summer recipes – marrying ease, elegance, and incredible flavor.
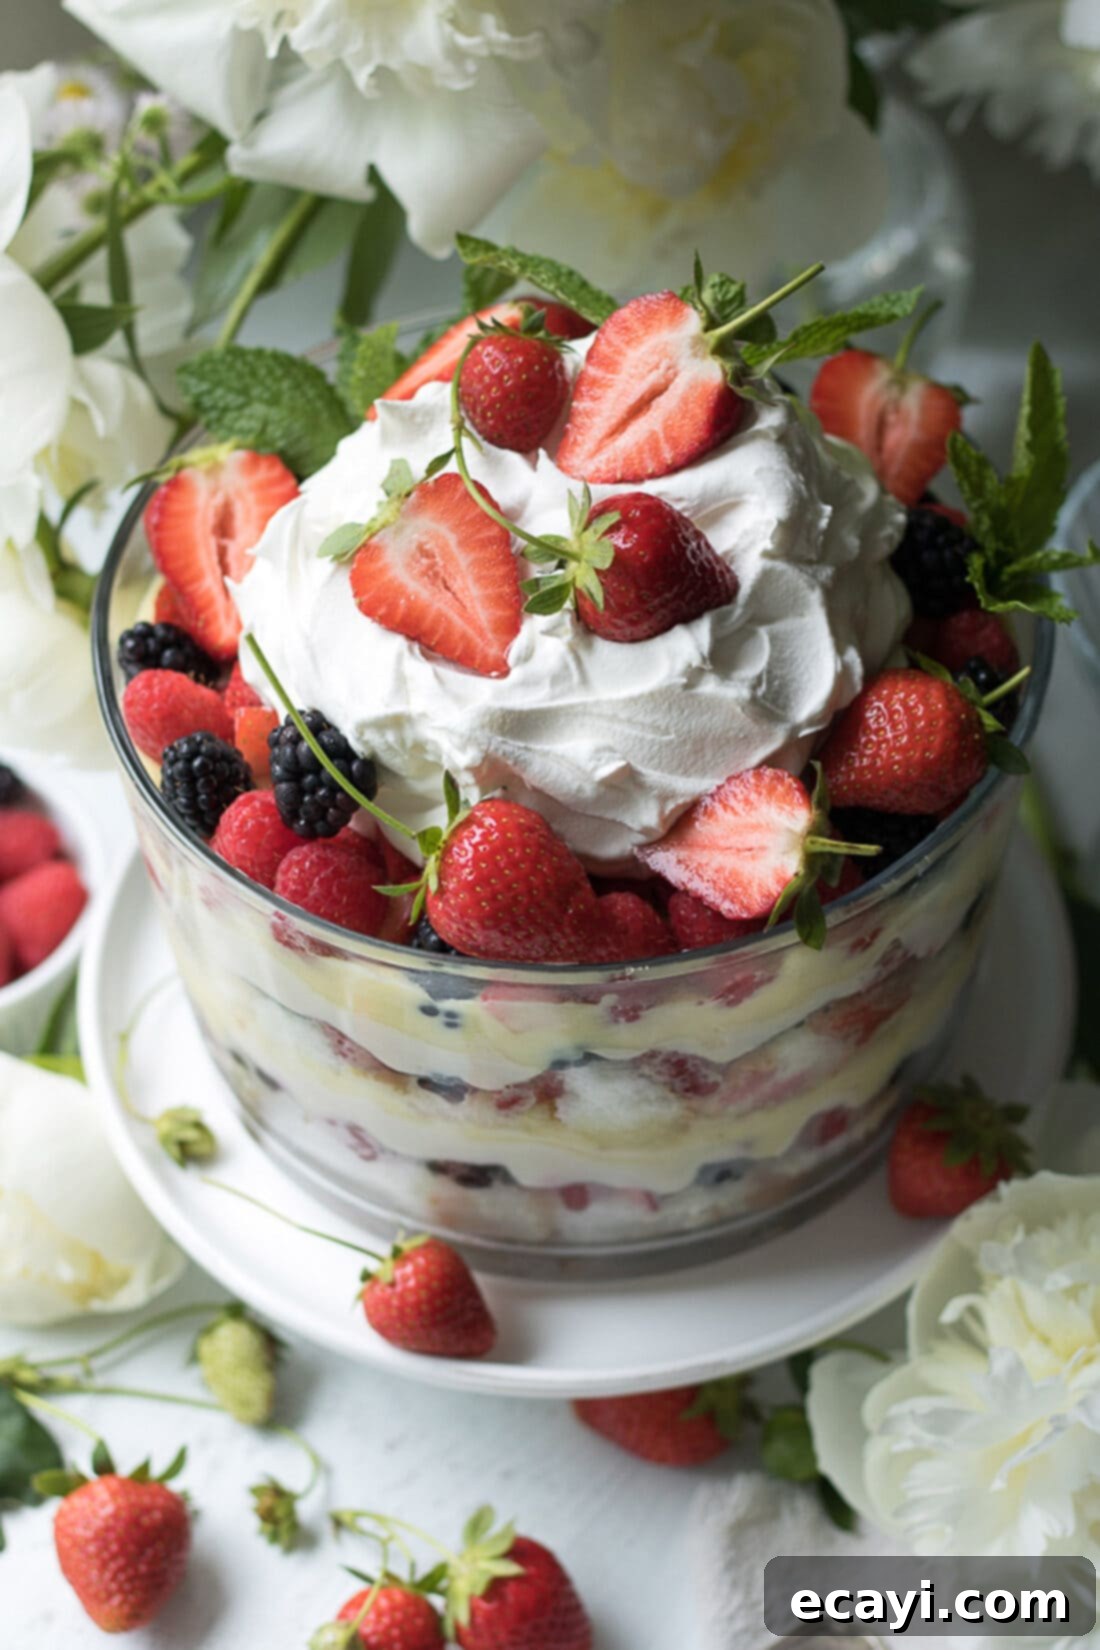
For ultimate convenience, we highly recommend using a store-bought angel food bundt cake. This shortcut ensures that this lovely dessert remains as easy and doable as possible, allowing you to focus on the fun part: assembly and enjoyment. Of course, if you have extra time and enjoy baking from scratch, feel free to prepare your own homemade angel food cake. The light and airy texture of angel food cake is perfect for soaking up the delicious flavors of the pudding and cream cheese, but if you prefer a richer, denser base, pound cake is also an excellent and acceptable option that will add a different dimension to your trifle.
Essential Ingredients for Your Mixed Summer Berry Trifle
Crafting this magnificent dessert begins with selecting quality ingredients that will build each delicious layer. Here’s a detailed look at what you’ll need and why each component is vital for creating the ultimate berry trifle:
- 1 (10 ounce) Angel Food Cake: Cut into 1.5-inch cake cubes. Angel food cake is the ideal choice for its incredibly light, airy texture and delicate sweetness. It readily absorbs the flavors of the pudding and cream, ensuring every bite is moist and flavorful. Using a store-bought cake is a brilliant time-saver, but a homemade one adds a special touch if you have the time.
- 8 ounces (1 package) Neufchatel or Cream Cheese or Mascarpone Cheese: This forms the rich, tangy-sweet cream layer. Neufchatel is a lighter alternative to cream cheese, offering a similar flavor profile with less fat. Mascarpone would provide an even richer, silkier texture. Ensure it’s softened for easy blending.
- 1/2 cup Granulated White Sugar: To sweeten the cream cheese layer and balance its tanginess.
- 1 teaspoon Vanilla Extract: A classic flavor enhancer that complements the berries and cream beautifully.
- 1 tablespoon Freshly Squeezed Lemon Juice: This is a secret ingredient that brightens the entire trifle. It adds a subtle zesty note to the cream cheese, cutting through the sweetness and enhancing the fresh berry flavors.
- 2 pounds Strawberries: Plus more for garnish. The star of the show, providing vibrant color and a burst of sweet-tart flavor. Slice them for easier layering and eating.
- 6 ounces Blackberries: Their deep, rich flavor and slight tartness add complexity to the berry medley.
- 6 ounces Raspberries: Delicate and intensely flavorful, raspberries contribute a beautiful red hue and a soft texture.
- 1 (3.4 ounce) package Vanilla Instant Pudding: The instant pudding creates a wonderfully smooth and creamy layer, adding moisture and a comforting vanilla flavor that ties all the components together.
- 2 cups Cold Milk: For preparing the instant pudding, ensuring it sets correctly.
Elegant Garnishes to Elevate Your Trifle
The final touch is where your trifle transforms from delicious to truly spectacular. Thoughtful garnishing adds visual appeal and extra freshness.
- 1 (8 ounce) container Cool Whip or 1 cup heavy cream, whipped to medium soft peaks: Cool Whip offers convenience and a consistently light texture. Freshly whipped heavy cream provides a richer, more luxurious finish. Both are excellent choices for the creamy topping.
- Remaining Berries: These are essential for that stunning visual appeal. Reserve the most perfect, unblemished berries for the top layer.
- Fresh Mint Leaves: Optional, but highly recommended. A few sprigs of fresh mint add a pop of color and a refreshing aromatic note that perfectly complements the berries.
Essential Kitchen Tools for Trifle Assembly
Having the right tools makes the assembly process smooth and enjoyable, ensuring your mixed berry trifle looks as impressive as it tastes. While most of these are standard kitchen items, a trifle dish is particularly recommended for showcasing those beautiful layers.
- Mixing Bowls: You’ll need at least two medium to large mixing bowls – one for preparing the vanilla pudding and another for whisking together the cream cheese mixture. Having separate bowls keeps your workflow organized.
- Measuring Cups and Spoons: Essential for accurate measurements of ingredients like sugar, vanilla extract, lemon juice, and milk, ensuring your trifle’s flavors are perfectly balanced.
- Baking Spatula: A versatile tool for scraping down bowls, folding ingredients, and spreading the pudding and cream cheese layers evenly within your trifle dish.
- Offset Spatula (for spreading layers): While a regular baking spatula works, an offset spatula with its angled blade is particularly excellent for smoothly spreading the cream cheese and pudding layers, especially in a deep trifle dish, ensuring a professional, even finish.
- Cutting Board: A clean surface for slicing your angel food cake into cubes and preparing your strawberries.
- Chef’s Knife: A sharp knife is crucial for cleanly cutting the angel food cake and slicing the larger berries like strawberries.
- 1 (13-inches wide) Clear/Glass Trifle Dish (about 5 quarts): This is arguably the most important tool for a trifle. Its clear sides allow the beautiful layers to be fully appreciated, making it a true showpiece. The 5-quart size is ideal for accommodating all the generous layers of this recipe.
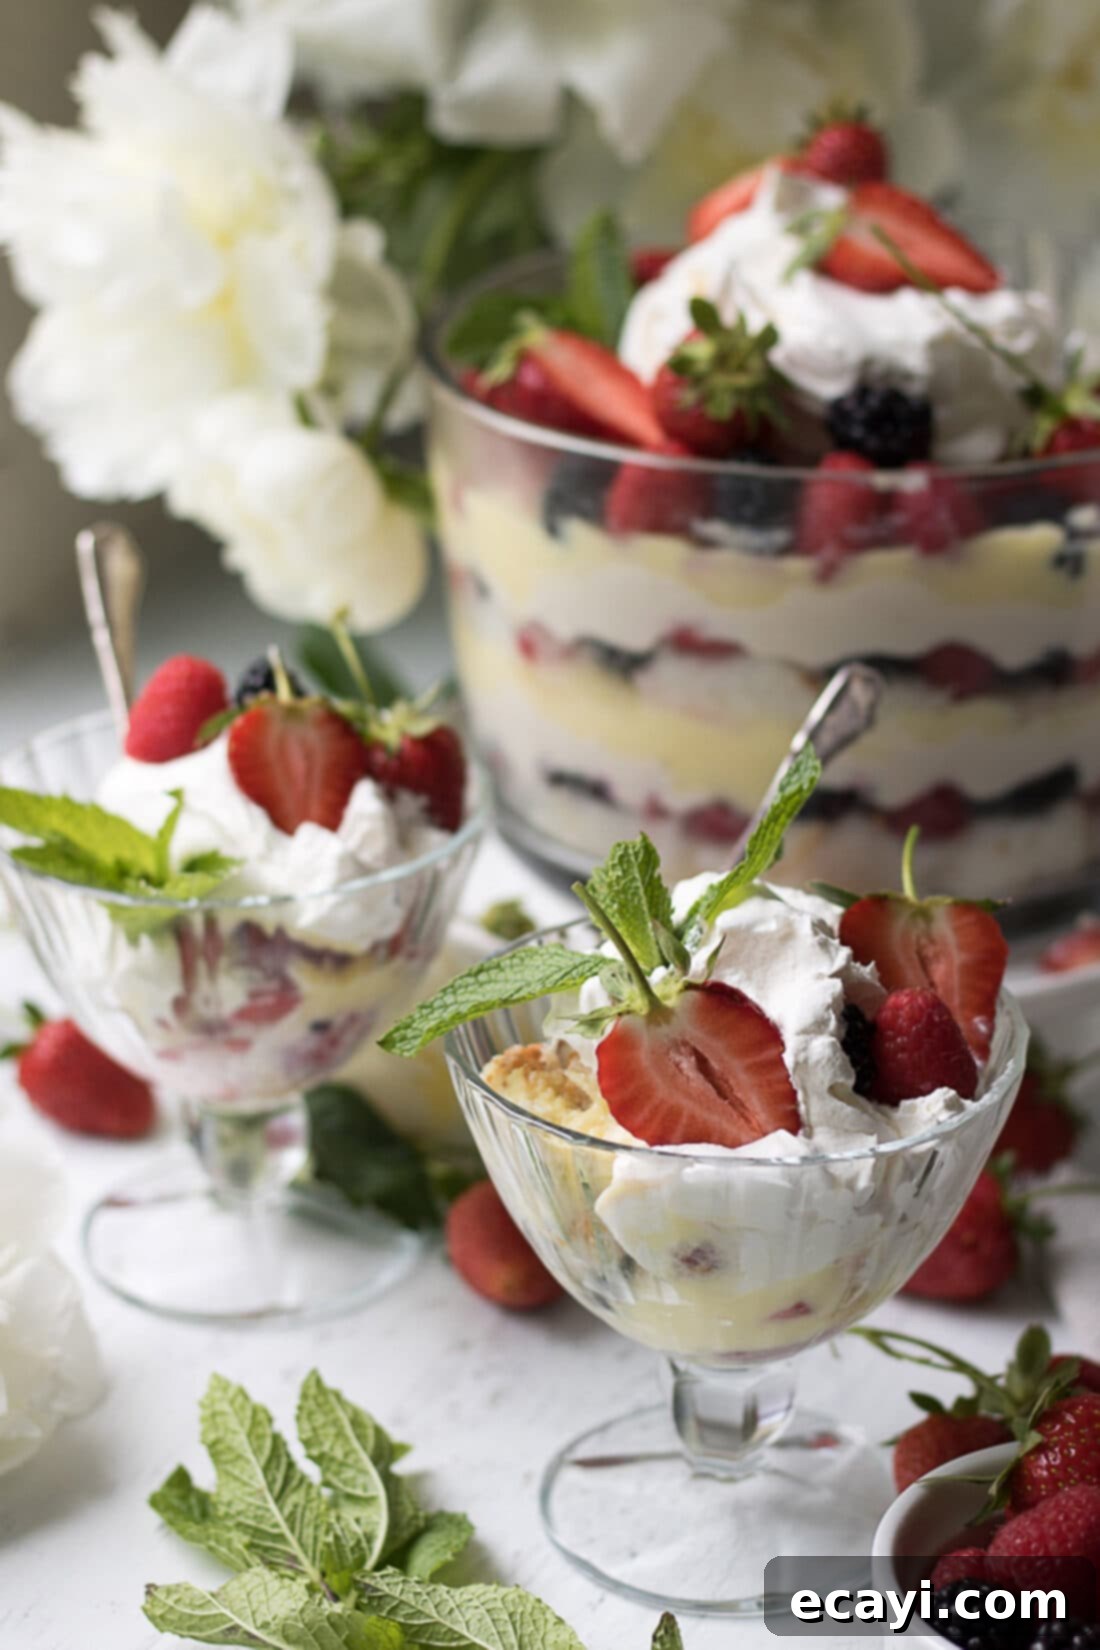
- Bowls or Parfait Glasses for Serving: While serving directly from the trifle dish is fine, individual parfait glasses or small dessert bowls allow guests to enjoy their own perfectly layered portion, which is particularly charming.
Tips for Assembling the Perfect Mixed Berry Trifle
Achieving a picture-perfect trifle is easier than you think with a few simple tips:
- Berry Preparation is Key: Always wash your berries thoroughly and, most importantly, ensure they are completely dry before assembling the trifle. Any residual moisture can make your cake soggy and thin out your creamy layers. Use paper towels or clean kitchen towels for effective drying.
- Layering for Visual Appeal: When arranging the berries in a clear trifle dish, consider alternating patterns, especially with blackberries and red berries, to create striking color contrasts. This makes each layer distinct and visually appealing. Remember, you have two layers of angel food cake, two layers of cream cheese, two layers of vanilla pudding, and three layers of mixed berries to arrange.
- Make It Ahead: This dessert is fantastic for making in advance. You can prepare and layer all components the night before serving. However, for the freshest look, wait to add the Cool Whip or fresh whipped cream, the top layer of berries, and the optional mint sprigs right before you’re ready to serve. This prevents the whipped topping from weeping and keeps the berries looking vibrant.
- Berry Selection for Garnish: This is a special hint! Before you start cubing your strawberries or mixing your berries into the layers, pick out the absolute prettiest, most perfectly formed berries to reserve for the final garnish. Alternatively, grab an extra carton of your favorite berries specifically for topping, ensuring you have plenty of gorgeous fruit for that crowning glory.
- Alternative Dishes: Don’t have a traditional trifle dish? No problem! This dessert can also be made in a large glass bowl. Keep in mind that the shape might be different, so you may need to adjust the layering to fill the bowl evenly. For individual portions, consider assembling them in elegant bowls or parfait glasses, which are excellent for showcasing the layers too.
Customize Your Trifle: Creative Variations
While this recipe is perfect as is, you can easily customize this trifle to your liking and make it uniquely yours. Here are a few exciting ideas to inspire you:
- Drizzle with Sauce: Enhance the flavor and presentation by drizzling some raspberry, strawberry, or even chocolate sauce on top of the whipped cream before adding the final berries. A lemon curd drizzle could also add a delightful tang.
- Add a Scoop of Ice Cream: For an extra indulgent treat, serve individual portions with a scoop of high-quality vanilla bean or berry-flavored ice cream on the side.
- Change Up the Fruit: While mixed berries are classic, feel free to use other fresh fruits in season. Peaches, kiwis, mangoes, or even a tropical fruit blend could create a completely different but equally delicious trifle. Ensure fruits are not overly watery.
- Different Pudding Flavors: Swap out the vanilla pudding for a lemon, white chocolate, or even cheesecake-flavored instant pudding to alter the overall taste profile.
- A Hint of Liqueur: For an adult-friendly version, lightly brush the angel food cake cubes with a little Grand Marnier, Chambord, or a berry liqueur before layering. This adds depth and a sophisticated touch.
- Nutty Crunch: Add a sprinkle of toasted slivered almonds or chopped pistachios between layers or on top for a pleasant textural contrast.
This recipe was originally inspired by our delightful No-Bake Berry Cheesecake Trifle in Mason Jars, which offers a fun, single-serving twist. If you adore fruity, layered desserts, you’ll also love our refreshing Lemon Blueberry Trifle, these charming mini shortcake cups, and any of my other delectable trifle or parfait dessert recipes!
Frequently Asked Questions About Berry Trifle
Here are some common questions to help you master this delicious mixed berry trifle:
Can I use frozen berries for this trifle?
While fresh berries are highly recommended for their texture and vibrant appearance, you can use frozen mixed berries if fresh ones are out of season or unavailable. If using frozen, make sure to thaw them completely and drain any excess liquid to prevent your trifle from becoming watery or soggy. Pat them dry with paper towels before layering.
Can I make my own angel food cake from scratch?
Absolutely! If you enjoy baking and have the time, homemade angel food cake will add an extra layer of freshness and pride to your trifle. Just ensure it’s fully cooled before cutting it into cubes. For convenience, a store-bought angel food cake works perfectly well and saves a significant amount of preparation time.
How far in advance can I prepare this mixed berry trifle?
You can assemble the main components of the trifle (cake, cream cheese, pudding, and berries) up to 24 hours in advance. This allows the flavors to meld beautifully. However, for the best presentation and texture, always add the whipped topping and the fresh berry garnish just before serving. This prevents the whipped cream from losing its firmness and the berries from weeping or becoming dull.
What’s the best way to store leftover trifle?
Leftover trifle should be covered tightly with plastic wrap and stored in the refrigerator. It will typically stay fresh for 2-3 days. The angel food cake might become a bit softer over time as it continues to absorb the moisture from the other layers, but it will still be delicious.
Can I substitute other fruits in this trifle?
Yes, this trifle is very versatile! While mixed berries are a classic choice, feel free to experiment with other soft, fresh fruits. Sliced peaches, nectarines, kiwi, or even cherries (pitted) would work wonderfully. Just ensure any substitute fruits are ripe, flavorful, and not overly watery. Bananas can be used but tend to brown quickly, so they are best added just before serving.
Mixed Summer Berry Trifle
IMPORTANT – There are often Frequently Asked Questions within the blog post that you may find helpful. Simply scroll back up to read them!
Print It
Pin It
Rate It
Save ItSaved!
Ingredients
- 10 ounces angel food cake cut into 1-1 1/2 inch cubes
- 8 ounces Neufchatel or cream cheese or Mascarpone cheese
- ½ cup granulated white sugar
- 1 teaspoon vanilla extract
- 1 tablespoon fresh squeezed lemon juice
- 2 pounds strawberries plus more for garnish
- 6 ounces blackberries plus more for garnish
- 6 ounces raspberries plus more for garnish
- 3.4 ounce Vanilla flavored Instant Jello pudding
- 2 cups cold milk
- 8 ounce Cool Whip or fresh whipped cream
- fresh mint leaves optional
Before You Begin
- Make sure to get those berries completely dry before assembling the trifle, you do not want any added moisture. I use paper towels or kitchen towels.
- You can make this dessert the night before you serve it, just wait to garnish with the Cool Whip, berries and mint before serving.
- Here’s a special hint with this recipe, make sure you pick out the prettiest berries for topping later before you assemble the trifle or just grab an extra carton of your favorite berries if you want to make sure you don’t run out.
Instructions
Prepare pudding:
-
In a medium mixing bowl, add 2 cups cold milk, add the instant vanilla pudding mix, whisk together for 2 minutes and set aside for 5 minutes to set in the refrigerator.
Prepare cream cheese layer:
-
In a medium-large mixing bowl, add the Neufchatel/cream cheese, 1/2 cup sugar, 1 tsp pure vanilla extract and lemon juice. Using a hand-held electric mixer, mix together until combined, set aside.
Assemble:
-
Arrange 1/2 the angel food cubes around the bottom of the trifle container.
-
Arrange a little less than 1/3 of the 3 types of berries in 1 even layer. I suggest arranging the blackberries and red berries in an alternating pattern, if using a clear, glass trifle container.
-
Add half the Neufchatel/cream cheese layer, spread evenly with an offset spatula or baking spatula.
-
Add half the vanilla pudding mixture, spread evenly.
-
Repeat until you have 2 layers each of angel food cake, berries, cream cheese, vanilla pudding and 3 layers of mixed berries.
-
Top the last layer of berries with Cool Whip in the center. Use an offset or baking spatula to form a “pillow” and garnish with the last of the berries and optional mint sprigs.
-
Serve in individual parfait glasses.
Nutrition
The recipes on this blog are tested with a conventional gas oven and gas stovetop. It’s important to note that some ovens, especially as they age, can cook and bake inconsistently. Using an inexpensive oven thermometer can assure you that your oven is truly heating to the proper temperature. If you use a toaster oven or countertop oven, please keep in mind that they may not distribute heat the same as a conventional full sized oven and you may need to adjust your cooking/baking times. In the case of recipes made with a pressure cooker, air fryer, slow cooker, or other appliance, a link to the appliances we use is listed within each respective recipe. For baking recipes where measurements are given by weight, please note that results may not be the same if cups are used instead, and we can’t guarantee success with that method.
This post originally appeared on this blog on Jun 3, 2018.
