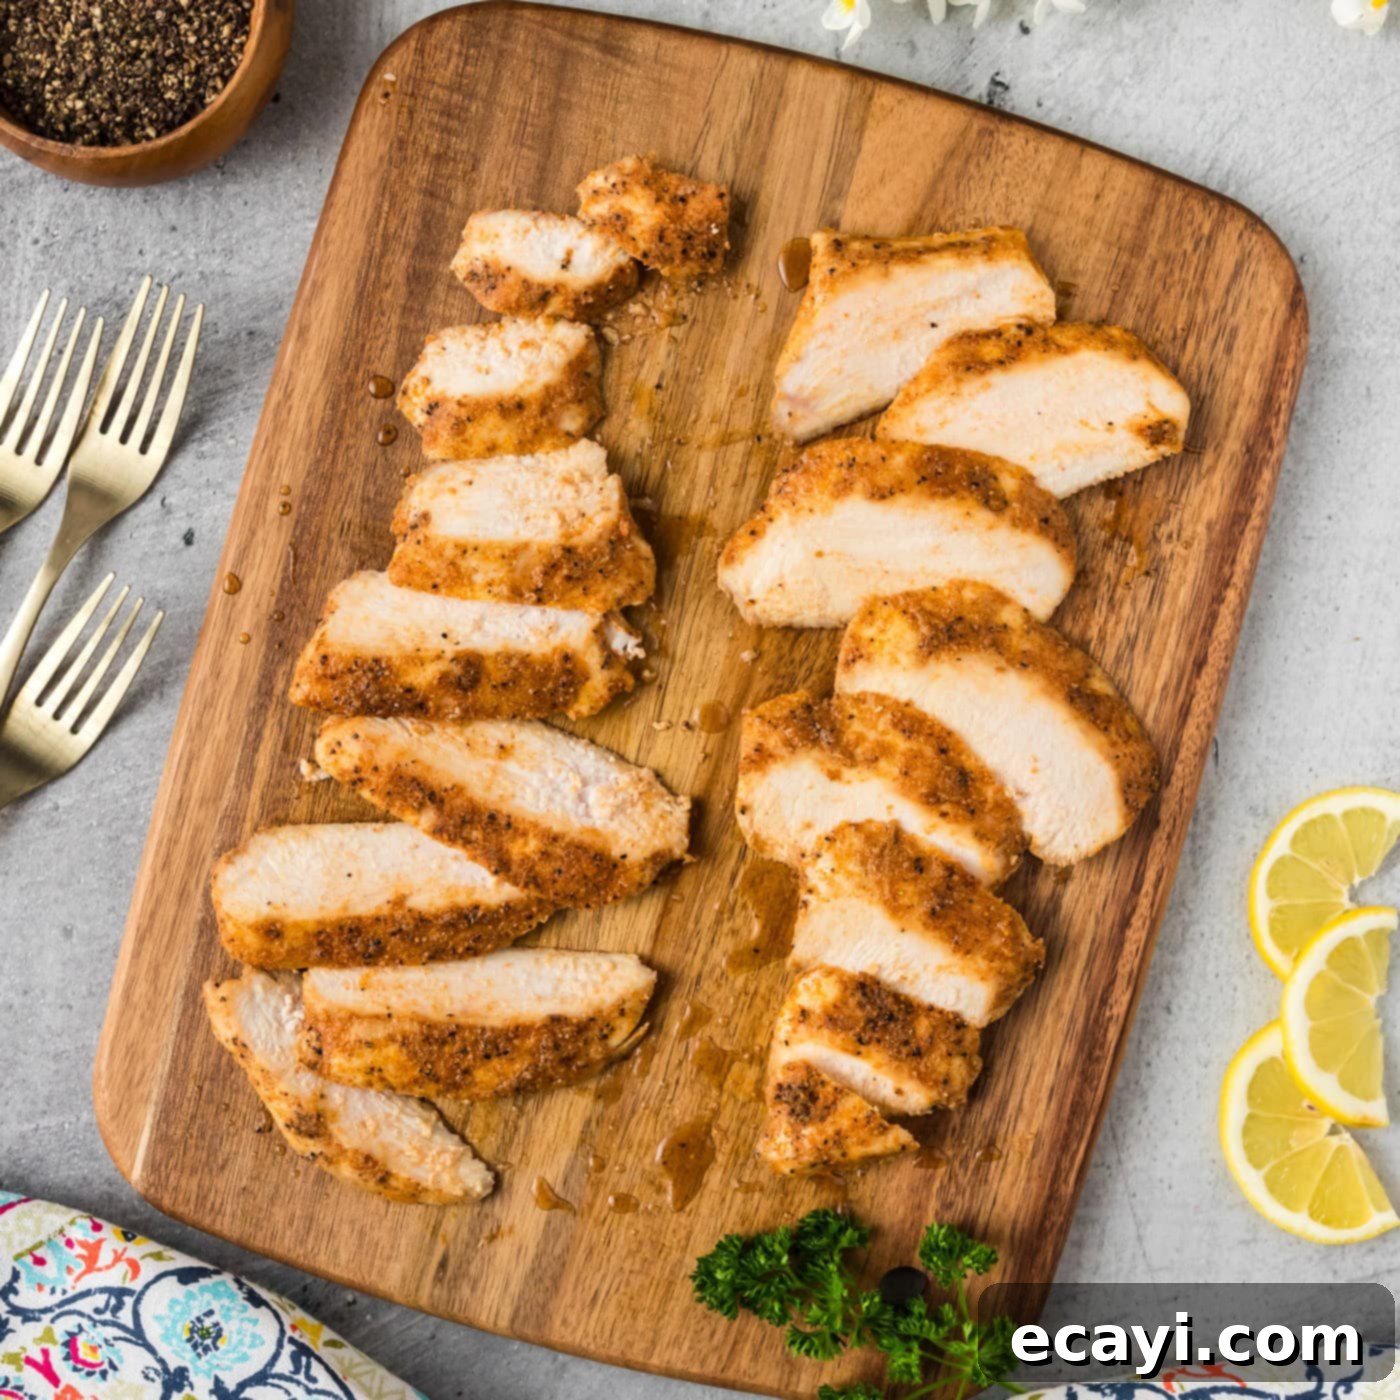
The Ultimate Guide to Perfectly Tender & Juicy Sous Vide Chicken Breast Every Time
Are you tired of dry, rubbery chicken breasts? Unlock the secret to consistently tender, incredibly juicy chicken with the sous vide method. This foolproof technique ensures your chicken is cooked to perfection from edge to edge, retaining all its natural moisture and flavor. Whether you’re a seasoned sous vide enthusiast or a curious beginner, this comprehensive guide will walk you through everything you need to know to achieve restaurant-quality chicken breast right in your own kitchen.
Why Sous Vide Chicken Breast is a Game-Changer
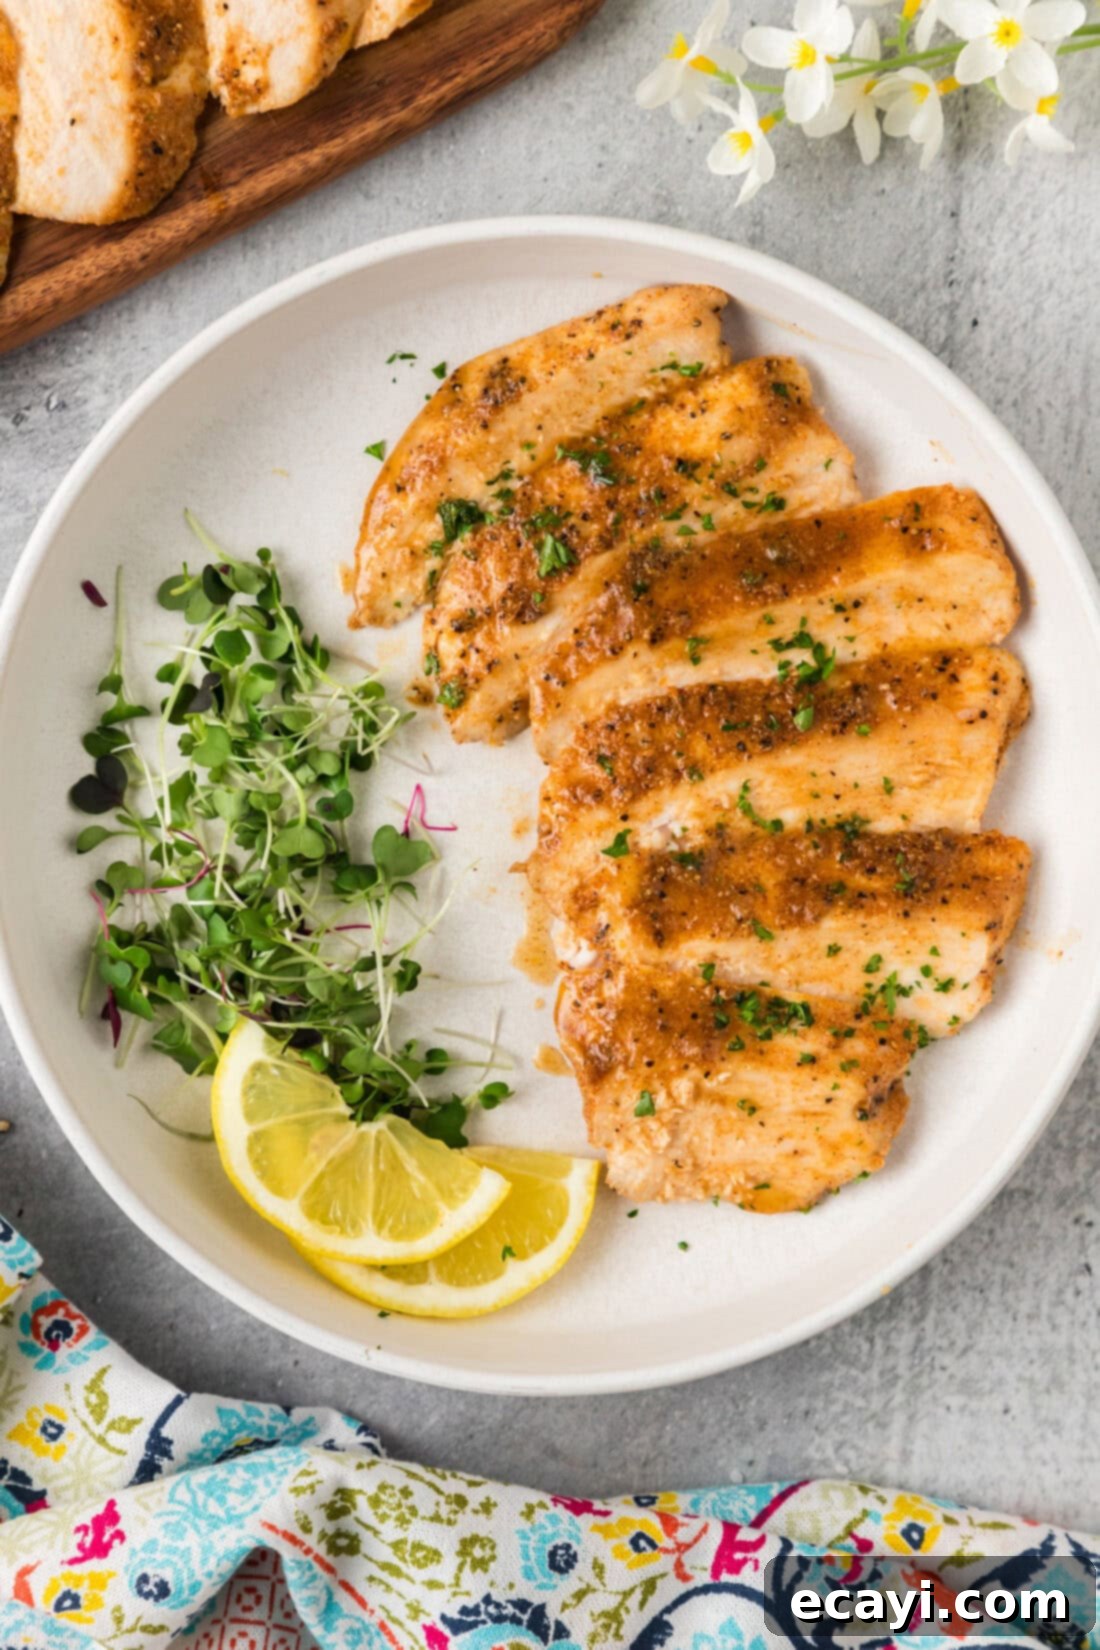
The sous vide method is truly revolutionary for cooking delicate proteins like chicken breast. It addresses all the common pitfalls of traditional cooking methods, which often result in unevenly cooked, dry, and bland chicken. Here’s why sous vide stands out as the ultimate technique for tender chicken:
- Unmatched Moisture Retention: Unlike pan-frying or grilling, sous vide cooks chicken in a vacuum-sealed bag within a precisely temperature-controlled water bath. This unique environment ensures that all the chicken’s natural juices and added seasonings are locked in. There’s no evaporation or drippage, guaranteeing an incredibly moist result that simply can’t be achieved with conventional cooking.
- Perfect, Even Cooking: The secret to sous vide’s success lies in its consistent temperature. Your sous vide immersion circulator maintains the water bath at an exact temperature throughout the entire cooking process. This means your chicken breast cooks perfectly from the center to the edge, eliminating any dry spots or undercooked areas. Say goodbye to the frustrating guesswork and constant monitoring often required with other methods.
- Tender Texture Every Time: Chicken breast is notorious for becoming tough and stringy when overcooked. Sous vide allows you to cook chicken to its ideal internal temperature without ever exceeding it. This gentle, precise cooking breaks down connective tissues slowly, resulting in a supremely tender texture that melts in your mouth. You’ll consistently achieve that desirable juicy tenderness, making every bite a delight.
- Foolproof Simplicity: Once you’ve seasoned your chicken and sealed it, the sous vide machine does all the hard work. You don’t need to constantly check the internal temperature or worry about burning. This hands-off approach frees you up to prepare side dishes or simply relax while your chicken cooks perfectly. It’s truly a set-it-and-forget-it method that delivers professional results.
- Enhanced Flavor Infusion: Because the chicken cooks in a sealed environment with its seasonings, the flavors have nowhere to escape. This allows the spices and herbs to deeply penetrate the meat, resulting in a more flavorful and aromatic chicken breast. The olive oil and seasoning blend in this recipe create a delicious rub that becomes wonderfully infused into the chicken during the water bath.
Having perfected sous vide pork chops and sous vide steak, we can confidently say that the texture achieved through this method is unparalleled. Once you experience the difference, you’ll be eager to explore the endless possibilities of sous vide cooking for various ingredients.
Essential Ingredients for Tender Sous Vide Chicken
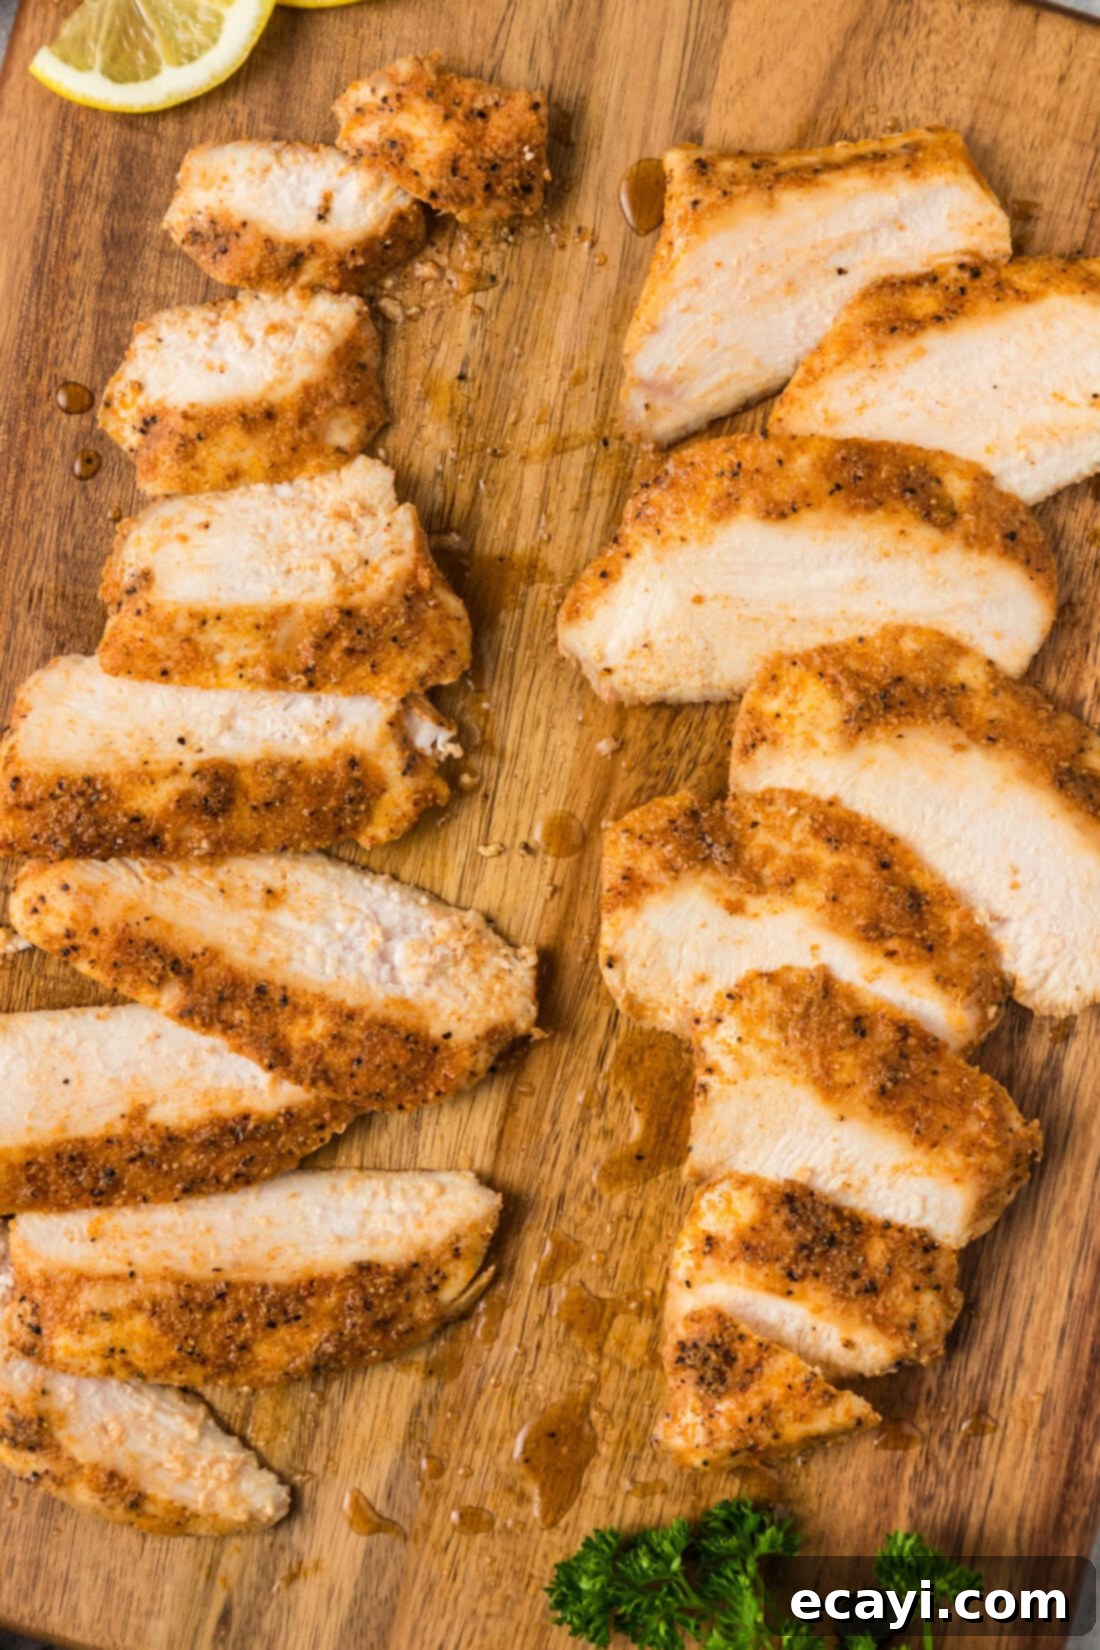
This recipe calls for a simple yet effective list of ingredients that guarantee a flavorful and perfectly cooked chicken breast. While the full, printable recipe with exact measurements is available at the end of this post, here’s a quick overview of what you’ll need to gather:
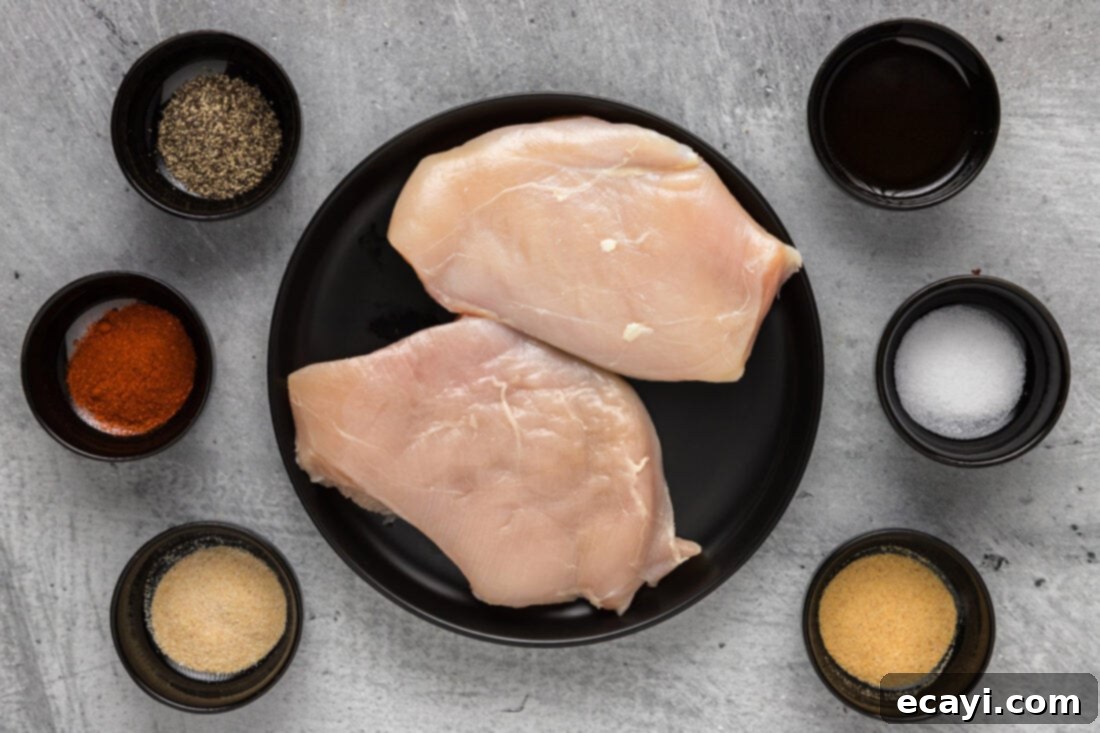
Ingredient Spotlight: Tips for Best Results
To ensure your sous vide chicken breast turns out exceptionally well, paying attention to your ingredients is key. Here are some detailed tips and substitution suggestions:
CHICKEN: For optimal results, we highly recommend using thawed boneless, skinless chicken breasts. Thawed chicken allows the seasonings to adhere beautifully and ensures even cooking from the start. Look for breasts that are roughly uniform in thickness for the most consistent outcome. If your chicken breasts vary significantly in thickness, you might consider pounding the thicker parts slightly to equalize them, ensuring every part cooks perfectly.
Using Frozen Chicken: While thawed chicken is preferred, you absolutely can cook frozen chicken breast sous vide. However, you’ll need to extend the cooking time by approximately 30 minutes to allow the chicken to fully defrost and cook through in the water bath. A useful tip for cooking from frozen: you can omit the olive oil in the seasoning rub if you wish, as it won’t adhere to the frozen surface anyway. Instead, generously sprinkle your seasonings directly into the vacuum seal bag before sealing. The cooking process will still infuse the flavors effectively.
Seasonings: Our go-to seasoning blend for this recipe creates a robust and versatile flavor profile that complements chicken beautifully. We use a combination of garlic powder, onion powder, paprika, salt, and black pepper, all mixed with olive oil to form a delicious rub. This blend provides a savory base with a hint of warmth from the paprika.
Don’t hesitate to customize the seasonings to your preference! The sealed bag environment is excellent for flavor infusion, so feel free to experiment with other spices and herbs. Consider:
- Herbs: Dried thyme, oregano, rosemary, or a classic Italian seasoning blend.
- Spicy Kick: A pinch of cayenne pepper, chili powder, or a dash of your favorite hot sauce (added directly to the bag).
- Smoky Flavor: Smoked paprika or a tiny amount of liquid smoke (use sparingly!).
- Citrus Brightness: A few lemon slices or orange zest added to the bag for a fresh, zesty note.
- Asian Inspired: A splash of soy sauce or a sprinkle of ginger powder and five-spice powder.
The olive oil in the rub helps the seasonings adhere to the chicken and contributes to moisture and flavor. You can substitute it with another neutral oil like avocado oil if preferred.
Step-by-Step Guide to Making Sous Vide Chicken Breast
These step-by-step photos and detailed instructions are designed to help you visualize each stage of this recipe. For a convenient printable version, complete with precise measurements and instructions, simply Jump to Recipe at the bottom of this post.
- Prepare the Chicken: Begin by carefully inspecting your boneless, skinless chicken breasts. Use a sharp knife to trim away any excess fat, gristle, or undesirable pieces. This ensures a cleaner cut and a more pleasant eating experience. Pat the chicken breasts thoroughly dry with paper towels; this helps the seasoning adhere better.
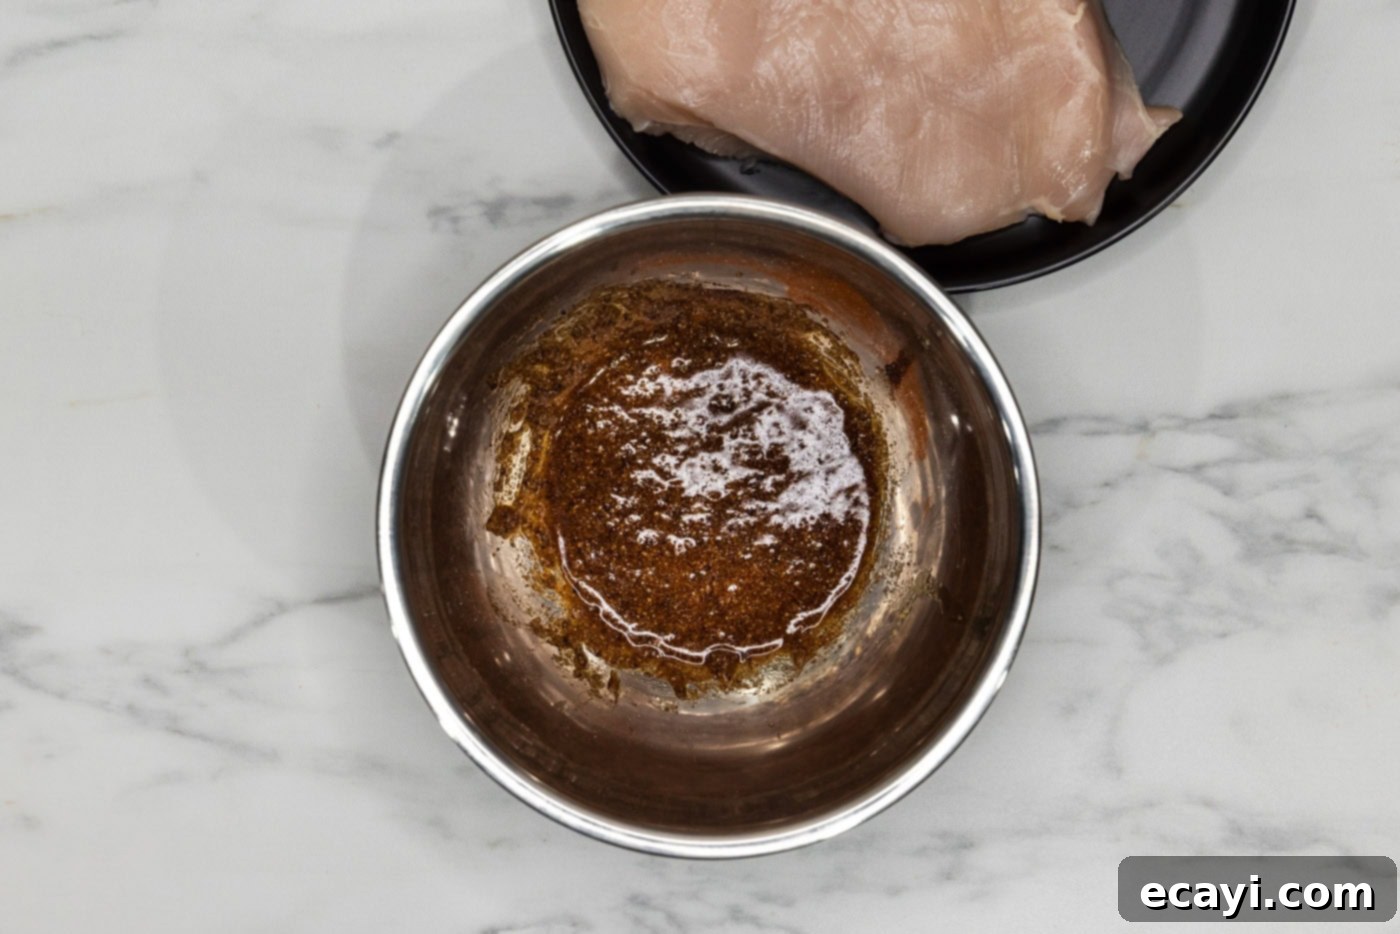
- Create the Flavorful Rub: In a medium-sized bowl, combine all your chosen spices – garlic powder, onion powder, paprika, salt, and black pepper – with the olive oil. Mix these ingredients thoroughly until you have a well-blended, paste-like rub. This ensures the flavors are evenly distributed.

- Season the Chicken: Donning a pair of food-safe gloves is recommended for this step, especially when handling raw chicken and working with spices. Using your gloved hands, generously rub the prepared spice mixture all over each chicken breast. Ensure every surface is coated evenly for maximum flavor penetration.

- Vacuum Seal the Chicken: Carefully place the seasoned chicken breasts into a bag suitable for vacuum sealing. If cooking multiple pieces, try to arrange them in a single layer without excessive overlapping to ensure even cooking. Use a reliable food vacuum sealer to remove as much air as possible from the bag before sealing it completely. A tight seal is crucial to prevent floating in the water bath and to ensure efficient heat transfer.

- Set Up the Sous Vide Water Bath: Prepare your sous vide cooker by attaching it to a suitable vessel (a large pot or a dedicated sous vide container works well). Fill the vessel with enough water to fully submerge your chicken bags, ensuring the water level is between the minimum and maximum fill lines of your circulator. Set the temperature on your sous vide cooker to 150°F (65.5°C). Allow the water bath to reach this target temperature before adding the chicken.
- Sous Vide Cooking: Once the water bath has reached 150°F, carefully add the vacuum-sealed chicken bags to the water. Ensure the bags are fully submerged; you can use sous vide weights or clips if necessary to prevent them from floating. Cook the chicken breasts for a precise 90 minutes.
CHEF’S TIP: It is absolutely critical that your bags remain fully submerged throughout the cooking process. If you notice a bag floating, it indicates that it was not properly sealed and still contains air. Immediately remove the bag from the water, re-bag the chicken (preferably in a new bag), and vacuum seal it again, ensuring all air is removed before returning it to the water bath. Proper submersion ensures consistent heat transfer and safe cooking.

Frequently Asked Questions & Expert Tips for Sous Vide Chicken
Sous vide cooking can raise a few questions, especially when it comes to specific ingredients like chicken. Here, we address common queries and offer expert tips to help you master this technique and achieve perfect results every time.
Searing after sous vide is entirely optional, but highly recommended if you desire a golden-brown, crispy crust and an extra layer of flavor. While not necessary for doneness, a quick sear adds textural contrast that many find appealing. To do this, just before removing the chicken bags from the water bath, preheat a heavy-bottomed skillet (cast iron works wonderfully) over medium-high heat with 1 tablespoon of olive oil, butter, or even a high smoke point oil like avocado oil. You want the oil to be shimmering and very hot. Remove the chicken from the bags, pat them extremely dry with paper towels (this is key for a good sear), and place them in the hot skillet. Sear for 60-90 seconds per side, just until a beautiful crust forms. Avoid over-searing, as this can undo the tenderness achieved by sous vide. Alternatively, for a quick crust, you can always use a kitchen torch.
This is one of the most common misconceptions about sous vide. While you technically cannot “overcook” sous vide chicken in the traditional sense (where it continues to rise in temperature and dry out), you can certainly degrade its texture if left in the water bath for too long. The sous vide method cooks food to a precise temperature and holds it there, so it won’t get hotter than your set temperature of 150°F. However, if chicken breast remains at this temperature for an extended period beyond the recommended time (e.g., more than 4 hours), the muscle fibers can begin to break down excessively, leading to a mushy or stringy texture rather than the desired tender bite. For this recipe, tested at 150°F, 90 minutes is the ideal cooking time. While it can safely remain in the water for up to 4 hours, for the best texture, it’s always best to remove it once it’s finished cooking.
Absolutely! The key to understanding sous vide safety lies in the combination of temperature and time. While the USDA recommends poultry be cooked to an internal temperature of 165°F for immediate safety, this recommendation is based on traditional high-heat cooking methods where a rapid kill of bacteria is necessary. Sous vide operates on the principle of pasteurization, where food is held at a consistent, lower temperature for a sufficient duration to achieve the same bacterial reduction as higher temperatures. At 150°F (65.5°C), chicken breast is safe to eat because this temperature is more than sufficient to kill harmful bacteria (such as Salmonella) when maintained over the specified period of 90 minutes. This extended exposure at a lower temperature achieves the same level of safety as a quick cook to 165°F, but with the added benefit of a much juicier and more tender product. Always ensure your sous vide machine maintains a stable temperature and your chicken remains fully submerged.
Yes, you can use bone-in, skin-on chicken breasts with the sous vide method, but the cooking time will need to be adjusted. Bone-in chicken will require a longer cooking duration, typically around 2 to 2.5 hours, at the same 150°F temperature. The bone acts as an insulator, requiring more time for the heat to penetrate and cook the meat evenly. If you choose bone-in, searing after the water bath is highly recommended to crisp up the skin, which will have a somewhat flabby texture straight out of the sous vide.
Sous vide chicken breast is fantastic for meal prepping! Once cooked, you can rapidly cool the sealed bags by placing them in an ice bath for 15-20 minutes. After cooling, store them in the refrigerator for up to 4-5 days, or in the freezer for several months. When ready to eat, reheat the chicken directly in the sous vide bath (at 140°F for about 30-45 minutes from refrigerated, or 1 hour from frozen), then sear if desired. This makes healthy, perfectly cooked chicken available for quick weeknight dinners, salads, sandwiches, or wraps.
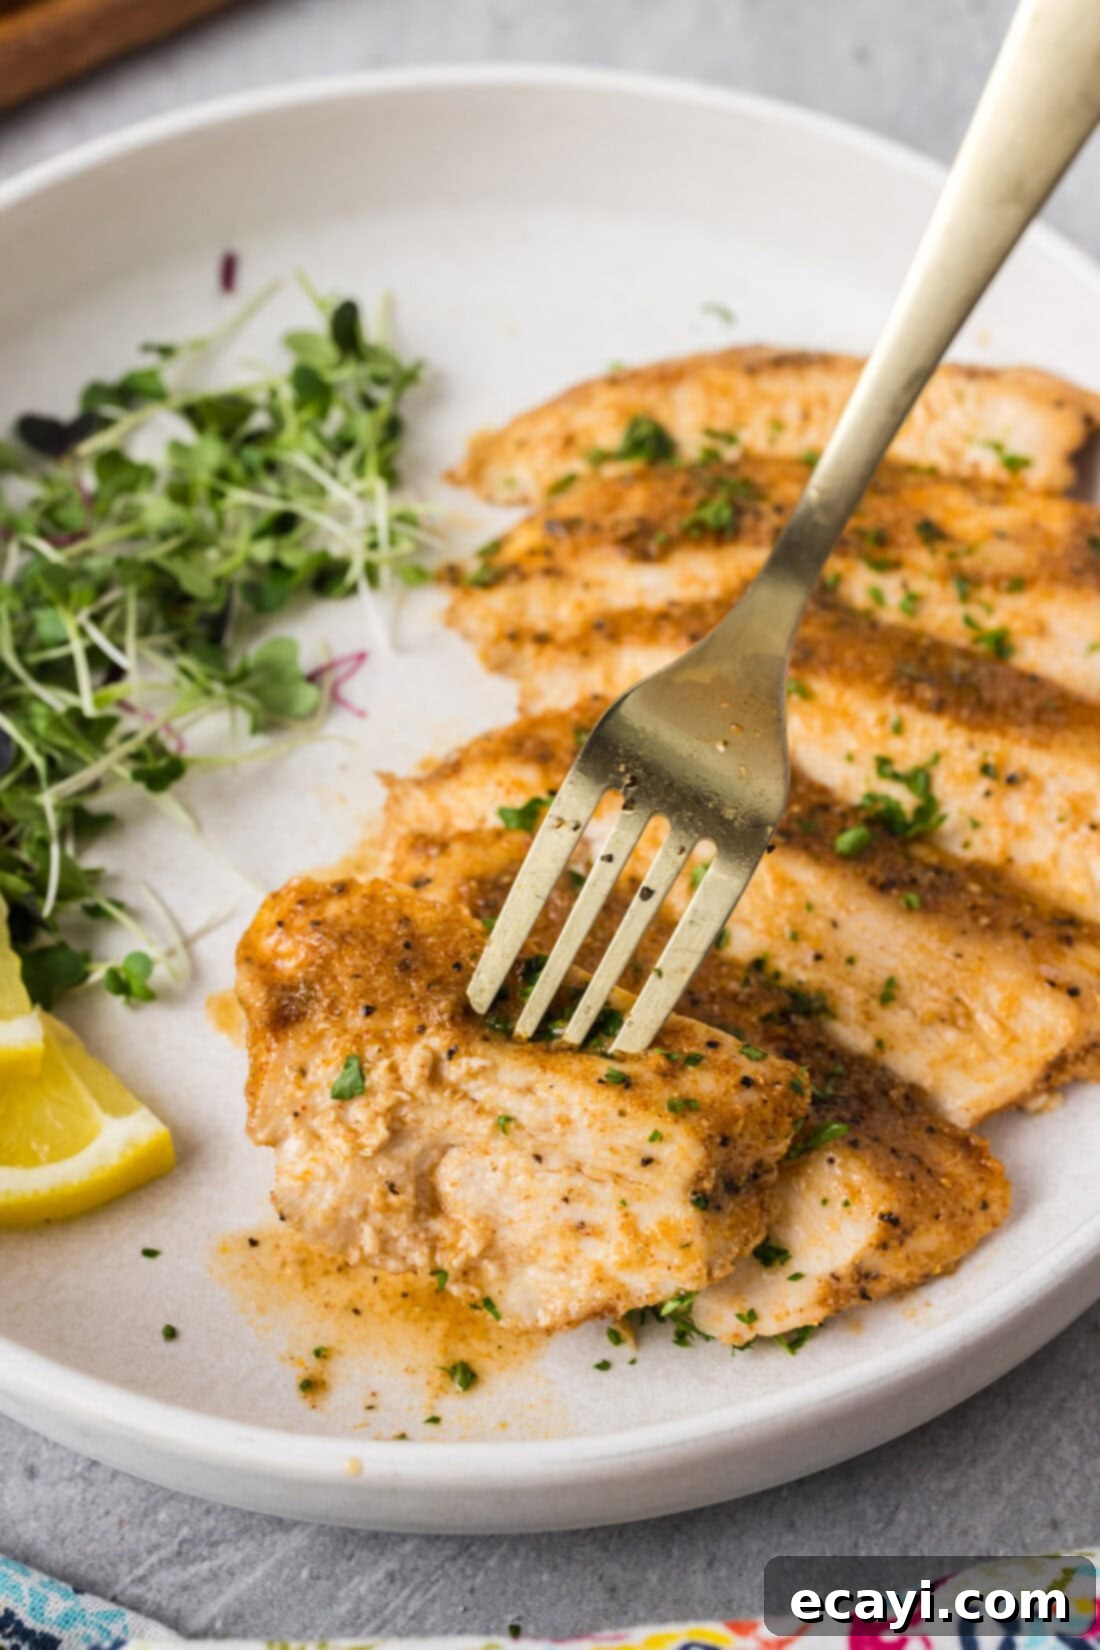
Delicious Serving Suggestions for Your Sous Vide Chicken
Once you’ve achieved that perfectly tender and juicy sous vide chicken breast, the possibilities for serving are endless! Its versatile flavor profile makes it a wonderful addition to a wide range of meals. Here are some delectable ideas to inspire your next dinner:
- Classic Comfort: Pair your chicken with a generous scoop of creamy mashed potatoes or a fluffy rice pilaf. Add a side of roasted asparagus, green beans, or glazed carrots for a complete and satisfying meal.
- Healthy & Fresh: Slice the chicken and serve it atop a vibrant dinner salad, dressed with a light vinaigrette. It’s also excellent in a Mediterranean-style bowl with quinoa, cucumbers, tomatoes, feta, and olives.
- Versatile & Quick: Shred or dice the cooked chicken for easy meal prep. Use it in chicken tacos, quesadillas, stir-fries, or even in a quick chicken salad sandwich.
- Sauce Pairings: The mild flavor of chicken breast allows it to beautifully absorb various sauces. Consider a rich mushroom cream sauce, a tangy lemon-herb sauce, a vibrant pesto, or even a simple pan sauce made from the juices in the bag after searing.
- Crispy Finish (Optional): Remember, if you prefer a beautiful golden-brown crust and extra texture, don’t skip the optional reverse sear after removing the chicken from its bag. A quick minute or two per side in a hot skillet can elevate the experience even further.
However you choose to enjoy it, your sous vide chicken breast is guaranteed to be a tender, flavorful star on your plate!
Explore More Sous Vide Culinary Adventures
If you’ve loved the ease and perfection of sous vide chicken, you’re in for a treat! The sous vide technique excels with many other proteins, ensuring consistent tenderness and flavor every time. Expand your culinary repertoire with these other tried-and-true sous vide recipes:
- Sous Vide Steak: Achieve steakhouse-quality results with edge-to-edge perfect doneness.
- Sous Vide Salmon: Experience incredibly flaky and moist salmon that’s never overcooked.
- Sous Vide Pork Chops: Say goodbye to dry pork chops and hello to tender, juicy perfection.
Dive into the world of precision cooking and discover new favorite dishes!
I love to bake and cook and share my kitchen experience with all of you! Remembering to come back each day can be tough, that’s why I offer a convenient newsletter every time a new recipe posts. Simply subscribe and start receiving your free daily recipes!
Sous Vide Chicken Breast Recipe
IMPORTANT – There are often Frequently Asked Questions within the blog post that you may find helpful. Simply scroll back up to read them!
Print It
Pin It
Rate It
Save ItSaved!
Ingredients
- 8-10 ounces boneless skinless chicken breasts
- 1 Tablespoon garlic powder
- 1 Tablespoon onion powder
- 1 Tablespoon paprika
- 2 teaspoons table salt
- 1 teaspoon black pepper
- 2 Tablespoons olive oil
Equipment You’ll Need
-
Food vacuum sealer and bags
-
Sous vide water container
-
Sous vide immersion circulator
Before You Begin
- For the best flavor and seasoning adhesion, it’s ideal to use thawed boneless, skinless chicken breasts.
- If you’re cooking from frozen chicken breasts, you will need to add an additional 30 minutes to the cook time. When cooking frozen, you can omit the olive oil in the rub, but make sure to generously sprinkle the seasonings directly into the bag before sealing. Seasonings won’t stick well to frozen chicken.
Instructions
-
Trim any excess fatty pieces from the chicken breasts. Pat dry.
-
In a medium bowl, combine garlic powder, onion powder, paprika, salt, pepper, and olive oil; mix well to create a rub.
-
Using gloved hands, thoroughly rub the spice mixture all over the chicken breasts.
-
Place seasoned chicken breasts into a vacuum seal bag and seal with a food vacuum sealer, removing all air.
-
Fill your sous vide vessel with water and attach the immersion circulator. Set the temperature to 150°F (65.5°C).
-
Once the water reaches temperature, carefully add the vacuum-sealed chicken to the water bath. Ensure the bags are fully submerged. Cook for 90 minutes.
Chef’s Tip: If the bags float, it means they are not properly sealed. Remove them, re-bag the chicken (using a new bag if necessary), and seal again, ensuring all air is expelled. Proper submersion is vital for even cooking and food safety.
Expert Tips & FAQs
- Optional Sear: For a beautiful golden crust and enhanced flavor, sear the chicken after sous vide cooking. Just before removing the bags from the water bath, preheat a heavy-bottomed skillet over medium-high heat with 1 tablespoon of olive oil (or butter/high smoke point oil). You want the oil to be nice and hot. Remove chicken from bags, pat very dry, and sear for 60-90 seconds per side until a crust forms. Be careful not to over-sear and overcook the chicken. A kitchen torch can also be used for a quick crust.
- Meal Prep: Cooked sous vide chicken breasts can be cooled rapidly in an ice bath, then stored in the refrigerator for 4-5 days or frozen for several months. Reheat in the sous vide bath (140°F for 30-45 mins) or gently pan-fry.
Nutrition Information
The recipes on this blog are tested with a conventional gas oven and gas stovetop. It’s important to note that some ovens, especially as they age, can cook and bake inconsistently. Using an inexpensive oven thermometer can assure you that your oven is truly heating to the proper temperature. If you use a toaster oven or countertop oven, please keep in mind that they may not distribute heat the same as a conventional full sized oven and you may need to adjust your cooking/baking times. In the case of recipes made with a pressure cooker, air fryer, slow cooker, or other appliance, a link to the appliances we use is listed within each respective recipe. For baking recipes where measurements are given by weight, please note that results may not be the same if cups are used instead, and we can’t guarantee success with that method.
