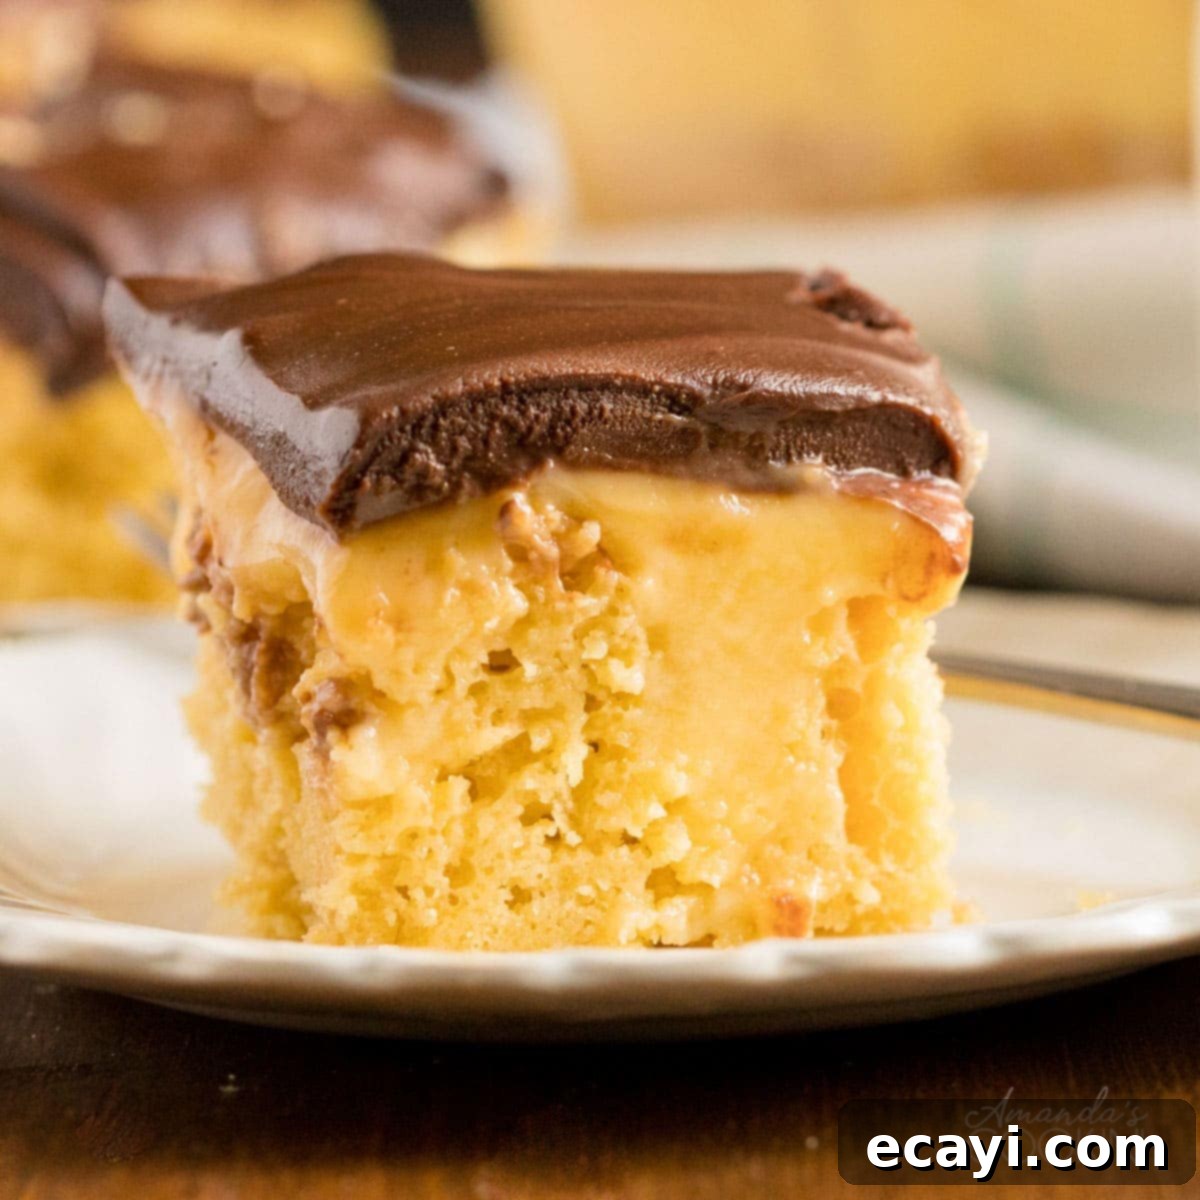
Indulge in the Easiest Boston Cream Poke Cake: A Crowd-Pleasing Dessert Recipe
If you’re searching for a truly show-stopping dessert that promises to impress without the fuss, look no further than this incredible Boston Cream Poke Cake! This recipe takes the classic flavors of a Boston Cream Pie and transforms them into an incredibly simple, yet utterly delicious poke cake. Everyone will be raving over the harmonious and delightful combination of moist yellow cake, rich, creamy vanilla pudding custard, and a glossy, decadent chocolate glaze. It’s a perfect blend of convenience and gourmet taste, making it an instant favorite for any occasion.
This one-pan dessert is specifically designed for ease and maximum flavor, making it an ideal choice to bring to your next gathering, potluck, or family dinner. Its stunning presentation and irresistible taste are guaranteed to make it a crowd favorite, much like other beloved treats such as the ever-delicious Chocolate Lasagna. Prepare for compliments and requests for the recipe – it’s that good!
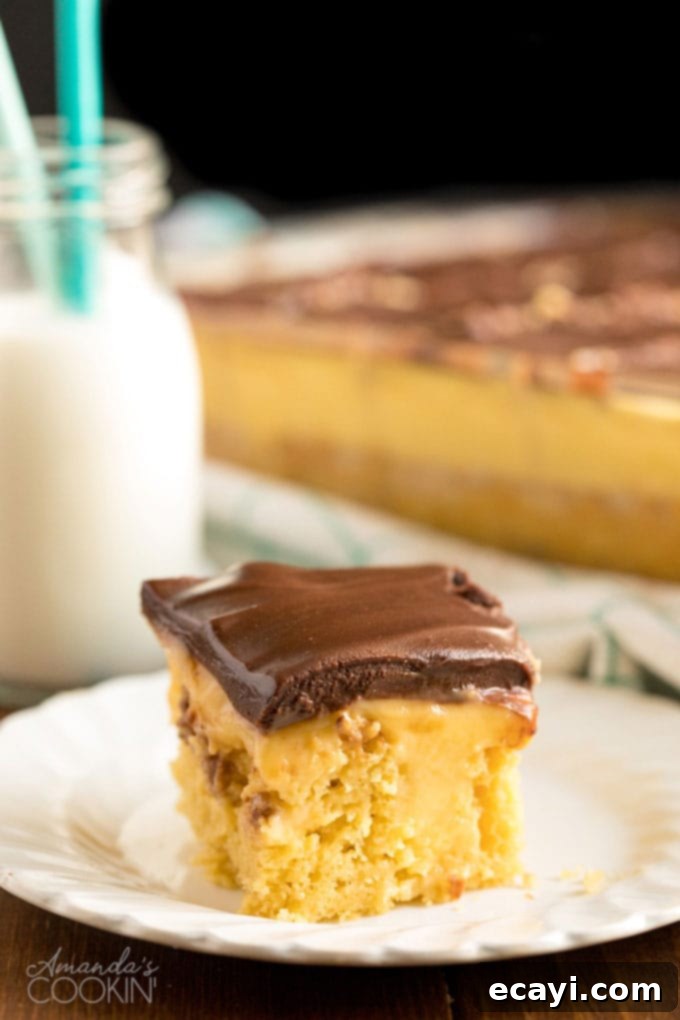
Why This Boston Cream Poke Cake Will Become Your Favorite Dessert
There’s something truly magical about custard-filled desserts, and for many, the Boston Cream Pie holds a special place in their hearts. When I was a young child, I found myself completely enamored with any and all sweets that featured a rich, smooth custard. I was particularly captivated by Boston Cream Pie, not just for its exquisite taste, but also because it playfully defied its name – it wasn’t a pie at all, but rather a luscious, custard-filled cake. And that final layer of glorious, shiny chocolate? Absolute bliss!
Related: For fellow chocolate lovers, my all-time favorite chocolate cake recipe is also a must-try!
While I learned the basics of baking at a young age, truly mastering intricate, egg-based confections like homemade custard or Creamy Flan came much later in life. If only I had known about this brilliant Boston Cream Poke Cake recipe sooner! I could have satisfied my cravings anytime the fancy struck, without the advanced skills or time commitment. It truly is that simple to create this decadent dessert using convenient ingredients like a boxed cake mix and instant vanilla pudding. This recipe eliminates the intimidation factor, allowing anyone to enjoy a taste of sophisticated dessert with minimal effort.
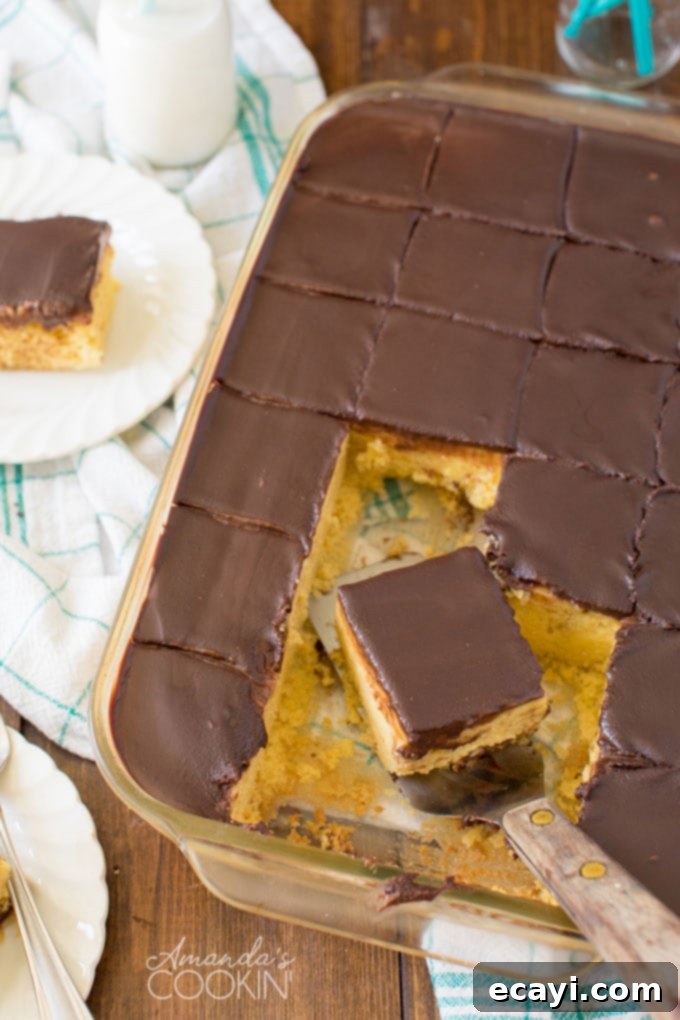
Even as an avid and experienced baker today, I’m certainly not above embracing clever boxed mixes and smart baking hacks. If these shortcuts can simplify the process, save precious time, and still deliver an undeniably yummy result, I am absolutely all for them! For instance, my delightful Lemon Sandwich Cookies, which are always a hit and disappear from the plate almost instantly, also cleverly start with a cake mix base.
The secret to making these “cheater” recipes taste truly homemade often lies in just one from-scratch component. For those lemon cookies, it’s the rich, tangy cream cheese frosting that elevates them. With that philosophy in mind for this Boston Cream Poke Cake, I decided to craft the indulgent chocolate glaze from scratch. As a self-proclaimed chocoholic, I believe a homemade chocolate topping truly makes all the difference! While you could certainly opt for convenience by using canned chocolate frosting, a homemade chocolate buttercream frosting, or even a chocolate fudge frosting, the process for making a simple chocolate ganache is incredibly straightforward. It requires little more than melting a few key ingredients together, yielding a superior shine and depth of flavor that’s well worth the minimal extra effort.
Essential Ingredients You’ll Need for This Easy Boston Cream Poke Cake
Gathering your ingredients is the first step to creating this delectable Boston Cream Poke Cake. The beauty of this recipe lies in its accessible components, many of which you might already have in your pantry. Here’s a detailed look at what you’ll need:
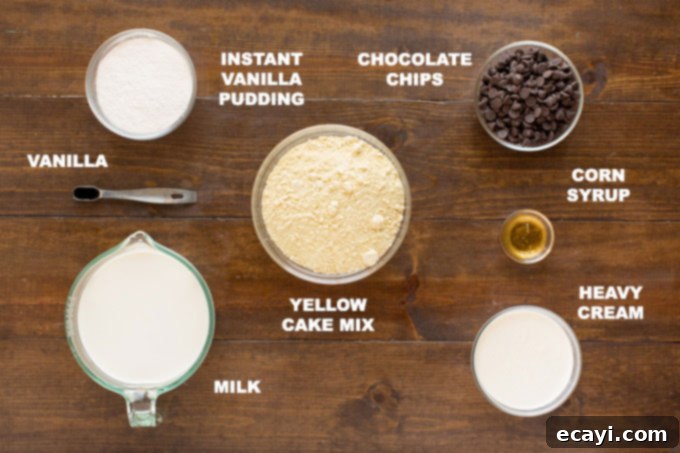
- Yellow Cake Mix: You’ll begin with one box of yellow cake mix. This forms the foundational spongy cake layer. Remember that beyond the mix itself, you will also need to procure the additional ingredients listed on the back of the cake mix box (typically eggs, oil, and water) to prepare it correctly.
- Instant Vanilla Pudding Mix: This is a crucial detail! Be absolutely certain you use instant vanilla pudding mix – specifically, two 3.4-ounce boxes. The “cook and serve” variety will not achieve the desired consistency for our creamy custard filling. Instant pudding thickens beautifully when mixed with milk and poured into the poked cake.
- Milk: You will need milk (typically cold milk is recommended for instant pudding) and a touch of vanilla extract to combine with the pudding mix. The milk helps hydrate and activate the instant pudding, creating that luscious, custardy texture that seeps into every nook and cranny of the cake.
- Vanilla Extract: Just a half teaspoon of vanilla extract enhances the vanilla flavor of the pudding, adding an extra layer of warmth and sweetness to the creamy filling.
- Semi-Sweet Chocolate Chips: To craft our rich, homemade chocolate ganache, you’ll need semi-sweet chocolate chips. Approximately 8 ounces, or about 1 1/4 cups, will provide ample chocolatey goodness for a generous glaze.
- Heavy Cream: This is essential for achieving a smooth, luxurious chocolate ganache. One cup of heavy whipping cream will be heated and poured over the chocolate chips, melting them into a silky, pourable glaze.
- Corn Syrup (or Butter): A small amount (1 tablespoon) of corn syrup is included in the ganache recipe. This ingredient helps give the glaze its characteristic glossy sheen and prevents it from crystallizing. If, however, you prefer not to use corn syrup, you can substitute it with an equal amount of butter. The butter will still contribute to a smooth texture and rich flavor, though the shine might be slightly less pronounced.
Having these ingredients ready will ensure a smooth and enjoyable baking process, leading to a truly delightful Boston Cream Poke Cake that tastes like it came from a professional bakery!
ONE-PAN DESSERTS COOKBOOK!
The one-pan dessert is ideal for all occasions including potlucks, holidays, barbecues and birthdays. Several of these desserts do not require baking making them perfect for summer. See ALL my cookbooks here!
20 delicious one-pan dessert recipes plus tips for dessert success! ONLY $9.97!!
Helpful Kitchen Tools for Making Boston Cream Poke Cake
To ensure your Boston Cream Poke Cake comes out perfectly, having the right tools on hand can make all the difference. While many of these are standard kitchen items, they are essential for simplifying the process:
- Hand Mixer: A hand mixer is incredibly useful for whisking the pudding quickly and thoroughly, ensuring it’s smooth and lump-free before it thickens.
- 13×9 Baking Dish: This standard size baking dish is perfect for a sheet cake and will be where your poke cake takes its delicious form.
- Whisk: Even if you have a hand mixer, a good whisk is indispensable for initial mixing and ensuring everything is well combined, especially for the pudding and the chocolate glaze.
- Mixing Bowls: You’ll need at least two mixing bowls: one for preparing the cake batter (if not using the baking pan itself for mixing) and another for the pudding mixture.
- Wooden Spoon Handle or Fork: While not linked, this is what you’ll use to create the “poke” holes in your cake!
How to Make This Amazing Boston Cream Poke Cake: Step-by-Step Guide
Creating this Boston Cream Poke Cake is an absolute breeze, especially with our simplified steps. The rest of this impressive dessert is equally quick and easy, making it accessible for bakers of all skill levels. Let’s break down the process:
Step 1: Bake and Prepare the Yellow Cake Base
First, you’ll need to prepare and bake your yellow cake. Follow the instructions provided on your chosen box of yellow cake mix explicitly. Generally, this involves mixing the cake mix with eggs, oil, and water, then pouring the batter into a greased 13×9 inch baking pan. Bake it according to the package directions, typically until a toothpick inserted into the center comes out clean. Once baked, it’s crucial to let the cake cool completely. This cooling period is vital to ensure the cake is firm enough to handle and won’t steam or break apart when the pudding is added. After it has fully cooled, take the bottom of a wooden spoon (or a large fork handle) and gently but firmly poke holes all across the top of the cake. Make sure these holes go all the way to the bottom of the pan to allow the luscious pudding to seep deep into the cake, creating those wonderful pockets of creamy flavor.
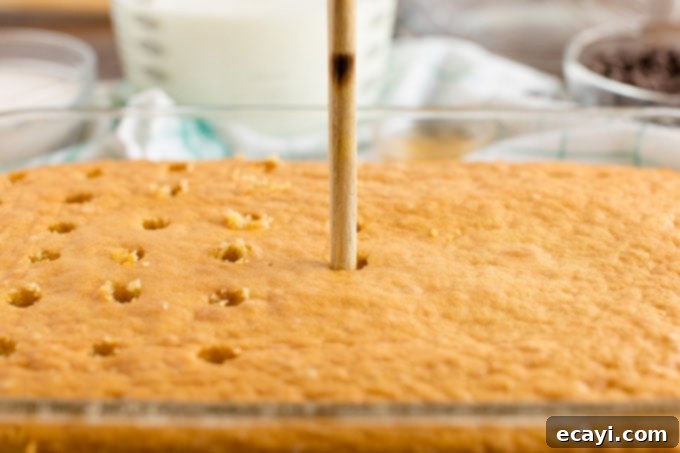
Step 2: Prepare and Pour the Vanilla Pudding Custard
While the cake is cooling, prepare your vanilla pudding. In a large mixing bowl, whisk together the instant vanilla pudding mix, cold milk, and vanilla extract. It’s important to mix this quickly and pour it over the cake *before* it begins to thicken too much. The thinner consistency allows the pudding to effortlessly drip all the way down into the poked holes, creating a beautiful, custardy surprise in every bite. If you wait until the pudding is too thick, it will sit on top of the cake and won’t penetrate deeply enough. Once poured, gently spread the pudding into an even layer over the cake, ensuring it fills all the holes. Refrigerate the cake for at least one hour to allow the pudding to set properly and infuse the cake with moisture.
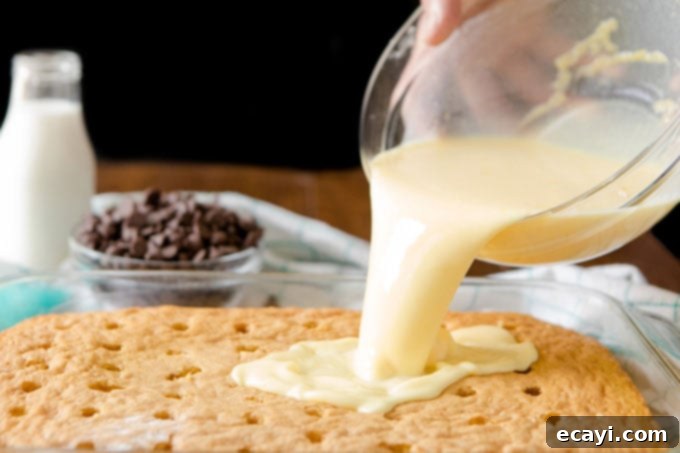
Step 3: Make the Silky Chocolate Glaze (Ganache)
Now for the crowning glory – the chocolate glaze! This homemade ganache is incredibly simple and adds that signature Boston Cream Pie finish. Place your semi-sweet chocolate chips and corn syrup (or butter, if substituting) in a heat-proof bowl. In a small saucepan over low heat, gently warm the heavy cream, stirring occasionally, until it just simmers. Alternatively, you can microwave the cream until it’s hot but not boiling. Carefully pour the hot cream over the chocolate chips and corn syrup, then let it sit undisturbed for about 2 minutes. This brief resting period allows the heat from the cream to melt the chocolate. After 2 minutes, stir the mixture gently but consistently until it transforms into a smooth, glossy, and uniform glaze. This next step is critical: let the glaze cool for 10 minutes before pouring it over the cake! Pouring hot glaze onto the chilled pudding layer can cause it to melt or create an undesirable texture. Allowing it to cool slightly ensures a perfect, even spread and a beautiful set.
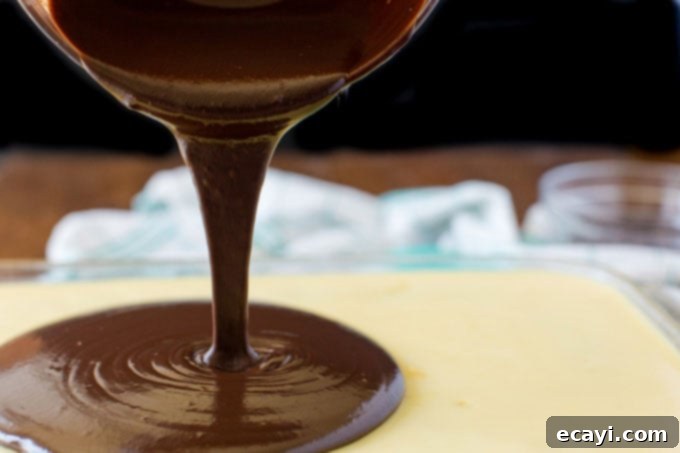
Step 4: Glaze and Chill for Perfection
Once the chocolate glaze has cooled for the recommended 10 minutes, pour it evenly over the pudding layer on your cake. Use a spatula to gently smooth the glaze across the entire surface, ensuring it’s beautifully coated. After glazing, place the cake back into the refrigerator to chill for a minimum of 4 hours, or ideally, overnight. Don’t underestimate the power of an overnight chill! While it’s tempting to dig in sooner, trust me on this: the flavors truly meld together in an amazing way when given ample time to rest. The yellow cake, creamy vanilla pudding, and rich chocolate glaze magically transform into a dessert that perfectly captures the essence of a classic Boston Cream Pie, but in an effortlessly easy poke cake form. The longer chill also ensures the pudding and glaze are fully set, making for clean, beautiful slices.
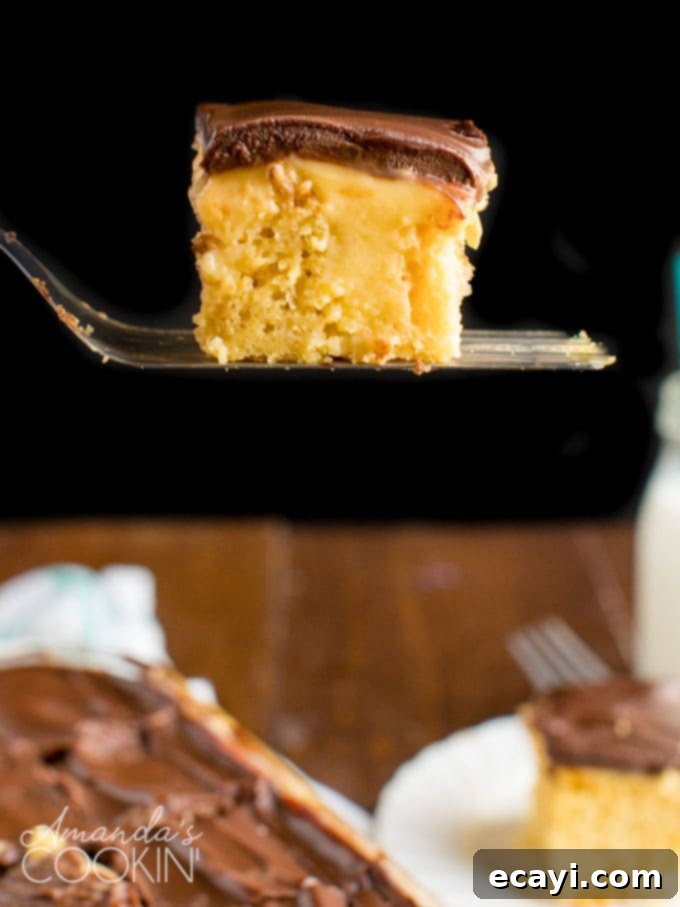
Tips for Success & Common Questions About Boston Cream Poke Cake
To ensure your Boston Cream Poke Cake is absolutely perfect every time, consider these helpful tips and answers to frequently asked questions:
- Can I use a different cake mix flavor? While yellow cake mix is traditional for Boston Cream Pie, you could experiment with white cake mix for a lighter color. Chocolate cake mix would create a delicious double-chocolate variation!
- What if my pudding thickens too fast? If your instant pudding starts to set before you can pour it, add a tablespoon or two of milk and whisk vigorously to loosen it slightly. Work quickly!
- Why is cooling the glaze important? Pouring hot glaze onto a cold, pudding-covered cake can cause the pudding to melt or shift, leading to a less neat finish. Cooling the glaze ensures a smooth, even set.
- How do I store Boston Cream Poke Cake? Always store this cake in an airtight container in the refrigerator. It will keep well for 3-4 days.
- Can I make this ahead? Absolutely! This cake is an excellent make-ahead dessert. In fact, it tastes even better the next day once the flavors have had time to fully meld together. Prepare it the evening before your event for optimal taste and texture.
- Can I freeze Boston Cream Poke Cake? While the cake itself freezes well, the pudding and glaze might change texture slightly upon thawing. It’s best enjoyed fresh or after a day of refrigeration.
- Serving Suggestions: This decadent cake is wonderful on its own, but it also pairs beautifully with a cup of hot coffee, a cold glass of milk, or even a side of fresh berries for a touch of tartness.
More Delicious One-Pan Desserts to Love
Don’t you just LOVE the convenience and deliciousness of one-pan desserts? They are always the perfect solution for BBQs, potlucks, casual get-togethers, or any occasion where you need a tasty treat without a mountain of dishes. Discover more crowd-pleasing favorites that simplify your baking and maximize your enjoyment:
- Strawberry Jello Pretzel Salad: A delightful sweet and salty combination.
- Eclair Cake: Layered goodness that tastes just like the classic pastry.
- Chocolate Texas Sheet Cake: A rich, moist cake perfect for feeding a crowd.
- Pineapple Dream Dessert: Light, airy, and bursting with tropical flavor.
- Strawberry Icebox Cake: A no-bake wonder, ideal for warm weather.
- No Bake Chocolate Eclair Cake: Even easier, no oven required!
- Lemon Lush: A refreshing and tangy layered dessert.
- Cookie Skillet: Warm, gooey, and perfect for sharing (or not!).
- Pistachio Cake: A unique and flavorful bundt cake.
- Pineapple Poke Cake: Another fantastic poke cake, this time with a tropical twist.
And of course, if you adore the Boston Cream flavor profile, you absolutely wouldn’t want to miss my charming Boston Cream Cupcakes for individual servings of this classic delight!

Boston Cream Poke Cake
IMPORTANT – There are often Frequently Asked Questions within the blog post that you may find helpful. Simply scroll back up to read them!
Print It
Pin It
Rate It
Save ItSaved!
Ingredients
- 16.25 ounce yellow cake mix plus ingredients to prepare
- 6.8 ounces instant vanilla pudding mix 2 (3.4oz) boxes
- 4 cups milk
- ½ teaspoon vanilla
- 8 ounces semi-sweet chocolate chips 1 1/4 cups
- 1 tablespoon corn syrup or butter if you prefer
- 1 cup heavy whipping cream
Things You’ll Need
-
Hand mixer
-
13×9 baking dish
-
Whisk
-
Mixing bowls
Before You Begin
- You’ll use a box of yellow cake mix, but you also need the ingredients on the back of the box.
- Be sure you use instant vanilla pudding mix, not the cook and serve kind!
- The ganache calls for a small amount of corn syrup. It’s a very small amount, but if it bothers you, use an equal amount of butter.
Instructions
-
Prepare and bake the cake in a 13×9 pan according to the package instructions. Let cool completely before poking holes across the cake with the bottom of a wooden spoon. Be sure to poke all the way to the bottom of the pan.16.25 ounce yellow cake mix
-
In a large bowl, whisk together pudding, milk, and vanilla, but don’t let it thicken. Pour the thin pudding over cake in an even layer, poking down into the holes if necessary.6.8 ounces instant vanilla pudding mix, 4 cups milk, 1/2 teaspoon vanilla
-
Refrigerate the cake for one hour.
Chocolate Glaze
-
Place the chocolate chips and corn syrup in a heat-proof bowl.8 ounces semi-sweet chocolate chips, 1 tablespoon corn syrup
-
In a small saucepan over low heat, warm the cream until it simmers, stirring occasionally. Alternatively, you can microwave the cream until hot.1 cup heavy whipping cream
-
Pour hot cream over chocolate chips and let sit for 2 minutes to melt.
-
Stir until smooth. Let the glaze cool for 10 minutes. Letting the glaze cool is an important step, don’t skip this part!
-
Pour glaze over cake and smooth with a spatula. Chill cake for 4 hours or overnight before serving.
Nutrition
The recipes on this blog are tested with a conventional gas oven and gas stovetop. It’s important to note that some ovens, especially as they age, can cook and bake inconsistently. Using an inexpensive oven thermometer can assure you that your oven is truly heating to the proper temperature. If you use a toaster oven or countertop oven, please keep in mind that they may not distribute heat the same as a conventional full sized oven and you may need to adjust your cooking/baking times. In the case of recipes made with a pressure cooker, air fryer, slow cooker, or other appliance, a link to the appliances we use is listed within each respective recipe. For baking recipes where measurements are given by weight, please note that results may not be the same if cups are used instead, and we can’t guarantee success with that method.
This recipe was originally published on May 12, 2017, but has since been updated to include more comprehensive helpful tips, detailed instructions, and new photos to enhance your baking experience.
