Easy & Colorful St. Patrick’s Day Sugar Cookies: Rainbows, Shamrocks, and Gold Coins
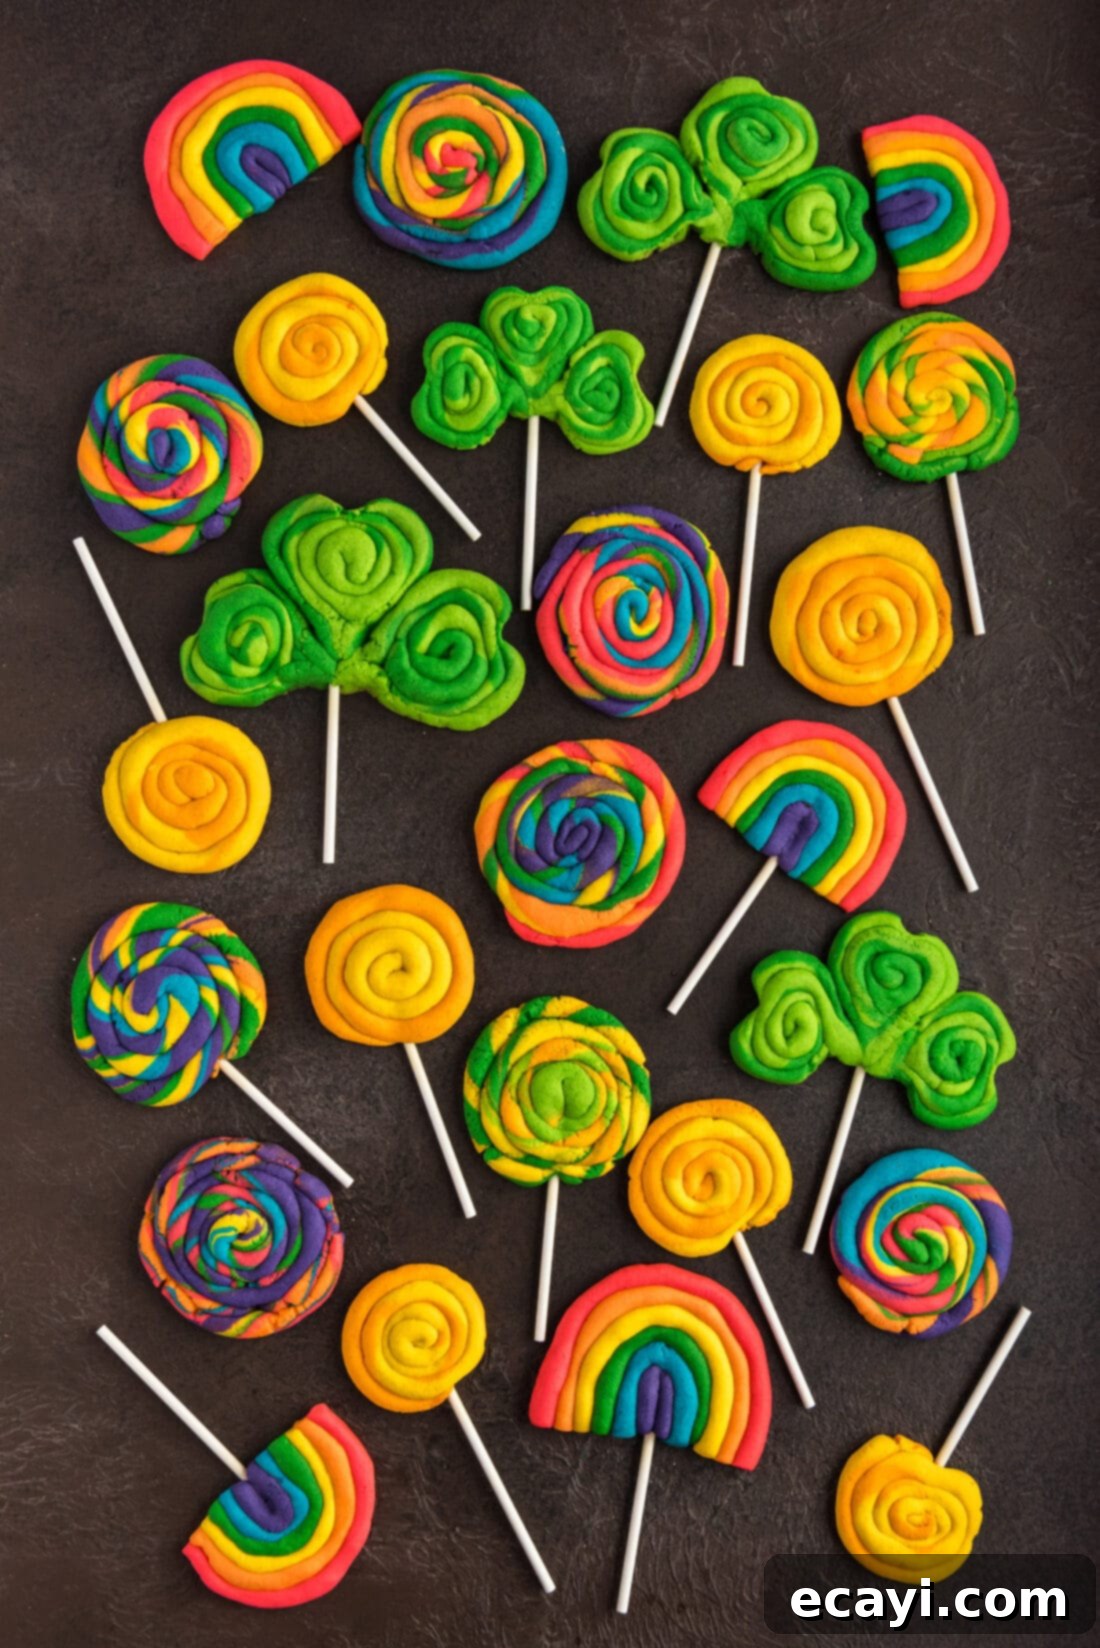
Celebrate St. Patrick’s Day with a burst of color and a touch of magic with these delightful sugar cookies. This recipe transforms a simple sugar cookie base into a festive array of shapes, featuring vibrant rainbows, classic green shamrocks, and shimmering gold coins. All you need is a few basic ingredients, a splash of food coloring, and a sprinkle of your own creativity to bring these edible masterpieces to life. Perfect for sharing with family and friends, these cookies are not only beautiful but also incredibly fun to make, offering a sweet taste of Irish cheer.
Why This Recipe Is Your Go-To for St. Patrick’s Day
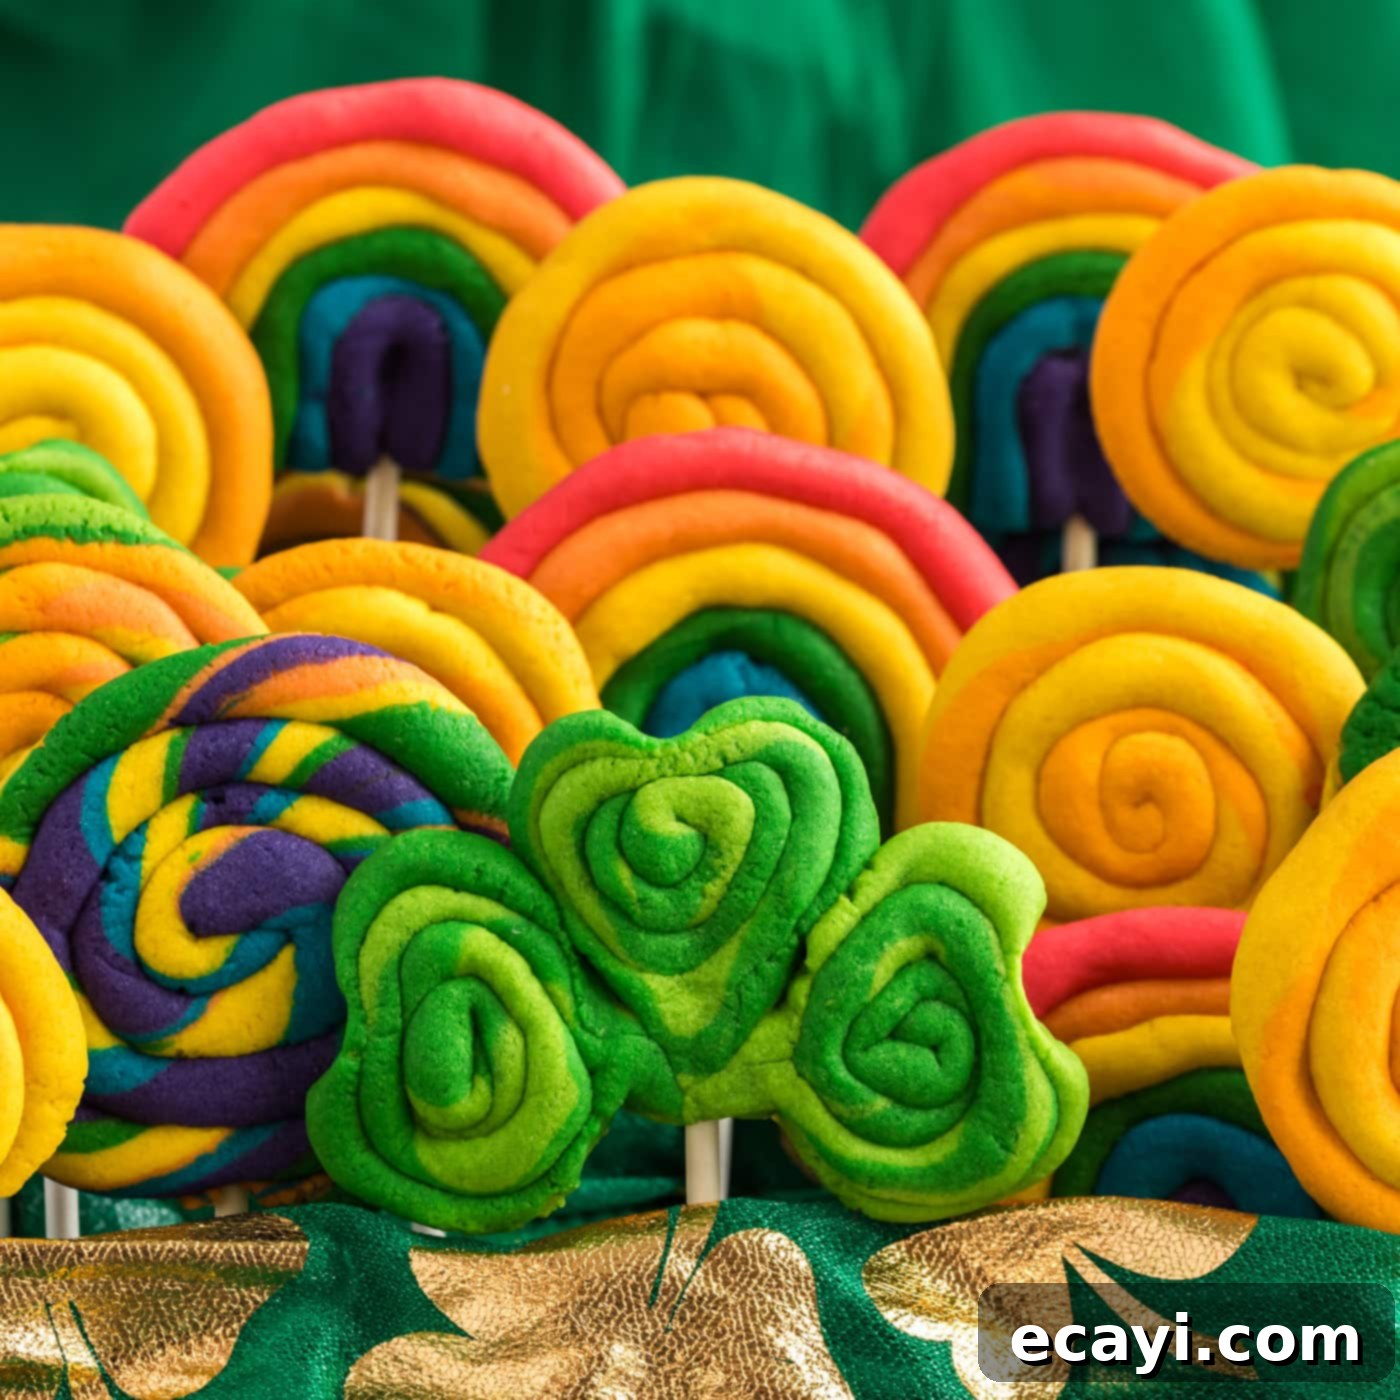
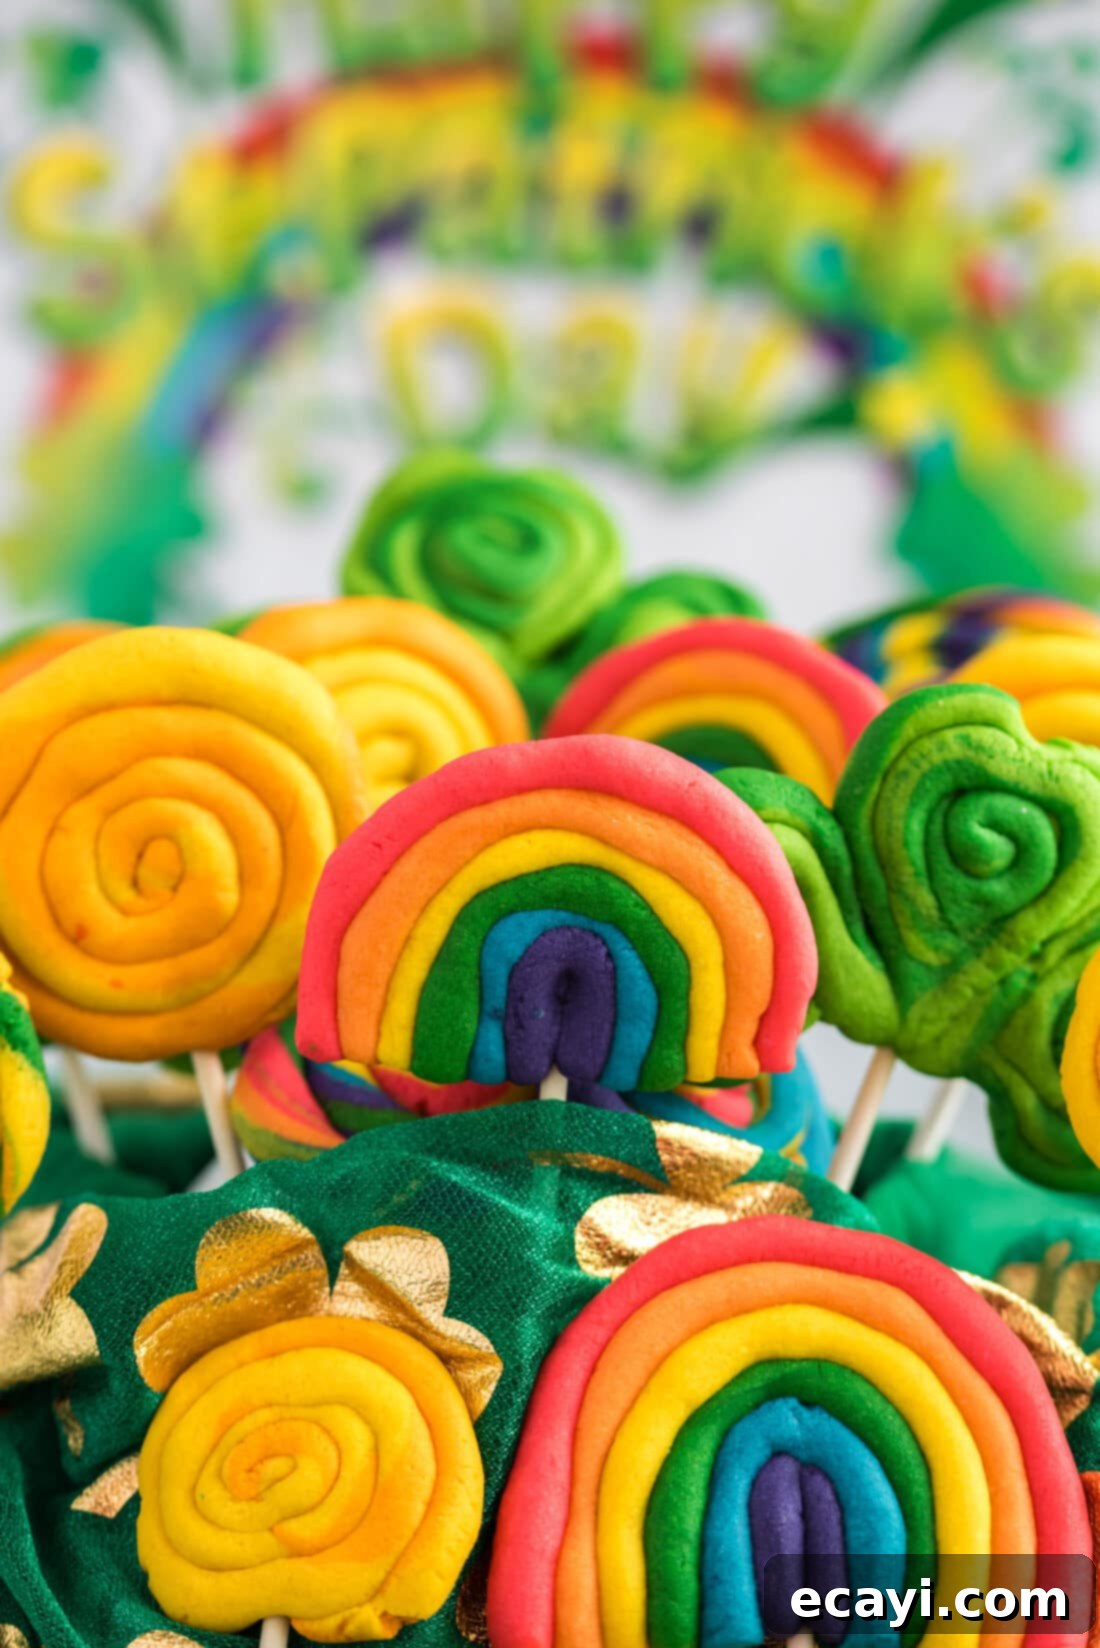
These St. Patrick’s Day cookies are more than just a treat; they’re an experience! They’re exceptionally colorful, incredibly easy to prepare, and offer a truly enjoyable baking project for all ages. What makes this recipe particularly stand out is its versatility and the sheer joy it brings. Whether you opt for simple yet charming gold coins, iconic green clovers, whimsical rainbow arches, or mesmerizing spiral rounds bursting with every color of the spectrum, you’re going to adore crafting these visually stunning and delicious sugar cookies. Each cookie is a little piece of edible art, perfect for adding a festive touch to your St. Patrick’s Day celebrations.
Beyond their vibrant appearance, these St. Patrick’s Day sugar cookies are surprisingly simple to master. Even if you’re a novice baker, you’ll find this recipe straightforward and rewarding. The key is to allow adequate time for your dough to chill in the refrigerator, which makes it much easier to handle and ensures your shapes hold perfectly during baking. This recipe encourages creativity and personalization. Feel free to mix and match your favorite shapes and colors, or create an entire batch dedicated to one design. The possibilities are endless, allowing you to tailor your cookies to your liking. It’s a fantastic way to engage the whole family in a fun, culinary activity that results in a beautiful and tasty reward.
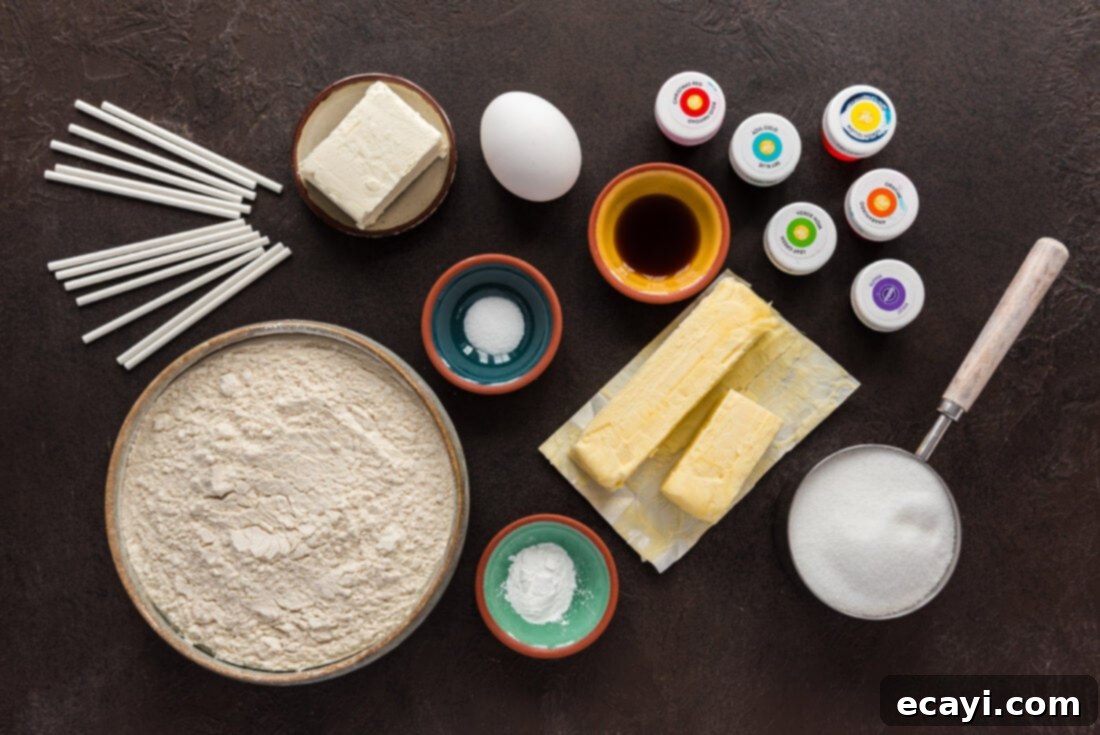
Essential Ingredients for Your St. Patrick’s Day Cookies
Gathering your ingredients is the first step to creating these festive treats. You’ll find a complete list of all measurements, specific ingredients, and detailed instructions in the printable recipe card located at the very end of this post. Having everything prepped and ready before you start mixing will ensure a smooth and enjoyable baking process.
Ingredient Spotlight & Expert Tips for Best Results
COOKIES – The foundation of these festive treats is a versatile sugar cookie dough. One of the most enjoyable aspects of this recipe is the creative freedom it offers. You can easily divide the dough into several sections, as we did, to produce a variety of different cookie designs – think adorable shamrocks, brilliant rainbows, lucky gold coins, or even whimsical twisted coil cookies. We affectionately refer to this dough as “play dough” because, in its raw, chilled state, it truly resembles colorful blobs of children’s play dough. But rest assured, these are 100% edible, wonderfully sweet sugar cookies that are sure to be a hit with everyone! For a similar creative experience, we’ve also adapted this recipe to make delightful Valentine’s Play Dough Cookies. The key to perfectly shaped cookies lies in adequately chilling the dough, which prevents spreading and ensures your intricate designs remain intact after baking. Don’t rush this step!
FOOD COLOR – To achieve the most stunning and vibrant cookies, we highly recommend using paste or gel food coloring. Unlike liquid food coloring, which can dilute your dough and require larger quantities, gel colors are highly concentrated. This means you’ll need significantly less to achieve intense, rich hues, preventing any unwanted changes to your dough’s consistency. A little truly goes a long way, so always start with a small amount on a toothpick and gradually build up to your desired shade. This careful approach ensures your cookies are as bright and festive as possible without compromising texture. For specific designs like the gold coins and shamrocks, creating different shades of the same color (e.g., light and dark yellow, light and dark green) adds wonderful depth and dimension to your finished cookies.
Crafting Your St. Patrick’s Day Cookie Masterpieces: A Step-by-Step Guide
These step-by-step photos and detailed instructions are designed to help you visualize each stage of making this recipe. For a convenient printable version of this recipe, complete with precise measurements and instructions, simply Jump to Recipe at the bottom of this page.
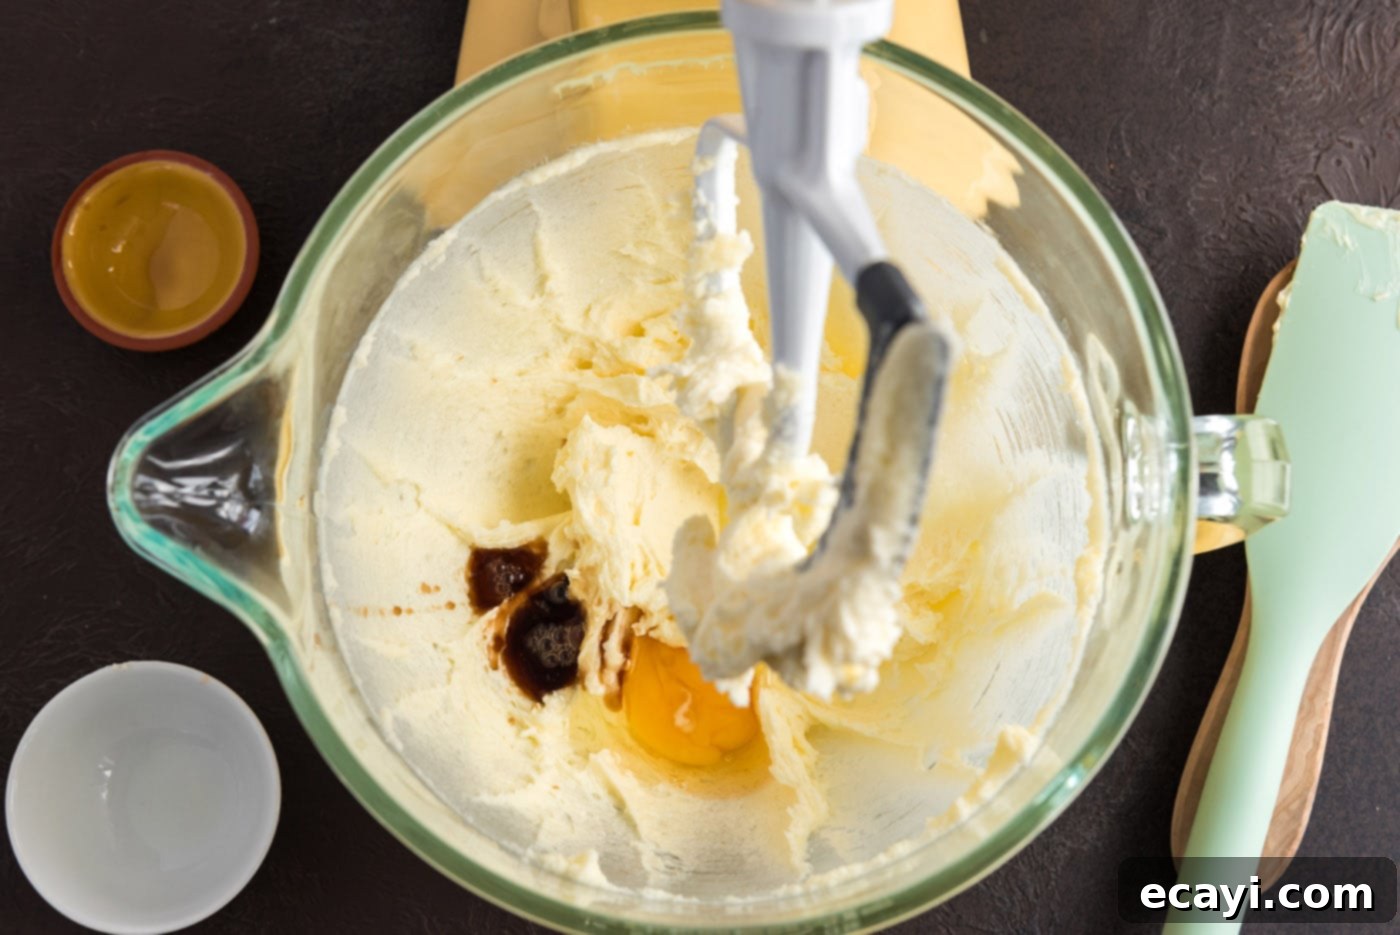
- Begin by creaming together the softened butter, cream cheese, and granulated sugar in a large mixing bowl until the mixture is light, fluffy, and well combined. This process incorporates air, contributing to a tender cookie. Next, add the large egg and vanilla extract, beating until the mixture is completely smooth and uniform.

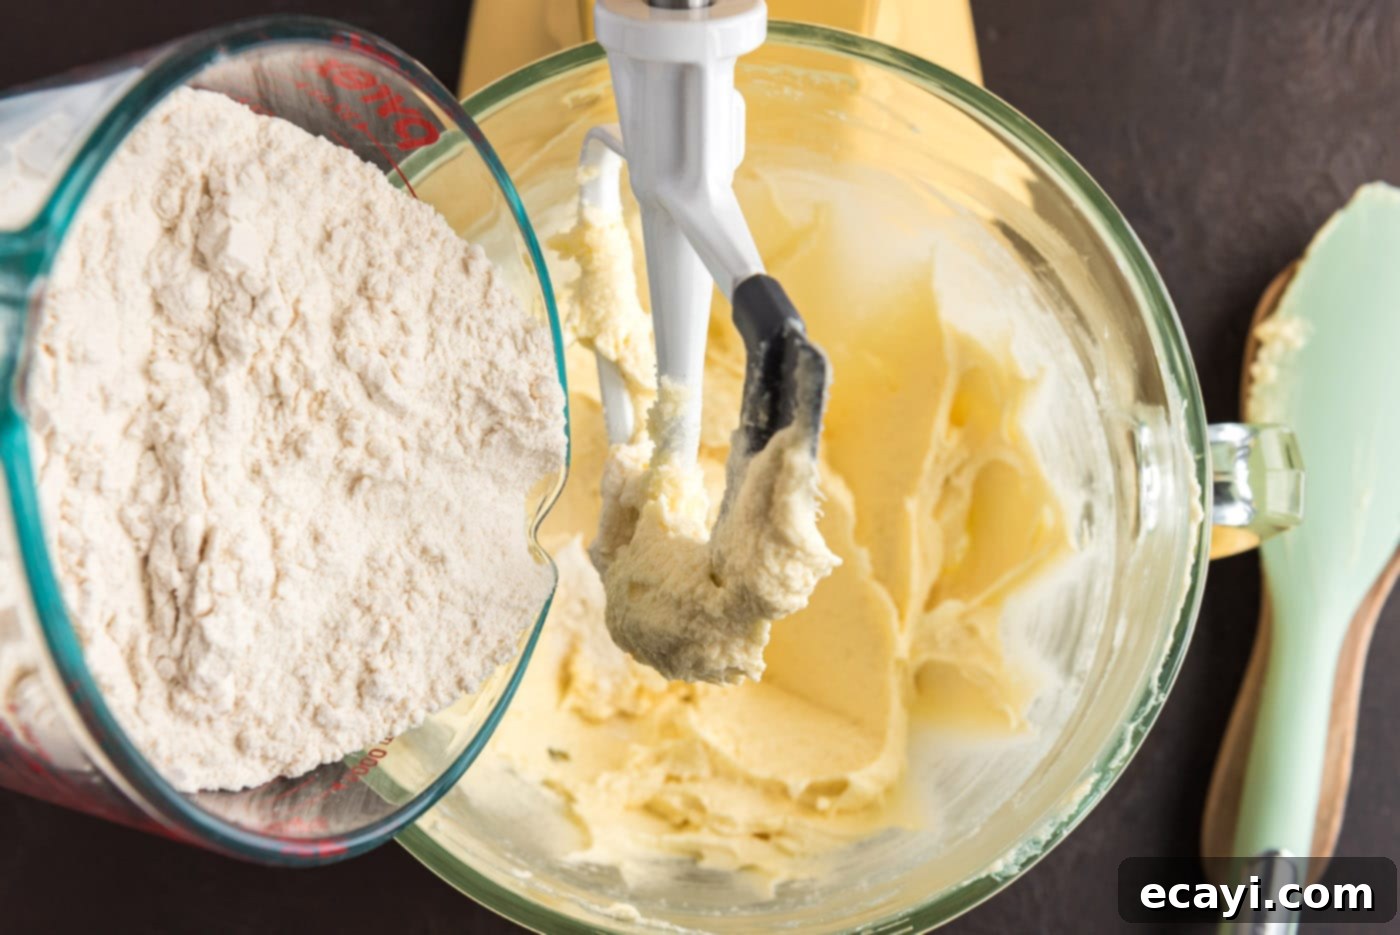
- In a separate medium-sized bowl, whisk together the all-purpose flour, baking powder, and salt. Gradually add these dry ingredients to your creamed wet mixture, mixing on low speed until a soft, pliable dough just begins to form. Be careful not to overmix, as this can result in tough cookies.

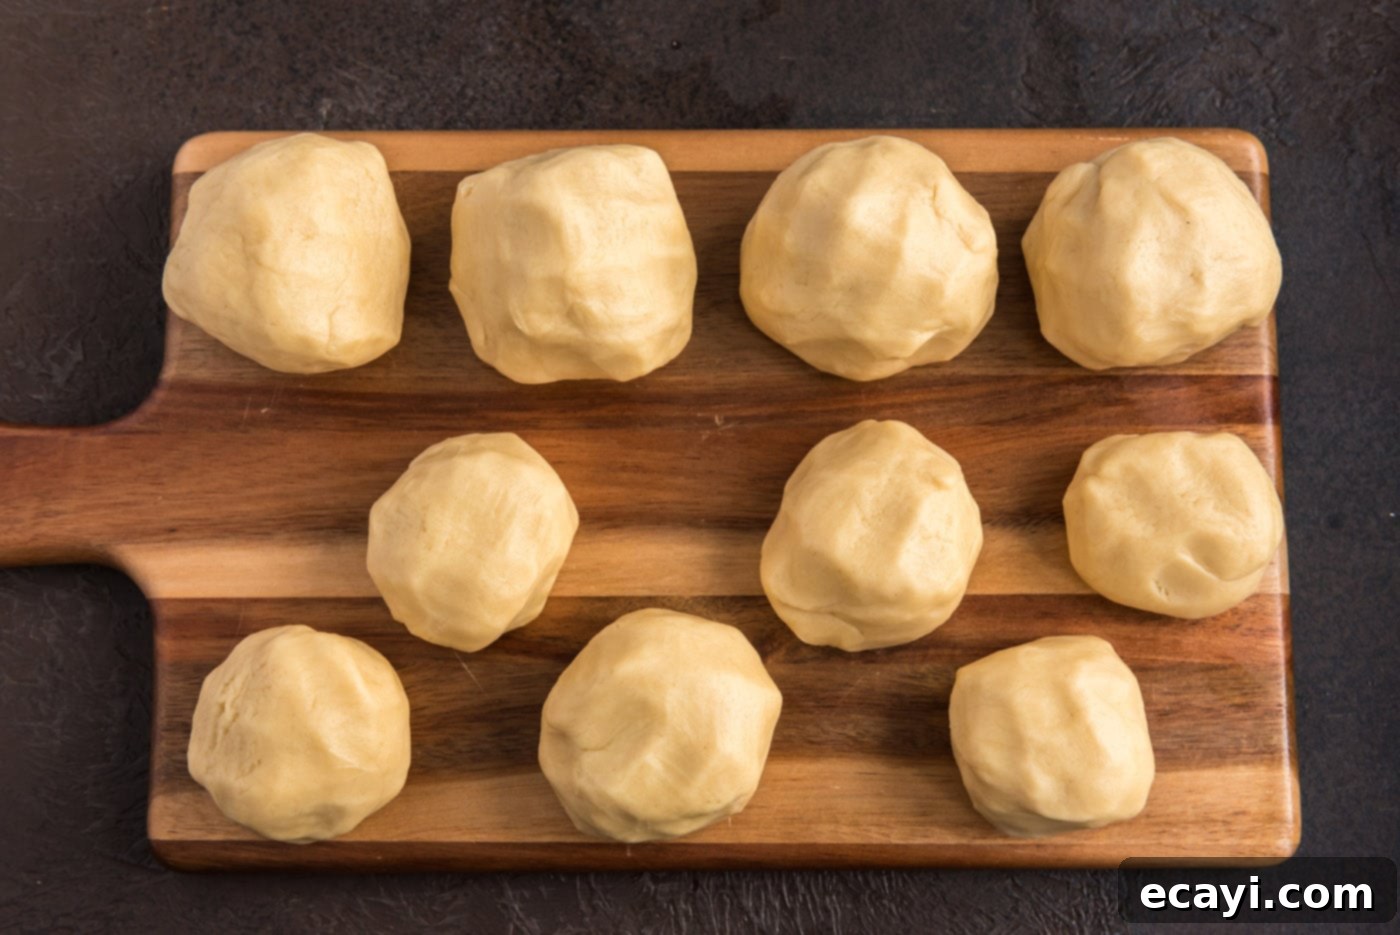
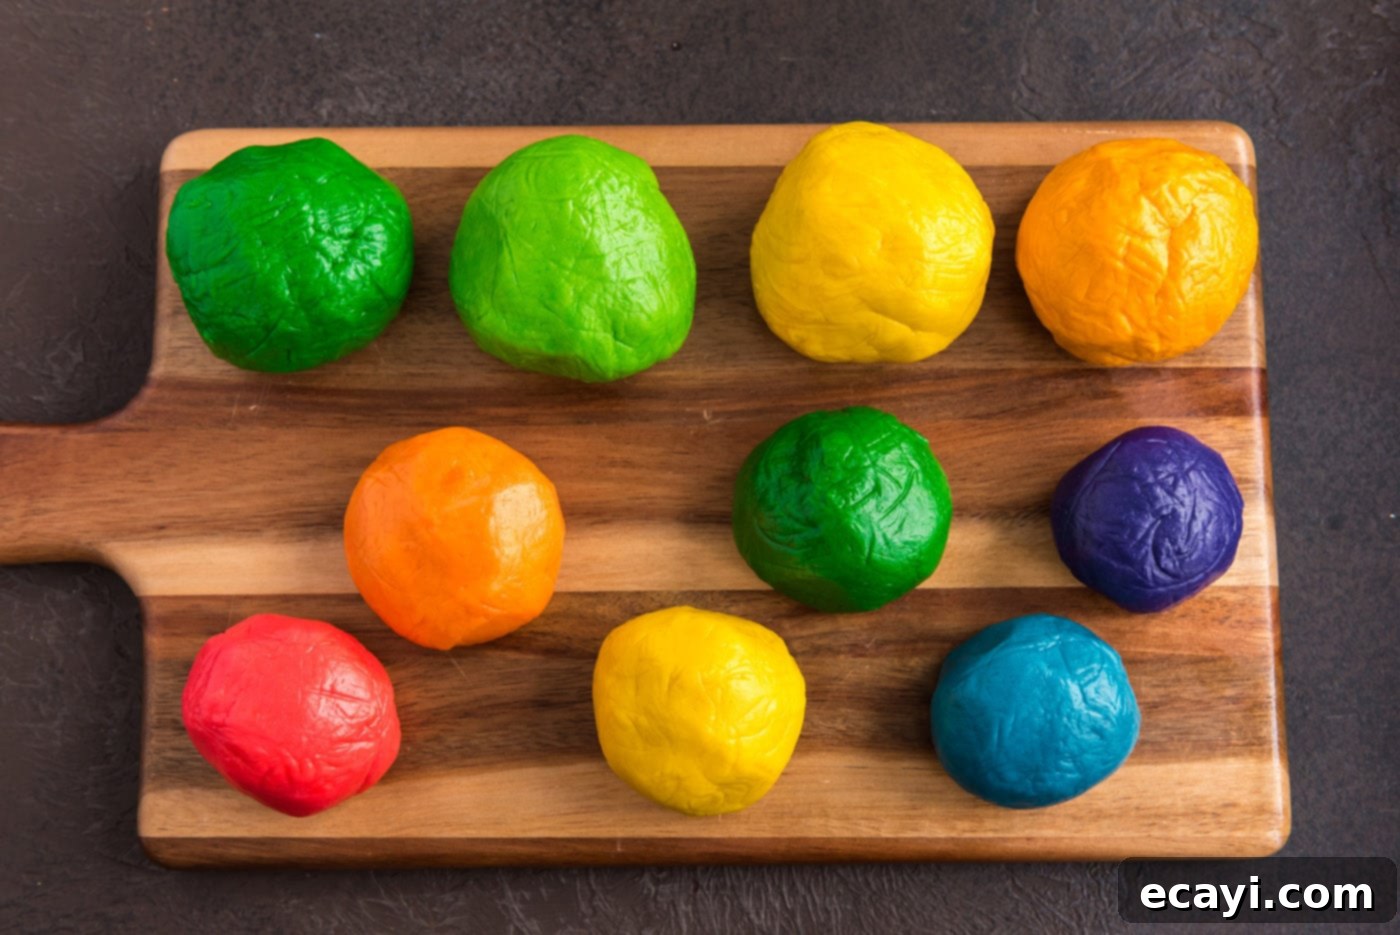
- Now comes the fun part: separating and coloring your dough! Divide the entire dough batch into sections. For a rainbow effect, you’ll need six pieces. We used gel food coloring to tint each of these six sections a distinct color of the rainbow: red, orange, yellow, green, blue, and indigo (purple). For the remaining dough, separate it into four pieces. Tint two of these pieces green (one darker than the other for visual interest) and the other two yellow (again, aiming for a slight contrast, though you might add a tiny bit of orange to one yellow batch to ensure a noticeable difference). The green dough is designated for your shamrocks, and the yellow dough for your gold coins. After thoroughly tinting each section, wrap each colored dough ball individually in plastic wrap and chill them in the refrigerator for at least two hours. This crucial step stiffens the dough, making it much easier to work with and preventing your cookies from spreading too much during baking.
- Once your dough is thoroughly chilled and you’re ready to start shaping your cookies, preheat your oven to 350 degrees F (175 degrees C). Having the oven ready when your creations are formed ensures optimal baking.


Crafting Lucky Gold Coin Cookies
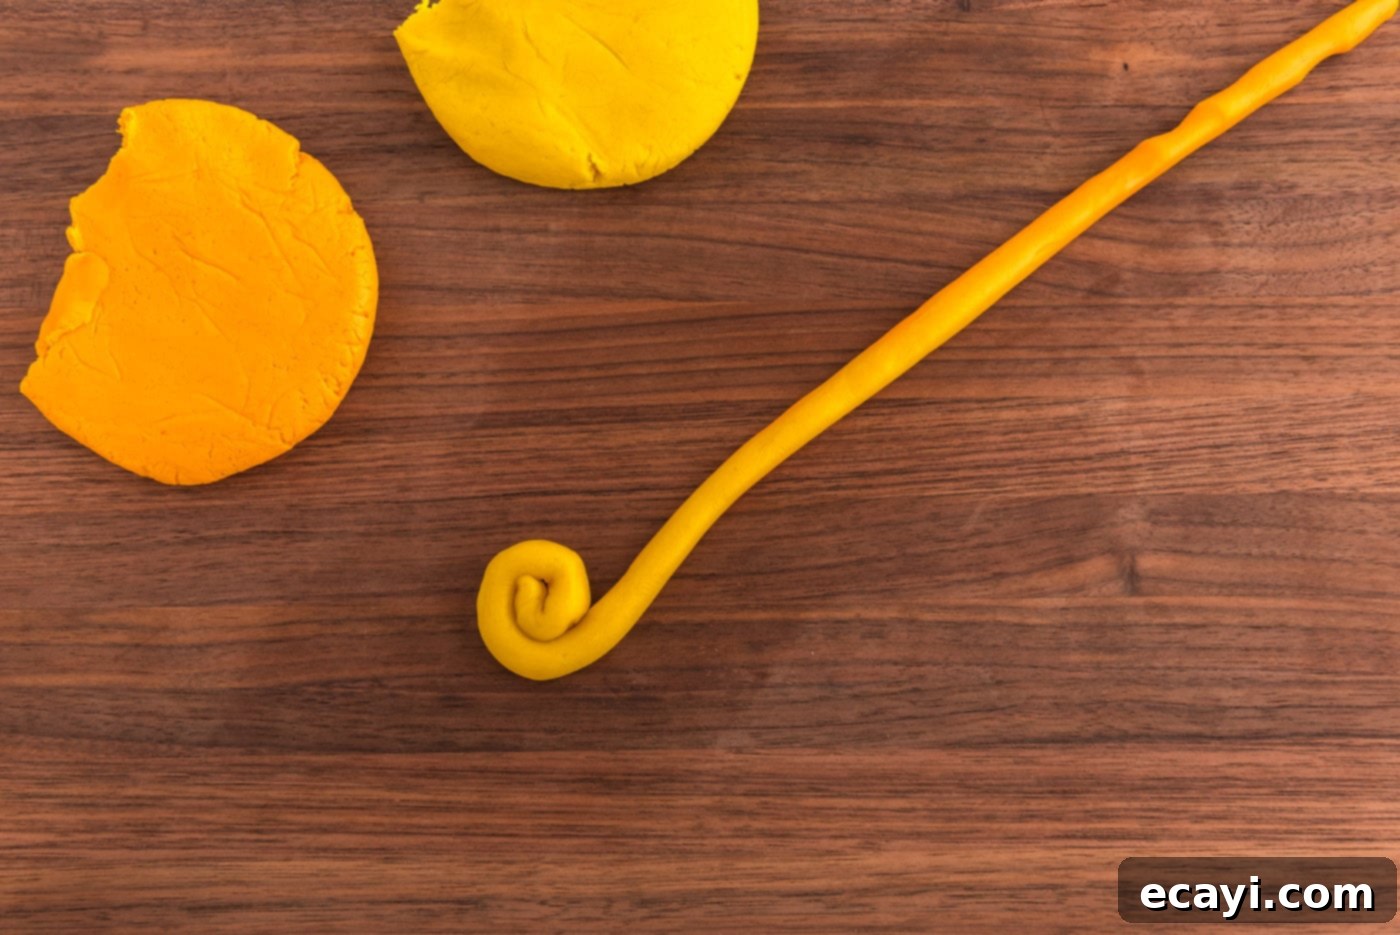
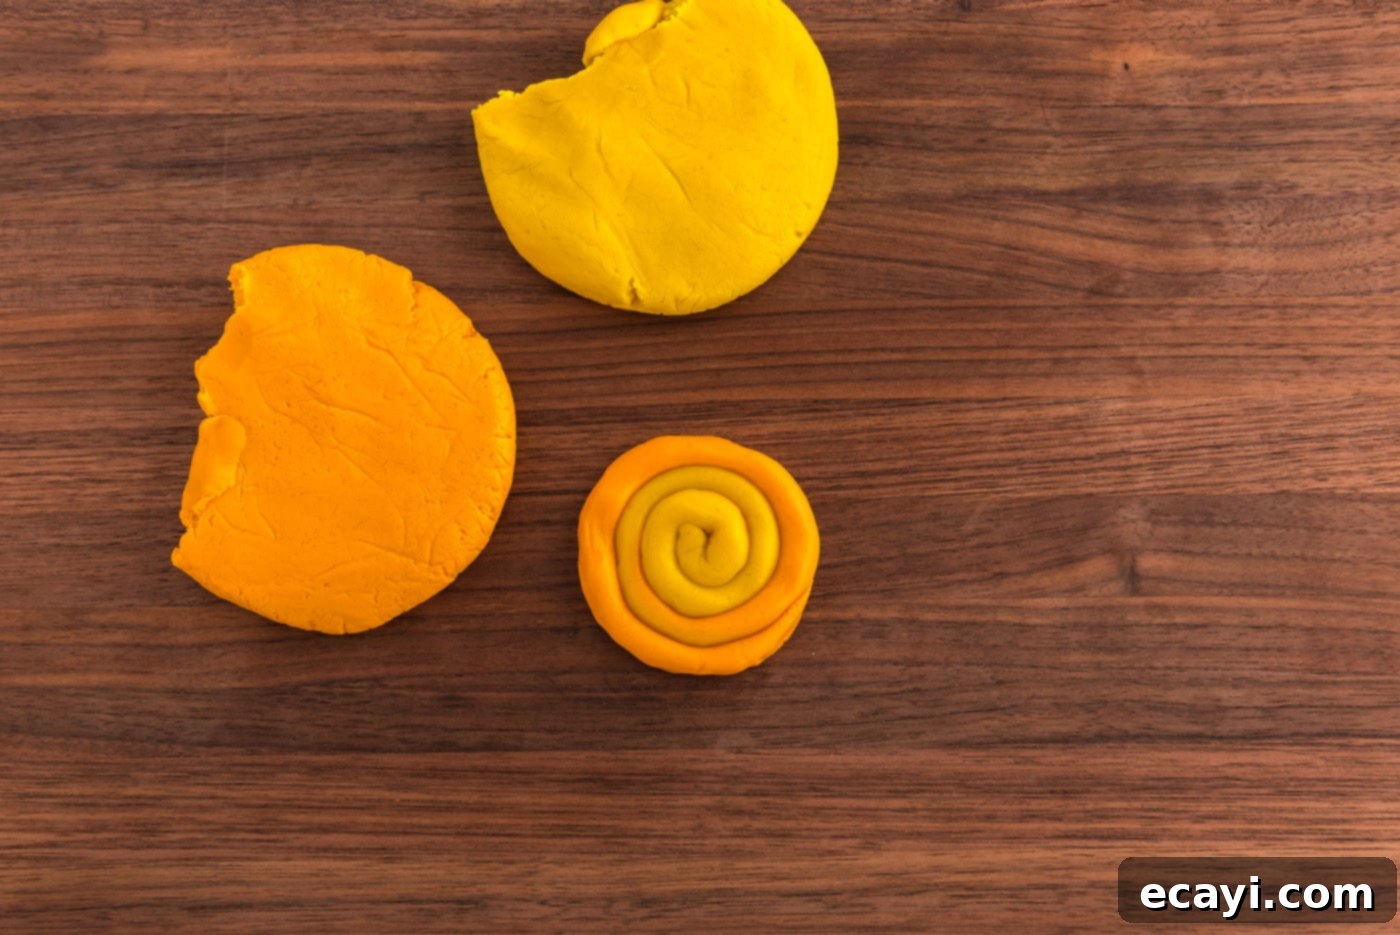
- The gold coin cookies are wonderfully straightforward to make, making them a great starting point or an activity for younger helpers. Take equal amounts of your two distinct yellow-tinted doughs – approximately a 3/4-inch ball of each. Gently roll these two balls together in your palms, just enough to combine them into a marbled pattern without fully blending the colors. The slight variation in yellow will create a beautiful, authentic “gold” effect. Next, using the palms of both hands, roll this marbled dough ball into a long snake, aiming for about 10-12 inches in length. Work gently to keep the colors distinct. Finally, starting from one end, carefully coil the dough snake tightly into a spiral to form your gold coin cookie. Place these on a parchment-lined baking sheet.


Shaping Perfect Green Shamrocks
- To create charming shamrock cookies, you’ll need three distinct green “discs” for each shamrock.
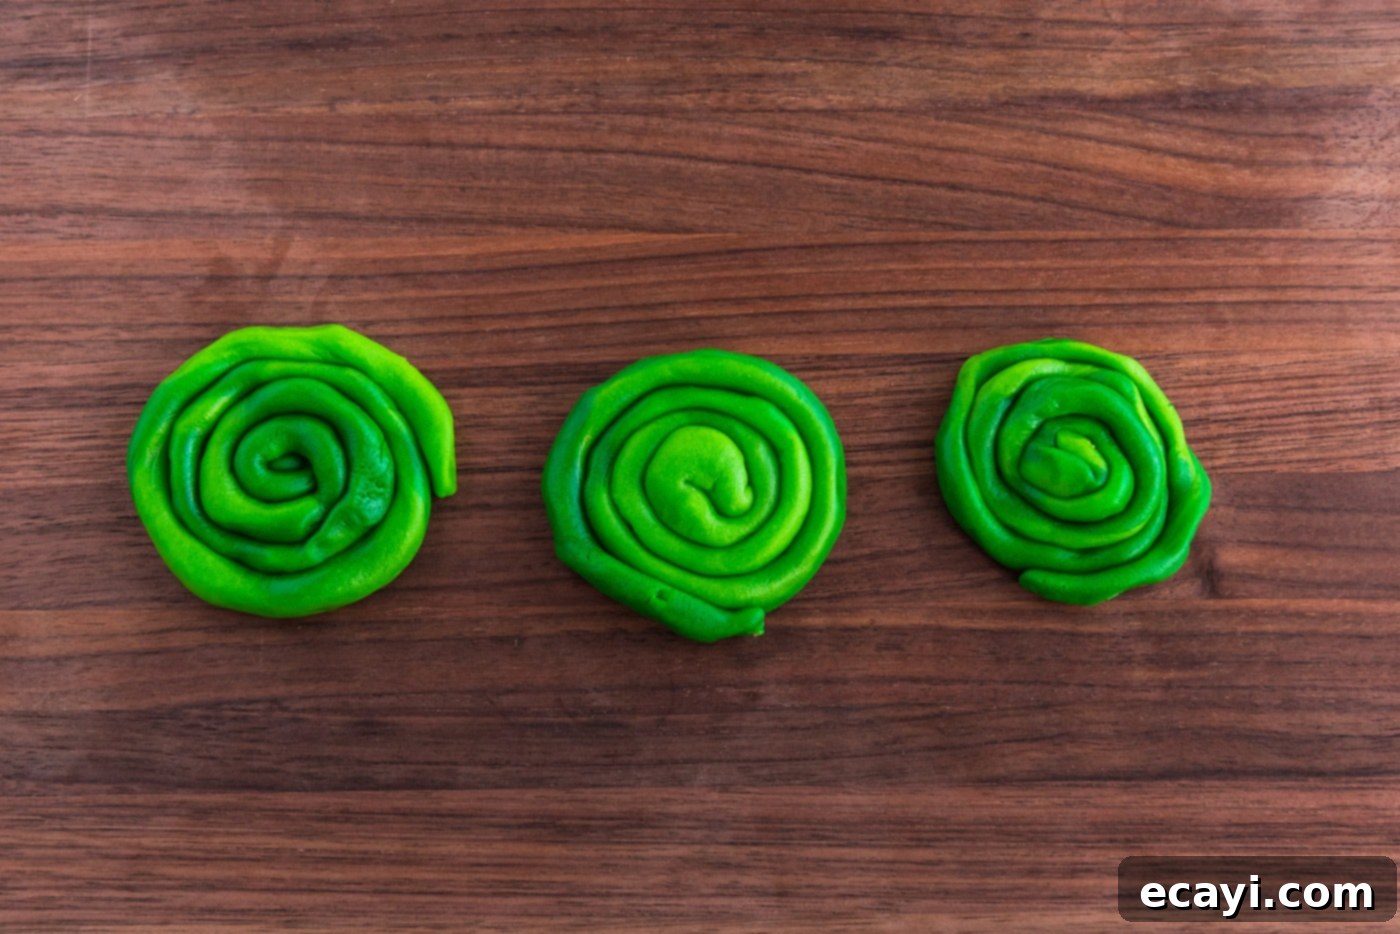
- Similar to the gold coins, take approximately a 3/4-inch ball from each of your two different shades of green dough. Gently roll these two balls together until they are just combined, creating a subtle marbled green effect. Then, using both palms, roll this combined dough into a snake about 10-12 inches long. From this snake, you will form your individual shamrock leaves.

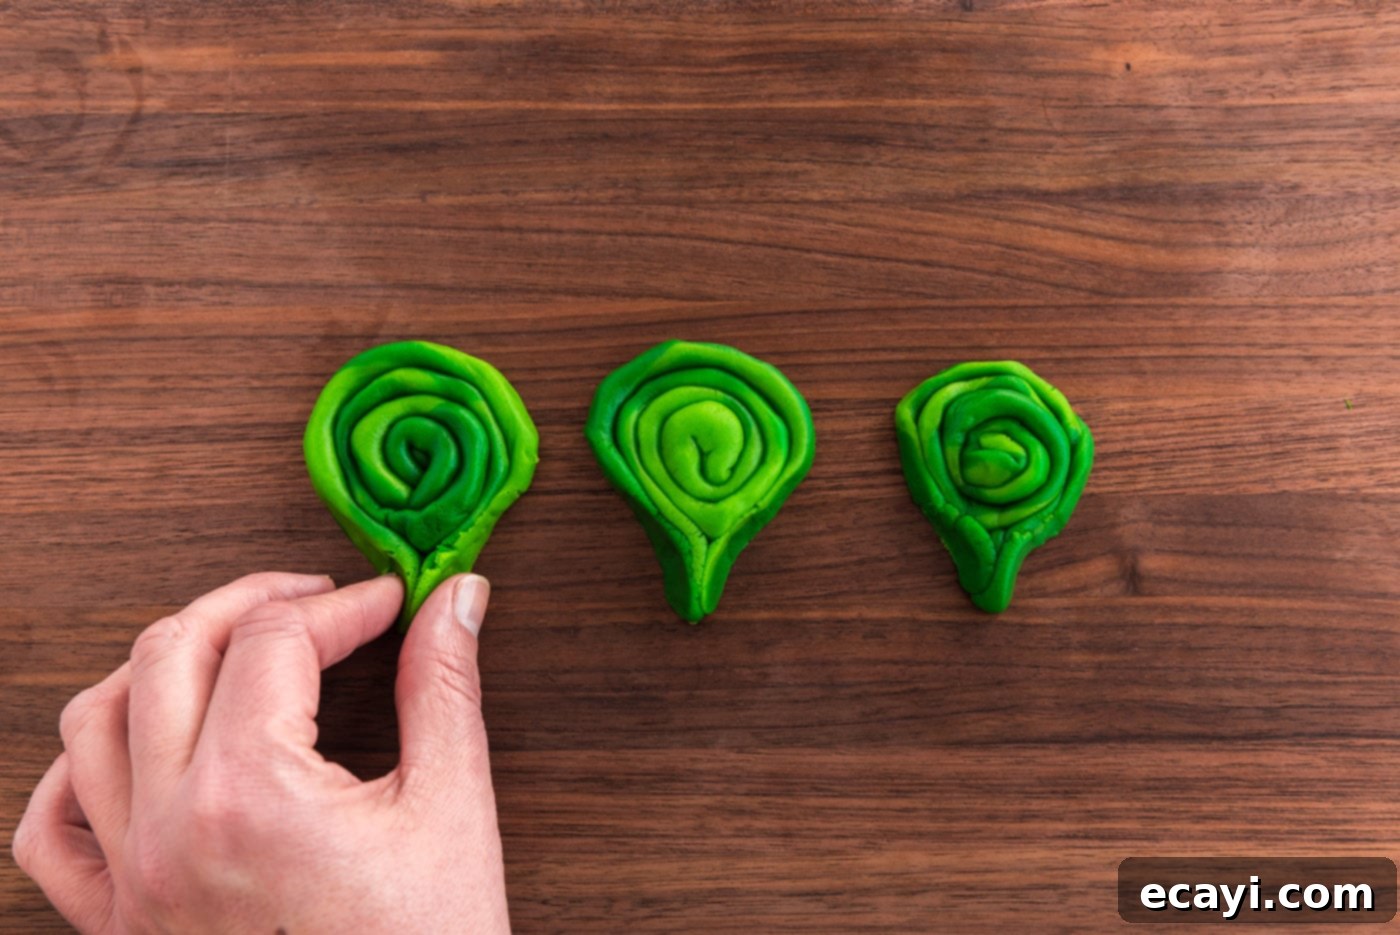
- To form the heart shape for each leaf, take a portion of your green snake and coil it into a small disc. Where the coiled end meets, gently pinch the dough into a distinct point. This forms the bottom of your heart shape.

- Next, use the blunt edge of a butter knife or the tip of a lollipop stick to create a small, shallow dent at the opposite (top) end of the pinched disc. This indentation will complete the classic heart shape of your shamrock leaf.
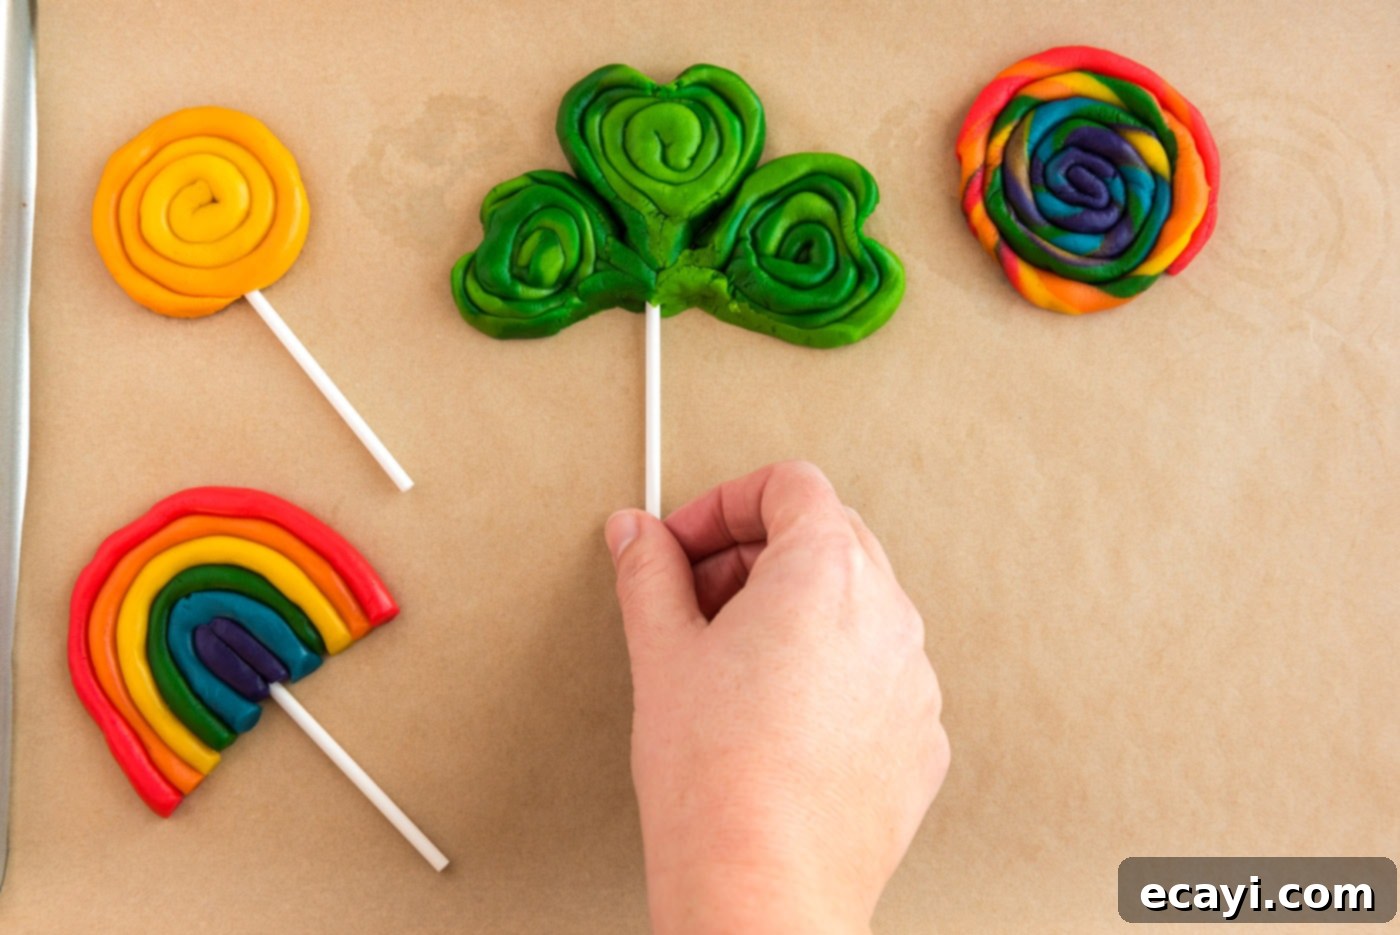
- Once you have three perfectly shaped green hearts, carefully arrange them together on your baking sheet so they meet in the center, forming a shamrock. For a fun twist, you can gently insert an oven-safe lollipop stick into the base of the shamrock where the three hearts meet, creating a cookie pop. Ensure the stick is securely embedded in the dough.

Baking a Pot of Gold: Easy Rainbow Cookies
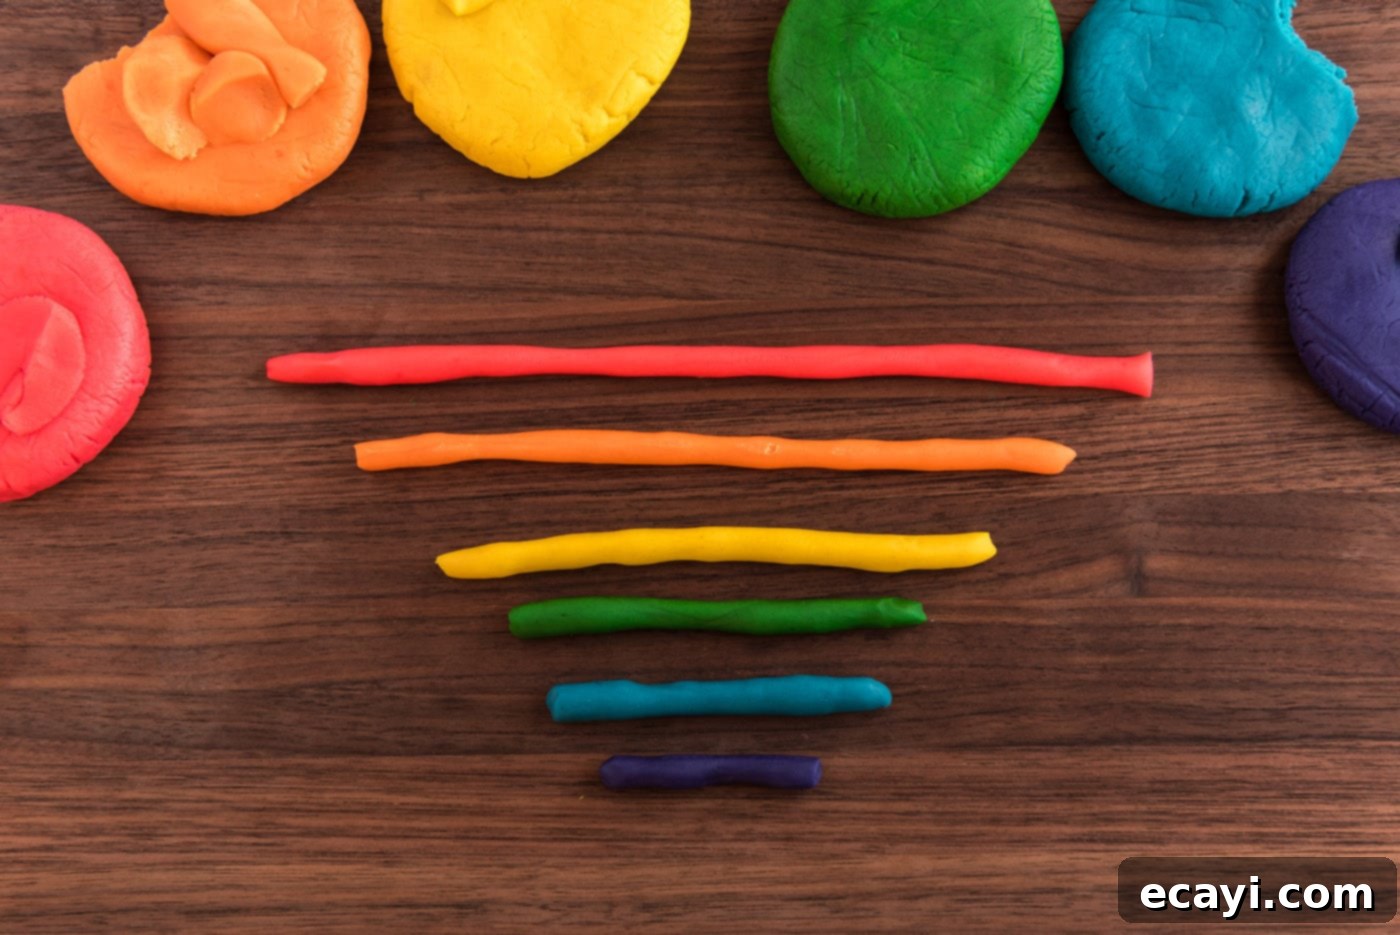
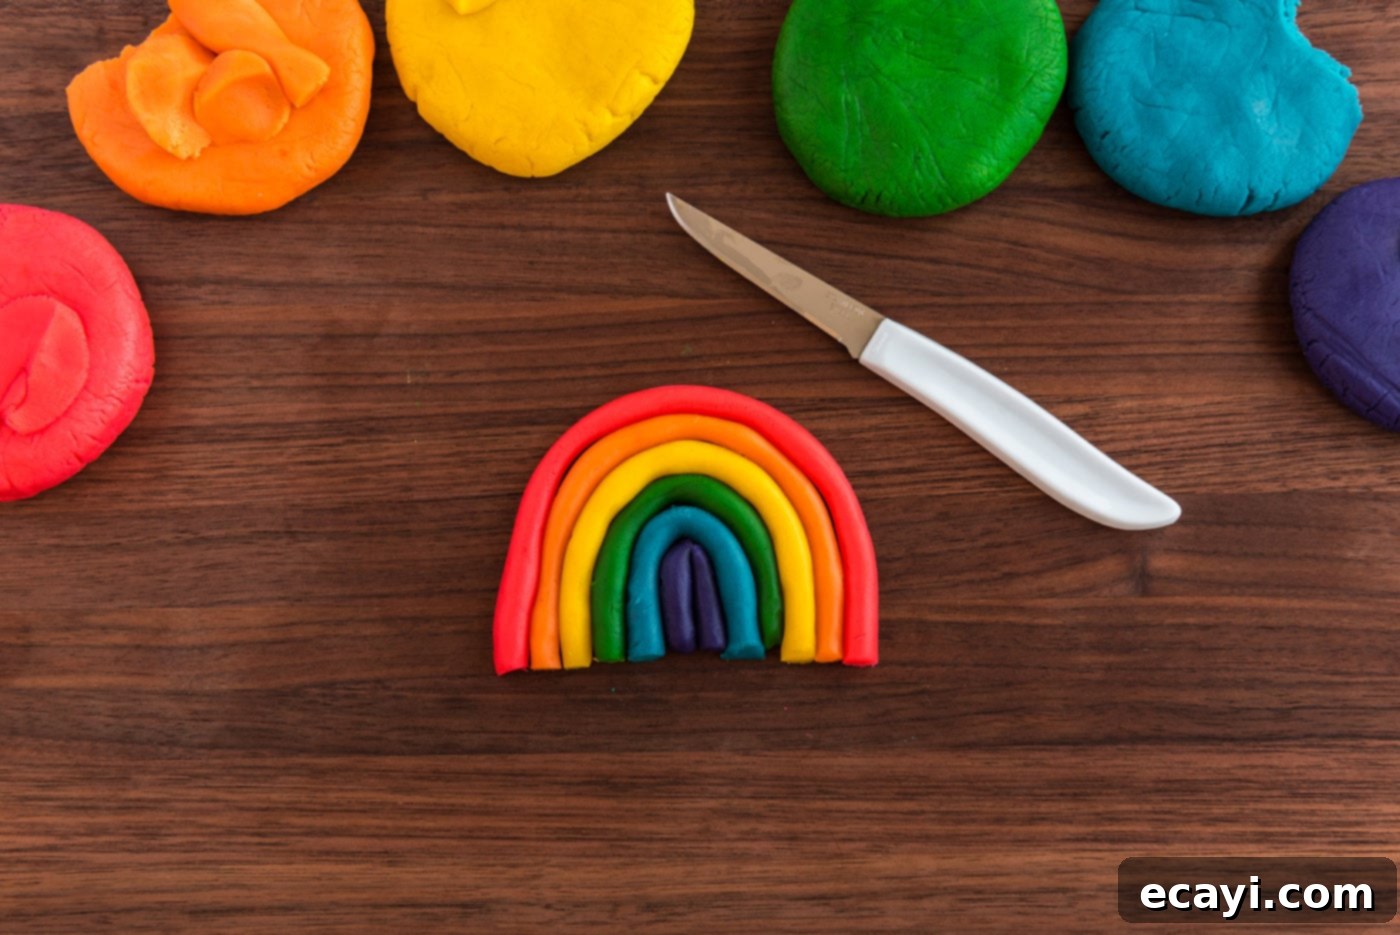
- For these vibrant rainbow cookies, take each of your rainbow-colored dough sections (red, orange, yellow, green, blue, and indigo/purple) and roll them into individual snakes. Aim for varying lengths and thicknesses to create a natural, arching rainbow effect. Arrange the snakes next to each other in the traditional rainbow order, with the smallest (purple) on the inside and the largest (red) on the outside, gently curving them to form an arch. Carefully press them together to ensure they stick during baking. For an extra touch of whimsy, you can insert an oven-safe lollipop stick into the base of the rainbow to create a beautiful cookie pop. These will bring a smile to anyone’s face!


Mesmerizing Rainbow Twisted Coil Cookies
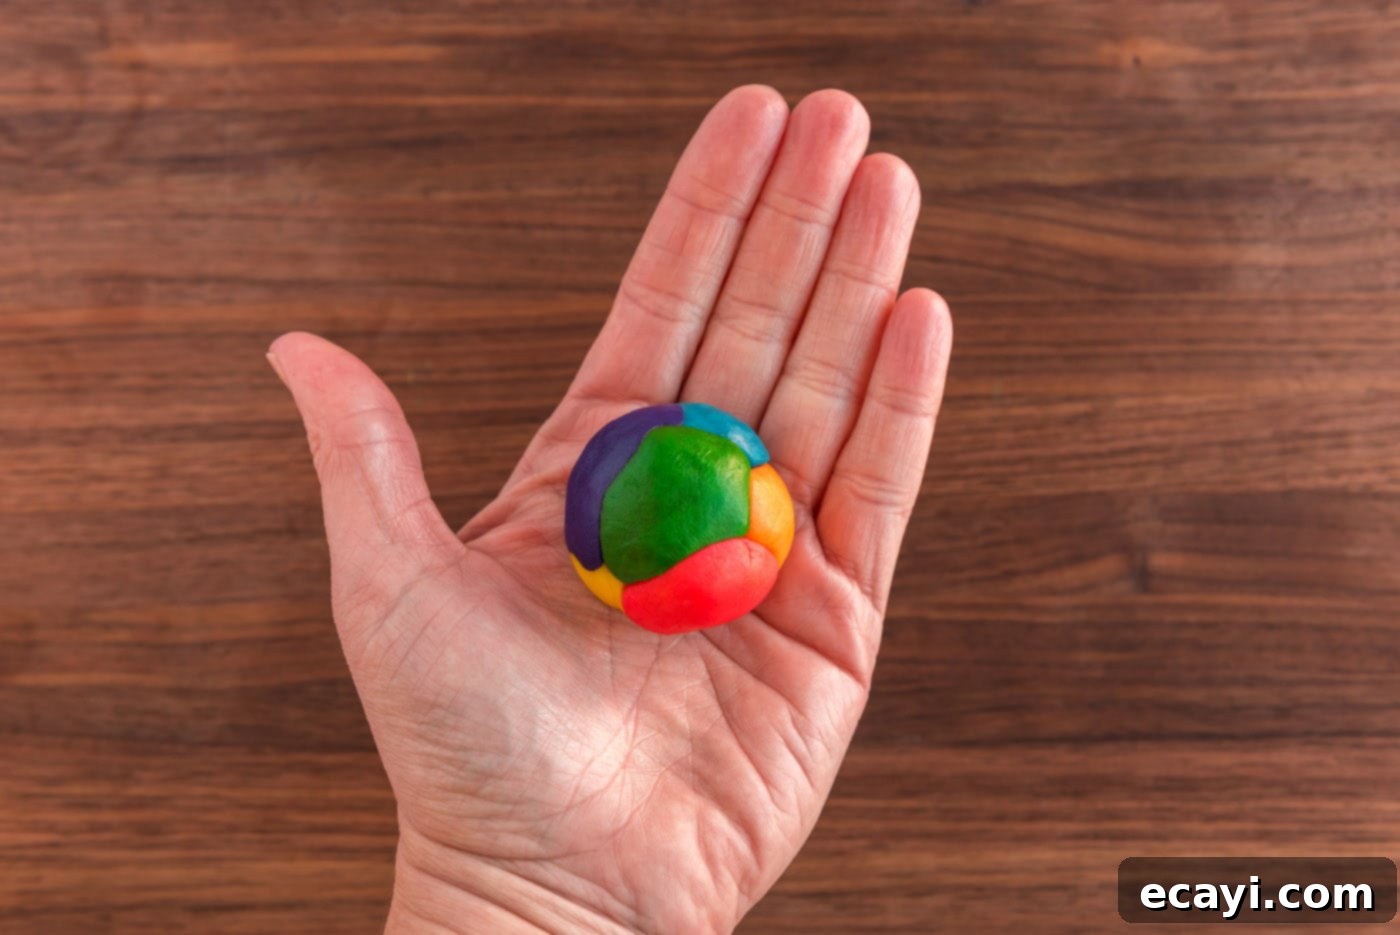
- To create these visually striking rainbow twisted coil cookies, you’ll need a small, approximately 1/2-inch ball of each of your rainbow-colored doughs. This technique creates a beautiful marbled effect.
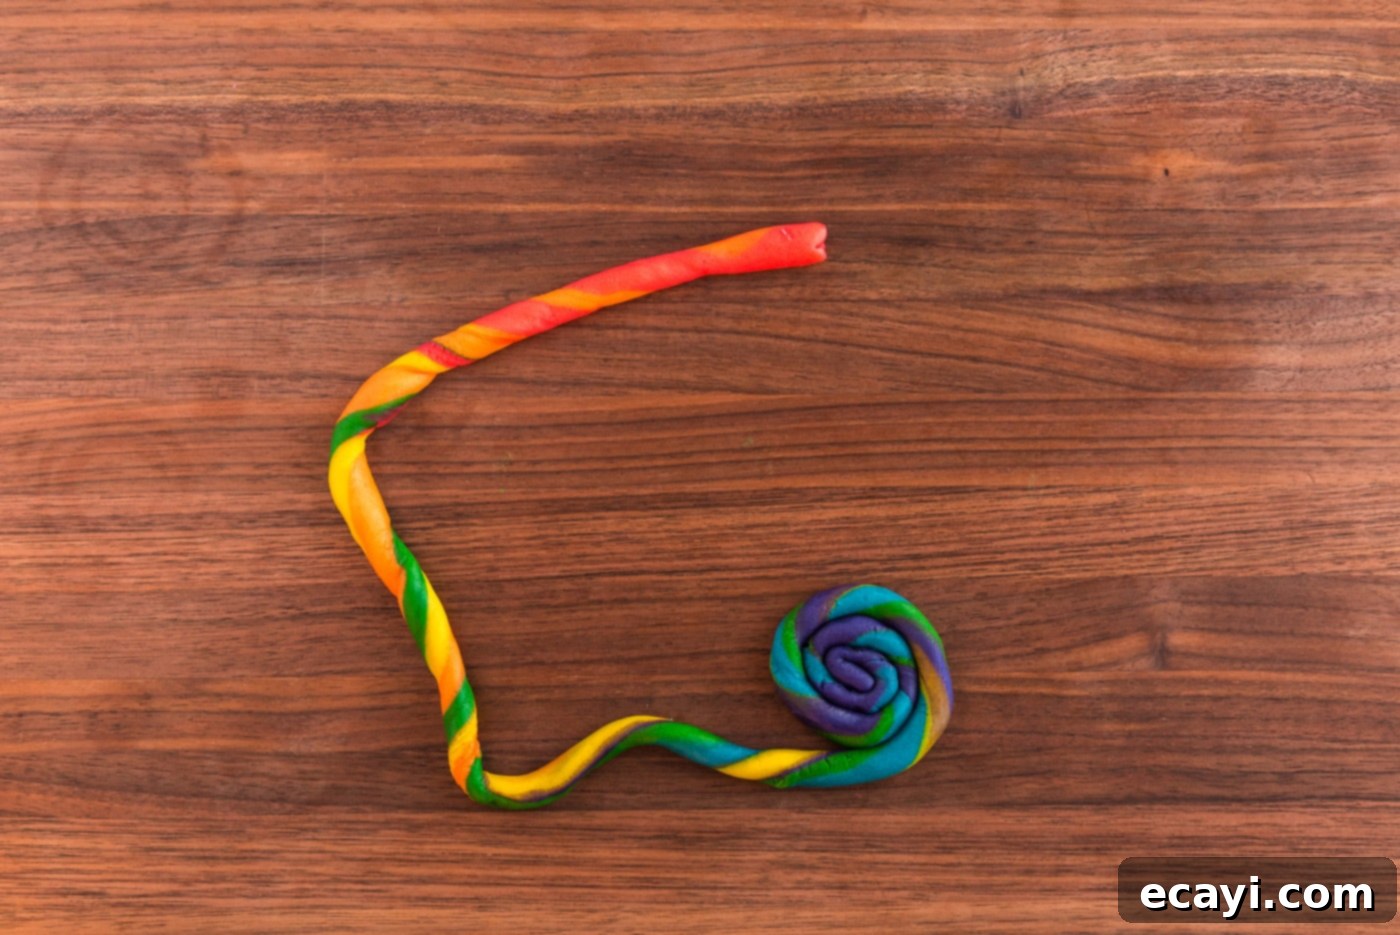
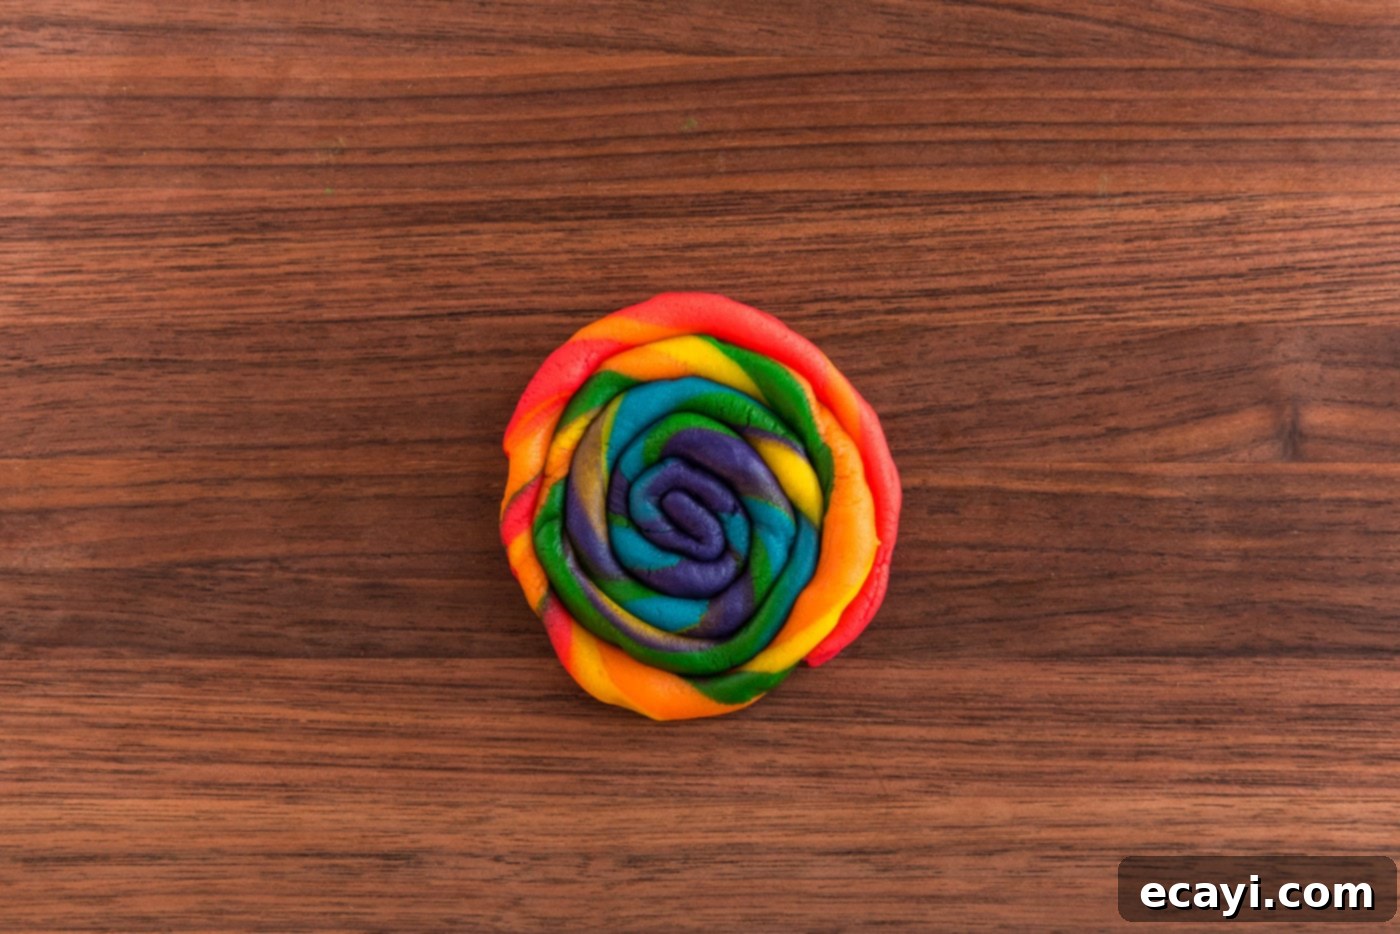
- Gently bring all the small colored dough balls together and carefully combine them into one larger, multi-colored ball. Avoid overmixing if you want distinct swirls. From this point, you have two options: you can either roll the combined ball directly into a long snake, then coil that snake into a tight spiral for a multi-colored coin effect, or you can gently twist the combined dough before rolling it into a snake to create a more dynamic, swirled pattern before coiling. The swirling pattern will be unique to each cookie, making them extra special.
TIP – Don’t be discouraged if your dough snake breaks a couple of times while you’re rolling it. This can happen, especially with multiple colors. Simply pinch the broken pieces back together gently, and it will bake up perfectly fine, often adding to its unique charm.


- Once all your cookies are shaped and placed on a parchment-lined baking sheet, transfer them to the preheated oven. Bake them for approximately 8 minutes, or until the edges are just lightly browned and the centers are set. Baking times can vary slightly depending on your oven and the thickness of your cookies, so keep a close eye on them. Once baked, carefully remove the cookies from the oven and let them cool on the baking sheet for a few minutes before transferring them to a wire rack to cool completely. Once fully cooled, store them in an airtight container to maintain their freshness and delicious texture.
Frequently Asked Questions & Expert Tips for Success
To keep your beautiful St. Patrick’s Day cookies fresh and delicious, store them in an airtight container at room temperature. They will maintain their quality and flavor for 4-5 days. For optimal freshness and to prevent them from drying out, you can place a slice of bread in the container with the cookies; the bread will absorb moisture and keep the cookies soft.
Absolutely! This versatile cookie dough freezes exceptionally well, allowing you to prepare ahead for your St. Patrick’s Day celebrations. After you’ve chilled the dough in the refrigerator as per the recipe, wrap each individual dough ball or section tightly in plastic wrap. Then, place these wrapped portions into a large freezer bag, removing as much air as possible before sealing. You can freeze the dough for up to 3 months. When you’re ready to bake, simply thaw the dough in the refrigerator overnight, then proceed with shaping and baking as directed. You can also bake directly from frozen, adding a few extra minutes to the baking time.
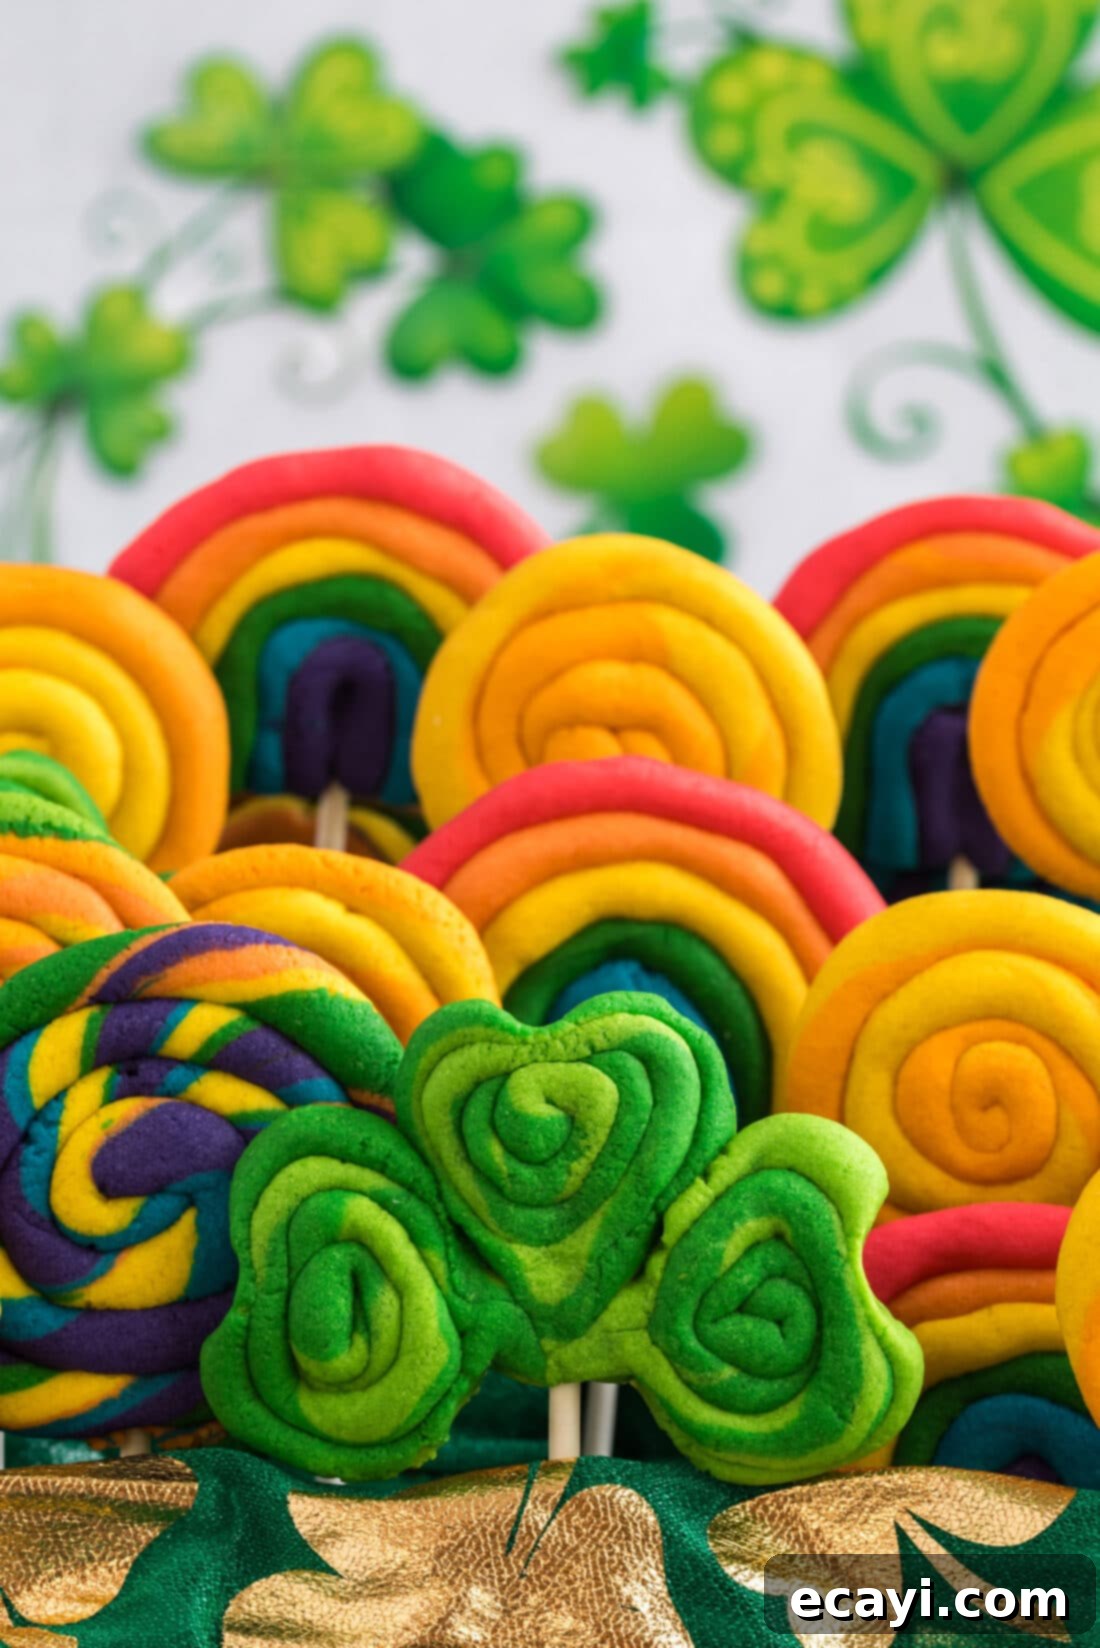
Yes, absolutely! Adding lollipop sticks transforms these cookies into fun, handheld treats, perfect for parties or gift-giving. Just ensure you use oven-proof lollipop sticks. Gently insert the stick into the back side of the shaped dough before placing it on the baking sheet. Make sure the stick is embedded securely into the dough so it doesn’t fall out when picked up after baking. This works particularly well for rainbow arches and shamrocks, creating festive cookie pops!
Chilling the dough is paramount! Ensure your dough is properly chilled for at least 2 hours, or even longer, before rolling and shaping. Cold dough helps the butter stay solid longer in the oven, preventing excessive spreading. Also, don’t overcrowd your baking sheets; leave enough space between cookies for even baking and to prevent them from merging.
Yes, these sugar cookies are an excellent canvas for further decoration. Once cooled completely, you can decorate them with royal icing for intricate designs, simple glaze icing, or even just a sprinkle of edible glitter or sugar for extra sparkle. For shamrocks, a white or green icing can add a lovely outline, and for gold coins, a touch of edible gold dust can enhance their shimmer!
Delightful Serving & Gifting Ideas
These festive St. Patrick’s Day cookies are perfect for a wide range of occasions. Serve them simply with a tall, refreshing glass of milk for a classic treat that kids and adults alike will adore. They’re also wonderfully suited for gift-giving: arrange a selection of different shapes and colors in clear cellophane baggies, tie them with a vibrant green or rainbow-colored bow, and you have a thoughtful, homemade gift. This recipe provides an ideal opportunity to get creative in the kitchen with your children! They will absolutely love the hands-on experience of shaping the colorful dough and watching their unique creations bake into these incredibly vibrant and delicious cookies. Consider adding them to a St. Patrick’s Day dessert board alongside other themed treats, or as a sweet ending to your holiday meal. Their cheerful appearance makes them a fantastic centerpiece for any celebration!
Explore More St. Patrick’s Day Delights
If you’re planning a full St. Patrick’s Day feast or just looking for more festive treats, be sure to check out these other amazing recipes:
- Rainbow Pancakes
- Shamrock Shaped Brownies
- Naturally Green Shamrock Shakes
- Bailey’s Irish Cream Chocolate Fudge
I love to bake and cook and share my kitchen experience with all of you! Remembering to come back each day can be tough, that’s why I offer a convenient newsletter every time a new recipe posts. Simply subscribe and start receiving your free daily recipes!

St. Patrick’s Day Cookies
IMPORTANT – There are often Frequently Asked Questions within the blog post that you may find helpful. Simply scroll back up to read them!
Print It
Pin It
Rate It
Save ItSaved!
Ingredients
- ¾ cup unsalted butter softened
- 3 ounces cream cheese
- 1 cup granulated sugar
- 1 large egg
- 1 teaspoon vanilla extract
- 2 ¾ cup all purpose flour
- 1 teaspoon baking powder
- ¼ teaspoon salt
- gel food coloring in red, orange, yellow, green, blue and indigo (purple).
Things You’ll Need
-
Electric mixer
-
Lollipop sticks optional. Make sure they are oven-proof
-
Baking sheet
Before You Begin
- This recipe is versatile and can yield anywhere from 20-30 cookies, depending on the specific shapes and sizes you choose to make. The nutrition facts provided are estimates, as the exact size and weight of each individual cookie will naturally vary.
- For the most vibrant and eye-catching cookies, it is highly recommended to use paste or gel food coloring. These types of food coloring are much more concentrated than liquid versions, meaning you’ll need less to achieve intense colors, and they won’t alter the dough’s consistency as much. Always start with a very small amount and gradually add more until you reach your desired shade.
- Feel free to unleash your creativity! You can divide the dough into multiple sections to create a variety of different cookie types – such as shamrocks, rainbows, gold coins, or twisted coil cookies – or dedicate the entire batch to your absolute favorite shape.
- Chilling the dough is a critical step that should not be skipped. A properly chilled dough is much easier to handle, preventing stickiness and ensuring your intricate shapes hold their form beautifully during baking, minimizing spread.
- To prevent sticking and ensure easy cleanup, always line your baking sheets with parchment paper or a silicone baking mat. This also promotes even browning on the bottom of the cookies.
Instructions
-
In a large bowl, using an electric mixer, cream together the softened unsalted butter, cream cheese, and granulated sugar until the mixture is light, fluffy, and smooth. This typically takes 2-3 minutes.
-
Beat in the large egg and vanilla extract until well combined and the mixture is completely smooth. Scrape down the sides of the bowl as needed.
-
In a separate medium bowl, whisk together the all-purpose flour, baking powder, and salt. Gradually add these dry ingredients to the wet mixture in the large bowl, mixing on low speed until a soft dough forms. Be careful not to overmix the dough.
-
Divide the dough into two main batches. For the rainbow cookies, separate one batch into 6 equal pieces and tint each piece with gel food coloring in the colors of the rainbow: red, orange, yellow, green, blue, and indigo (purple). For the shamrocks and gold coins, separate the second batch into 4 pieces. Tint two pieces green (one darker than the other) for shamrocks and the remaining two pieces yellow (again, one darker than the other, or add a touch of orange to one yellow for better contrast) for gold coins.
-
Wrap each individual colored dough ball tightly in plastic wrap and chill them in the refrigerator for a minimum of two hours. This step is essential for easy handling and to prevent cookies from spreading.
-
Once the dough is chilled and you are ready to begin shaping your cookies, preheat your oven to 350 degrees F (175 degrees C). Line your baking sheets with parchment paper or silicone mats.
Gold Coin Cookies
-
To make the gold coin cookies, take a 3/4-inch ball from each of your two yellow dough shades. Gently roll these two balls together in your hands until they are slightly combined and marbled, creating a two-toned effect. Roll this combined dough into a snake about 10-12 inches long. Carefully coil the snake into a spiral shape, resembling a gold coin. Place on your prepared baking sheet.
Shamrock Cookies
-
For shamrock cookies, you will create three individual green heart shapes per cookie.
-
Take a 3/4-inch ball from each of your two green dough shades and gently combine them into a marbled green ball. Roll this into a snake approximately 10-12 inches long. From this snake, form small disc-like portions.
-
For each shamrock leaf, take a small portion of the green dough and roll it into a ball, then flatten it slightly. Pinch one end of the flattened disc into a point to form the bottom of a heart shape.
-
Use a butter knife or a lollipop stick to create a small indentation at the opposite (top) end of the pinched disc, completing the heart shape. Repeat this process to create three heart shapes for each shamrock.
-
Carefully place the three green hearts together on the baking sheet so their points meet in the center to form a shamrock. If desired, gently insert an oven-safe lollipop stick into the base of the shamrock, ensuring it’s well-adhered.
Rainbow Cookies
-
For the rainbow cookies, roll each of your six rainbow-colored doughs (red, orange, yellow, green, blue, indigo/purple) into separate snakes of varying lengths and thicknesses. Arrange them on the baking sheet in an arched rainbow pattern, pressing them gently together so they adhere. Insert an oven-safe lollipop stick into the base if making cookie pops.
Rainbow Coil Cookies
-
To create rainbow twisted coil cookies, take a 1/2-inch ball of each of your rainbow-colored doughs.
-
Gently combine these small colored balls into a single multi-colored ball. Roll this ball into a snake, then coil the snake tightly into a spiral. You can also gently twist the combined dough before rolling for a more dynamic swirl pattern.
TIP – If the dough snake happens to break a couple of times while you’re rolling it, don’t worry! Simply pinch the pieces back together, and they will bake up perfectly fine, creating a unique pattern.
-
Bake all shaped cookies for approximately 8 minutes, or until the edges are lightly browned and the cookies are set. Remove from the oven and let cool on the baking sheet for a few minutes before transferring to a wire rack to cool completely. Store in an airtight container at room temperature.
Expert Tips & FAQs
- Store these colorful St. Patrick’s Day cookies in an airtight container at room temperature for 4-5 days to maintain their freshness and delicious texture. For optimal softness, consider placing a half slice of plain bread in the container with them.
- Freezing Dough: This cookie dough is freezer-friendly! After chilling the dough in the refrigerator and wrapping each colored ball tightly in plastic wrap, place them inside a large freezer bag. The dough can be frozen for up to 3 months. Thaw in the refrigerator overnight before rolling and shaping, or bake directly from frozen, adding a few extra minutes to the baking time.
- Preventing Spread: The most crucial step to ensure your cookies maintain their festive shapes is to adequately chill the dough. Cold dough keeps the butter from melting too quickly in the oven, preventing excessive spreading. Ensure your oven is fully preheated to the correct temperature before baking.
- Color Intensity: Always use gel food coloring for the best results, as it provides vibrant colors without adding excess liquid to your dough. Start with a tiny amount and gradually add more to achieve your desired shade. This precision prevents unintended dilution of your dough’s consistency.
- Cookie Pops: If you plan to make cookie pops, make sure your lollipop sticks are oven-proof. Insert them gently into the shaped dough before baking, ensuring they are well-embedded so they don’t detach after baking.
- Don’t Overmix: Overmixing the dough can develop the gluten too much, leading to tough cookies. Mix only until the ingredients are just combined for a tender, melt-in-your-mouth texture.
- Even Baking: Bake cookies of similar size and thickness together on the same tray to ensure even baking. Rotate the baking sheet halfway through the baking time for uniform results.
Nutrition
The recipes on this blog are tested with a conventional gas oven and gas stovetop. It’s important to note that some ovens, especially as they age, can cook and bake inconsistently. Using an inexpensive oven thermometer can assure you that your oven is truly heating to the proper temperature. If you use a toaster oven or countertop oven, please keep in mind that they may not distribute heat the same as a conventional full sized oven and you may need to adjust your cooking/baking times. In the case of recipes made with a pressure cooker, air fryer, slow cooker, or other appliance, a link to the appliances we use is listed within each respective recipe. For baking recipes where measurements are given by weight, please note that results may not be the same if cups are used instead, and we can’t guarantee success with that method.
This post originally appeared here on Feb 21, 2014 and has since been updated with new photos and expert tips to enhance your baking experience.
