The Ultimate Eggs Benedict Recipe: Master Classic Brunch Perfection
Eggs Benedict stands as a true culinary icon, a luxurious open-faced English muffin sandwich that transforms any meal into a special occasion. Picture this: a perfectly toasted English muffin, generously topped with savory Canadian bacon, followed by a delicately poached egg, and finally, drenched in a rich, velvety hollandaise sauce. This exquisite combination creates a symphony of flavors and textures that is truly irresistible. While it might not be your everyday quick breakfast, Eggs Benedict is the quintessential choice for elevating holidays, family brunches, or any gathering where you want to impress and delight your loved ones.
Often reserved for moments of celebration, serving this elegant dish on Mother’s Day, for instance, is a thoughtful and delicious way to show appreciation. It offers a sophisticated alternative to more common breakfast fares. While our wildly popular breakfast casserole is always a fantastic and hearty option for holiday mornings, the unique charm and gourmet appeal of Eggs Benedict truly make it a standout treat. Its presentation alone is enough to make a meal feel like an event, promising a memorable dining experience for all.

Unraveling the Mystery: What is Eggs Benedict?
The origin story of Eggs Benedict is as rich and layered as the dish itself, with several fascinating claims to its creation. One popular theory credits Delmonico’s Restaurant in New York City, where a Mrs. LeGrand Benedict, finding herself tired of the usual menu, requested something new and unique. Another widely cited account attributes it to a Wall Street broker named Lemuel Benedict, who, suffering from a hangover in 1894, ordered “buttered toast, crisp bacon, two poached eggs, and a hooker of hollandaise” at the Waldorf Hotel. The maître d’hotel, Oscar Tschirky, was so impressed that he added it to the breakfast and lunch menus, substituting ham for bacon and English muffins for toast.
Regardless of its true beginnings, the core components of Eggs Benedict remain constant and contribute to its enduring popularity. It typically starts with a perfectly toasted English muffin half, often buttered while still warm to achieve that delightful crisp exterior and soft interior. Next, a slice of savory Canadian bacon is added – though traditional ham or crispy bacon strips can certainly be used for a delicious twist. The star of the show, a flawlessly poached egg, is then placed on top, its runny yolk promising a burst of creamy richness with every bite. Finally, the entire masterpiece is generously smothered in hollandaise sauce, that luxurious, buttery, and tangy emulsion that ties all the elements together.

While often perceived as a dish exclusively served in upscale restaurants or for elaborate brunches, preparing Eggs Benedict at home is surprisingly accessible. Many home cooks might find the idea daunting, particularly the thought of making hollandaise sauce or perfectly poaching eggs. However, with the right techniques and a few helpful tools – especially a blender for that effortlessly smooth hollandaise – this seemingly complex dish becomes an enjoyable and rewarding cooking project. It’s a wonderful way to bring that gourmet brunch experience right to your own kitchen, impressing guests and delighting your family with a meal that feels both special and lovingly homemade.
Essential Ingredients for Eggs Benedict
To create this classic breakfast or brunch dish, quality ingredients make all the difference. Fresh eggs are paramount for perfect poaching, and good quality butter will ensure a rich hollandaise. You’ll find all specific measurements, quantities, and detailed instructions in the printable recipe version located at the very end of this post.
- 4 slices of Canadian bacon (or 8 slices regular bacon/ham)
- 4 large eggs (for poaching)
- 2 teaspoons white vinegar (to help eggs hold their shape)
- 2 English muffins, split
- Salted butter (for English muffins)
- 2 tablespoons chopped fresh parsley, for garnish
For the Irresistible Hollandaise Sauce:
The hollandaise sauce is the crown jewel of Eggs Benedict, adding a luxurious creaminess and bright tang that elevates every bite. Here’s what you’ll need for this essential emulsion:
- 10 tablespoons unsalted butter, melted (ensure it’s hot but not boiling)
- 3 large egg yolks (separated carefully)
- 1 tablespoon fresh lemon juice (key for tanginess)
- 1/2 teaspoon salt
- Dash of cayenne pepper or Tabasco (for a subtle kick)
Crafting Your Perfect Eggs Benedict: A Step-by-Step Guide
These step-by-step photos and detailed instructions are designed to help you visualize each stage of making this delightful recipe. For your convenience, you can Jump to Recipe to access the printable version, complete with precise measurements and full instructions at the bottom of this page.
Achieving a harmonious Eggs Benedict often comes down to precise timing and keeping all components warm. While it can be a bit of a juggle, the glorious results – perfectly cooked eggs, crisp bacon, and warm, silky sauce – are absolutely worth the effort. Let’s break down the process to make it manageable and enjoyable.
- Prepare the Canadian Bacon: In a large skillet, heat over medium-low heat. Add the sliced Canadian bacon. Cook slowly, turning occasionally, until it’s lightly browned and heated through on both sides. This gentle cooking ensures it’s flavorful without being tough. Remove the cooked bacon from the pan and place it on a covered plate or wrap it loosely in foil to keep it warm while you prepare the other elements. If using regular bacon, cook until crispy.
- Set Up for Poaching: Meanwhile, bring a large saucepan of water to a boil over medium-high heat. Once boiling, add the white vinegar. The vinegar is crucial as it helps the egg whites coagulate more quickly, allowing them to hold their shape better in the water. Bring the water back to a boil briefly, then immediately lower the heat to a very low simmer – the water should have small bubbles, not a rolling boil.
- Begin the Hollandaise Sauce: As your poaching water is heating, start on the hollandaise. In a blender, combine the 3 egg yolks, one tablespoon of lemon juice, and 1/2 teaspoon of salt. Process this mixture on medium-high speed for about 20-30 seconds. You’ll notice the mixture will become lighter in color and slightly thicker, indicating the yolks are well emulsified and ready for the butter.

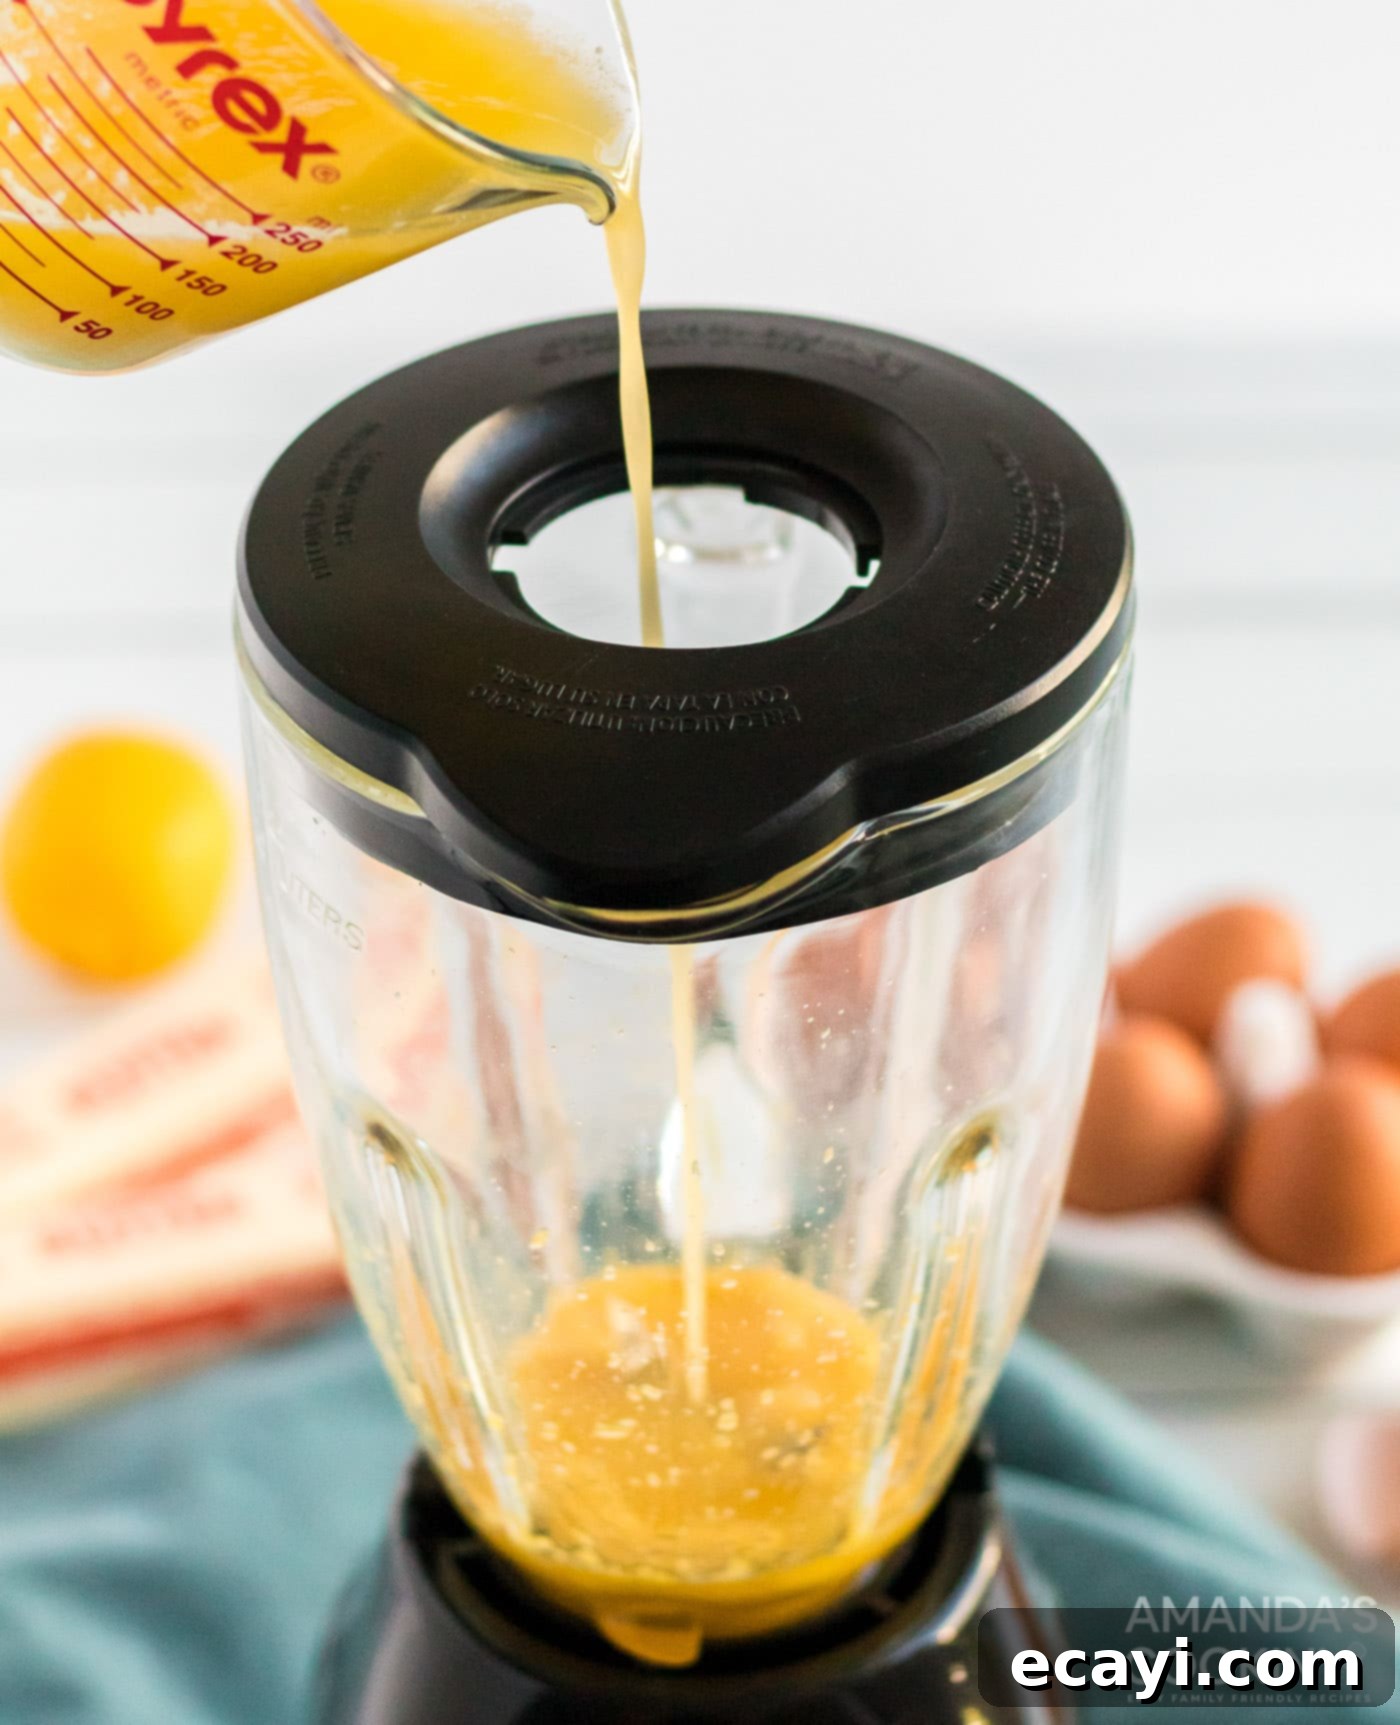
- Emulsify the Hollandaise: Melt 10 tablespoons of unsalted butter until it’s hot and liquid, but not browned. Turn your blender down to its lowest setting. With the blender running, slowly and steadily drizzle in the hot melted butter in a thin stream. Continue blending until the sauce is thick, smooth, and creamy. The slow addition of butter is key to preventing the sauce from breaking.

- Keep Hollandaise Warm: Once your hollandaise is ready, transfer the sauce to a container that makes pouring easy, such as a small pitcher or gravy boat. Set this container in a warm place – ideally on or near the stovetop, but away from direct heat – to keep it at a good temperature without allowing it to cook further or separate. A warm, not hot, environment is crucial.
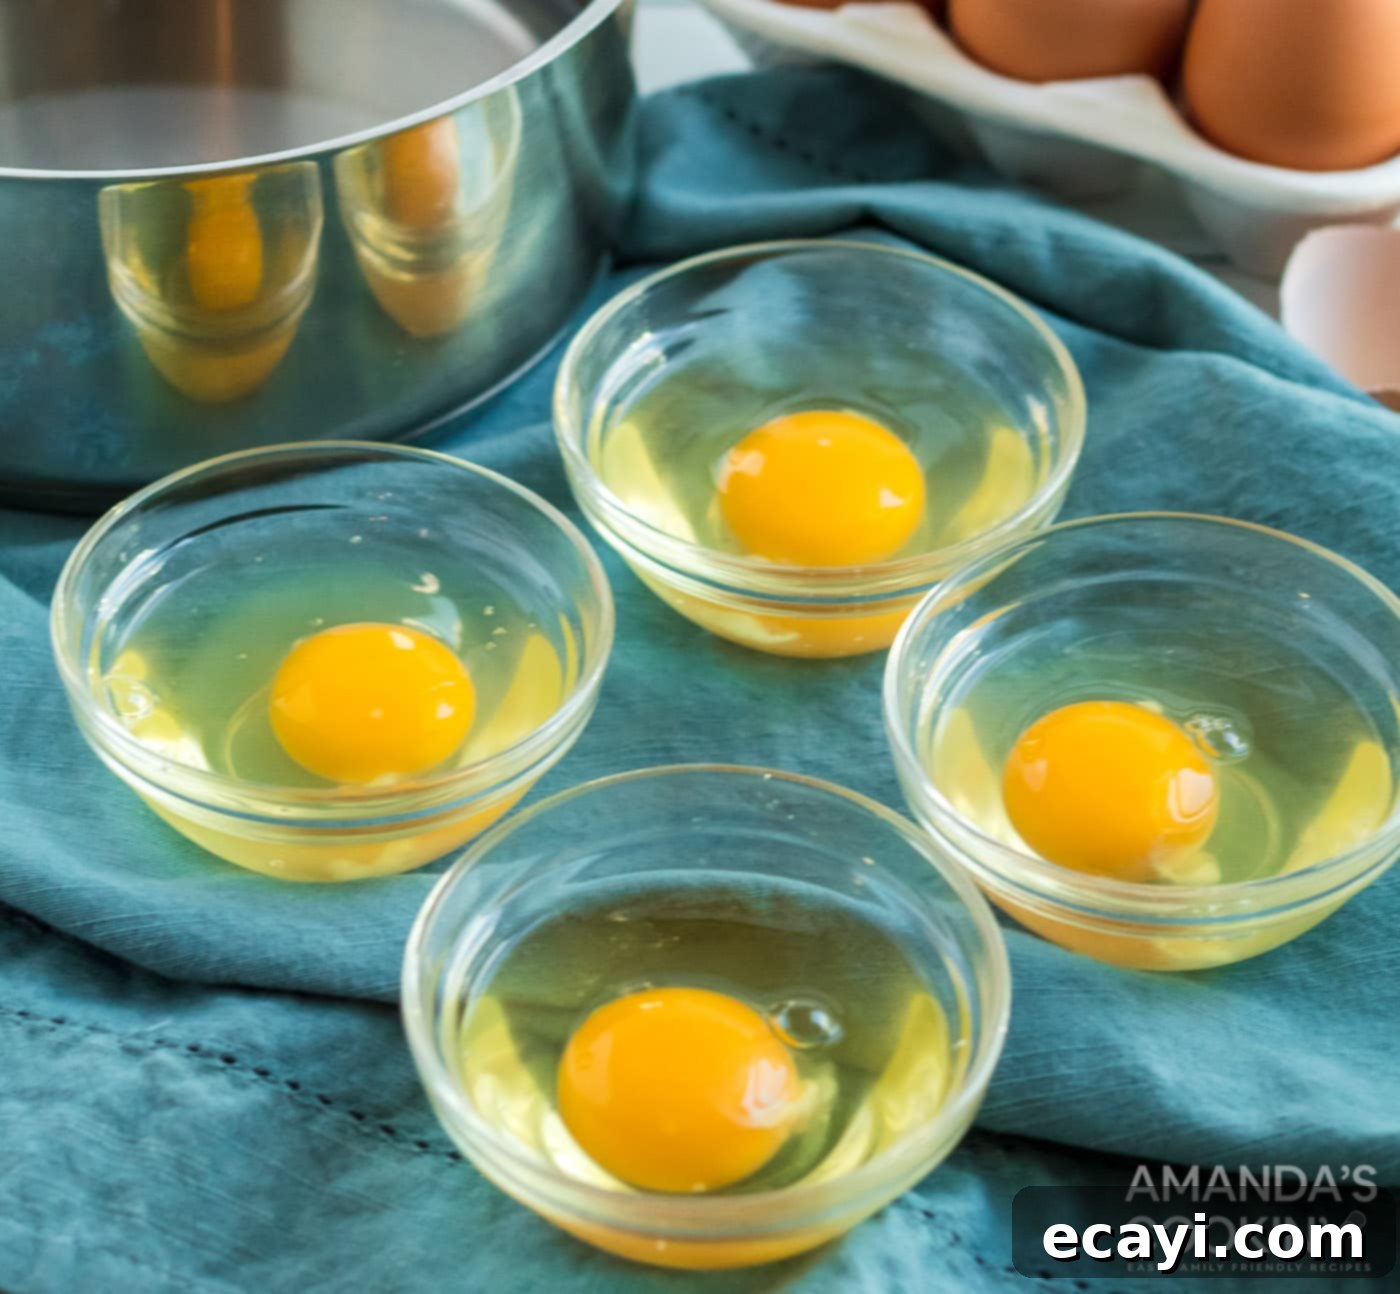
- Prepare to Poach Eggs: To ensure perfectly shaped eggs, crack each of the 4 eggs individually into four separate small bowls or ramekins. This allows you to gently slide them into the simmering water one by one, preventing them from clumping together or breaking.

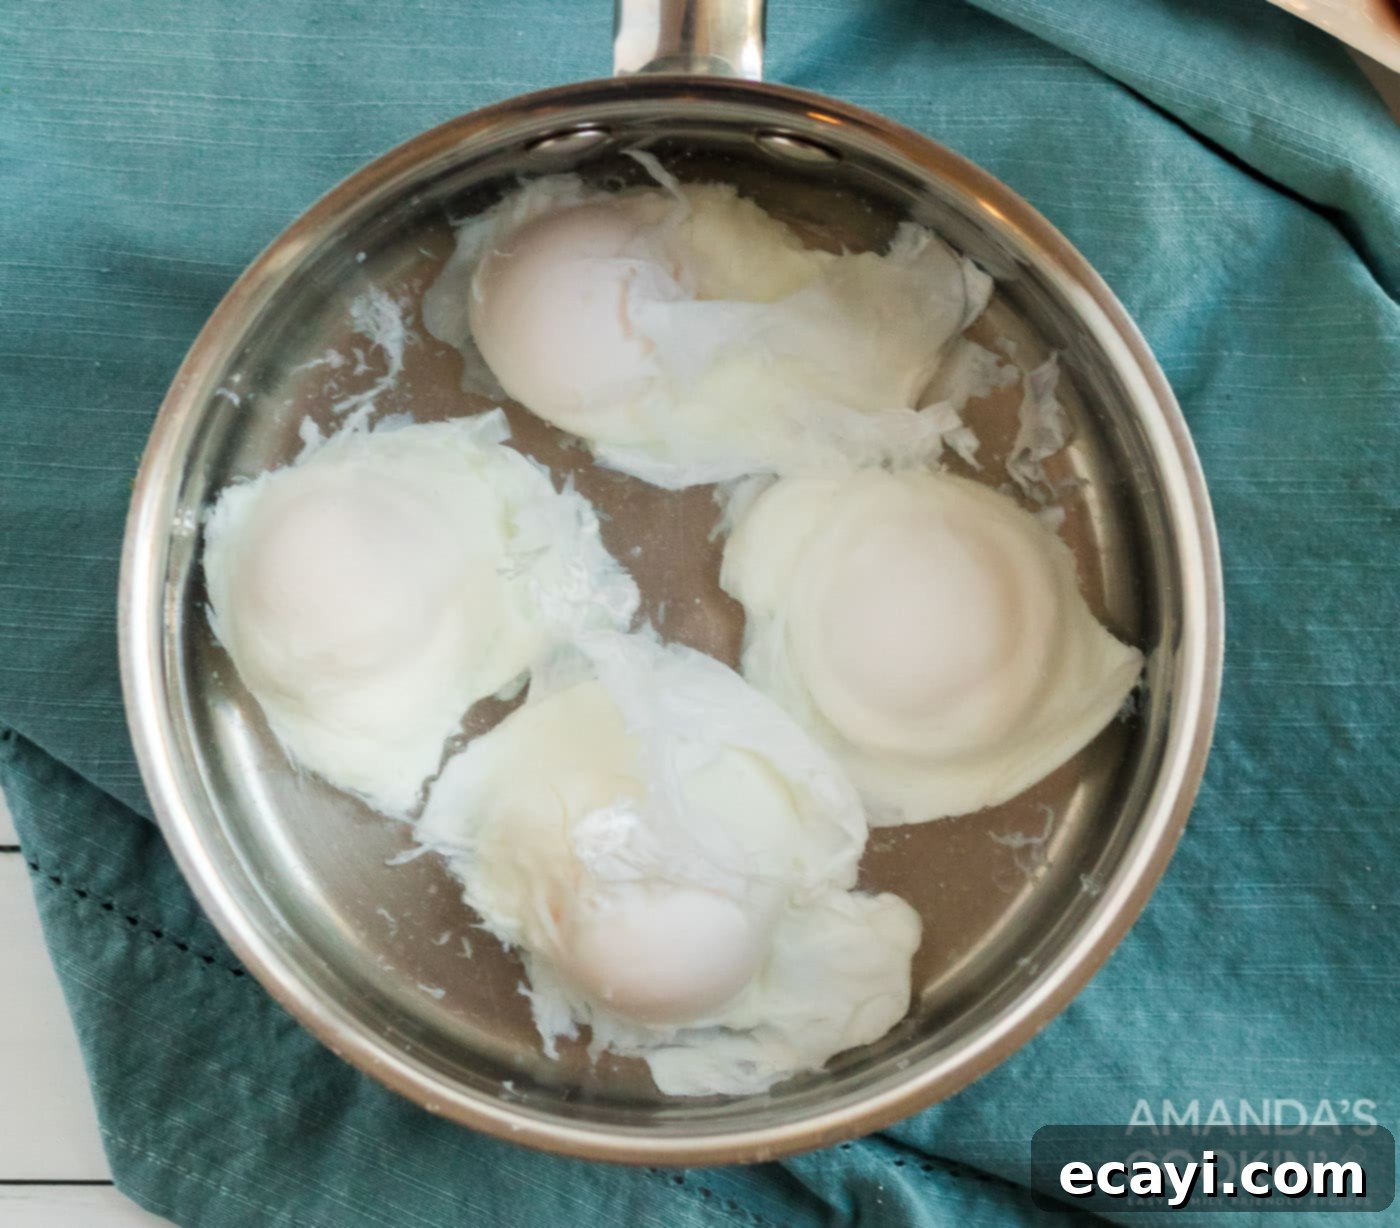
- Poach the Eggs: Working carefully with one egg at a time, gently slide it from its bowl into the barely simmering water. As soon as the white begins to solidify around the yolk (this usually takes about 30 seconds), you can add the next egg. Continue this process until all four eggs are gently cooking in the water. Avoid overcrowding the pan.
- Finish Poaching: Once all eggs are in the water, turn off the heat. If you are using an electric stovetop, it’s best to remove the pan entirely from the burner to prevent residual heat from overcooking the eggs. Cover the pan with a lid and let the eggs sit undisturbed for 4 minutes. This gentle method allows the eggs to cook evenly to a perfect medium-runny yolk.

- Remove Poached Eggs: After 4 minutes, gently remove the eggs from the water using a slotted spoon. Briefly rest them on a paper towel to drain any excess water before assembling.
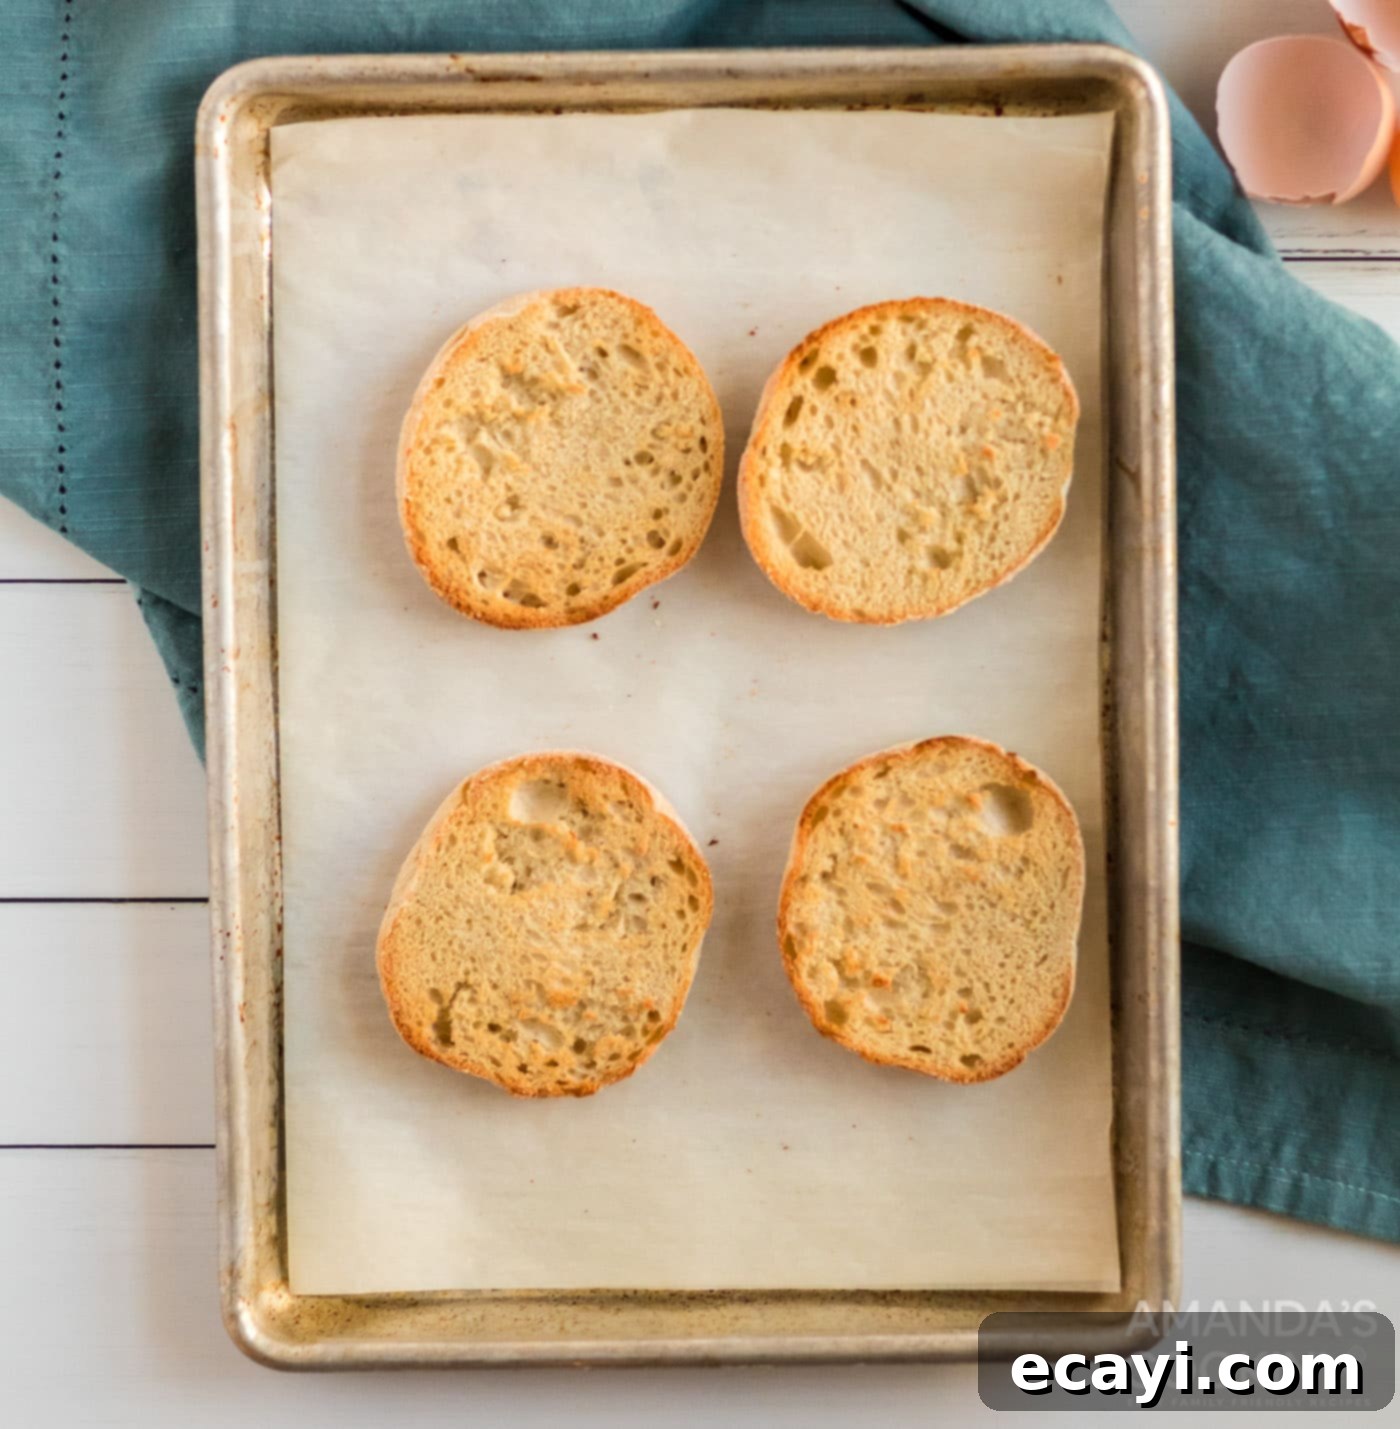
- Toast English Muffins: As the last egg goes into the poaching water, begin toasting your English muffins. You want them warm and lightly golden, providing a sturdy and delicious base for your Eggs Benedict.


How to Assemble Your Exquisite Eggs Benedict
With all your components ready and warm, the final step is to bring them together into a stunning and delicious dish. Quick assembly is key to serving Eggs Benedict at its best.
- Butter the Muffin: Lightly butter one side of each toasted English muffin half. This adds another layer of flavor and helps to keep the muffin from getting soggy.
- Layer the Bacon: Place one slice of the warm Canadian bacon (or your preferred alternative) on top of each buttered English muffin half.
- Add the Poached Egg: Carefully place a perfectly poached egg on top of the Canadian bacon. Be gentle to avoid breaking the delicate yolk.
- Drizzle Hollandaise: Generously pour the warm, creamy Hollandaise sauce over the poached egg, allowing it to beautifully cascade down the sides.
- Garnish and Serve: Finish with a sprinkle of fresh chopped parsley for a touch of color and fresh flavor. Serve your Eggs Benedict immediately, ensuring the eggs are still warm and the hollandaise is at its silkiest.
Tips for Success & Common Troubleshooting
- Egg Freshness: Fresher eggs poach better, holding their shape more effectively. If your eggs are older, the whites might spread more in the water.
- Water Temperature: The “low simmer” for poaching is critical. A rolling boil will break the eggs apart, while water that’s not hot enough won’t cook them properly.
- Hollandaise Issues: If your hollandaise breaks (separates), it’s usually due to adding the butter too quickly or the sauce getting too hot. To fix it, whisk a teaspoon of hot water into a fresh egg yolk, then slowly whisk in the broken sauce.
- Keep it Warm: Timing all elements perfectly can be tricky. Consider warming your serving plates in a low oven to help keep everything hot until served.
Delicious Variations to Explore
While the classic Eggs Benedict is perfect on its own, don’t hesitate to experiment with different toppings:
- Eggs Florentine: Substitute Canadian bacon with sautéed spinach.
- Eggs Royale (or Eggs Atlantic): Replace Canadian bacon with smoked salmon.
- California Benedict: Add sliced avocado or guacamole for a creamy, fresh twist.
- Country Benedict: Use crispy fried chicken or sausage patties instead of bacon, and consider a sausage gravy in place of hollandaise.
- Vegetable Variations: Try grilled asparagus, roasted portobello mushrooms, or sliced tomatoes for a lighter, vegetarian option.
I genuinely hope you enjoy this detailed Eggs Benedict recipe and find the process of creating it as satisfying as eating it! This dish truly has the potential to become your favorite go-to for special breakfasts or brunches. For those who love exploring delicious breakfast ideas, don’t stop here! You might also love my baked cake donuts, these amazing blueberry muffins, or my comforting homemade cinnamon rolls! And for truly classic morning fare, be sure to try these traditional buttermilk pancakes and my hearty biscuits and gravy! Each offers a unique and delightful start to your day.
Looking for another fun and versatile way to use English muffins? You absolutely must check out my English Muffin Pizza Bar! It’s an excellent idea for parties or a quick, customizable meal that everyone will love.

Eggs Benedict
IMPORTANT – There are often Frequently Asked Questions within the blog post that you may find helpful. Simply scroll back up to read them!
Print It
Pin It
Rate It
Save ItSaved!
Ingredients
- 4 slices of Canadian bacon or 8 slices bacon, cooked until lightly browned and warmed through
- 4 large eggs for poaching, preferably fresh
- 2 teaspoons white vinegar to help eggs hold their shape
- 2 English muffins split and lightly toasted
- Salted butter for buttering the toasted English muffins
- 2 tablespoons chopped parsley for garnish, preferably fresh
For the Hollandaise:
- 10 tablespoons unsalted butter melted and hot, but not boiling
- 3 large egg yolks separated from the whites
- 1 tablespoon lemon juice freshly squeezed for best flavor
- ½ teaspoon salt
- Dash of cayenne pepper or tabasco for a subtle hint of spice
Before You Begin
Instructions
-
Cook the Canadian Bacon: In a large skillet, heat over medium-low heat. Add the sliced Canadian bacon. Cook slowly, turning occasionally, until lightly browned and thoroughly heated on both sides. This gentle cooking prevents it from drying out. Remove from the pan and keep warm on a covered plate or loosely tented with foil.
-
Prepare Poaching Water: Meanwhile, bring a large saucepan of water to a rolling boil over medium-high heat. Once boiling, add the white vinegar. The vinegar helps the egg whites set quickly and maintain their shape during poaching. Bring the water back to a boil, then immediately reduce the heat to a very low simmer. The water should have small, gentle bubbles, not a vigorous boil.
-
Start the Hollandaise Sauce: While the water heats, begin your hollandaise. In a blender, combine the 3 egg yolks, a tablespoon of fresh lemon juice, and ½ teaspoon of salt. Process this mixture on medium-high speed for 20-30 seconds until the egg mixture becomes lighter in color and slightly thickened. This indicates the yolks are properly emulsified and ready.
-
Finish the Hollandaise: Melt 10 tablespoons of unsalted butter until it’s hot but not boiling or browned. Turn the blender down to its lowest setting. With the blender still running, slowly drizzle in the hot melted butter in a thin, steady stream. Continue blending until the sauce is thick, smooth, and emulsified. Transfer the finished sauce to a small pitcher or gravy boat and set it on a warm—but not hot—place on or near the stovetop to keep it from separating.
-
Poach the Eggs: To poach the eggs, first crack each of the four eggs into separate small bowls or ramekins. This makes it easier to slide them into the water individually. Working with one egg at a time, carefully slide it into the barely simmering water. Once the white begins to solidify around the yolk (after about 30 seconds), you can add another egg. Continue until all four eggs are in the water. Do not overcrowd the pan.
-
Cook to Desired Doneness: Turn off the heat (and remove the pan from the burner if you are using an electric stovetop to prevent residual heat from overcooking). Cover the pan with a lid and let the eggs sit undisturbed for exactly 4 minutes for a perfectly runny yolk. If you prefer a firmer yolk, you can let them sit for an additional minute.
-
Remove Eggs: Using a slotted spoon, gently lift each poached egg from the water. Carefully place them on a paper towel for a moment to absorb any excess water before assembling. This helps prevent a watery muffin.
-
Note on Egg Timing: The cooking time for poached eggs can be slightly variable depending on factors such as the size of your pan, the volume of water, the number of eggs, and your personal preference for yolk runniness. You may need a little experimentation with your specific setup to consistently achieve eggs exactly to your liking.
-
Toast English Muffins: As soon as you’ve added the last egg to the poaching water, begin toasting your English muffins. You want them warm and lightly golden, providing a sturdy and delicious base.
Assemble your Eggs Benedict
-
Butter Muffin: Lightly butter one side of each toasted English muffin half, ensuring it’s evenly coated for added flavor and texture.
-
Add Canadian Bacon: Place 1 slice of the warm Canadian bacon on top of each buttered English muffin half. If using regular bacon or ham, layer accordingly.
-
Place Poached Egg: Carefully place a perfectly poached egg on top of the Canadian bacon. Be gentle to keep the yolk intact and runny.
-
Pour Hollandaise: Generously pour the warm, silky Hollandaise sauce over the poached egg, allowing it to gracefully cascade down the sides of the muffin.
-
Garnish & Serve: Sprinkle with fresh chopped parsley for a burst of color and a hint of herbaceous freshness. Serve immediately to enjoy the optimal temperature and texture of all components.
Nutrition
The recipes on this blog are tested with a conventional gas oven and gas stovetop. It’s important to note that some ovens, especially as they age, can cook and bake inconsistently. Using an inexpensive oven thermometer can assure you that your oven is truly heating to the proper temperature. If you use a toaster oven or countertop oven, please keep in mind that they may not distribute heat the same as a conventional full sized oven and you may need to adjust your cooking/baking times. In the case of recipes made with a pressure cooker, air fryer, slow cooker, or other appliance, a link to the appliances we use is listed within each respective recipe. For baking recipes where measurements are given by weight, please note that results may not be the same if cups are used instead, and we can’t guarantee success with that method.

