Crispy Butterfly Shrimp: Your Guide to Perfectly Pan-Fried Seafood with Old Bay
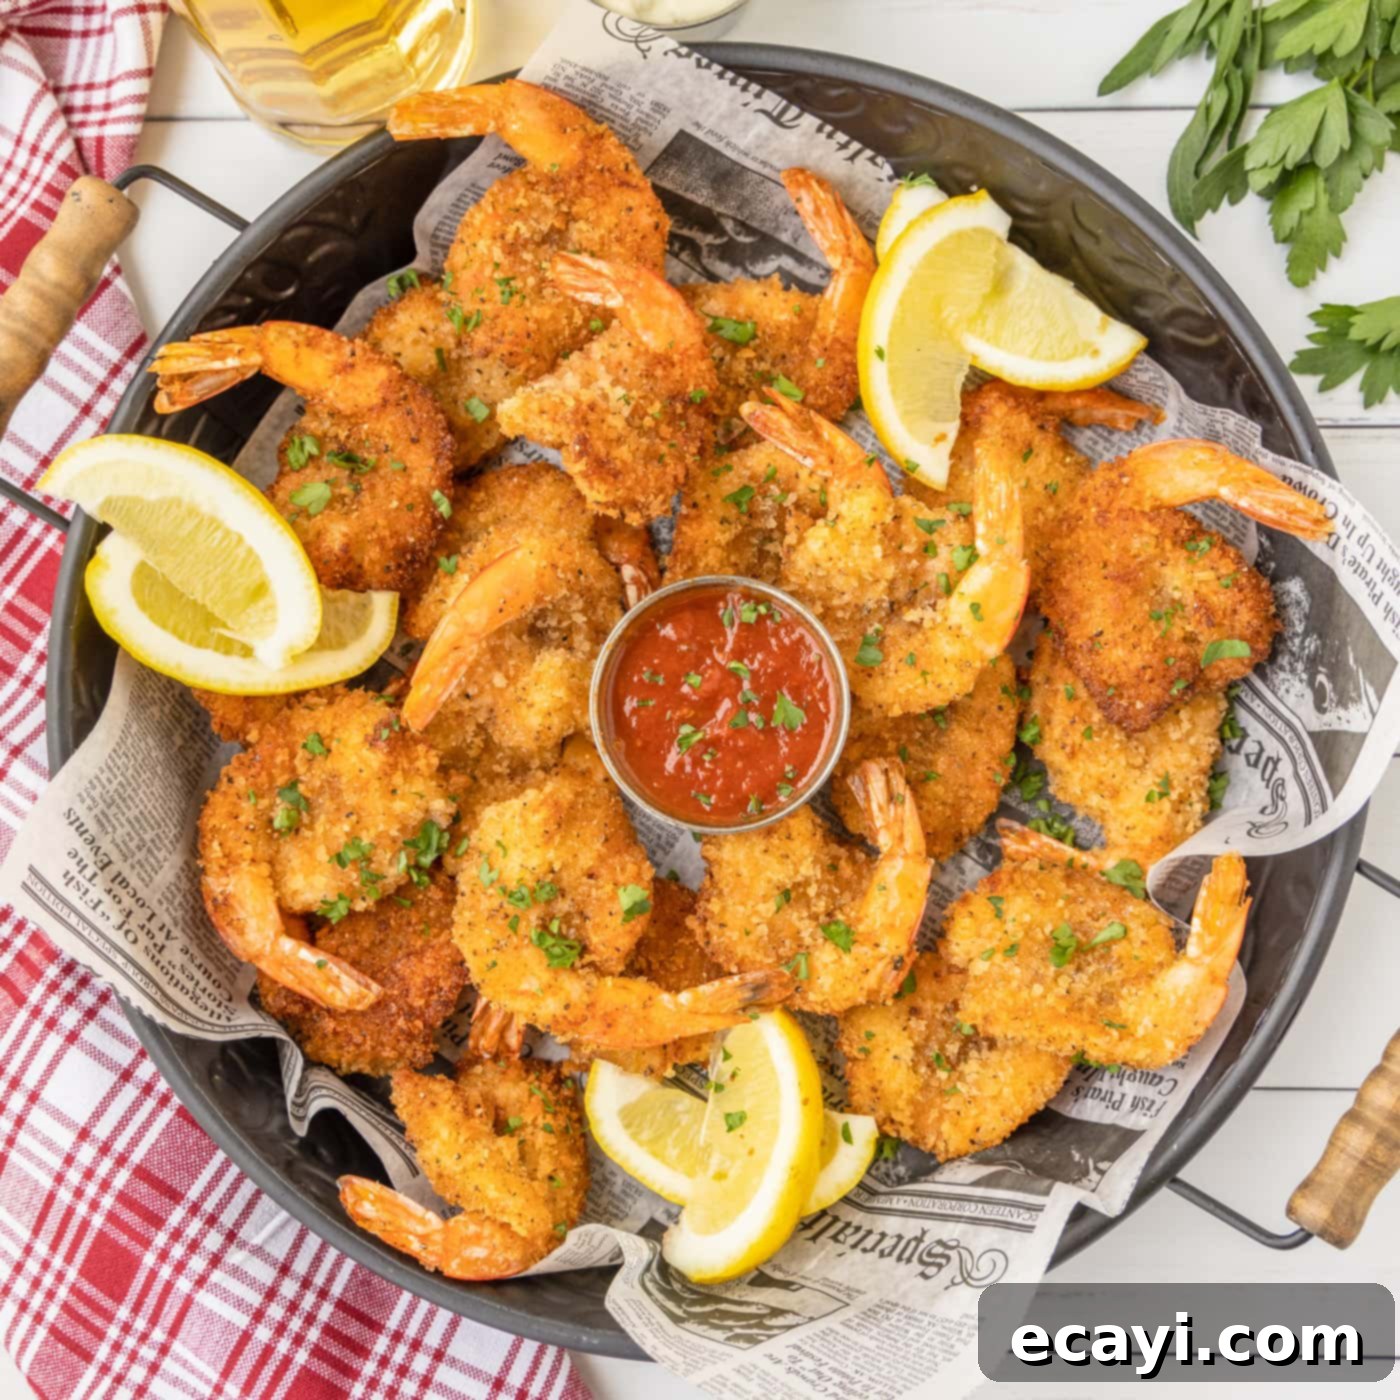
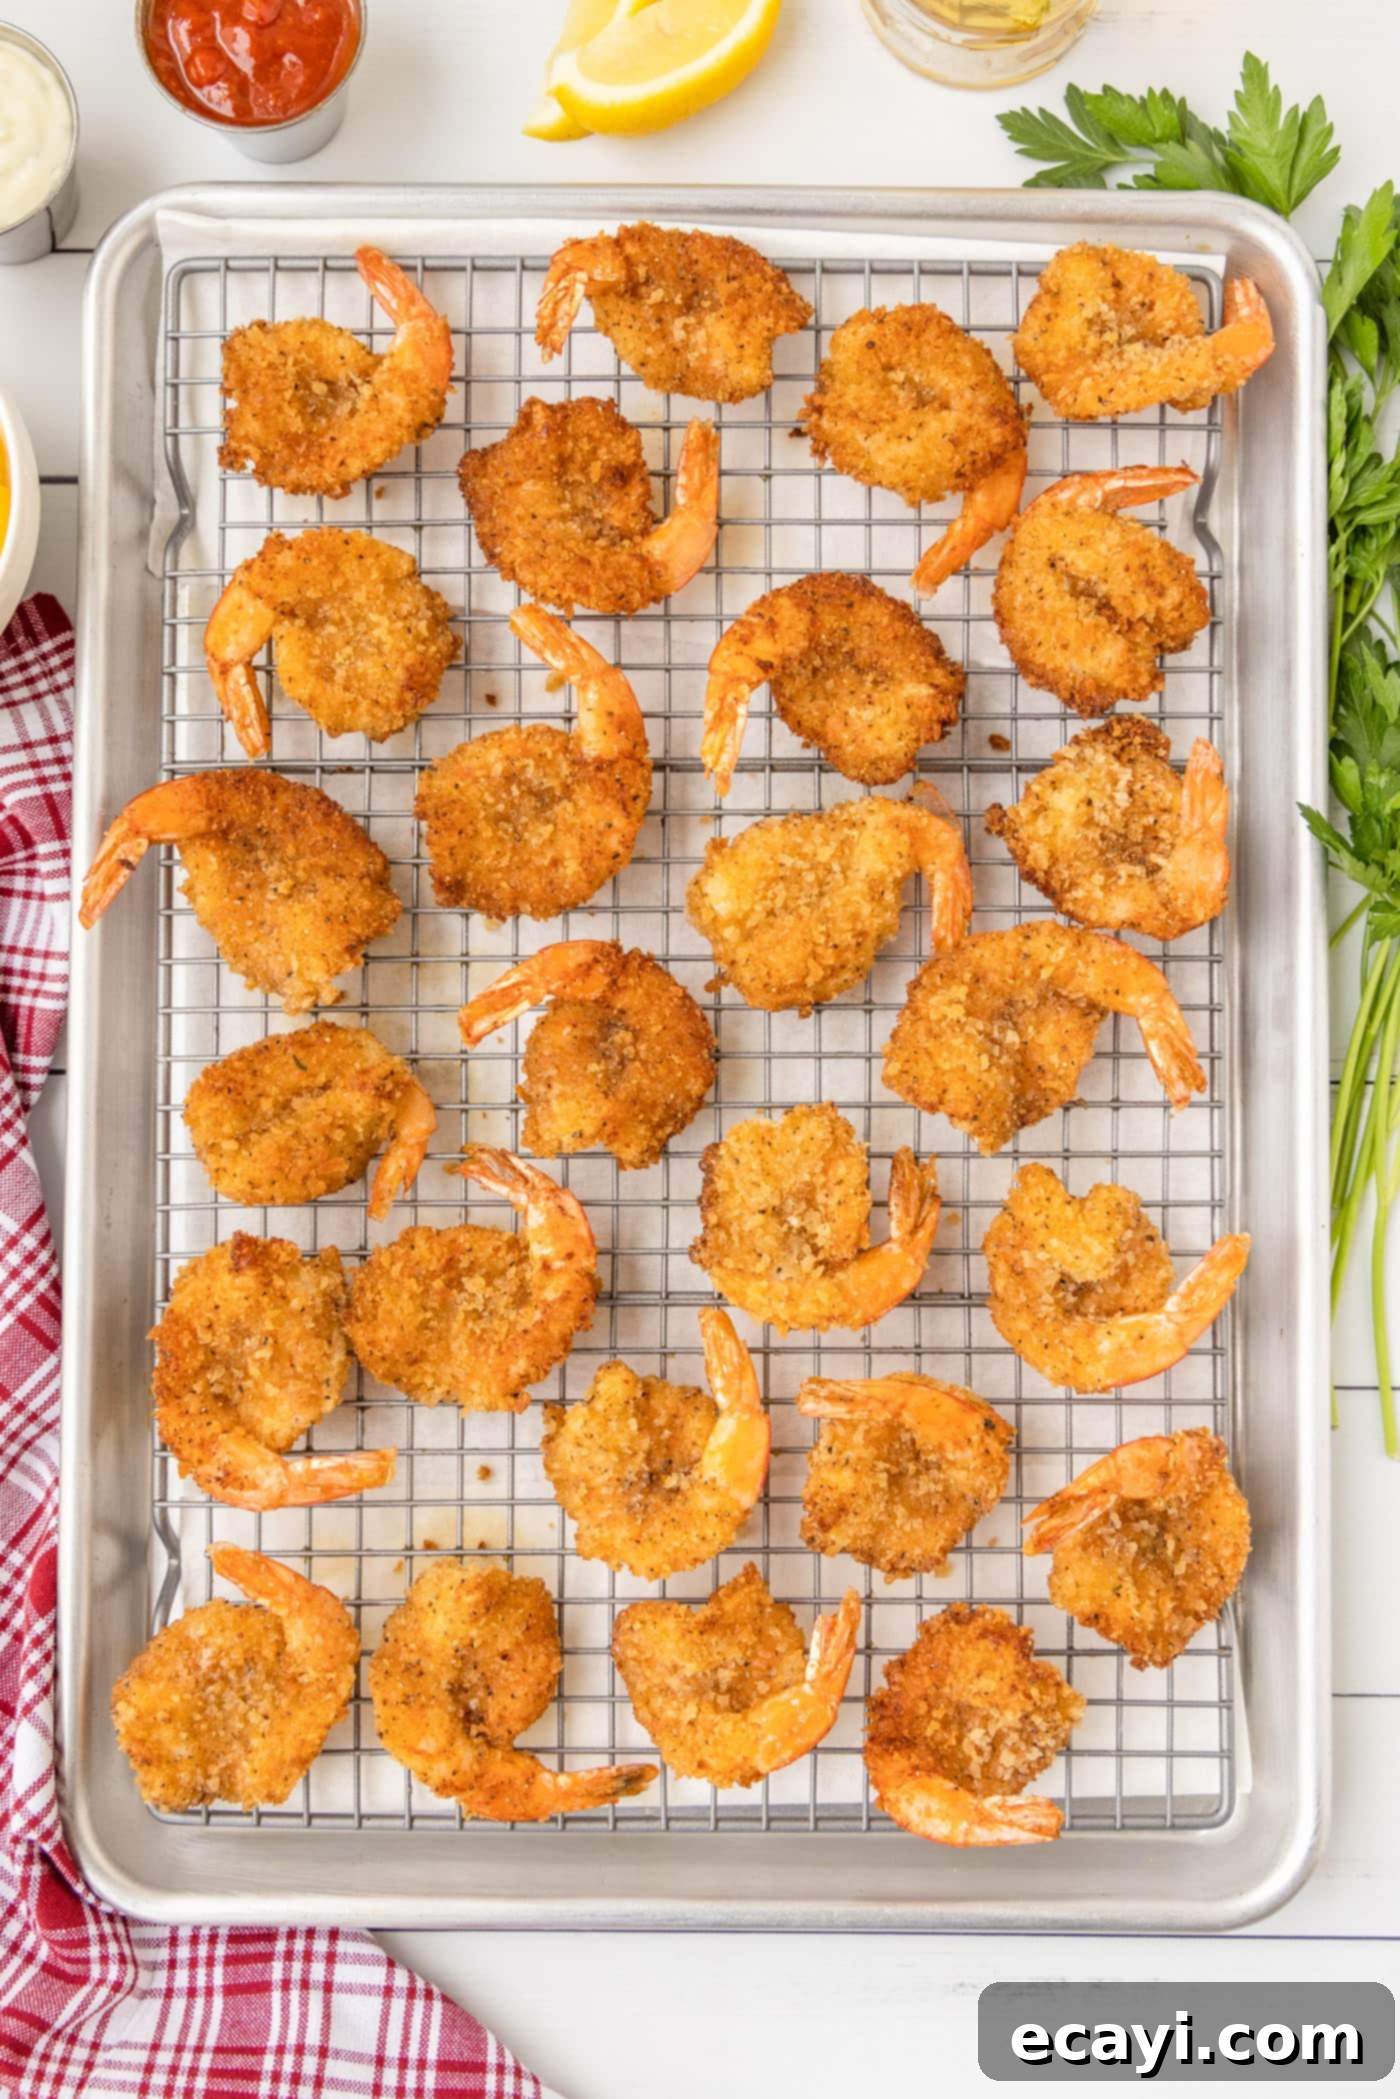
These incredibly crispy butterfly shrimp are a true delight, coated generously in a savory mixture of panko, traditional breadcrumbs, and classic Old Bay seasoning. Each shrimp is then expertly pan-fried to a stunning, crunchy golden brown, making them utterly irresistible. They practically beg for a bright squeeze of fresh lemon and a satisfying dip into your favorite tangy cocktail sauce, offering a burst of flavor and a delightful texture in every bite. Perfect as an appetizer or a main course, this recipe brings restaurant-quality seafood right to your kitchen table.
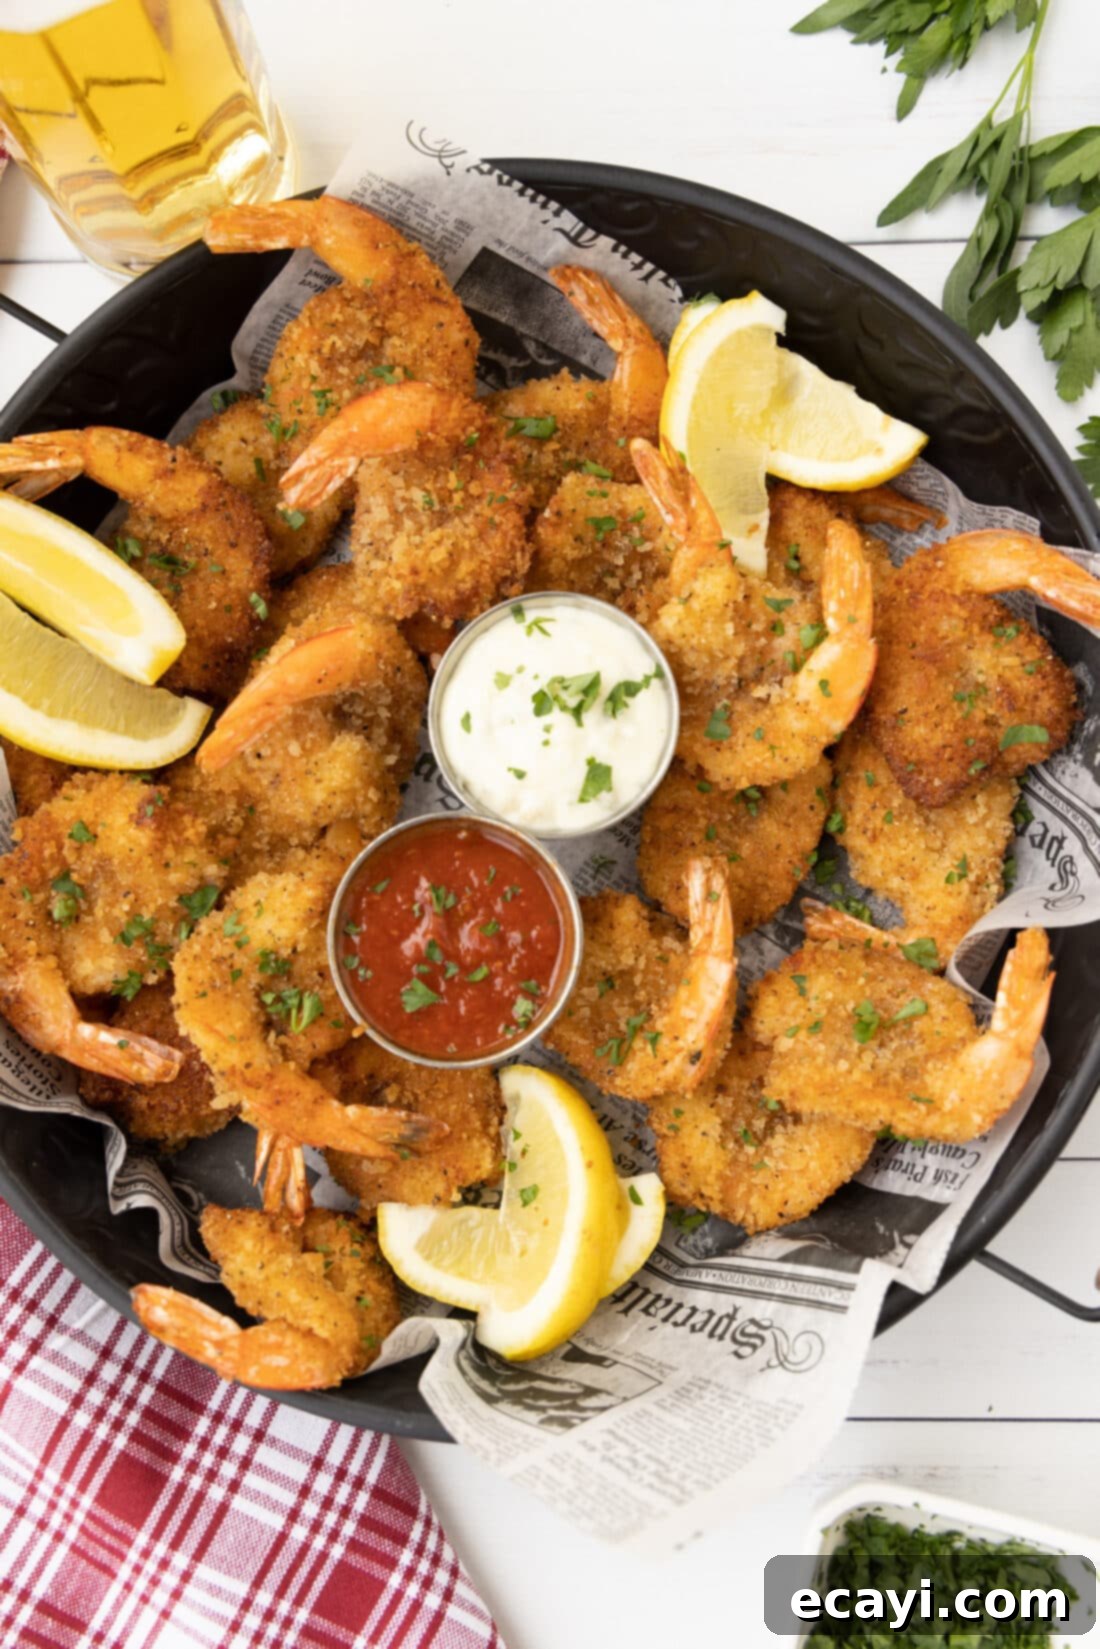
Why This Crispy Butterfly Shrimp Recipe Works Every Time
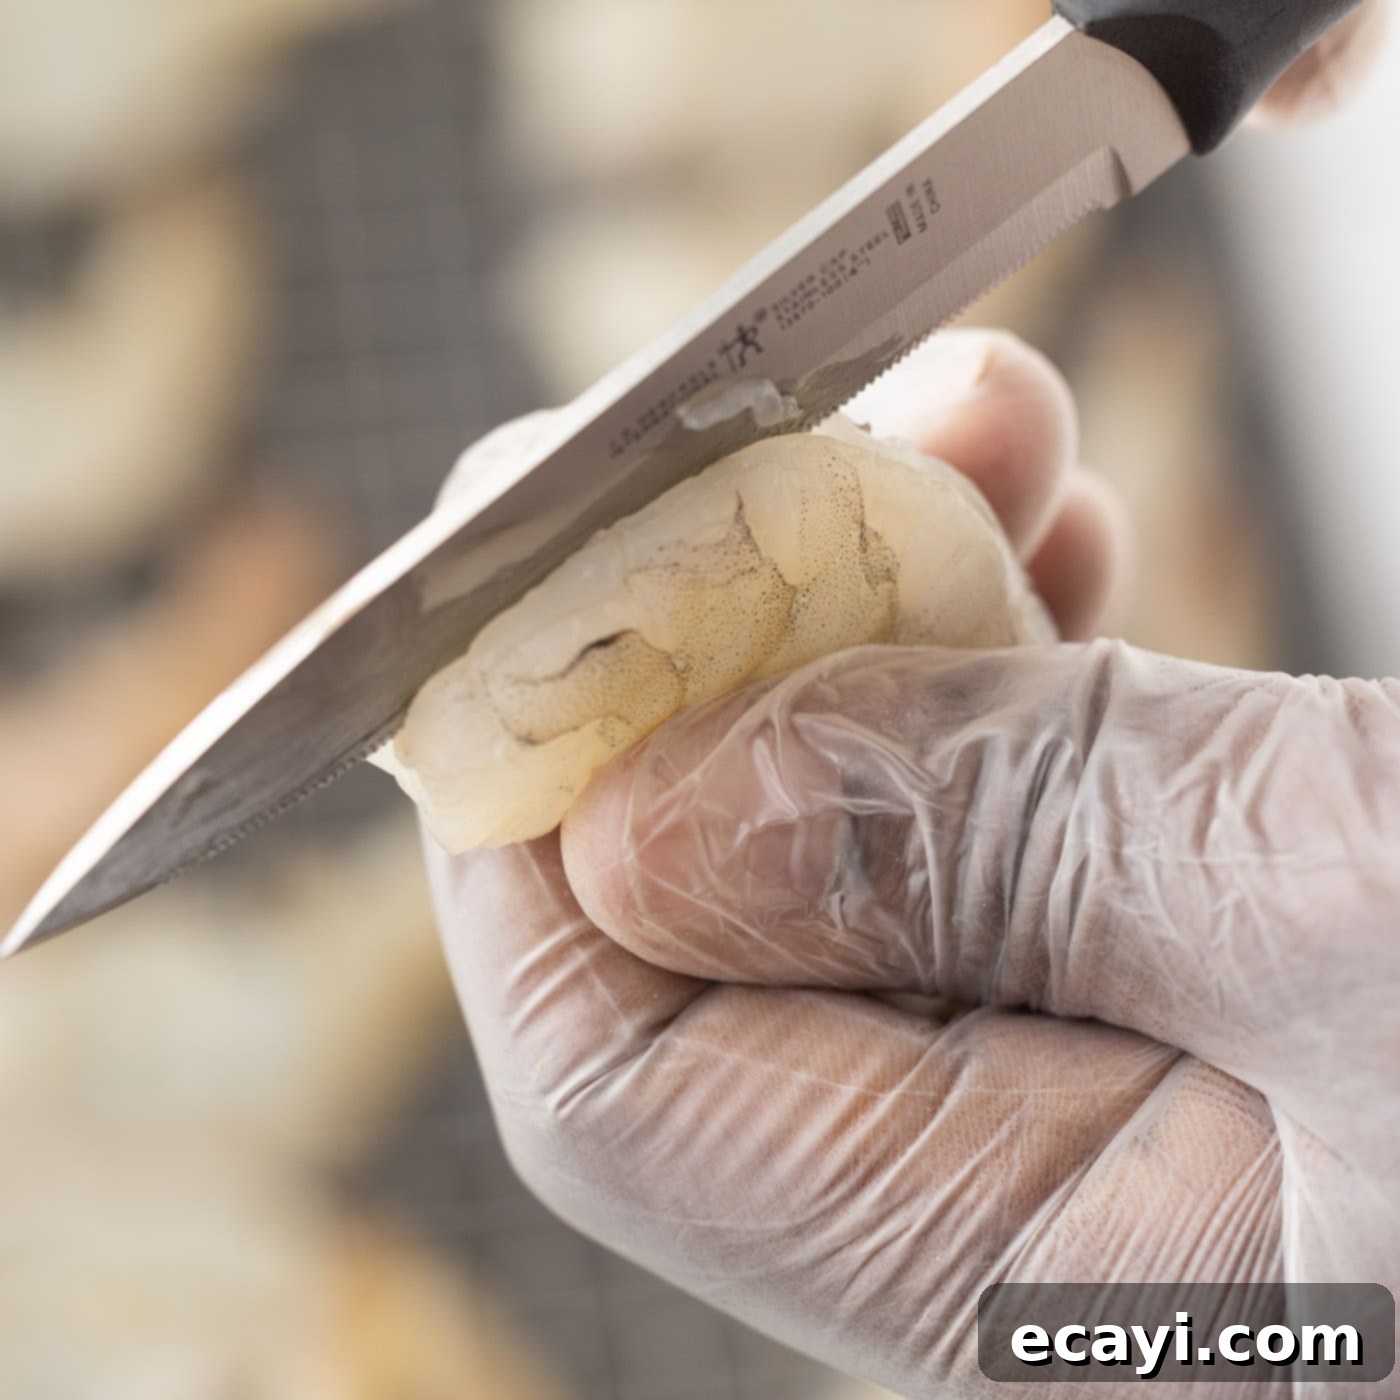
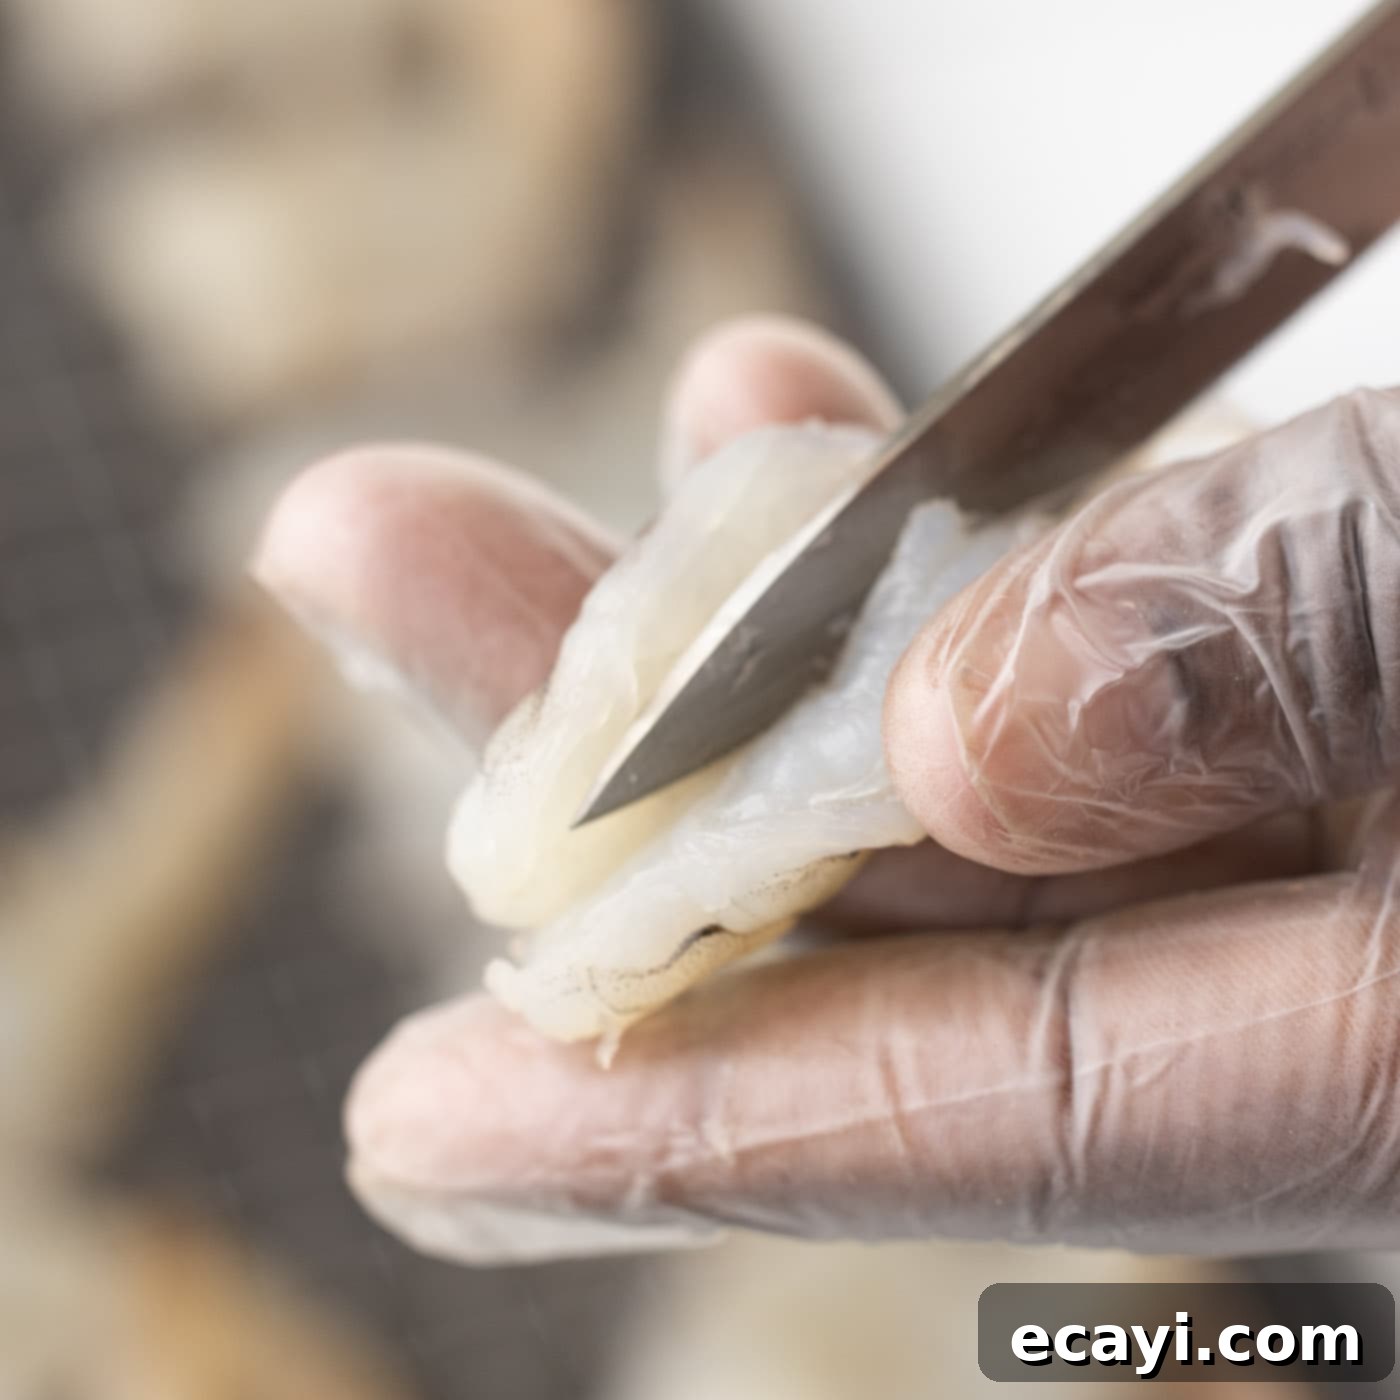
This butterfly shrimp recipe stands out for its elegant simplicity and the impressive presentation it delivers. The secret lies in the butterflying technique: you’ll carefully slice each shrimp down the center, without cutting all the way through, allowing it to flatten and thin out. This clever preparation serves multiple purposes. Firstly, it ensures that the shrimp cooks evenly and quickly, preventing some parts from being undercooked while others are overcooked. Secondly, it creates a larger surface area, which means more crispy breading per bite – a crucial element for that irresistible crunch!
While often performed on larger or jumbo shrimp for maximum effect, this method is also perfectly adaptable for regular-sized shrimp, ensuring delicious results regardless of size. You can think of it much like butterflying chicken breasts for dishes like stuffed chicken breast. However, instead of filling them with savory ingredients, we embrace the natural sweetness of the shrimp by coating them in a flavorful, crunchy breadcrumb mixture before pan-frying them to golden perfection. This process guarantees a tender interior and a wonderfully crisp exterior, making these butterfly shrimp a guaranteed crowd-plepleaser.
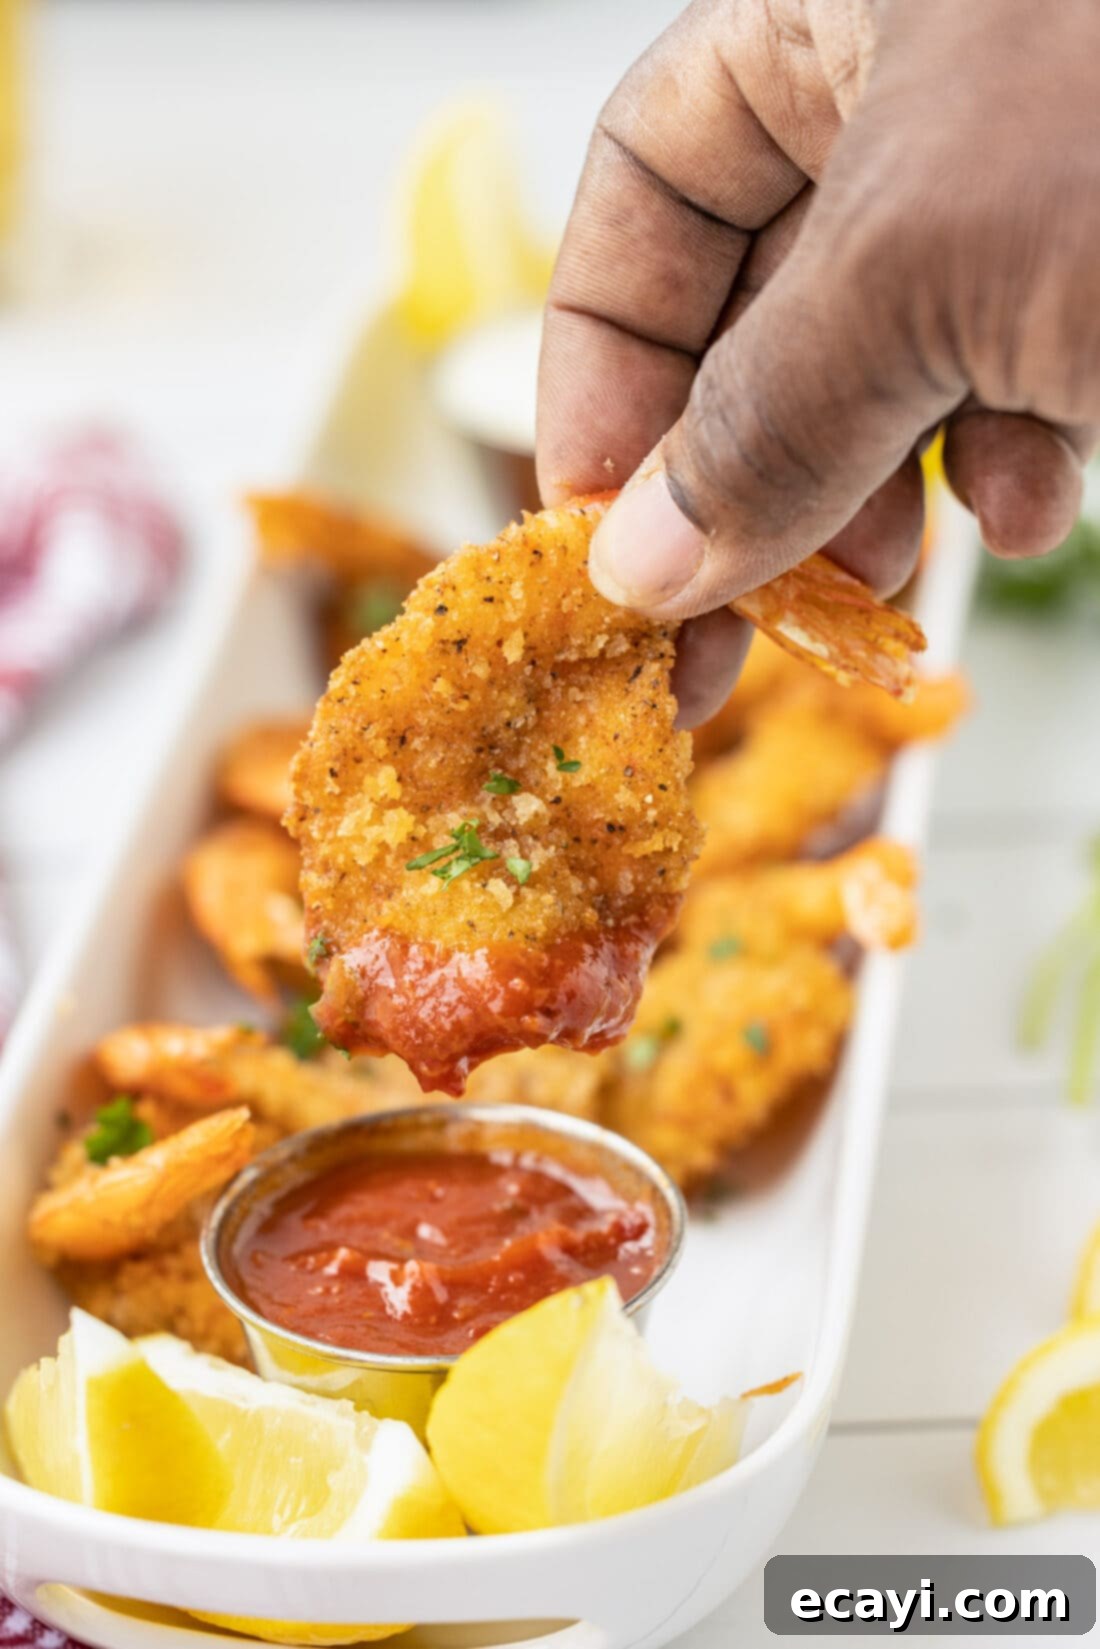
Essential Ingredients for Your Crispy Butterfly Shrimp
Gathering your ingredients is the first step towards creating these delectable butterfly shrimp. You’ll find a complete list of all measurements, ingredients, and detailed instructions in the printable recipe card located at the very end of this comprehensive guide. We recommend having everything prepped and ready before you begin the cooking process to ensure a smooth and enjoyable experience.
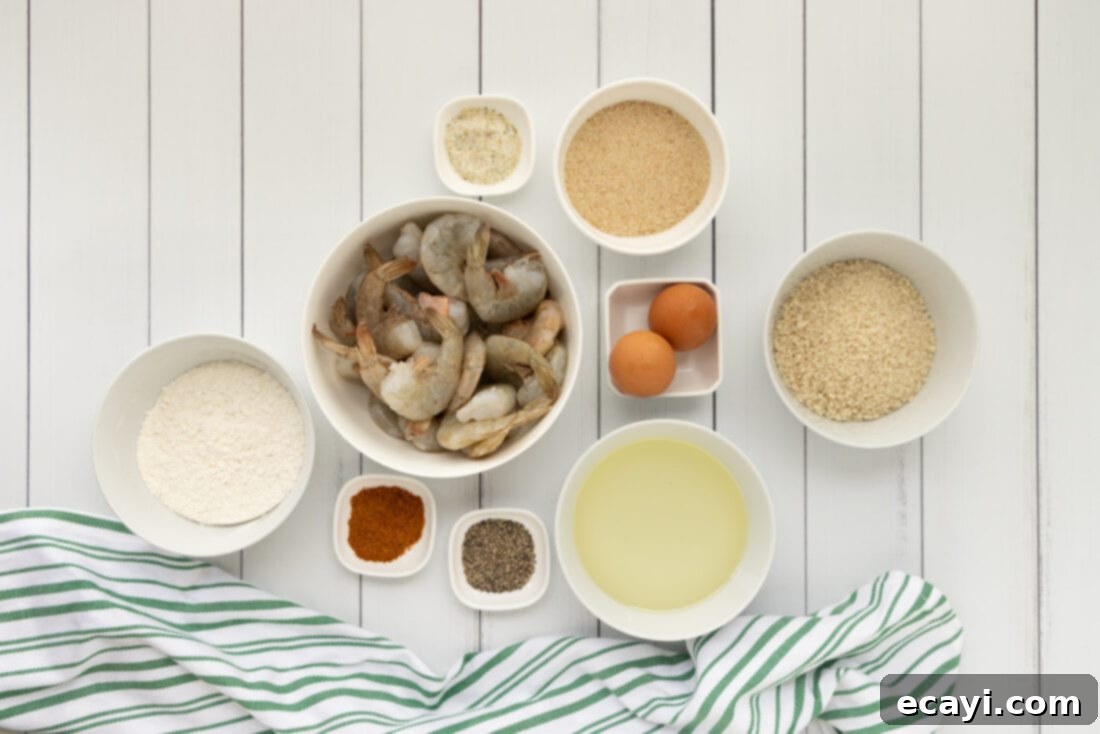
Ingredient Spotlight & Expert Substitution Tips
Understanding your ingredients is key to successful cooking. Here’s a closer look at what you’ll need and how you can adapt the recipe to your preferences:
SHRIMP – The quality of your shrimp is paramount. For this recipe, we highly recommend using what are often labeled as “grilling shrimp” from your grocery store’s seafood counter. These are typically larger, meatier, and possess a heartier texture than smaller varieties, which makes them ideal for butterflying and frying. When selecting shrimp, look for those that are peeled, deveined, and have their tails on – this makes for a more appealing presentation and an easier eating experience. Because the butterflying technique makes the shrimp thinner, they will cook very quickly. This is crucial: **avoid overcooking at all costs!** Overcooked shrimp become tough and rubbery, losing their delicate flavor and texture. You truly only need enough time for the breading to achieve a beautiful golden brown and become perfectly crispy.
BREADCRUMBS & PANKO – The combination of regular breadcrumbs and panko breadcrumbs is what gives these shrimp their unparalleled crispiness. Regular breadcrumbs provide a fine, even coating that adheres well, while panko (Japanese-style breadcrumbs) are larger, flakier, and absorb less oil, resulting in an exceptionally airy and crunchy texture. You can adjust the ratio if you prefer one type over the other, but the blend offers the best of both worlds. For an extra layer of flavor, consider using seasoned breadcrumbs or adding a pinch of dried herbs like oregano or thyme to your mixture.
SEASONINGS (Old Bay, Garlic Salt, Black Pepper) – Old Bay seasoning is a classic choice for seafood, offering a distinct blend of spices that perfectly complements the shrimp. Garlic salt provides a savory depth, while black pepper adds a subtle kick. Feel free to adjust these to your taste. If you don’t have Old Bay, a mix of paprika, celery salt, mustard powder, and a touch of cayenne can mimic its flavor. You could also experiment with other spice blends like Cajun seasoning for a different profile.
EGGS & WATER – This egg wash mixture is essential for helping the breading adhere to the shrimp. The eggs act as a binder, and a small amount of water helps to thin it slightly, ensuring an even coating without being too thick. Ensure your eggs are well-whisked to achieve a consistent texture.
ALL-PURPOSE FLOUR – The flour creates the initial dry layer on the shrimp, giving the egg wash something to cling to more effectively. This three-step dredging process (flour, egg, breadcrumbs) is fundamental for a robust and crispy coating. Gluten-free all-purpose flour can be used as a substitute if needed.
VEGETABLE OIL – For pan-frying, a neutral-flavored oil with a high smoke point is crucial. Vegetable oil is an excellent choice, as are canola oil, grapeseed oil, or peanut oil. You need enough oil to cover about half the height of the shrimp in the skillet, ensuring even frying and a truly golden crust. Do not use olive oil for frying, as its smoke point is too low.
How to Make Perfect Crispy Butterfly Shrimp
These step-by-step photos and detailed instructions are provided to help you visualize each stage of making this delicious recipe. For a quick reference or to print the recipe, simply Jump to Recipe to access the printable version, complete with precise measurements and instructions at the bottom of this post.
- Begin by thoroughly rinsing your shrimp under cold water. This helps remove any impurities. Then, pat each shrimp completely dry with paper towels. Excess moisture can prevent the breading from sticking, so this step is crucial for crispy results.
- Prepare your resting station for the cooked shrimp. Line a large baking sheet with several layers of paper towel. Place a wire rack over the paper towels on the baking sheet and set it aside. This setup allows air to circulate, keeping your fried shrimp crispy as they cool.
- Now for the butterflying: With gloved hands (this helps with grip and hygiene), take one shrimp at a time. Carefully slice down the center of the shrimp along its back, from head to tail, but do not cut all the way through. You want it to open up flat like a butterfly. Place the butterflied shrimp on a second clean wire rack as you go. This provides excellent drainage and airflow before breading.


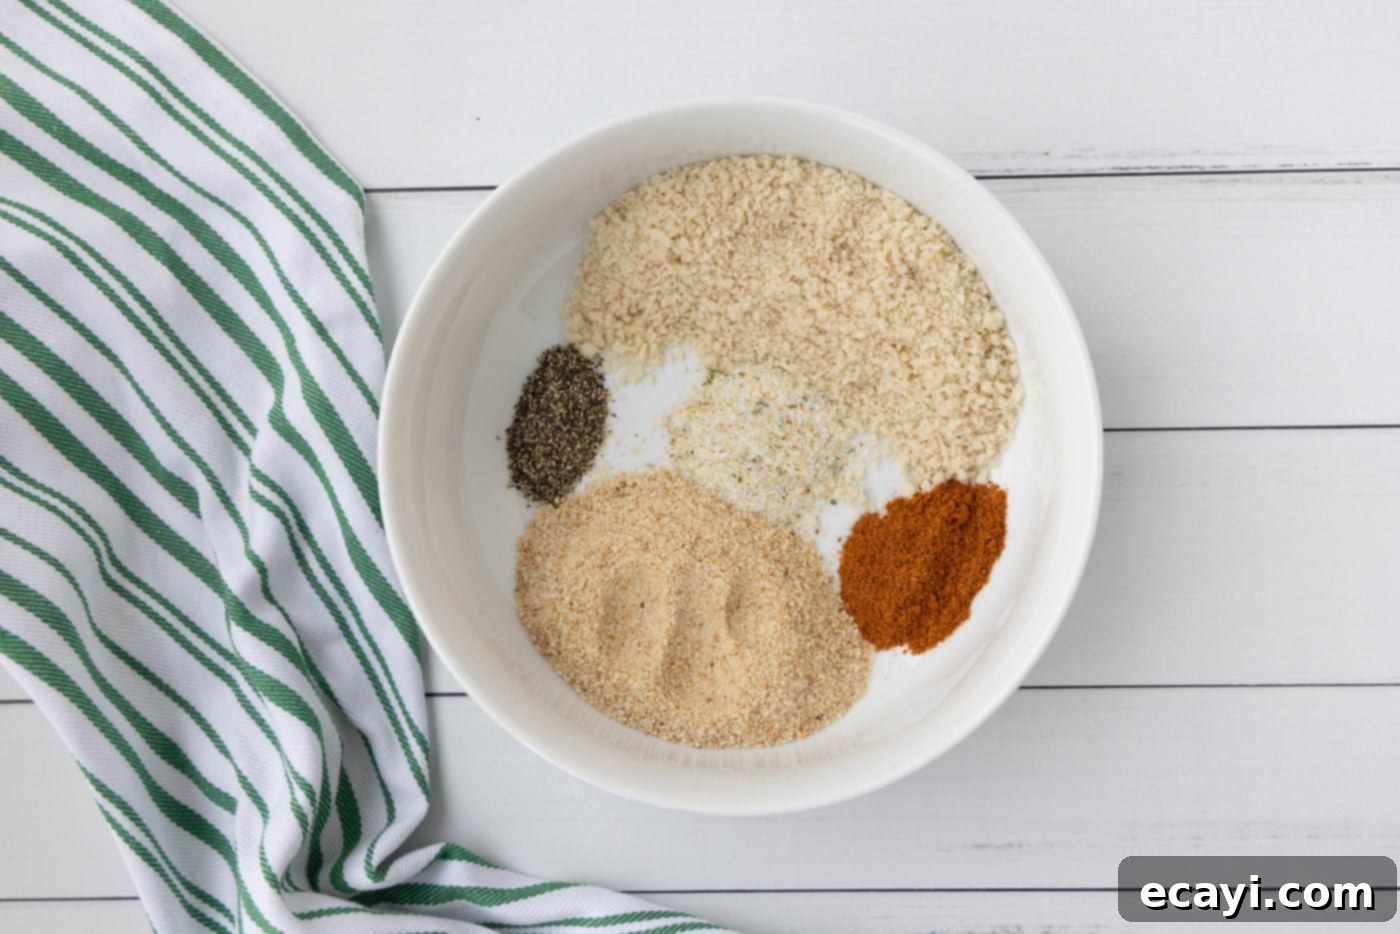
- In a medium bowl, combine the bread crumbs, panko bread crumbs, garlic salt, Old Bay seasoning, and black pepper. Stir well to ensure all the spices are evenly distributed throughout the breading mixture. This will be your final coating.

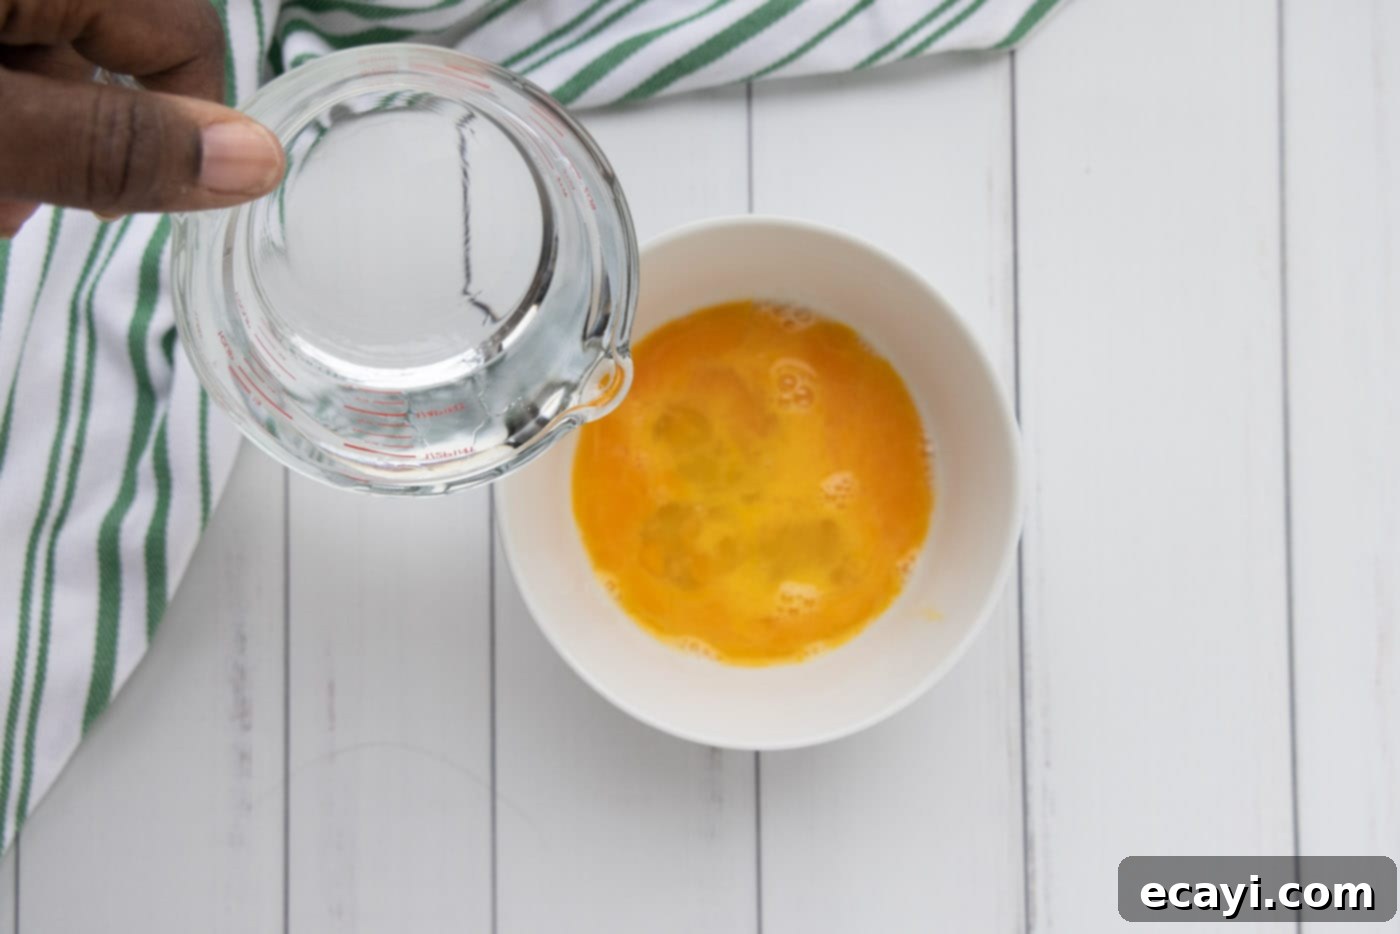
- In a separate medium bowl, whisk together the two large eggs and two tablespoons of water until thoroughly combined. This creates your egg wash, which acts as the crucial binder for the breading.

- Place the all-purpose flour in a third medium bowl. This sets up your classic dredging station: flour, egg wash, then breading.
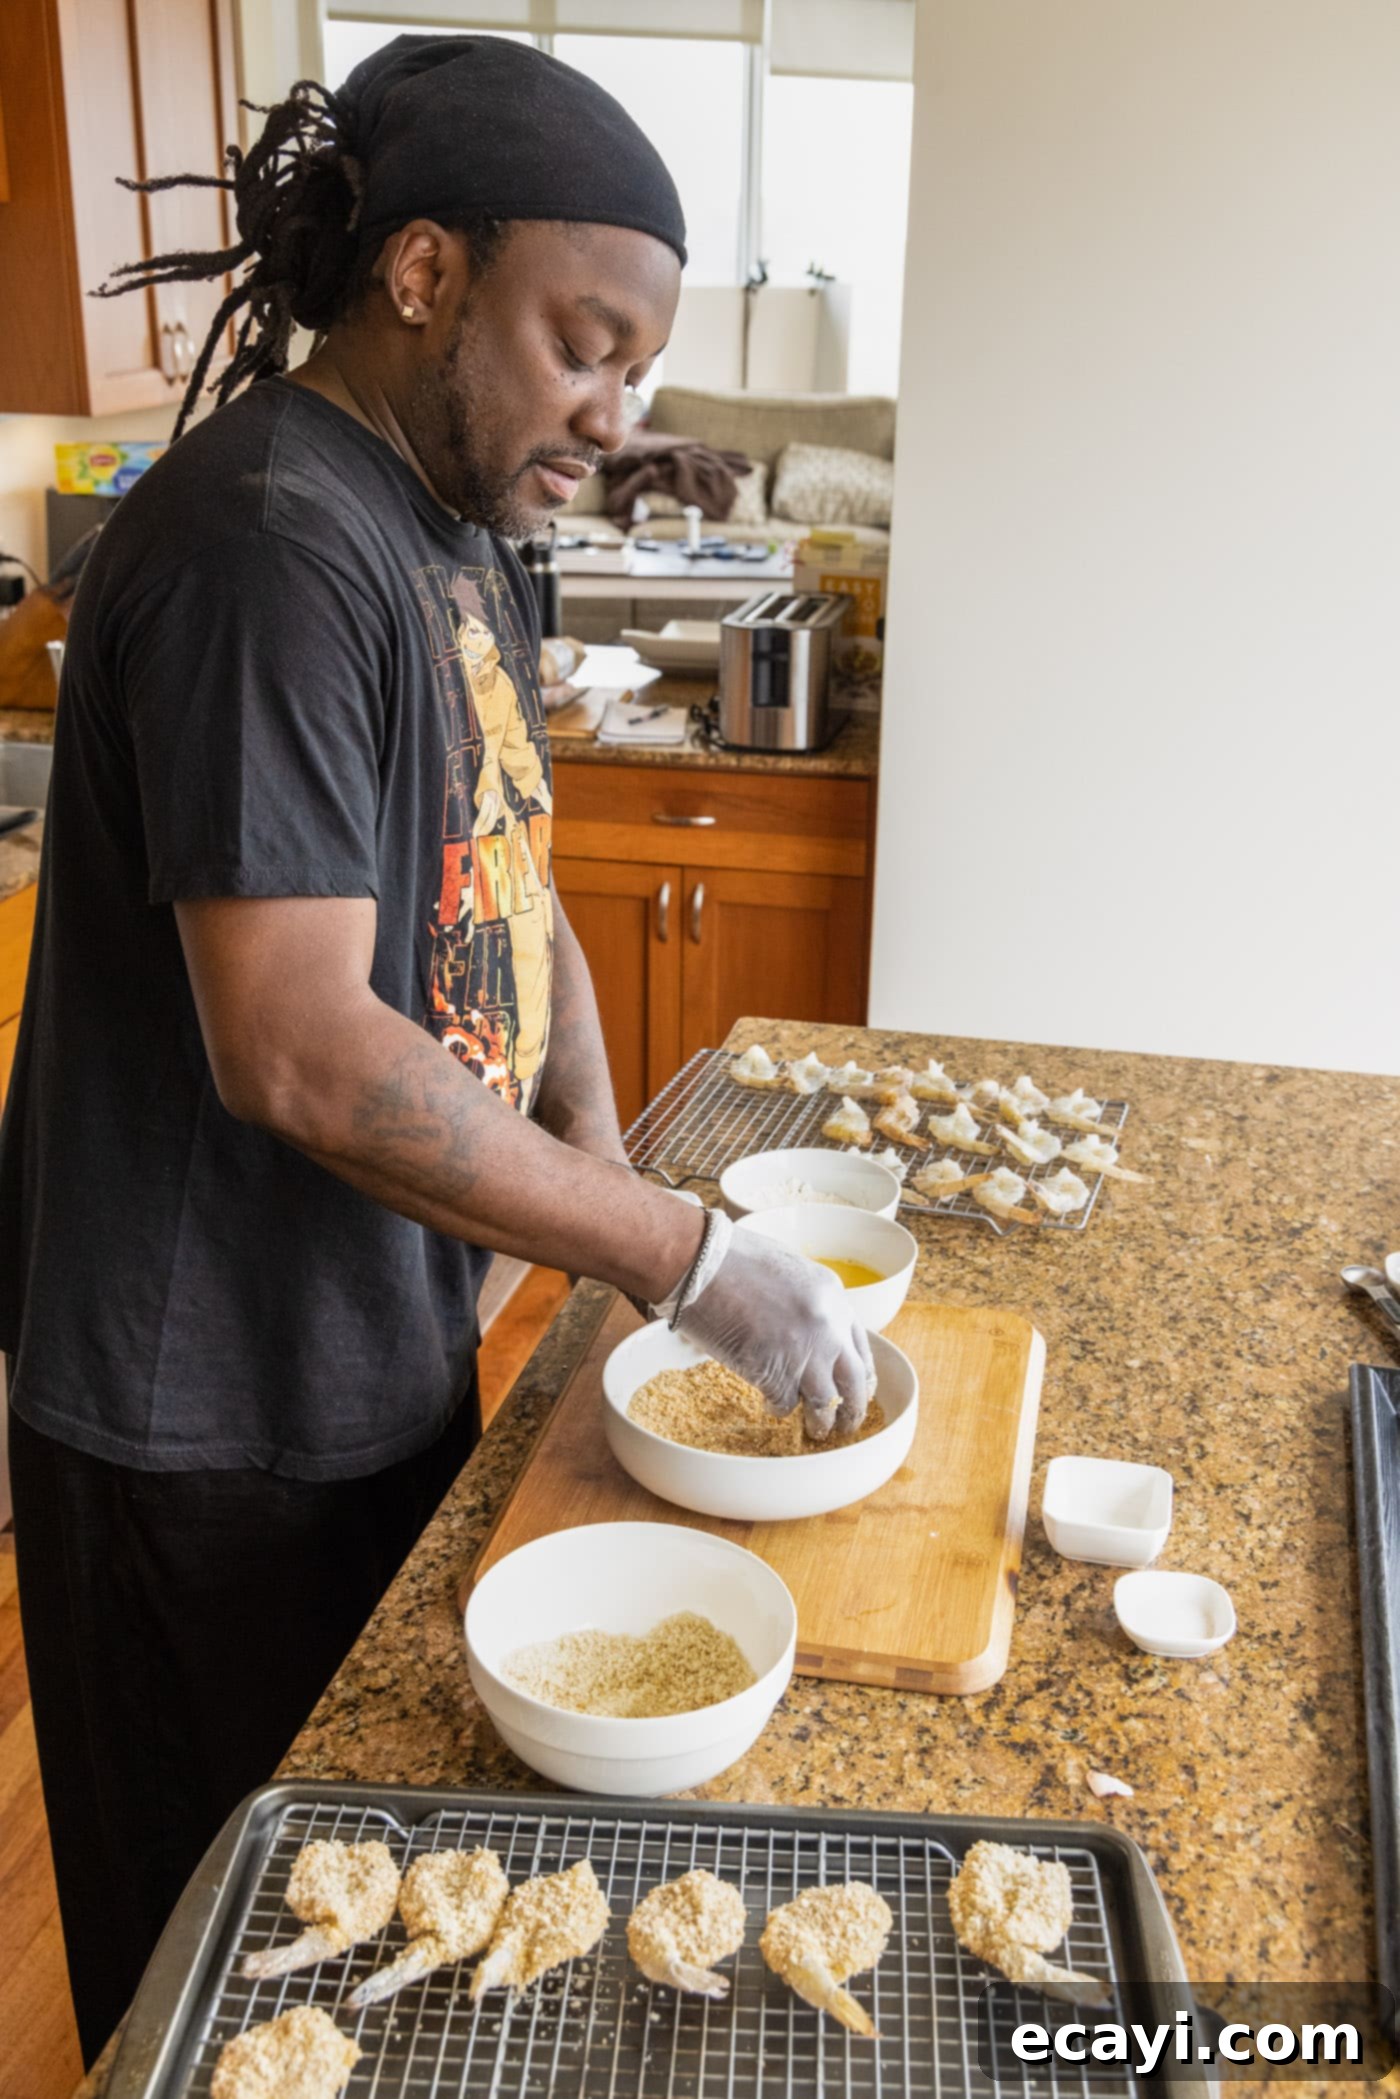
- Take one butterflied shrimp and dip it into the bowl of flour, making sure both sides are lightly but completely coated. Shake off any excess flour.
- Next, dip the floured shrimp into the egg/water mixture, ensuring it’s fully coated. Let any excess egg drip off.
- Finally, dip the shrimp into the bread crumb mixture. Gently press down on both sides with your hands to help the breading adhere firmly. This ensures a thick, crispy crust.

- Place the fully breaded shrimp back on the second wire rack. Continue this breading process with all the remaining shrimp until they are all coated and ready for frying.
- Heat 1 ½ cups of vegetable oil in a large, heavy-bottomed skillet over medium heat. The oil should reach about 350-375°F (175-190°C) and appear shimmering. If you don’t have a thermometer, you can test by dropping a tiny pinch of breadcrumbs into the oil; if it sizzles vigorously, it’s ready.

NOTE – For a visual guide, you can watch a short demonstration video at the end of these step-by-step instructions.
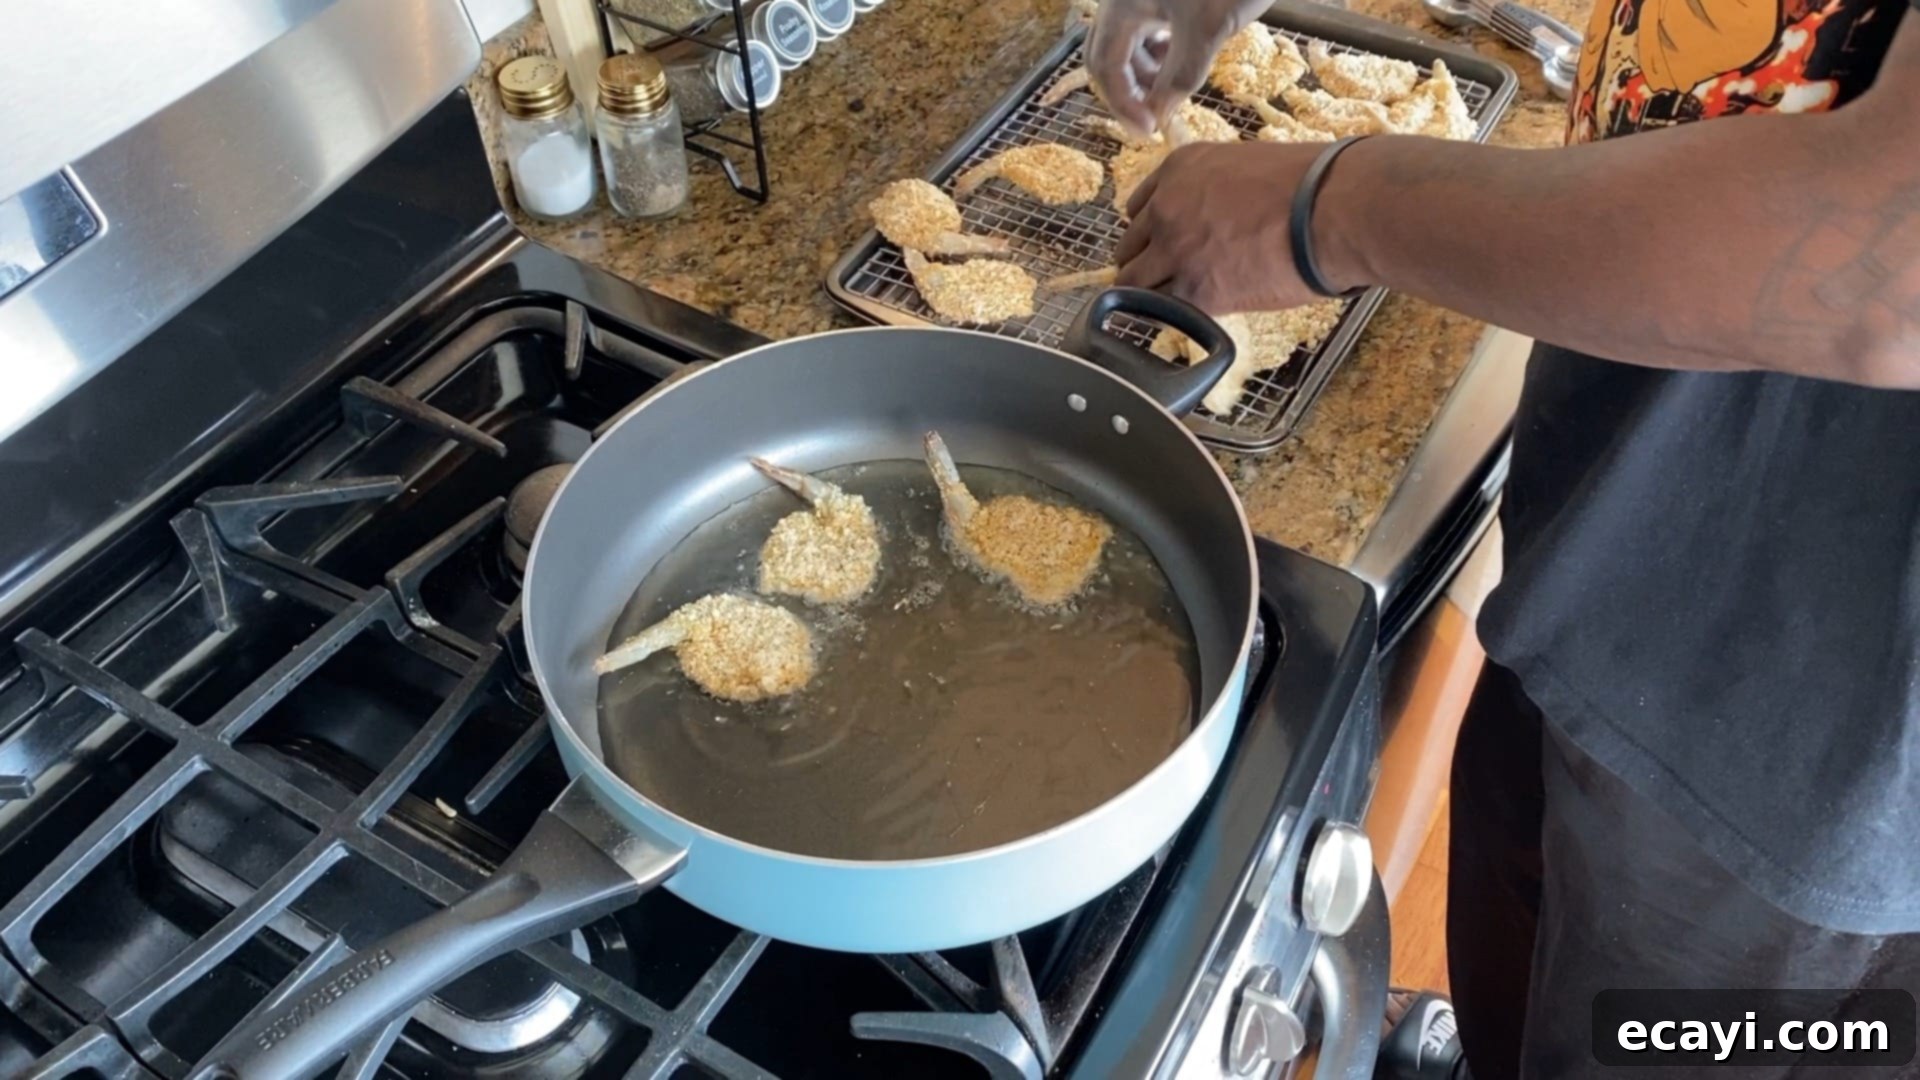
- Carefully place the breaded shrimp into the hot oil. Be mindful not to overcrowd the skillet, as this can lower the oil temperature and lead to soggy shrimp. You will likely need to cook the shrimp in multiple batches.
- Cook the shrimp for approximately 2 minutes on each side, or until they are a beautiful golden brown and crispy. Remember, butterflied shrimp are thin and cook very quickly. It’s essential not to overcook them, as this will result in a rubbery texture. The goal is to perfectly brown and crisp the breading while the shrimp inside remains tender and juicy.

- Once cooked, remove the crispy butterfly shrimp from the skillet using tongs and place them on the prepared paper towel-lined pan with a wire rack to drain any excess oil. Serve immediately for the best flavor and crunch!
Frequently Asked Questions & Expert Tips for Butterfly Shrimp
Absolutely, you can use frozen shrimp, but proper thawing is essential. Make sure they are completely thawed before you begin the rinsing and butterflying process. The best way to thaw shrimp is overnight in the refrigerator. If you’re short on time, place the frozen shrimp in a colander under cold running water for about 15-20 minutes, or submerge them in a bowl of cold water, changing the water every 10-15 minutes until thawed. Once thawed, rinse them thoroughly and, most importantly, pat them bone dry with paper towels. This ensures the breading and seasonings will adhere properly and results in a crisper finish. We strongly recommend using only raw frozen shrimp, not pre-cooked frozen shrimp, as pre-cooked shrimp will become rubbery and tough if fried again.
Store any leftover crispy butterfly shrimp in an airtight container in the refrigerator for 3-4 days. To bring them back to their crispy glory, we recommend reheating them in an air fryer or on a baking sheet in the oven. For an air fryer, cook at 350°F (175°C) for 5-7 minutes, shaking the basket halfway through. For the oven, preheat to 300°F (150°C) and place the shrimp on a wire rack set over a baking sheet. Reheat for 10-15 minutes, or until heated through and crisp again. Microwaving is not recommended as it will make them soggy.
For pan-frying, a neutral-flavored oil with a high smoke point is ideal. Good choices include vegetable oil, canola oil, grapeseed oil, or peanut oil. These oils can reach the necessary high temperatures without burning and imparting off-flavors to your shrimp. Avoid using olive oil, as it has a lower smoke point and can smoke excessively and burn at frying temperatures.
The ideal oil temperature for frying shrimp is between 350°F (175°C) and 375°F (190°C). The best way to check is with a deep-fry thermometer. If you don’t have one, a simple trick is to drop a small pinch of the breading mixture into the hot oil. If it immediately sizzles and floats to the surface, the oil is ready. If it browns too quickly, the oil is too hot; if it just sits there or barely sizzles, it needs to heat up more.
While pan-frying yields the crispiest results, you can certainly bake or air fry these shrimp for a slightly healthier alternative. For baking, place the breaded shrimp on a wire rack set over a baking sheet and bake at 400°F (200°C) for 10-15 minutes, flipping halfway, until golden and cooked through. For air frying, preheat your air fryer to 375°F (190°C), spray the basket lightly with oil, and cook the shrimp in a single layer for 8-12 minutes, shaking the basket or flipping halfway, until crispy and cooked. Note that the texture may be slightly different from pan-frying but still delicious!
The most common mistakes are not drying the shrimp properly before breading, overcrowding the pan during frying, and overcooking the shrimp. Always ensure your shrimp are as dry as possible for optimal breading adhesion. Fry in batches to maintain oil temperature and achieve maximum crispiness. And remember, shrimp cook very quickly, especially when butterflied, so keep a close eye on them to prevent them from becoming rubbery.
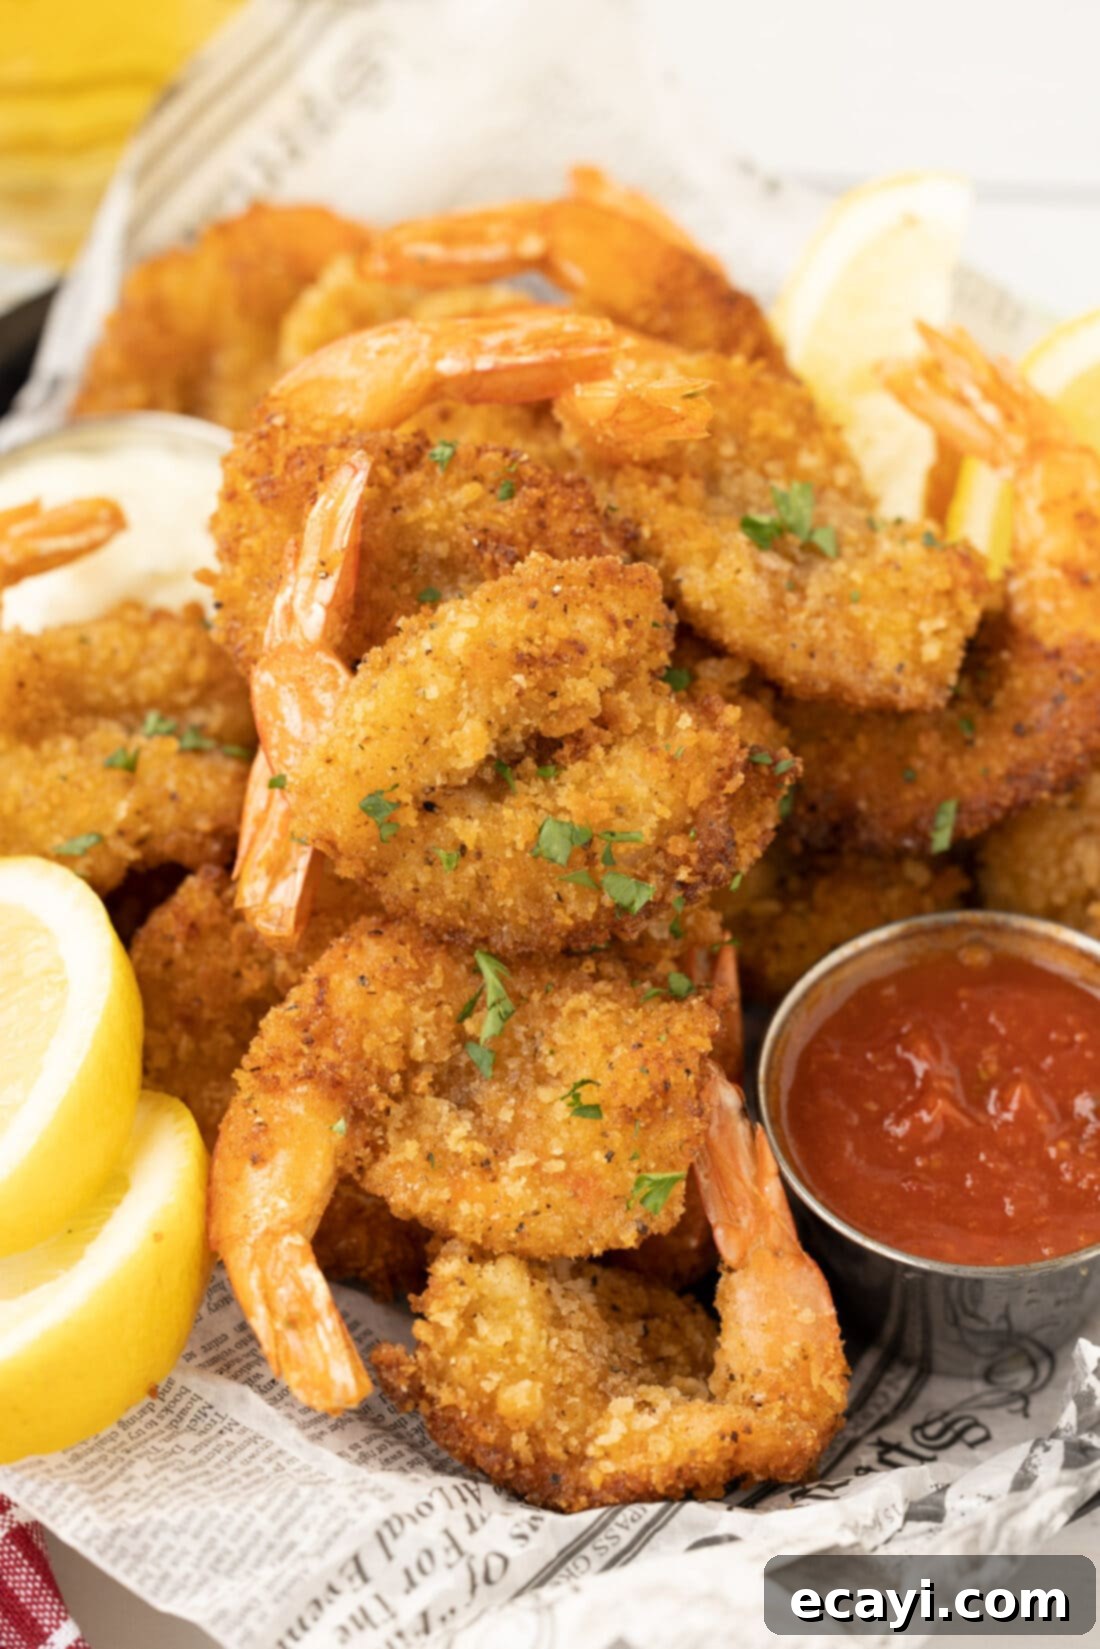
Delicious Serving Suggestions for Your Crispy Butterfly Shrimp
These crispy butterfly shrimp are incredibly versatile and can be enjoyed in many ways. For classic enjoyment, serve them hot with a side of zesty cocktail sauce or a creamy homemade tartar sauce for dipping. Don’t forget fresh lemon wedges – a squeeze of lemon juice truly brightens the rich flavors of the fried shrimp. For a complete and satisfying meal, pair them with traditional favorites like crispy french fries, a refreshing coleslaw, creamy macaroni and cheese, or sweet corn on the cob. They also make fantastic appetizers for parties, or even as a filling for gourmet shrimp tacos or po’boy sandwiches!
Discover More Irresistible Shrimp Recipes
If you love shrimp as much as we do, you’re in for a treat! Explore some of our other fantastic shrimp recipes that are sure to become family favorites:
- Classic Shrimp Boil
- Simple Crispy Shrimp
- Flavorful Sautéed Shrimp
- Fun Popcorn Shrimp
- Spicy Blackened Shrimp
- Healthy Air Fryer Shrimp
I absolutely adore cooking and baking, and it brings me immense joy to share my culinary adventures and kitchen experiences with all of you! Keeping up with new recipes daily can be a challenge, which is why I’ve made it easy for you with a convenient newsletter. Every time a fresh recipe is posted, you’ll receive it directly in your inbox. Simply subscribe today and start receiving your free daily recipes, ensuring you never miss a delicious meal idea!
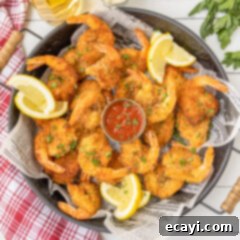
Butterfly Shrimp
IMPORTANT – There are often Frequently Asked Questions within the blog post that you may find helpful. Simply scroll back up to read them!
Print It
Pin It
Rate It
Save ItSaved!
Ingredients
- 1 pound grilling shrimp peeled, deveined, tails on
- 1 cup breadcrumbs
- 2 cups panko breadcrumbs
- ½ Tablespoon garlic salt
- ½ Tablespoon Old Bay seasoning
- 1 teaspoon black pepper
- 2 large eggs
- 2 Tablespoons water
- 1 cup all-purpose flour
- 1 ½ cups vegetable oil for frying
Things You’ll Need
-
Large heavy bottomed skillet
-
Wire cooling racks
-
Baking sheet
-
Tongs
-
Vinyl gloves
Before You Begin
- The shrimp will cook quickly because it is so thin. Be careful not to overcook or they will become rubbery. You basically just need enough time to brown the breading.
- The shrimp we used are called grilling shrimp and we get them from the grocery store seafood counter.
- Grilling shrimp are larger and heartier than other shrimp.
- Nutrition facts listed do not include the oil needed for frying.
Instructions
-
Rinse shrimp and pat dry with paper towels.
-
Line a large baking sheet with paper towel. Place wire rack over the baking sheet and set aside to use for the cooked shrimp.
-
With gloved hands, carefully butterfly each shrimp by carefully slicing through the center of the shrimp but not cutting all the way through. Place butterflied shrimp on a second wire rack.
-
In a medium bowl, combine bread crumbs, pinko bread crumbs, garlic salt, Old Bay, and black pepper.
-
In another medium bowl whisk together eggs and water.
-
Place flour in a third medium bowl.
-
Dip a shrimp into the flour, coating both sides.
-
Dip floured shrimp into egg/water mixture.
-
Lastly dip shrimp into bread crumb mixture, pressing down gently on both sides to adhere.
-
Place breaded shrimp on wire rack and continue this process until all shrimp are breaded.
-
Heat oil in skillet over medium until shimmering.
-
Place shrimp into hot oil being careful not to crowd. You may need to cook in batches.
-
Cook for about 2 minutes on each side.
-
Remove to paper towel lined pan with wire rack.
Nutrition
The recipes on this blog are tested with a conventional gas oven and gas stovetop. It’s important to note that some ovens, especially as they age, can cook and bake inconsistently. Using an inexpensive oven thermometer can assure you that your oven is truly heating to the proper temperature. If you use a toaster oven or countertop oven, please keep in mind that they may not distribute heat the same as a conventional full sized oven and you may need to adjust your cooking/baking times. In the case of recipes made with a pressure cooker, air fryer, slow cooker, or other appliance, a link to the appliances we use is listed within each respective recipe. For baking recipes where measurements are given by weight, please note that results may not be the same if cups are used instead, and we can’t guarantee success with that method.
