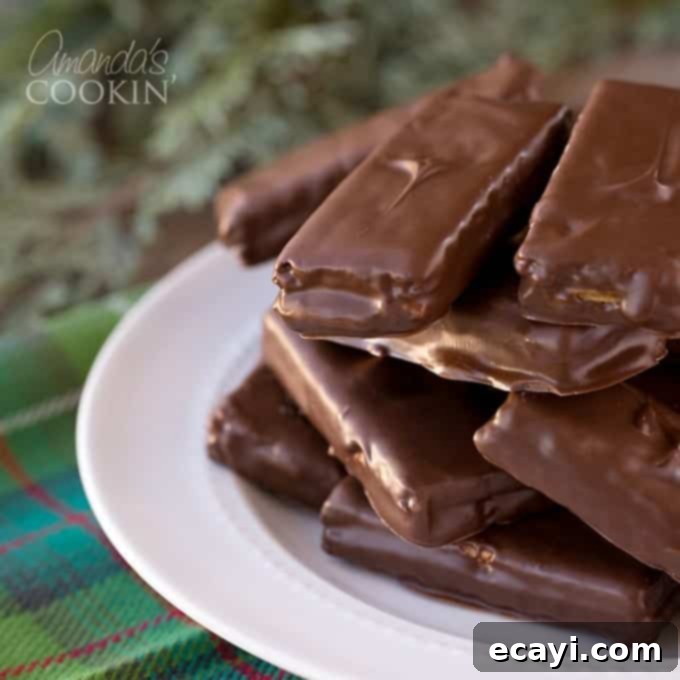
Irresistible No-Bake Peanut Butter Chocolate Graham Cracker Candy Bars
If you’re anything like me, you have a soft spot for the classic combination of graham crackers and creamy peanut butter. It’s a truly satisfying snack that perfectly curbs those sweet cravings without much fuss. And who can resist those decadent chocolate-dipped graham crackers often found at coffee shops? So, when the idea of bringing all these delightful elements together into a single, easy-to-make, homemade candy bar was presented to me by a dear friend, I was absolutely on board. The result? A remarkably simple yet utterly delicious treat that quickly became a household favorite.
This candy recipe is incredibly straightforward, making it a fantastic activity for all ages. Both kids and adults will adore these no-bake wonders, which are perfect for a quick snack, a party dessert, or even a thoughtful homemade gift. They combine the crunchy texture of graham crackers with the smooth, rich flavor of peanut butter, all enveloped in a generous layer of luscious chocolate. Get ready to indulge in a treat that tastes far more complex than it is to prepare, proving that sometimes the simplest ingredients create the most memorable sweets.
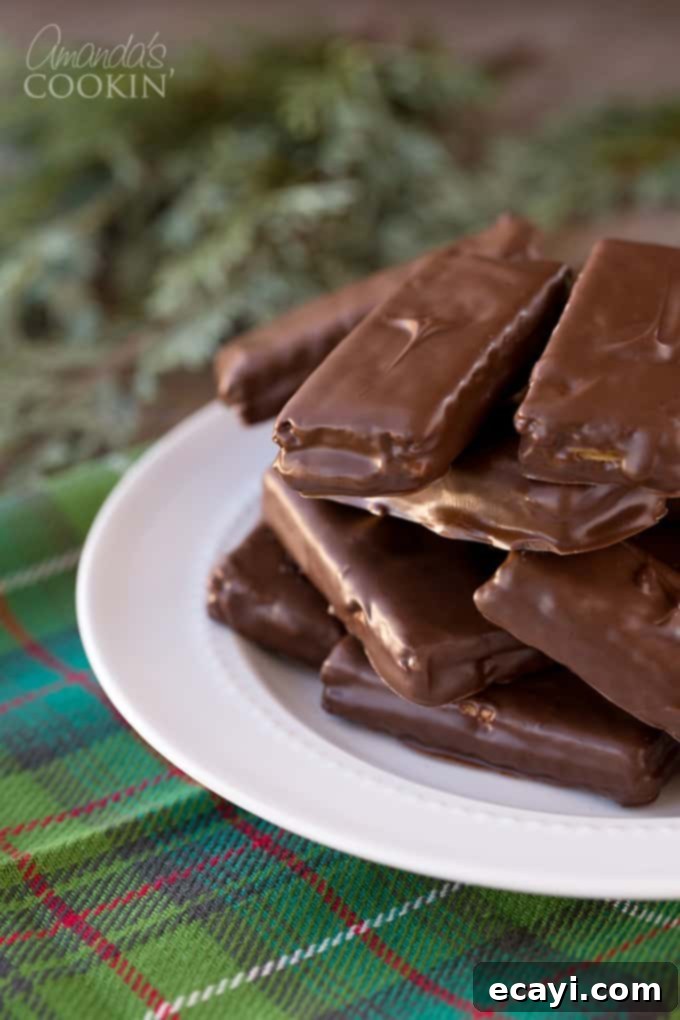
The Undeniable Appeal of These Easy Homemade Candy Bars
There’s something uniquely charming about homemade treats, and these peanut butter chocolate graham cracker candy bars are no exception. They effortlessly evoke nostalgic memories of childhood snacks, but with an elevated, candy-bar twist that feels both familiar and special. I’ve witnessed firsthand the immediate adoration these bars receive. My own children were absolutely smitten with them from the first bite, especially my now 19-year-old son, who was infatuated at 13 and remains just as passionate about them today. He’s a true connoisseur of anything involving chocolate and peanut butter, and these no-bake candy bars consistently hit all the right notes for him, proving their enduring appeal.
Beyond personal anecdotes, the broad appeal of these homemade candy bars lies in their remarkable simplicity and the universally loved flavor profile. They offer that perfect balance of salty and sweet, crunchy and creamy, all within a neat, hand-held package that’s easy to enjoy on the go or as a delightful end to any meal. Unlike many baking projects that demand precise measurements, extensive techniques, and significant oven time, these no-bake candy bars are incredibly forgiving and genuinely fun to make. This makes them an ideal choice for busy schedules, impromptu dessert needs, or when you want to involve little helpers in the kitchen. They also make a fantastic, crowd-pleasing addition to holiday platters, school bake sales, potlucks, or simply as a delightful indulgence to keep on hand for whenever a sweet craving strikes. Their versatility and effortless charm make them a truly irresistible treat.
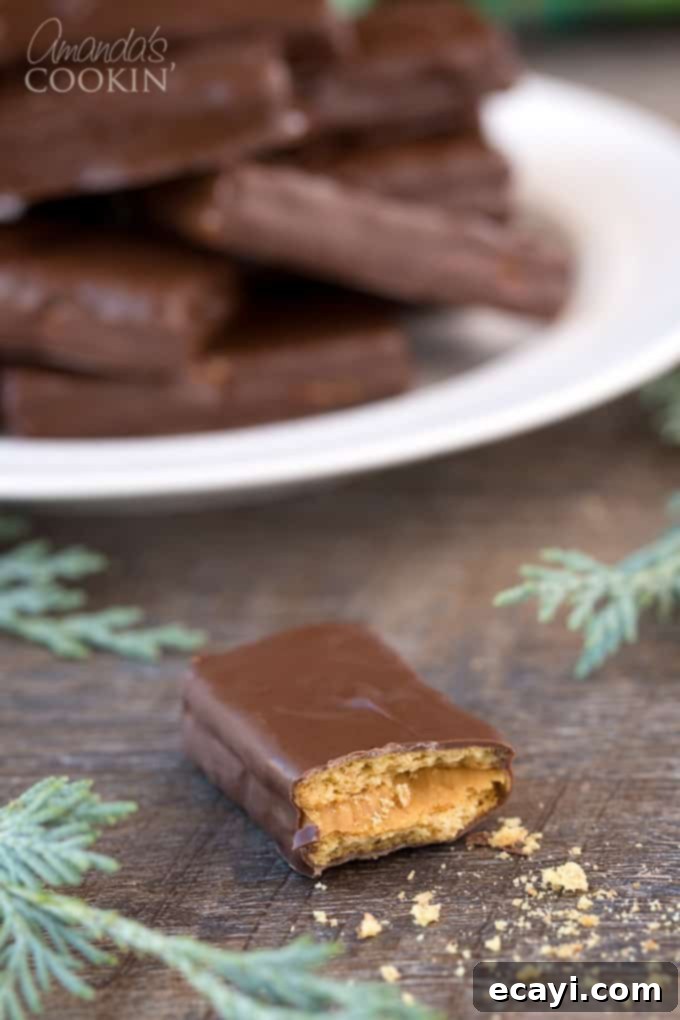
Key Ingredients for Your Delicious No-Bake Candy Bars
One of the most appealing aspects of this recipe for homemade candy bars is its wonderfully minimal list of readily available ingredients. You won’t need to embark on a scavenger hunt for obscure items; everything required can be conveniently found at your local grocery store. Here’s a closer look at each essential component and how it contributes to the magic of these delightful treats:
- Graham Crackers: These humble crackers form the crunchy, subtly sweet foundation of our candy bars. Their distinct texture provides a satisfying contrast to the creamy fillings, and their mild flavor ensures they complement rather than overpower the other elements. You can opt for classic honey graham crackers for a traditional taste, or experiment with cinnamon graham crackers to introduce an extra layer of warm spice. No matter your choice, their characteristic snap makes them the perfect base.
- Peanut Butter: This creamy, rich ingredient is undoubtedly the heart and soul of these candy bars! For a velvety smooth filling, creamy peanut butter works wonderfully. However, if you appreciate a bit of added texture, feel free to use crunchy peanut butter, which introduces small, delightful peanut pieces into each bite. For an extra layer of decadence and a subtle hint of hazelnut chocolate, you have the fantastic option to mix your peanut butter with Nutella. This combination adds another dimension of flavor that peanut butter and chocolate enthusiasts will particularly cherish. While any brand will work, a good quality, creamy peanut butter will offer the best consistency for smooth spreading and a richer flavor.
- Ghirardelli Dipping Chocolate or Almond Bark: This is the key to creating the luscious, glossy, and irresistible chocolate shell that encases our peanut butter graham cracker sandwiches. Ghirardelli melting wafers or dipping chocolates are exceptional choices because they are formulated to melt smoothly and set beautifully, providing a professional-looking, crisp finish without tempering. Almond bark is another excellent, easy-to-use alternative that also sets quickly and delivers a firm chocolate coating. If these aren’t readily available, you can certainly use good quality chocolate chips (milk, semi-sweet, or dark varieties) and enhance their melting properties. Simply add a teaspoon or two of coconut oil or vegetable shortening per cup of chocolate chips when melting to ensure a smooth, liquid consistency ideal for dipping. This small addition helps the chocolate harden evenly and prevents it from becoming too thick.
Essential Kitchen Tools for Easy Preparation
While the ingredient list is refreshingly simple, having a few basic kitchen tools on hand will undoubtedly make the preparation process even smoother, more efficient, and ultimately more enjoyable. These carefully selected tools ensure precision and cleanliness, helping you achieve perfectly formed and beautifully coated homemade candy bars every single time:
- Sharp Knife: A sharp kitchen knife is truly indispensable for cleanly cutting the graham crackers. While the perforations might suggest they’re meant to be broken by hand, this often leads to uneven edges and crumbly pieces. A sharp knife allows you to score and slice the cracker sheets into individual, uniform pieces with straight, neat edges. This precision is crucial for creating visually appealing candy bars and also makes the subsequent steps of spreading and dipping much easier. It’s also handy for smoothing any peanut butter overflow.
- Appetizer Tongs: These small, versatile tongs are an absolute game-changer when it comes to dipping your graham cracker sandwiches into the melted chocolate. They allow you to securely hold each bar, ensuring an even and complete coating of chocolate while significantly minimizing mess on your fingers. This tool transforms the dipping process from a potentially sticky endeavor into a quick, clean, and efficient step.
- Waxed Paper or Parchment Paper: Lining your cookie sheet or chosen setting surface with either waxed paper or parchment paper is a critical step. This non-stick barrier prevents the chocolate-dipped candy bars from adhering to the pan as they cool and set, making them incredibly easy to lift off once firm. Furthermore, it greatly simplifies cleanup, allowing you to enjoy your treats without worrying about stubborn sticky residue.
- Cookie Sheet or Cutting Board: You will need a flat, sturdy surface to place your freshly dipped candy bars on while the chocolate coating hardens. A standard baking sheet works perfectly, or a large cutting board lined with your chosen paper will also do the trick. Ensure you have ample space to arrange all your candy bars without them touching, allowing the chocolate to set uniformly.
- Microwave-Safe Bowl or Double Boiler: Although not explicitly listed in the original provided list, a proper vessel for melting your chocolate is fundamental. A glass microwave-safe bowl is ideal for quick melting in short bursts. Alternatively, a heat-proof bowl set over a small pot of simmering water creates a gentle double boiler setup, perfect for slowly and evenly melting chocolate without the risk of scorching.
Step-by-Step Guide to Crafting Your Delicious Homemade Candy Bars
Making these no-bake peanut butter chocolate graham cracker bars is a fantastically fun and incredibly simple process that yields impressive results. Follow these detailed steps to create your very own batch of irresistible treats that will have everyone asking for more:
1. Prepare Your Graham Crackers for Assembly
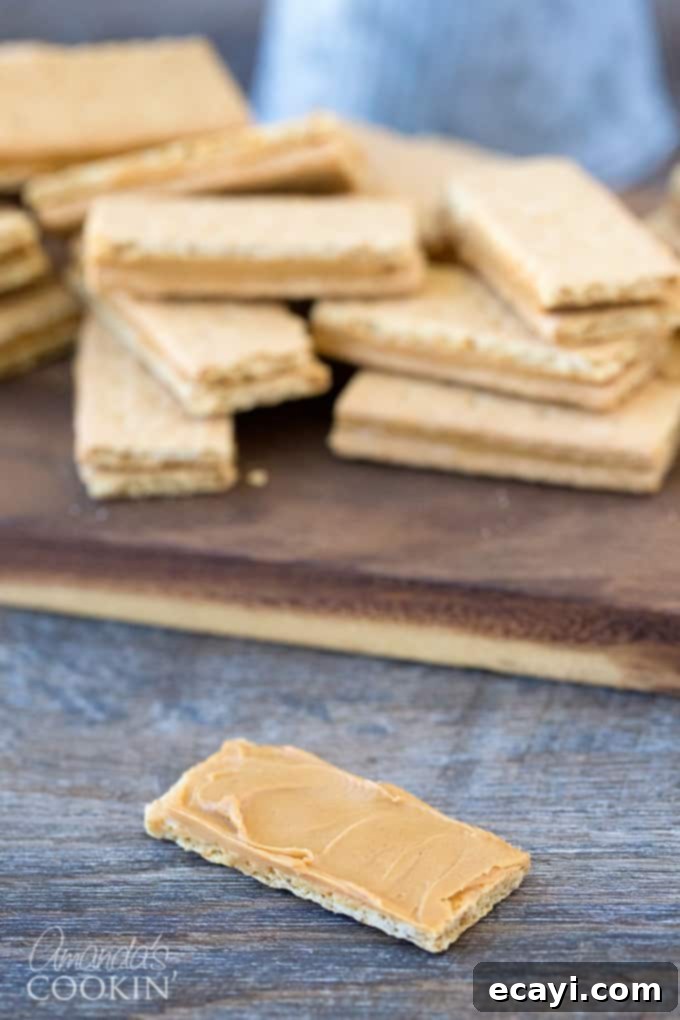
Begin by preparing your graham crackers. While it might be tempting to simply break them along their perforations with your fingers, using a sharp knife is highly recommended for the best results. Graham crackers often break unevenly when snapped by hand, leading to irregular shapes and crumbly edges, which can make for less attractive and harder-to-dip candy bars. For precision and a clean finish, lay the full graham cracker sheets on a cutting board and carefully slice them along their natural perforations or to your desired individual piece size. This small effort towards uniformity will make the subsequent steps much easier and ensure your homemade candy bars look as good as they taste.
2. Assemble the Peanut Butter Graham Cracker Sandwiches
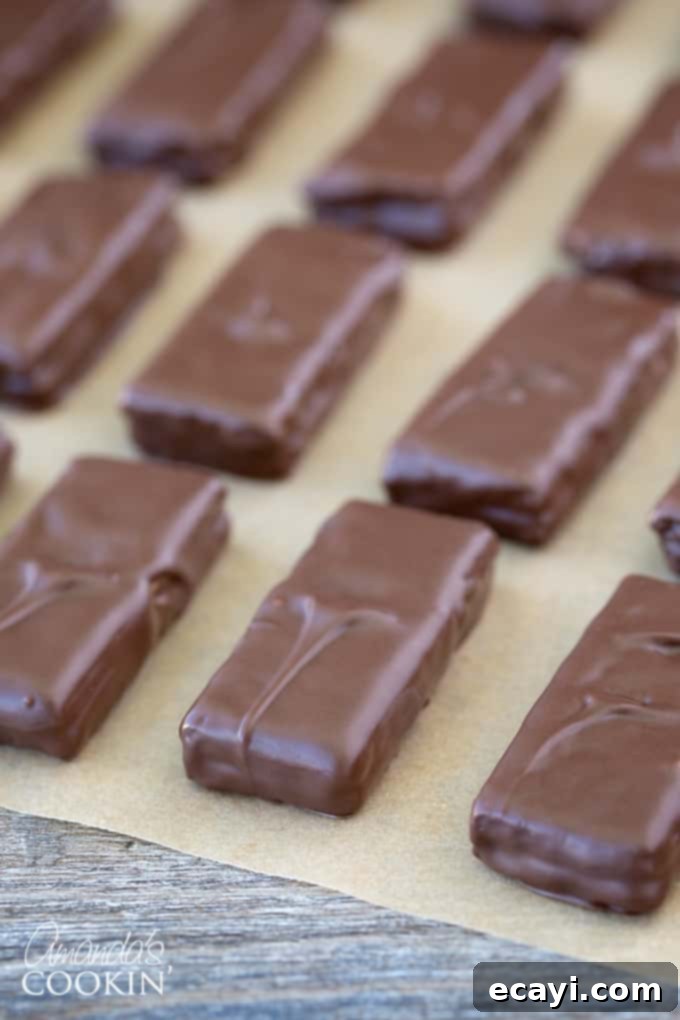
Now it’s time to construct the delicious core of your candy bars. Take one piece of your neatly cut graham cracker and generously spread it with your chosen peanut butter. Aim for an even layer, approximately ¼ to ½ inch thick, adjusting the amount based on your personal preference for peanut butter intensity. Then, gently place another graham cracker piece directly on top, creating a perfect sandwich. Once assembled, take a moment to carefully smooth the sides where any peanut butter might have seeped out. You can use the back of a knife or a small offset spatula for this. If needed, don’t hesitate to apply a little extra peanut butter around the edges to fill any gaps and create a perfectly even, rectangular shape all the way around the cracker sandwich. This meticulous step ensures a clean, consistent base for the chocolate coating and greatly contributes to the overall appealing aesthetic of your homemade candy bars.
3. Prepare and Melt the Chocolate Coating
The chocolate coating is what truly transforms these simple sandwiches into delectable candy bars. I personally find Ghirardelli melting chocolate to be an excellent choice, often available in bulk at stores like Sam’s Club, because it melts beautifully and consistently, yielding a smooth, flawless finish. However, almond bark is an equally superb alternative, well-regarded for its quick setting time and crisp, even coating. If you’re opting for chocolate chips, remember a crucial tip: add a touch of coconut oil or vegetable shortening (about 1-2 teaspoons per cup of chips) to achieve a smooth, liquid, and easily dippable consistency. This helps the chocolate to thin out and harden nicely. Melt your chocolate in a microwave-safe bowl in short 30-second intervals, stirring thoroughly after each, until it becomes completely smooth and fluid. Alternatively, you can use a double boiler method for gentle, even melting, which minimizes the risk of overheating or scorching the chocolate. Patience here will result in a perfect coating.
4. Dip and Set Your Homemade Candy Bars
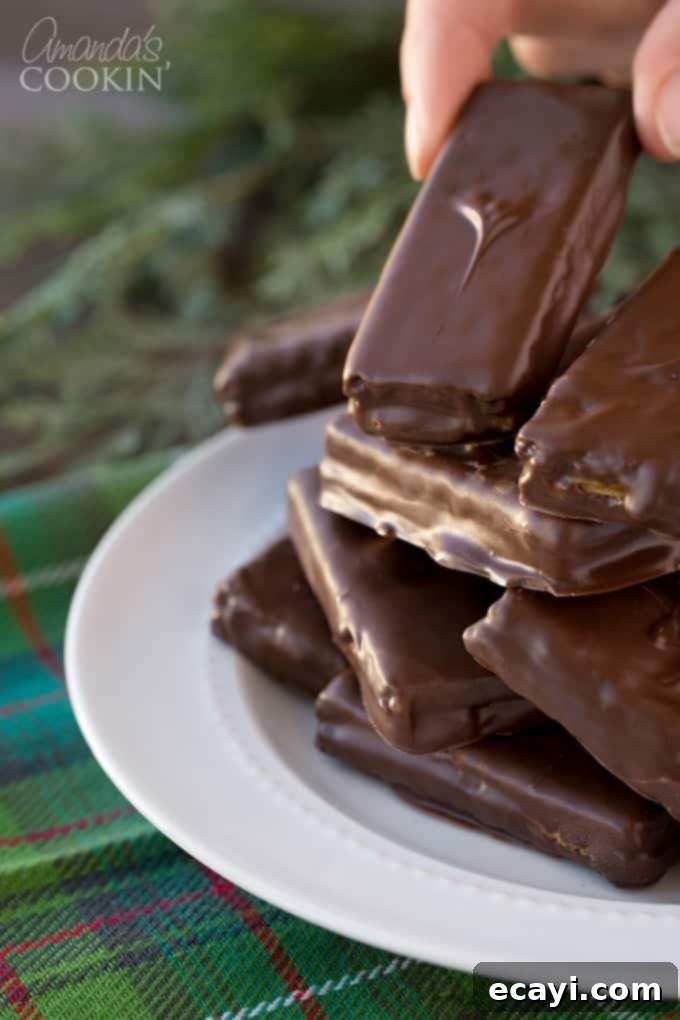
With your peanut butter graham cracker sandwiches prepared and your chocolate perfectly melted, it’s time for the most satisfying step: dipping! Using appetizer tongs, carefully pick up one graham cracker sandwich. Submerge it completely into the warm, melted chocolate, ensuring all sides are thoroughly coated. Gently lift the bar out and allow any excess chocolate to drip back into the bowl. A slight tap against the edge of the bowl can help shake off any extra, preventing puddles of chocolate on your baking sheet and ensuring a clean, even finish. Carefully place the dipped candy bar onto a cookie sheet that has been meticulously lined with waxed paper or parchment paper. Repeat this process with the remaining sandwiches, ensuring they are spaced apart. Once all are dipped, allow the chocolate to set completely. This can be done at room temperature, which might take an hour or two depending on your environment, or you can accelerate the process by placing the cookie sheet in the refrigerator for approximately 15-30 minutes until the chocolate is firm to the touch. Once fully set, your delightful homemade candy bars are ready to be savored and enjoyed!
Tips for Variations and Perfecting Your No-Bake Candy Bars
These peanut butter chocolate graham cracker bars are undeniably fantastic in their original form, but their versatility means there are countless ways to customize them and ensure every batch is a resounding success. Experiment with these additional tips and creative variations to make them truly your own, catering to diverse tastes and occasions:
- Peanut Butter Power-Up: Don’t hesitate to get creative with your peanut butter filling. As previously mentioned, a delightful 50/50 mix with Nutella introduces a wonderful hazelnut-chocolate dimension. Beyond that, consider stirring in a tiny pinch of sea salt to enhance the peanut butter flavor, or a minuscule dash of vanilla extract for added warmth and depth before spreading. For a crunchier texture, incorporate finely chopped peanuts directly into the peanut butter.
- Explore Chocolate Choices: While Ghirardelli and almond bark are reliable choices, the world of chocolate offers endless possibilities. For a more intense, less sweet profile, dip your bars in high-quality dark chocolate. Milk chocolate provides a classic, creamy sweetness that’s universally loved, while white chocolate can create a different aesthetic and a unique, sweeter flavor profile. You can even use a combination, drizzling white chocolate over dark-dipped bars for a striking contrast.
- Exciting Toppings Galore: Before the chocolate has a chance to fully set, sprinkle your freshly dipped candy bars with an array of fun and flavorful toppings! Options include mini chocolate chips, finely chopped peanuts, walnuts, or pecans, colorful sprinkles (perfect for holidays or parties), a delicate dusting of flaky sea salt (which beautifully balances and enhances both the chocolate and peanut butter flavors), or even a playful drizzle of contrasting melted chocolate (like white chocolate over a milk chocolate coating).
- Achieve Uniformity: For the most professional-looking and satisfying results, pay attention to uniformity. Ensure your graham cracker pieces are cut as evenly as possible, and strive for a consistent thickness in your peanut butter layer. This meticulousness helps the chocolate coating go on smoothly and evenly, resulting in a polished finish.
- Mastering Melted Chocolate: When melting chocolate, remember that “low and slow” is the golden rule to prevent scorching. If using the microwave, always heat in short bursts (15-30 seconds) and stir thoroughly after each interval, even if the chocolate doesn’t appear fully melted. Residual heat will continue the process. If using a double boiler, ensure the water in the pot is simmering gently and that the bottom of your chocolate bowl does not touch the water. A smooth, fluid, lump-free chocolate consistency is absolutely essential for easy, beautiful dipping.
- Optimal Storage Suggestions: Once the chocolate has fully set and hardened, transfer your homemade candy bars to an airtight container. They will remain wonderfully fresh and delicious when stored at room temperature for up to a week. For extended freshness, they can be kept in the refrigerator for up to two weeks, or even frozen for up to a month. If freezing, separate layers with parchment paper to prevent sticking and allow them to thaw slightly before enjoying.
- Perfect for Gifting: These irresistible no-bake treats make truly thoughtful and impressive homemade gifts. Arrange them aesthetically in decorative boxes, wrap them individually in cellophane bags tied with a festive ribbon, or include them as a standout item on a larger dessert platter. Their homemade charm and delicious taste make them a universally appreciated present!
Frequently Asked Questions About Homemade Candy Bars
Here are some common questions you might have about making, storing, and enjoying these delightful homemade candy bars, along with helpful answers:
- Can I use different types of crackers? Yes, absolutely! While graham crackers offer a classic taste and texture that works perfectly, you can certainly experiment with other flat, rectangular crackers. Consider options like butter crackers for a slightly saltier contrast, or even digestive biscuits for a different sweet and crumbly base. Just ensure the cracker you choose is sturdy enough to hold the peanut butter filling without crumbling too easily.
- How long do these homemade candy bars stay fresh? When stored properly in an airtight container at room temperature, these delicious candy bars will maintain their freshness and best quality for approximately 5-7 days. If you prefer them chilled or need to extend their shelf life, they can be refrigerated for up to two weeks.
- Can I make them ahead of time for a party or event? Yes, these no-bake candy bars are an ideal make-ahead dessert! You can easily prepare them a day or two before your event. In fact, many people find that the flavors meld and deepen beautifully after a day, making them even more delicious. Store them in an airtight container at room temperature or in the refrigerator.
- Are there options for dietary restrictions? This recipe, as traditionally written, contains gluten from the graham crackers and peanuts from the peanut butter. Dairy may also be present depending on your chosen chocolate. For gluten-free options, search for certified gluten-free graham crackers. For dairy-free versions, ensure your chocolate is specifically dairy-free (many dark chocolates are, but always check labels) and use a dairy-free peanut butter. For those with nut allergies, sunflower seed butter (often called SunButter) can be an excellent substitute for peanut butter, coupled with nut-free crackers and chocolate.
- What should I do if my melted chocolate becomes too thick while dipping? If your melted chocolate starts to thicken as you work, don’t worry! You can gently reheat it in the microwave for just a few seconds (10-15 seconds at a time) or warm it over your double boiler until it returns to a smooth, dippable consistency. Stirring in a tiny bit more coconut oil or vegetable shortening (about ½ teaspoon at a time) can also help thin it out without affecting the taste or setting properties.
We have lots of easy candy dessert ideas on the blog, like our Heart Oreo Truffles which are perfect for Valentine’s Day or anniversaries, these Candy Bar Cookies which are a huge hit over the holidays during cookie exchanges, or you can check out our comprehensive collection of 30+ Homemade Candy Recipes for even more inspiration and delightful creations!
More Irresistible Candy Recipes to Explore
- Saltine Toffee
- Candied Pecans
- Peanut Butter Cups
- Homemade Peanut Brittle
- Chocolate Peanut Butter Balls
- Chocolate Peanut Butter Fudge
- Potato Candy

Easy Homemade Candy Bars
IMPORTANT – There are often Frequently Asked Questions within the blog post that you may find helpful. Simply scroll back up to read them!
Print It
Pin It
Rate It
Save ItSaved!
Ingredients
- 6 sheets graham crackers
- ½ cup peanut butter you can mix with Nutella if you like
- 12 oz Ghirardelli dipping chocolate or almond bark
Instructions
-
Cut graham crackers into individual pieces using a sharp knife. You can break them with your fingers, but sometimes they don’t break evenly. Your best bet is to use a knife.
-
Spread one cracker with peanut butter, then place another graham cracker on top of it. Smooth the sides where peanut butter may have seeped out. Use extra peanut butter to make them even all the way around the cracker sandwich.
-
Use appetizer tongs to dip in melted chocolate. Shake off the excess and place on a lined with wax paper cookie sheet and allow chocolate to set.
Nutrition
The recipes on this blog are tested with a conventional gas oven and gas stovetop. It’s important to note that some ovens, especially as they age, can cook and bake inconsistently. Using an inexpensive oven thermometer can assure you that your oven is truly heating to the proper temperature. If you use a toaster oven or countertop oven, please keep in mind that they may not distribute heat the same as a conventional full sized oven and you may need to adjust your cooking/baking times. In the case of recipes made with a pressure cooker, air fryer, slow cooker, or other appliance, a link to the appliances we use is listed within each respective recipe. For baking recipes where measurements are given by weight, please note that results may not be the same if cups are used instead, and we can’t guarantee success with that method.
This recipe was originally published on Jan 30, 2011
There you have it – a straightforward, incredibly satisfying recipe for homemade candy bars that are sure to become a cherished staple in your dessert repertoire. Whether you’re whipping them up for a special occasion, a simple sweet treat craving, or as a fun and engaging kitchen project with the family, these peanut butter chocolate graham cracker bars consistently deliver on both sensational flavor and impressive ease. Enjoy the delightful process of creating these wonderful confections, and prepare for an outpouring of rave reviews from everyone who has the pleasure of trying them. Happy snacking!
