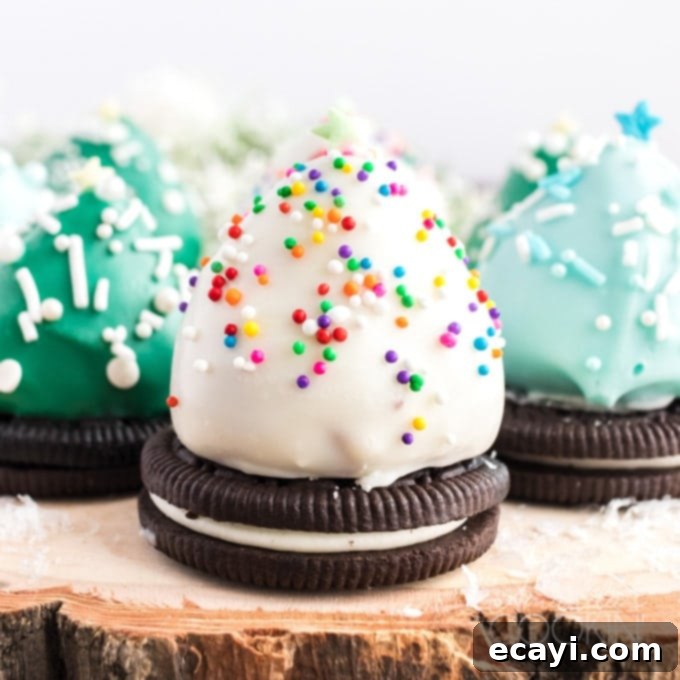
Delightful Chocolate Covered Strawberry Christmas Trees: Easy Holiday Fun for the Whole Family
The holiday season is a magical time for creating cherished memories, and what better way to do that than by gathering in the kitchen to whip up some festive treats? These enchanting Chocolate Covered Strawberry Christmas Trees are not only visually stunning but also incredibly simple to make, making them an ideal activity for kids and adults alike. With a sturdy Oreo cookie base, fresh strawberries, a decadent chocolate coating, and a sprinkle of festive cheer, these adorable edible trees are guaranteed to bring smiles and holiday spirit to any gathering. Forget complicated desserts; this recipe focuses on fun, flavor, and ease, ensuring that even the littlest helpers can join in the holiday baking adventure. Imagine the joy of seeing these delightful, vibrant green (or even white, with a touch of color!) strawberry trees adorned with colorful sprinkles, perched atop a rich chocolate cookie. They’re perfect as a charming centerpiece, a delightful party favor, or simply a sweet snack to enjoy with loved ones.
Dive into this step-by-step guide and discover how you can transform simple ingredients into a truly magical Christmas treat. Your family will love crafting these, perhaps alongside other festive favorites like our Christmas Tree brownies!
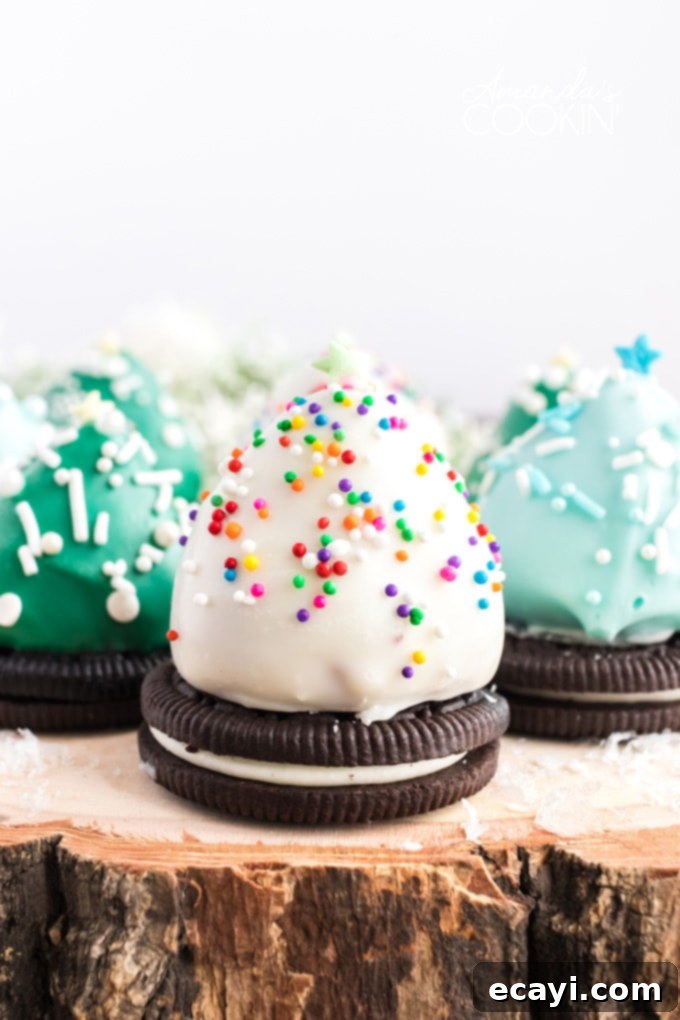
Transform Strawberries into Festive Christmas Trees
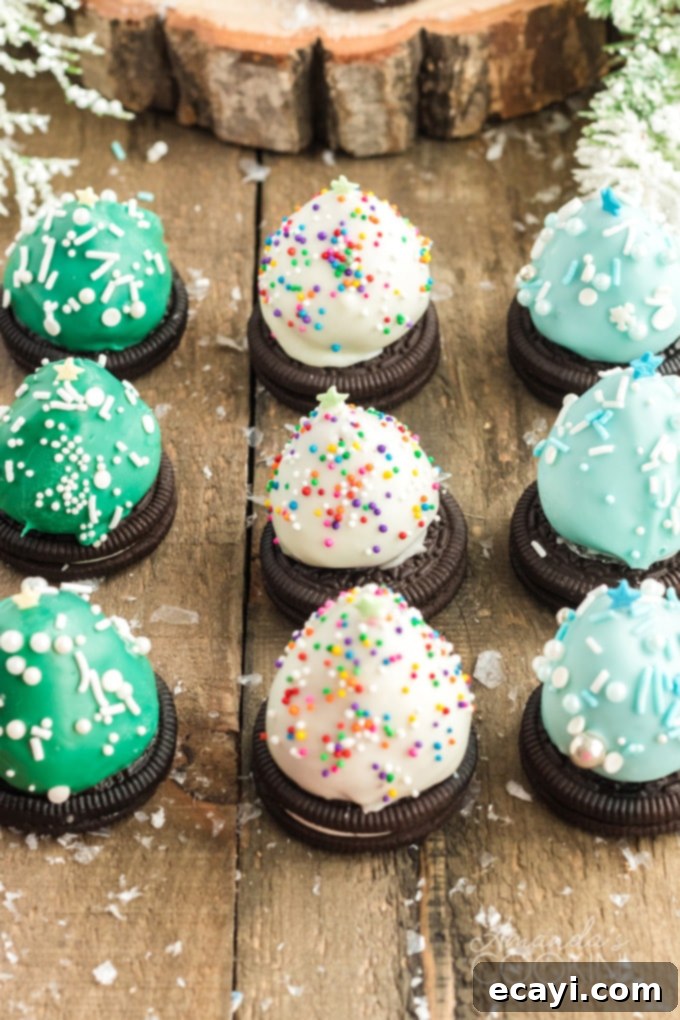
Everyone adores the classic combination of a juicy, fresh strawberry enveloped in rich, smooth chocolate. But why stop there when you can elevate this beloved treat into something truly spectacular for your holiday celebrations? These chocolate-dipped strawberries are cleverly designed to resemble miniature, charming Christmas trees, complete with a sturdy base and twinkling decorations. They’re an instant hit at holiday parties, potlucks, or as a special snack for Christmas movie nights. Their unique shape and festive decorations make them a standout dessert that’s both delicious and incredibly fun to make and eat. They’re also surprisingly elegant, despite their simplicity, and can be customized to match any holiday theme or color palette. Get ready to impress your guests and delight your family with these edible works of art!
Essential Ingredients for Your Edible Christmas Trees
Crafting these delightful strawberry Christmas trees requires only a handful of readily available ingredients. The beauty of this recipe lies in its flexibility, allowing you to easily adapt it to your taste preferences. For instance, while dark or milk melting chocolate provides a classic look and taste, white chocolate chips or almond bark can be used for a lighter, snow-like appearance, which can then be tinted with food coloring to create green, red, or even blue Christmas trees! Experiment with different flavors and colors to make these treats uniquely yours.
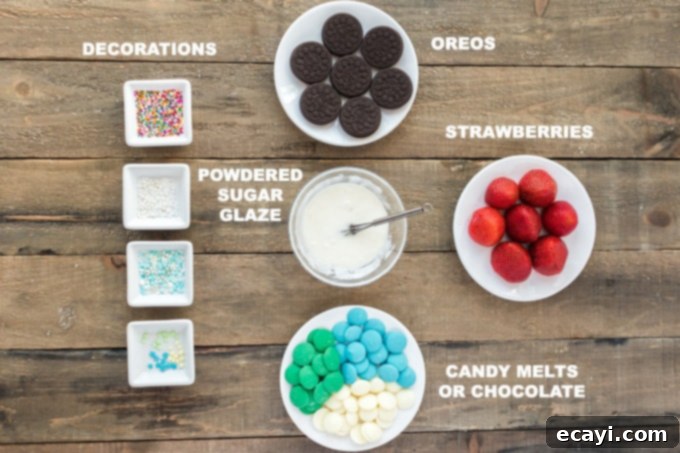
- 12 ounces melting chocolate or candy melts: Choose your favorite! Dark, milk, or white chocolate work wonderfully. Candy melts offer a wider range of colors, perfect for vibrant green trees. Ensure it’s good quality for a smooth finish that sets well.
- 1 pound strawberries: Select firm, fresh, and uniformly shaped strawberries for the best “tree” appearance. Larger strawberries tend to make more impressive trees. Wash them thoroughly and pat them completely dry before use; any moisture can cause the chocolate to seize.
- 24 Oreo cookies: These iconic chocolate sandwich cookies provide a delicious and stable base for your trees, mimicking the tree trunk and ground. They add an extra layer of chocolatey goodness and are readily available.
- 2 cups powdered sugar: Essential for creating the “snow” icing that helps secure the strawberry and adds a sweet, wintry touch. Also known as confectioners’ sugar, it dissolves smoothly for a creamy glaze.
- 2-3 tablespoons milk: Used to thin the powdered sugar into a smooth, spreadable icing. Start with 2 tablespoons and add more incrementally until the desired consistency is reached. Any type of milk (dairy or non-dairy) will work.
- Assorted Sprinkles and Nonpareils: The “ornaments” for your Christmas trees! Choose festive colors like red, green, gold, silver, or a mix. Nonpareils add tiny, classic dots, while larger sprinkles can simulate decorative bulbs.
- Star sprinkles: The crowning glory of your Christmas trees! Edible star sprinkles add that perfect finishing touch, sitting proudly at the top of each strawberry tree. Look for gold, silver, or even red stars for a classic, celebratory look.
12 DAYS OF CHRISTMAS COOKIES
12 Christmas cookies you will love, PLUS bonus baking tips and TWO extra recipes you will not find on this blog! See ALL my cookbooks here!
Get the Christmas cookies cookbook! ONLY $9.97!!
Buy with Card
Buy Now
Recommended Kitchen Tools for Easy Preparation
Having the right tools on hand can significantly streamline the preparation process for these delightful treats. While many items are standard kitchen staples, a few specialized tools will make the dipping and decorating much easier and mess-free. Precision and cleanliness are key to achieving those picture-perfect Christmas trees.
- Toothpicks or wooden skewers: These are indispensable for dipping the strawberries without getting your fingers messy, acting as a convenient handle. Wooden skewers are great for larger strawberries or if you want a more secure grip, allowing for full coating.
- Mixing bowls: You’ll need at least two: one for melting your chocolate and another for whisking the powdered sugar icing. Glass or microwave-safe bowls are ideal for melting chocolate as they retain heat well.
- Whisk: For smoothly combining your powdered sugar and milk to achieve the perfect icing consistency. A small whisk works best for lumps-free results.
- Chef’s knife: A sharp knife is essential for cleanly slicing the tops off your strawberries, ensuring a flat and stable base for your trees to stand upright on the cookies.
- Parchment paper or wax paper: For lining your baking sheets or trays, providing a non-stick surface for the chocolate-dipped strawberries to dry without sticking. This makes cleanup much easier.
- Baking sheet or tray: To hold your strawberries during chilling and drying. A flat surface is necessary to prevent the strawberries from rolling.
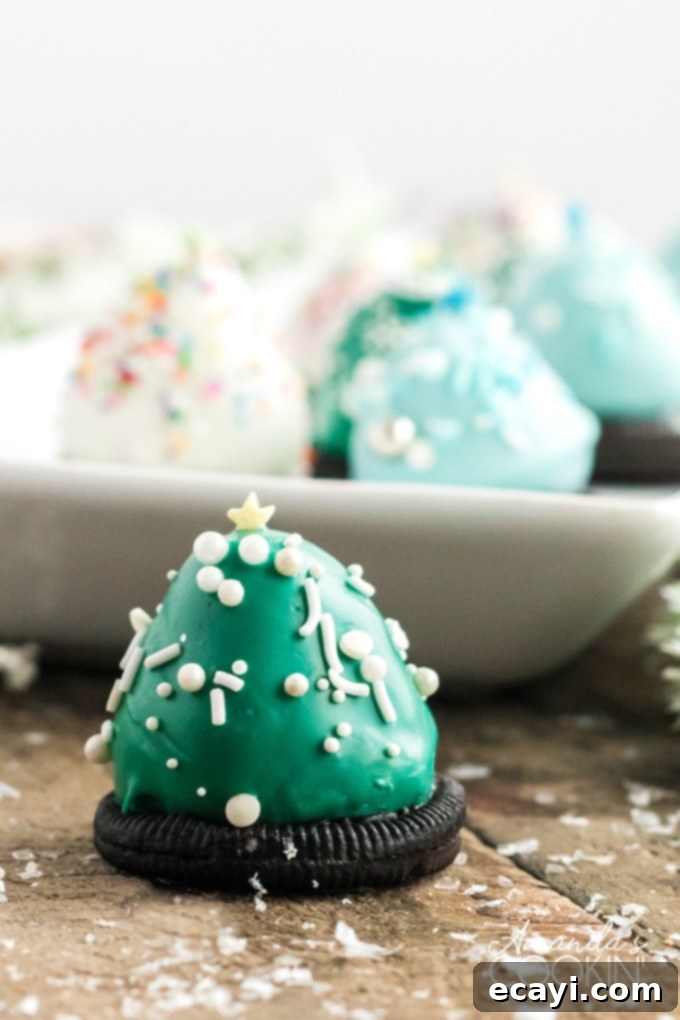
Expert Kitchen Tips for Perfect Strawberry Christmas Trees
Achieving perfectly coated and beautifully decorated strawberry Christmas trees is simpler than you might think, especially with a few professional tips and tricks. These pointers will help you navigate the process with ease, ensuring delicious and visually appealing results every time. Pay close attention to the chocolate melting process and the consistency of your icing for the best outcome.
- Melting Chocolate Mastery: When melting chocolate, whether in the microwave or a double boiler, it’s crucial to avoid overheating. Overheated chocolate can seize, become grainy, or burn, ruining its smooth texture. The best approach is to stop the melting process when small, unmelted pieces are still visible (about 80% melted). Remove the chocolate from the heat (or microwave) and continue stirring gently. The residual heat will melt the remaining pieces, resulting in a perfectly smooth, glossy consistency ideal for dipping. If using candy melts, strictly follow package instructions for optimal results.
- Keep it Clean with Skewers: To avoid getting your fingers sticky and messy while dipping, always use a toothpick or a wooden skewer. Insert it firmly into the flat end of the strawberry. This provides a clean, easy-to-handle grip, allowing you to fully coat the strawberry and shake off excess chocolate without direct contact. This also helps in achieving a uniform coating.
- Creating a Snowy Base: For a magical “snow-covered” effect around your Christmas tree, spread the powdered sugar icing not just in the center of the Oreo cookie, but all the way to its edges. This creates a broader white “snow” base that enhances the festive appearance. Then, carefully place the flat end of your chocolate-dipped strawberry tree firmly into the center of this snowy icing. The icing acts as a delicious adhesive, securing your strawberry tree in place and adding to the festive aesthetic.
- Chill for a Quick Set: Chilling your prepared strawberries for about an hour before dipping is a game-changer. Cold strawberries cause the warm chocolate to set much more quickly, minimizing drips and ensuring a smoother, more uniform coating. This rapid setting also means you need to have your sprinkles and star toppers laid out and ready to go *before* you start dipping, as the window for applying decorations will be very short!
- Achieving Icing Consistency: The powdered sugar icing should be thick enough to hold its shape and act as a glue for the strawberry, but still spreadable without tearing the Oreo. If it’s too thin, your strawberry might slide or the icing will run off the cookie; if too thick, it won’t spread nicely. Add milk gradually, a teaspoon or even half a teaspoon at a time, until you reach a smooth, spreadable consistency that is thick but manageable. A few drops of water can be used as a last resort if it’s too stiff, but milk is preferred for flavor.
- Storage: Once decorated, these strawberry Christmas trees are best enjoyed fresh. If you need to store them, place them in a single layer in an airtight container in the refrigerator for up to 1-2 days. The strawberries will soften over time, so plan to serve them relatively soon after preparation.
How to Make Chocolate Covered Strawberry Christmas Trees: Step-by-Step Guide
Follow these simple steps to create your festive and delicious strawberry Christmas trees. Precision and timing are key, especially when working with melted chocolate, but don’t worry – it’s an enjoyable process that yields impressive results!
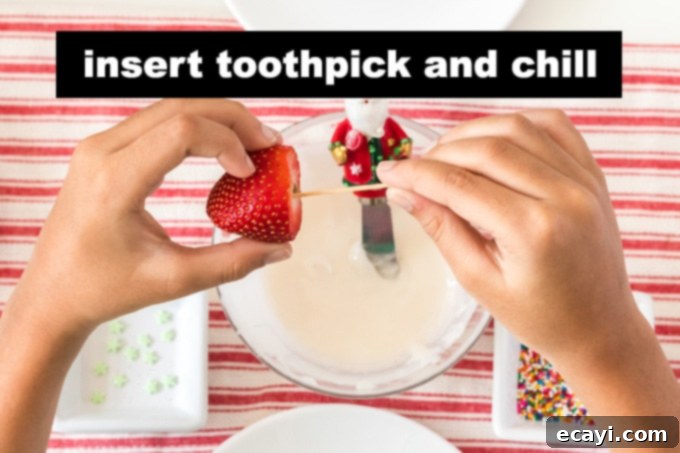
- Prepare the Strawberries: Begin by carefully washing and thoroughly drying your strawberries. Using a sharp chef’s knife, cut off the green tops of each strawberry, ensuring the cut end is perfectly flat. This flat surface will allow the strawberry to stand upright on the Oreo cookie base. Once trimmed, insert a toothpick or a wooden skewer firmly into the flat end of each strawberry. Arrange the skewered strawberries on a tray lined with parchment paper and chill them in the refrigerator for approximately one hour. This crucial step helps the chocolate set quickly and cleanly.
- Melt the Chocolate: While the strawberries are chilling, prepare your chocolate. Place the melting chocolate or candy melts in a microwave-safe mixing bowl. Heat in the microwave in 30-second intervals, stirring thoroughly after each interval, until the chocolate is mostly melted with a few small pieces remaining. Remove from the microwave and continue stirring until completely smooth and glossy, ensuring no lumps remain. Alternatively, you can use a double boiler method: place the bowl of chocolate over a saucepan of simmering water, ensuring the bottom of the bowl does not touch the water, and stir until melted and smooth.
- Prepare the Powdered Sugar Icing: In a separate mixing bowl, whisk together the powdered sugar and 2 tablespoons of milk. Continue whisking, adding more milk in very small increments (half a teaspoon at a time), until you achieve a thick, smooth, and spreadable icing consistency. It should be thick enough to act as a glue but thin enough to spread easily over the cookie.
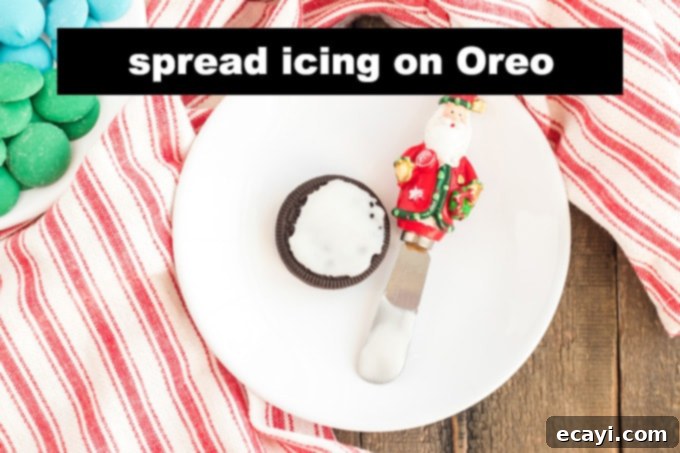
- Prepare the Cookie Base: Take ONE Oreo cookie. Using a small spoon or knife, spread a small amount of the prepared powdered sugar icing on the top surface of the cookie. This will serve as both the delightful “snow” and the essential adhesive for your strawberry tree. If you desire a fuller “snow-covered” ground effect, spread the icing all the way to the edges of the cookie.
- Dip and Decorate the Strawberries: Remove the chilled strawberries from the refrigerator. Holding one strawberry by its toothpick or skewer, carefully dip the entire strawberry into the melted chocolate, rotating it to ensure even coverage from top to bottom. Gently lift the strawberry and lightly shake off any excess chocolate back into the bowl with a gentle tap. Immediately, while the chocolate is still wet and before it sets, sprinkle generously with your chosen nonpareils and candy sprinkles. Work quickly as the chocolate will set fast on the cold strawberry.
- Assemble the Christmas Tree: Once the chocolate coating on the strawberry has dried and hardened (this should happen rapidly due to the chilling), carefully remove the strawberry from the toothpick or skewer. Gently place the flat, cut end of the chocolate-covered strawberry onto the powdered sugar icing on top of the prepared Oreo cookie. Press lightly but firmly to secure it; the icing will act as a strong adhesive, holding your festive tree in place.
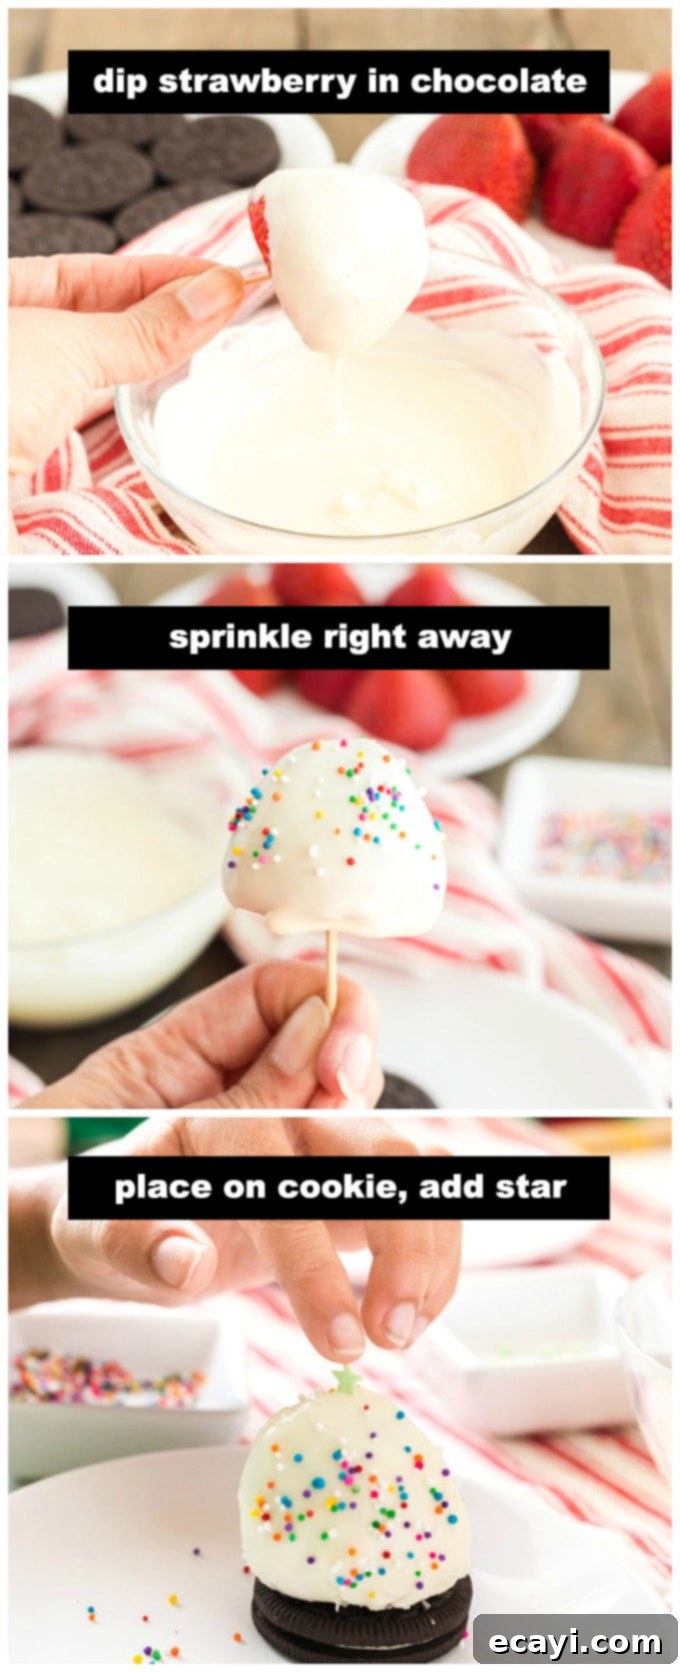
- Add the Star Topper: To complete your mini Christmas tree, carefully place a star sprinkle on the very top of the strawberry. You might need a tiny dab of extra icing or melted chocolate on the back of the star to help it stick securely, especially if the chocolate on the tip has already dried.
- Repeat and Enjoy: Continue this delightful process for each remaining strawberry and Oreo cookie until you have a whole forest of festive, edible Christmas trees! Arrange your finished Chocolate Covered Strawberry Christmas Trees beautifully on a platter and prepare for compliments and eager smiles!
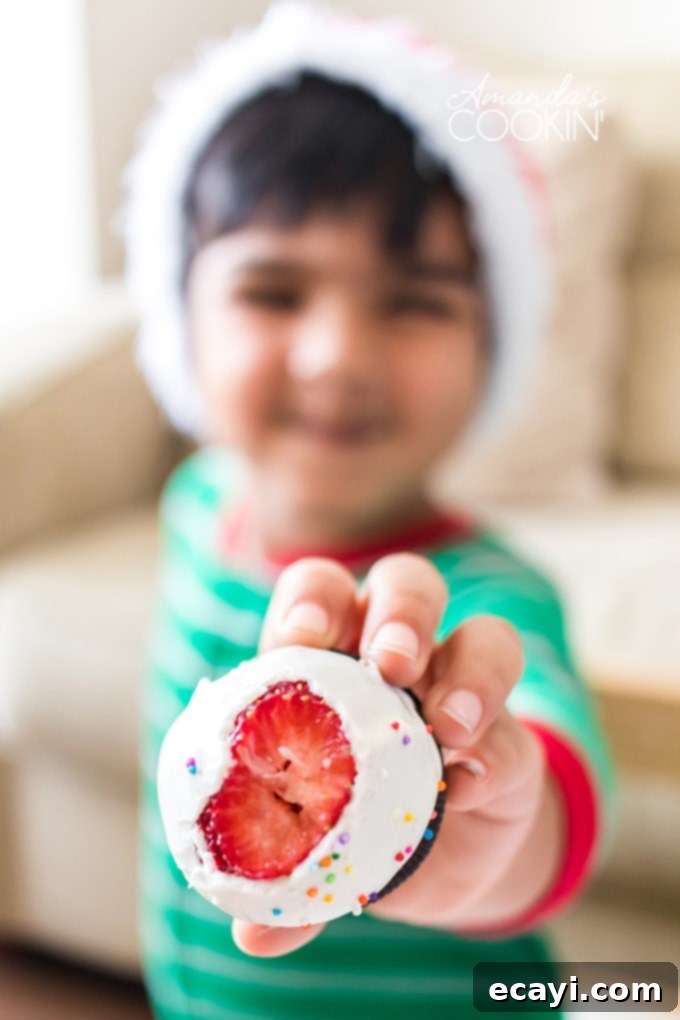
Repeat this enchanting process for each strawberry until you have a whole forest of festive, edible Christmas trees!
Creative Variations and Serving Suggestions
While the classic chocolate-covered strawberry Christmas tree is undoubtedly charming, there are many ways to customize this recipe to suit your taste and holiday theme. Don’t be afraid to get creative and experiment with different colors, flavors, and toppings to make your Christmas trees truly unique and personal.
- Color Variations: Instead of dark chocolate, use white candy melts tinted with green food coloring for classic green trees, or red candy melts for a vibrant, festive look. You can even create a mix of different colored trees for a truly whimsical display that pops on your dessert table.
- Different Bases: While Oreos are fantastic, consider other sturdy bases like small brownie bites, round shortbread cookies, ginger snaps, or even mini cupcakes for a different texture and flavor profile. Ensure the base is flat and strong enough to support the strawberry.
- Alternative Toppings: Beyond traditional sprinkles, try edible glitter for a shimmering, magical effect, finely shredded coconut (lightly toasted for extra flavor) for realistic “snow,” or even mini chocolate chips for “ornaments.” A drizzle of contrasting colored chocolate (e.g., white chocolate drizzle on dark chocolate trees) can also add a sophisticated touch.
- Flavor Boosts: Add a tiny drop of peppermint extract to your melted chocolate for a festive minty twist, or orange zest for a bright, citrusy note. Just be careful not to add too much liquid, as it can cause the chocolate to seize. A pinch of cinnamon or a dash of vanilla extract can also enhance the chocolate flavor.
- Holiday Themes: Adapt the colors and sprinkles for other holidays. Red and blue for Fourth of July, pastels for Easter, or spooky orange and black for Halloween. The possibilities are endless for year-round fun!
These Strawberry Christmas Trees are more than just a dessert; they are a delightful activity and a great addition to your holiday table, buffet, or dessert bar. Arrange them on a tiered stand for an impressive display, or pack them in small decorative boxes as charming edible gifts for friends, family, and neighbors. They are sure to be a conversation starter!
More Festive Holiday Treats to Explore
Looking for more delicious and creative ideas to make your holiday season extra special? Here are some other festive recipes that will complement your Chocolate Covered Strawberry Christmas Trees and add even more cheer to your celebrations. From savory to sweet, these options are perfect for sharing with loved ones during the most wonderful time of the year.
- Christmas Tree Cheese Platter: A savory and beautiful centerpiece idea that’s easy to assemble and always a crowd-pleaser.
- Christmas Tree Pull Apart Bread: A warm, shareable, and delicious bread that’s perfect for brunch or a snack, ideal for festive gatherings.
- Christmas Tree Rice Krispie Treats: Another fun, no-bake option that kids will love to help decorate, offering a delightful chewy texture.
- Spiked Cherries: For the adults, a boozy treat to add a sophisticated touch and a hint of indulgence to the holiday spread.
- Candy Cane Jello Shots: A playful and spirited dessert for adult gatherings, adding a festive and fun element.
- Cornflake Christmas Wreaths: A classic, easy-to-make, and wonderfully nostalgic holiday treat that brings back childhood memories.

Strawberry Christmas Trees
Everyone loves a strawberry dipped in chocolate. Take yours to the next level to make adorable little Christmas trees for your holiday parties.
IMPORTANT – There are often Frequently Asked Questions within the blog post that you may find helpful. Simply scroll back up to read them!
Print It
Rate It
Ingredients
- 12 ounces melting chocolate or candy melts
- 1 pound strawberries
- 24 Oreo cookies
- 2 cups powdered sugar
- 2-3 tablespoons milk
- Sprinkles and nonpareils
- Candy stars
Things You’ll Need
-
Toothpicks or Wooden Skewers
-
Mixing bowls
-
Whisk
-
Chef’s knife
-
Parchment or Wax Paper
-
Baking Sheet
Before You Begin (Helpful Tips)
- When melting chocolate it’s best to stop the melting process when there are still small pieces visible. Remove from heat or microwave and stir until remaining pieces melt.
- Using a toothpick or a wooden skewer to dip the strawberries keeps your fingers mess free!
- If you would like it to look like the “tree” is surrounded by snow, spread the powdered sugar icing to the edges of the Oreo cookie and then put the strawberry tree in place.
Instructions
-
Cut the tops off of the strawberries. The ends should be flat. Insert a toothpick or skewer into the flat end of each strawberry and chill in the refrigerator for about an hour. By chilling the strawberries the chocolate will dry quickly, so you need to have the sprinkle decorations ready.
-
Melt the chocolate or candy melts in the microwave, stirring occasionally. You can also melt these double boiler style, in a bowl over a saucepan of simmering water.
-
Whisk together the powdered sugar and 2 tablespoons of the milk. Add more milk to reach a thick spreading consistency. If it’s still too thick you can add small amounts of water or more milk until you are happy with it.
-
Spread a small amount of powdered sugar icing on the top of ONE Oreo cookie.
-
Using the toothpick as a handle, dip ONE strawberry into the melted chocolate. Gently shake off any excess chocolate.
-
Sprinkle with nonpareils and candy sprinkles.
-
The chocolate should dry quickly. when it does, remove the strawberry from the toothpick and place the flat end onto the top of the Oreo cookie. The powdered sugar icing will act as a glue.
-
Add a star sprinkle to the top.
-
Repeat this process for each strawberry!
Nutrition Information
Calories: 133cal |
Carbohydrates: 24g |
Protein: 1g |
Fat: 4g |
Saturated Fat: 2g |
Cholesterol: 1mg |
Sodium: 63mg |
Potassium: 56mg |
Fiber: 1g |
Sugar: 20g |
Vitamin A: 2IU |
Vitamin C: 11mg |
Calcium: 7mg |
Iron: 1mg
Tried this Recipe? Pin it for Later!
Follow on Pinterest @AmandasCookin or tag #AmandasCookin!
The recipes on this blog are tested with a conventional gas oven and gas stovetop. It’s important to note that some ovens, especially as they age, can cook and bake inconsistently. Using an inexpensive oven thermometer can assure you that your oven is truly heating to the proper temperature. If you use a toaster oven or countertop oven, please keep in mind that they may not distribute heat the same as a conventional full sized oven and you may need to adjust your cooking/baking times. In the case of recipes made with a pressure cooker, air fryer, slow cooker, or other appliance, a link to the appliances we use is listed within each respective recipe. For baking recipes where measurements are given by weight, please note that results may not be the same if cups are used instead, and we can’t guarantee success with that method.
