Easy Halloween Mummy Hand Pies: Flaky Puff Pastry Delights with Sweet Fillings
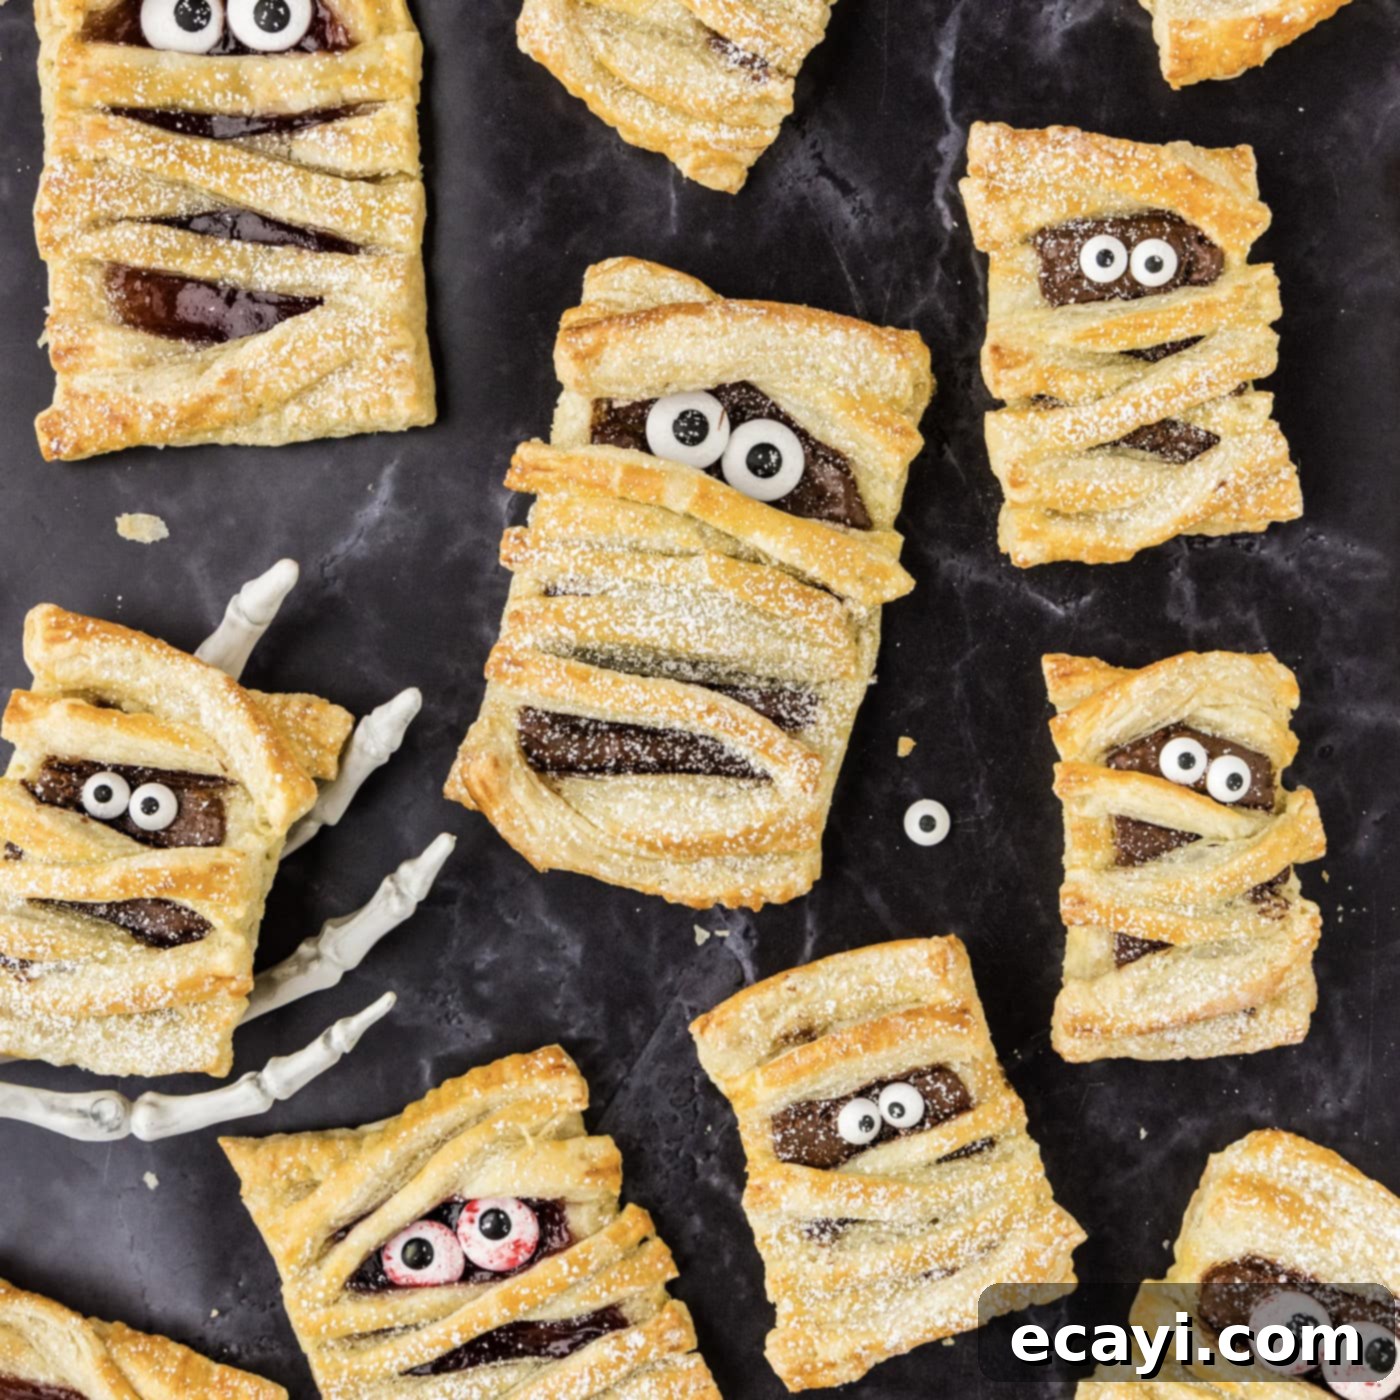
Get ready to enchant your taste buds and impress your Halloween party guests with these utterly adorable and deliciously spooky Mummy Hand Pies! Imagine biting into a golden, flaky puff pastry exterior, only to discover a gooey, sweet surprise of jam or rich Nutella waiting underneath its “bandage” layers. These individual treats are not just a feast for the eyes but a delightful indulgence, perfect for celebrating the most ghoulish time of the year.
Why These Mummy Hand Pies Are a Must-Make This Halloween
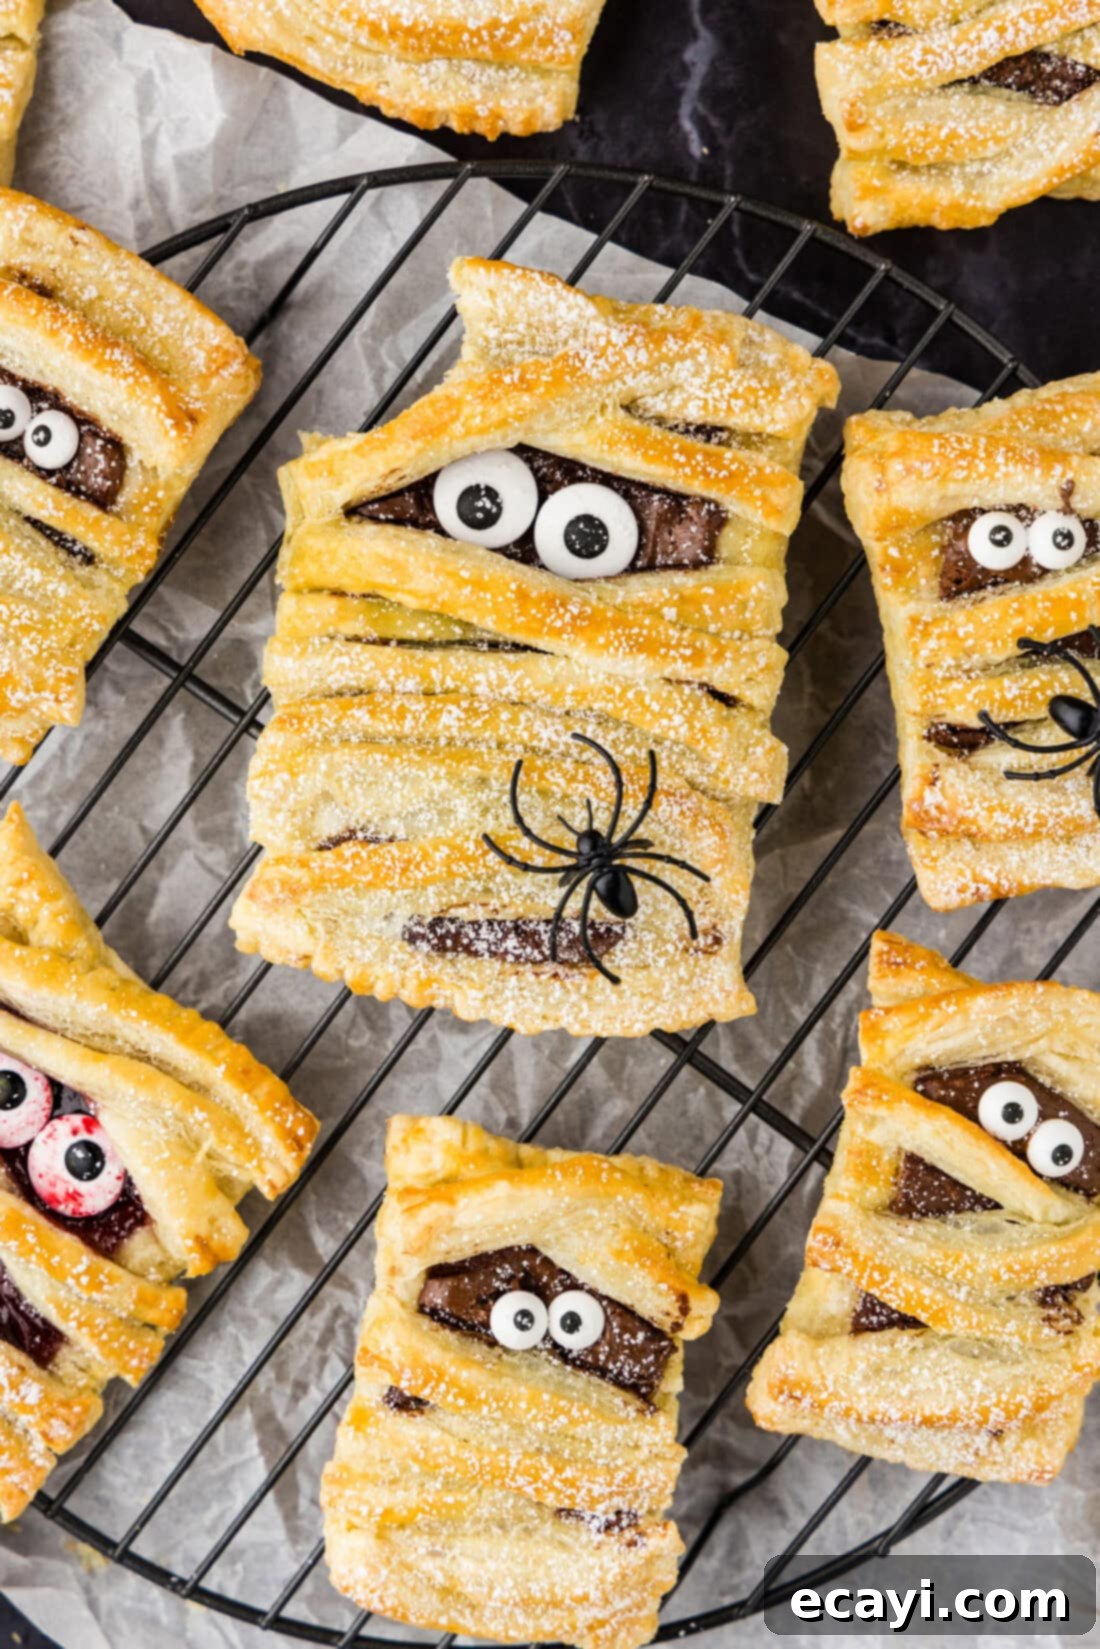
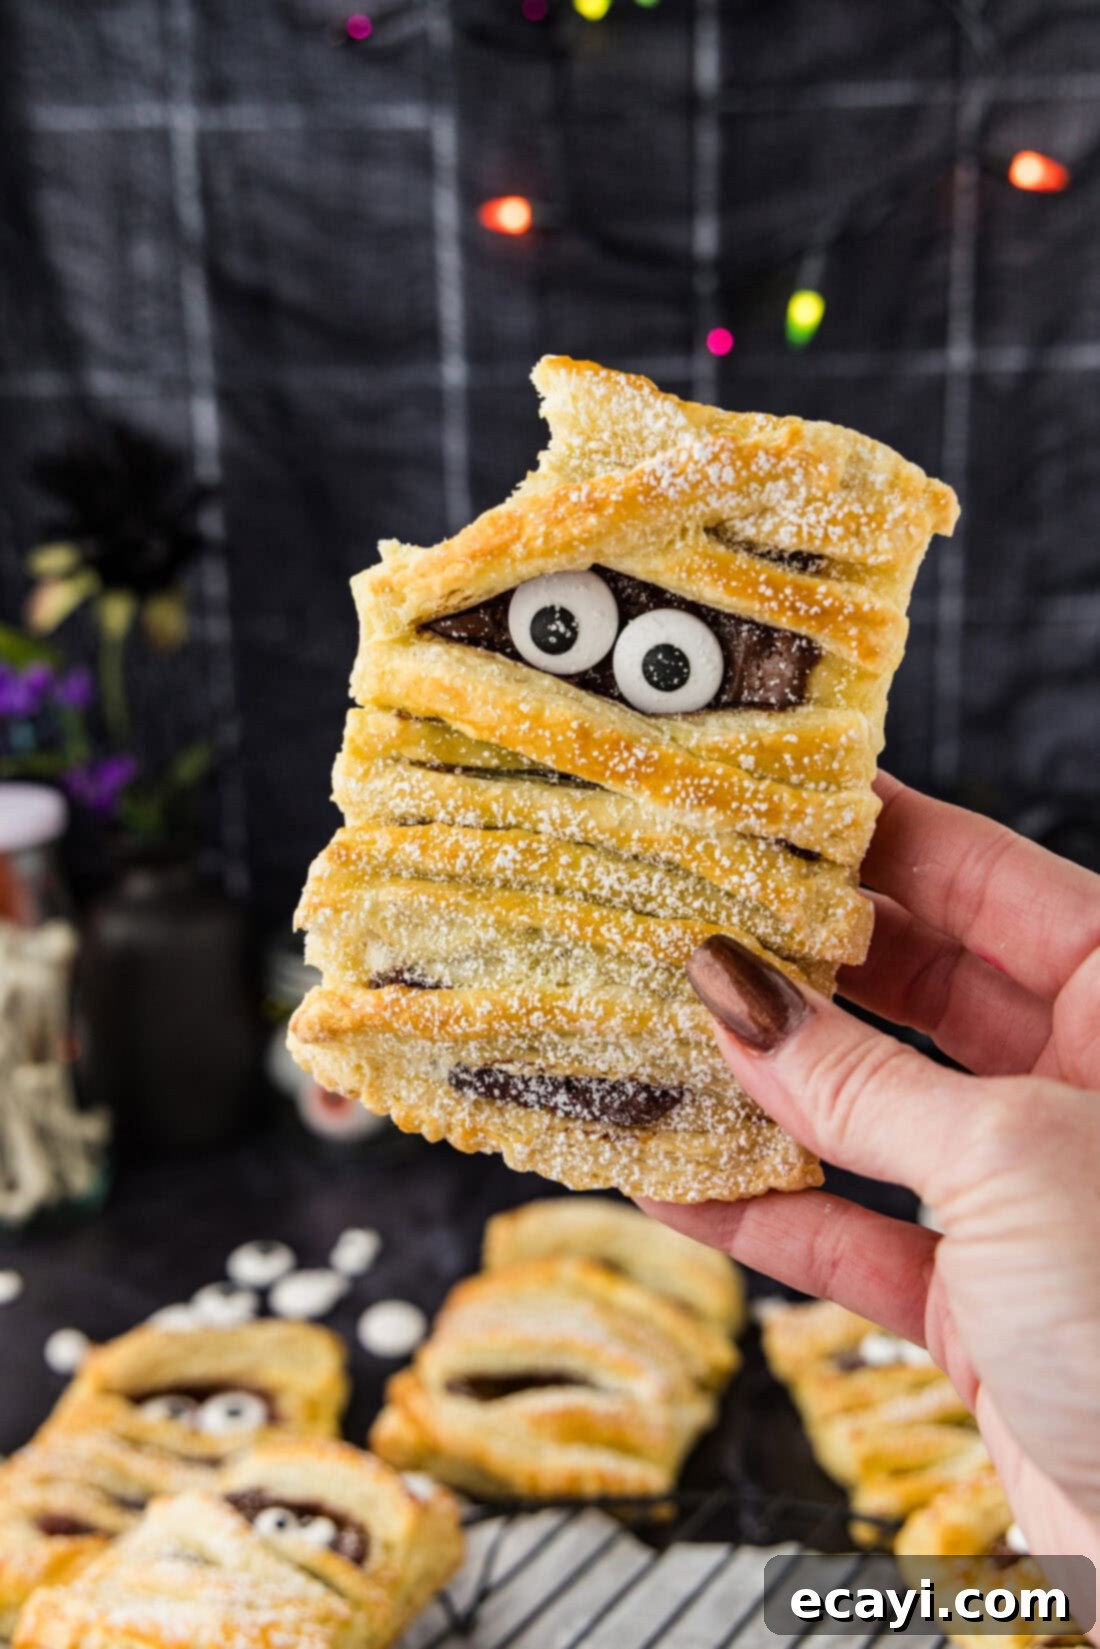
These Mummy Hand Pies aren’t just a clever Halloween novelty; they are genuinely one of the easiest and most rewarding festive treats you can whip up. The magic begins with a soft, crackly bite into that beautifully flaky puff pastry, which then gives way to a sticky, sweet interior. Depending on your preference, this could be a vibrant, fruity jam bursting with berry flavor or a decadent, creamy Nutella that chocolate lovers dream of.
What truly makes this recipe a winner is its incredible versatility and simplicity. You can stuff these delightful hand pies with virtually any jam, preserve, or spread your heart desires. Think classic strawberry, tangy apricot, robust blackberry, or even a mix-and-match approach with chocolate chips and peanut butter for a truly indulgent experience. The secret to their effortless creation lies in using a box of pre-made puff pastry, cutting down on prep time significantly without compromising on taste or texture. Once baked to a golden perfection, a light dusting of powdered sugar adds that eerie, cobweb-like finish, transforming them into irresistibly cute and spooky Halloween hand pies.
My own stepdaughter, who is usually quite particular about her sweets, absolutely adored these! She eagerly helped me assemble them, even patiently waiting while I captured photos, though that certainly didn’t stop her from asking when she could finally dig in! Her enthusiasm was so great that she even requested to take a few to school to share with her friends, proving just how universally appealing these little mummies are. Whether you’re planning a Halloween party, looking for a fun baking project with kids, or simply want a festive treat, these hand pies are guaranteed to bring smiles and delicious memories.
Craving more spooky main courses? For dinner, consider a classic like Mummy Meatloaf, a fun and hearty dish that perfectly complements these sweet pies!
Essential Ingredients for Your Mummy Hand Pies
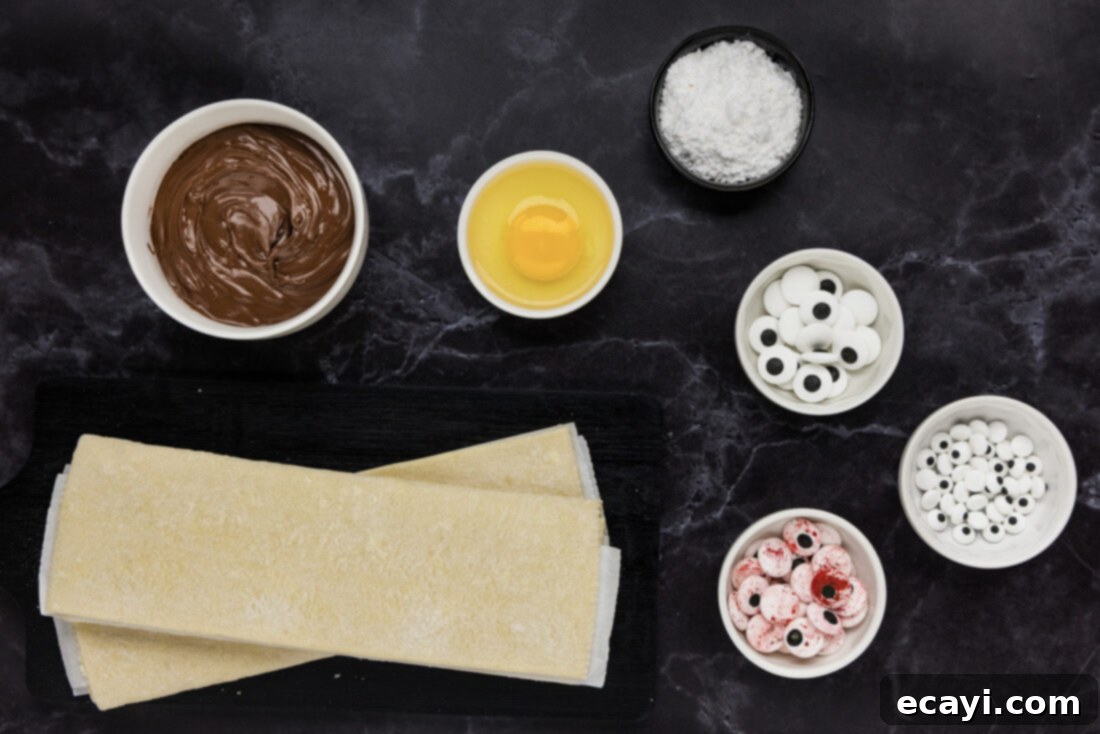
Creating these delightful Halloween treats requires just a few simple ingredients, many of which you might already have in your pantry. For precise measurements and a detailed list of instructions, you can always find the printable version of this recipe at the very end of this post.
Ingredient Spotlight & Creative Substitutions
Let’s dive a little deeper into the ingredients that make these spooky hand pies so special, along with some great ideas for substitutions to match your taste or what you have on hand.
PASTRY: The star of this show, making these mummy hand pies incredibly simple, is a box of frozen puff pastry sheets. This magical ingredient puffs up beautifully to create those wonderful, flaky layers that are so satisfying. It’s crucial to manage its temperature correctly. Be sure to remove the pastry from its package and let it thaw at room temperature just enough until it’s pliable and easy to unfold without cracking, typically 20-30 minutes. If it’s too cold or still frozen, it will crack when you try to unfold it. Conversely, if it gets too soft and warm, it becomes sticky and challenging to handle. A good rule of thumb is that it should feel cold but not stiff. If you do encounter any small cracks from trying to use it too soon, don’t worry! Simply dip your finger in a little water and gently press the edges of the cracks together to “mend” them. For best results, use a high-quality all-butter puff pastry if available.
FILLING: The beauty of these hand pies lies in their customizable fillings. For our recipe, we used a rich, chocolatey Nutella, along with sweet strawberry jam and delightful seedless blackberry jam, which provide that classic “bloody” mummy look. However, the possibilities are truly endless! Consider creamy peanut butter for a savory-sweet twist, tangy apricot preserves for a brighter flavor, or any of your favorite fruit jams – raspberry, cherry, or even blueberry. You could also experiment with thicker fruit pie fillings (like apple or cherry pie filling, ensuring they are well-drained to avoid soggy bottoms), apple butter, or pumpkin butter for a seasonal autumn flavor. For an extra treat, try a cream cheese filling sweetened with a touch of sugar and vanilla.
EYEBALLS: What’s a mummy without its signature stare? Candy eyeballs are absolutely essential for bringing these mini hand pies to life! They add that perfect touch of spooky charm. We recommend using a variety of sizes and styles for added character. You can find small candy eyeballs for a subtle look, regular-sized candy eyeballs for a bolder statement, or even bloodshot candy eyeballs for an extra creepy effect. These are widely available seasonally in most grocery stores or year-round online.
EGG WASH & DUSTING: A simple egg wash gives the puff pastry its beautiful golden sheen and helps it crisp up. Powdered sugar is optional but highly recommended for that “dusty mummy” effect, adding a touch of sweetness and visual appeal.
Step-by-Step Guide: How to Make Mummy Hand Pies
These detailed step-by-step photos and instructions are here to help you visualize exactly how to create this fun recipe. If you prefer to jump straight to the full printable version of this recipe, complete with precise measurements and instructions, simply Jump to Recipe located at the bottom of this page.
- First things first, preheat your oven to a steady 400°F (200°C). While the oven is warming up, prepare a baking sheet by lining it with parchment paper. This non-stick surface is crucial for easy removal and prevents any sticky jam from fusing to the pan.
- Retrieve your frozen puff pastry from the refrigerator. Allow it to sit at room temperature for about 20-30 minutes. This crucial step ensures the pastry is pliable enough to unfold and work with without cracking, but not so warm that it becomes sticky and difficult to handle. It should still be cool to the touch.
- Carefully unfold the thawed puff pastry sheet on a lightly floured surface or parchment paper. Using a sharp knife or a pizza cutter, cut the sheet into three equal sections lengthwise. Then, cut each of those sections in half widthwise. This will give you 6 rectangular pieces, which will form the base of your mummy hand pies.
- Now, take three of these rectangles and cut them into thin strips. These strips will serve as the “bandages” for your mummies. Aim for strips about ½ inch wide. The more irregular they are, the more authentic your mummy will look!
- Lightly brush the edges of the remaining three full rectangles with water using a pastry brush. This will act as a natural glue, helping the edges seal securely once folded over.
- Spoon about 1 tablespoon of your chosen filling (Nutella or jam) into the center of each of the three full pastry rectangles. Spread the filling out slightly, but be careful not to go all the way to the edges, as you need space for sealing the pies. Don’t overfill, or your pies might burst in the oven.
- Carefully lay the pastry strips you cut earlier across the Nutella or jam filling to form the mummy bandages. Criss-cross them artfully to mimic the appearance of ancient wraps, leaving a small gap in the top third of the pie where the “eyes” will eventually be placed.
- Once your bandages are in place, gently fold the unfilled half of the pastry rectangle over the filled half, creating a pocket. Use the back of a fork to firmly crimp and seal the edges all around. This step is essential to keep the delicious filling from leaking out during baking. If desired, you can trim any excess pastry pieces around the edges for a neater look, or leave them for a more rustic feel.
- In a small bowl, beat the large egg well to create an egg wash. Lightly brush this egg wash over the top of each assembled mummy hand pie. This will give them a beautiful golden-brown color and a lovely shine once baked.
- Transfer the prepared mummy hand pies to your parchment-lined baking sheet. Bake them in the preheated oven for 12-15 minutes, or until the pastry has puffed up significantly and turned a gorgeous golden brown. Keep an eye on them, as oven temperatures can vary.
- Once baked, carefully remove the hand pies from the oven. Transfer them to a wire rack to cool completely. This prevents the bottoms from becoming soggy and helps them crisp up.
- After the pies have cooled sufficiently (they don’t have to be completely cold, just cool enough to handle), it’s time for the final touch! Dab a tiny bit of Nutella or jam onto the back of each candy eyeball, and then carefully place two eyes in the exposed area at the top of each hand pie. The sticky filling acts as a perfect edible adhesive.
- For that extra touch of ancient dust and sweetness, use a fine mesh strainer to delicately dust powdered sugar over the finished mummies. This gives them an authentic, ghostly appearance that’s sure to be a hit!
- To make mini mummies: If you’re hosting a larger gathering or simply prefer smaller bites, you can easily scale down this recipe. Follow all the instructions above, but instead of cutting the puff pastry into 6 pieces, cut it into 12 smaller pieces. Everything else, from filling to baking time (though you might reduce it by a minute or two), remains the same. This yields more bite-sized treats perfect for little hands!
Frequently Asked Questions & Expert Tips for Perfect Mummy Hand Pies
Once your Mummy Hand Pies have completely cooled, store any leftovers in an airtight container. They will keep well at room temperature for up to 2 days, or in the refrigerator for up to 4 days. While they are delicious cold, they are truly best enjoyed warmed. You can optionally reheat them gently in a toaster oven or air fryer for a few minutes until warmed through and crispy. If using a regular toaster, be very careful of the candy eyeballs falling off or melting; I highly recommend removing them before reheating in a toaster. Reheating in a conventional oven at 300°F (150°C) for about 5-7 minutes also works wonders to restore their flakiness.
Absolutely! You can assemble the hand pies up to the point of brushing with egg wash (step 9) and then cover them loosely with plastic wrap. Refrigerate for up to 24 hours. When you’re ready to bake, proceed with the egg wash (if not already done) and baking instructions, possibly adding a minute or two to the baking time since they’ll be cold. This is a fantastic way to prepare for a Halloween party or busy morning.
Beyond the suggested jams and Nutella, you can get very creative! Try a mixture of cream cheese and powdered sugar with a hint of vanilla for a “phantom” filling. For a savory twist, though less “mummy-like,” you could fill them with savory ingredients like pizza sauce and mozzarella (check out our Mini Mummy Pizzas for inspiration!). You could also use a store-bought lemon curd or even a thick caramel sauce with a sprinkle of sea salt. Just ensure your filling isn’t too runny, as this can make the pastry soggy.
Puff pastry is a dream to work with once you get the hang of it. Always ensure it’s properly thawed (cold but pliable). Work quickly to keep it cool, as warm pastry becomes sticky and hard to manage. A lightly floured surface or parchment paper is your best friend. Don’t stretch the pastry too much, as this can prevent it from puffing up evenly. If at any point the pastry becomes too warm and difficult, pop it back into the fridge for 5-10 minutes to chill before continuing. A sharp knife or pizza cutter will give you cleaner cuts, which also helps with puffing.
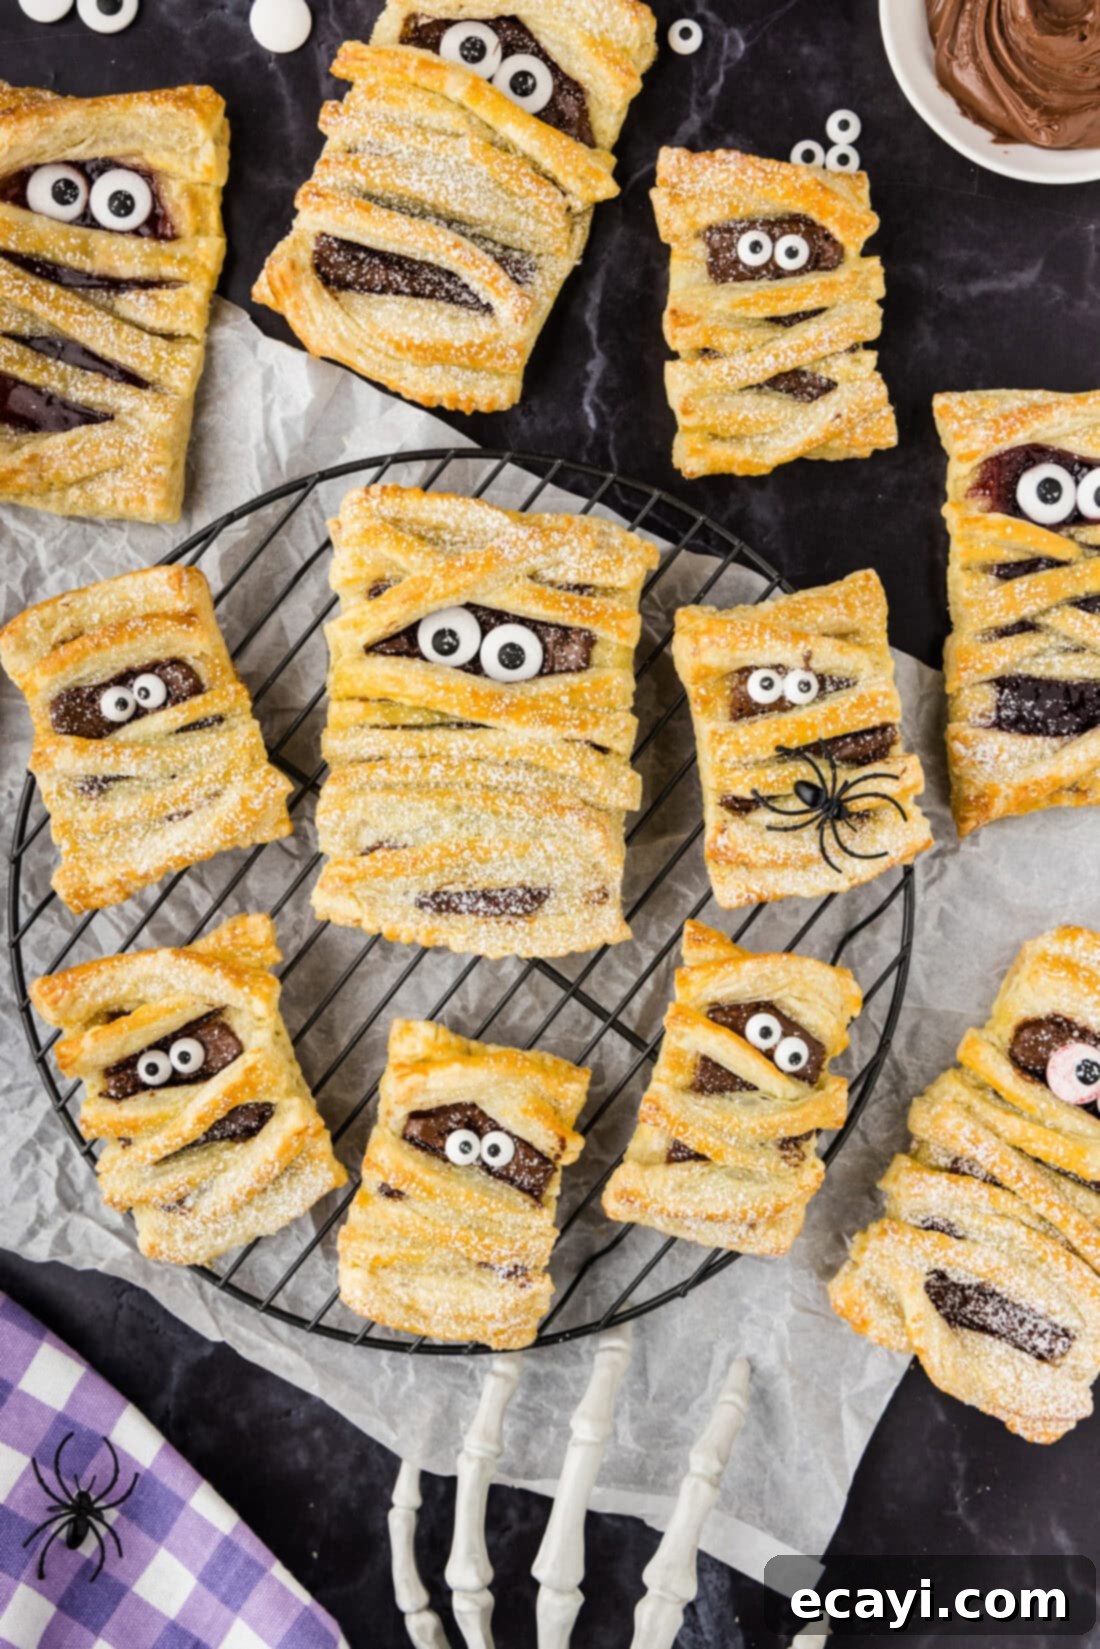
Serving Suggestions for Your Spooky Hand Pies
These Mummy Hand Pies are incredibly versatile and can be enjoyed in many ways. While a dusting of powdered sugar is, in my opinion, what truly completes their ghostly mummy appearance and adds an extra layer of sweetness, it is entirely optional. Feel free to serve them plain, or even drizzle a bit of melted white chocolate “webbing” over them for another spooky touch.
Serve them warm from the oven for a comforting treat, at room temperature for a convenient grab-and-go snack, or even lightly toasted the next day for a delightful breakfast or afternoon pick-me-up. They are perfect for Halloween parties, school lunches, a festive breakfast on a chilly October morning, or simply as an after-dinner dessert. Pair them with a glass of milk, a mug of hot cocoa, or even a spooky-themed punch for the ultimate Halloween spread. No matter how you choose to enjoy them, these hand pies are sure to be a memorable part of your holiday celebrations!
Discover More Ghoulish Halloween Recipes
Looking to round out your Halloween menu? We’ve got plenty more spooky and delicious ideas to make your holiday feast unforgettable:
- Mini Mummy Pizzas: A fun savory option that kids adore, mimicking the mummy look with stringy cheese.
- Spiderweb Taco Dip: A creative and crowd-pleasing appetizer, perfect for any Halloween gathering.
- Jalapeno Popper Mummies: A spicy and savory treat wrapped in pastry bandages for a festive kick.
- Cheese and Pretzel Broomsticks: Simple, healthy, and incredibly cute snacks that are quick to assemble.
I’m passionate about baking and cooking, and I love sharing my kitchen experiences and perfected recipes with all of you! It can be tough to remember to check back for new creations daily, which is why I offer a convenient newsletter. Every time a new recipe is posted, you’ll receive it directly in your inbox. Simply subscribe today and start receiving your free daily recipes, ensuring you never miss out on delicious inspiration!
Mummy Hand Pies
IMPORTANT – There are often Frequently Asked Questions within the blog post that you may find helpful. Simply scroll back up to read them for more tips and variations!
Print It
Pin It
Rate It
Save ItSaved!
Ingredients
- 17 ounces frozen puff pastry sheet (typically 1 box, yields 6 regular or 12 mini hand pies)
- ½ cup Nutella (or any jam/preserves of your choice, like strawberry, blackberry, apricot, or peanut butter)
- 1 large egg (for egg wash)
- 12 candy eyeballs (for decoration, you might need more if making mini pies)
- powdered sugar (optional, for dusting)
Tools You’ll Need
-
Baking sheet
-
Parchment paper
-
Pastry brush
-
Fine mesh strainer
-
Pizza cutter (optional, for clean cuts)
Before You Begin – Important Notes & Tips
- This recipe is designed to yield 6 regular-sized hand pies, perfect for individual servings. Alternatively, if you’re catering to smaller appetites or a larger crowd, you can easily adapt it to make 12 mini hand pies by adjusting the pastry cuts as noted in the instructions.
- The key to working with frozen puff pastry is proper thawing. Always ensure you remove the pastry from its packaging and allow it to sit at room temperature until it’s pliable and easy to unfold without breaking or cracking. This typically takes 20-30 minutes if it’s coming from the refrigerator. If it’s too cold and stiff, it will crack; simply wet your finger and gently “mend” any cracks that appear. However, avoid letting it get too soft or warm, as it will become overly sticky and much harder to handle and shape.
- Get creative with your fillings! We’ve found Nutella, strawberry jam, and blackberry seedless jam to be incredibly popular choices for their flavor and appearance. However, don’t hesitate to experiment with other delightful options like creamy peanut butter, tangy apricot preserves, any other fruit jam you love, thick fruit pie fillings (ensure they are well-drained), or seasonal favorites like apple butter or pumpkin butter.
- For a truly successful and enjoyable baking experience, consider glancing through the Frequently Asked Questions and Expert Tips section located above the recipe card. It contains valuable advice on storage, making ahead, and other helpful hints that will ensure your Mummy Hand Pies turn out perfectly every time.
Instructions
-
Begin by preheating your oven to 400°F (200°C). While the oven is heating, line a standard baking sheet with parchment paper to prevent sticking.
-
Remove the frozen puff pastry sheet from its packaging and place it on a clean surface. Allow it to sit at room temperature for approximately 20-30 minutes, or until it is pliable enough to unfold easily without cracking.17 ounces frozen puff pastry sheet
-
Once thawed, carefully unfold the pastry. Using a sharp knife or a pizza cutter, cut the entire sheet into three equal rectangular sections. Then, cut each of those three sections in half horizontally. This will result in 6 equally sized pastry rectangles.
-
From these 6 rectangles, set aside 3 to be the bases of your hand pies. Take the remaining 3 rectangles and cut them into thin strips, approximately ½ inch wide. These strips will be used to create the mummy’s bandages.
-
Using a pastry brush, lightly moisten the outer edges of the three whole pastry rectangles with water. This helps create a good seal when you fold the pies.
-
Spoon about 1 tablespoon of your chosen filling (Nutella or jam) into the center of each of the three water-brushed pastry rectangles. Spread the filling gently, ensuring you leave a clear border around the edges for sealing.1/2 cup Nutella
-
Place the prepared pastry strips across the Nutella/jam-coated half of each rectangle. Criss-cross them in various directions to resemble mummy bandages. Remember to leave a small, clear space in the top third of the pastry for where the candy eyeballs will go later.
-
Fold the unfilled half of the pastry rectangle over the filled, bandaged half. Using the tines of a fork, firmly press down all along the edges to crimp and seal the hand pies. This secures the filling inside. You can trim any excess pastry from the edges for a neater look if desired.
-
In a small bowl, beat the large egg thoroughly to create an egg wash. Brush this egg wash lightly and evenly over the top surface of each assembled mummy hand pie. This will give them a beautiful golden and glossy finish during baking.1 large egg
-
Carefully transfer the egg-washed hand pies to your prepared baking sheet. Bake in the preheated oven for 12-15 minutes, or until the pastry is puffed, golden brown, and cooked through. Baking times may vary slightly, so watch for that perfect color.
-
Once baked, remove the mummy hand pies from the oven. Let them cool on the baking sheet for a few minutes before carefully transferring them to a wire rack to cool completely. Cooling on a rack helps prevent the bottom from getting soggy.
-
Once cooled (they don’t need to be completely cold, just cool enough to handle), apply a tiny dab of Nutella or jam to the back of each candy eyeball. Carefully place two eyeballs onto the exposed filling area in the top third of each hand pie, bringing your mummies to life!12 candy eyeballs
-
For the finishing touch, lightly dust powdered sugar over the mummies using a fine mesh strainer. This adds a whimsical, ghostly effect, making them even more festive and appealing for Halloween.
-
To create mini mummy hand pies, simply follow all the instructions above, but instead of cutting the puff pastry into 6 larger pieces, cut it into 12 smaller rectangles. This will result in smaller, bite-sized treats perfect for parties. The rest of the process, including baking time (you might reduce by 1-2 minutes for smaller sizes), remains the same.
Expert Tips & FAQs for Mummy Hand Pies
- Storage and Reheating: Store cooled leftover mummy hand pies in an airtight container at room temperature for up to 2 days, or in the refrigerator for up to 4 days. While delicious cold, for the best flaky texture, reheat them in a toaster, air fryer, or toaster oven. If using a toaster, a quick note of caution: the candy eyeballs can sometimes fall off or even slightly melt. I highly recommend carefully removing the candy eyeballs before reheating, and then reattaching them once the pies are warmed. This will preserve their spooky charm!
- Preventing Leaks: To ensure your delicious filling stays inside the pastry, don’t overfill the pies. About 1 tablespoon per hand pie is usually sufficient. Also, make sure to thoroughly crimp the edges with a fork, creating a tight seal all around. The water brush on the edges also greatly assists in this.
- Achieving Flaky Pastry: The key to beautifully puffed and flaky pastry is to work with it while it’s cold but pliable. If your kitchen is warm, you can pop the assembled (but unbaked) pies into the refrigerator for 10-15 minutes before baking to chill them. This helps the butter layers in the puff pastry remain intact, leading to a better rise.
- Creative Garnish: Beyond powdered sugar, consider a thin drizzle of white or dark chocolate over the cooled pies for an extra touch of decadence. You could also sprinkle edible glitter for a magical, spooky sparkle!
Nutrition Information
The recipes on this blog are tested with a conventional gas oven and gas stovetop. It’s important to note that some ovens, especially as they age, can cook and bake inconsistently. Using an inexpensive oven thermometer can assure you that your oven is truly heating to the proper temperature. If you use a toaster oven or countertop oven, please keep in mind that they may not distribute heat the same as a conventional full sized oven and you may need to adjust your cooking/baking times. In the case of recipes made with a pressure cooker, air fryer, slow cooker, or other appliance, a link to the appliances we use is listed within each respective recipe. For baking recipes where measurements are given by weight, please note that results may not be the same if cups are used instead, and we can’t guarantee success with that method.
