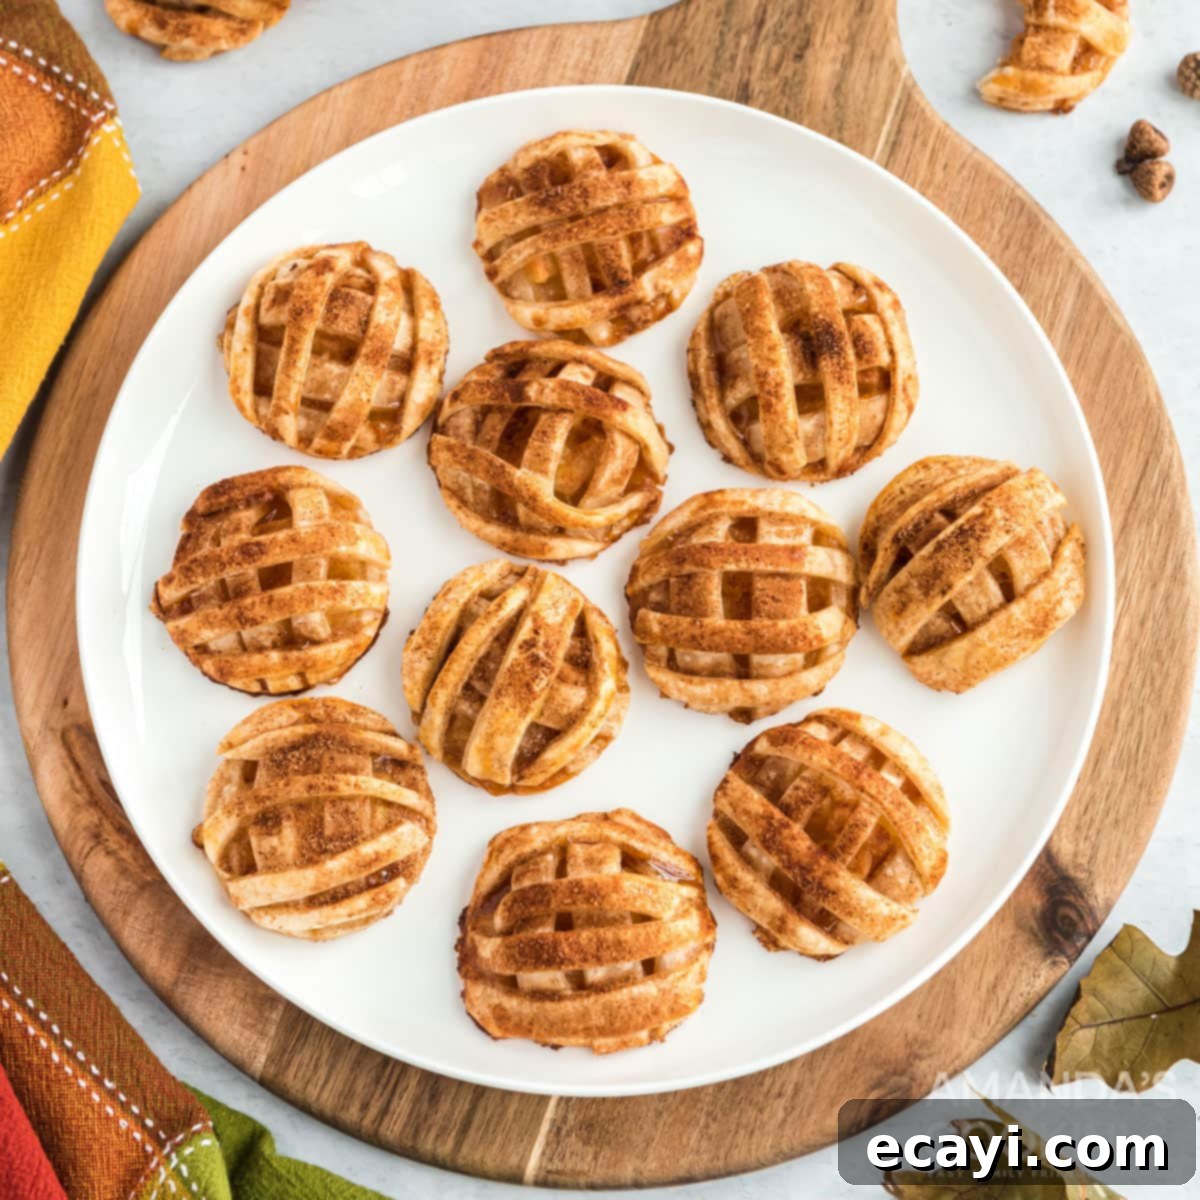
Effortless Apple Pie Cookies: Your Ultimate Guide to Quick & Delicious Fall Treats
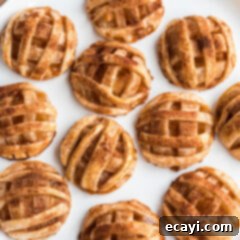
If you’ve spent any time browsing Pinterest or scrolling through Facebook, chances are you’ve encountered those charming apple pie cookies. They often look irresistible, yet many recipes are either overly complicated, demand a long list of ingredients, or create a colossal mess in the kitchen. We understand the desire for that cozy, homemade flavor without the fuss, especially during the busy fall season. That’s why we’ve taken the best of those ideas and radically simplified the process for you! Our recipe focuses on minimal ingredients and a streamlined approach, ensuring these adorable treats are much easier to make and leave you with far less cleanup.
Why This Apple Pie Cookie Recipe Works So Well
Our recipe stands out because it cleverly leverages convenience without compromising on flavor or the beloved homemade feel. The secret lies in two readily available, time-saving ingredients: refrigerated pie crusts and canned apple pie filling. These shortcuts are absolute game-changers, transforming what could be an hour-long baking project into a quick and delightful endeavor.
Forget the tedious tasks of making dough from scratch, peeling and coring apples, or simmering a homemade filling. With our method, you bypass the most labor-intensive steps, making these mini apple pies a truly stress-free option. This approach not only speeds up the preparation but also ensures consistent results every time, perfect for bakers of all skill levels. When fall arrives, bringing with it a whirlwind of activities, holiday preparations, and cozy gatherings, the last thing you need is an aggravating baking process. These charming apple pie cookies are designed to fit seamlessly into your busy schedule, letting you enjoy the comforting aromas and flavors of autumn with minimal effort.
Essential Ingredients You Will Need
Gathering your ingredients for these apple pie cookies is straightforward, focusing on a few key items that deliver maximum flavor with minimum fuss. Here’s a detailed look at what you’ll need to create these delicious treats:
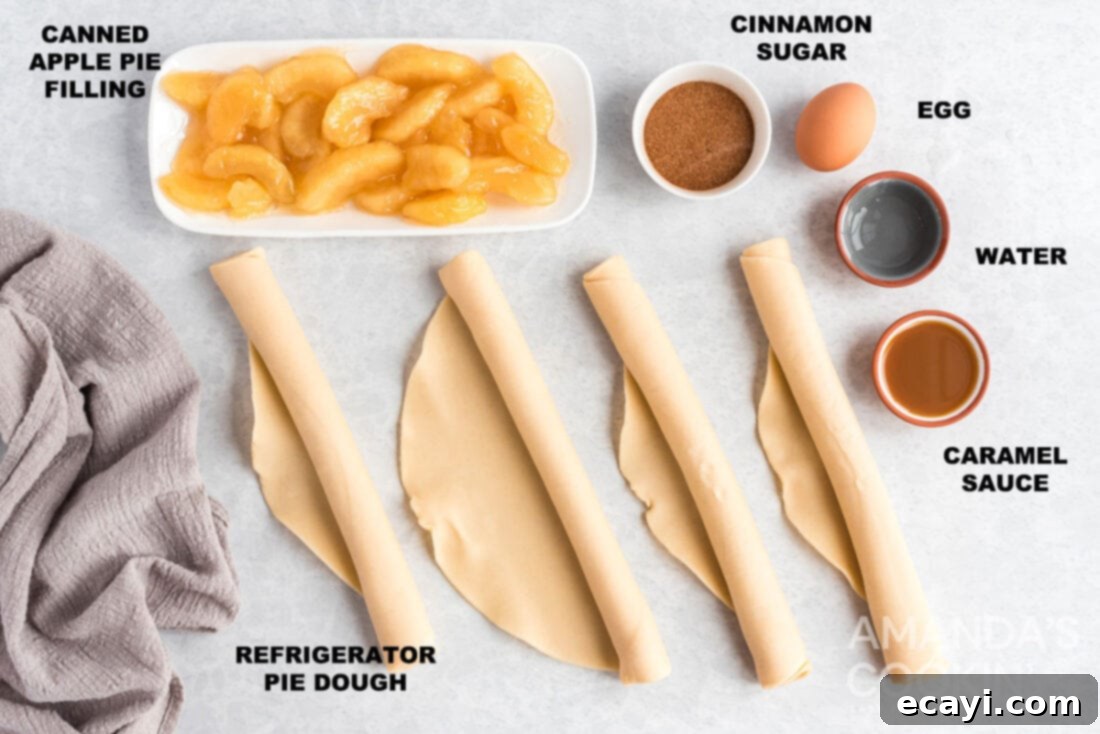
- Refrigerated Pie Crusts (2 boxes, 4 circles): These are the backbone of our easy recipe. Opt for your favorite brand; the consistency and convenience they offer are unmatched. Thaw them according to package directions before use to prevent cracking and make them pliable.
- Canned Apple Pie Filling (21 oz): This is another fantastic shortcut. While any good quality canned filling works, consider varieties with a slightly firmer apple texture if available. We’ll be separating the apples from most of the sauce to prevent our cookies from becoming soggy, but don’t discard that leftover sauce!
- Caramel Sauce (ice cream topping style): A generous drizzle of caramel adds a wonderful depth of flavor and gooey texture to these cookies. Choose a thicker caramel sauce if possible, as thinner ones can spread too much during baking.
- Large Egg (1): Combined with a touch of water, this creates our essential egg wash. It’s critical for sealing the cookie tops and giving them that beautiful golden-brown, shiny finish.
- Water (1 teaspoon): To mix with the egg for the egg wash.
- Ground Cinnamon (1 teaspoon): Essential for that classic apple pie aroma and taste.
- Granulated Sugar (2 teaspoons): When mixed with cinnamon, this creates a delightful topping that adds sparkle and a hint of sweet crunch to the baked cookies.
With these simple ingredients, you’re well on your way to baking a batch of irresistible apple pie cookies!
How to Master Apple Pie Cookies: Step-by-Step Instructions
These detailed step-by-step photos and instructions are provided to help you easily visualize each stage of making this delightful recipe. For a convenient printable version of this recipe, complete with precise measurements and comprehensive instructions, you can Jump to Recipe at the very bottom of this post.
- Preheat and Prepare: Start by preheating your oven to 350°F (175°C). Line insulated baking sheets with parchment paper or silicone baking mats. This crucial step prevents sticking and makes cleanup a breeze.
- Thaw Pie Dough: If your pie dough is frozen, ensure it’s thawed completely according to the package directions. Proper thawing makes the dough pliable and prevents it from cracking when unrolled or cut.
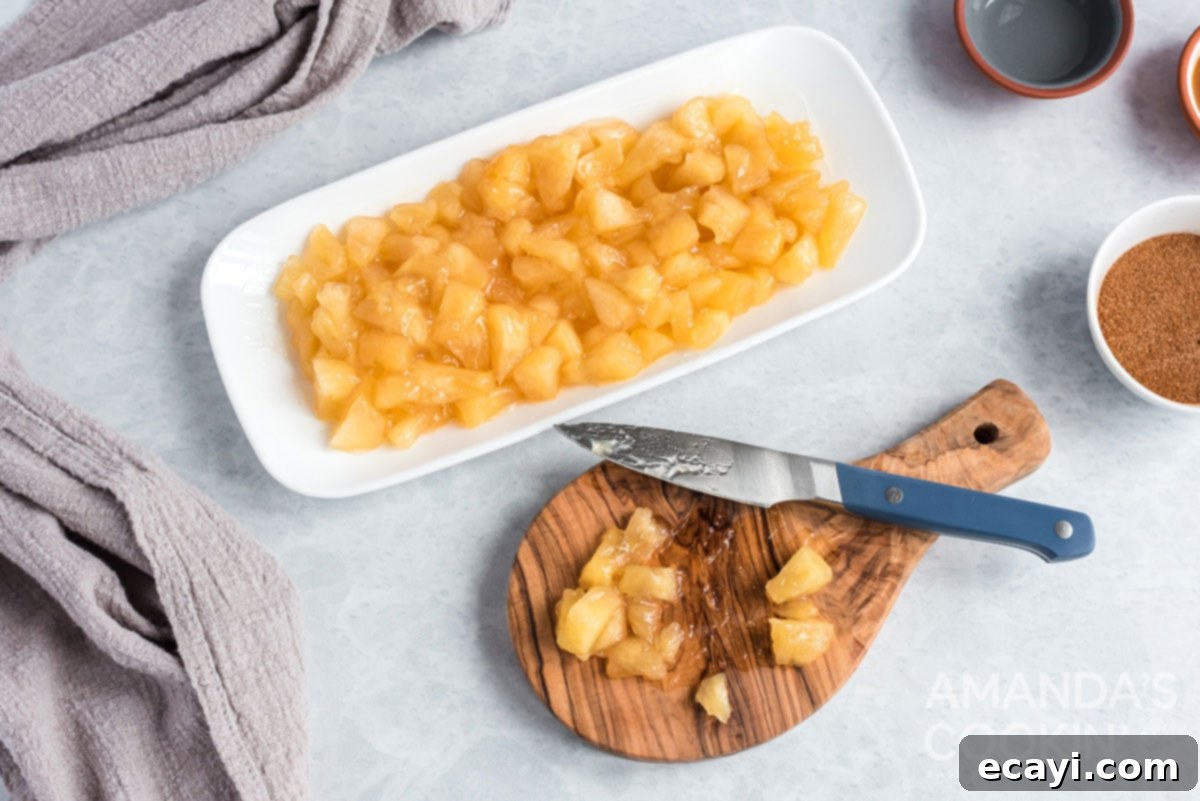
- Prepare Apple Filling: Empty the can of apple pie filling into a medium-sized bowl. Using a fork, carefully remove the apple chunks from the thick sauce. Don’t worry about wiping the apples completely dry; a little residual sauce is fine. The goal is to avoid an excess of liquid that could make your cookies soggy.
- Chop Apples: Use a sharp knife to cut the apple pieces into smaller, more manageable chunks. Aim for pieces that are roughly 1/4 to 1/2 inch in size. This ensures they fit well within the cookie and bake evenly.

- Unroll Pie Dough: Gently unroll two of the refrigerated pie dough circles. If you notice any small cracks, gently smooth them out with your fingers or a tiny bit of water.
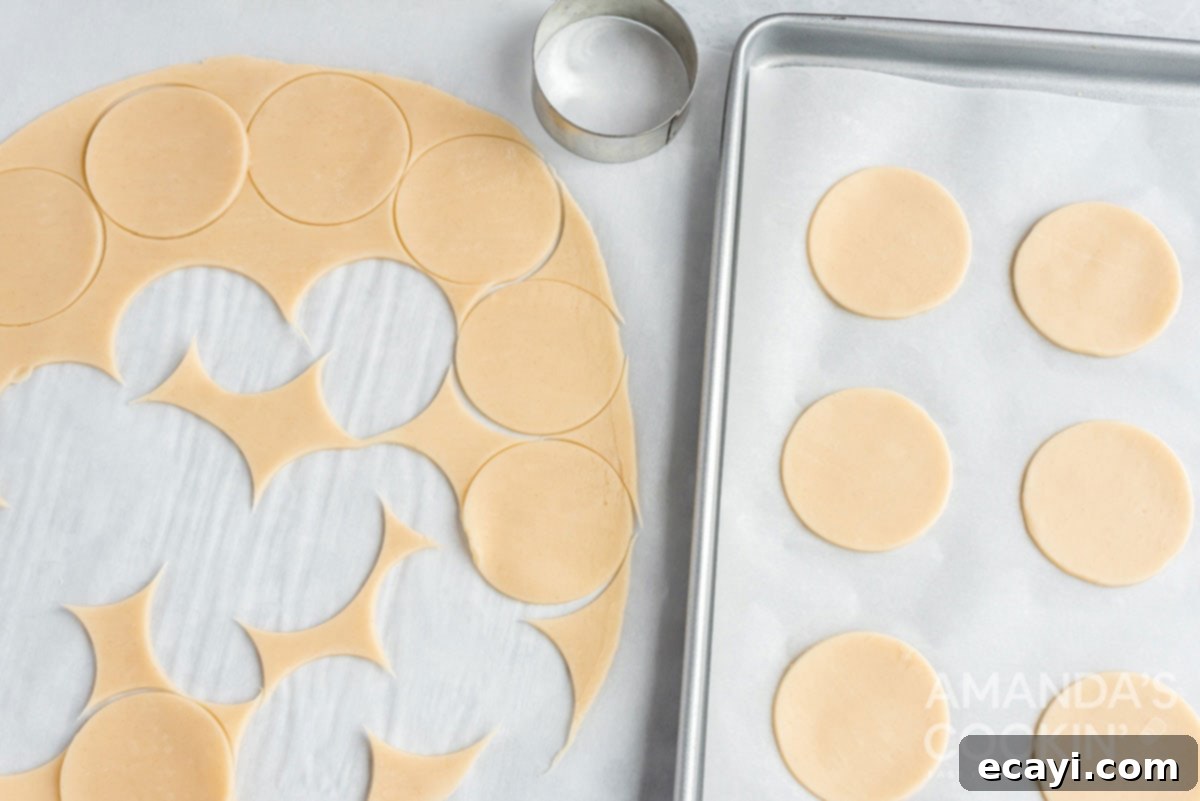
- Cut Cookie Bases: Using a 2.5-inch round cookie cutter, cut out circular bases from the unrolled pie doughs. Carefully place these dough circles onto your prepared baking sheets. Set aside any scrap dough; we’ll reuse it later!

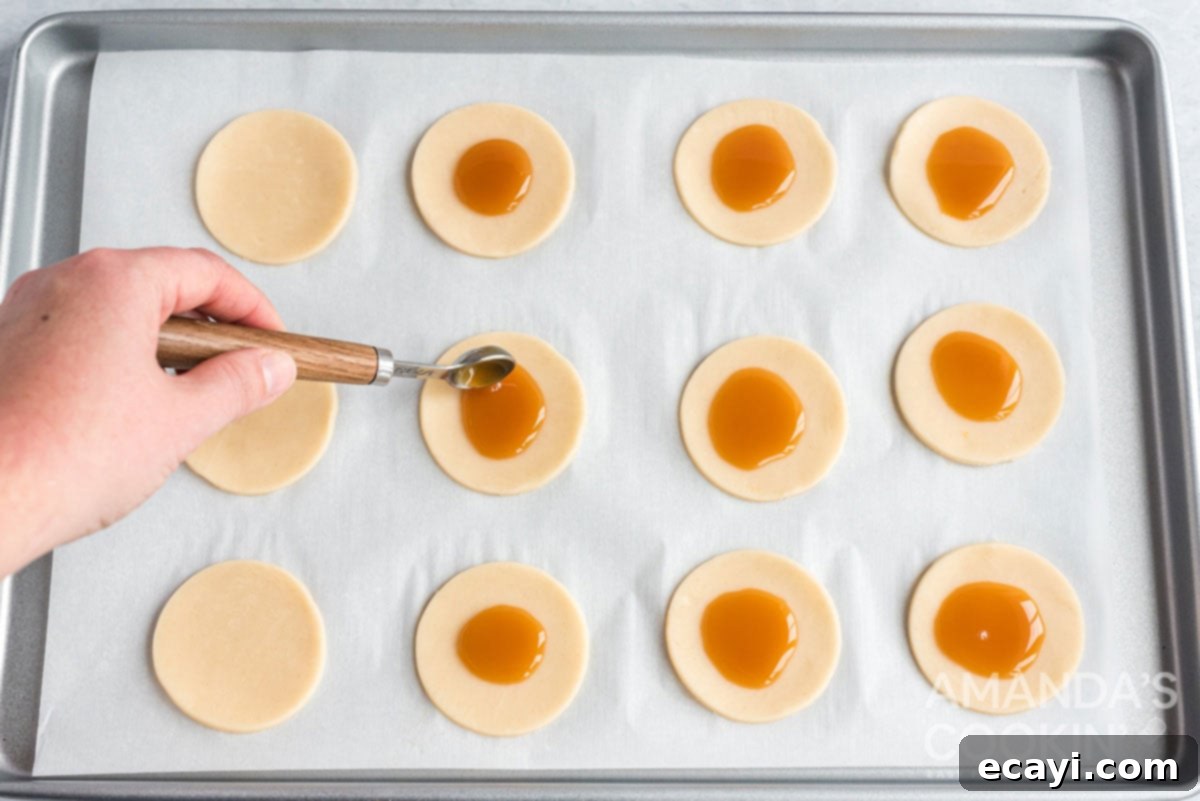
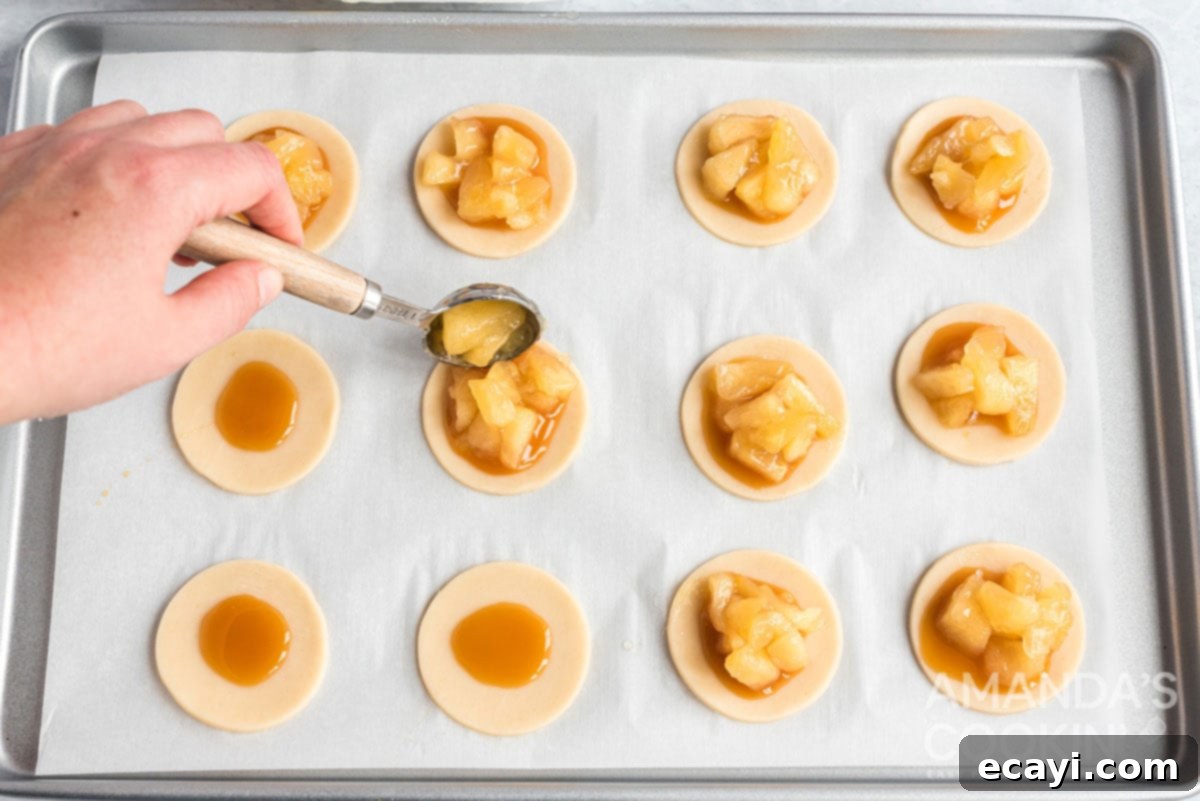
- Add Caramel: Place approximately 1/2 to 1 teaspoon of caramel sauce onto the center of each pie dough cut-out. Be mindful not to add too much, as the caramel will spread during baking, and excessive amounts can seep out.

- Top with Apples: Spoon about a tablespoon of the chopped apple chunks directly on top of the caramel on each dough circle. Distribute them evenly.

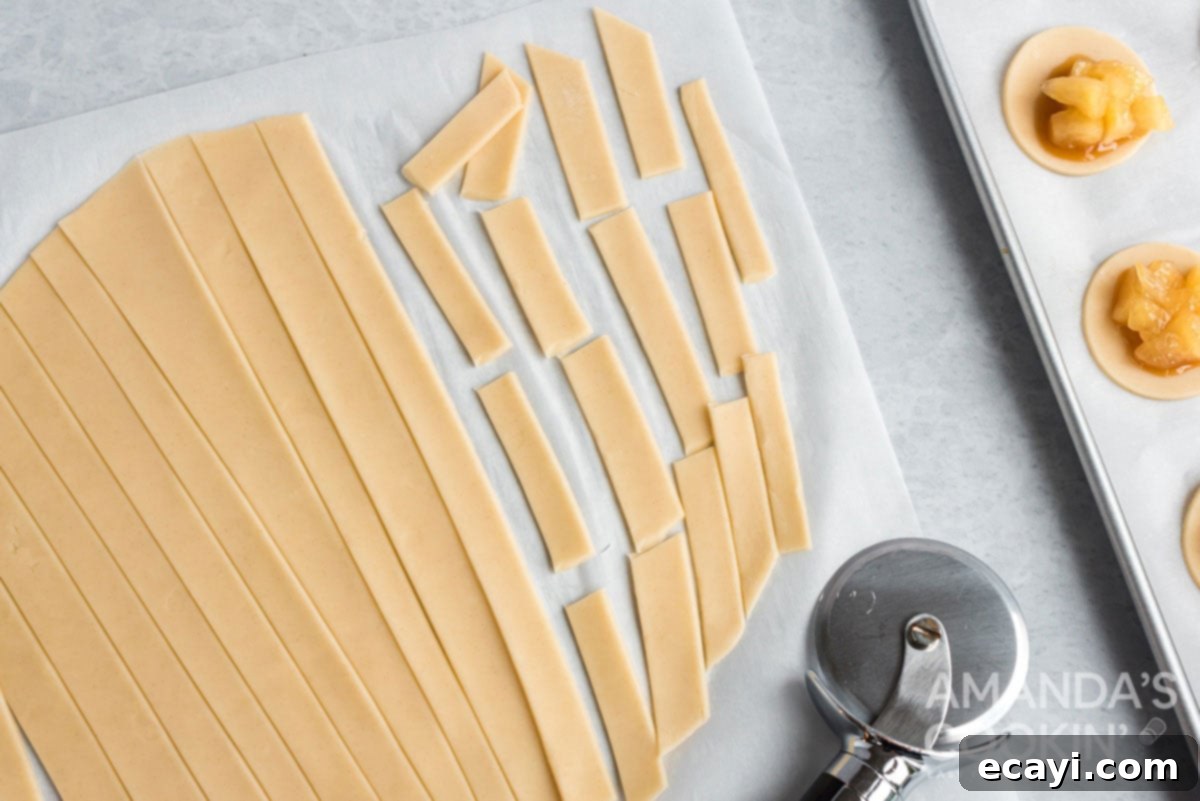
- Prepare Dough Strips: Take your remaining two pie doughs. Using a pizza cutter or a knife, slice the dough into strips about 1/2 to 1 inch thick. Then, cut these strips into thirds or quarters, creating shorter segments that are easier to work with for our “faux lattice” topping.

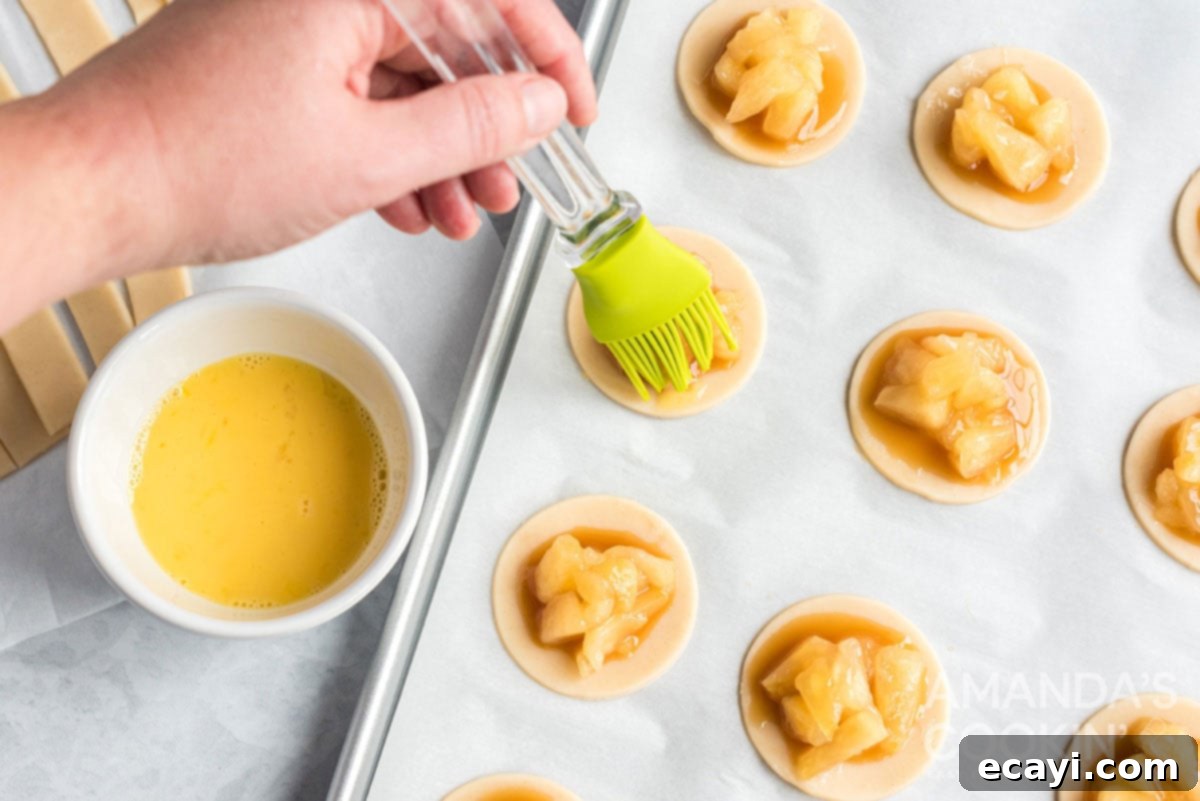
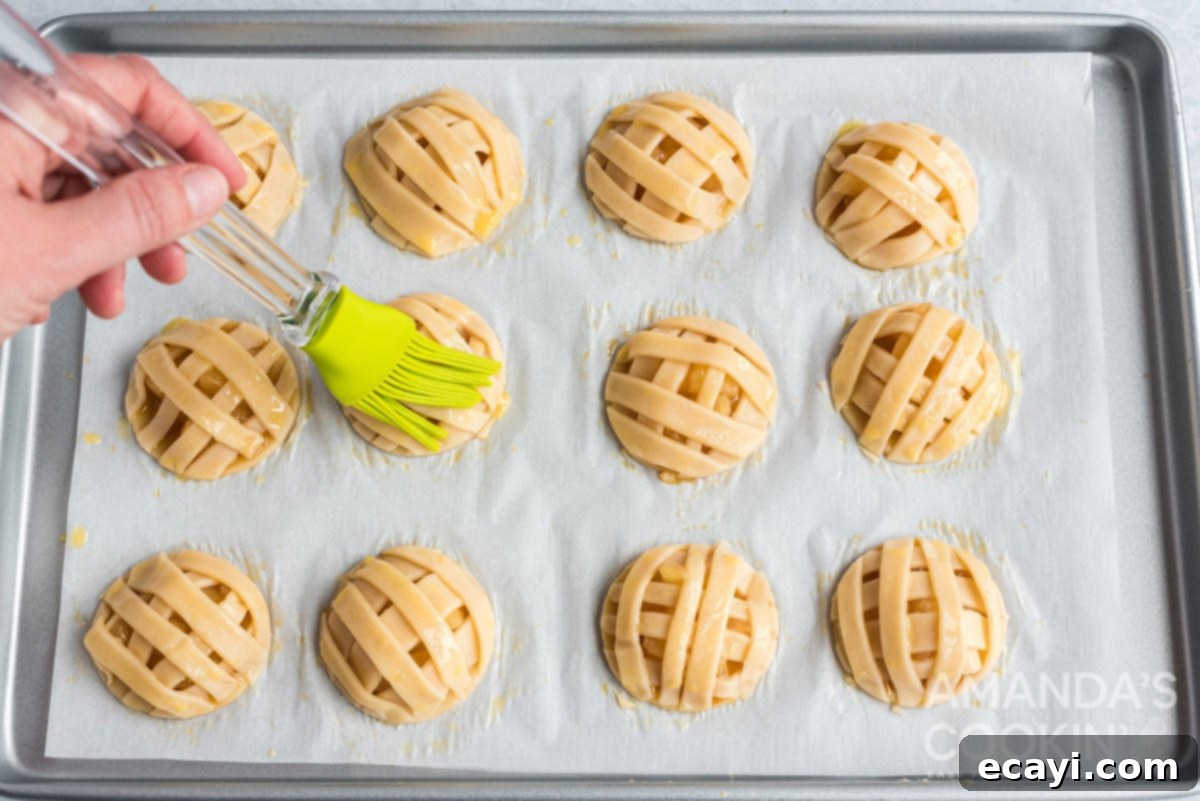
- Make Egg Wash & Baste Edges: In a small bowl, whisk together the egg and water with a fork until well combined. This is your egg wash. Use a pastry brush to lightly baste (brush) the edges of each apple-filled dough circle. This creates a sticky surface for the top strips.

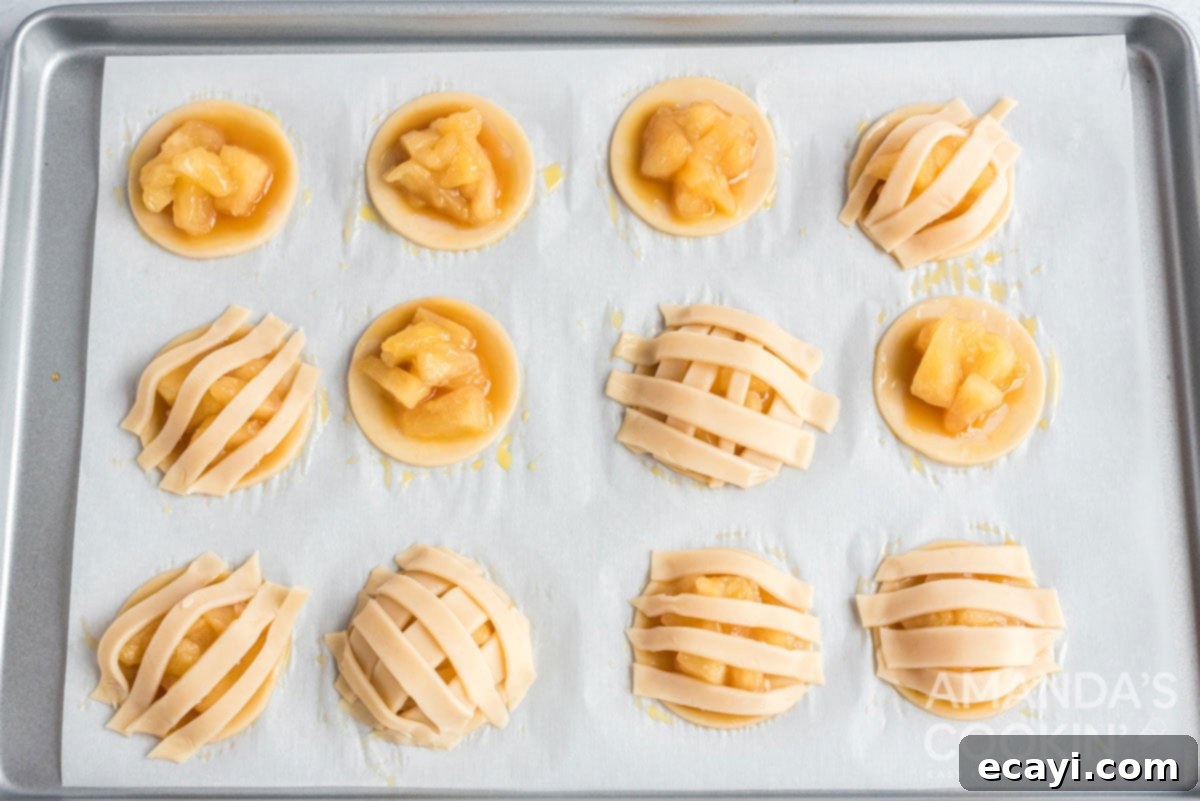
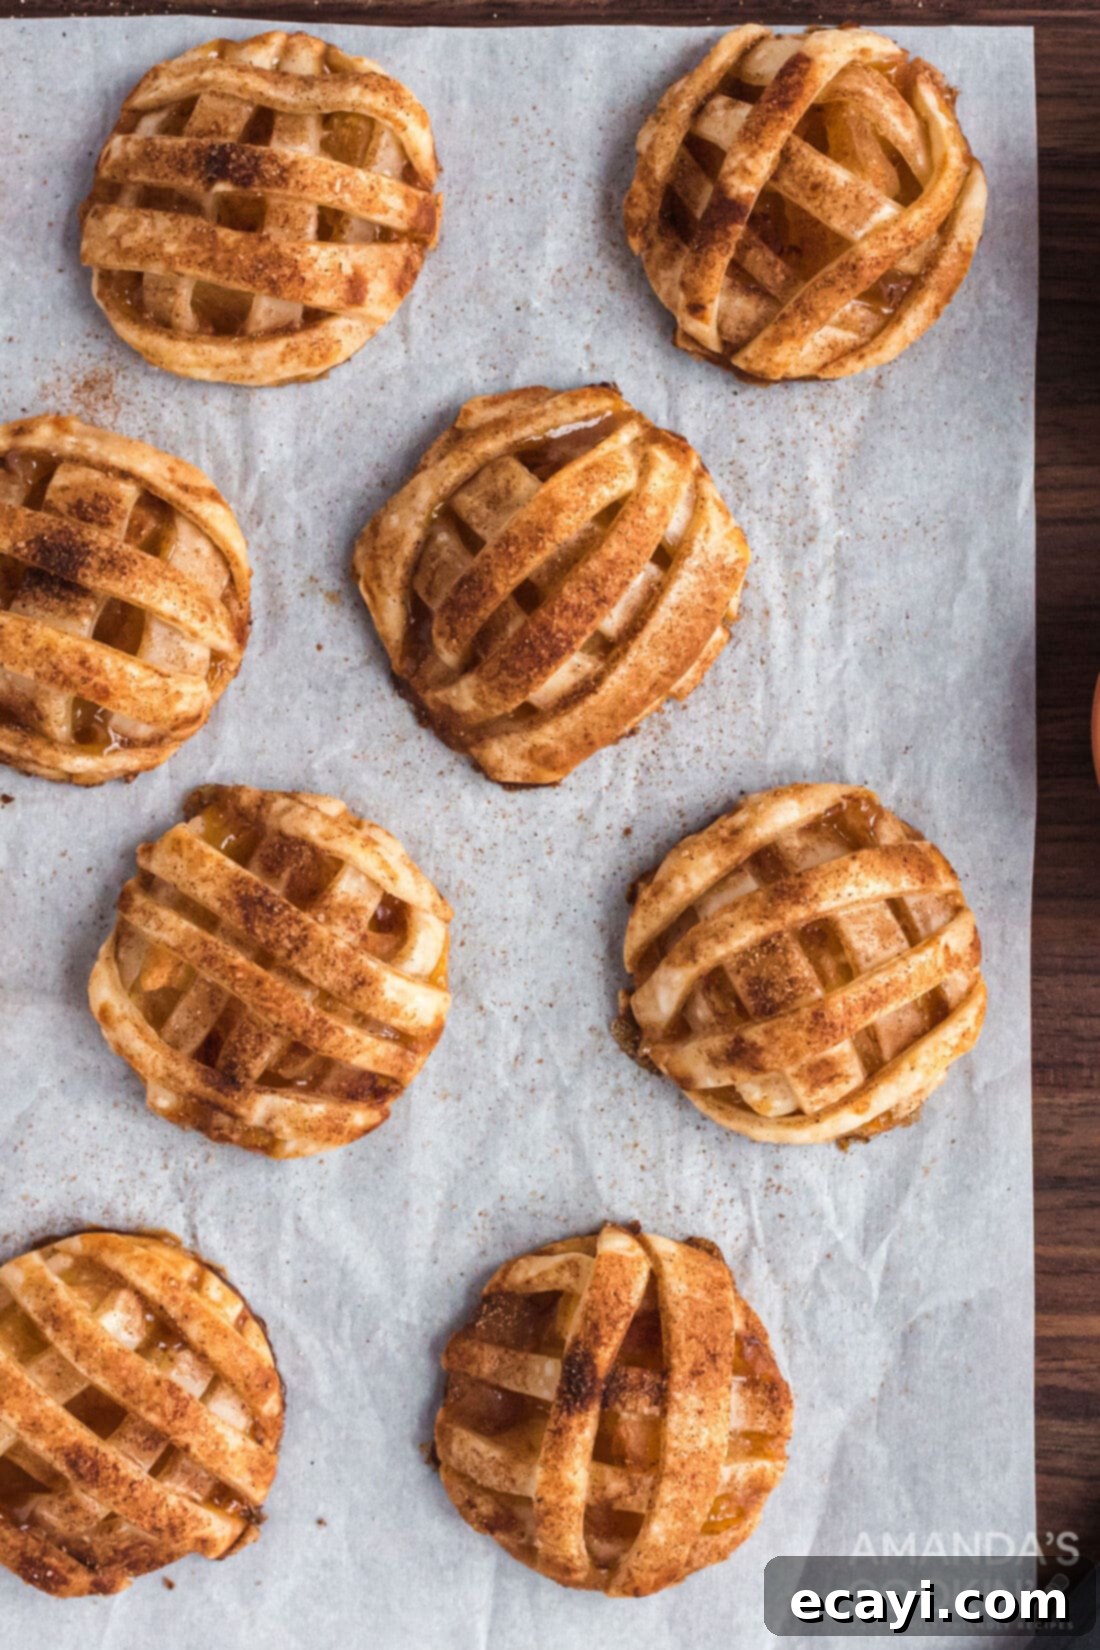
- Create the Topping: Carefully place the dough strips over the apple and caramel filling. For a simple design, arrange approximately 4 strips vertically and 4 strips horizontally over each cookie, creating a criss-cross pattern. Press the ends of the strips onto the egg-washed edges of the cookie base to ensure they adhere. Make sure strips are placed along the edges to help contain the filling. While we’re not creating a traditional woven lattice here, you certainly can if you prefer a more intricate look!

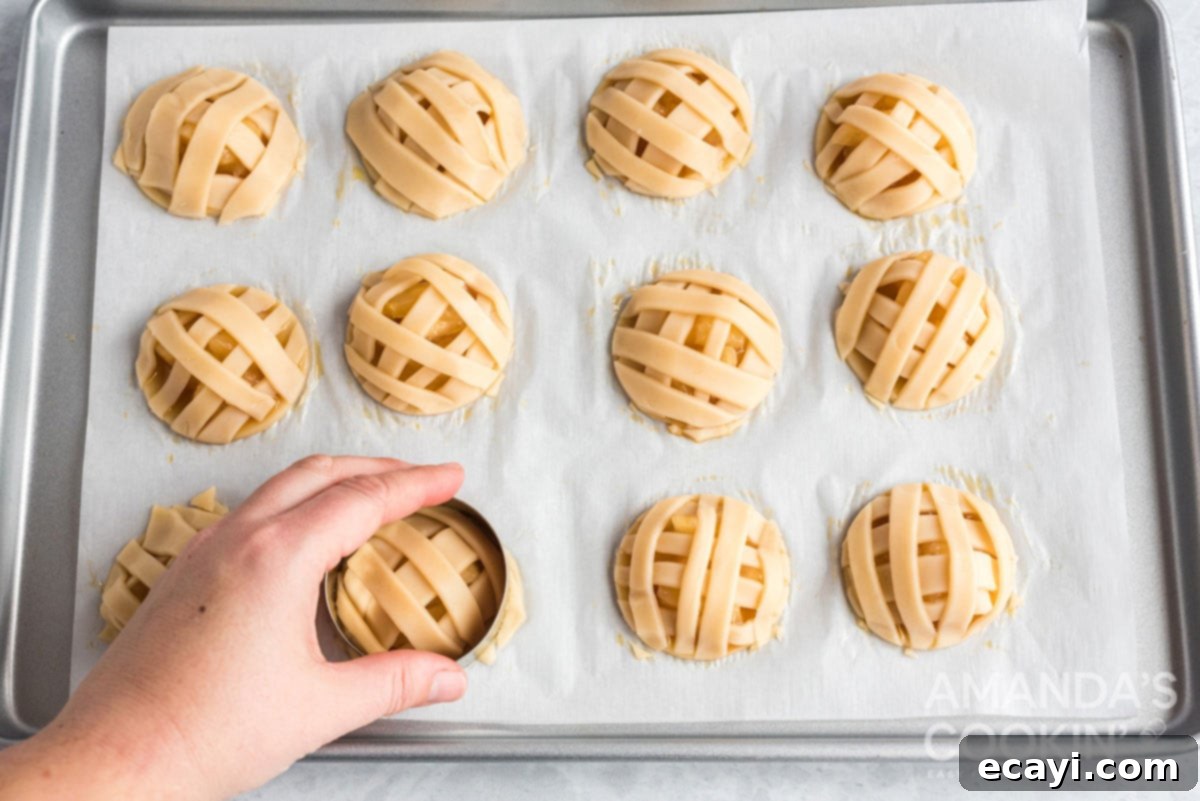
- Trim & Neaten: Once the strips are in place, gently press your cookie cutter back over the top of each mini apple pie. Press down to trim off any excess dough from the strips, ensuring a clean, uniform edge. Use your finger to gently go around the edges and clean up any small dough scraps.

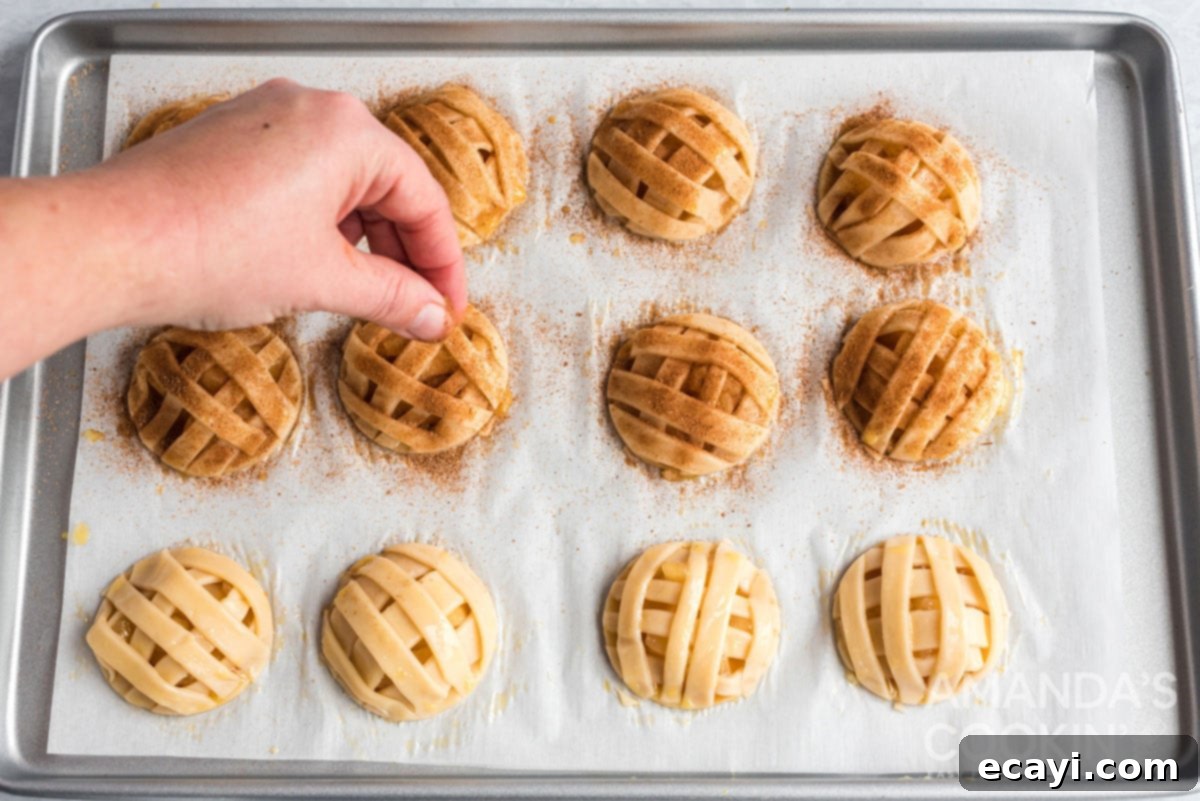
- Final Glaze & Sprinkle: Lightly baste the entire top of each cookie with the remaining egg wash. In a small bowl, combine the ground cinnamon and granulated sugar to create your cinnamon sugar mixture. Generously sprinkle this mixture over each egg-washed cookie for a beautiful golden finish and added flavor.


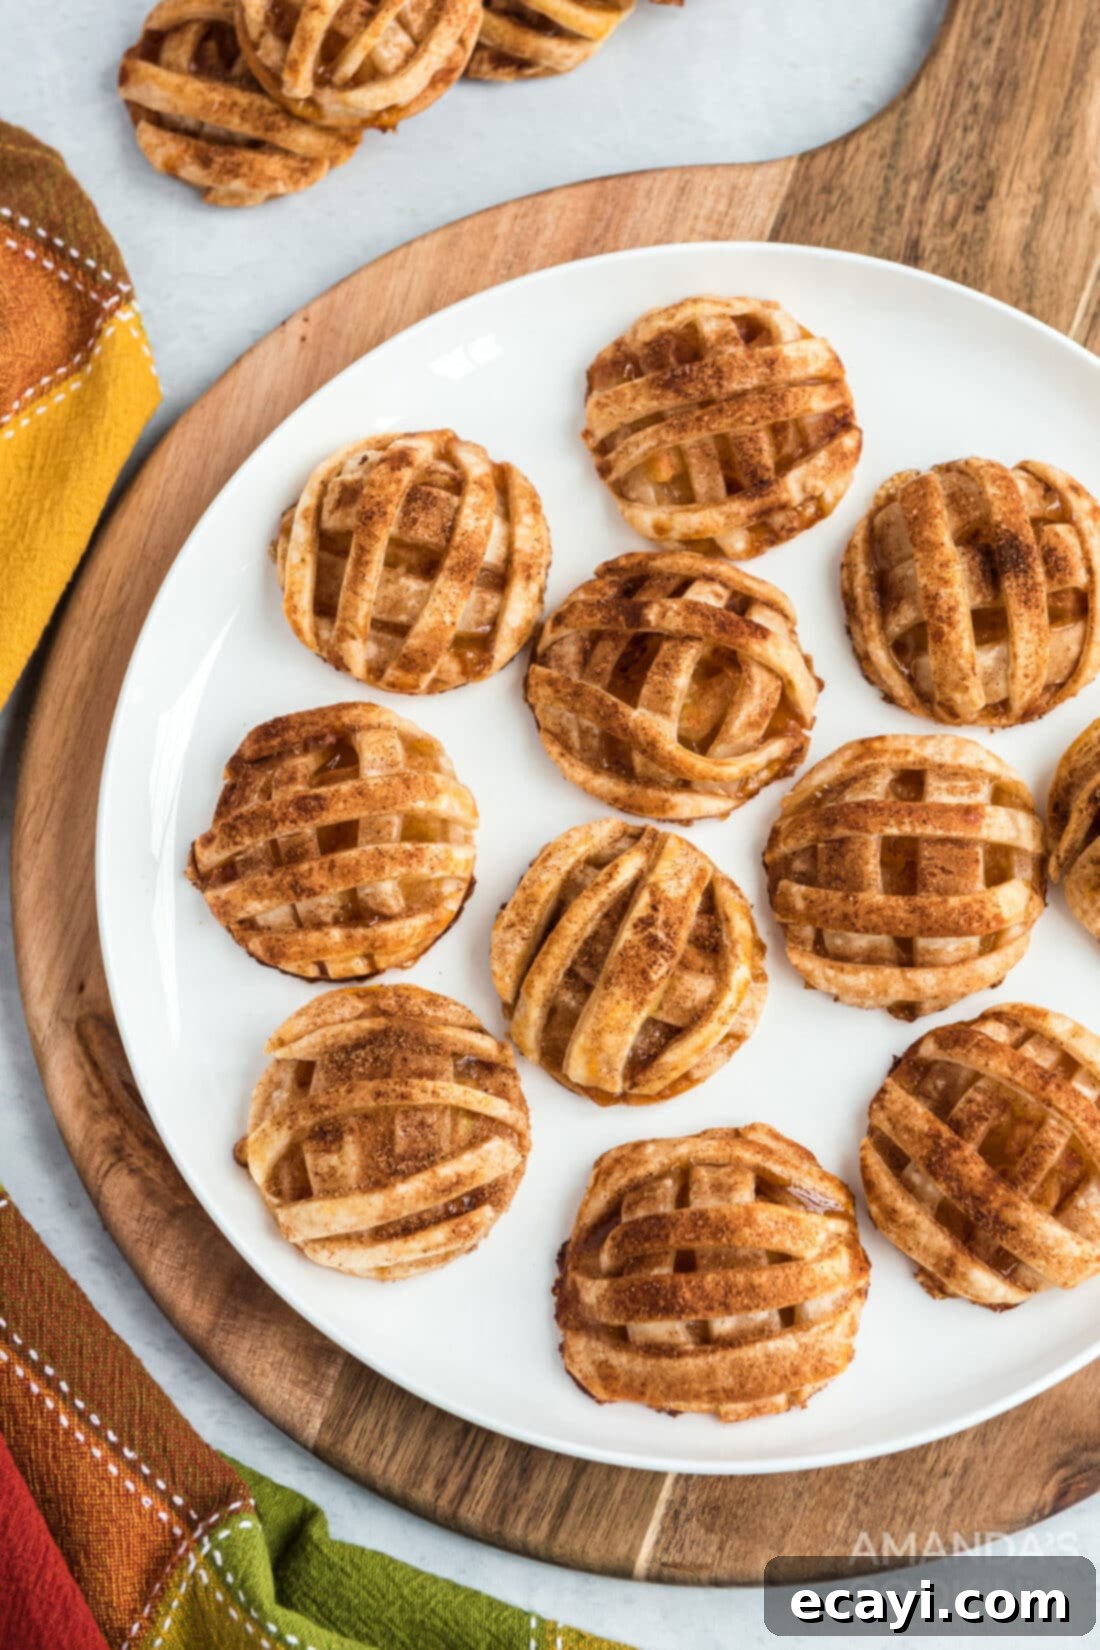
- Bake to Golden Perfection: Place your baking sheets in the preheated oven. Bake for approximately 25-30 minutes, or until the cookies are beautifully golden brown and the filling is bubbly. Baking times can vary by oven, so keep an eye on them.
- Cool Completely: Once baked, remove the cookies from the oven and carefully transfer them to wire racks to cool completely. Cooling allows the filling to set properly and the crust to become delightfully crisp.
Don’t Waste Those Scraps! At this point, you can gather all the leftover dough scraps, gently press them together, and use a rolling pin to flatten them out. Repeat the cutting, filling, and topping process for even more delicious apple pie cookies!
Expert Tips for Perfect Apple Pie Cookies Every Time
Achieving bakery-quality apple pie cookies at home is easy with a few insider tips. These suggestions will help you elevate your baking game and ensure your cookies are consistently delicious:
- Mind the Caramel: While tempting to overfill, remember that caramel expands significantly when heated. Stick to 1/2 to 1 teaspoon per cookie. If your caramel sauce is very thin, try chilling it briefly before using to make it less prone to oozing.
- Prevent Soggy Bottoms: The key here is proper apple filling preparation. Draining excess sauce from the canned apples is crucial. Also, ensure your oven is fully preheated and the cookies bake long enough to crisp up the bottom crust. Using insulated baking sheets and parchment paper helps promote even baking.
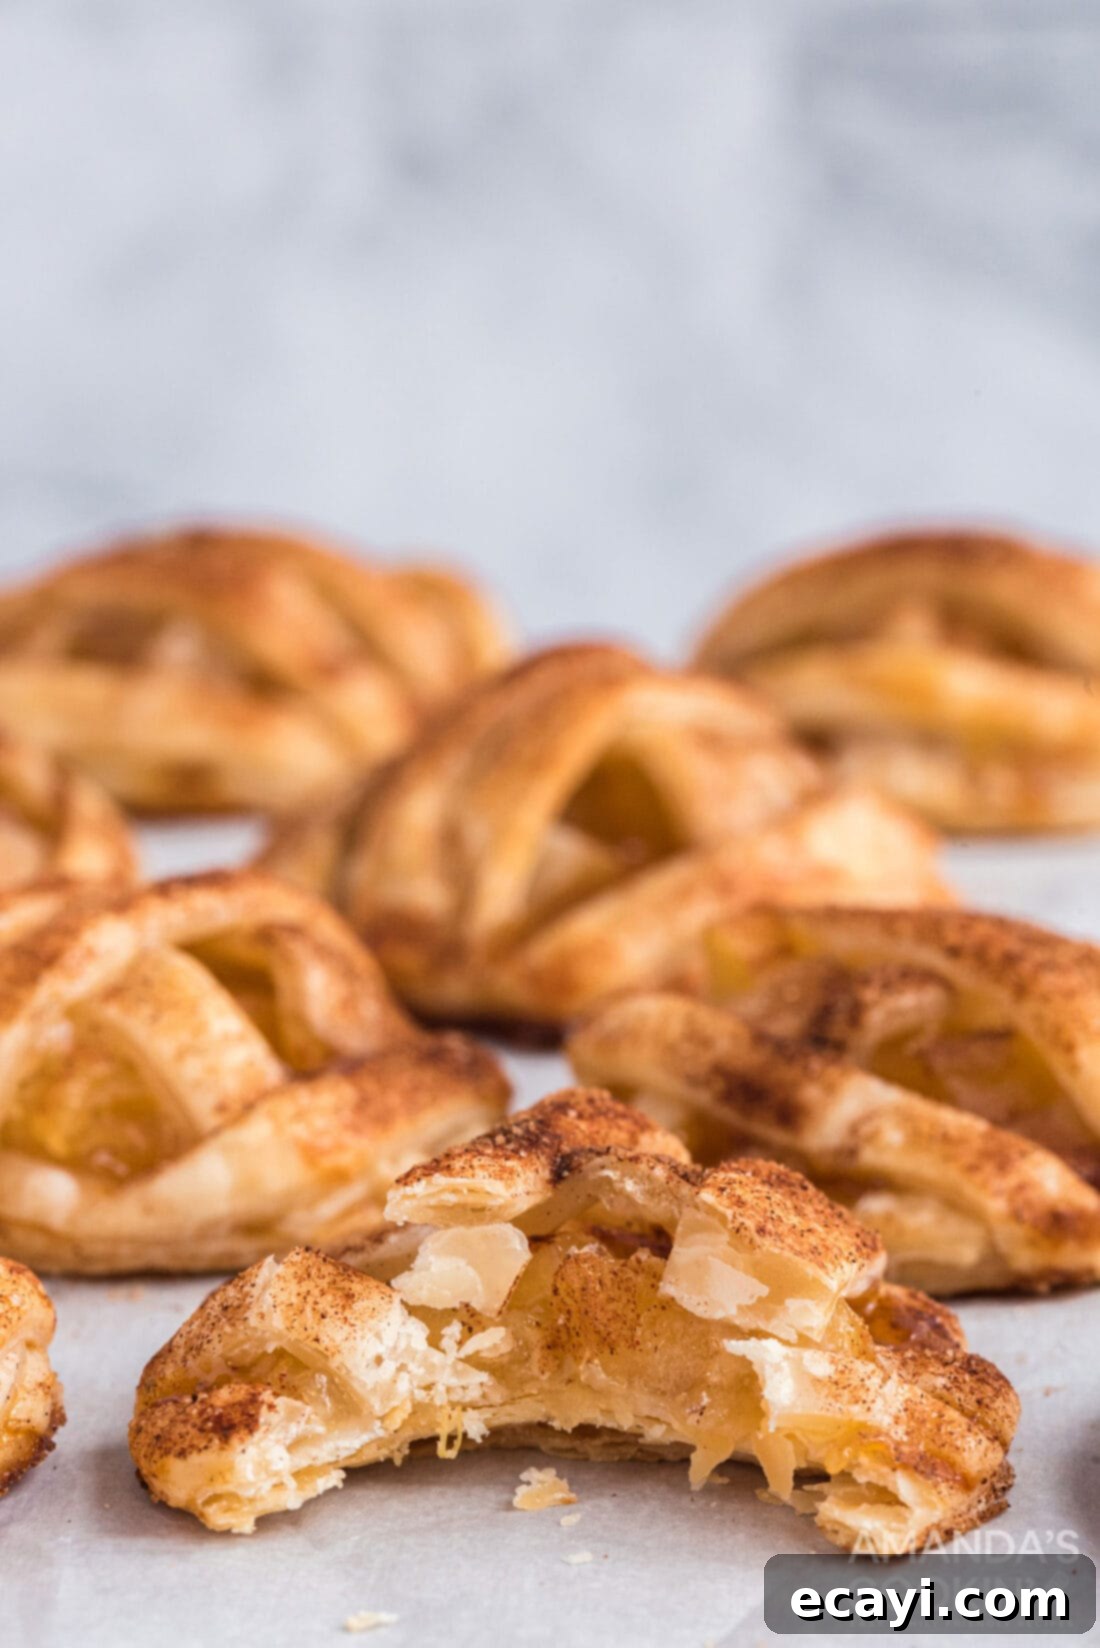
- Golden Brown Perfection: The egg wash and cinnamon sugar mixture aren’t just for looks. The egg wash helps the crust turn a beautiful golden hue, while the sugar caramelizes, adding a delightful crunch and sparkle. Don’t be afraid to let them bake until truly golden for the best flavor and texture.
- Don’t Rush the Cooling: It’s hard to wait, but cooling on a wire rack is essential. This allows air to circulate, preventing the bottoms from becoming steamy and soggy, and gives the apple and caramel filling time to set properly. Cutting into them too soon can result in a messy, unset center.
- Customize Your Flavors: Feel free to experiment! A tiny pinch of nutmeg or allspice can be added to the cinnamon sugar mixture for an extra layer of warmth. For a nutty twist, sprinkle a few finely chopped pecans or walnuts over the apple filling before adding the top strips.
- Re-rolling Dough Scraps: When re-rolling the scrap dough, gather it gently into a ball, then flatten it with a rolling pin. Try not to overwork the dough, as it can become tough. You might get another 2-4 cookies from the scraps, depending on how much you have.
Frequently Asked Questions About Apple Pie Cookies
Absolutely do not waste it! The leftover sauce from the canned apple pie filling is a delicious bonus. Simply warm it up gently on the stovetop or in the microwave. It makes an incredible topping for vanilla ice cream, pancakes, waffles, or even stirred into oatmeal for a burst of apple flavor. You can store it in an airtight container in the refrigerator for up to a week.
For short-term storage, you can keep these freshly baked cookies overnight on the kitchen counter. Simply tent them loosely with foil to protect them. To extend their freshness, refrigerate the cookies in an airtight container or covered tightly with foil for up to 4 days. This helps maintain their crispness and keeps the filling fresh.
Yes, just like a traditional apple pie, these cookies freeze beautifully! Once your apple pie cookies have completely cooled down to room temperature, arrange them in a single layer on a baking sheet and flash freeze for 2-3 hours. This prevents them from sticking together. Once frozen solid, wrap each individual cookie tightly in plastic wrap, then place them in an airtight freezer-safe container or a heavy-duty freezer bag. They can be stored for up to 2-3 months. To enjoy, simply thaw at room temperature or warm gently in the oven.
While this recipe is designed for maximum convenience using store-bought ingredients, you absolutely can substitute with homemade pie crust or apple filling if you prefer. Just ensure your homemade pie dough is chilled and easy to work with, and your apple filling is not overly watery to prevent soggy cookies. Adjust baking times as needed, as homemade ingredients might behave slightly differently.
No cookie cutter? No problem! You can use the rim of a drinking glass (approximately 2.5-3 inches in diameter) to cut out your dough circles. Simply press firmly and twist to get clean cuts. For the top strips, a ruler and a knife can help you achieve even widths.
Certainly! This recipe is very versatile. You can easily swap the apple pie filling for cherry, peach, blueberry, or mixed berry filling. Just remember to drain any excess sauce from the fruit, as some fillings can be quite juicy. The baking time and method should remain largely the same, but always keep an eye on them for that perfect golden brown finish.
A Personal Note From Amanda & Kristen
This particular recipe holds a special place in our hearts because it embodies our philosophy of making delicious food accessible and enjoyable for everyone. My daughter, Kristen, who also serves as the editorial manager for this blog, spearheaded the creation of these apple pie cookies. She noticed a common frustration among home bakers: the beautiful apple pie cookies circulating online often came with overly complex instructions, requiring everything from scratch – homemade pie dough, homemade apple filling, and intricate lattice work.
Kristen took it upon herself to meticulously review countless recipes, identifying the pain points and brainstorming ways to simplify without sacrificing flavor or appeal. Her goal was clear: create a version that was not only incredibly delicious but also genuinely easy and mess-free. Many recipes she found led to wasted ingredients and a frustrating experience due to complicated assembly. This simplified version is her brainchild, a testament to her dedication to practical and enjoyable baking.
We both truly hope that you find her thoughtful approach makes baking these apple pie cookies a much more pleasant and rewarding experience. Enjoy the fruits of her labor, and let us know what you think!
More Irresistible Apple Recipes to Try
If you’re as passionate about apple desserts as we are, you’ll love exploring these other fantastic recipes. From comforting crisps to convenient hand pies, there’s an apple treat for every occasion:
- Apple Cranberry Crisp
- Crockpot Apple Cobbler
- Mini Apple Pies
- Merryfield Apple Cake
- Apple Hand Pies
- 3-Ingredient Apple Pie Cupcakes
- Apple Pie Bites
- Caramel Apple Cheesecakes Bars
I love to bake and cook and share my kitchen experience with all of you! Remembering to come back each day can be tough, that’s why I offer a convenient newsletter every time a new recipe posts. Simply subscribe and start receiving your free daily recipes!
Easy Apple Pie Cookies
IMPORTANT – There are often Frequently Asked Questions within the blog post that you may find helpful. Simply scroll back up to read them!
Print It
Pin It
Rate It
Save ItSaved!
Ingredients
- 28 ounces frozen pre-made pie doughs 2 boxes (4 pie dough circles), thawed according to package directions
- 21 oz can of apple pie filling
- Caramel sauce for ice cream topping, preferably thicker consistency
- 1 large egg
- 1 teaspoon water
- 1 teaspoon ground cinnamon
- 2 teaspoons granulated sugar
Tools You’ll Need
-
2.5-inch round cookie cutters
-
Pizza Cutter
-
Pastry brush
-
Rolling pin
-
Insulated baking sheets
-
Silicone baking mat
-
Whisk
-
Wire cooling racks
Before You Begin: Important Tips & Storage
- Utilize Leftover Apple Pie Sauce: You will have delicious sauce remaining from the can of apple pie filling after separating the apples. Do not pour it down the sink! This sauce is fantastic warmed up and used as a delightful topping for ice cream, pancakes, waffles, or even stirred into your morning oatmeal. Store it in an airtight container in the refrigerator.
- Storing Freshly Baked Cookies: These cookies can be stored overnight on your kitchen counter, loosely tented with foil to keep them fresh. For longer preservation, refrigerate them covered tightly in foil or in an airtight container for up to 4 days.
- Freezing for Future Enjoyment: Just like a traditional apple pie, these cookies are excellent for freezing! Once they have completely cooled to room temperature, arrange them on a baking sheet and flash freeze for 2-3 hours until solid. This step prevents them from sticking together. After flash freezing, wrap individual cookies tightly in plastic wrap, then transfer them to an airtight container or a freezer-safe bag for storage. They will keep well in the freezer for up to 2-3 months.
Instructions
-
Preheat your oven to 350°F (175°C) and prepare your baking sheets by lining them with parchment paper or silicone baking mats for easy release.
-
Thaw the refrigerated pie doughs thoroughly according to the package instructions. This is essential for preventing cracks and ensuring pliability.
-
Empty the can of apple pie filling into a bowl. Use a fork to gently remove the apple pieces from the thick sauce. You want to avoid excessive sauce on the apples to prevent soggy cookie bottoms.
-
Using a knife, cut the separated apple pieces into smaller, more uniform chunks, roughly 1/4 to 1/2 inch in size, for better distribution in your cookies.
-
Unroll two of the pie dough circles and gently smooth out any visible cracks with your fingers.
-
Using a 2.5-inch round cookie cutter, cut out circular bases from the unrolled doughs. Carefully transfer these dough circles to your prepared baking pan. Set aside any remaining dough scraps for later use.
-
Dollop 1/2 to 1 teaspoon of caramel sauce onto the center of each pie dough cut-out. Be careful not to use too much, as the caramel will spread during baking.
-
Place a generous tablespoon of the chopped apple chunks directly on top of the caramel on each cookie base.
-
From your remaining two pie doughs (and any scraps from earlier), use a pizza cutter or a knife to slice strips approximately 1/2 to 1 inch thick. Then, cut these strips into thirds or quarters to create shorter segments.
-
In a small bowl, whisk one large egg with 1 teaspoon of water using a fork to create an egg wash. Lightly baste (brush) the outer edges of the filled cookie bases with this egg wash.
-
Carefully place dough strips over the top of the cookies. For a simple design, arrange about 4 strips vertically and 4 strips horizontally to form a criss-cross pattern. Ensure the ends of the strips are pressed onto the egg-washed edges to seal them, helping to prevent the filling from oozing out. While not a true woven lattice, it gives a charming pie-like appearance.
-
Place your cookie cutter back over the top of each mini apple pie and press down firmly to trim off any excess dough from the strips, ensuring a neat, uniform edge. Use your finger to tidy up any small dough scraps around the edges.
-
Lightly baste the entire top surface of each cookie with the remaining egg wash. Then, generously sprinkle each cookie with a mixture of 1 teaspoon ground cinnamon and 2 teaspoons granulated sugar.
-
Bake in the preheated oven for approximately 25-30 minutes, or until the cookie tops are beautifully golden brown and the filling is gently bubbling.
-
Once baked, remove the cookies from the oven and carefully transfer them to wire racks. Allow them to cool completely before serving to allow the filling to set and the crust to become perfectly crisp.
Nutrition Information
The recipes on this blog are tested with a conventional gas oven and gas stovetop. It’s important to note that some ovens, especially as they age, can cook and bake inconsistently. Using an inexpensive oven thermometer can assure you that your oven is truly heating to the proper temperature. If you use a toaster oven or countertop oven, please keep in mind that they may not distribute heat the same as a conventional full sized oven and you may need to adjust your cooking/baking times. In the case of recipes made with a pressure cooker, air fryer, slow cooker, or other appliance, a link to the appliances we use is listed within each respective recipe. For baking recipes where measurements are given by weight, please note that results may not be the same if cups are used instead, and we can’t guarantee success with that method.
