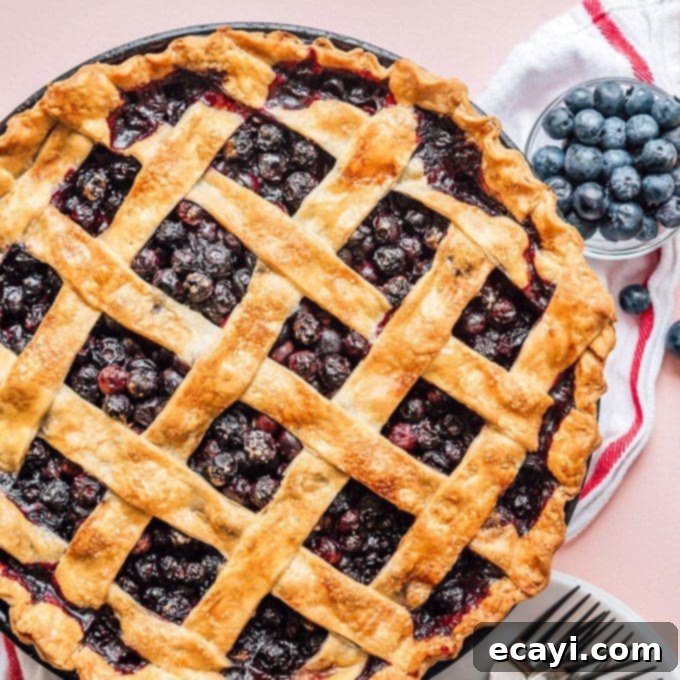
The Ultimate Homemade Blueberry Pie: A Classic Recipe with a Flaky Lattice Crust
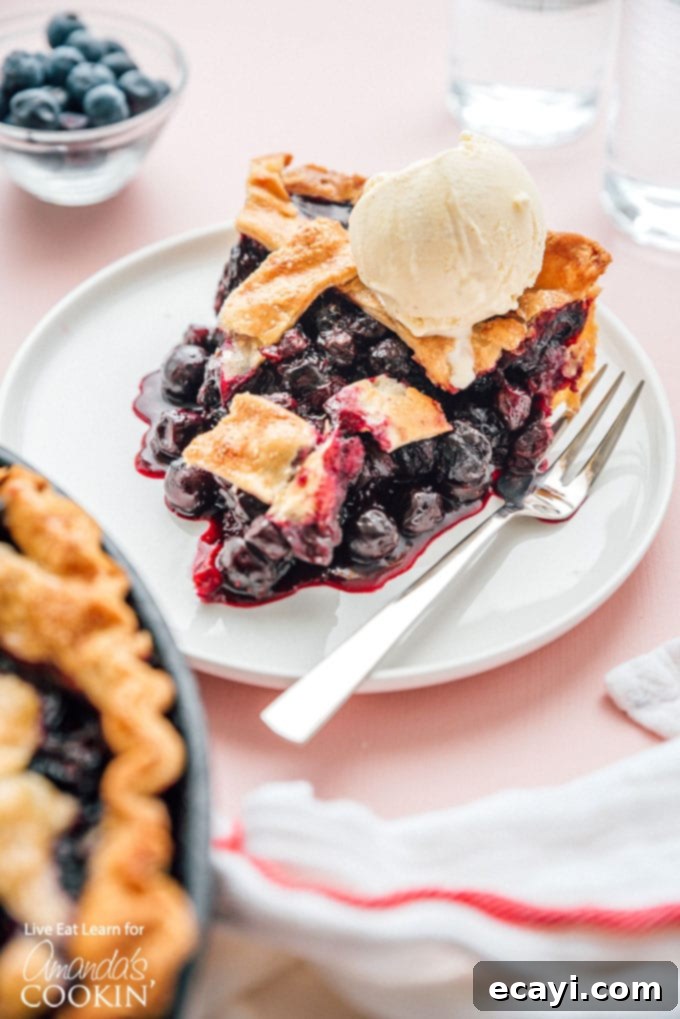
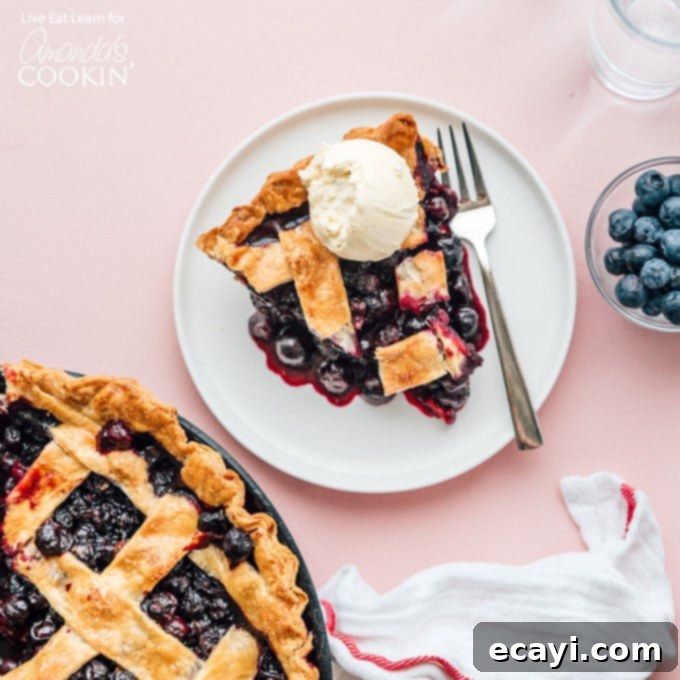
There’s nothing quite like the comforting aroma and delightful taste of a freshly baked homemade blueberry pie. This timeless dessert, bursting with sweet, juicy blueberries and crowned with an intricately woven lattice crust, is a true culinary masterpiece that evokes warmth and nostalgia. Imagine a slice of this heavenly pie, still warm from the oven, served with a generous scoop of melting vanilla ice cream – a truly unforgettable experience that will transport you straight to blueberry bliss. Whether you’re a seasoned baker or just starting your journey into the world of homemade desserts, this classic blueberry pie recipe is designed to guide you to perfection, ensuring a flaky crust and an irresistibly sweet, gooey filling every single time.
Why This Homemade Blueberry Pie Recipe is a Must-Try
Our classic Blueberry Pie isn’t just a recipe; it’s a celebration of simple, fresh ingredients transformed into something extraordinary. This beloved family favorite is surprisingly easy to make, delivering incredible results that will impress everyone at your next gathering. What makes this recipe truly stand out?
- Unleashing Fresh Flavors: If you find yourself with an abundance of fresh, ripe blueberries, this recipe is your ideal solution. The berries undergo a magical transformation in the oven, softening into a wonderfully gooey, sweet, and slightly tart filling that is utterly addictive. The natural sweetness of the blueberries truly shines, enhanced by a hint of lemon zest and cinnamon for a balanced, complex flavor profile. We’ll guide you through selecting the perfect berries and combining them to create a filling that’s both flavorful and perfectly set.
- Effortless Elegance with a Lattice Crust: While a lattice crust might appear daunting, our step-by-step instructions make it entirely achievable, even for beginners. This beautiful woven top adds a touch of rustic elegance to your pie, allowing glimpses of the luscious blueberry filling beneath while ensuring even baking and steam release for that perfect pie consistency. It’s a signature look that elevates a simple pie to a show-stopping dessert.
- The Perfect Texture Combination: This recipe promises a perfectly flaky, golden-brown crust that provides a delightful contrast to the tender, bursting blueberries within. The balance of textures, from the crisp, buttery crust to the soft, warm, and juicy filling, is what makes each bite so satisfying. Every element is crafted to contribute to a harmonious and delicious experience.
- A Versatile Dessert for Any Occasion: Perfect for summer picnics, holiday gatherings, or simply a comforting weeknight treat, this homemade blueberry pie is always a crowd-pleaser. Its timeless appeal makes it suitable for celebrations big and small. Serve it warm with a dollop of whipped cream, a scoop of premium vanilla bean ice cream, or simply on its own for a truly delightful experience that highlights the natural goodness of the fruit.
RELATED: To truly master your pie, you might also like this recipe – How to Make Pie Crust.
Essential Tips for the Perfect Homemade Blueberry Pie
Find all precise measurements, a complete list of ingredients, and detailed instructions in the printable recipe card located at the end of this comprehensive guide.
Achieving a truly spectacular homemade blueberry pie involves more than just following steps; it’s about understanding a few key principles that elevate a good pie to a great one. Despite its impressive appearance, crafting this classic dessert is actually quite straightforward when you know these little secrets:
- Cold Butter is Your Best Friend for a Flaky Crust: The secret to a consistently flaky pie crust lies in using very cold butter, cut into small pieces. When these cold butter bits hit the hot oven, they melt and release steam, creating tiny pockets that separate the layers of dough. This process is what gives you that coveted, airy, and flaky texture. Avoid overworking the dough at all costs, as this can develop the gluten too much, resulting in a tough, unappealing crust.
- Choosing the Right Blueberries: The star of the show is, of course, the blueberries. For the best flavor and texture, opt for fresh, ripe blueberries that are plump, firm, and deep blue in color. Their natural sweetness and slight tartness are unmatched. While frozen blueberries can be used (see FAQs below for specific tips), fresh ones will always offer a superior taste and texture profile.
- Balancing Sweetness and Tartness with Lemon Zest: Blueberries inherently possess a delicate balance of sweet and tart notes. While sugar is crucial for sweetening the filling, a touch of fresh lemon zest plays a vital role in elevating the flavor profile. It brightens the overall taste, prevents the pie from becoming overly sweet, and adds a zesty, aromatic note that beautifully complements the berries. Don’t skip this ingredient – it makes a noticeable difference!
- The Magic of Cornstarch as a Thickener: Blueberries naturally release a lot of liquid when baked. Cornstarch is your hero here, acting as a powerful thickening agent that ensures your pie filling sets into a luscious, gooey consistency rather than being watery. Without a proper thickener, you’d end up with a soupy pie. Ensure it’s thoroughly mixed with the berries to avoid lumps.
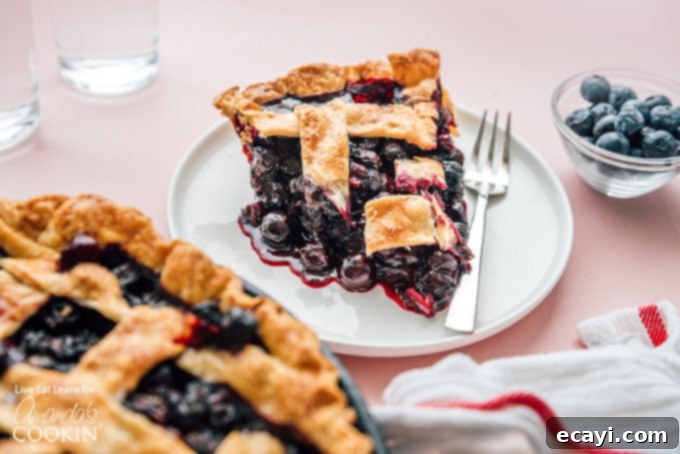
- Patience is Key: Don’t Rush the Cooling Process: This is arguably the hardest part of making any fruit pie, and blueberry pie is no exception! Allowing your pie to cool completely (or at least for several hours) is absolutely essential. During this critical cooling period, the cornstarch in the filling continues to set and thicken. Cutting into a hot pie will almost certainly result in a runny, messy filling. For neat, beautiful slices and the best texture, resist the temptation and let it cool down properly.
Crafting the Perfect Flaky Pie Dough from Scratch
A homemade, flaky crust is the unparalleled foundation of any truly great pie, and our recipe is specifically designed to achieve maximum flakiness with relative ease. Follow these detailed steps to prepare your buttery, tender pie dough that will cradle your delicious blueberry filling:
- Begin by combining 2 ½ cups of all-purpose flour and ½ teaspoon of salt in a large mixing bowl. The salt enhances the flavor of the crust. Next, add 1 cup of unsalted butter, which should be very cold and cut into small, ½-inch cubes. Using a pastry cutter, two forks, or even your clean fingertips, work the butter into the flour. The goal is to cut the butter until the mixture resembles coarse crumbs, with some pea-sized pieces of butter still visible. These distinct butter pieces are absolutely vital for creating those highly sought-after flaky layers in your baked crust. Work quickly to prevent the butter from melting.
- Once you’ve achieved the desired crumbly texture, begin to gradually drizzle in 6 to 8 tablespoons of ice-cold water, one tablespoon at a time, mixing gently after each addition. Continue adding water until the dough just barely starts to come together and can be formed into a loose ball. It’s crucial not to add too much water, as an overly wet dough will develop too much gluten and result in a tough, rather than tender, crust. You want the dough to be moist enough to hold its shape but not at all sticky.
- Carefully divide the freshly made dough into two equal portions. Gently pat each portion into a flattened disk shape. This disk shape is not only convenient for storage but also makes it significantly easier to roll out later. Wrap each disk tightly in plastic wrap to prevent it from drying out, and then refrigerate for at least one hour. This chilling period is crucial for several reasons: it allows the gluten in the flour to relax, which prevents the crust from shrinking excessively during baking, and it ensures the butter remains perfectly cold, further contributing to that incredibly flaky texture. You can prepare this dough up to two days in advance.
Preparing the Sweet & Juicy Blueberry Pie Filling
While your impeccably prepared pie dough is chilling in the refrigerator, you can turn your attention to crafting the star of the show: the irresistible blueberry filling. This simple yet flavor-packed mix bursts with the vibrant taste of summer and comes together quickly:
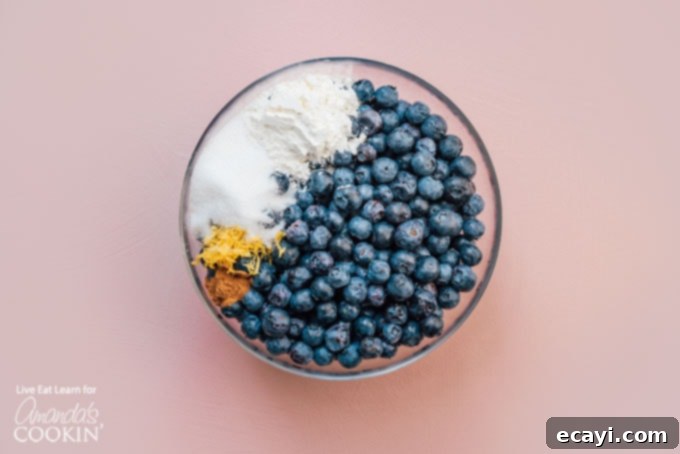
- In a separate, large mixing bowl, gently combine 6 cups of fresh blueberries with ¼ cup of cornstarch, ¼ cup of granulated sugar, 1 teaspoon of fresh lemon zest, ½ teaspoon of ground cinnamon, and a tiny pinch of salt (about ¼ teaspoon). The cornstarch is a crucial component here; it acts as a thickening agent, ensuring your pie filling achieves a luscious, gooey consistency and isn’t too runny when baked. The granulated sugar provides the necessary sweetness, while the lemon zest adds a bright, tangy note that perfectly complements the natural sweetness of the blueberries and the warm, aromatic hint of cinnamon. Carefully mix all the ingredients together, taking care not to crush the delicate berries, as you want them to remain mostly intact. Set this flavorful mixture aside while you prepare your bottom crust.
Assembling Your Beautiful Homemade Blueberry Pie
Now comes the exciting and creative part – bringing all the perfectly prepared components together to create your magnificent blueberry pie. The lattice crust, though it looks intricate and professional, is actually simpler to achieve than you might think and adds a gorgeous, rustic touch that will surely impress.
- Once your pie dough has thoroughly chilled (at least an hour), remove one disk from the refrigerator. Let it sit at room temperature for approximately 5-10 minutes to soften just slightly, which will make it much easier to roll out without cracking. Lightly flour a clean work surface and your rolling pin to prevent sticking. Roll the dough out into a large, even circle, aiming for approximately 12-13 inches in diameter and about 1/8 inch thick. The circle should be large enough to comfortably line your pie pan (a standard 9-inch pie pan is ideal) with at least a ½ inch overhang around the edges. Carefully transfer the rolled dough into your pie pan. Trim any excess dough, leaving that crucial ½ inch overhang, then crimp or flute the edges as desired to create a decorative finish and seal for the filling.
- Pour the deliciously prepared blueberry pie filling into the dough-lined pie dish. Gently spread the filling evenly across the bottom crust with a spatula or the back of a spoon, ensuring an even distribution of berries and juice.
- For the intricate lattice top, retrieve the second chilled dough disk from the refrigerator. On your lightly floured surface, roll it out into another large circle, similar in size and thickness to the bottom crust. Using a sharp knife, a pizza cutter, or a pastry wheel, cut the dough into even strips, approximately 1 inch thick. You will need about 8-10 strips for a classic lattice pattern, depending on the tightness of your weave.
Step-by-Step Guide to Creating the Perfect Lattice Crust:
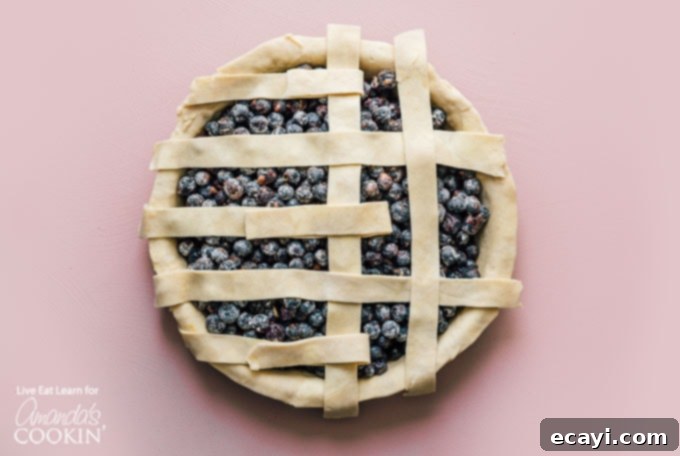
- Lay half of your prepared dough strips (for instance, 4 or 5 strips) parallel to each other across the top of the pie. Position them in one direction, let’s say horizontally, spacing them about 1 inch apart. Make sure they extend slightly over the pie’s edge.
- Now, carefully fold back every other horizontal strip (meaning the 1st, 3rd, and 5th strips, for example) about halfway towards the center of the pie. Take one of your remaining vertical dough strips and lay it perpendicular (vertically) over the unfolded horizontal strips, positioning it close to the folded-back edges.
- Once the vertical strip is in place, unfold the horizontal strips that you just folded back, laying them carefully over the newly placed vertical strip. This locks the first vertical strip into the weave.
- Next, fold back the *other* set of horizontal strips (e.g., the 2nd, 4th, and 6th strips) halfway. Place another vertical strip perpendicular to the horizontal strips, positioning it parallel to the first vertical strip you laid down.
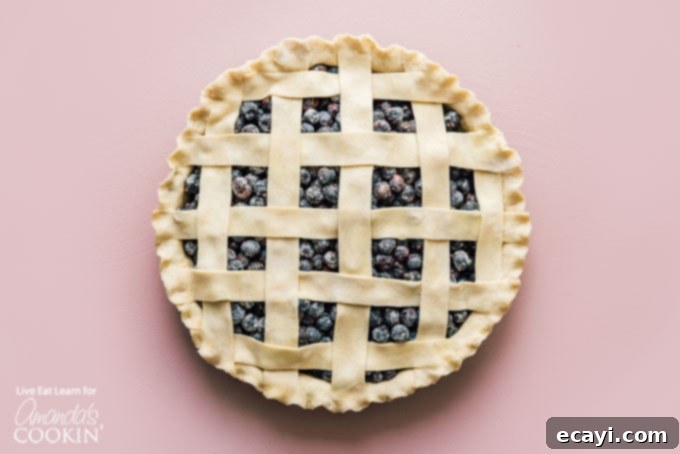
- Unfold these horizontal strips over the second vertical strip. Continue repeating this weaving pattern, alternating which horizontal strips you fold back each time, until you have covered the entire pie with a beautiful, interconnected woven lattice design. Take your time to ensure the strips are evenly spaced and gently woven.
- Finally, trim any excess lattice strips, ensuring they line up with the bottom crust’s overhang. Then, press the ends of the lattice strips firmly onto the bottom crust’s edge to securely seal them together. You can then crimp the combined edges together, or flute them using your fingers or a fork, for a neat and decorative finish. For a gorgeous golden sheen and a touch of extra sweetness, brush the entire lattice top with one whisked egg (this is known as an egg wash) and, optionally, sprinkle a little granulated sugar over it for a sparkling finish.
Baking Your Blueberry Pie to Golden Perfection
The final and most anticipated step is the baking process, where the magic truly happens, transforming your carefully assembled pie into a golden, bubbling, and aromatic delight that fills your kitchen with an irresistible scent.
- First, preheat your oven to 400 degrees F (200 degrees C). This initial high temperature is crucial for setting the crust quickly and promoting beautiful browning. To simplify cleanup and prevent any potential blueberry juice spills from making a mess in your oven, it’s highly recommended to place a large baking sheet on the bottom rack of your oven before you place the pie in. This will catch any drips from the bubbling filling.
- Carefully transfer your assembled pie onto the preheated baking sheet in the oven. Bake the pie for an initial 20 minutes at 400 degrees F. This high heat jump-starts the baking process, helps create a flaky crust, and begins to cook the filling.
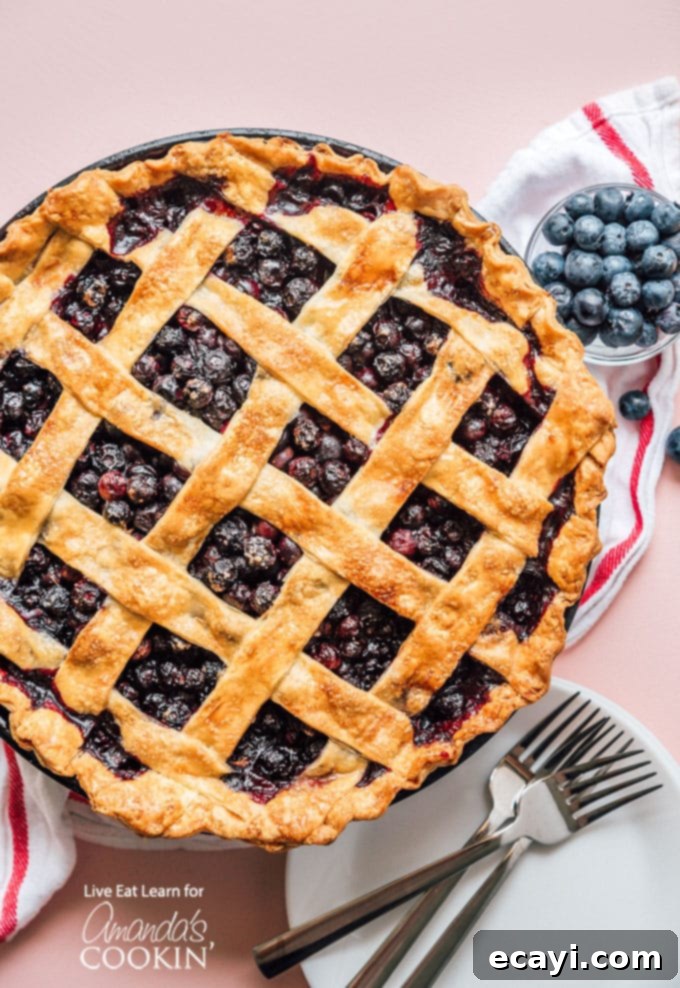
- After the initial 20 minutes, reduce the oven temperature to 350 degrees F (175 degrees C) without opening the oven door unnecessarily. Continue baking for an additional 35-45 minutes. The pie is ready when the blueberry filling is visibly bubbling thickly at the edges through the lattice (indicating it has properly thickened) and the crust has achieved a rich, inviting golden-brown color. Keep a close eye on the crust edges; if you notice them browning too quickly before the rest of the pie is done, loosely cover them with strips of aluminum foil to prevent burning.
- Once baked to perfection, carefully remove the pie from the oven. This is often the hardest part for any pie baker: you must allow the pie to cool completely on a wire rack for at least 3-4 hours, or even longer (preferably at room temperature). This crucial cooling period allows the cornstarch in the filling to fully set and solidify. Resisting the temptation to cut into a hot pie is essential, as cutting it too early will result in a runny, soupy filling that won’t hold its shape. Patience truly is key for achieving those perfectly neat, beautiful slices.
Expert Tips & Frequently Asked Questions (FAQs) for Blueberry Pie Success
To ensure your homemade blueberry pie turns out perfectly every time, here are some invaluable tips and answers to common questions that often arise during the baking process:
If you don’t have a specialized pastry cutter, don’t worry – you have a few excellent alternatives right in your kitchen. You can effectively cut the cold butter into the dry ingredients by using two butter knives, moving them in a scissor-like motion. Another highly effective method is to use your clean fingertips, pinching and rubbing the butter into the flour until the mixture resembles coarse crumbs. The key is to work as quickly as possible to prevent the butter from warming up too much from your body heat, which is vital for a flaky crust.
Absolutely! You can successfully use frozen blueberries for this pie, but there are a couple of crucial points to remember. It’s imperative that you do not thaw them first. Add the frozen blueberries directly to your other filling ingredients while they are still in their frozen state. Furthermore, do not prepare the blueberry filling until you are truly ready to immediately put it into the pie crust and place it in the oven. Thawed frozen blueberries will release a significant amount of extra liquid, which could easily make your pie filling too watery. If using frozen, you might consider adding an extra tablespoon of cornstarch to compensate for this additional moisture and ensure a well-set filling. Keep in mind that frozen blueberries can sometimes slightly extend the overall baking time.
Yes, for the sake of convenience and to save time, you can certainly opt for store-bought, pre-made refrigerated pie dough (available as either tubes or sheets). Just follow the instructions provided on the package for preparing and lining your pie pan with the crust. Once the crust is prepared, you can then proceed with our recipe for the filling and baking as directed. While a homemade crust offers an unmatched flaky texture and superior flavor that is truly rewarding, pre-made crusts are a fantastic time-saver, especially on busy days, and will still yield a delicious pie with our stellar blueberry filling.
Proper storage is key to enjoying your delicious pie for longer. Leftover blueberry pie can be safely stored at room temperature for up to 2 days, provided it is loosely covered with plastic wrap or aluminum foil to prevent it from drying out. For extended freshness, you can refrigerate it for up to 4-5 days. If refrigerated, the pie is absolutely delicious served cold, or you can gently reheat individual slices in the microwave (for speed) or in a low oven (around 300°F/150°C) until warmed through for that fresh-baked feel.
Yes, blueberry pie freezes exceptionally well, making it a perfect make-ahead dessert! You can freeze it either baked or unbaked. To freeze a baked pie: allow it to cool completely to room temperature, then wrap it tightly in several layers of plastic wrap, followed by a layer of heavy-duty aluminum foil. It will maintain its quality in the freezer for up to 3-4 months. To thaw, place it in the refrigerator overnight, then reheat in a low oven (around 300°F/150°C) until warmed through. To freeze an unbaked pie: assemble the pie completely, then wrap it thoroughly as described above and freeze. When you’re ready to bake, place the frozen pie directly into a preheated oven (no need to thaw), adding about 15-20 minutes to the baking time. Keep an eye on the crust and tent with foil if it starts to brown too quickly.
While a scoop of classic vanilla ice cream is undeniably a perfect and beloved pairing for warm blueberry pie, don’t limit your imagination! Blueberry pie is also fantastic with a generous dollop of freshly whipped cream, perhaps infused with a hint of vanilla or almond extract. For a more sophisticated touch, consider a drizzle of crème anglaise or a simple dusting of powdered sugar for an elegant presentation. For an extra touch of textural contrast and decadence, a sprinkle of toasted slivered almonds or a small sprig of fresh mint can truly elevate the experience.
The most challenging aspect of making this incredible homemade blueberry pie is undoubtedly the waiting game – allowing it to cool sufficiently before you can finally cut into its luscious, perfectly set goodness. But trust us, the anticipation only makes that first sweet, tart, and flaky bite even more rewarding and memorable. This is a dessert that truly pays off the effort, bringing joy to every palate. Enjoy every single mouthful!
More Delicious Pie Recipes to Explore
If you loved this blueberry pie, be sure to explore our other fantastic pie creations. There’s a perfect pie for every season and every craving!
- Banana Cream Pie
- No Bake Peanut Butter Pie
- Key Lime Pie
- Strawberry Pie
- French Silk Pie
- Peach Pie
- Apple Pie
- Deep Dish Peach Pie
- Southern Buttermilk Pie

Blueberry Pie
IMPORTANT – There are often Frequently Asked Questions within the blog post that you may find helpful. Simply scroll back up to read them!
Print It
Rate It
Save ItSaved!
Ingredients
Crust
- 2 ½ cups all-purpose flour
- ½ tsp salt
- 1 cup unsalted butter chilled
- 6 to 8 Tbsp ice water
- 1 egg whisked
Filling
- 6 cups fresh blueberries
- ¼ cup cornstarch
- ¼ cup sugar
- 1 tsp lemon zest
- ½ tsp cinnamon
- ¼ tsp salt
Things You’ll Need
-
Pastry cutter
-
Pie plate
-
Pie server
Before You Begin
Instructions
-
1. Prepare the Pie Dough: In a large bowl, combine 2 ½ cups all-purpose flour and ½ tsp salt. Add 1 cup cold, unsalted butter (cubed). Cut the butter into the flour using a pastry cutter, two forks, or your fingertips until the mixture resembles coarse crumbs with some pea-sized butter pieces. Slowly drizzle in 6 to 8 Tbsp of ice water, one tablespoon at a time, mixing gently until the dough just comes together into a loose ball. Divide the dough into two equal balls, pat into disk shapes, wrap tightly in plastic wrap, and refrigerate for at least one hour to firm up.
-
2. Make the Blueberry Filling: In a separate large bowl, gently mix together 6 cups fresh blueberries, ¼ cup cornstarch, ¼ cup sugar, 1 tsp lemon zest, ½ tsp cinnamon, and ¼ tsp salt. Ensure all berries are coated.
-
3. Assemble the Pie: Preheat your oven to 400 degrees F (200 degrees C). Remove one chilled pie crust disk from the fridge. On a lightly floured surface, roll it out into a large circle, about 12-13 inches in diameter (at least 1 inch larger than your 9-inch pie pan). Carefully transfer the crust into the pie pan, leaving a ½ inch overhang on all sides. Trim excess and crimp edges if desired.
-
4. Fill the Crust: Spoon the blueberry filling evenly into the prepared bottom crust.
-
5. Prepare Lattice Strips: Remove the second pie crust disk from the fridge and roll it out into an equally large circle. Cut this dough into 1-inch wide strips using a sharp knife or pastry wheel.
-
6. Create the Lattice Top: Lay half of the dough strips parallel across the top of the pie in one direction (e.g., horizontally), spaced about 1 inch apart. Fold back every other horizontal strip (e.g., the 1st, 3rd, 5th strips) halfway. Place one vertical strip perpendicular to the horizontal strips, close to the folded-back edges. Unfold the horizontal strips over the vertical strip. Now, fold back the *other* set of horizontal strips (e.g., the 2nd, 4th, 6th strips) halfway. Place another vertical strip parallel to the first. Unfold these horizontal strips over the second vertical strip. Continue this weaving pattern until the entire pie is covered. Trim excess lattice strips and press them onto the bottom crust’s overhang to seal.
-
7. Apply Egg Wash: Brush the lattice dough with 1 whisked egg for a beautiful golden finish, and optionally sprinkle with a bit of granulated sugar for extra sparkle and sweetness.
-
8. Bake the Pie: Place the pie in the preheated 400°F (200°C) oven, preferably on a baking sheet to catch any drips. Bake for 20 minutes at this temperature. Then, reduce the oven temperature to 350 degrees F (175 degrees C) and continue baking for 35-45 minutes, or until the blueberry filling is bubbling thickly at the edges and the crust is beautifully golden brown. If the crust edges start to brown too much, cover them loosely with aluminum foil.
-
9. Cool and Serve: Carefully remove the pie from the oven and allow it to cool completely on a wire rack for at least 3-4 hours (or longer) before slicing and serving. This cooling time is essential for the blueberry filling to set properly.
Nutrition
The recipes on this blog are tested with a conventional gas oven and gas stovetop. It’s important to note that some ovens, especially as they age, can cook and bake inconsistently. Using an inexpensive oven thermometer can assure you that your oven is truly heating to the proper temperature. If you use a toaster oven or countertop oven, please keep in mind that they may not distribute heat the same as a conventional full sized oven and you may need to adjust your cooking/baking times. In the case of recipes made with a pressure cooker, air fryer, slow cooker, or other appliance, a link to the appliances we use is listed within each respective recipe. For baking recipes where measurements are given by weight, please note that results may not be the same if cups are used instead, and we can’t guarantee success with that method.
