Festive & Fun: Easy Homemade Carrot Rice Krispie Treats for Easter
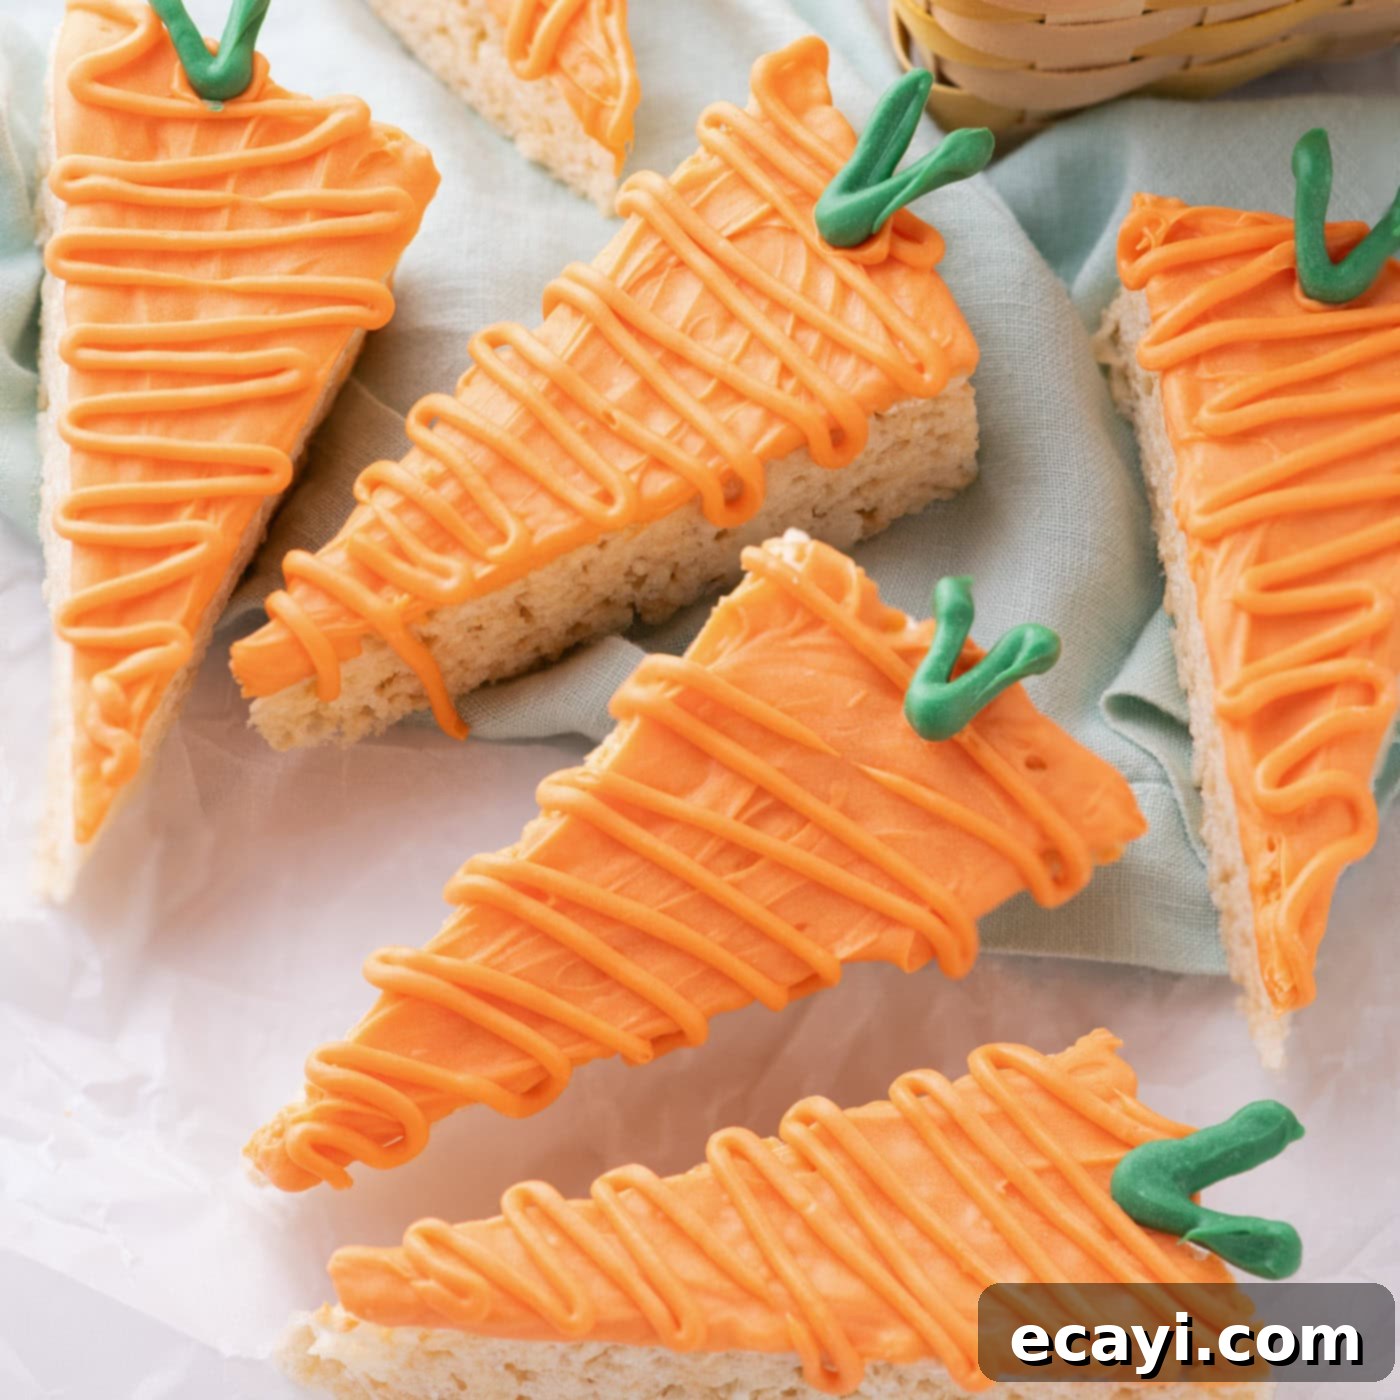
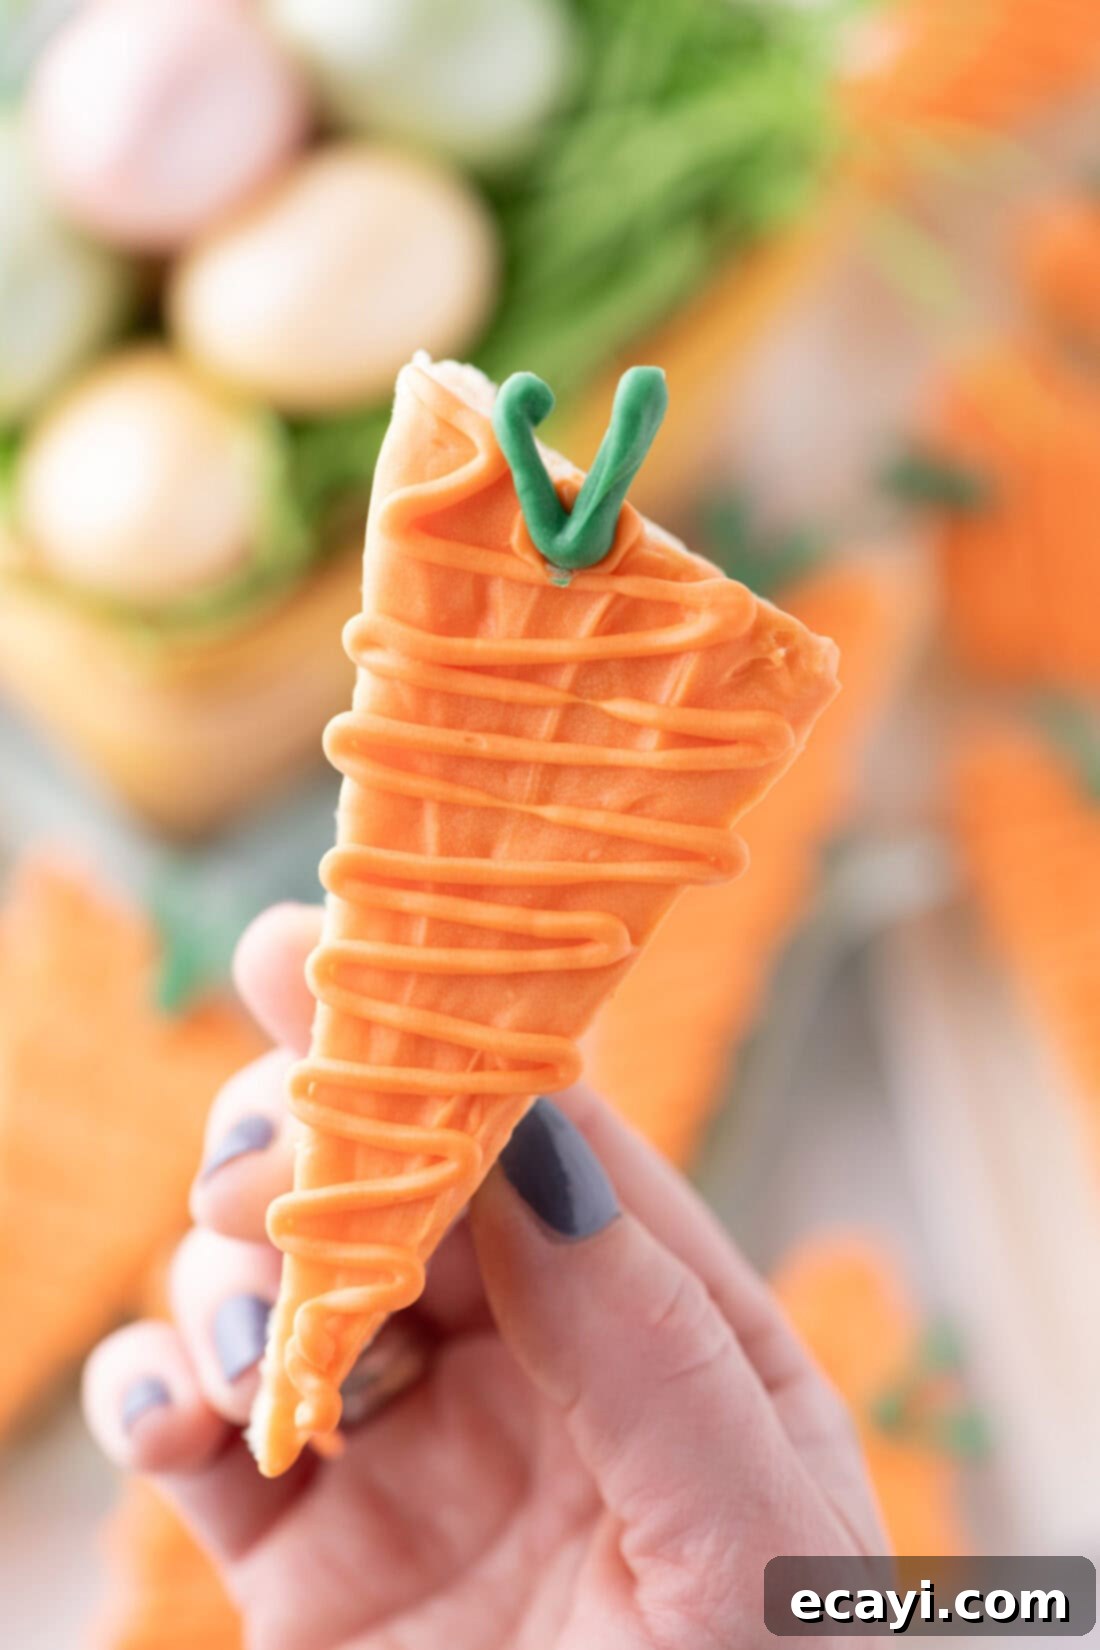
Delight your family and friends this Easter with our incredibly adorable and delicious Carrot Rice Krispie Treats! These festive cereal bars are transformed into charming little carrots, complete with vibrant orange pastel chocolate dipping and drizzling, and topped with delicate green chocolate stems. They’re everything you love about classic Rice Krispie treats – delightfully sweet, wonderfully chewy, and perfectly crispy – but with an extra touch of seasonal magic that makes them irresistible. Perfect for holiday gatherings, Easter baskets, or simply a fun baking project with the kids, these treats are sure to bring smiles to every face.

Why You’ll Love This Carrot Rice Krispie Treat Recipe
This recipe is an absolute winner for several fantastic reasons, making it a go-to choice for your Easter celebrations. First and foremost, it takes the timeless comfort of classic Rice Krispie treats and elevates them into a truly festive masterpiece. Unlike ordinary marshmallow cereal squares, these aren’t just sweet and crispy; they’re lovingly dipped and drizzled in a smooth, pastel orange chocolate coating, then cleverly shaped to mimic charming little carrots.
What truly sets these treats apart is their surprising ease of preparation combined with their impressive visual appeal. You might glance at them and think they came straight from a gourmet bakery, but the secret is, they’re incredibly simple to create right in your own kitchen! The process involves straightforward steps: mixing, pressing, cutting, and a bit of creative chocolate work. No complex baking techniques or fancy equipment required, making them accessible even for novice bakers. This simplicity means you can focus on the fun of decorating and sharing, rather than stressing over complicated instructions.
The magic lies in how easily crispy rice cereal and gooey marshmallows can be transformed into adorable holiday-themed delights. We’ve explored this creativity before with our popular rice krispie nests, which have become an annual tradition. The irresistible combination of chewy marshmallow, satisfyingly crunchy cereal, and a hint of rich chocolate creates a textural and flavor experience that’s hard to beat. These carrot-shaped treats are not only delicious but also incredibly versatile for Easter decorating, adding a playful and vibrant touch to any dessert spread. They offer a perfect blend of nostalgic flavors and holiday cheer, making them a delightful project and an even more delightful treat to share with everyone.
Essential Ingredients for Your Carrot Rice Krispie Treats
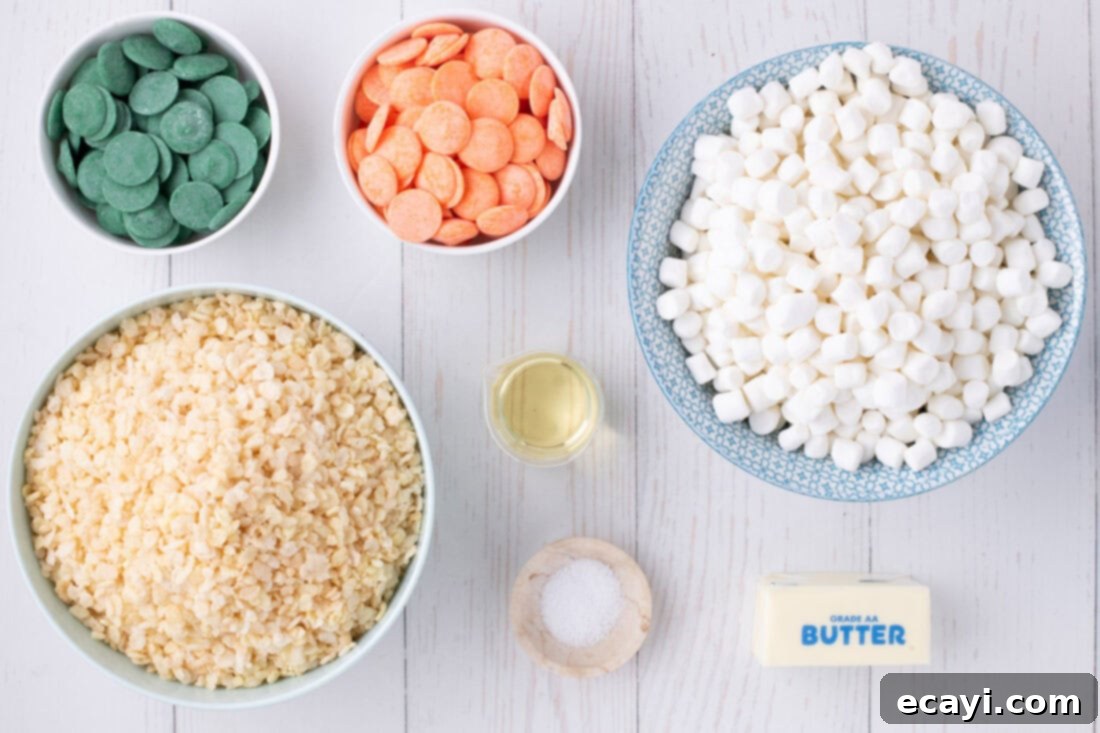
Crafting these delightful carrot-shaped treats requires a handful of common pantry staples, along with a few special items for decoration. Each ingredient plays a crucial role in achieving that perfect balance of chewy, crispy, and sweet. Below, you’ll find a detailed list of everything you’ll need, ensuring you’re fully prepared before you begin. For precise measurements and a comprehensive breakdown, please refer to the printable recipe card located at the conclusion of this article.
Ingredient Insights and Smart Substitutions
Understanding your ingredients is key to successful baking. Here’s a closer look at the components of our Carrot Rice Krispie Treats, along with helpful tips and substitution ideas to ensure your treats turn out perfectly every time.
CRISPY RICE CEREAL: While the classic “Rice Krispies” brand is synonymous with these treats and our primary recommendation, don’t hesitate to use any store-brand crispy rice cereal. The key is to ensure it’s fresh and truly crispy to achieve that signature crunch. Avoid stale cereal, as it will impact the texture of your finished treats, making them less enjoyable. The airy nature of this cereal is what gives the treats their light, yet satisfying bite, providing the perfect canvas for the sweet marshmallow and chocolate. Ensure your cereal isn’t crushed or broken too much before mixing.
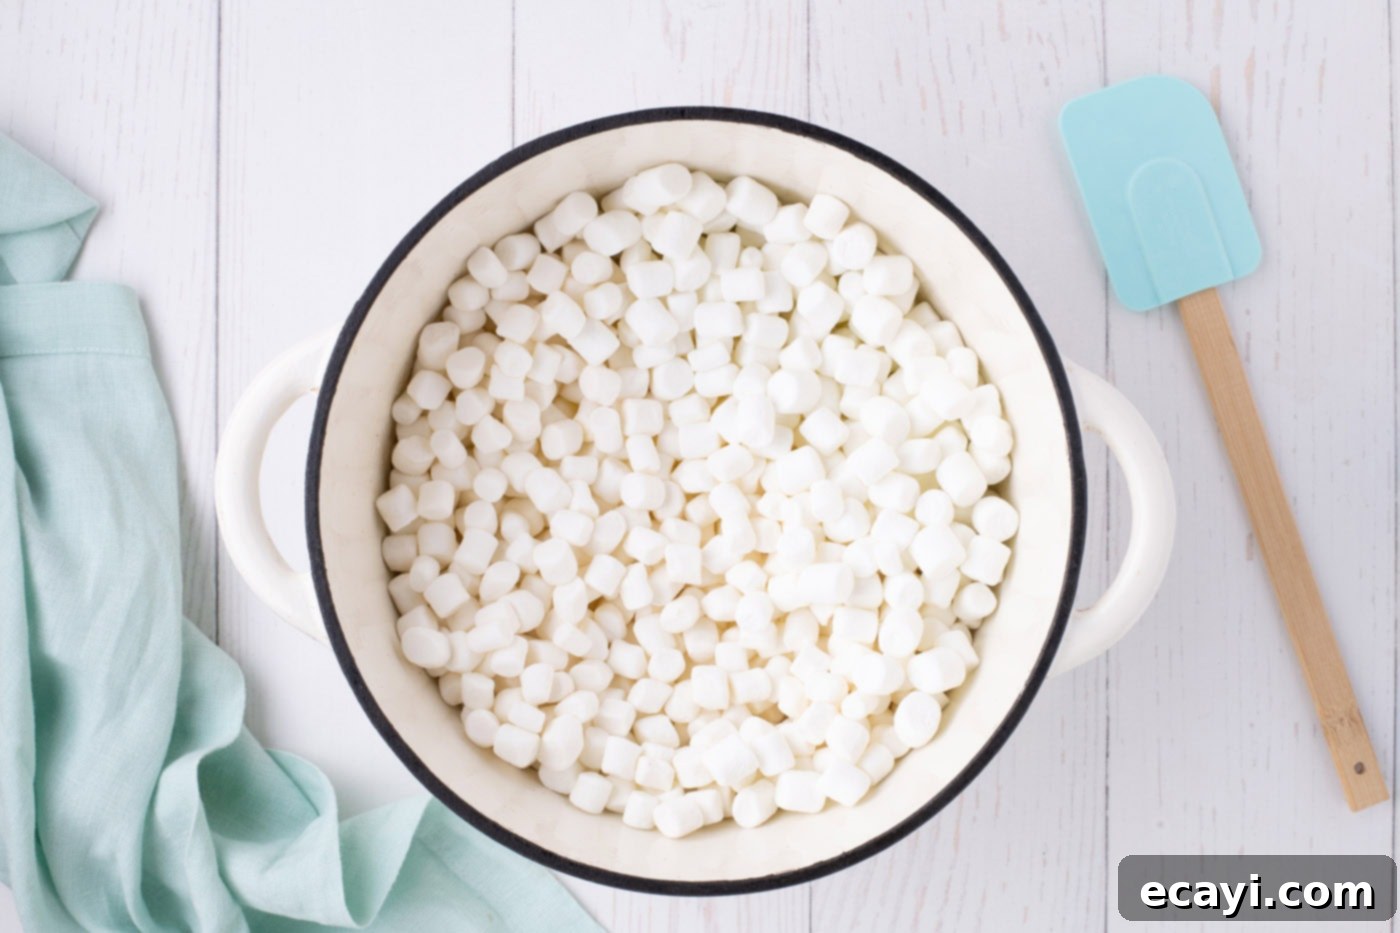
MARSHMALLOWS: We highly recommend using mini marshmallows for this recipe. Their smaller size means they melt much more quickly and evenly, leading to a smoother, lump-free marshmallow mixture that coats the cereal beautifully. This also reduces the risk of scorching the marshmallows. If you only have regular-sized marshmallows on hand, don’t worry! Simply cut them into smaller pieces using kitchen shears or a lightly greased knife before adding them to the pot. This will help them melt down more efficiently and yield a consistently smooth mixture. Fresh marshmallows are crucial for the right gooey consistency; older marshmallows can be harder to melt smoothly.
UNSALTED BUTTER: Butter is essential not only for flavor but also for creating the perfect texture and preventing the marshmallows from sticking excessively to the pot and later to your hands. Unsalted butter allows you to control the exact salt content in your recipe. If you only have salted butter available, you can reduce or even omit the additional ¼ teaspoon of salt called for in the recipe to avoid over-salting your treats.
SALT: A small pinch of salt, as specified in the recipe card, truly enhances the sweetness of the marshmallows and chocolate, creating a more balanced and nuanced flavor profile. It prevents the treats from being overwhelmingly sweet by adding a subtle contrast. However, if you prefer, it can be omitted without drastically altering the structure or fundamental taste of the treats, though we recommend including it for the best flavor experience.
CANDY MELTS (Orange & Green): These vibrant candy melts are what give our carrots their distinctive orange body and delicate green stems. We use both orange candy melts for the main dipping and drizzling, and green candy melts for the small “leaf” stems. Wilton candy melts are widely available and work wonderfully for this purpose, providing a smooth, easy-to-melt consistency and bright, consistent colors. As an excellent alternative, you can use high-quality white chocolate chips or wafers and tint them with oil-based gel food coloring. It is crucial to use gel food coloring, not water-based liquid coloring, as water can cause chocolate to seize and become thick and unusable. For the green stems, you could also consider using green royal icing if you prefer a different texture, though candy melts are generally simpler and quicker for this specific application.
VEGETABLE OIL: A small amount of vegetable oil is added to the orange candy melts to help thin them out slightly, making them smoother and easier to dip and drizzle uniformly over the treats. This addition contributes to a more professional-looking finish. Coconut oil or shortening can also be used as alternatives, achieving a similar effect. This is particularly useful if your candy melts feel a bit too thick straight out of the package or after melting, ensuring a silky, manageable consistency.
Step-by-Step Guide: Crafting Your Carrot Rice Krispie Treats
Making these festive treats is a straightforward and enjoyable process. Follow these detailed steps, complete with expert tips, to ensure your carrot Rice Krispie treats come out perfectly shaped and delicious. Remember, for a quick print-friendly version with all precise measurements, you can jump to the full recipe card at the bottom of this page.
- Prepare Your Baking Pan: Begin by generously greasing a 9 x 13-inch baking pan with butter or non-stick cooking spray. Then, line it with parchment paper, making sure the paper extends over the edges of the pan on two opposing sides. These overhangs will act as convenient “handles,” allowing you to easily lift the entire slab of treats out of the pan once it has set, making the removal and cutting process much simpler and cleaner.
- Melt the Butter: In a large, heavy-bottomed pot or Dutch oven, cut your ½ cup of unsalted butter into quarters. Place the pot over medium-high heat. Cutting the butter into smaller pieces helps it melt more quickly and evenly, which is crucial for incorporating it smoothly with the marshmallows and reducing the chance of burning.
- Combine Marshmallows and Salt: Once the butter has completely melted and is shimmering in the pot, add the 20 ounces of mini marshmallows and the ¼ teaspoon of salt. Immediately reduce the heat to medium-low. This controlled heat is vital to prevent the marshmallows from scorching or turning too hard, which can result in tough treats. Keep a close eye on the mixture.

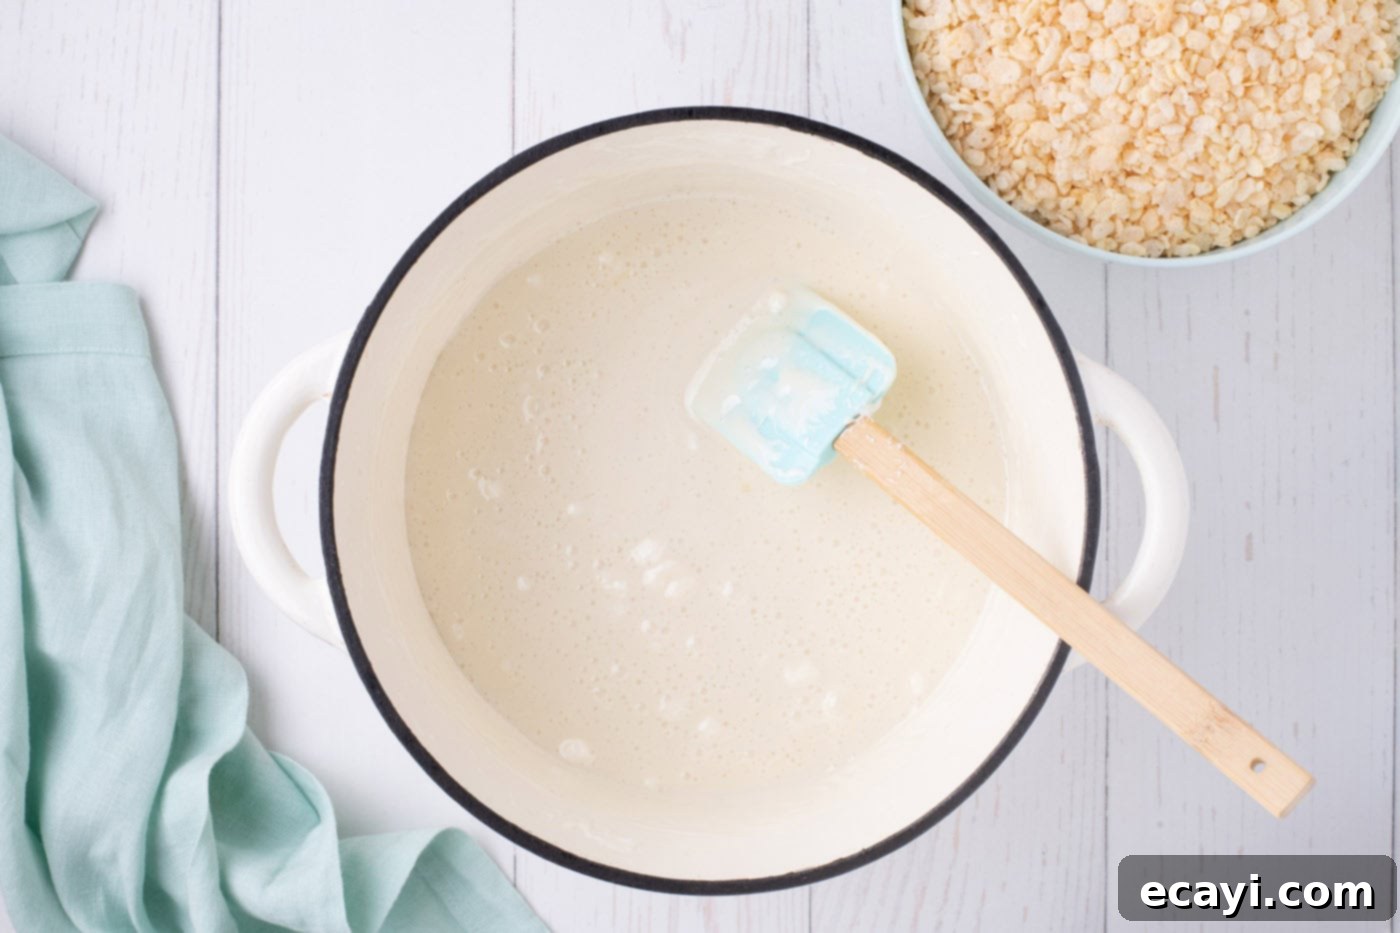
- Achieve Smooth Marshmallow Mixture: Stir the marshmallow mixture continuously with a heat-resistant rubber spatula until it is completely melted and smooth. Consistency is key here; you want a uniform, gooey mixture without any lumps. Be vigilant and stir constantly, especially around the bottom and edges of the pot, to prevent the marshmallows from sticking and burning. A perfectly melted marshmallow base is the foundation of delicious, chewy Rice Krispie treats, so don’t rush this step.

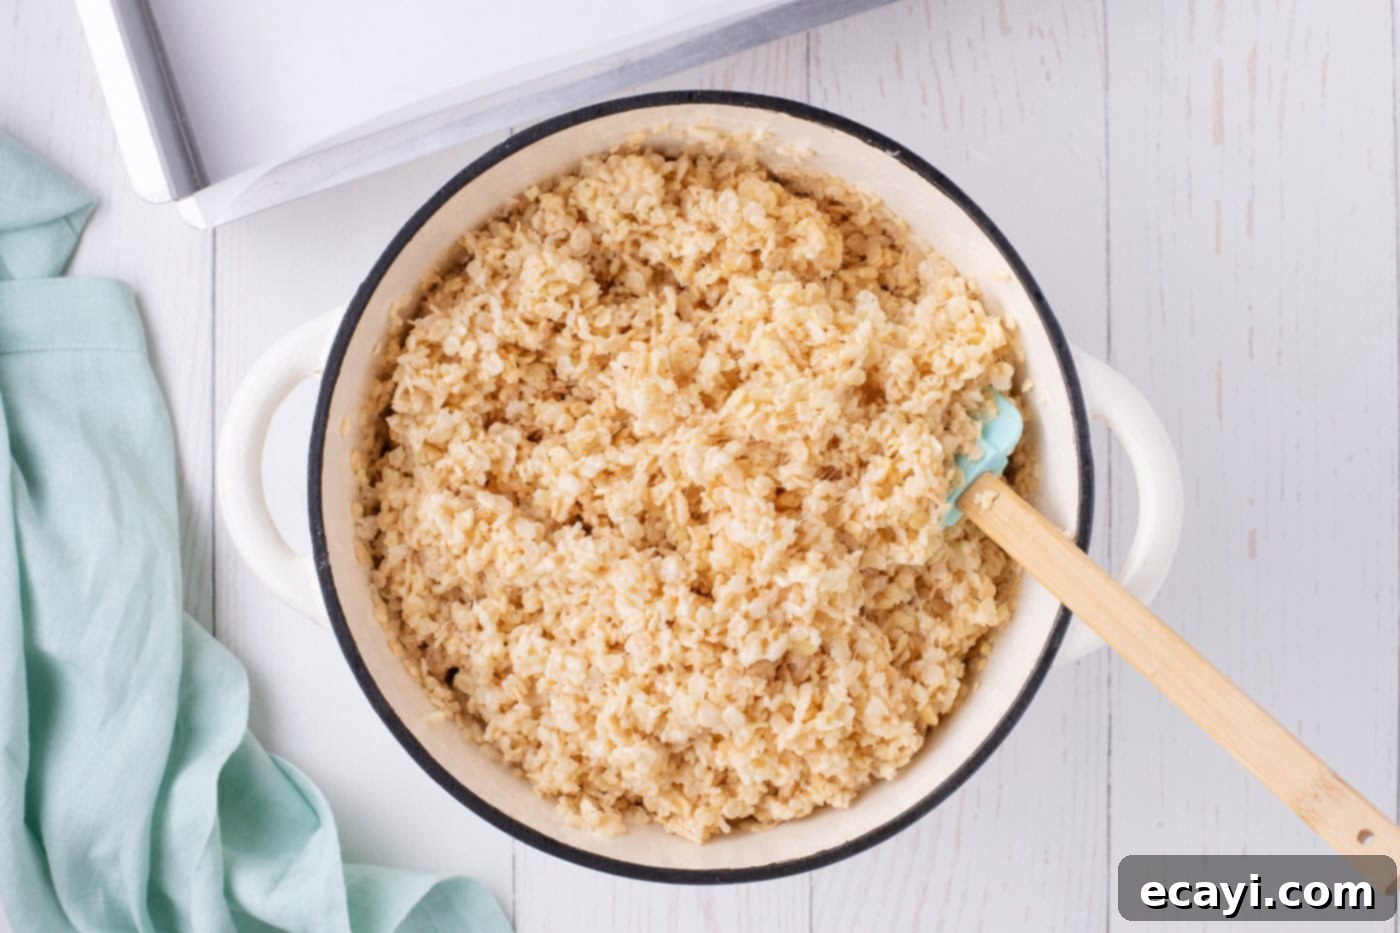
- Incorporate Rice Krispies Cereal: Remove the pot from the heat immediately after the marshmallows are smooth. Promptly add all 12 ounces of Rice Krispies Cereal to the melted marshmallow mixture. Working quickly, use your spatula to gently and thoroughly stir until every single piece of cereal is coated with the sweet, sticky marshmallow. Speed is important here, as the marshmallow can begin to harden as it cools. If it starts to stiffen too much, refer to our FAQ section below for a quick tip! Ensure no dry spots remain.

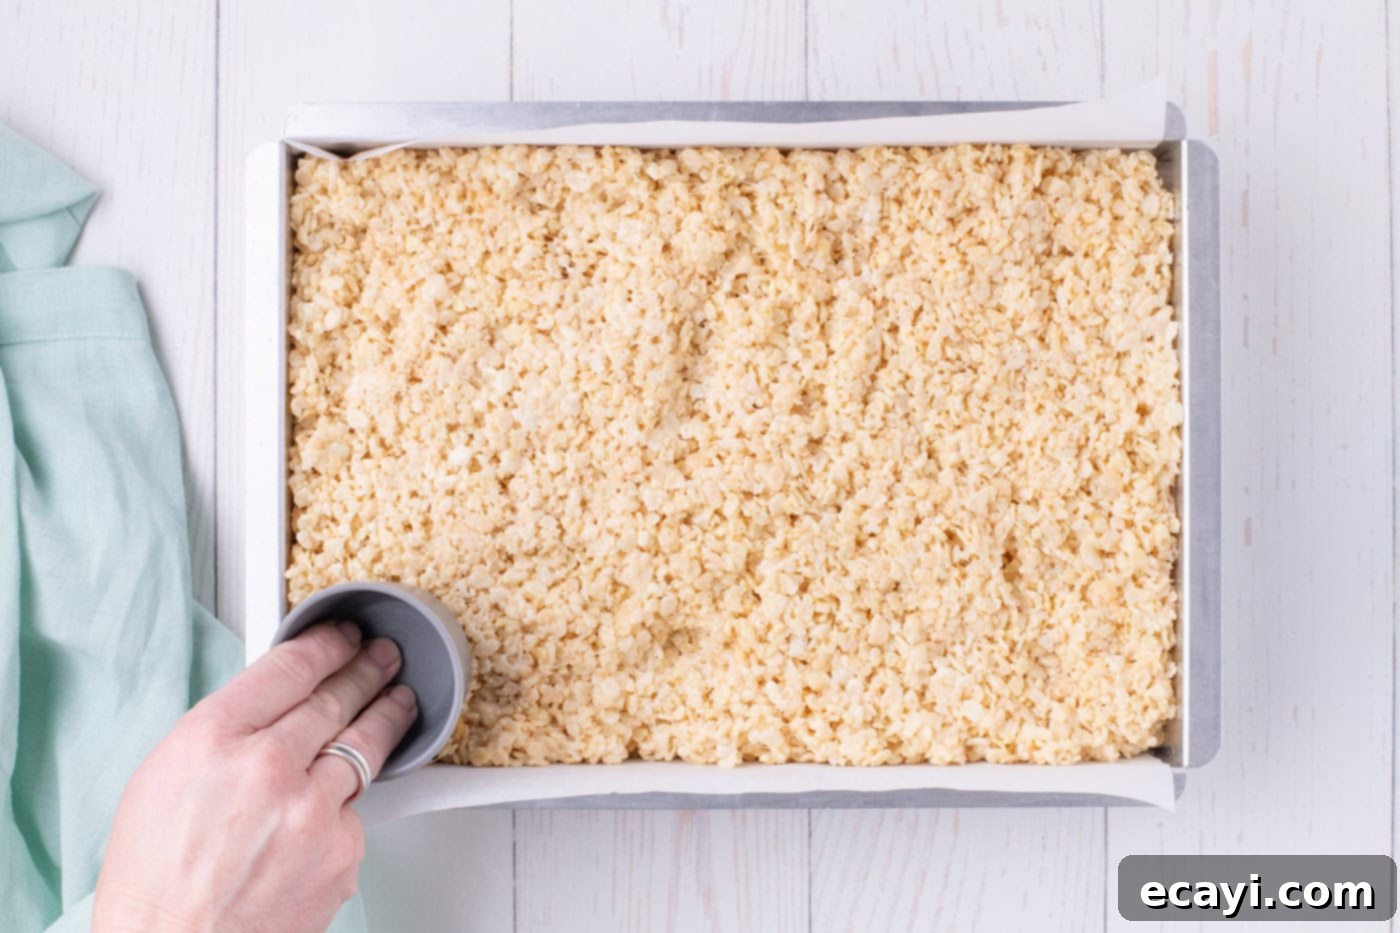
- Press into Pan: Transfer the warm cereal mixture into your prepared 9×13-inch baking pan. Use the back of a lightly greased measuring cup or a lightly greased spatula to gently, but firmly, press the mixture evenly into the pan, making sure to push it into all the corners. Aim for a smooth and consistent top layer. The firmer you press, the denser your treats will be, which is crucial for achieving clean, sharp cuts later on when shaping them into carrots. However, avoid over-compressing, as this can make the treats too hard; a firm, even press is ideal.

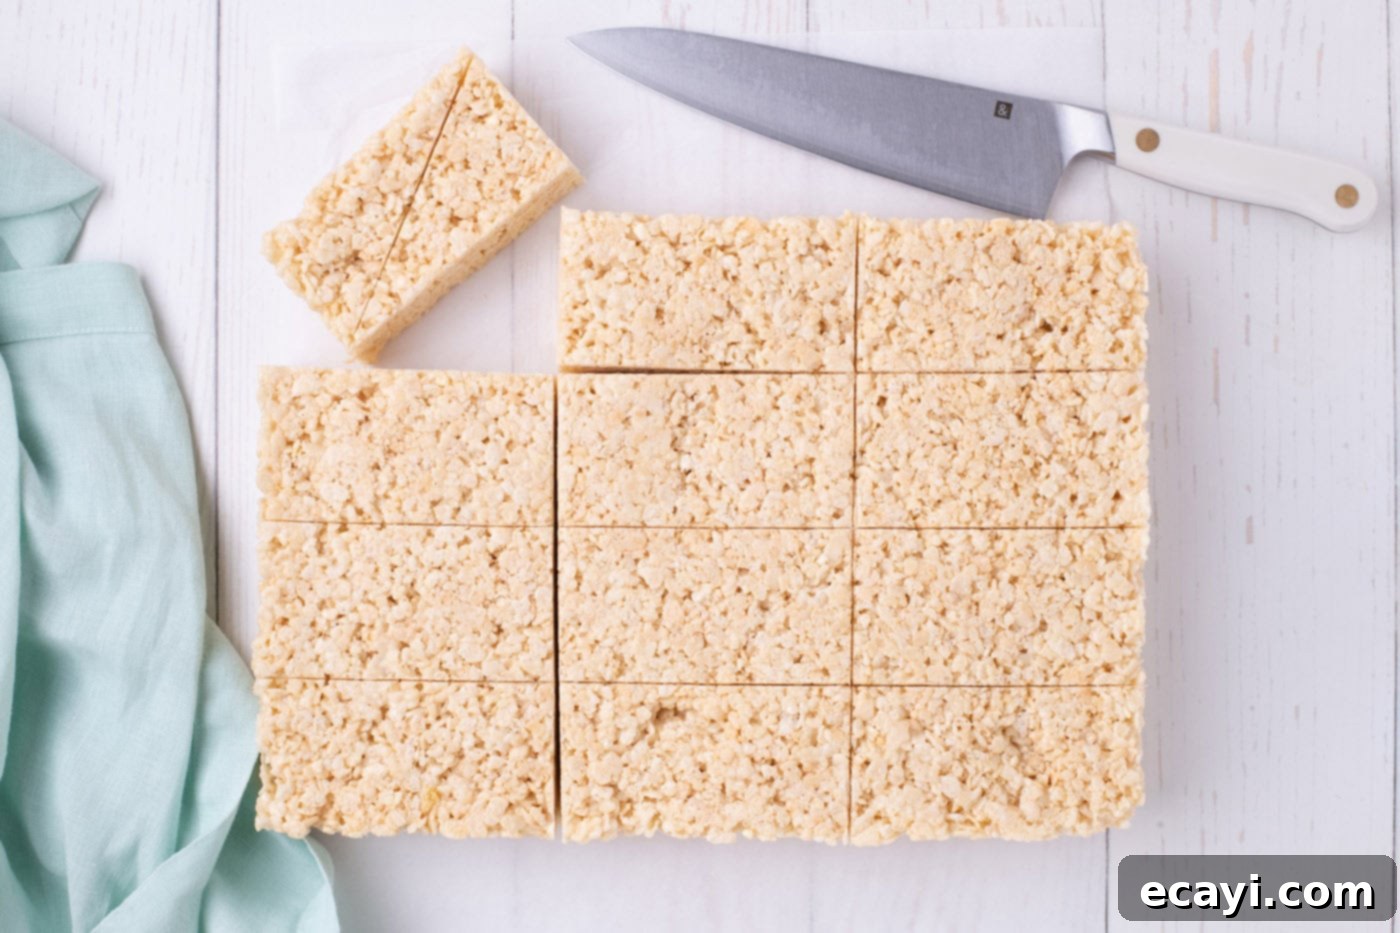
- Cool and Cut Rectangles: Allow the treats to cool completely at room temperature for at least 30-60 minutes, or until firm. Once cooled and firm, use the parchment paper handles to lift the entire slab of Rice Krispie treats out of the pan and place it on a clean cutting board. With a very sharp, lightly greased knife, meticulously divide the large slab into 4 even columns and 3 even rows. This will yield 12 perfectly sized rectangles, each measuring approximately 2 ¼ inches by 4 3/8 inches. Precision here will lead to uniformly shaped “carrots,” so take your time.

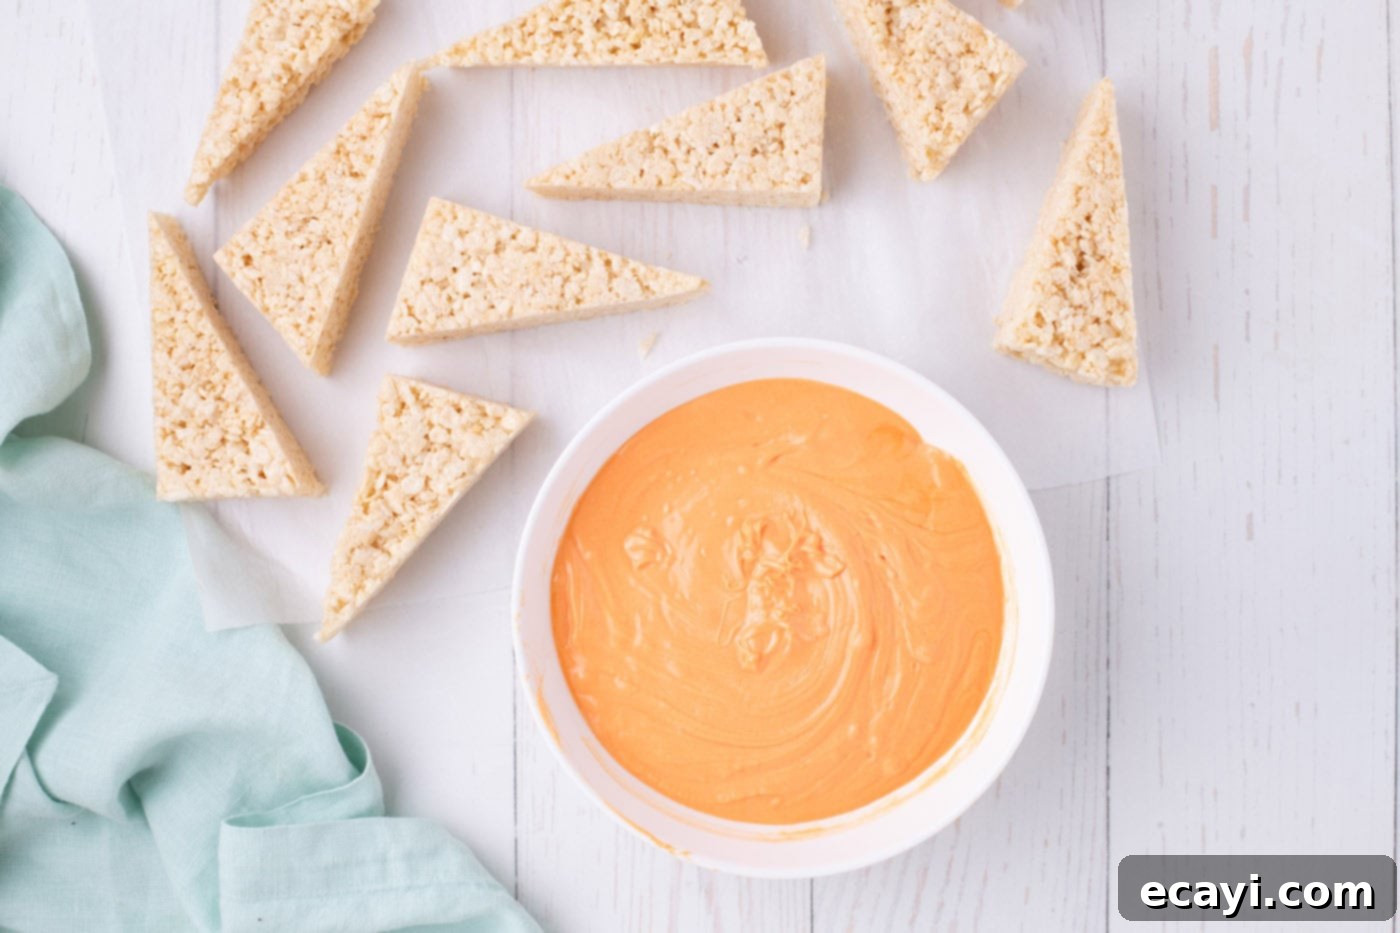
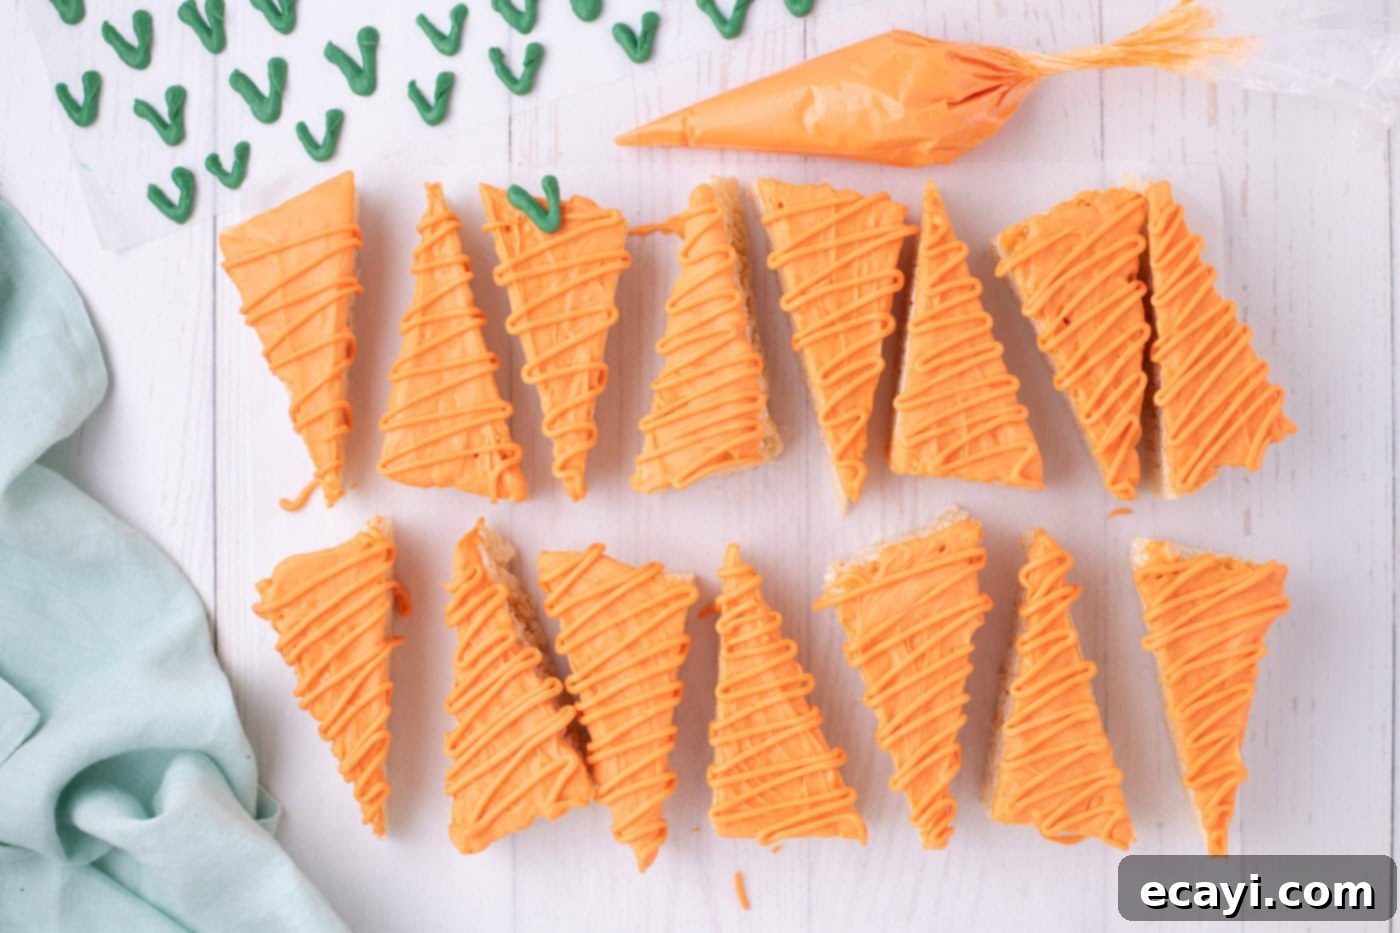
- Shape into Carrots: Take each of the 12 rectangles and cut it diagonally in half. This simple cut, from one corner to its opposite, will transform each rectangle into two triangular shapes, perfectly resembling the iconic tapered form of a carrot. You will now have 24 individual carrot-shaped Rice Krispie treats ready for the fun part: decoration!
Adding the Festive Touch: Decorating Your Carrot Rice Krispie Treats
Now for the truly fun part – transforming your triangular treats into vibrant, edible carrots! This decorating stage adds the visual charm that makes these desserts so perfect for Easter. Take your time, and enjoy the creative process, as these details truly bring the treats to life.
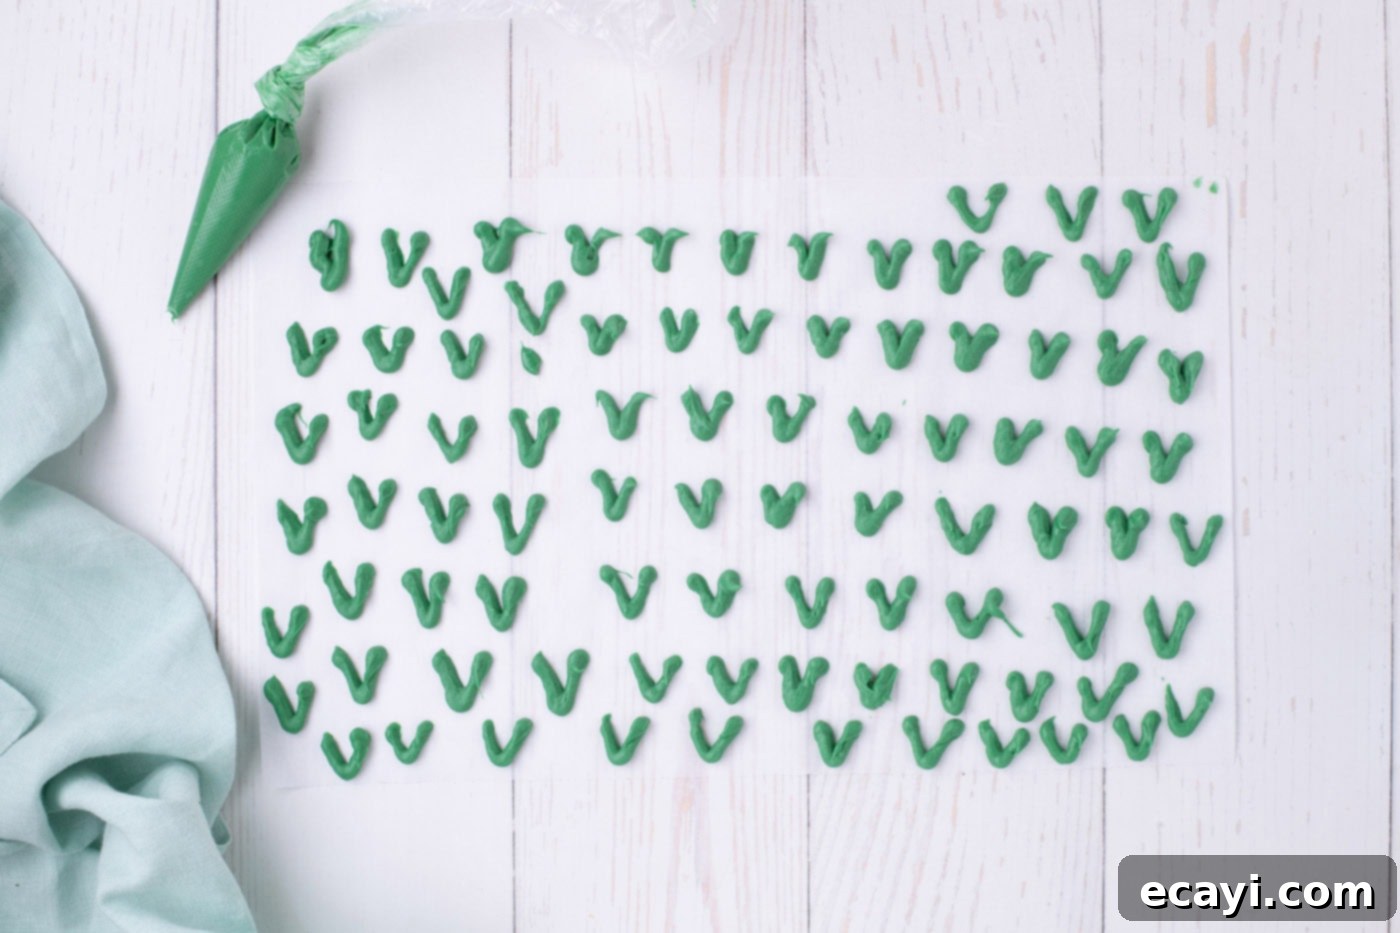
- Craft the Green Stems: Start by preparing your carrot stems. Melt the 12 ounces of green candy melts according to package directions, typically in a microwave-safe bowl in short 30-second increments, stirring frequently until smooth. Once melted, transfer the green chocolate into a piping bag, or a sturdy ziplock bag with a tiny corner snipped off. On a sheet of parchment paper, pipe small “V” shapes. These will be the leafy tops of your carrots. Pro Tip: Pipe more “V” shapes than you think you’ll need (at least double the amount of carrot treats). These delicate chocolate stems can be quite fragile, and it’s always good to have extras in case some break during handling. Allow them to dry completely at room temperature or chill briefly in the refrigerator to speed up setting.

- Melt the Orange Chocolate: While your green stems are firming up, prepare the orange chocolate coating. Place the 24 ounces of orange candy melts into a wide, shallow bowl. The bowl should be wide enough to comfortably dip the broad, flat end of your carrot-shaped treats. Add 1 teaspoon of vegetable oil to the candy melts. Melt the mixture in the microwave on high power, using 30-second intervals. After each interval, stir thoroughly. Continue this process until the orange candy melts are completely smooth, fluid, and free of lumps. The vegetable oil helps achieve a silky consistency perfect for dipping and drizzling.

- Dip the Carrot Bodies: Take each triangular Rice Krispie treat and dip its top (the wider, flat end) into the smooth, melted orange candy. Ensure the top third to half of the treat is coated. Allow any excess chocolate to drip off gently back into the bowl, then place the dipped treat onto a fresh sheet of parchment paper to dry and set. Repeat this dipping process for all your carrot triangles. This creates the vibrant orange body of your treats.
- Drizzle for Texture: Once the initial orange dip has slightly set (it doesn’t need to be completely hard, just not wet), transfer any remaining melted orange candy into a clean piping bag or a ziplock bag with a very small tip snipped off. If the chocolate has cooled and thickened, briefly reheat it in the microwave until it’s fluid again. Drizzle thin, wavy lines across the tops of all the orange-dipped triangles. These drizzles add texture and visual interest, mimicking the natural ridges of a carrot and giving a more realistic appearance.
- Attach the Green Stems: Finally, it’s time to add the finishing touch! Take a small amount of the melted orange candy (or if it’s all used, melt a tiny bit more) and pipe a small dab onto the back of one of your dried green “V” stems. Carefully place this onto the flat, top end of an orange-dipped carrot treat. Gently press to secure. Repeat this step for all the remaining carrots. Allow all the decorated treats to dry completely until the chocolate is firm to the touch. This ensures they are stable and ready for handling. Once set, your charming Carrot Rice Krispie Treats are ready to be served and enjoyed!

Frequently Asked Questions & Expert Tips for Perfect Carrot Rice Krispie Treats
To help you achieve the best possible results and troubleshoot common issues, we’ve compiled a list of frequently asked questions and invaluable expert tips. These insights will ensure your carrot Rice Krispie treats are a smashing success every time, from preparation to presentation.
For optimal freshness and chewiness, store your completed carrot Rice Krispie treats in an airtight container. Keep them at room temperature, away from direct sunlight or excessive heat, which can cause the chocolate to melt or the treats to become greasy. They will remain delightfully delicious for up to 5 days. We do not recommend refrigerating them, as this can make them hard, less chewy, and potentially cause the chocolate to bloom (develop a white film).
This can sometimes happen, especially if your kitchen is cool, or you’re working with a very large batch. If your melted marshmallow mixture begins to stiffen before all the cereal is adequately coated, simply return the pot to very low heat on your stovetop. Stir gently for a few seconds, allowing the mixture to soften just enough to become workable again. Be careful not to overheat it, as this can make the marshmallows too brittle or cause the cereal to become soggy. This quick fix will make coating the remaining cereal much easier and ensure an even distribution.
If your melted candy melts appear too thick or gloopy for a smooth, even dip, don’t worry! You have a couple of effective options. You can add another ½ to 1 teaspoon of vegetable oil (or coconut oil/shortening) to the mixture. Reheat it in the microwave for another 10-15 seconds, then whisk vigorously until the mixture becomes smooth, fluid, and a perfect dipping consistency. If dipping is still challenging or you prefer a rustic look, you can always spoon the melted candy over the triangular treats and spread it evenly with the back of your spoon or an offset spatula. This still creates a beautiful, homemade finish.
Absolutely! These carrot Rice Krispie treats are an excellent make-ahead dessert, making holiday preparations much easier. You can prepare them up to 2-3 days in advance of your event. Just be sure to store them properly in an airtight container at room temperature to maintain their freshness and ideal texture. This advance preparation allows you more time to enjoy your guests and the festivities.
A very sharp, lightly greased knife is your best friend when cutting and shaping Rice Krispie treats. For the cleanest, most precise cuts, wipe your knife clean and re-grease it (a little non-stick cooking spray on a paper towel works wonders) after every few cuts. This prevents the sticky marshmallow from dragging and tearing the treats, ensuring crisp, neat edges for your carrot shapes and a professional-looking finish.
While candy melts provide vibrant, consistent colors and a smooth finish with ease, you can certainly use natural food coloring if you prefer. You would need to use high-quality white chocolate and then tint it with a natural, oil-based orange food coloring. Be mindful that achieving the same bright, consistent color can sometimes be more challenging with natural colorings, and they can occasionally alter the texture slightly. Always ensure your coloring is specifically designed for use with chocolate (oil-based) to prevent it from seizing.
Delightful Serving Suggestions for Your Easter Carrots
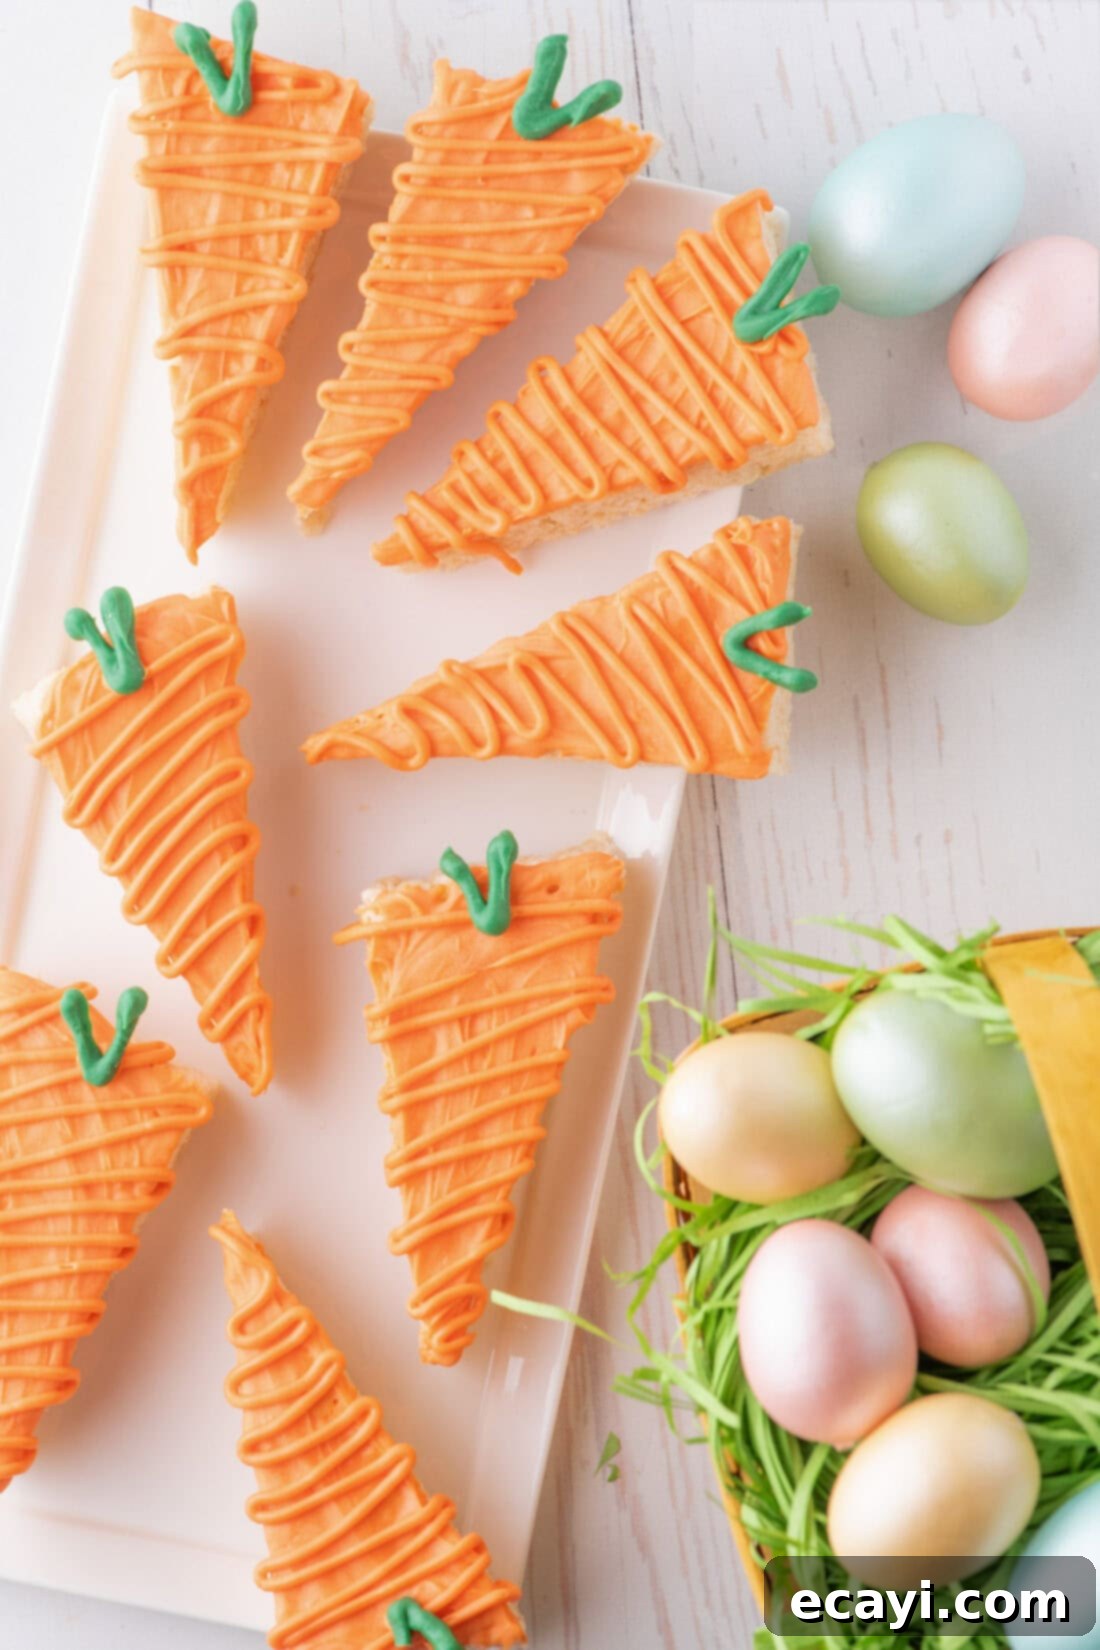
Once your adorable carrot Rice Krispie treats are fully set and ready, it’s time to showcase them! These charming desserts are not just a feast for the taste buds but also a visual delight, perfect for enhancing any spring or Easter celebration. Their vibrant colors and whimsical shapes make them an instant hit.
Serve these treats at room temperature to maintain their ideal soft, chewy, and crispy texture. Arrange them artfully on a festive platter, allowing their vibrant orange bodies, intricate chocolate drizzles, and distinctive green “V” stems to truly shine. They make a fantastic centerpiece for your dessert table, adding a playful pop of color and homemade charm that guests of all ages will appreciate.
Beyond a simple platter, consider these creative serving ideas to make your treats even more special:
- Easter Basket Fillers: Wrap individual carrot treats in clear cellophane bags, tying them with a colorful ribbon. They make delightful and unexpected additions to Easter baskets, bringing a personal, homemade touch to gifts for friends, family, and little ones.
- Dessert Charcuterie Board: Create an impressive Easter-themed dessert board by arranging these carrots alongside other spring treats like mini cupcakes, chocolate eggs, fresh berries, colorful meringues, and small sugar cookies. The variety of textures and colors will be a showstopper and offer something for everyone.
- Classroom Treats or Party Favors: If you’re celebrating with children, these make perfect classroom treats or thoughtful party favors. Their individual nature makes them easy to distribute and enjoy without mess.
- Brunch Spread Enhancement: Add a sweet, whimsical element to your Easter brunch spread. Position them near fresh fruit salads or alongside more savory options like quiches and pastries for a balanced and inviting presentation.
- Gift for Hosts: Bringing a plate of these homemade carrot Rice Krispie treats is a thoughtful and much-appreciated gesture for anyone hosting an Easter gathering. They demonstrate care and effort, making them a truly special gift.
However you choose to present them, these carrot Rice Krispie treats are guaranteed to be a memorable and much-loved part of your Easter festivities, leaving everyone with sweet memories.
Explore More Delightful Easter Recipes
If you’ve enjoyed making these festive carrot Rice Krispie treats, you’ll love our other holiday-inspired creations. Dive into our collection of popular Easter recipes designed to add even more charm and sweetness to your seasonal celebrations. Each recipe is crafted to be fun, delicious, and perfect for sharing with loved ones.
- Adorable Rice Krispie Nests: Another fantastic way to use crispy rice cereal, these charming nests are perfect for holding chocolate eggs and are incredibly fun for kids to make and decorate.
- Whimsical Bunny Butt Cupcakes: These incredibly cute cupcakes feature a fondant bunny butt sticking out of the frosting, guaranteed to get a giggle and be a hit at any Easter party!
- Decadent Easter Dirt Cake: A rich, creamy, and chocolatey dessert layered to resemble “dirt,” often adorned with gummy worms or candy eggs for a playful, delicious touch.
- Charming Easter Bunny Pull Apart Bread: A delightful and edible centerpiece, this sweet bread is shaped like a bunny and perfect for sharing among family and friends.
- Colorful Easter M&M Cookies: Soft, chewy cookies packed with festive pastel M&Ms, a simple and satisfying treat for any Easter gathering or spring celebration.
We are passionate about bringing joy to your kitchen through delicious recipes and shared culinary experiences! Creating delightful treats like these Carrot Rice Krispie Treats is part of that joy. Don’t miss out on future inspiration and fantastic dishes. Stay connected and receive our latest recipes directly to your inbox. Simply subscribe to our free daily newsletter and embark on a continuous journey of delicious discovery!

Carrot Rice Krispie Treats
IMPORTANT – There are often Frequently Asked Questions within the blog post that you may find helpful. Simply scroll back up to read them!
Print It
Pin It
Rate It
Save It
Saved!
Prevent your screen from going dark
Course:
Dessert
Cuisine:
American
24
Krispie treat
45 minutes
258
Amanda Davis
Ingredients
-
½
cup
unsalted butter
113g -
20
ounces
mini marshmallows
two 10 ounce bags. 567g -
¼
teaspoon
salt -
12
ounces
Rice Krispies Cereal
328g -
12
ounces
green candy melts
such as Wilton. 340g -
24
ounces
orange candy melts
two 12 ounce bags such as Wilton. 680g -
1
teaspoon
vegetable oil
Things You’ll Need
-
13×9 baking dish -
Parchment paper -
Large saucepan -
Piping bag
or ziptop bag with the end snipped off
Before You Begin
- The salt called for in the ingredients is simply there to help cut the sweetness a tad. It isn’t imperative to the recipe and you can omit it if desired!
- Mini marshmallows are a lot easier to melt down compared to regular-sized marshmallows. If using full sized marshmallows, I would suggest cutting them up into smaller pieces before melting.
- If the melted marshmallow hardens before all the cereal has been coated, return the pot to low heat and allow the mixture to soften; this should make coating the remaining cereal easier.
- If the melted candy seems too thick to dip, spoon it over the triangle and smooth it out with the back of your spoon. Alternatively, you can add another teaspoon of vegetable oil to the mixture, reheat it for 10-15 seconds, and whisk it into the melted candy. It should be much easier to dip.
Instructions
-
Grease and line a 9 x 13-inch baking pan with parchment paper long enough to extend past the pan’s edge to create ‘handles’ for easy removal of the treats.
-
Cut butter into quarters and place in a large pot over medium-high heat.1/2 cup unsalted butter
-
Once the butter melts, add the marshmallows and salt, reducing the heat to medium-low.20 ounces mini marshmallows,
1/4 teaspoon salt -
Stir continuously until the marshmallows have melted and are smooth. Make sure not to let the marshmallows burn.
-
Remove the pot from the heat, add the Rice Krispies Cereal to the melted marshmallow, and stir quickly to coat all the cereal.12 ounces Rice Krispies Cereal
-
Place the mixture into the prepared baking pan, making sure to get it into the corners. Even out the top layer with the back of a measuring cup, making it as smooth as possible. Press the cup firmly down onto the treats to make them more dense. The denser they are, the easier to cut straight, neat lines.
-
Using the parchment paper ‘handles,’ remove the treats from the pan and place them on a cutting board. With a very sharp knife, divide the treats into 4 columns and 3 rows so that each rectangle measures 2 ¼ inches x 4 3/8 inches. You will have 12 rectangles.
-
Cut each of these rectangles diagonally in half to form the triangular shape of a carrot.
-
Prepare the carrot stems by melting the bag of green candy melts and placing it in a piping bag with the end cut off. Pipe ‘v’ shapes onto parchment paper and allow them to dry. (I piped double the amount of ‘v’ shapes, as they are fragile and many will break, so it’s good to have extra.)12 ounces green candy melts
-
While the stems are drying, place the orange candy melts in a wide, shallow bowl (wide enough to fit the length of the carrot). Add 1 teaspoon of vegetable oil and melt it in the microwave oven on high in 30-second increments. Stir until the mixture is smooth.24 ounces orange candy melts,
1 teaspoon vegetable oil -
Dip the top layer of the triangle into the melted candy. Then, place it on parchment paper to dry. Repeat with the remaining triangles.
-
Place the remaining melted candy into a piping bag (reheat if needed), snip off the end, and drizzle lines across the tops of the triangles.
-
Finally, pipe a small amount of the melted candy onto the back of a ‘v’ and place it on the carrot’s top (flat end) to create the stem. Repeat with the remaining carrots. Allow to dry and serve.
Expert Tips & FAQs
- Store them in an air-tight container kept at room temperature for up to 5 days.
Nutrition
Serving:
1
Krispie treat
|
Calories:
258
cal
|
Carbohydrates:
43
g
|
Protein:
1
g
|
Fat:
9
g
|
Saturated Fat:
7
g
|
Polyunsaturated Fat:
0.4
g
|
Monounsaturated Fat:
1
g
|
Trans Fat:
0.2
g
|
Cholesterol:
10
mg
|
Sodium:
137
mg
|
Potassium:
20
mg
|
Fiber:
0.1
g
|
Sugar:
26
g
|
Vitamin A:
1061
IU
|
Vitamin C:
9
mg
|
Calcium:
3
mg
|
Iron:
4
mg
Tried this Recipe? Pin it for Later!
Follow on Pinterest @AmandasCookin or tag #AmandasCookin!
The recipes on this blog are tested with a conventional gas oven and gas stovetop. It’s important to note that some ovens, especially as they age, can cook and bake inconsistently. Using an inexpensive oven thermometer can assure you that your oven is truly heating to the proper temperature. If you use a toaster oven or countertop oven, please keep in mind that they may not distribute heat the same as a conventional full sized oven and you may need to adjust your cooking/baking times. In the case of recipes made with a pressure cooker, air fryer, slow cooker, or other appliance, a link to the appliances we use is listed within each respective recipe. For baking recipes where measurements are given by weight, please note that results may not be the same if cups are used instead, and we can’t guarantee success with that method.
