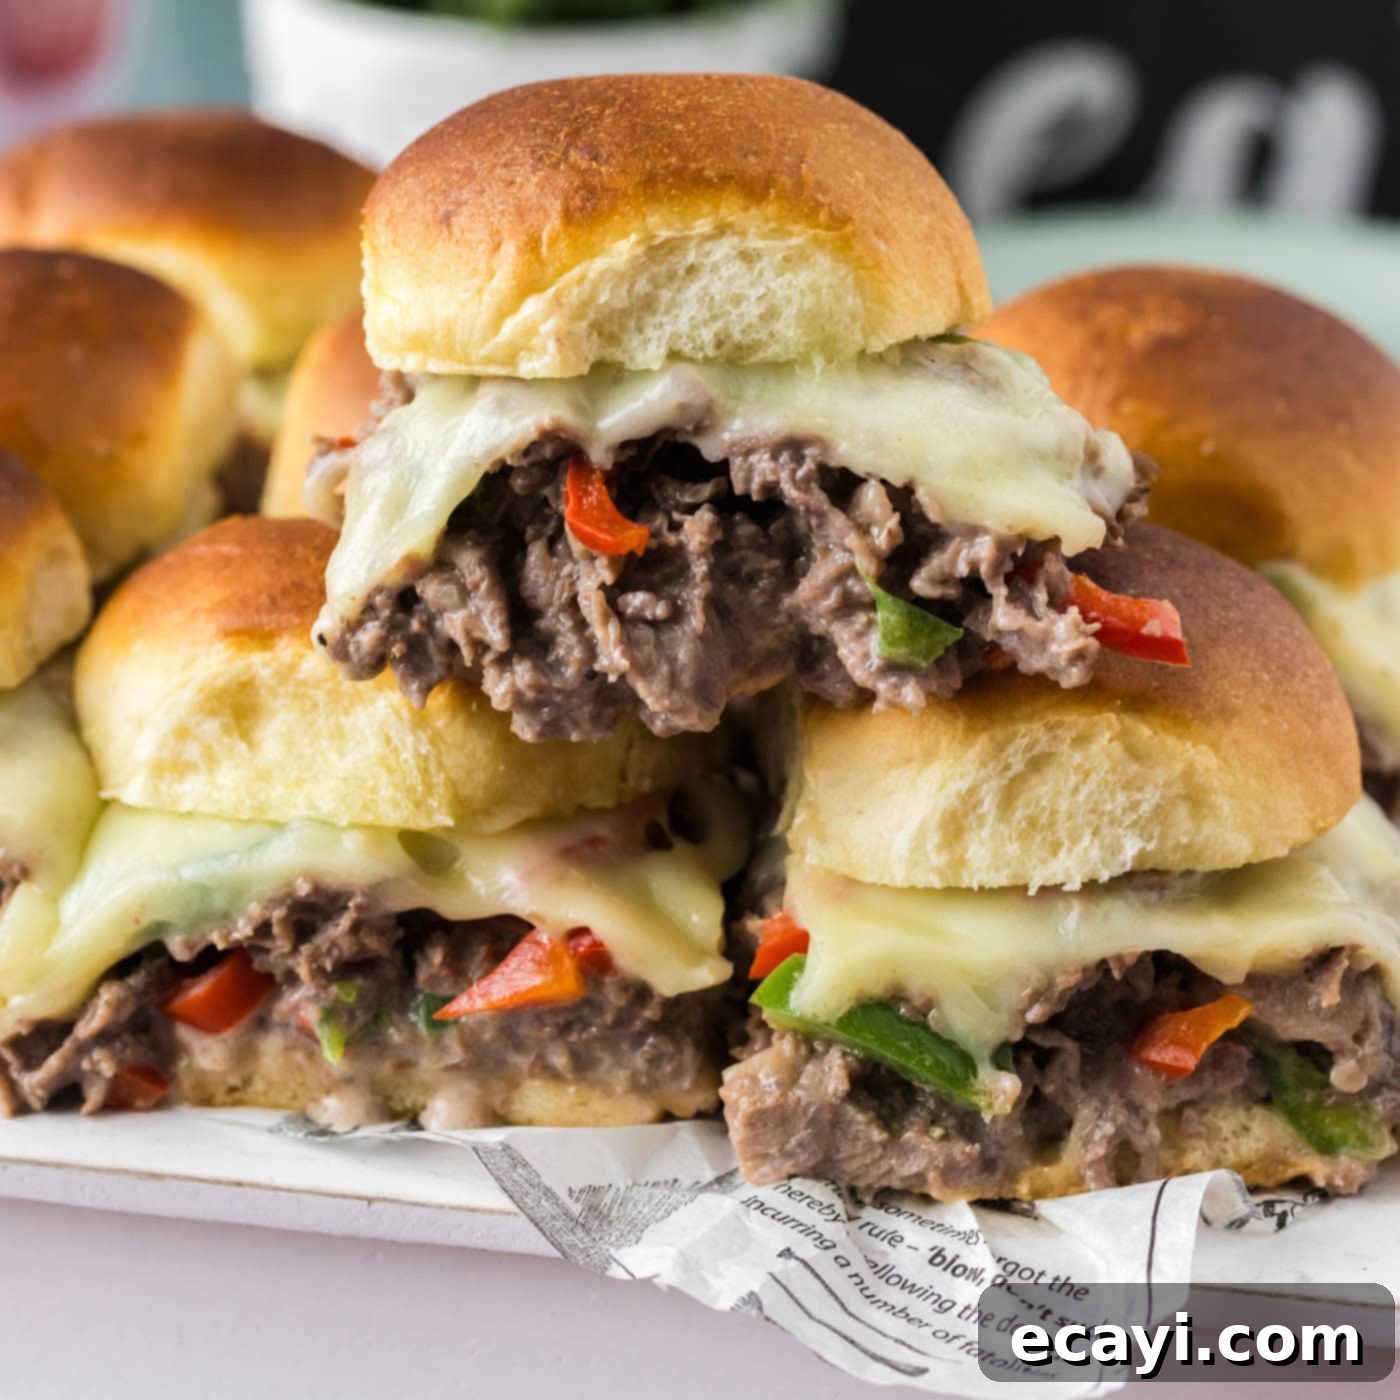
The Ultimate Philly Cheesesteak Sliders: An Easy Game Day & Party Recipe
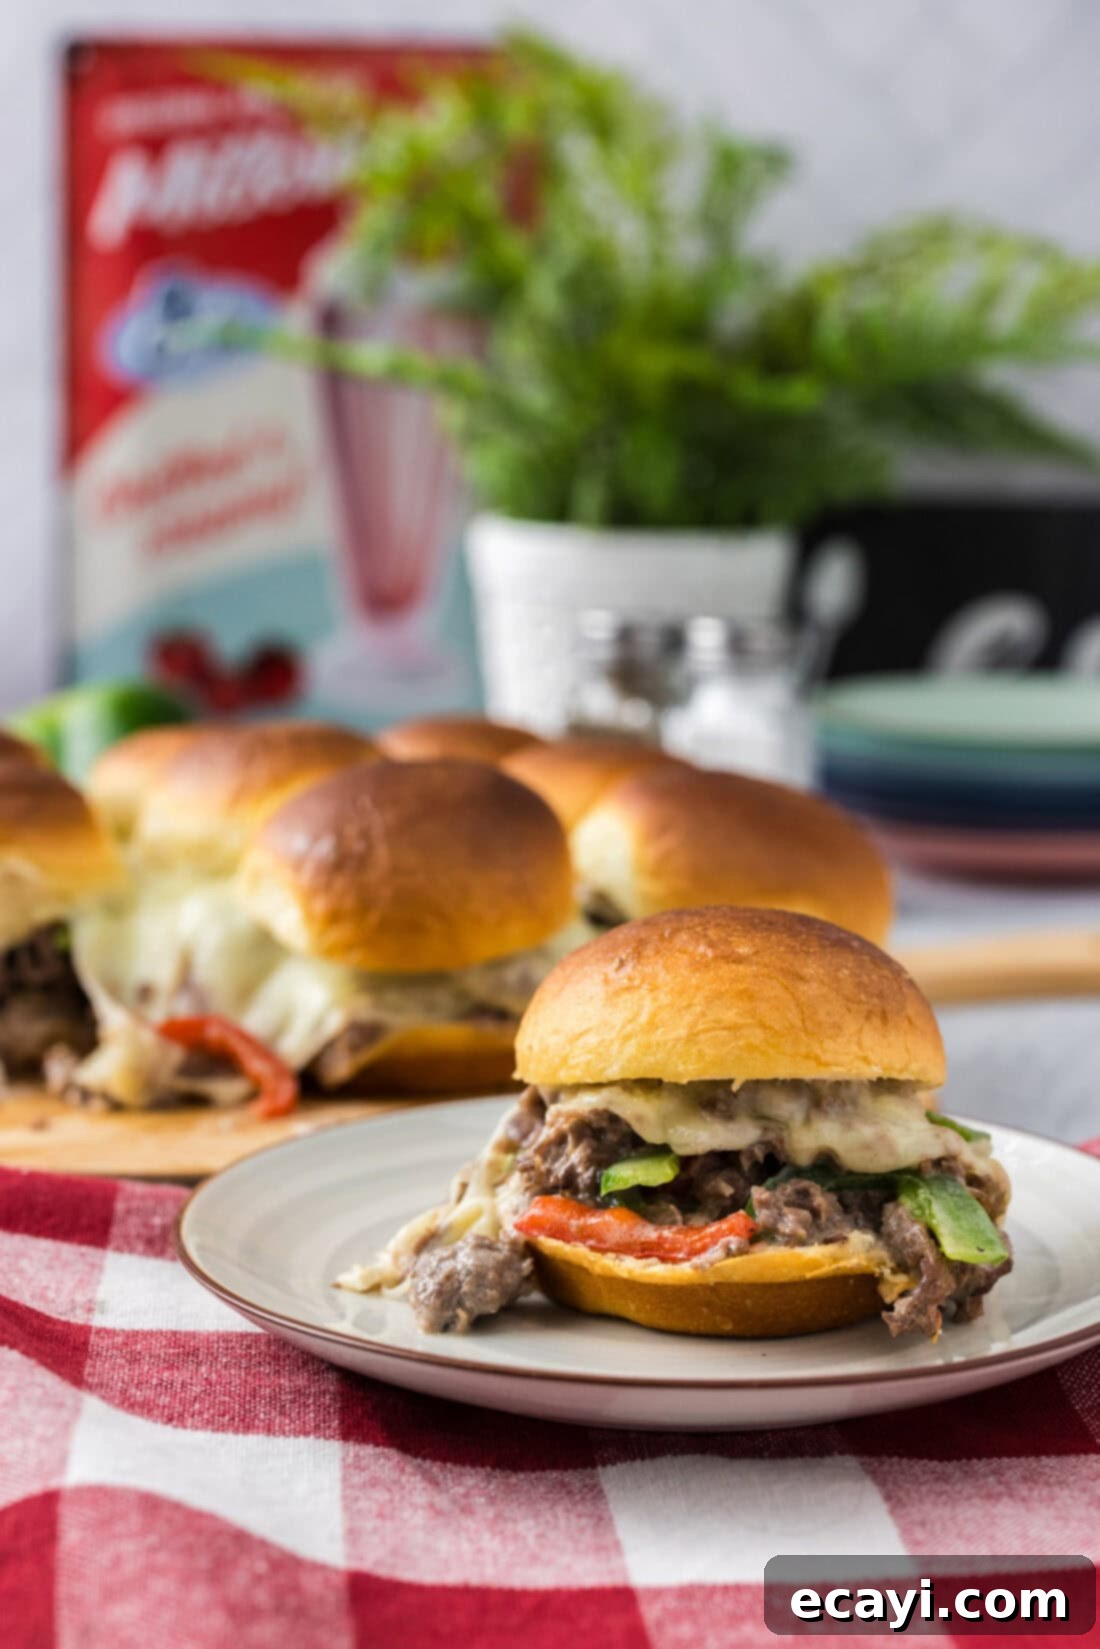
Get ready to elevate your game day menu or weeknight dinner with these incredibly delicious and easy-to-make Philly Cheesesteak Sliders! This recipe takes all the iconic flavors of a classic Philly cheesesteak – tender, thinly sliced beef, vibrant bell peppers, and an irresistible combination of melty provolone and creamy queso blanco – and shrinks them into perfectly portioned, miniature slider buns. They’re a guaranteed crowd-pleaser, delivering maximum flavor with minimal effort, making them ideal for football parties, family gatherings, or simply a fun and satisfying meal. These savory, cheesy mini sandwiches are not just food; they’re an experience, promising to be the highlight of any spread. Prepare to impress everyone with these golden-brown, flavor-packed delights!
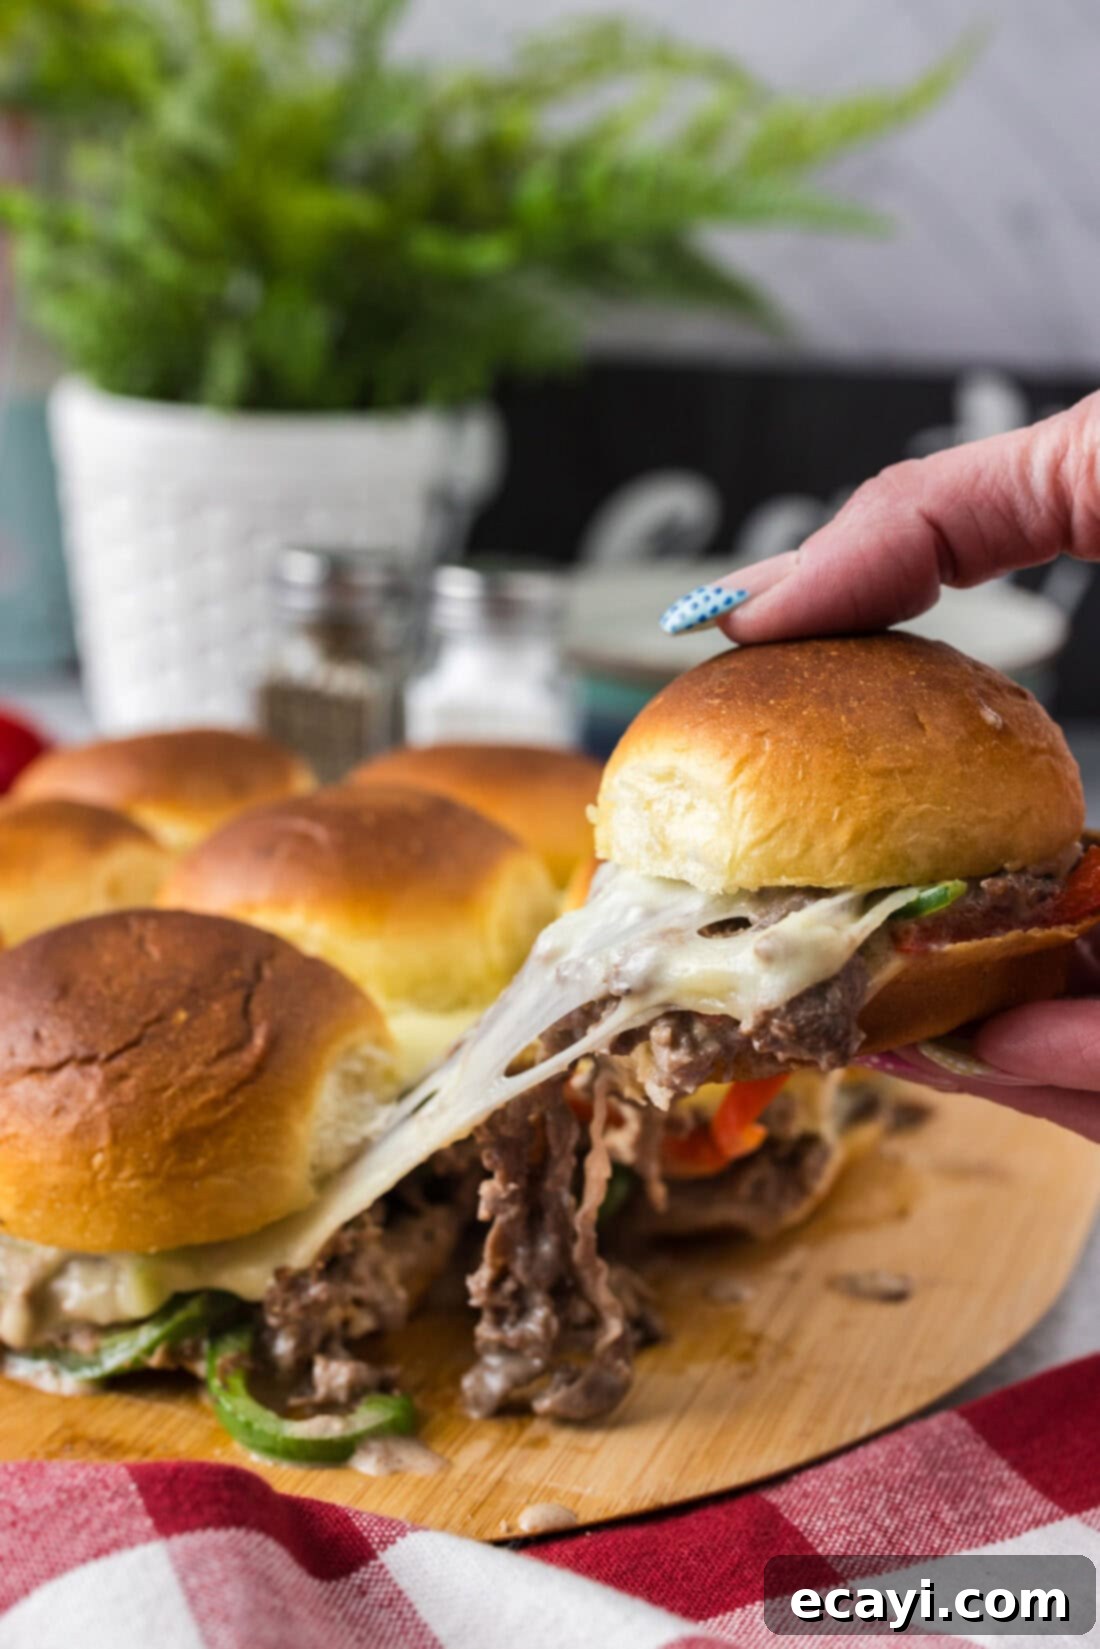
Why These Philly Cheesesteak Sliders Are a Must-Try
These Philly cheesesteak sliders aren’t just a snack; they’re a miniature culinary marvel, perfectly capturing the essence of the beloved classic Philly cheesesteak in a convenient, bite-sized form. Stacked high with savory, tender beef, sweet bell peppers, and an abundance of rich, gooey cheese, they offer an explosion of flavor in every bite. Whether you’re hosting a lively football watch party, a casual game day get-together, or simply need a quick and satisfying dinner for a hungry family, these sliders are an absolute winner. Their irresistible combination of textures and flavors makes them stand out on any table.
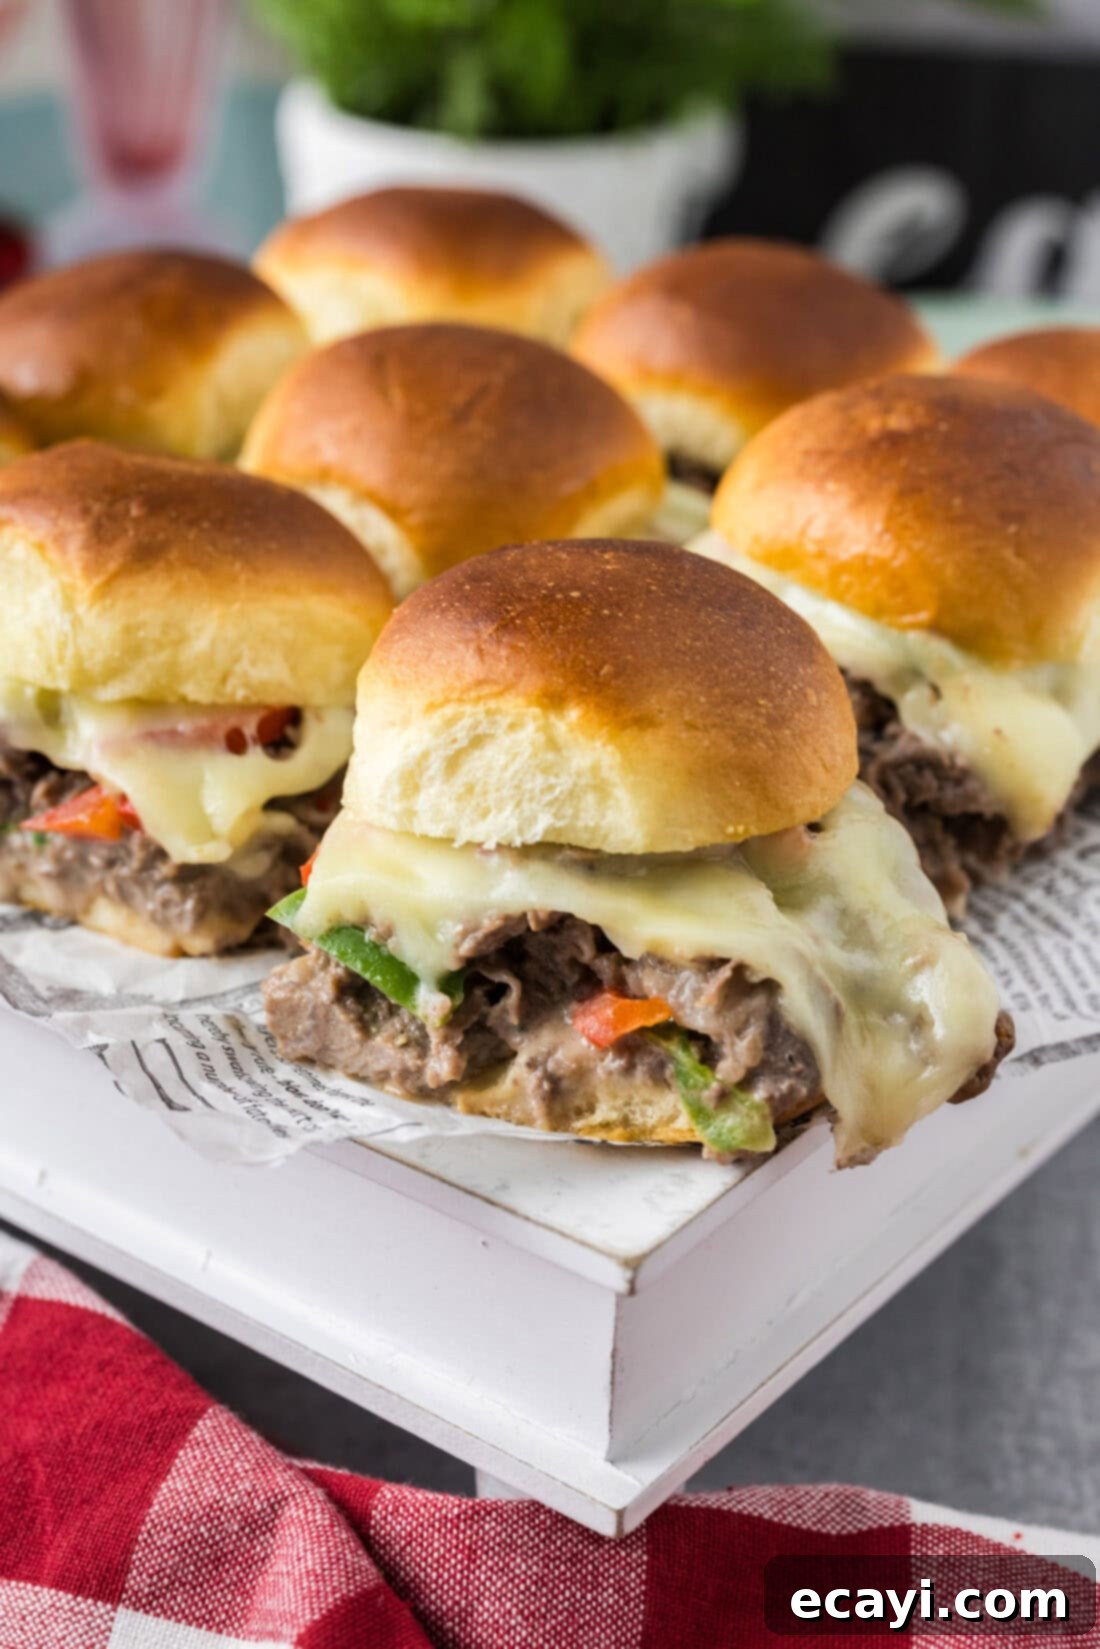
One of the standout features of this recipe is its incredible versatility and ease of preparation. Sliders are inherently fun and easy to handle, making them perfect party food that doesn’t require plates and forks, minimizing cleanup. The individual portions are ideal for sharing, and their compact size means you can serve a crowd without hassle. Furthermore, the convenience of being able to prep the components in advance means less stress on the day of your event, allowing you more time to enjoy with your guests. The simple assembly and baking process ensures that even novice cooks can achieve deliciously impressive results, making these Philly cheesesteak sliders accessible to everyone.
Our kitchen is a big fan of all things cheesesteak-inspired! We’ve taken this iconic flavor profile and adapted it into various formats, from a rich and creamy Philly cheesesteak dip that’s always a hit at parties, to a hearty and comforting cheesesteak casserole that has quickly become a family favorite and a popular choice among our readers. It was only natural to add these irresistible sliders to our collection of tried-and-true recipes. They’re a fantastic addition to any menu, promising big flavor in a small package and guaranteed to satisfy any cheesesteak craving. Let’s dive into how to make them and discover why they’ll become your new go-to appetizer or meal!
Essential Ingredients for Your Philly Cheesesteak Sliders
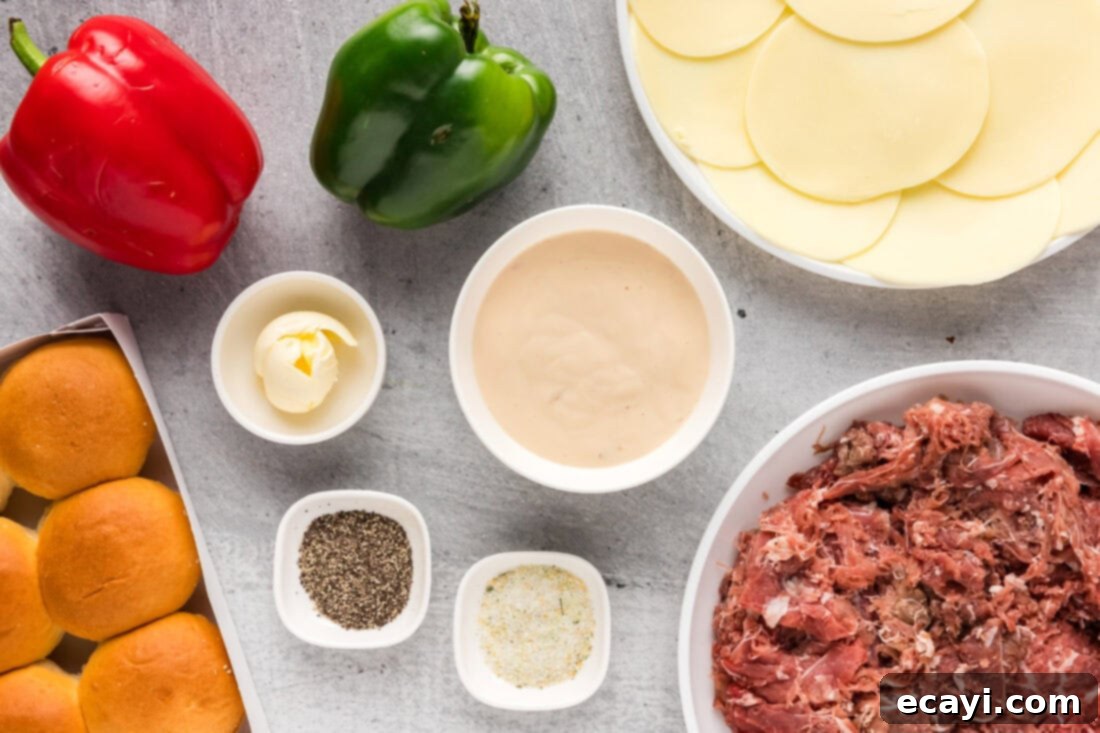
Crafting the perfect batch of Philly Cheesesteak Sliders begins with selecting high-quality ingredients. Each component plays a crucial role in building that signature flavor and texture that makes these sliders so utterly irresistible. Below you’ll find a detailed breakdown of what you’ll need, along with helpful tips and substitution suggestions to ensure your sliders are nothing short of amazing. For precise measurements and comprehensive step-by-step instructions, be sure to check the convenient printable recipe card located at the very end of this post.
Ingredient Information and Smart Substitutions
BUNS – The foundation of any great slider is a soft, slightly sweet bun that can hold up to all the delicious fillings. We highly recommend King’s Hawaiian slider buns, which typically come in a convenient 9-pack. Their signature sweetness and pillowy texture are absolutely perfect, soaking up the savory juices without becoming soggy. If King’s Hawaiian aren’t available, a 12-pack of other regular sweet slider buns or even classic Hawaiian rolls will work beautifully. For an extra special touch and an unparalleled fresh taste and softness, consider making our homemade Hawaiian rolls – they’re definitely worth the effort!
CHEESE – What’s a cheesesteak without the “cheese”? For this recipe, we opted for a dynamic duo of creamy Tostitos brand Queso Blanco dip and classic Provolone slices. The Queso Blanco adds a wonderfully smooth, slightly tangy, and incredibly gooey base, infusing the beef and peppers with a rich, uniform cheese sauce that clings to every morsel. Feel free to use your favorite brand of queso or any similar creamy cheese sauce. If you prefer a more traditional, authentic Philly style, you could also experiment with Cheez Whiz, or a blend of provolone and white American cheese for that iconic taste and melt. The key is to get that irresistible melty, cheesy goodness throughout the sandwich, ensuring a luxurious, savory experience.
BEEF – The heart of these sliders is undoubtedly the beef. You’ll need thinly shaved steak for an authentic Philly cheesesteak experience. This cut is designed to cook quickly and become incredibly tender, easily blending with the cheese and peppers to create a harmonious filling. We successfully used Kroger brand shaved beef, which is generally readily available in most supermarkets. If you can’t find pre-shaved beef, ask your butcher to thinly slice ribeye, top sirloin, or even flank steak for you. Alternatively, you can partially freeze a piece of steak at home for about 30-60 minutes, then slice it against the grain with a sharp knife as thinly as possible. This extra step ensures that melt-in-your-mouth texture that is crucial for a truly great cheesesteak.
PEPPERS – Our recipe calls for a vibrant mix of red and green bell peppers, julienned. These add a delightful pop of color, a subtle sweetness, and a crisp-tender texture that perfectly complements the rich beef and cheese. The contrast in both taste and texture elevates the overall slider experience. You can adjust the ratio of red to green based on your preference for sweetness or visual appeal. For an added layer of flavor and complexity, and to cater to classic cheesesteak preferences, you can easily add other thinly sliced vegetables such as yellow or white onions, or even mushrooms. Simply sauté them along with the bell peppers until they reach your desired tenderness.
SEASONING & BUTTER – Keeping it simple yet impactful, basic garlic salt and freshly ground black pepper are all you need to perfectly season the shaved beef. These seasonings enhance the beef’s natural savory flavors without overpowering them. A touch of good quality olive oil is used for sautéing the beef and vegetables, providing a healthy cooking fat. Finally, melted butter is generously brushed on top of the buns before baking, creating a beautifully golden-brown, irresistible crust. This butter baste not only adds another layer of rich flavor but also contributes to the appealing presentation and slight crispness of the buns.
Crafting Your Delicious Philly Cheesesteak Sliders
These step-by-step photos and detailed instructions are designed to help you visualize and confidently execute this recipe, ensuring your sliders turn out perfectly. You’ll find it incredibly straightforward to bring these flavorful mini sandwiches to life. For a convenient printable version, complete with all precise measurements and essential instructions, simply Jump to Recipe at the bottom of this page.
Let’s walk through the process of making these irresistible Philly Cheesesteak Sliders. The key to success lies in proper preparation and thoughtful layering, ensuring every bite is packed with the savory, cheesy goodness you crave. Follow these steps meticulously for perfect results every time, transforming simple ingredients into a spectacular meal or appetizer:
- Prepare Your Oven & Buns: Begin by preheating your oven to 350°F (175°C). This ensures it’s ready for baking as soon as your sliders are assembled, allowing for even cooking. Next, if your slider buns (like the King’s Hawaiian variety) aren’t already pre-sliced, carefully cut them in half horizontally using a serrated knife. The trick is to keep the entire block of buns intact during this cut, which makes the subsequent assembly much easier and neater. Place the bottom halves of the buns onto a large baking sheet, ready to be loaded with their delicious filling.
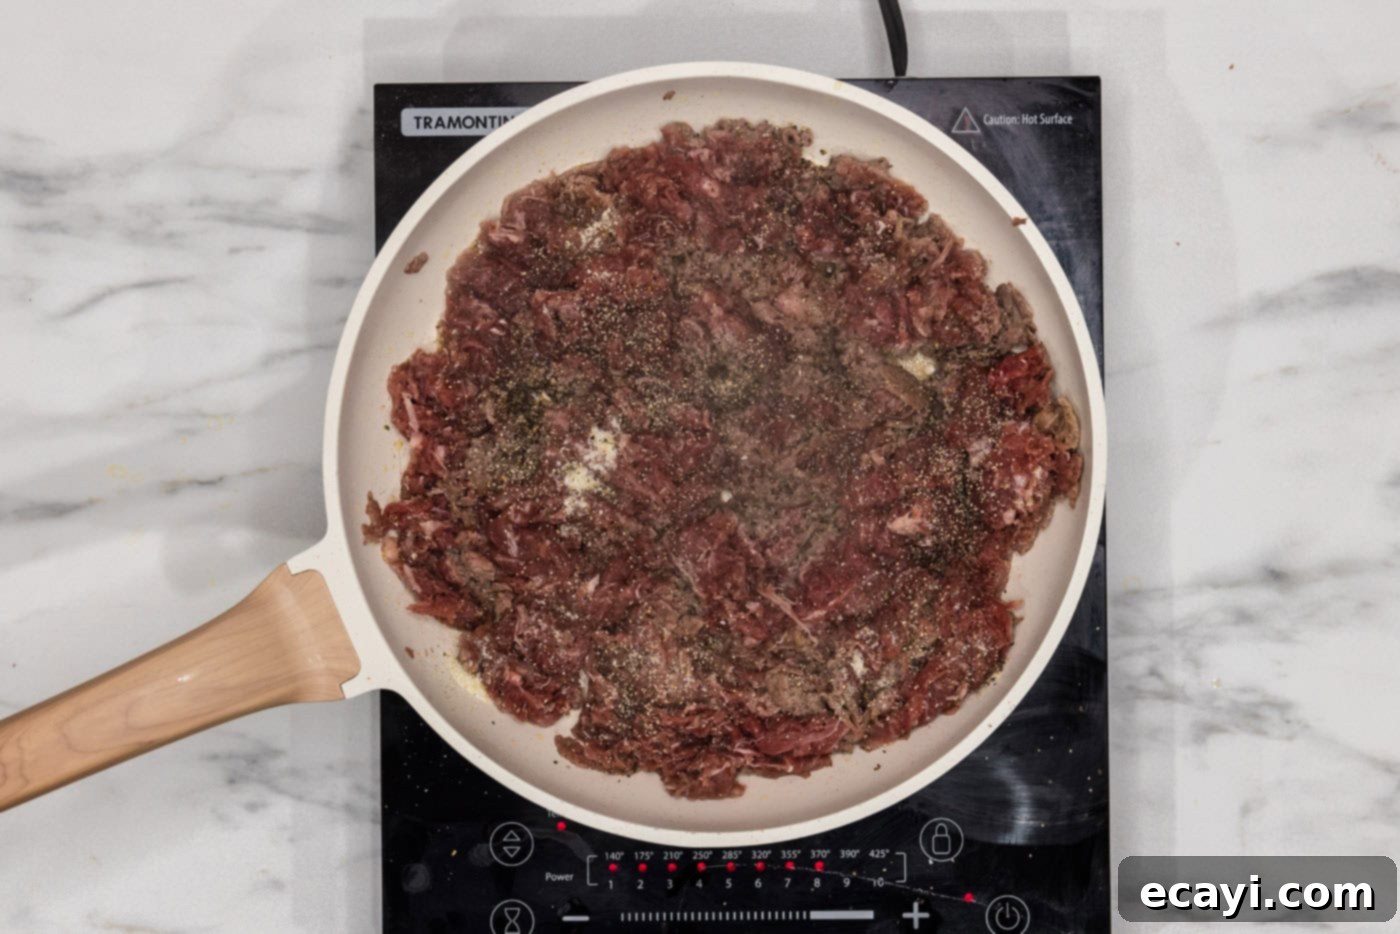
- Sauté the Shaved Beef: Heat the olive oil in a large, heavy-bottomed skillet (cast iron works wonderfully here for even heat distribution) over medium-high heat until it shimmers, indicating it’s hot enough. Add the thinly shaved beef to the hot skillet. Cook the beef, breaking it apart with tongs and turning occasionally, until it’s beautifully browned on all sides and cooked through. It’s crucial to avoid overcrowding the pan; if necessary, cook the beef in batches to ensure a good sear and rich caramelization, rather than simply steaming it. This browning step is absolutely crucial for developing deep, savory flavors that form the backbone of a great cheesesteak.
- Season the Beef: Once the beef is thoroughly browned and cooked, season it generously to taste with garlic salt and freshly ground black pepper. Stir well to distribute the seasonings evenly throughout the meat. The garlic salt adds a fantastic aromatic depth that is quintessential to an authentic cheesesteak flavor profile.
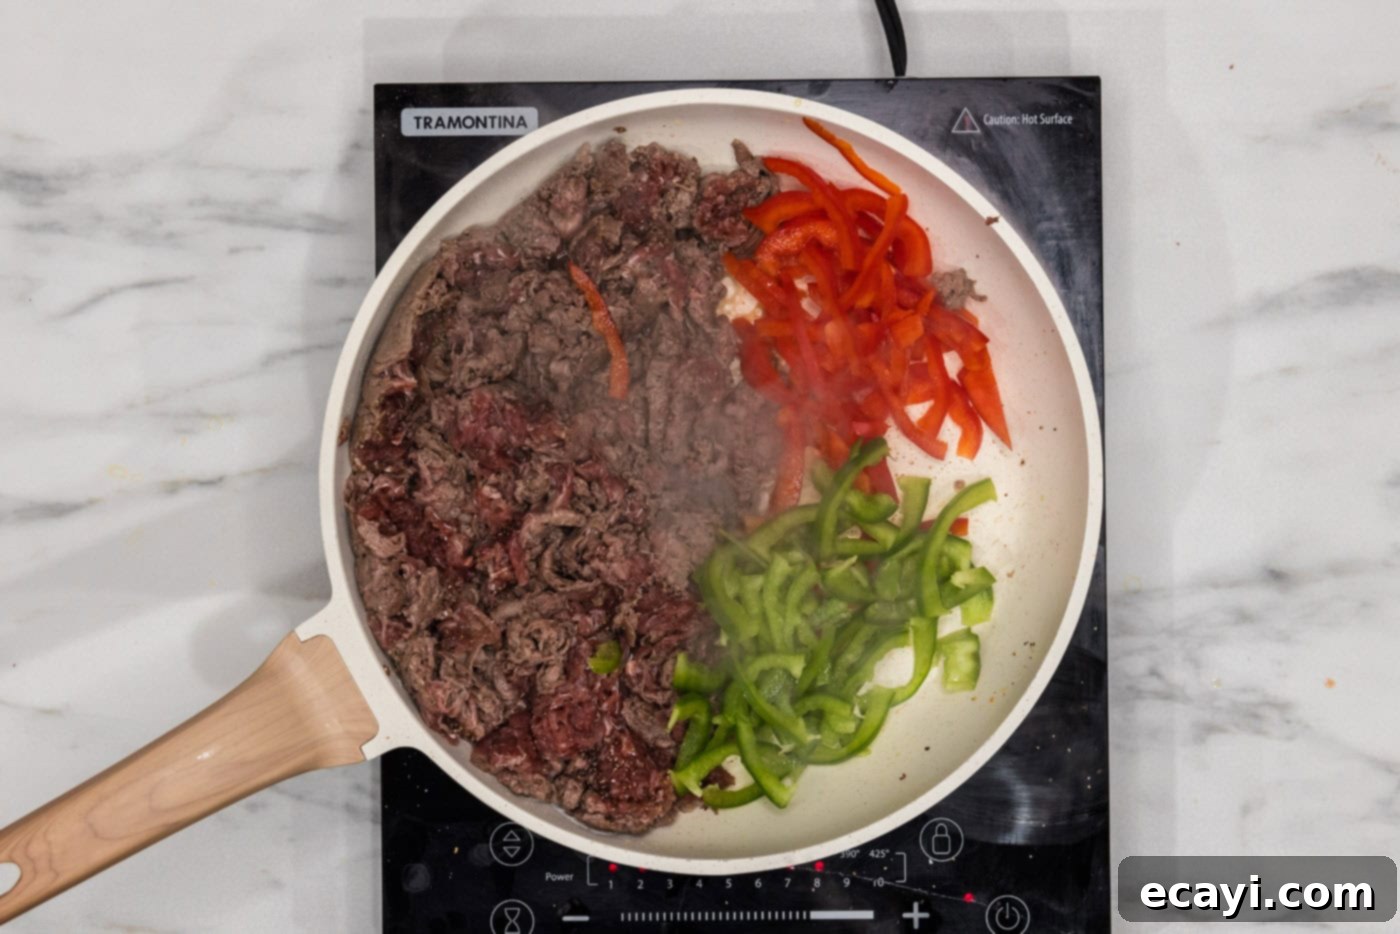
- Cook the Bell Peppers: Gently push all the seasoned beef to one side of the skillet, creating an empty space. Add your julienned red and green bell pepper strips to the vacant side of the pan. Cook the peppers, turning them occasionally, until they become tender-crisp. You want them softened but still retaining a slight bite to provide a pleasant textural contrast to the soft beef and gooey cheese. If adding onions or mushrooms, now is the time to add them alongside the peppers.
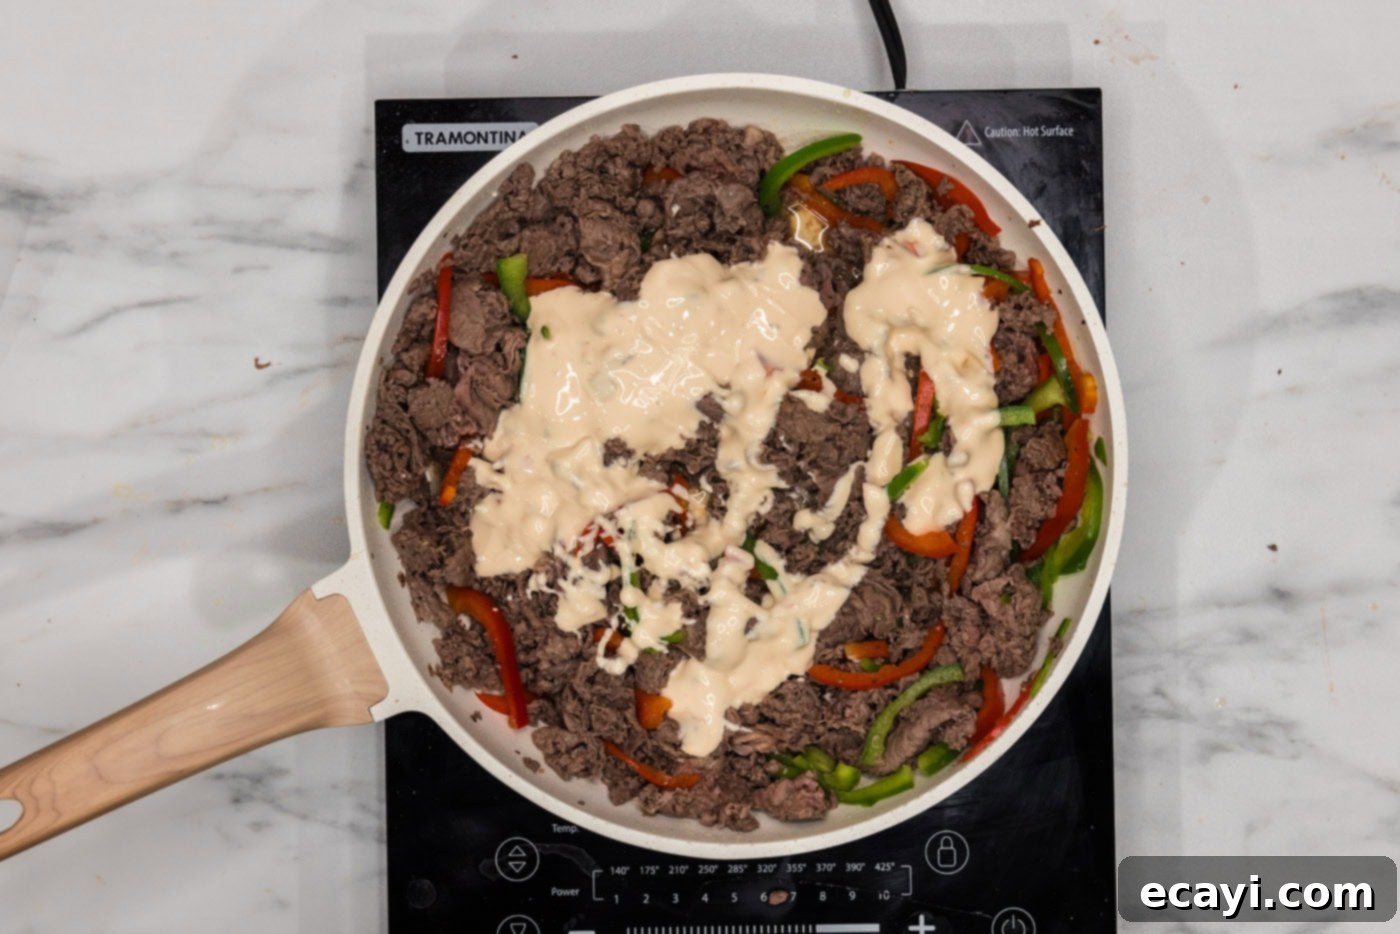
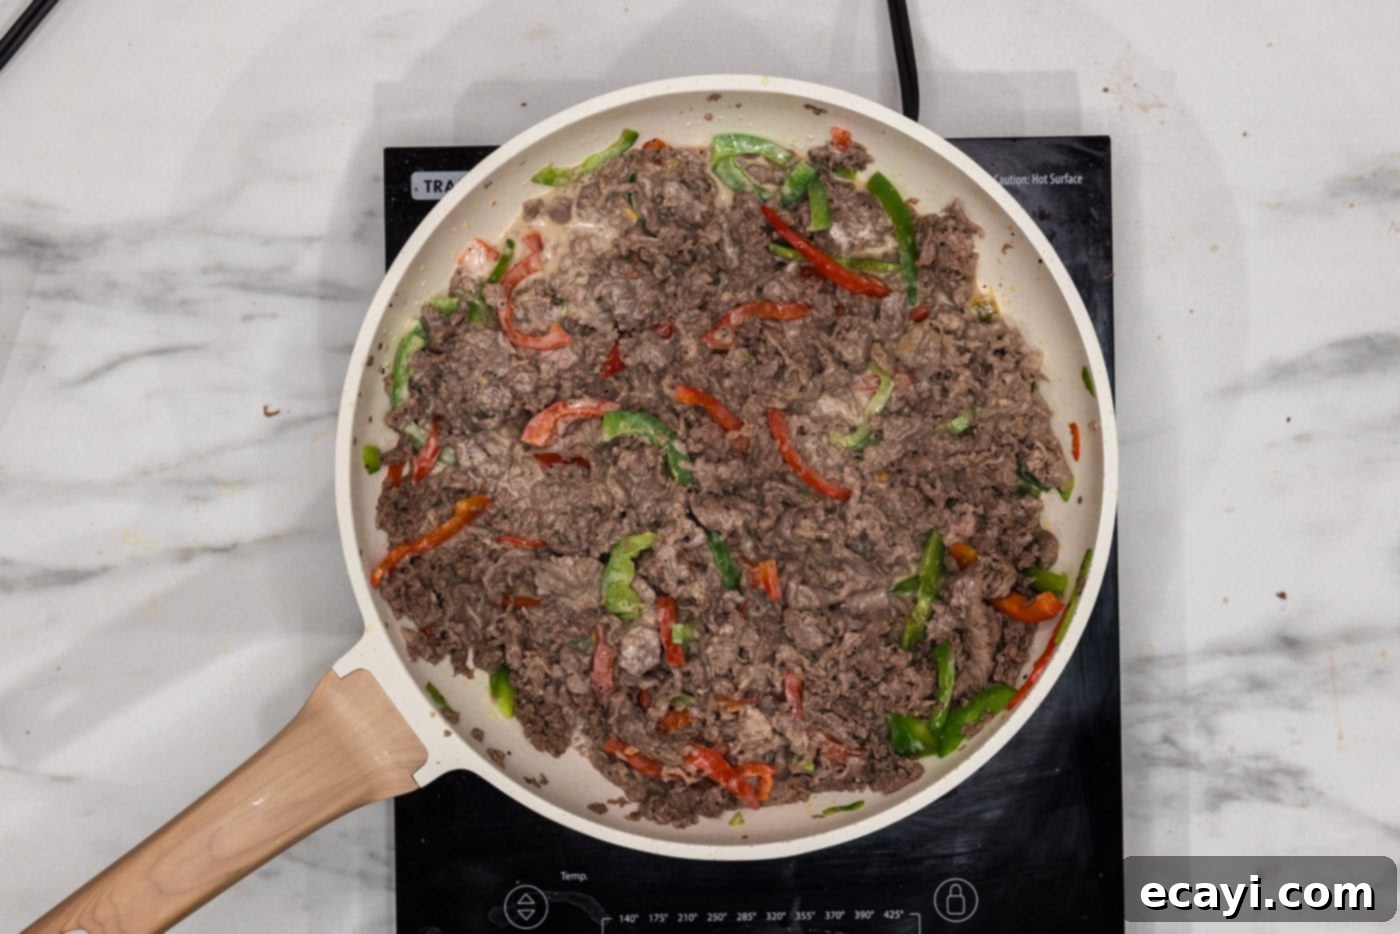
- Integrate the Queso: Now for the magic that brings these sliders to life! Add the queso dip directly into the skillet, incorporating it with the beef and peppers. Stir everything together thoroughly until the queso is fully melted, well combined with the meat and vegetables, and heated through. This step binds all the incredible flavors together and ensures every single slider is infused with a rich, creamy, and irresistible cheesy goodness, creating that signature gooey texture.
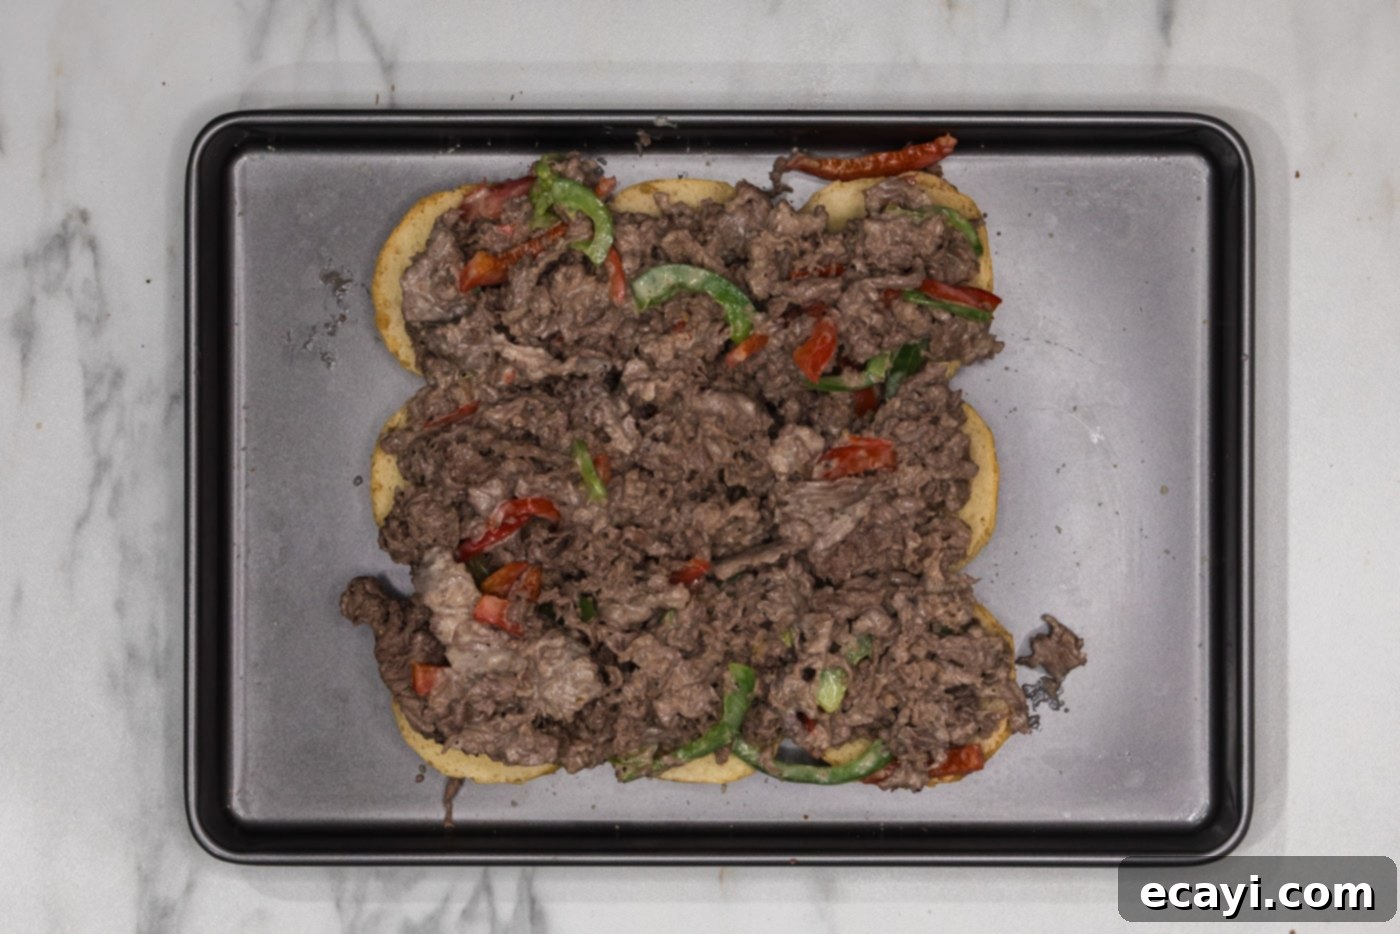
- Assemble the Sliders: Using tongs, carefully and generously portion the rich beef and pepper mixture onto the bottom halves of the slider buns. Don’t be shy – pile the meat high! A thick, satisfying layer of filling is key to a truly great slider. Distribute the mixture evenly across all the buns, ensuring each one gets its fair share of deliciousness.
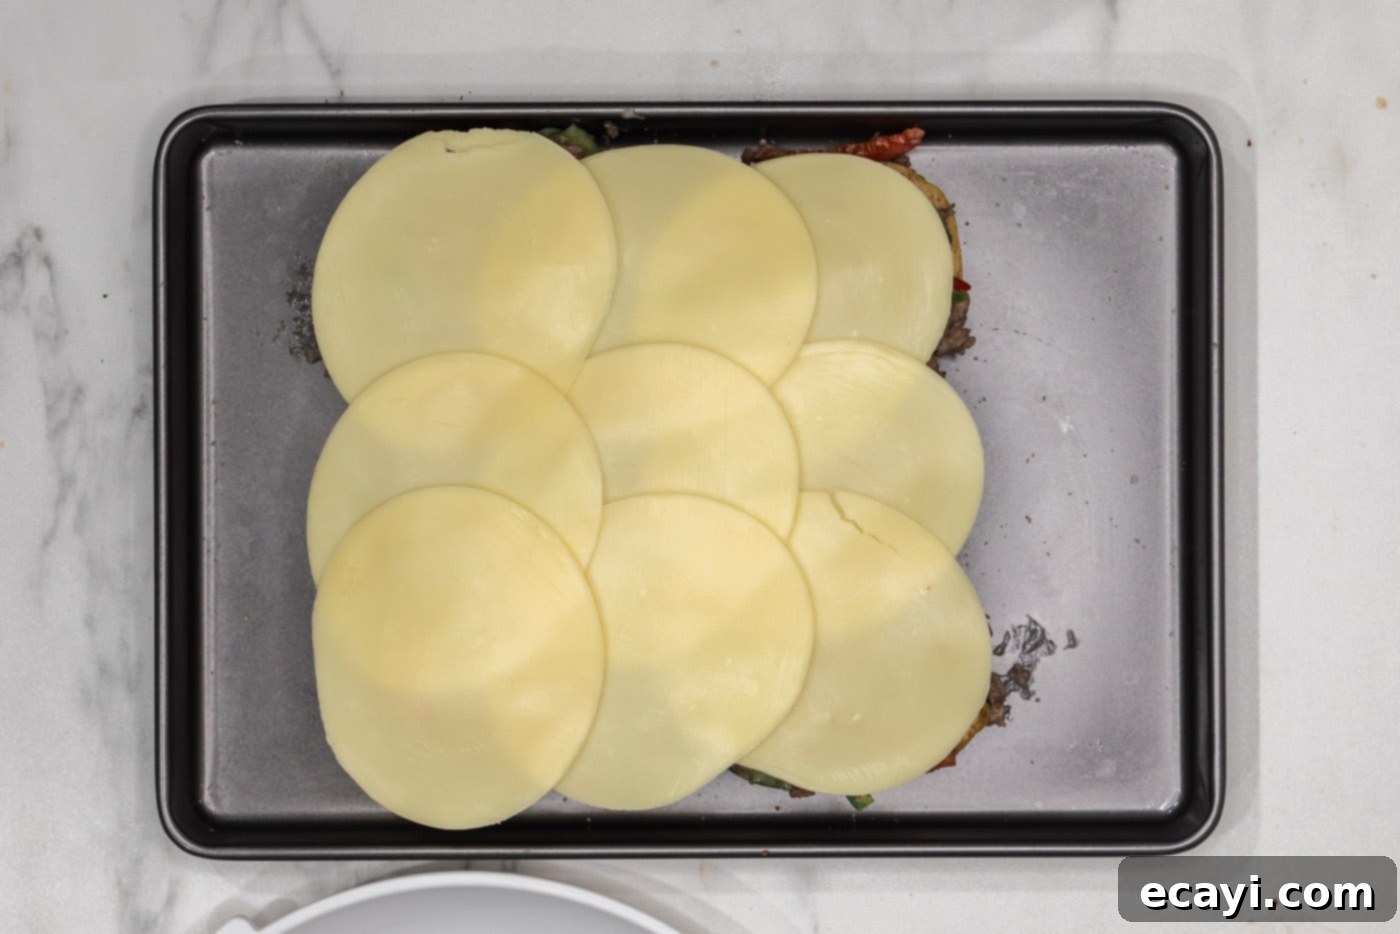
- Add Provolone: Top the beef and pepper mixture with the slices of provolone cheese. The provolone will melt beautifully in the oven, adding another crucial layer of classic cheesesteak flavor and creamy texture. Arrange the slices so they cover as much of the filling as possible, creating a delicious cheese blanket.
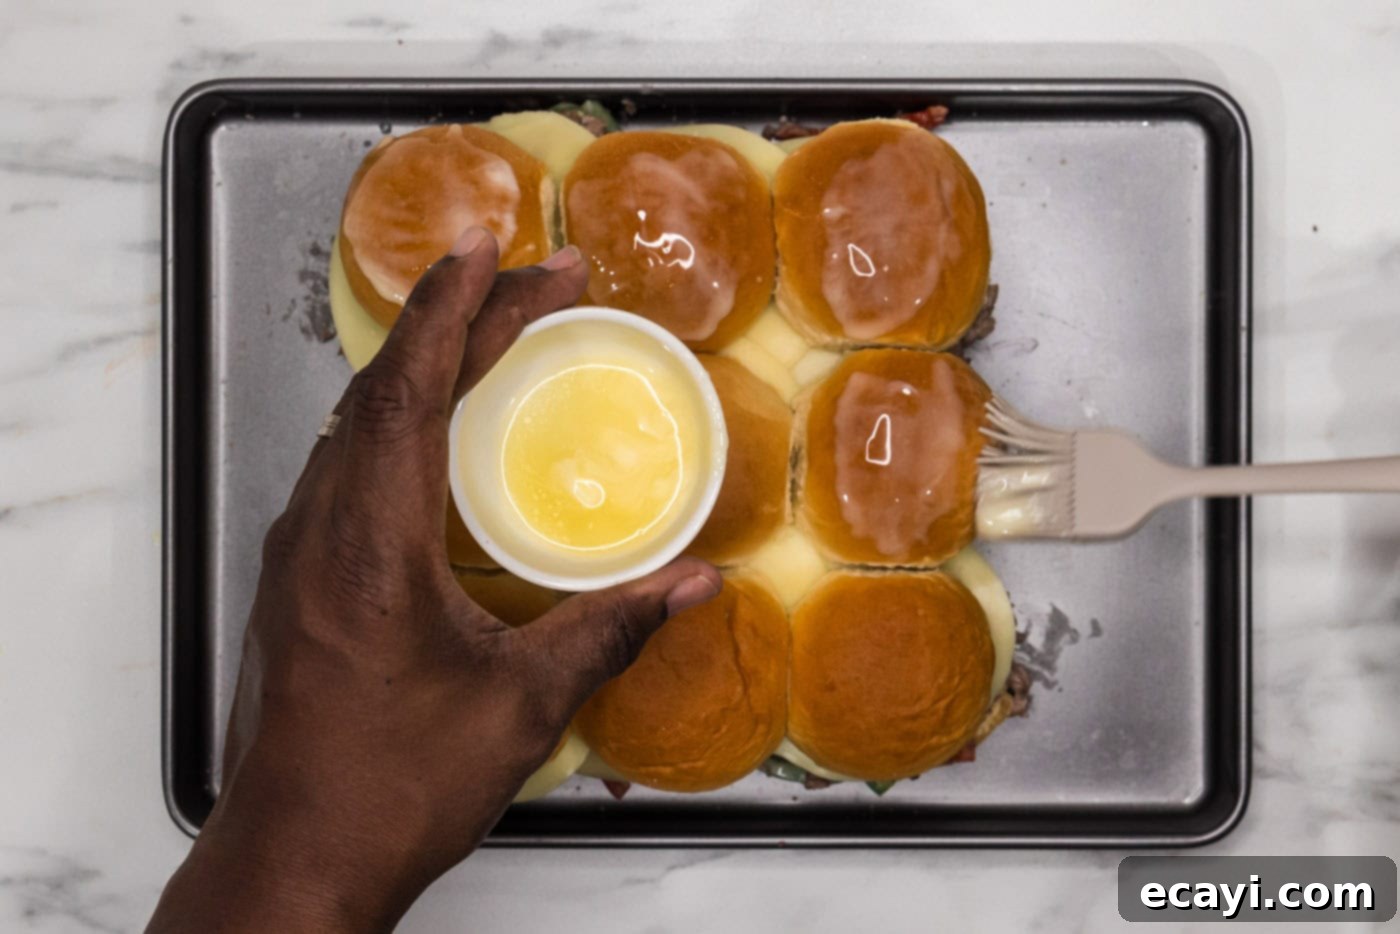
- Top and Butter the Buns: Gently place the top halves of the slider buns back over the provolone cheese, completing your sandwiches. Now, for that golden, irresistible finish: generously baste the tops of the buns with melted butter using a basting brush. This step is vital for adding a delicious buttery flavor and helping the buns crisp up and turn a beautiful golden brown in the oven, enhancing both taste and presentation.
- Bake to Perfection: Place the baking sheet with your assembled sliders into the preheated oven. Bake for approximately 20 minutes, or until the cheese is thoroughly melted, gloriously bubbly, and the tops of the buns are a beautiful golden brown and slightly crispy. Keep a watchful eye on them during the last few minutes to prevent any over-browning.
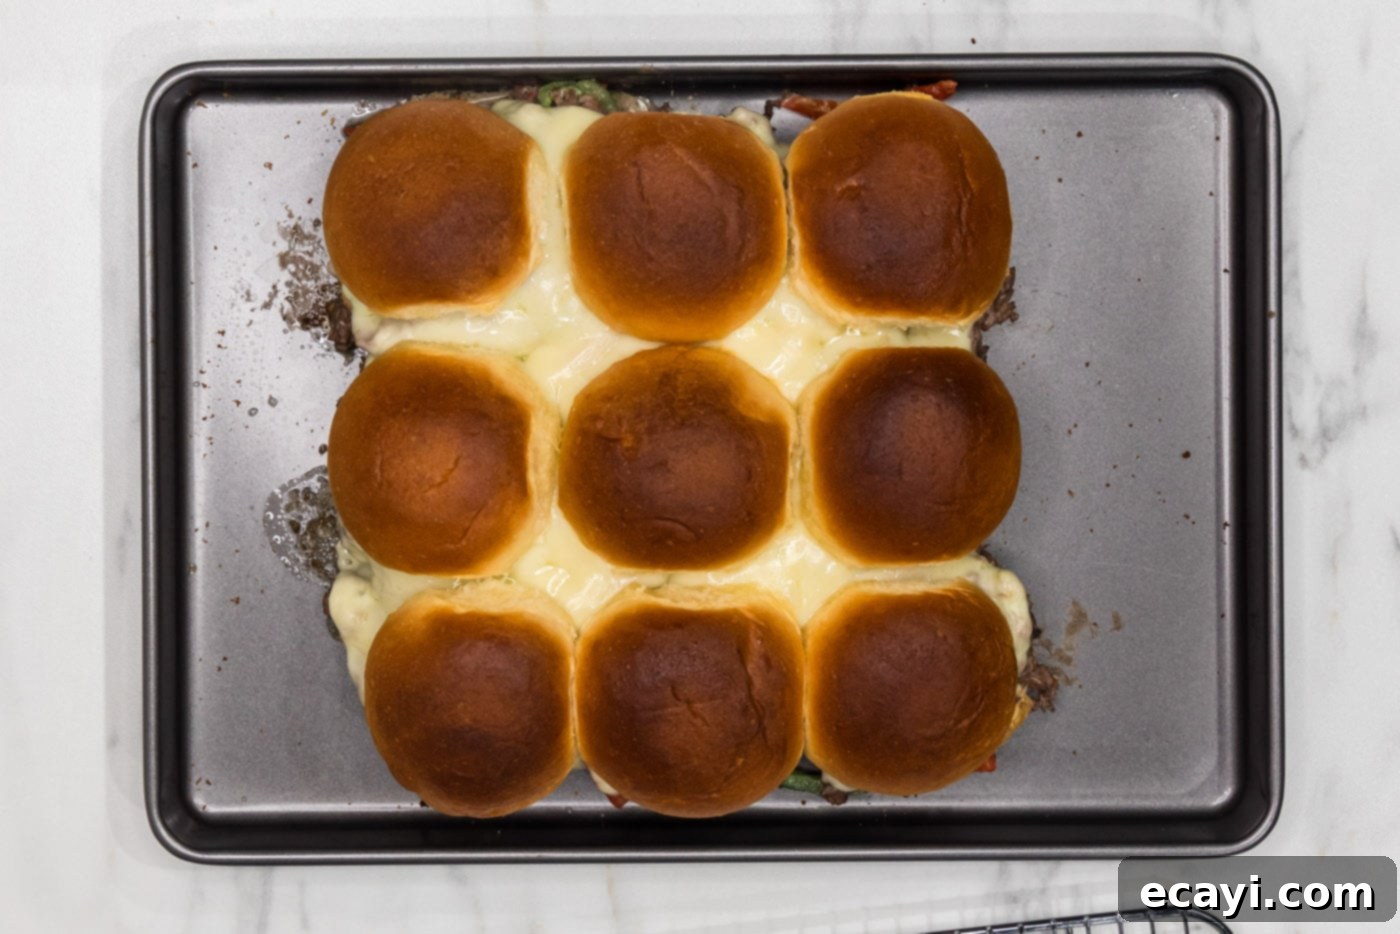
Once baked, remove the Philly Cheesesteak Sliders from the oven, let them cool for just a few minutes (the cheese will be very hot!), then slice them apart and serve immediately. Enjoy the incredible aroma and taste of your homemade, perfectly crafted Philly Cheesesteak Sliders!
Frequently Asked Questions & Expert Tips for Perfect Sliders
To ensure your Philly Cheesesteak Sliders turn out perfectly every time, and to help you manage your meal prep, here are some common questions and our expert tips for success. These insights will help you master this delicious recipe and even customize it to your liking!
Absolutely! These sliders are excellent for make-ahead preparation, which is a huge bonus for party planning or busy weeknights. You can fully cook the beef and bell pepper mixture (and any other vegetables like onions or mushrooms) ahead of time and store it in an airtight container in the refrigerator for up to 2-3 days. When you’re ready to serve, simply rewarm the mixture slightly on the stovetop or in the microwave (or even use it cold if pressed for time), then proceed with assembling the sliders on the buns as described in the recipe. Pop them into the oven to bake, and they’ll be hot, fresh, and cheesy in no time. This advanced prep significantly reduces your active cooking time on the day of serving, allowing for a more relaxed experience.
Storing leftover Philly cheesesteak sliders is simple and effective. Once they’ve cooled completely to room temperature, place them in an airtight container. They will keep well in the refrigerator for 3-4 days. To reheat them for the best results, arrange the sliders on a baking sheet or oven-safe pan. For optimal bun texture and to prevent them from drying out, cover the pan loosely with aluminum foil. Bake in a preheated 350°F (175°C) oven until they are thoroughly warmed through and the cheese is beautifully melted again, which usually takes around 10-15 minutes. Alternatively, you can reheat individual sliders in the microwave for a quicker option, though the buns might not be as crispy as when reheated in the oven.
Yes, definitely! While bell peppers are a classic and delicious choice, many variations of cheesesteak incorporate additional vegetables. Feel free to enhance your sliders by adding thinly sliced yellow or white onions to the skillet along with the bell peppers, cooking them until they are translucent and tender, or even slightly caramelized for extra sweetness. Sliced mushrooms also make a fantastic addition; cook them until they release their moisture and achieve a nice golden brown. For those who enjoy a bit of heat, a pinch of red pepper flakes or thinly sliced jalapeños can be added to the beef mixture. Just remember to maintain a good balance so that the core cheesesteak flavors aren’t overwhelmed by too many additions.
A large, heavy-bottomed skillet is absolutely ideal for cooking the shaved beef and peppers in this recipe. Cast iron skillets are particularly excellent for achieving the best results as they retain heat very well and distribute it evenly, allowing the beef to sear and brown beautifully rather than just steaming. This process is crucial for developing that rich, savory flavor. A good quality non-stick skillet will also work effectively, making cleanup somewhat easier. The most important thing is to use a skillet that is large enough to comfortably accommodate the beef and vegetables without overcrowding. If your skillet is too small, it’s always better to cook the beef in batches to ensure proper browning and flavor development.
Delicious Serving Suggestions for Your Sliders
These Philly Cheesesteak Sliders are incredibly satisfying and flavor-packed on their own, but pairing them with the right side dishes can transform your meal into a true feast, whether it’s for game day, a festive party, or a casual weeknight dinner. Here are some fantastic suggestions to complement their rich, savory flavors:
- Crispy Chips: A simple, no-fuss pairing that always works. The satisfying crunch of classic potato chips offers a delightful textural contrast to the soft, cheesy sliders.
- Golden Tater Tots: These fun, bite-sized potato cylinders are always a crowd-pleaser, especially when baked to a crispy golden perfection. Their mild potato flavor and crispy exterior make them a perfect companion.
- Savory Baked Beans: The rich, sweet, and tangy flavors of classic baked beans complement the savory beef and cheese in the sliders wonderfully, adding a comforting and hearty element to the meal.
- Classic French Fries: You can never go wrong with perfectly seasoned, hot French fries. Serve them alongside your sliders with your favorite dipping sauces for an extra treat and a satisfying, familiar combination.
- Crunchy Onion Rings: The sweet and savory notes of onion rings, combined with their crispy texture, provide a lovely counterpoint to the meaty, cheesy sliders, offering a different kind of fried goodness.
- Creamy Coleslaw: A cool, tangy, and crunchy coleslaw offers a refreshing balance to the rich and warm flavors of the cheesesteak sliders. Its acidity beautifully cuts through the richness, cleansing the palate.
- Fresh Side Salad: For a lighter and healthier option, a simple green salad tossed with a bright vinaigrette dressing can add freshness, essential vitamins, and a vibrant contrast to your indulgent sliders.
For drinks, consider pairing these savory sliders with a cold, crisp beer (if you’re enjoying them for game day), a refreshing homemade lemonade, or a classic iced tea to complete the perfect casual dining experience.
More Irresistible Slider Recipes to Try
If you’re now a fan of the sheer convenience and undeniable deliciousness of sliders, you’ll be thrilled to know we have plenty more recipes to keep your menu exciting and your taste buds tingling. These miniature sandwiches are incredibly versatile and perfect for parties, quick lunches, or easy weeknight dinners, offering endless flavor possibilities. Expand your slider repertoire with these fantastic options:
- Italian Sliders
- Roast Beef Sliders
- Cheeseburger Sliders
- Mississippi Pot Roast Sliders
- Reuben Sliders
I love to bake and cook and share my kitchen experience with all of you! Remembering to come back each day can be tough, that’s why I offer a convenient newsletter every time a new recipe posts. Simply subscribe and start receiving your free daily recipes!
Philly Cheesesteak Sliders
IMPORTANT – There are often Frequently Asked Questions within the blog post that you may find helpful. Simply scroll back up to read them!
Print It
Pin It
Rate It
Save ItSaved!
Ingredients
- 9 slider buns we used Kings Hawaiian slider buns for their sweet, soft texture
- 1.75 pounds shaved beef (like ribeye or top sirloin, very thinly sliced)
- 2 Tablespoons olive oil
- garlic salt to taste (for seasoning the beef)
- black pepper to taste
- ½ large red bell pepper julienned
- ½ large green bell pepper julienned
- 1 cup queso blanco dip (Tostitos brand or your preferred creamy cheese sauce)
- 9 slices provolone cheese
- 2 Tablespoons melted butter
Things You’ll Need
-
Large heavy bottomed skillet (ideally cast iron for best searing)
-
Tongs
-
Baking sheet
-
Basting brush
Before You Begin
- We used Kings Hawaiian slider buns which come in a 9-pack, providing a wonderfully soft and slightly sweet base for these sliders. A 12-pack of other quality sweet slider buns or even homemade Hawaiian rolls (check out our recipe for homemade Hawaiian rolls!) would work just as well, ensuring that perfect balance of softness and subtle sweetness.
- For the creamy cheese element, we used Tostitos brand Queso Blanco dip. This offers a fantastic creamy texture and mild flavor. However, feel free to use any creamy queso or your preferred cheese sauce; even a classic Cheez Whiz or a combination of provolone and white American cheese could be used for an authentic touch.
- The key to tender, flavorful beef is using thinly shaved steak. This is the type of beef we found and highly recommend for its quick cooking and tender results. If pre-shaved isn’t available, a butcher can prepare thinly sliced ribeye or sirloin, or you can thinly slice partially frozen steak at home.
- For an extra layer of flavor and to customize your sliders, consider adding thinly sliced yellow onions or mushrooms to the skillet when you cook the bell peppers. They cook down beautifully and integrate well with the beef and cheese.
Instructions
-
Preheat the oven to 350 F (175 C) to ensure it’s ready for baking as soon as your sliders are assembled.
-
If your slider buns are not already cut in half, carefully slice them horizontally through the middle, keeping the entire block of buns intact. Place the bottom halves of the buns onto a large baking sheet.
-
Heat the olive oil in a large, heavy-bottomed skillet over medium-high heat until it begins to shimmer.
-
Add the shaved beef to the hot skillet. Cook, breaking it up with tongs and turning occasionally, until it is completely browned and cooked through. Cook in batches if necessary to avoid overcrowding and ensure proper browning.
-
Season the cooked beef generously to taste with garlic salt and freshly ground black pepper, stirring to combine thoroughly.
-
Move all the seasoned beef to one side of the skillet, creating an open space. Add the julienned bell pepper strips to the empty side. Cook the peppers, turning occasionally, until they are tender-crisp, about 5-7 minutes.
-
Add the queso dip to the skillet with the beef and peppers. Stir everything together until well combined and the queso is heated through, creating a creamy, cohesive filling.
-
Using tongs, evenly portion the beef and pepper mixture onto the bottom halves of the slider buns. Pile it on thick for a satisfying sandwich!
-
Layer the slices of provolone cheese directly on top of the beef and pepper mixture, ensuring full coverage.
-
Carefully place the top halves of the slider buns back onto the assembled sandwiches. Generously baste the tops of the buns with the melted butter using a brush for a golden finish.
-
Bake in the preheated oven for 20 minutes, or until the cheese is beautifully melted and bubbly, and the buns are golden brown and slightly crispy. Serve warm.
Expert Tips & FAQs
- Make Ahead – These sliders are ideal for advanced preparation, making them perfect for parties or busy schedules. You can fully cook the beef and bell peppers mixture (along with any other desired vegetables) ahead of time and store it in an airtight container in the refrigerator for 2-3 days. When you’re ready to serve, simply rewarm the mixture slightly on the stovetop or in the microwave, then assemble the sliders as per the recipe instructions, and bake. This method significantly streamlines your cooking on the day of serving.
- Storage – If you have any leftover Philly cheesesteak sliders, allow them to cool completely to room temperature before transferring them to an airtight container. Store them in the refrigerator, where they will keep fresh for 3-4 days. To reheat for the best quality, place the sliders on a baking sheet or oven-safe pan. For optimal bun texture and to prevent drying, cover the pan loosely with aluminum foil. Bake in a preheated 350°F (175°C) oven until they are thoroughly warmed through and the cheese is beautifully re-melted, which typically takes around 10-15 minutes.
- Customizing Vegetables – While bell peppers are a fantastic choice, feel free to add other classic cheesesteak vegetables to the filling. Thinly sliced yellow onions, sautéed until tender and slightly caramelized, add a wonderful sweetness and depth. Sliced mushrooms also make a delicious addition; cook them until they release their moisture and achieve a nice golden-brown color. Just add them to the skillet with the bell peppers and cook together.
- Achieving the Best Beef Texture – For truly tender and melt-in-your-mouth beef, ensure your shaved steak is cut as thinly as possible. If you’re slicing the steak yourself, a great tip is to partially freeze the steak for about 30-60 minutes before slicing it against the grain with a very sharp knife. This makes it much easier to get those super-thin pieces that are characteristic of an authentic cheesesteak.
- Don’t Overcrowd the Skillet – When cooking the shaved beef, it is absolutely crucial not to overcrowd your skillet. Cooking too much beef at once can lower the pan temperature, causing the beef to steam rather than sear and brown. For the best flavor development and texture, cook the beef in smaller batches if necessary, ensuring each piece gets proper contact with the hot surface to achieve a rich, caramelized crust.
Nutrition
The recipes on this blog are tested with a conventional gas oven and gas stovetop. It’s important to note that some ovens, especially as they age, can cook and bake inconsistently. Using an inexpensive oven thermometer can assure you that your oven is truly heating to the proper temperature. If you use a toaster oven or countertop oven, please keep in mind that they may not distribute heat the same as a conventional full sized oven and you may need to adjust your cooking/baking times. In the case of recipes made with a pressure cooker, air fryer, slow cooker, or other appliance, a link to the appliances we use is listed within each respective recipe. For baking recipes where measurements are given by weight, please note that results may not be the same if cups are used instead, and we can’t guarantee success with that method.
