Irresistible No-Bake Chocolate Icebox Cake: Your Easiest Dreamy Dessert
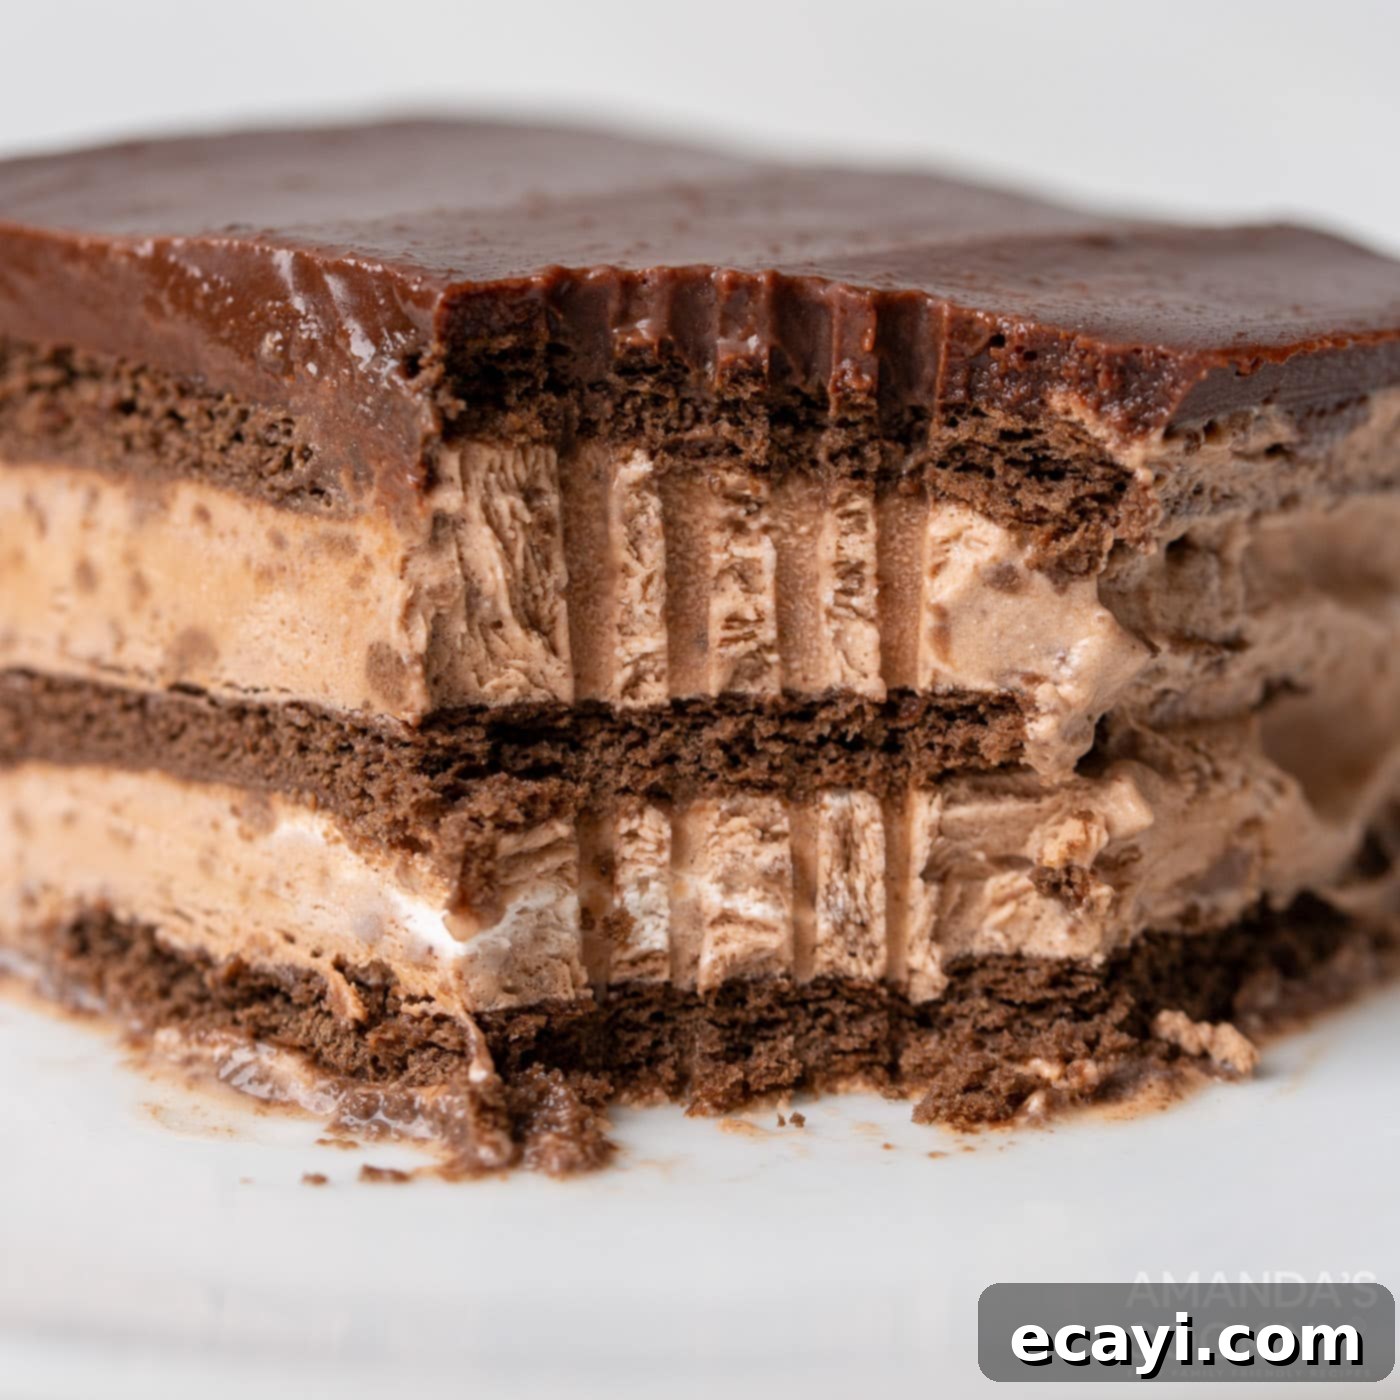
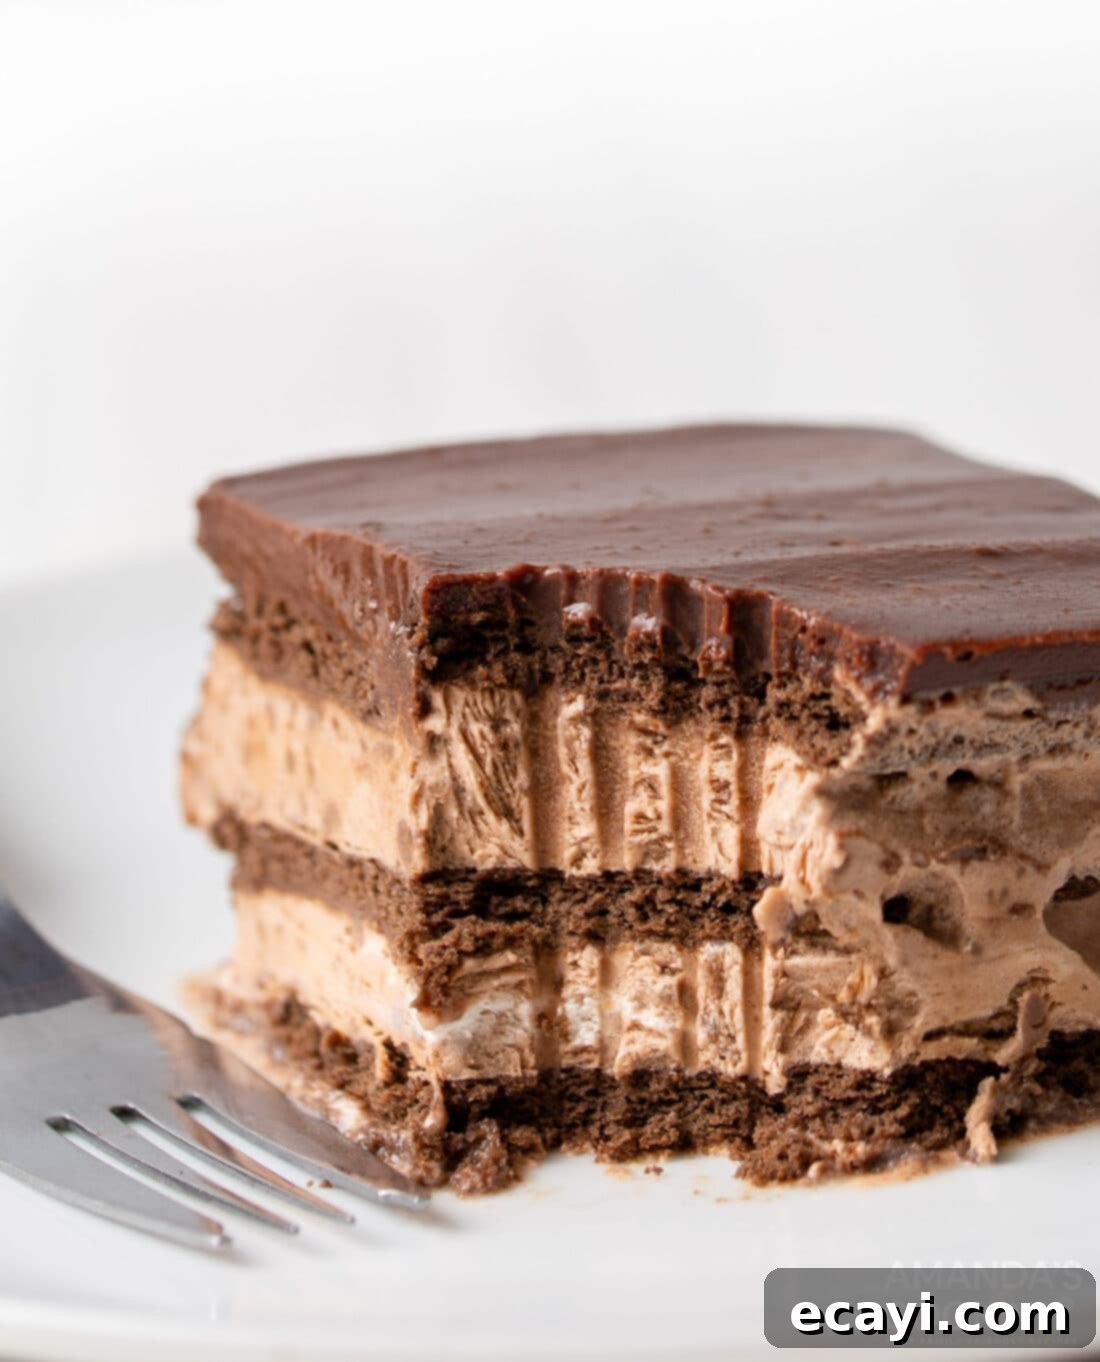
Indulge in pure bliss with this incredibly easy and utterly irresistible no-bake chocolate icebox cake. Each luscious layer is a testament to chocolate perfection, featuring crisp graham crackers, rich chocolate pudding, velvety cream cheese, light and airy whipped cream, and a glistening topping of homemade chocolate ganache. This decadent dessert promises a symphony of textures and flavors that will captivate every chocolate lover, making it the ultimate treat for any occasion.
Why This Easy Chocolate Icebox Cake Will Be Your New Favorite
For devoted chocolate enthusiasts, finding a dessert that truly hits every note can be a challenge. Look no further! This no-bake chocolate icebox cake isn’t just a recipe; it’s a revelation. Its appeal lies not only in its exquisite flavor profile but also in its remarkable simplicity. Imagine a dessert that delivers deep, satisfying chocolatey goodness in every bite, without ever needing to turn on your oven. That’s precisely what makes this recipe a standout for summer gatherings, holiday meals, or simply an indulgent weeknight treat.
Icebox cakes have long held a special place in our hearts, especially during the warmer months. They offer a refreshing escape from hot kitchens and complex baking processes, making them our go-to choice for effortless entertaining. This particular version takes the classic icebox cake concept and elevates it to an unparalleled chocolate experience. We’ve meticulously crafted each element to maximize chocolate impact, resulting in a dessert that’s creamy, dreamy, and utterly irresistible. From the chocolate-infused layers of graham crackers to the rich, smooth ganache topping, every component harmonizes beautifully to create a truly memorable dessert. And if you’re a fan of cookies and cream, you absolutely must check out our Oreo Icebox Cake – another no-bake wonder that’s a cookies-and-cream dream come true!
Beyond its incredible taste, this chocolate icebox cake is a fantastic choice for its sheer convenience and make-ahead versatility. It’s perfect for busy hosts, novice bakers, or anyone who simply wants a show-stopping dessert without the fuss. The preparation is straightforward, involving simple mixing and layering, which means you can spend less time in the kitchen and more time enjoying your friends and family. The magical transformation happens in your refrigerator (or freezer!), where the layers meld together, softening the graham crackers into a delightful cake-like texture. This hands-off approach makes it an ideal make-ahead dessert, allowing the flavors to deepen and the textures to become even more perfect over time. Get ready to impress with minimal effort and maximum flavor!
Essential Ingredients for Your Decadent Chocolate Icebox Cake
Crafting this luscious no-bake chocolate icebox cake requires a few simple, readily available ingredients that come together to create a complex and satisfying dessert. You’ll find a complete list of all measurements, ingredients, and detailed instructions in the printable recipe card located at the very end of this post. Having everything measured out and ready before you begin will ensure a smooth and enjoyable preparation process for your irresistible dessert.
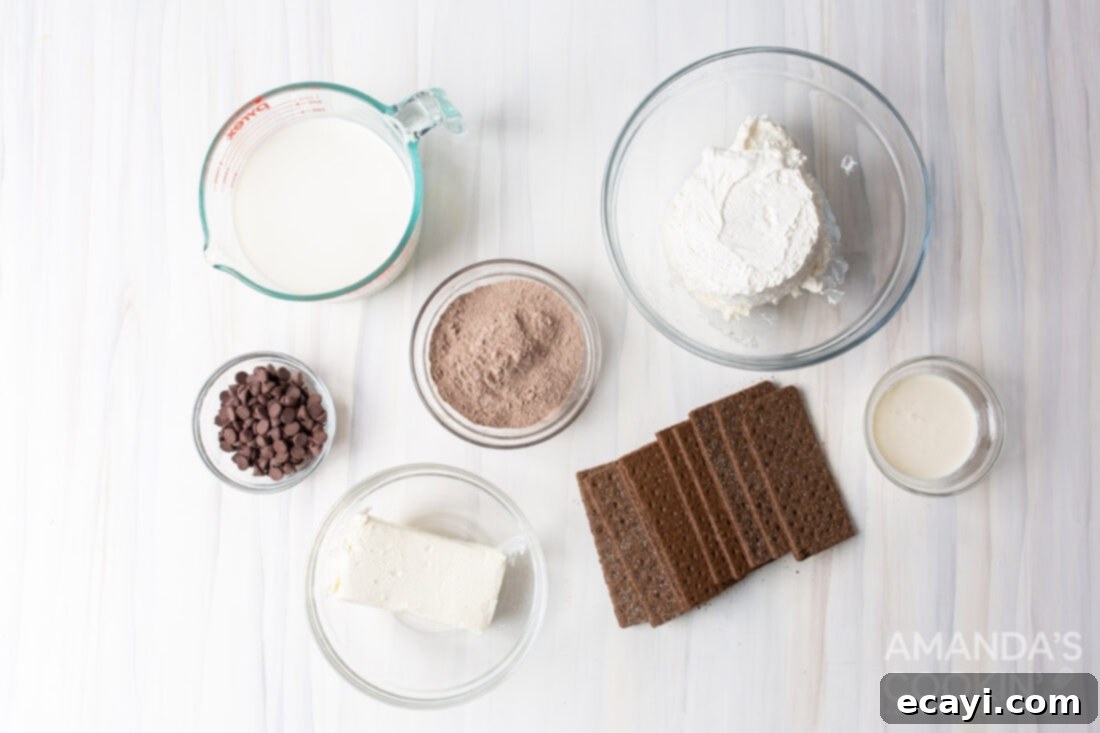
Ingredient Spotlight & Smart Substitutions for Perfect Results
Understanding each component and knowing when and how to make substitutions can elevate your icebox cake experience. Here’s a closer look at the key ingredients and some helpful tips:
WHIPPED CREAM – For ultimate convenience and consistent results, we’ve opted for a container of ready-to-use Cool Whip. Its light, airy texture and sweet flavor perfectly complement the rich chocolate layers without any extra fuss. However, if you prefer the fresh taste and control of homemade, whipping up your own is simple! You’ll need heavy whipping cream, a touch of granulated sugar, and pure vanilla extract. Combine these in a chilled bowl and beat on high speed using a stand mixer or handheld mixer until medium to stiff peaks form. Be vigilant not to overbeat, as this can cause the whipped cream to separate and become grainy. Homemade whipped cream offers a slightly richer, more natural flavor that truly shines with the chocolate layers.
PUDDING – The secret to our smooth, creamy, and quickly setting filling is the use of instant chocolate pudding mix. This type of pudding solidifies without requiring any cooking, making it ideal for a no-bake recipe. It is crucial to use only the dry pudding powder from the box; disregard the milk and other ingredients typically listed on the package for preparing pudding. We’ll be mixing the powder directly into our cream cheese base to create a dense, decadent layer that forms the heart of this icebox cake. Feel free to experiment with different types of instant chocolate pudding, such as dark chocolate or milk chocolate, to customize the intensity of your dessert’s flavor to your preference.
GRAHAM CRACKERS – To truly amplify the chocolate factor and create an intensely cocoa-rich dessert, chocolate graham crackers are highly recommended. They imbue every layer with an extra dimension of cocoa flavor, making this chocolate icebox cake exceptionally decadent. If you prefer a slightly less intense chocolate experience, or simply can’t find chocolate graham crackers, traditional honey graham crackers make an excellent substitute. They still provide the classic crunchy base that softens beautifully into a cake-like consistency as it chills. For a unique twist or if you’re looking for alternatives, consider using Oreo thins (without the cream filling), plain digestive biscuits, or even chocolate wafers. The goal is to have a sturdy, rectangular cookie that can absorb the moisture from the pudding mixture to create that iconic, tender icebox cake texture.
CREAM CHEESE – Always ensure your cream cheese is softened to room temperature before you begin mixing. This is a vital step for achieving a perfectly smooth, homogeneous, and lump-free pudding mixture. Cold cream cheese is firm and will not blend easily, leading to a clumpy texture that compromises the final appeal and deliciousness of your icebox cake. A smart trick to speed up the softening process is to unwrap the block of cream cheese, slice it into smaller cubes, and spread them out on a plate. Leave the cubes on the counter for about 20-30 minutes, allowing them to soften more quickly and evenly throughout.
CHOCOLATE CHIPS (for Ganache) – Semi-sweet chocolate chips are typically perfect for the ganache, offering a balanced sweetness that isn’t overly rich. For those who love a deeper, more intense chocolate flavor, dark chocolate chips can be used. Alternatively, if you prefer a sweeter, creamier ganache, milk chocolate chips would be a good choice. Always use good quality chocolate chips for the best results, as they melt more smoothly and contribute significantly to the luxurious texture of the ganache.
Step-by-Step Guide: Crafting Your Chocolate Icebox Cake
These detailed step-by-step photos and instructions are provided to help you visualize each stage of making this delectable dessert. For a convenient printable version of this recipe, complete with precise measurements and instructions, you can Jump to the Recipe Card at the bottom of this post.
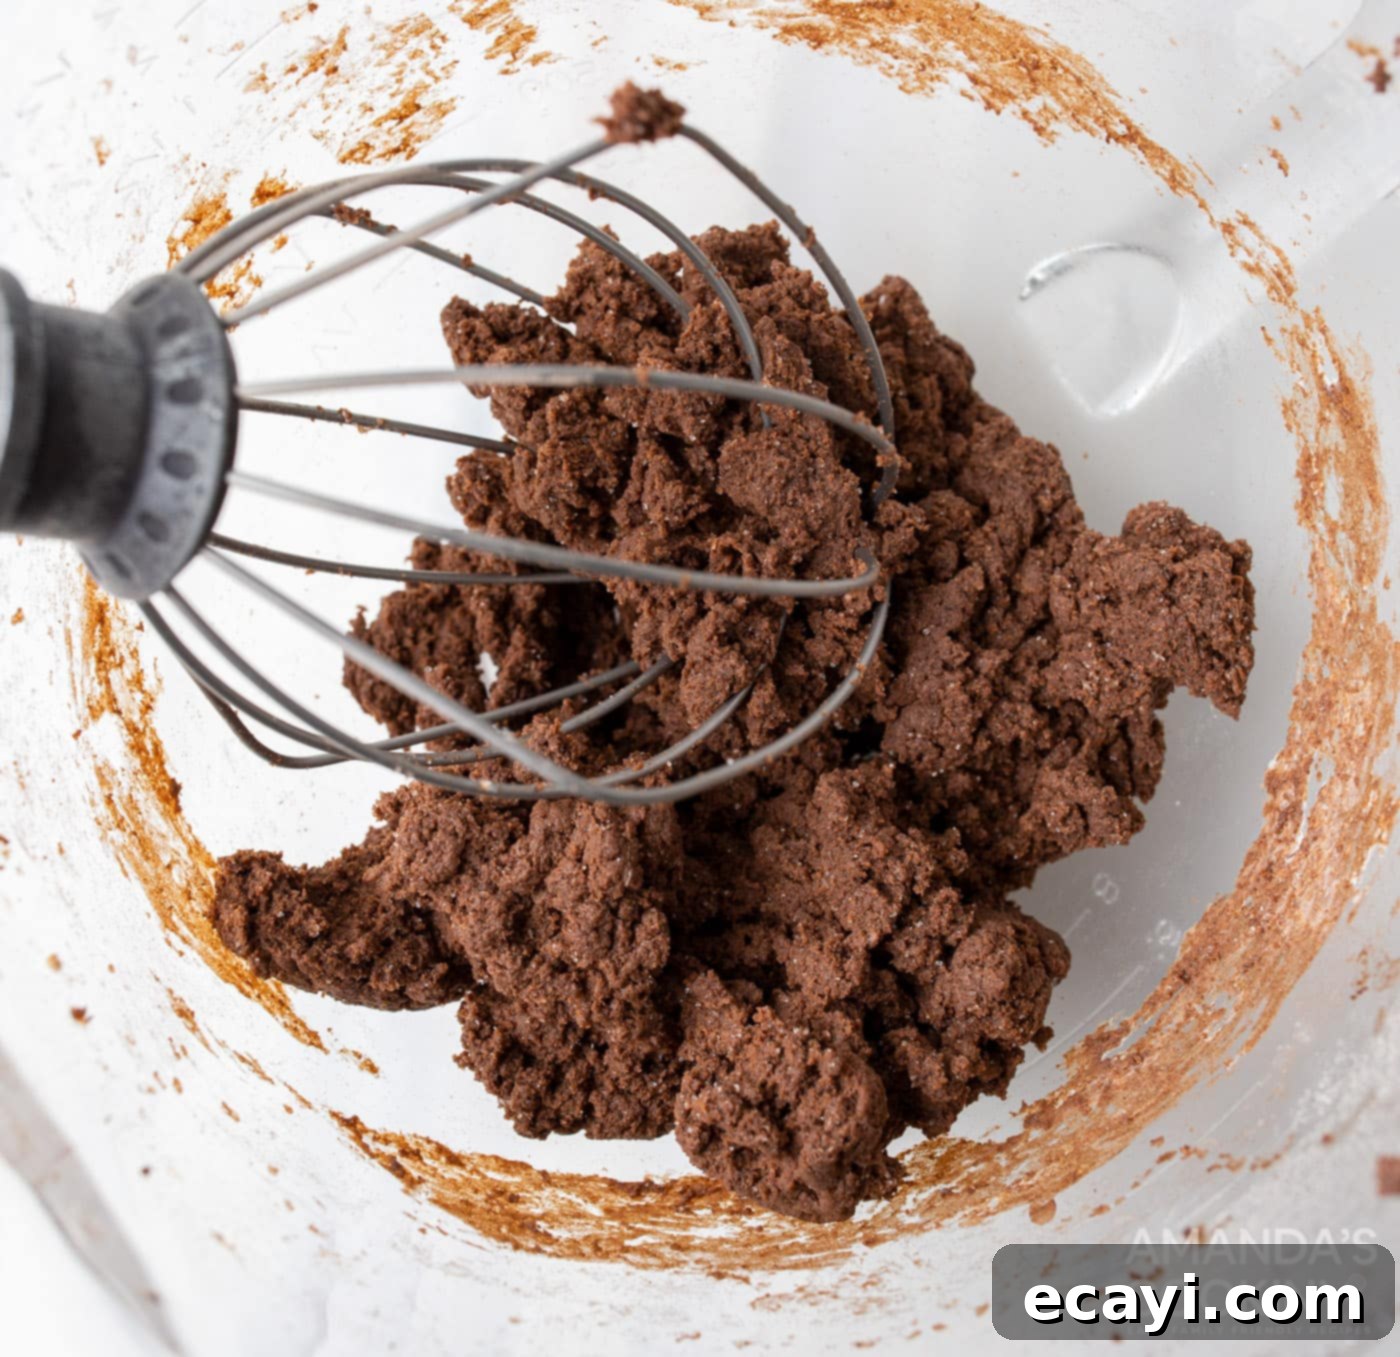
- **Prepare the Cream Cheese Base:** In a large mixing bowl, beat the softened cream cheese using either a stand mixer fitted with a paddle attachment or a handheld mixer. Beat on medium-high speed for approximately 2 minutes until the cream cheese is light, smooth, and fluffy. This initial aeration is key to achieving a perfectly creamy, lump-free texture for your filling.
- **Incorporate the Pudding Mix:** To the same bowl, add the instant chocolate pudding powder. Continue to blend with your mixer on low speed, gradually increasing to medium, until the pudding powder is fully incorporated and the mixture achieves a uniform, lump-free consistency. Make sure to scrape down the sides of the bowl as needed to ensure everything is well combined and evenly mixed.

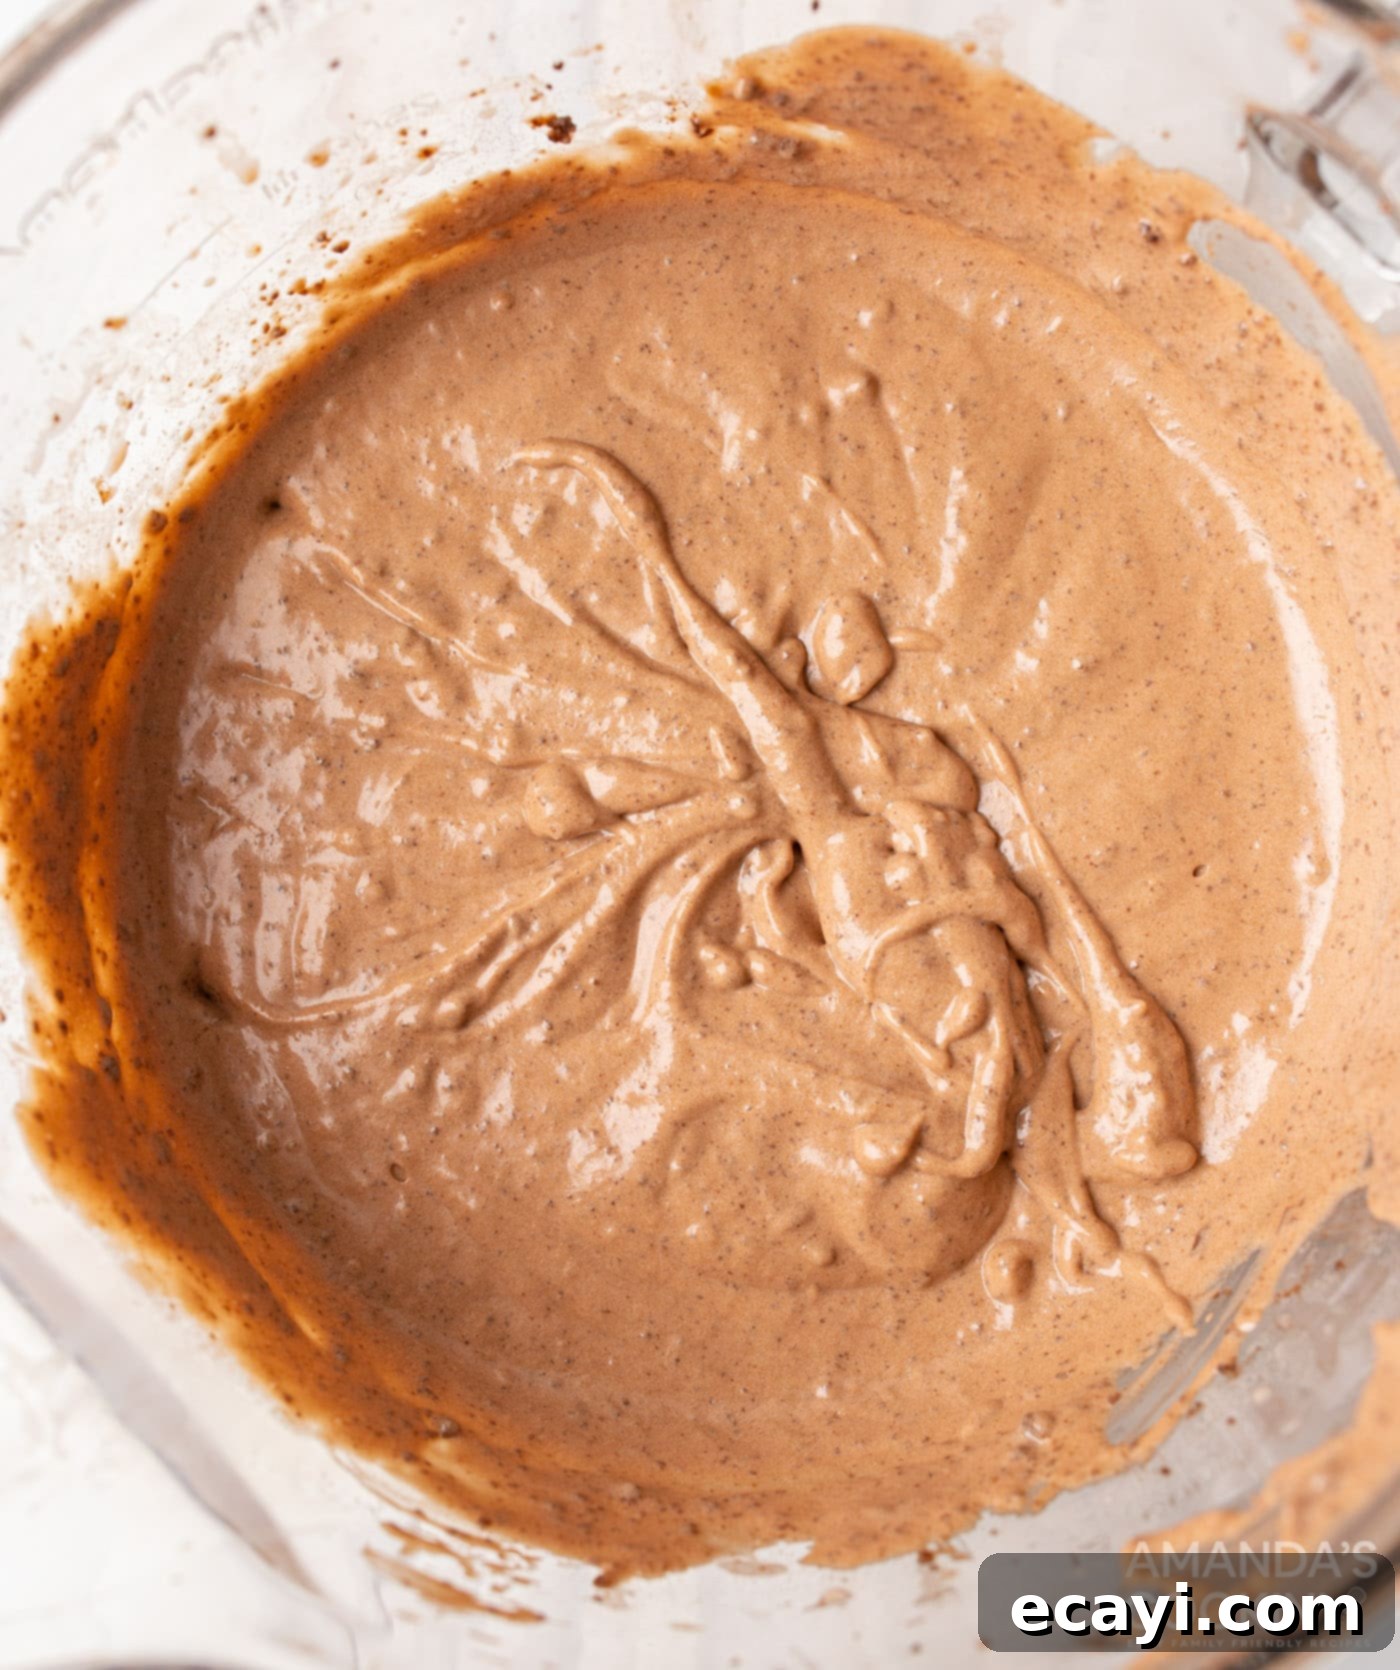
- **Add the Milk:** With the mixer still running on low speed, slowly pour in the cold whole milk. Continue mixing until almost all lumps have disappeared and the mixture is smooth and velvety. Be patient during this step; thorough mixing ensures a homogenous and wonderfully creamy pudding.

- **Fold in Whipped Topping:** Gently add the Cool Whip (or your freshly made homemade whipped cream) to the chocolate pudding mixture. Using a rubber spatula, carefully fold the whipped topping into the mixture until just combined. The goal is to maintain its airy texture, so avoid overmixing, which can deflate the whipped cream.
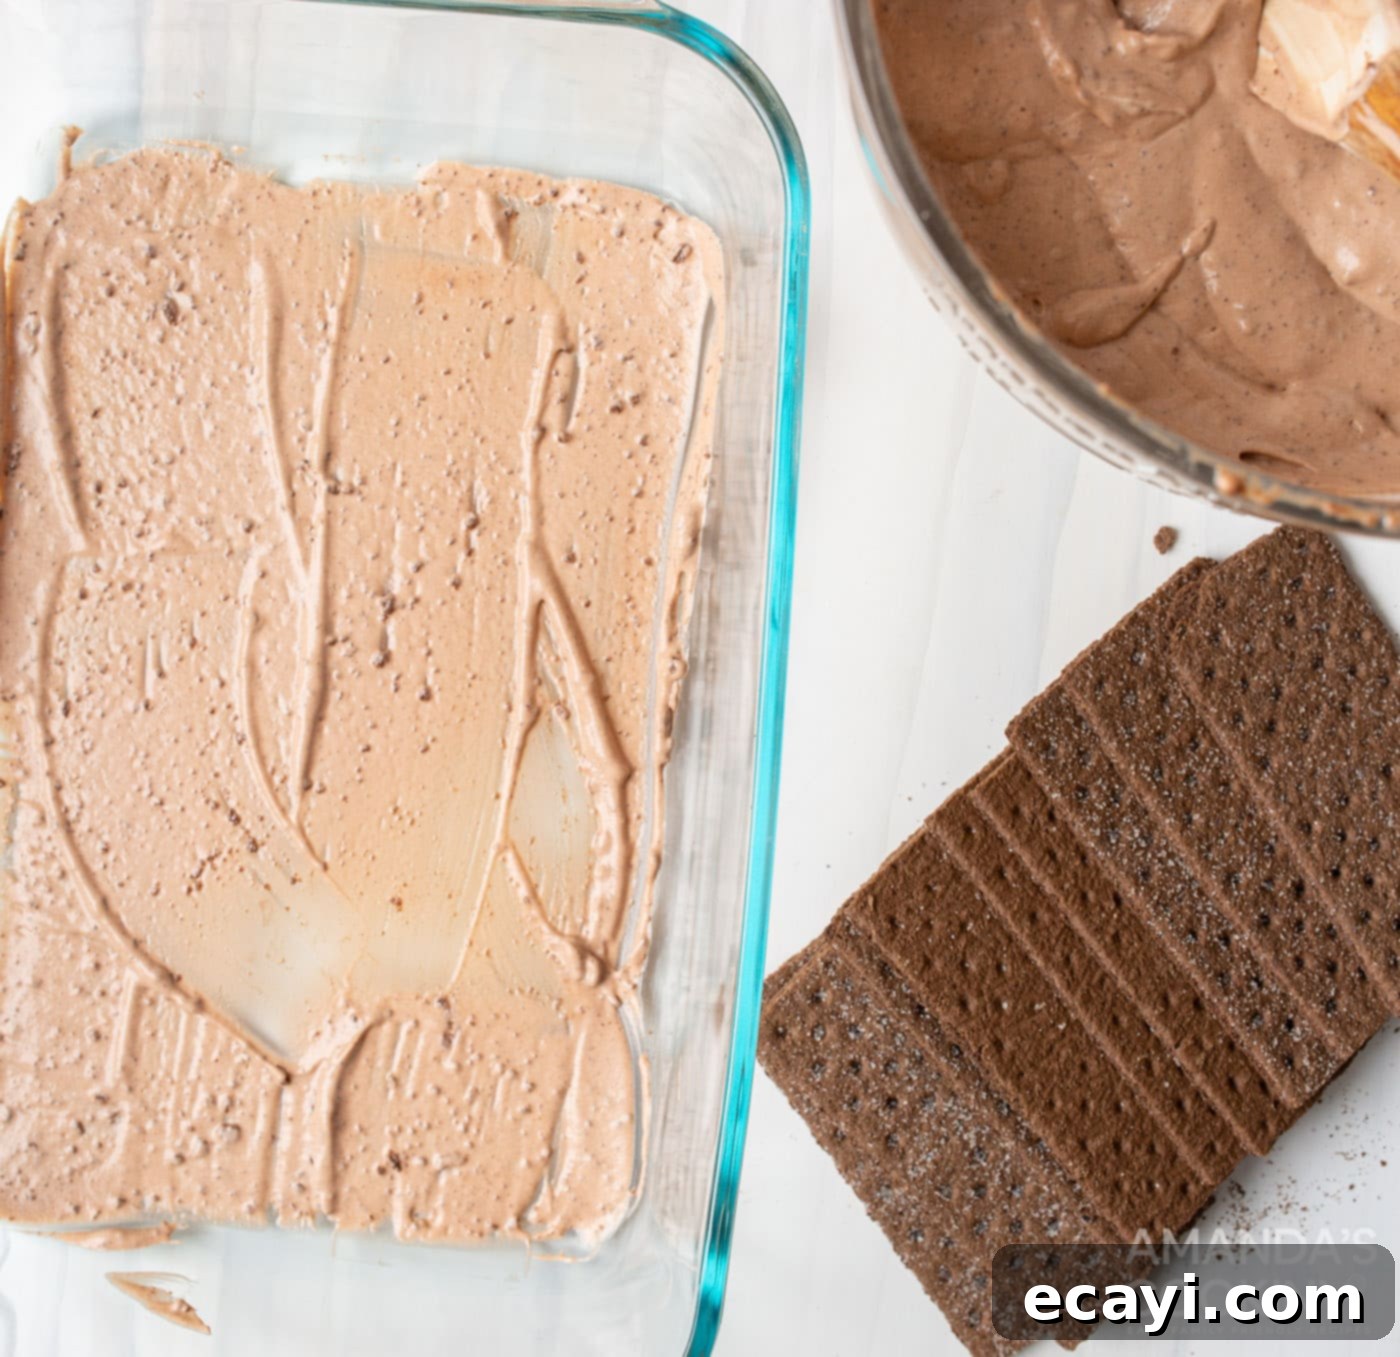
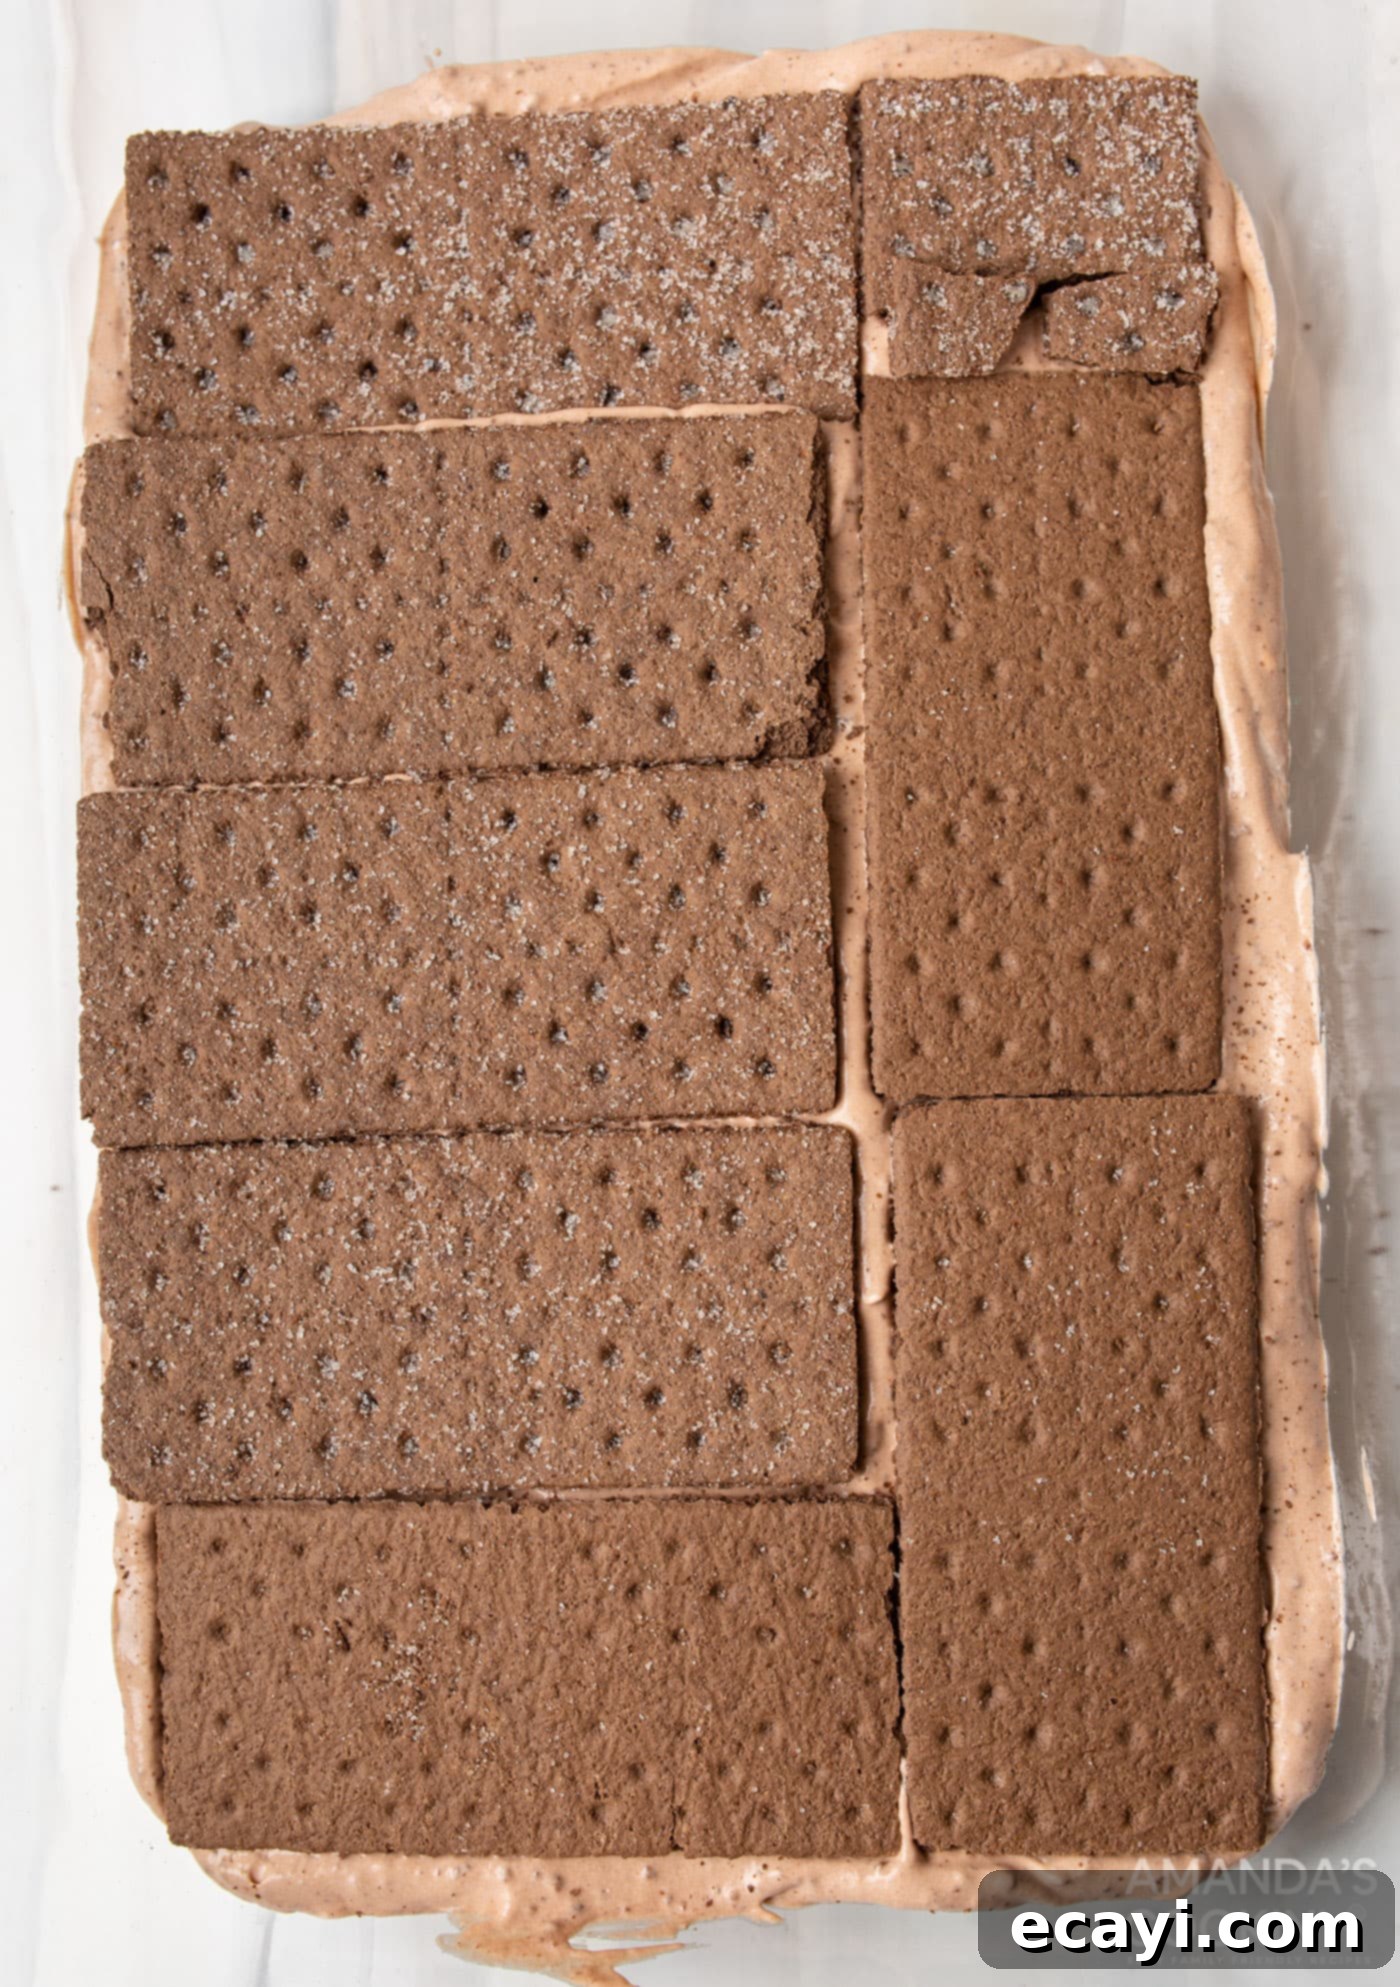
- **First Layer of Pudding and Crackers:** Prepare a 9×13-inch casserole dish. Spread about 1/2 cup of the chocolate pudding mixture evenly across the bottom of the dish. This forms the foundational layer and helps prevent the graham crackers from sliding. Then, arrange a single layer of chocolate graham crackers directly over the pudding. Don’t worry if they don’t fit perfectly; you can easily break pieces to fill in any gaps and ensure the entire surface is covered. This helps create a cohesive structure when the cake sets.


- **Second Pudding Layer:** Pour half of the *remaining* pudding mixture on top of the first graham cracker layer and spread it out smoothly and evenly with your spatula. This creates another thick, creamy layer that will infuse the crackers with moisture, contributing to the cake-like texture.
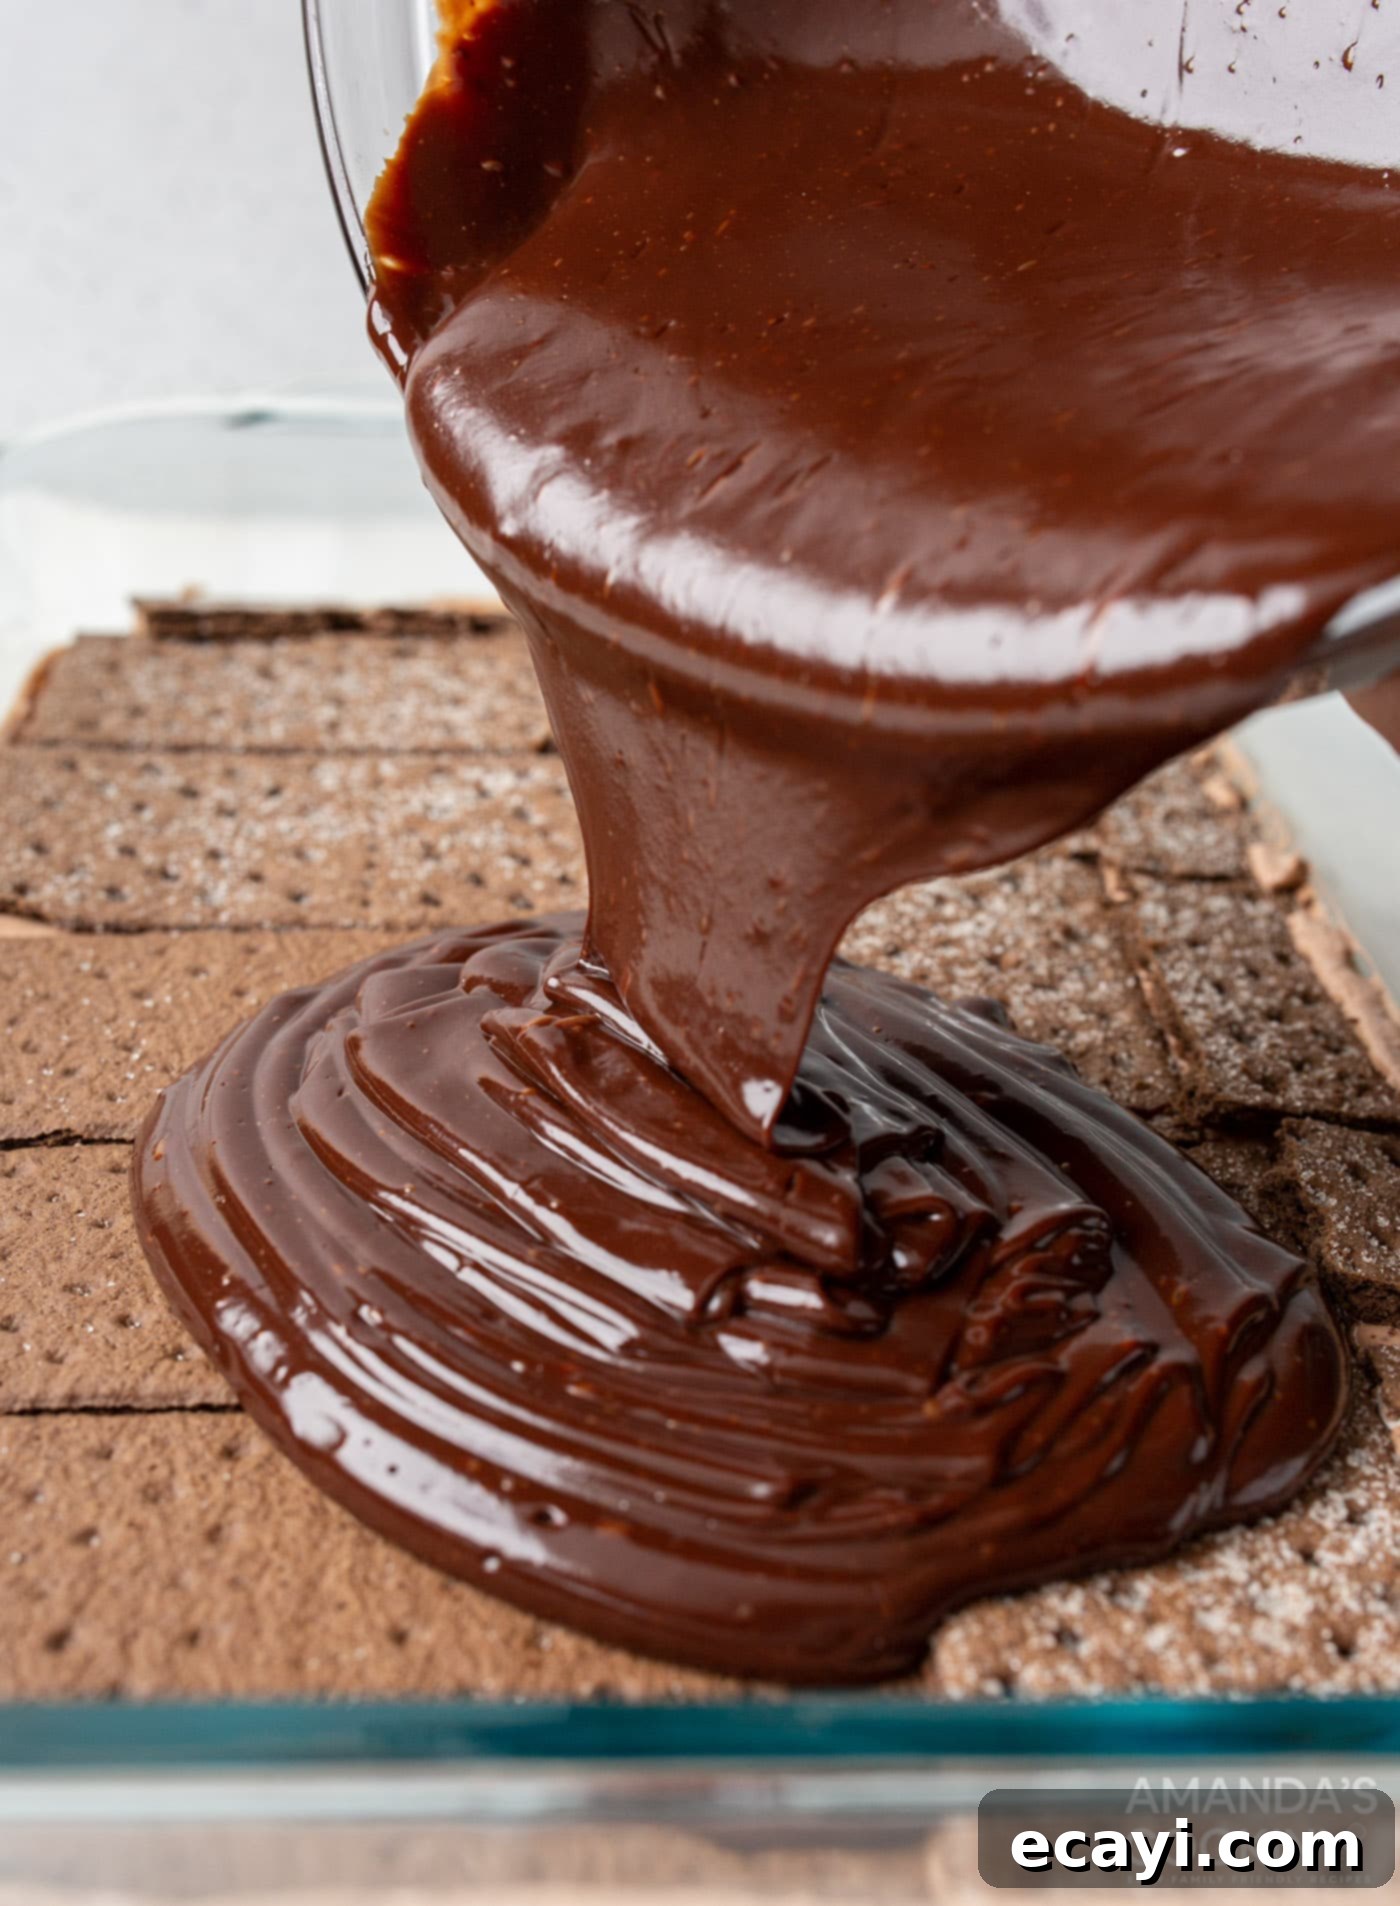
- **Repeat Layers & Ganache Topping:** Continue the layering process: add another full layer of graham crackers, then the remaining pudding mixture, followed by a final, top layer of graham crackers. For the grand finale, generously pour the freshly prepared chocolate ganache over the top, spreading it evenly to cover the entire surface of the cake. This final layer of rich, glossy ganache will set beautifully, adding both visual appeal and an intense chocolate finish.

- **Prepare the Chocolate Ganache:** In a microwave-safe bowl, heat the heavy whipping cream for 30 seconds to 1 minute, or until it is hot but not boiling. Immediately add the semi-sweet chocolate chips to the hot cream. Let it sit undisturbed for 1-2 minutes to allow the chocolate to melt thoroughly. Then, whisk vigorously until the mixture is completely smooth, glossy, and uniform in consistency. If necessary, microwave for a few more seconds and whisk again until fully melted and combined.
- **Chill to Perfection:** Once assembled, your chocolate icebox cake needs ample time to chill and set. You have two excellent options: either freeze it for a minimum of 4 hours or refrigerate it overnight (ideally for at least 8 hours). Freezing for the specified time will result in firmer slices, making it easier to achieve clean, neat cuts, which is great for presentation. If frozen, remove the cake from the freezer and let it sit on your counter for 15-20 minutes before slicing to allow it to soften slightly, ensuring a perfect, enjoyable texture. If refrigerating, an overnight chill is highly recommended for the graham crackers to fully absorb the moisture and become wonderfully tender and cake-like.
Frequently Asked Questions & Expert Tips for Your No-Bake Delight
Absolutely! In fact, making your chocolate icebox cake ahead of time is not only possible but highly recommended and one of its greatest advantages. The recipe explicitly calls for a minimum of 4 hours of chilling time after assembly. This crucial period allows the graham crackers to thoroughly absorb the rich cream cheese and chocolate pudding mixture. The result is a magical transformation: the crackers soften beautifully, creating a wonderfully tender, sponge-like texture that mimics a baked cake. For the best flavor development and texture, you can effortlessly prepare this dessert a full day in advance; simply store it covered in the refrigerator overnight, and it will be perfectly ready to serve, with flavors even more developed and integrated.
When a recipe specifies “softened cream cheese,” it means your cream cheese should be brought to room temperature before you begin mixing. This is a critical step that ensures a smooth, homogeneous, and lump-free dessert. Cold cream cheese is firm and will not blend easily, leading to a lumpy pudding mixture that compromises the final texture and creamy mouthfeel of your icebox cake. A smart trick to speed up the softening process is to unwrap the block of cream cheese, slice it into smaller cubes, and spread them out on a plate. Leave the cubes on the counter for about 20-30 minutes, allowing them to soften more quickly and evenly throughout. This small step makes a big difference in the final outcome!
Yes, this chocolate icebox cake freezes beautifully, making it an excellent option for long-term storage or enjoying a slice whenever a craving strikes. To freeze it effectively, we recommend a method called “flash freezing.” First, slice the cake into individual servings. Arrange these slices on a baking sheet lined with wax paper or parchment paper, ensuring they don’t touch. Place the baking sheet in the freezer for about 1-2 hours until the slices are completely firm. After flash freezing, remove them from the freezer and individually wrap each piece tightly in plastic wrap, then place them into a large freezer-safe bag or an airtight container. Flash freezing prevents the dessert from sticking to the plastic wrap and helps maintain its shape and presentation. To thaw, simply remove a desired portion from the freezer, unwrap it immediately, and place it in the refrigerator for a few hours or allow it to thaw at room temperature for about 30-60 minutes until soft enough to enjoy.
You absolutely do not *have* to freeze it for 4 hours. Refrigerating it for an extended period, ideally overnight, works perfectly well for setting the cake and allowing the flavors to meld beautifully. The primary reason we often recommend freezing it for 4 hours is to achieve exceptionally clean and neat slices. A firmer, partially frozen cake holds its structure much better during cutting, resulting in picture-perfect pieces. If presentation isn’t your top priority or you simply prefer a softer, more traditional icebox cake texture, feel free to pop it directly into the refrigerator to chill for at least 4 hours, or better yet, overnight. Either method will yield a delicious no-bake chocolate icebox cake!
Leftover chocolate icebox cake should be stored in an airtight container in the refrigerator for up to 3-4 days. This helps maintain its freshness, prevents it from drying out, and ensures it doesn’t absorb other refrigerator odors. If you anticipate having leftovers for an extended period, or simply want to keep individual portions ready, consider freezing individual slices as described in the freezing FAQ above. Properly stored, it remains a delicious treat for days!
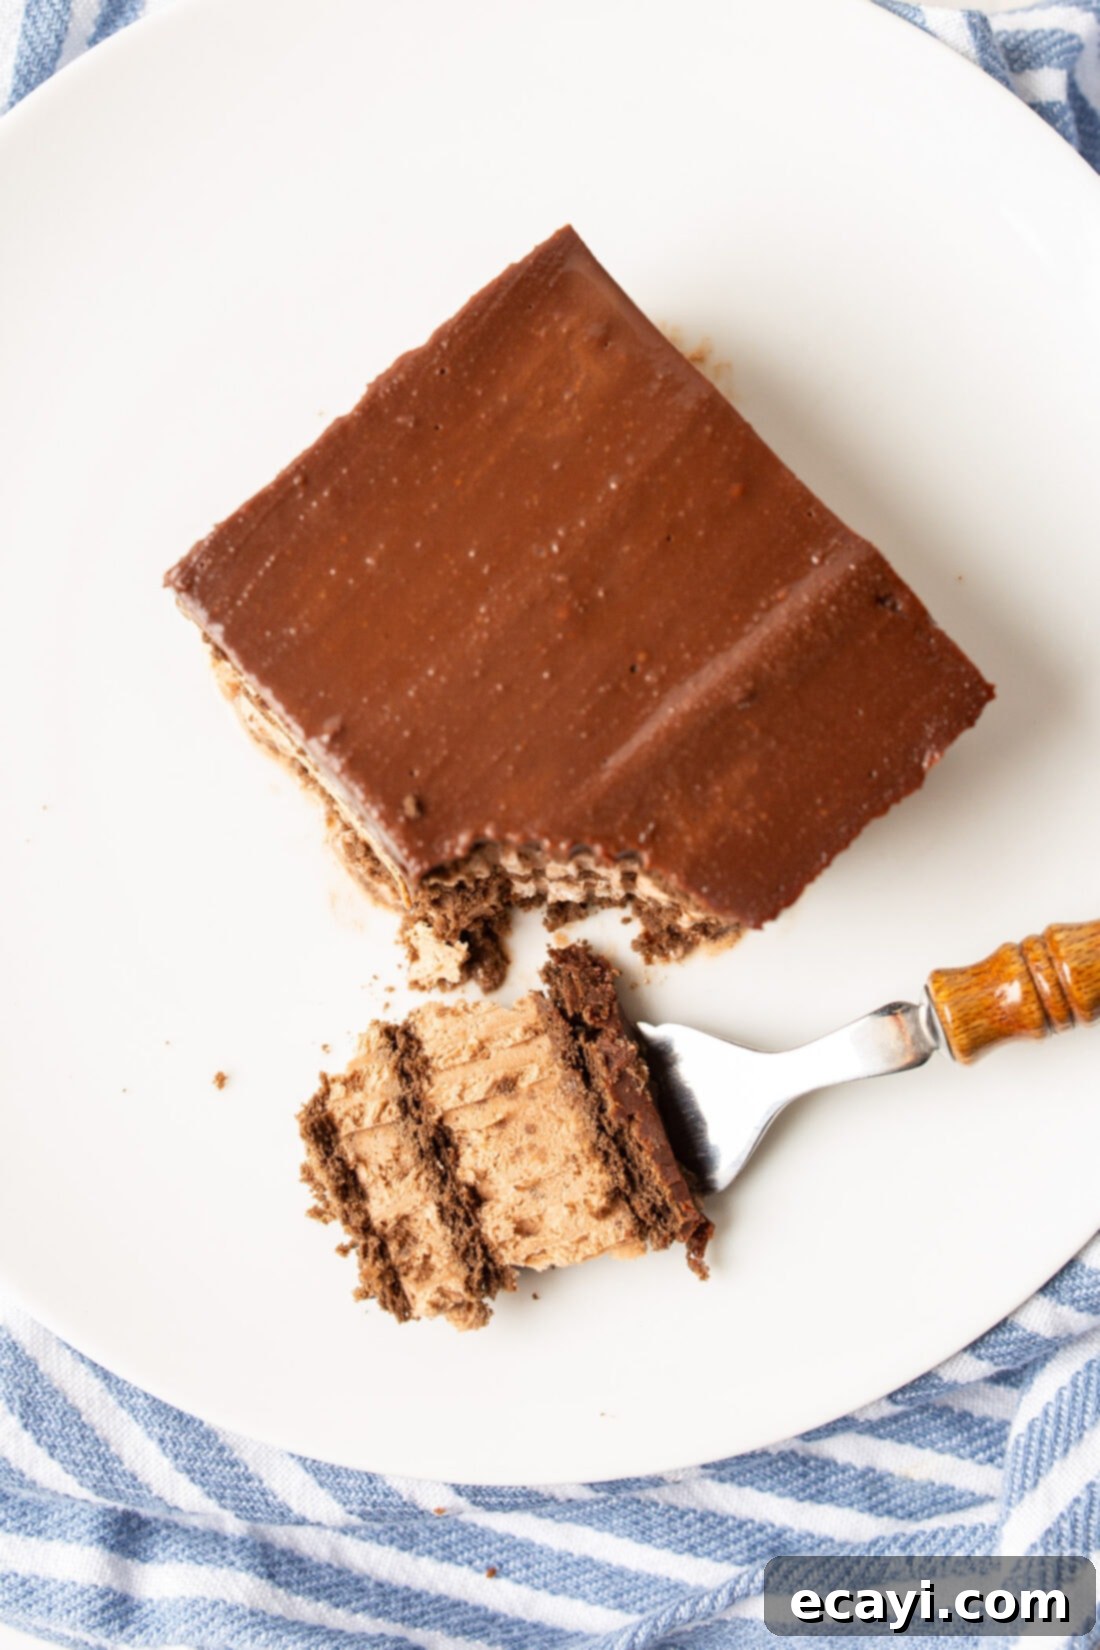
Serving Your Perfect Chocolate Icebox Cake
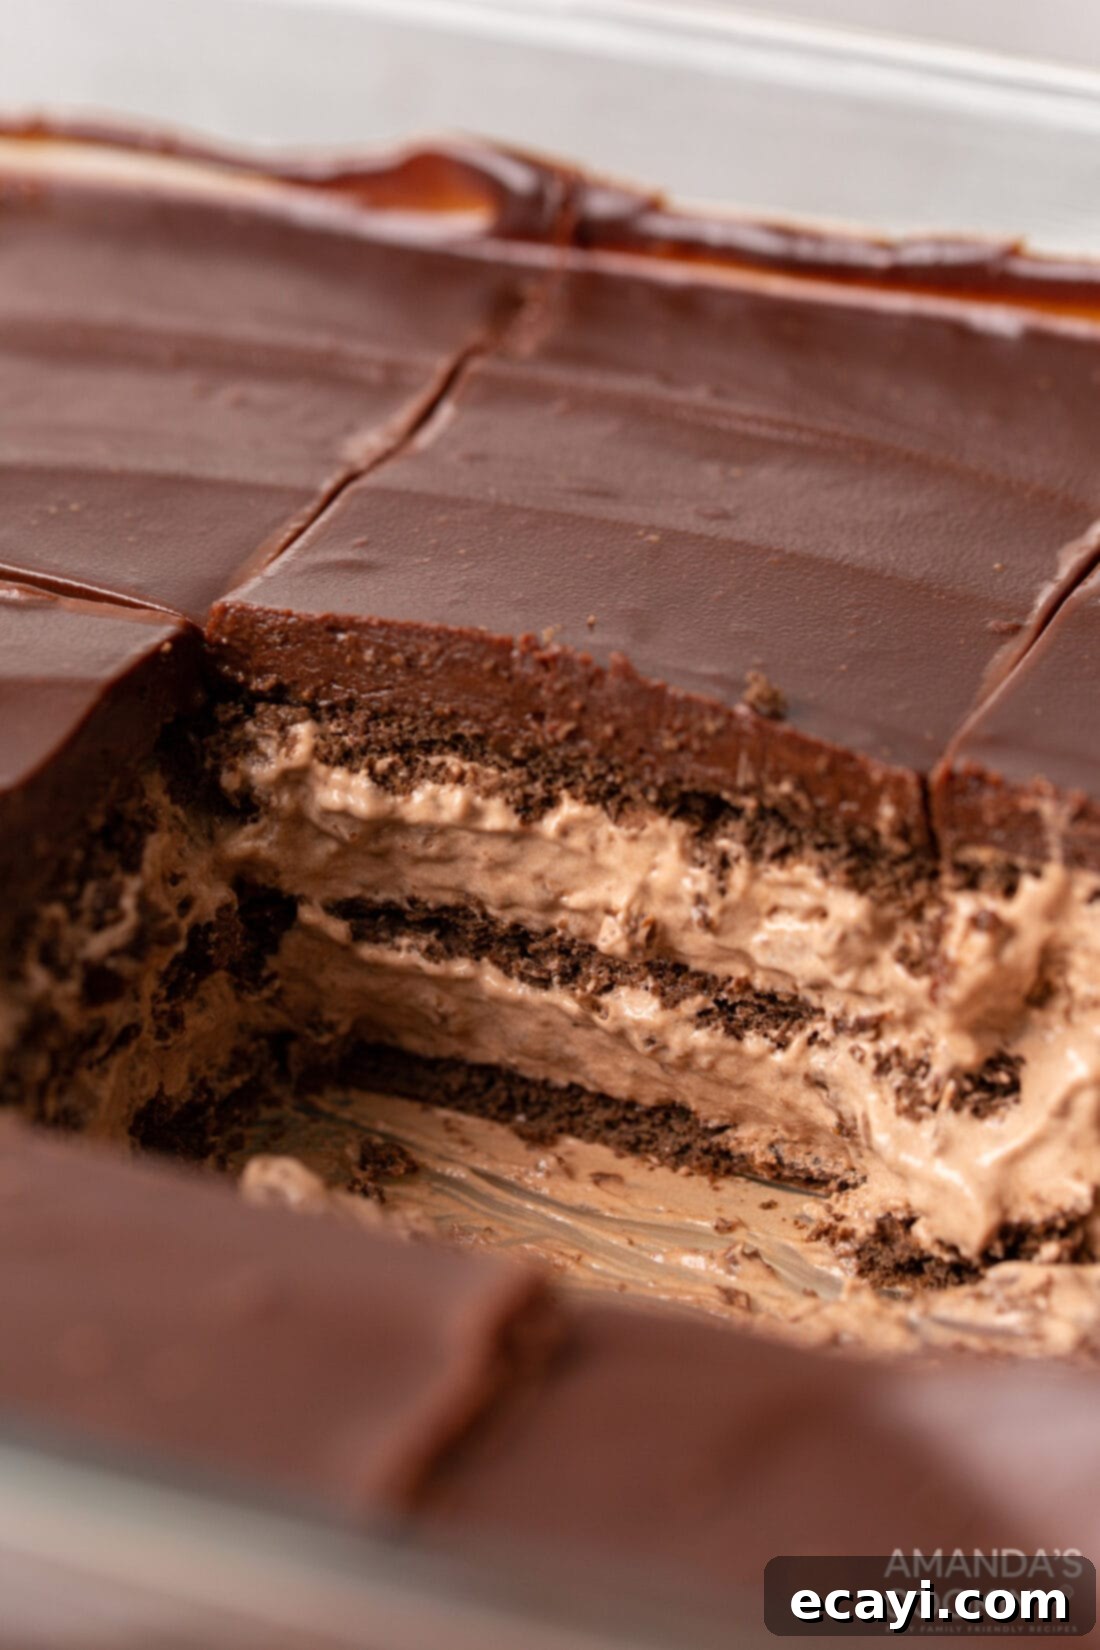
To ensure you get beautiful, clean slices of your chocolate icebox cake, a little freezer time before serving is your best friend. Popping the assembled cake into the freezer for about 30 minutes (after its initial chill) can make a remarkable difference in its presentation, allowing for crisp, defined cuts. Once sliced, you can enhance its visual appeal and flavor with various toppings. Consider a delicate dusting of high-quality cocoa powder, a sprinkle of elegant shaved chocolate curls, a scattering of mini chocolate chips for added visual interest, or even a few crushed chocolate graham cracker crumbs for an extra layer of texture and nostalgic crunch. A generous dollop of extra whipped cream is also always a welcome addition!
This chocolate icebox cake is surprisingly light yet incredibly satisfying, making it an ideal dessert to enjoy after dinner without feeling too heavy. Its rich flavor, elegant layered appearance, and no-bake convenience also make it a fantastic alternative to a traditional baked birthday cake, offering a unique and refreshing twist for any celebration. Moreover, its easy preparation and ability to be made ahead of time make it a perfect candidate for potlucks, family gatherings, picnics, or any party where you want to bring a crowd-pleasing dessert that requires minimal last-minute effort. Prepare to receive rave reviews and requests for the recipe!
Explore More Delightful No-Bake Icebox Cake Recipes
If you’ve fallen in love with the ease and deliciousness of this chocolate icebox cake, you’ll be thrilled to discover the incredible versatility of no-bake desserts. We have a treasure trove of other fantastic icebox cake recipes that are just as simple to make and equally delightful. Each offers a unique flavor profile, perfect for satisfying any craving or occasion:
- Lemon Icebox Cake
- Tiramisu Icebox Cake
- S’mores Icebox Cake
- Funfetti Icebox Cake
- Strawberry Icebox Cake
- Lemon Blueberry Icebox Cake
- Orange Icebox Cake
- Mixed Berry Icebox Cake
I absolutely adore creating and sharing my kitchen adventures and recipes with all of you! It can be challenging to remember to check back daily for new culinary inspiration, which is why I offer a convenient newsletter delivering a fresh recipe directly to your inbox every time a new one is posted. Simply subscribe here to start receiving your free daily recipes and never miss out on a delicious new idea!
Chocolate Icebox Cake
IMPORTANT – For additional insights, tips, and troubleshooting, be sure to check the Frequently Asked Questions (FAQ) section within the blog post above. It’s packed with helpful information!
Print Recipe
Pin It
Rate & Review It
Save RecipeSaved!
Ingredients
- 8 oz cream cheese softened to room temperature
- 6 oz instant chocolate pudding mix (powder only, do not prepare as directed on box)
- 2 ½ cups whole milk
- 8 oz Cool Whip (1 container, or 3 cups homemade whipped cream)
- 14.4 oz chocolate graham crackers (1 box)
For the Ganache
- 1 cup heavy whipping cream
- 3 cups semi-sweet chocolate chips
Equipment You’ll Need
-
9×13 baking dish
-
Hand mixer (or stand mixer)
-
Rubber spatula
Recipe Notes & Tips
- For an extra touch of elegance and flavor, consider garnishing your chocolate icebox cake with shaved chocolate curls, mini chocolate chips, or a sprinkle of crushed graham crackers on top of the ganache just before serving.
- Ensure your cream cheese is at room temperature for a smooth, lump-free filling. Speed this up by cutting it into cubes.
- Allow plenty of chilling time – at least 4 hours, but overnight is best – for the graham crackers to fully soften and the flavors to meld beautifully.
Instructions
-
In a large bowl, using a stand mixer or handheld mixer, beat the softened cream cheese until it is light and fluffy, which usually takes about 2 minutes. Ensure no lumps remain for a silky smooth base.
-
Add the instant chocolate pudding powder to the same bowl. Continue mixing with the stand mixer until the powder is fully incorporated and the mixture is uniform in consistency. Scrape down the sides of the bowl to ensure everything is well blended.
-
Slowly pour in the whole milk while the mixer is running on low speed. Mix until any minimal lumps are gone and the pudding mixture becomes smooth and creamy.
-
Gently add the Cool Whip (or your homemade whipped topping). Using a rubber spatula, carefully fold the Cool Whip into the chocolate pudding mixture until just combined and airy. Avoid overmixing.
-
In a 9×13 casserole dish, spread about 1/2 cup of the prepared pudding mixture evenly over the bottom. This acts as the base layer. Then, arrange a single layer of chocolate graham crackers over the pudding, breaking pieces as necessary to fit snugly and cover the entire bottom of the dish.
-
Pour half of the remaining pudding mixture on top of the graham cracker layer and spread it out evenly using your spatula.
-
Repeat the layering sequence: add another layer of graham crackers, followed by the rest of the pudding mixture, and then a final layer of graham crackers. Top the entire cake generously with the freshly made chocolate ganache.
-
To make the chocolate ganache: microwave the heavy whipping cream in a bowl for 30 seconds to 1 minute until hot. Add the semi-sweet chocolate chips to the hot cream, let sit for 1-2 minutes, then whisk until completely smooth and glossy.
-
Chill the icebox cake for at least 4 hours in the freezer OR overnight in the refrigerator. For easier, cleaner slices, freezing is recommended. If frozen, remove from the freezer and allow to sit at room temperature for 15-20 minutes to soften slightly before cutting and serving.
Nutrition Information
The recipes on this blog are tested with a conventional gas oven and gas stovetop. It’s important to note that some ovens, especially as they age, can cook and bake inconsistently. Using an inexpensive oven thermometer can assure you that your oven is truly heating to the proper temperature. If you use a toaster oven or countertop oven, please keep in mind that they may not distribute heat the same as a conventional full sized oven and you may need to adjust your cooking/baking times. In the case of recipes made with a pressure cooker, air fryer, slow cooker, or other appliance, a link to the appliances we use is listed within each respective recipe. For baking recipes where measurements are given by weight, please note that results may not be the same if cups are used instead, and we can’t guarantee success with that method.
