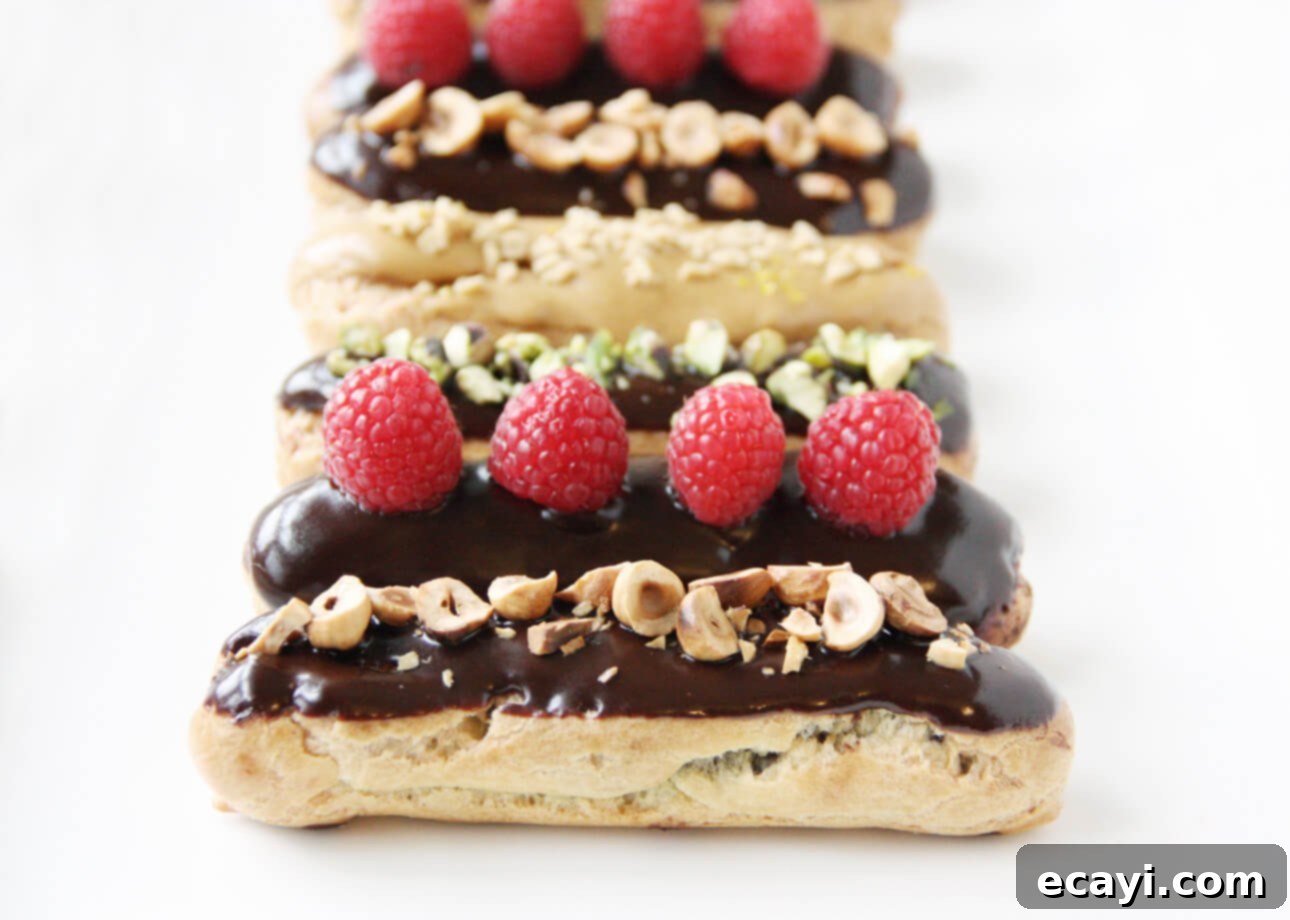
Mastering the Art of Chocolate Éclairs: A Step-by-Step Recipe Guide to French Pastry Perfection
Unlock the secrets to crafting perfect chocolate éclairs, the iconic French treat, with this comprehensive, step-by-step recipe, complete with expert tips and an insightful video class!
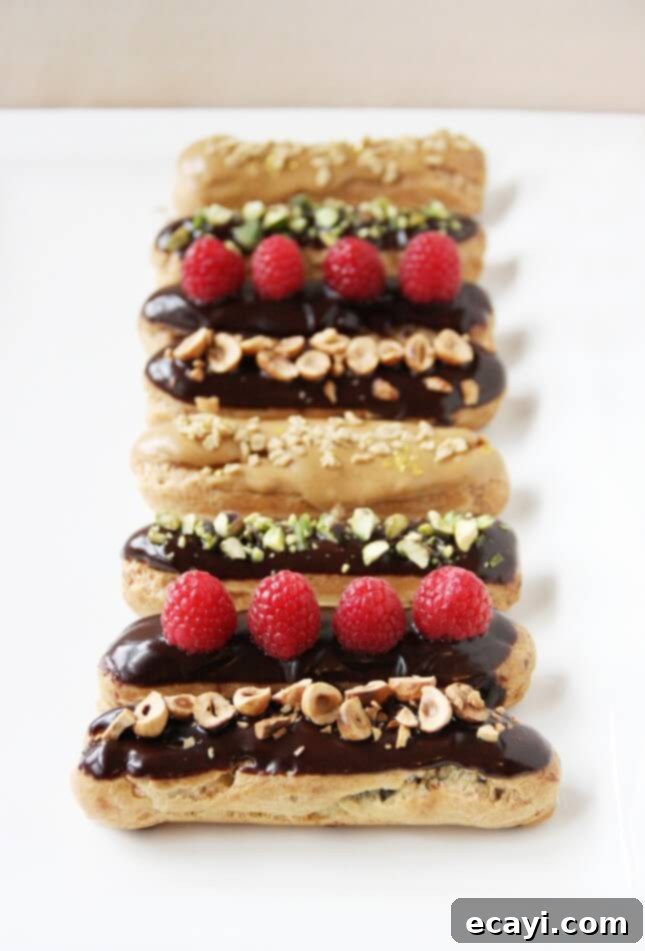
The culinary world is abuzz with a delightful revelation: many experts are now proclaiming that éclairs are captivating dessert enthusiasts, much like macarons once did. For centuries, this classic French pastry, elegantly defined by the prestigious Larousse Gastronomique as a “small elongated pastry made with choux pastry, filled with cream, and glazed with fondant,” held a cherished, albeit predictable, place in traditional pâtisserie displays. For over 160 years, the éclair was a beloved staple, most often presented in comforting, classic flavors like rich chocolate, aromatic coffee, and sweet caramel. Many French people fondly remember growing up with éclairs as a special treat, a delightful indulgence for celebrations or a simple weekend pleasure. However, until recently, it was uncommon to hear someone return from a trip to Paris exclaiming about an extraordinary éclair; more vibrant and diverse confections, such as the colorful macarons, were typically the ones leaving memorable impressions.
So, what exactly triggered this remarkable resurgence and propelled the once-traditional éclair into a new era of global popularity? A significant portion of this credit belongs to the visionary French chef Christophe Adam. After a dedicated 15-year tenure at Fauchon, the renowned Parisian gourmet food emporium, Adam embarked on a mission to redefine the éclair’s potential. It was at Fauchon where I personally discovered that the éclair could transcend its classic alter ego and become something truly extraordinary. Each September, Fauchon hosts an exclusive “Éclair Week” at its iconic Place de la Madeleine location, and I was fortunate enough to experience this culinary event in 2009. There, I witnessed and tasted exquisite creations that were nothing short of edible art pieces, featuring imaginative sweet and savory flavor combinations I had never imagined could be associated with the traditional éclair form.
Witness a stunning selection of Fauchon’s groundbreaking “couture” éclairs. In 2009, this visionary collection showcased an impressive range of three dozen sweet and a dozen savory éclair varieties, pushing the boundaries of what a pastry could be.
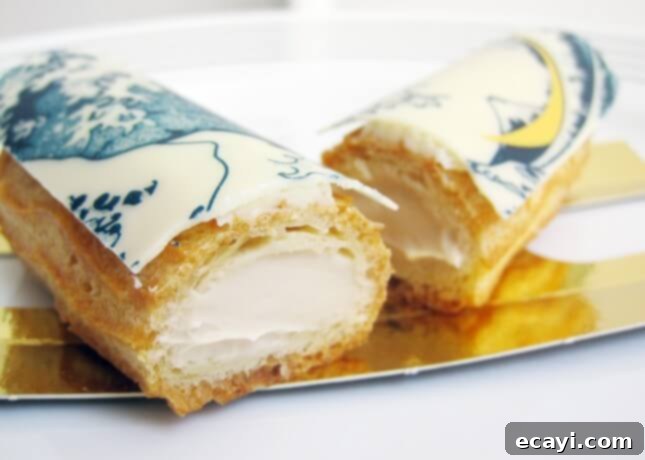
Among these remarkable pastries, one particular creation captured my heart: a vibrant éclair generously filled with a zesty lime cream, elegantly topped with tempered white chocolate. What made it uniquely unforgettable was the intricate print adorning the chocolate – my absolute favorite Japanese woodblock print, The Great Wave, by Hokusai. It felt as though this culinary masterpiece was made just for me, a perfect fusion of artistic expression and delightful flavor.
Who but Christophe Adam would conceive of filling an éclair with delicate chicken Chantilly, then adorning it with vibrant green peas and perfectly diced carrots? Adam’s bold and innovative spirit didn’t end with his time at Fauchon. After his transformative tenure, he ventured to open his own highly acclaimed shop, L’Éclair de Génie—a name that aptly translates to “Stroke of Genius.” In his exquisite boutiques, dozens of colorful sweet and savory éclairs are meticulously showcased in gleaming glass cases, each one resembling a precious jewel. These audacious and highly creative offerings swiftly propelled L’Éclair de Génie to the top of food lovers’ bucket lists, setting a new benchmark and paving the way for a multitude of other specialty pastry shops focusing on choux pastries, both in Paris and internationally. On my most recent visit to Paris this past summer, I had the pleasure of discovering Popelini, a charming establishment dedicated exclusively to selling choux creations, specifically cream puffs, further illustrating the widespread revival and appreciation for this versatile dough.
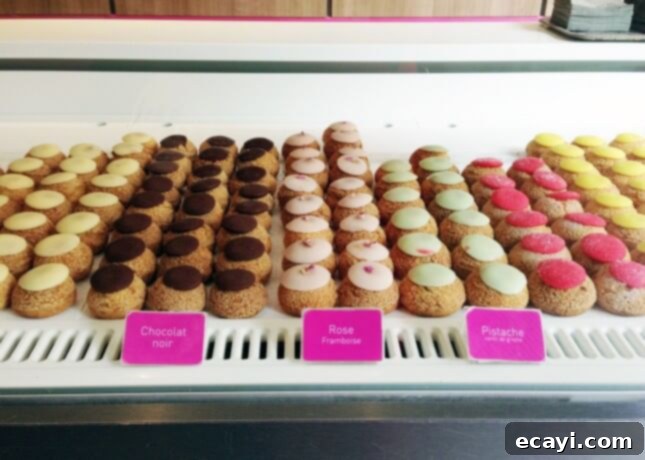
An impeccably elegant display of choux pastries, artfully lined up at Paris’ renowned Popelini, a true testament to the renewed appreciation for this versatile and delightful dough:
While the new, creatively reimagined éclairs crafted by an increasing number of talented pastry chefs around the globe are undeniably delicious and exciting, I must confess that a few timeless classics still hold an unparalleled place in my gourmande heart. At the very pinnacle of my list is the exquisite chocolate éclair from Stohrer. Paris’s oldest operating pastry shop, Pâtisserie Stohrer, has been a venerable institution on Paris’s historic rue Montorgueil since 1730. Its original owner, Nicolas Stohrer, a celebrated pastry chef who served royalty, is famously credited with inventing the iconic rum baba. More recently, in 2011, this esteemed pastry shop’s chocolate éclairs were officially declared “The Best of Paris” by Figaro Magazine. Characterized by its perfectly slender form, a deeply rich and velvety dark chocolate cream filling, and presenting an impeccable ratio of filling to delicate pastry, Stohrer’s chocolate éclair is consistently one of the first treats I seek out and indulge in whenever I visit Paris. It has since become the benchmark, the gold standard I aspire to achieve when crafting chocolate éclairs in my own home kitchen.
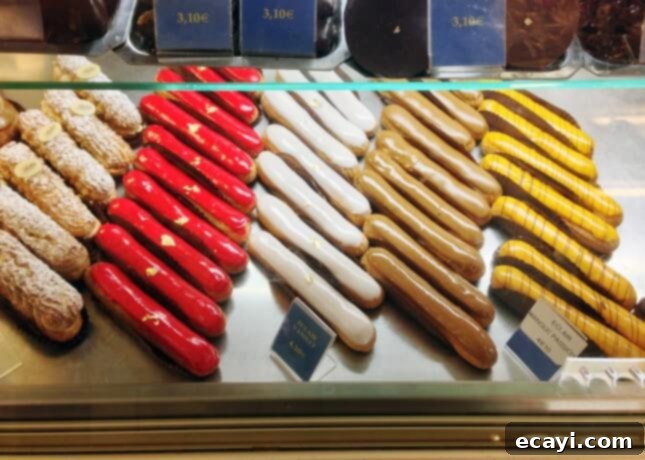
Stohrer’s elegantly curated éclair display in Paris, a visual feast that proudly showcases centuries of unwavering pastry perfection and tradition:
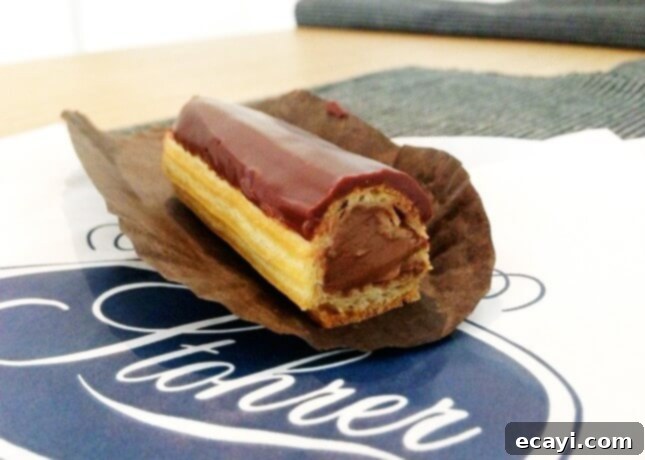
A close-up of Stohrer’s classic chocolate éclair, proudly recognized as “The Best Éclair in Paris” by Figaro Magazine in 2011—a true testament to its enduring quality and exquisite taste, a must-try for any pastry lover:
The Unexpected Ease and Joy of Making Chocolate Éclairs at Home
While the thought of making decadent chocolate éclairs at home might initially conjure images of intricate and challenging pastry work, causing some apprehension, you can confidently set those fears aside: they are surprisingly approachable and remarkably easy to master with a bit of guidance. Preparing these elegant French pastries from scratch is sure to elicit impressed “wows” and admiring glances from your guests, and the entire process itself is incredibly rewarding. The fundamental secret to successful éclairs lies in carefully following the instructions for creating the choux pastry – a simple yet magical dough. When prepared correctly, this versatile dough puffs up beautifully in the oven, creating a wonderfully hollow interior that is just waiting to be filled with rich, velvety pastry cream.
Through repeated practice, many bakers find that the most time-consuming aspects are often the final, delicate touches: meticulously filling, glazing, and decorating the éclairs. Piping the chocolate cream into the delicate éclair shells without creating any mess certainly requires a steady hand and some practice to perfect. However, for those seeking efficiency or a simpler approach, many professional chefs employ a clever shortcut: they carefully slice open the éclairs horizontally with a serrated knife to create neat “lids.” This method allows for the cream to be generously spooned or piped inside more quickly and evenly, ensuring a perfectly filled pastry every time. The beauty of baking éclairs is not just in the delicious outcome, but in the rewarding journey of creation.
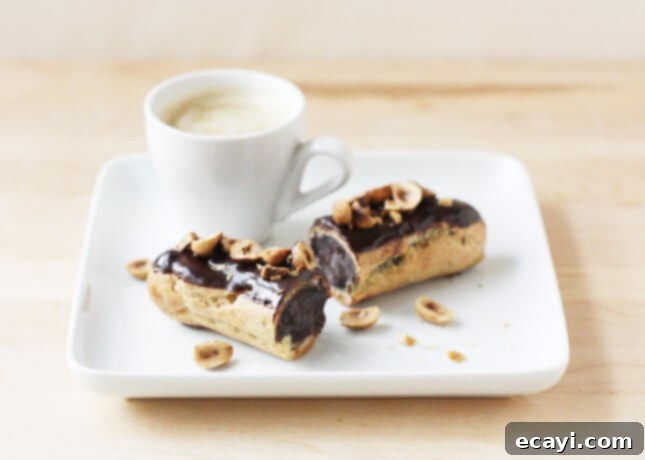
Moreover, mastering how to make chocolate éclairs adds a versatile and valuable skill to your baking repertoire. The fundamental choux pastry dough is incredibly adaptable and opens up a world of other delightful possibilities. Instead of piping the dough into elongated logs for éclairs, you can form smaller, charming mounds to create light and airy choux puffs. These can then be effortlessly transformed into delectable profiteroles, perhaps drizzled with a warm chocolate sauce and served with ice cream. If you’re feeling particularly ambitious and want to create a show-stopping centerpiece for a special occasion, these profiteroles can even be assembled into an impressive croquembouche – a towering cone of cream puffs bound together with delicate strands of caramel. Alternatively, you can easily pivot to savory creations: by simply adding cheese to the choux dough and skipping the sweet filling, you can create addictive savorygougères. These fluffy French cheese puffs are, in my opinion, among the most festive and irresistible bites imaginable, perfect as an appetizer or a sophisticated snack. Learning choux pastry truly unlocks a world of delicious and impressive culinary adventures!
Essential Tips for Successful Chocolate Éclair Making
To ensure your homemade chocolate éclairs turn out beautifully and deliciously every single time, keep these crucial and helpful tips in mind throughout your baking process:
- Prepare the Pastry Cream in Advance: This is a golden rule for many pastry projects, and especially vital for éclairs. Always make your chocolate pastry cream first, ideally a day in advance. It is absolutely imperative that the cream cools down completely and thoroughly chills in the refrigerator before you attempt to fill your delicate choux pastry shells. Attempting to fill warm or even slightly cool shells with warm cream can lead to soggy pastry and an unstable final product. A properly chilled cream will hold its shape better and provide a delightful contrast in temperature and texture.
- Bake Pastry Shells Ahead of Time: Your choux pastry shells offer fantastic flexibility as they can be baked well in advance. Once they are baked to a crisp, golden perfection, allow them to cool down entirely on a wire rack to prevent any condensation. Store them carefully in airtight storage bags or rigid containers, taking extreme care not to squash or flatten their delicate structure. These pre-baked shells will stay fresh and crisp for a couple of days at room temperature. Alternatively, for longer storage, you can freeze them for up to a month, ready to be filled whenever a craving for fresh éclairs strikes or unexpected guests arrive.
- Enjoy Éclairs Fresh: For the ultimate taste and textural experience, chocolate éclairs are truly best savored the very day they are filled. The delicate crispness of the choux pastry gradually softens as it absorbs moisture from the rich cream filling. While they will keep beautifully for a day or two in the refrigerator, their delightful initial crispness will diminish. This principle of freshness applies equally to all choux-based pastries, so plan to enjoy them promptly after assembly.
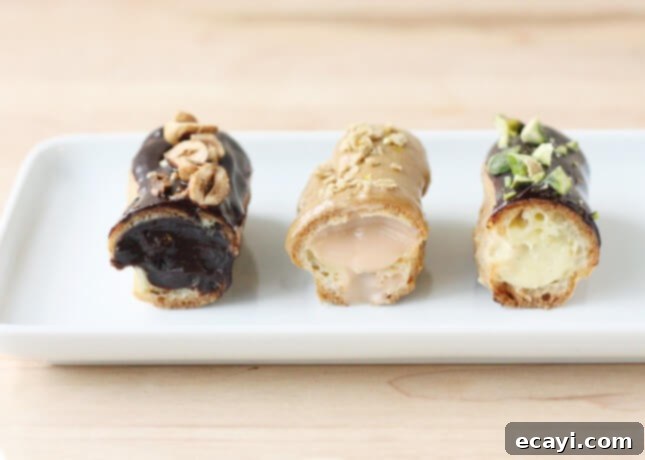
- Embrace Creativity with Flavors and Toppings: This is where you can truly unleash your culinary imagination and personalize your éclairs! The basic chocolate pastry cream provides a fantastic and versatile canvas for endless flavor variations. Experiment with different types of chocolate – use white chocolate for a sweeter, milder cream, milk chocolate for a classic balance, or intensify the experience with a darker, more bittersweet chocolate. Infuse the cream with other delightful flavors such as rich maple syrup, classic vanilla bean extract or paste, robust coffee, luscious salted caramel, vibrant pistachio paste, or tangy raspberry puree. The possibilities are truly boundless, and I can easily envision a hundred unique and exciting combinations. Similarly, elevate your toppings beyond a simple glaze for added visual appeal and textural contrast. While classic éclairs are traditionally only glazed, consider jazzing them up a bit with fresh fruits like thinly sliced strawberries, juicy raspberries, or segments of oranges. Add a delightful crunch with a sprinkle of toasted nuts such as finely chopped hazelnuts, pistachios, or almonds. For a touch of whimsy and elegance, consider a dusting of vibrant edible glitter, delicate edible stars, or even a contrasting drizzle of white chocolate or caramel. These creative additions will make your éclairs even more visually appealing and festive, perfect for any occasion from casual gatherings to elegant dinner parties.
Enhance Your Skills: Watch My Video Class on Choux Pastry!
All About Choux: Sweet and Savory Puffed Treats, from Éclairs to Gougères
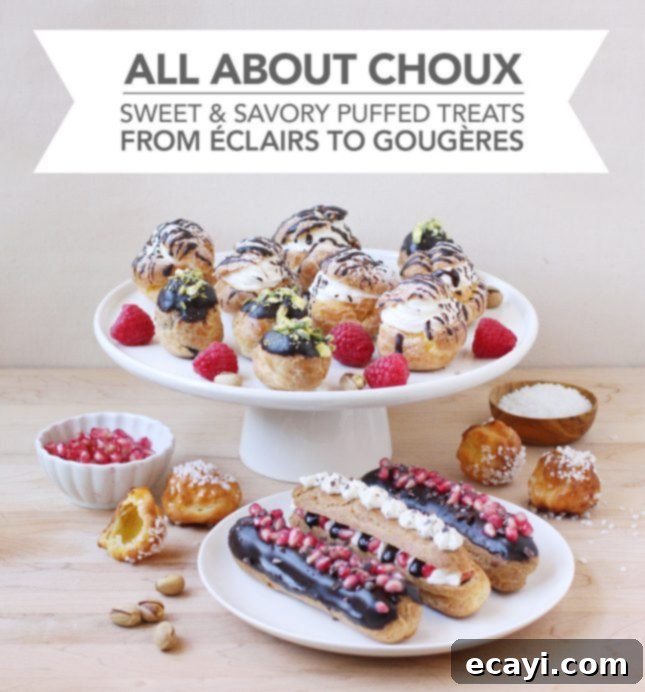
Never made pâte à choux before? Or perhaps you’re looking to refine your technique and expand your repertoire? My detailed video class is designed specifically for aspiring bakers like you! In this comprehensive course, you will not only master the fundamental techniques of making perfect pâte à choux from scratch, but you’ll also discover the incredible versatility of this single dough. We’ll explore how to transform it into an array of delightful treats, from simple chouquettes and classic cream puffs to elegant profiteroles, sophisticated éclairs, and savory cheese puffs known as gougères. Throughout the class, I’ll share invaluable tips and proven tricks to help ensure your success on your very first attempt, and demonstrate a multitude of creative variation ideas to inspire your own culinary adventures. My engaging and fun class will quickly empower you to master a new and impressive skill, allowing you to confidently create a wide variety of stunning puffed pastries that are sure to impress. Start watching now and elevate your baking game to a professional level!
Curious about the exciting content awaiting you? Check out the class trailer for a sneak peek into what you’ll learn:
Access the full class and embark on your journey to baking delicious choux pastries today!
How to Make Chocolate Éclairs: The Ultimate Step-by-Step Recipe
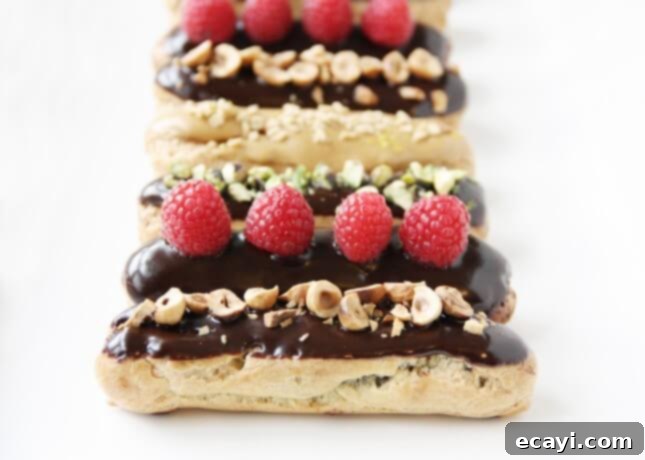
Embark on your journey to create these exquisite French pastries right in the comfort of your own kitchen. This detailed recipe breaks down each essential step, making the process enjoyable, achievable, and utterly rewarding for home bakers of all skill levels. Gather your tools and ingredients, and let’s begin crafting these delightful and impressive chocolate éclairs!
Tools You’ll Need for Éclair Perfection:
- An efficient electric mixer (either a handheld model for simplicity or a freestanding stand mixer for convenience will both yield excellent results)
- A selection of assorted mixing bowls for various stages of preparation
- Accurate measuring spoons and cups, crucial for precise ingredient ratios
- A sturdy small saucepan and a medium saucepan
- A reliable and durable whisk for achieving silky smooth batters and creams
- Heat-resistant silicone spatulas, perfect for efficiently scraping bowls and pans
- A clear glass measuring cup
- Ample plastic wrap (absolutely essential for preventing skin formation on your pastry cream)
- High-quality parchment paper for non-stick baking and easy cleanup
- Several large baking sheets
- Large pastry bags, indispensable for cleanly piping both the choux dough and the delicious fillings
- Essential pastry tips: A plain round tip or a star-shaped tip (size 6, which is typically 1/2-inch [1.25-cm]) for piping the éclair shells, and a smaller plain round tip size 2 (1/4-inch [0.6-cm]) for neatly filling the baked shells.
Step 1: Crafting the Silky Smooth Chocolate Pastry Cream (Crème Pâtissière au Chocolat)
This decadent chocolate pastry cream forms the heart of your éclairs. Preparing it first and allowing it to chill completely is key to a flawless result.
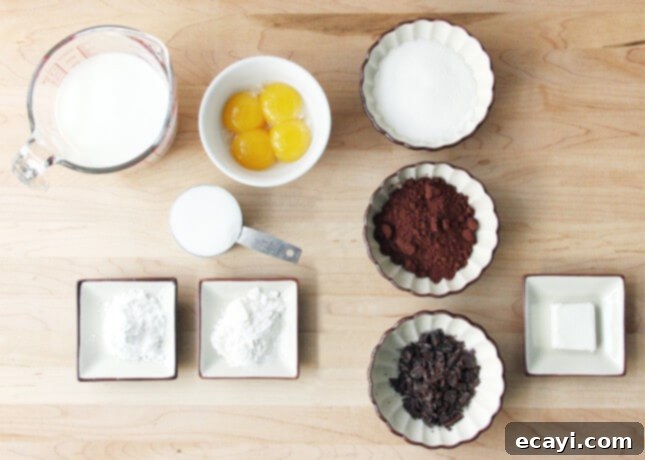
This recipe generously yields approximately 2 cups [500 ml] of luscious pastry cream, providing ample filling for your éclairs.
Ingredients for Chocolate Pastry Cream:
- 1/3 cup [80 ml] granulated sugar (for the egg mixture)
- 2 tbsp [30 ml] all-purpose flour
- 2 tbsp [30 ml] cornstarch
- 4 large egg yolks
- 1 1/3 cups [330 ml] whole milk
- 1/3 cup [80 ml] additional granulated sugar (for the milk mixture)
- 1/3 cup [80 ml] premium-quality cocoa powder (such as Vahlrona’s), finely sifted to prevent any lumps
- 1 oz [28 g] dark chocolate, or quality semi-sweet chocolate, finely chopped for quick melting
- 1 tbsp [15 ml] unsalted or semi-salted butter, cut into small pieces
Detailed Instructions for Chocolate Pastry Cream:
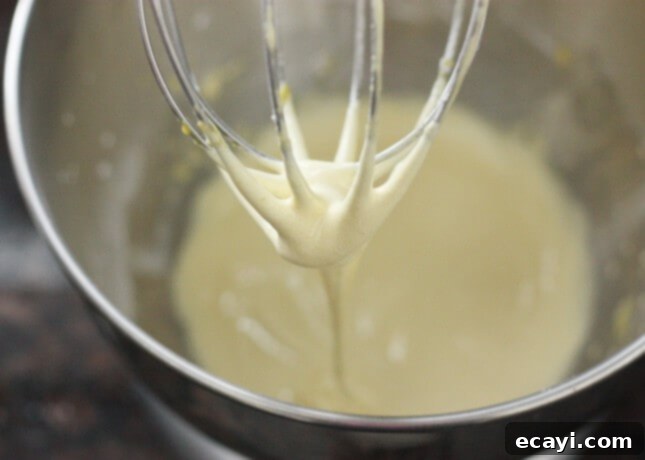
In the bowl of your electric mixer, combine the first portion of granulated sugar (1/3 cup), the all-purpose flour, cornstarch, and the four large egg yolks. Beat these ingredients together on medium speed for approximately two minutes. During this time, the mixture will thicken noticeably and transform into a pale yellow, creamy consistency, forming a smooth and airy base for your pastry cream.
While the egg mixture is processing, begin preparing the milk mixture. In a medium saucepan, combine the whole milk, the second portion of granulated sugar (1/3 cup), and the finely sifted cocoa powder. Whisk these ingredients gently to ensure they are well combined, and then place the saucepan over medium heat, bringing the mixture to a gentle simmer. Stir occasionally to prevent the cocoa from scorching at the bottom. Once the milk mixture is simmering, remove the saucepan from the heat. Ladle approximately one cup of this hot milk mixture into a separate, heat-proof measuring cup. Gradually and slowly pour this hot liquid into your beaten egg yolk mixture, continuously mixing on low speed with your electric mixer or stirring vigorously by hand. This critical step, known as tempering, slowly and safely raises the temperature of the egg yolks, preventing them from curdling or scrambling when they are returned to the hot saucepan.
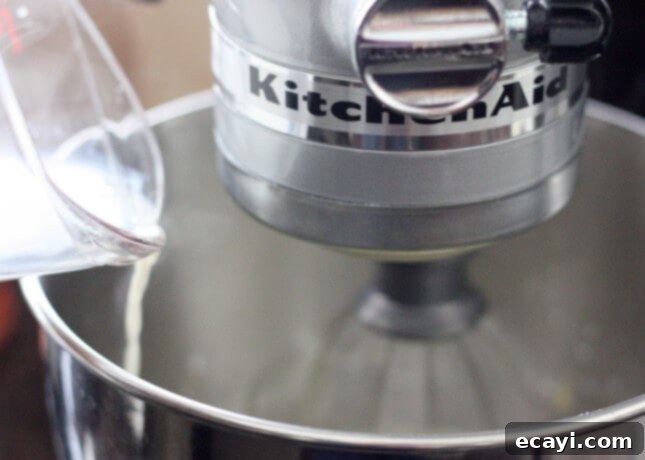
Scrape the tempered egg and milk mixture back into the original saucepan containing the remaining milk mixture. Place the saucepan back over medium-low heat. This is a very critical stage for pastry cream: cook the mixture, never stopping whisking and diligently scraping the bottom and corners of the pan with your whisk or a heat-resistant spatula. This constant agitation is absolutely vital to prevent the cream from sticking, scorching, or forming any lumps. Continue whisking until the mixture begins to thicken noticeably and small bubbles appear, indicating it’s reaching its cooking point. Pay extremely close attention here, as the thickening process can happen quite rapidly. A moment’s lapse in attention could result in a curdled or burnt pastry cream. If you feel the mixture suddenly thickening in one particular spot in the pan, immediately lift the pan from the heat and whisk vigorously (while off the heat) to redistribute the heat and ensure even cooking. Return the pan to the heat and continue cooking, whisking constantly, until the custard achieves a lusciously thick, pudding-like consistency. It should be thick enough to coat the back of a spoon and hold its shape.
Once the desired thickness is achieved, remove the pan from the heat and immediately add the finely chopped dark or semi-sweet chocolate and the small cubes of butter to the hot custard. Whisk gently but consistently until both the chocolate and butter are completely melted and fully incorporated into the cream, creating a perfectly smooth, glossy, and rich chocolate pastry cream with a beautiful sheen.
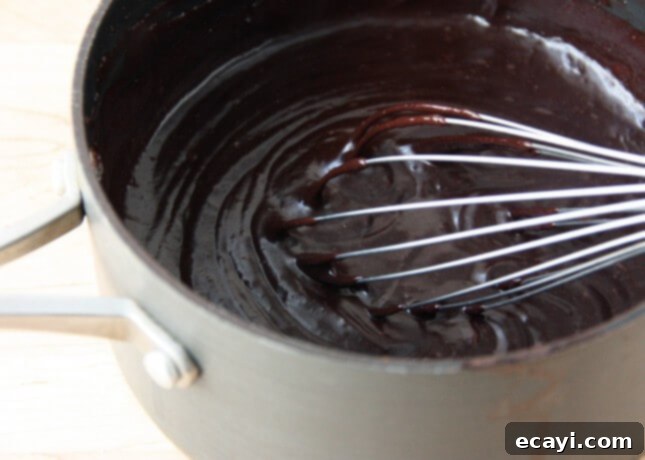
Transfer the warm custard to a clean bowl. To prevent an unsightly “skin” from forming on the surface as it cools, immediately press a piece of plastic wrap or parchment paper directly onto the entire surface of the cream, ensuring there are no air pockets between the wrap and the cream. Refrigerate the chocolate pastry cream until it is completely chilled, preferably for several hours or, ideally, overnight. This prolonged cooling period is essential for it to set properly, achieve its ideal consistency, and be easy to pipe into your éclair shells.
Step 2: Preparing the Light and Airy Choux Pastry (Pâte à Choux)
Choux pastry is the foundation of your éclairs. Its unique preparation method creates a light, hollow interior perfect for filling.
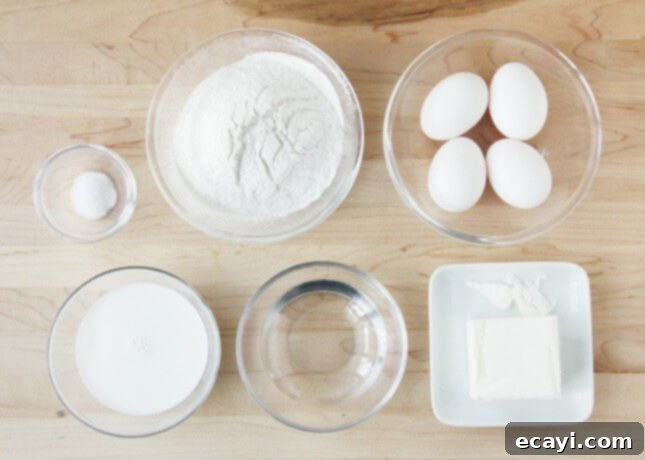
This recipe is designed to yield approximately 16 generously sized éclairs, perfect for sharing or savoring!
Ingredients for Choux Pastry:
- 1 cup [250 ml] all-purpose flour
- ½ cup [125 ml] water
- ½ cup [125 ml] whole milk (the combination of water and milk helps achieve a good balance of crispness and tenderness in the baked pastry)
- 8 tbsp (1 stick) [113 g] unsalted butter, cut into small, even cubes for consistent melting
- ½ tsp [2.5 ml] fine salt (this enhances the overall flavor of the pastry)
- 4 large eggs (or potentially more, depending on the dough’s final consistency – please refer to the detailed instructions below)
Detailed Method for Choux Pastry:
Before you begin the cooking process, ensure your oven rack is accurately positioned in the lower third of the oven. Preheat your oven to a robust 400°F [200°C]. This initial high heat is absolutely crucial for generating the burst of steam that causes the choux pastry to puff up dramatically and create its characteristic hollow center.
Carefully measure your all-purpose flour and set it aside, positioned conveniently close to your stovetop, for quick and efficient addition later.
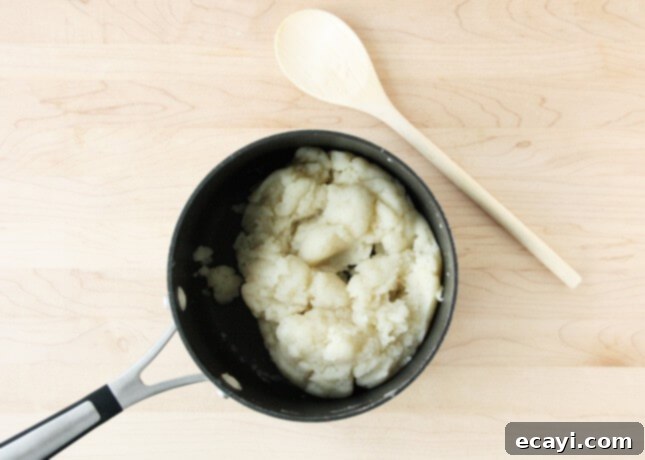
In a sturdy, large saucepan, combine the water, whole milk, the cubed unsalted butter, and the salt. Place the saucepan over medium heat and bring the mixture to a vigorous rolling boil, ensuring that all the butter is completely melted and fully incorporated. As soon as the mixture reaches a hard boil, remove the pan from the heat. Immediately add all of the measured flour at once. Stir exceptionally vigorously and continuously with a sturdy wooden spoon or a heat-resistant silicone spatula. Keep stirring without pause until the mixture comes together into a cohesive ball of dough and pulls cleanly away from the sides of the pan, leaving the pan relatively clean.
Return the saucepan to medium heat and continue to cook and stir the dough for approximately 1 minute. This crucial step “dries out” the dough, eliminating excess moisture, which is the key to achieving a light, crisp, and beautifully puffed éclair shell that won’t become soggy. You might notice a thin film of dough forming on the bottom of the pan; this is perfectly normal and a sign you’re doing it right, especially with a nonstick surface. At this point, the dough should mostly come together into a single, cohesive mass and easily roll away from the sides of the pan when stirred. Take the pan off the heat.
Transfer the warm dough to the bowl of an electric mixer fitted with the paddle attachment. Allow the dough to cool for about 5 minutes, stirring it occasionally at a very low speed if using a stand mixer, or by hand, to allow the steam to escape. This cooling period is essential to prevent the eggs from cooking and scrambling when they are added.
With the mixer set to medium speed, begin adding the eggs one at a time. This is another critical stage, so take your time. Ensure each egg is fully and completely incorporated into the dough before adding the next one. It’s also very important to stop the mixer and scrape down the sides and bottom of the bowl thoroughly between each egg addition to ensure everything is evenly mixed. Initially, every time you add an egg, the dough will appear to separate and look like a shiny, curdled, or clumpy mess – do not panic, this is a completely normal and expected phase in the choux pastry process!
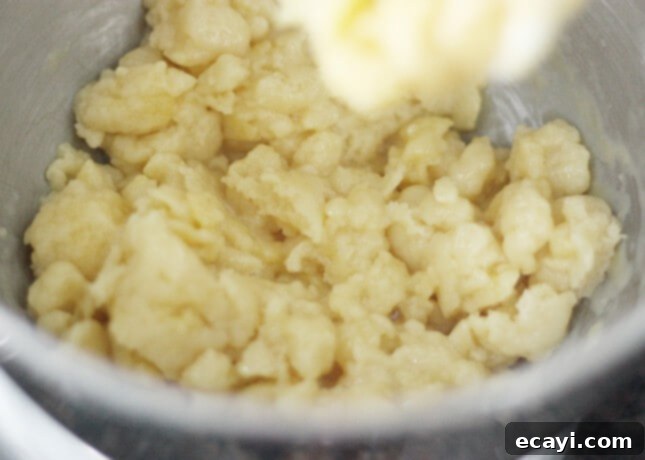
However, with continued mixing, it will eventually come back together, forming a very thick, sticky, and somewhat crumbly, yet cohesive, consistency. The dough will progressively become smoother, more elastic, and less clumpy as you incorporate more eggs and the mixture emulsifies.
Observe the fascinating transformation: After egg #1, the dough begins its journey towards a cohesive, but still textured, consistency:
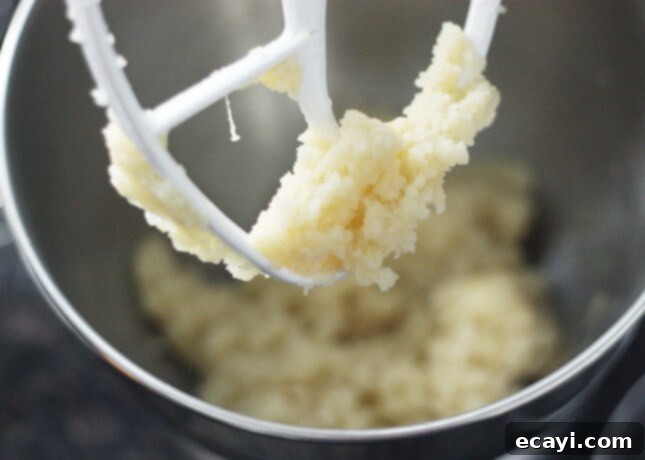
And after egg #3, you’ll notice it becoming considerably smoother, more pliable, and starting to resemble the final texture:
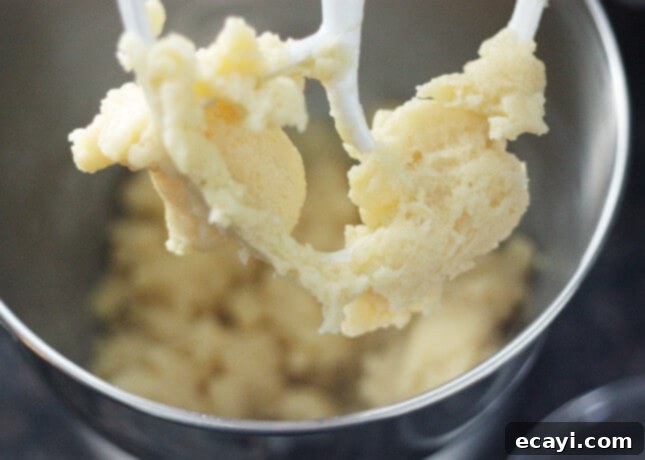
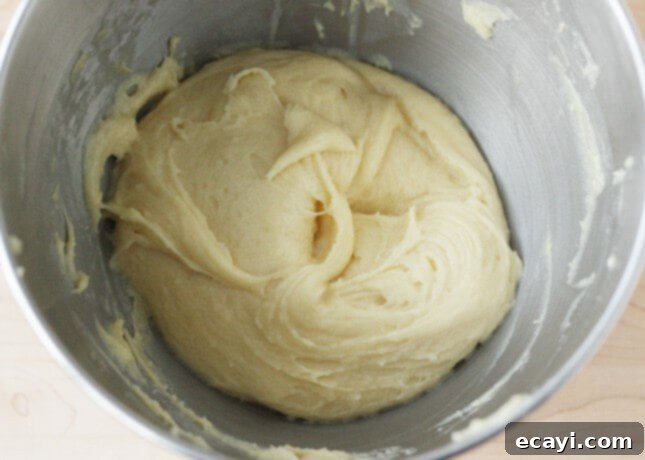
The choux dough is perfectly done when it is smooth, glossy, and elastic, yet still very thick and notably sticky. It should not appear dry, stiff, or overly crumbly. The exact number of eggs required can vary slightly due to several factors: how long the dough was cooked over the heat (affecting moisture evaporation), the precise packing of the flour, the fat content of the butter you used, and even the size of your eggs. If, after incorporating the fourth egg, your dough still seems a bit stiff, crumbly, or hasn’t achieved that characteristic smooth, elastic texture, beat in a fifth egg, adding it gradually, perhaps half at a time, until the desired consistency is reached. When perfectly ready, the dough should have a “V” shape when lifted with the paddle attachment, slowly falling off in a thick, cohesive mass, like this:
Once your choux pastry is prepared to perfection, it can be covered tightly with plastic wrap and refrigerated for up to half a day without any loss of quality. When you are ready to use it, there’s no need to bring it back to room temperature before shaping; it can be piped directly from the fridge, maintaining its firm consistency.
Step 3: Expert Techniques for Shaping Uniform Éclairs
Begin the shaping process by lining your large baking sheets with sheets of high-quality parchment paper. For those striving for perfectly uniform éclairs, a helpful trick is to print or draw éclair templates (usually rectangular outlines) and slide them underneath the parchment paper as a visual guide. To prevent the parchment paper from shifting or moving while you are piping the dough, use small pieces of masking tape or painter’s tape to secure one side of the paper to the baking sheet.
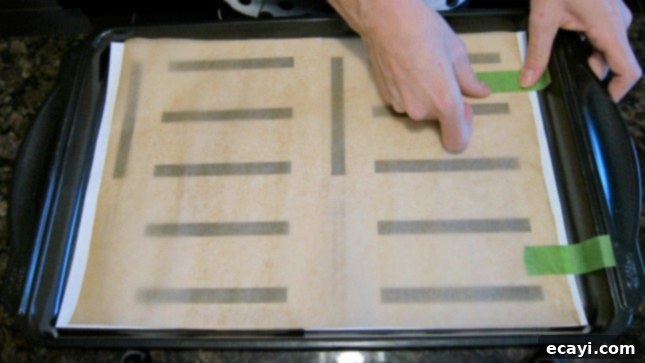
Fit a large pastry bag with a ½-inch [1.25-cm] size 6 plain round or star-shaped pastry tip, depending on your desired final finish (a plain tip creates smooth, classic éclairs, while a star tip adds attractive ridges). To easily fill the bag, fold the top 3 inches [7.5 cm] of the pastry bag down over itself to form a cuff. Using a rubber spatula, carefully scoop the prepared choux pastry into the bag, making sure to fill it no more than two-thirds full. This allows for comfortable handling and prevents the dough from squeezing out the top.
Unfold the cuff and firmly twist the top part of the bag to seal it, gently pushing the choux pastry down toward the tip. Hold the bag with the pastry tip at a 45-degree angle, with the tip just barely touching the parchment-lined baking sheet. Apply gentle and consistent pressure to the twisted top of the bag with one hand, while carefully guiding the tip of the bag with your other hand. Use light pressure to form slender éclairs; for thicker, more substantial éclairs, apply slightly greater pressure and move the bag a bit slower. Pipe out logs approximately 5-inches-long [12.5-cm] for standard large éclairs. Aim for consistency in size and shape across all your piped logs for even baking and a professional appearance.
To neatly stop piping each éclair, simply release the pressure from the bag. Then, quickly push the tip down onto the sheet and jerk it upward to cleanly break off the dough, preventing unsightly “tails” from forming. Pipe all your éclair logs onto the baking sheets, ensuring they are spaced at least 2 inches apart to allow ample room for expansion during baking. Once all éclairs are piped, carefully remove the masking or painter’s tape, then gently slide the templates off the baking sheets (if you used them).
After piping all the logs, if any small peaks or “tails” remain on your éclairs, gently smooth them down. Dip your finger in cold water and lightly tap the peaks to flatten them. This simple step ensures a uniform and attractive surface for your baked shells, contributing to a polished final product.
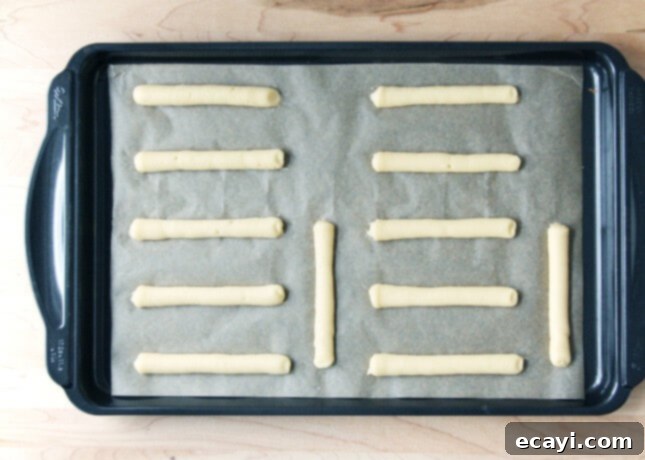
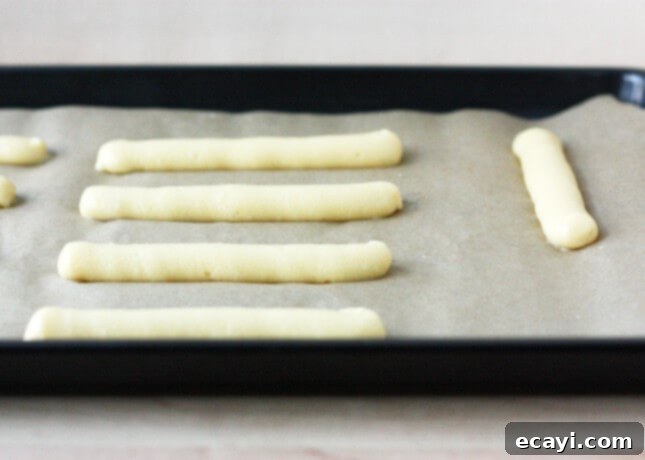
Step 4: Baking Éclairs to Golden Perfection and Crispness
Bake your piped éclairs in the preheated 400°F [200°C] oven for precisely 15 minutes. This initial burst of high heat is crucial; it rapidly creates steam inside the dough, which causes the éclairs to puff up dramatically and form their characteristic hollow interior. It is absolutely vital to resist the urge to open the oven door during this critical phase, as even a small drop in temperature can cause the delicate choux pastry to collapse, resulting in flat or dense éclairs.
After the initial 15 minutes, reduce the oven temperature to 350°F [175°C]. If your oven allows, do this without opening the door to maintain the internal temperature. Continue baking the éclairs until they achieve a beautiful golden brown color and feel very firm, crisp, and light to the touch. This secondary baking phase at a lower temperature is essential for thoroughly drying out the choux pastry, ensuring a wonderfully crisp exterior and preventing them from becoming soggy after cooling. Smaller éclairs will typically need about 10 minutes more at the lower temperature, while larger éclairs may require an additional 20 minutes to dry out completely. The total baking time will depend on their size and the precise calibration of your oven.
Once baked to perfection, promptly remove the baking sheet from the oven and immediately transfer the hot éclairs to a wire rack to cool down completely. To aid in drying out the interior and prevent any trapped steam from softening the shells, use a pointy knife or a skewer to gently poke a small hole under each éclair. This allows excess moisture to escape, ensuring a perfectly crisp shell ready for filling.
Step 5: Generously Filling Your Delectable Chocolate Éclairs
Once your pastry shells are completely cooled and your chocolate pastry cream is thoroughly chilled and set, it’s time for the most delicious part: the filling! Fit a large pastry bag with a small ¼-inch [0.6-cm] plain round tip (size 2). Carefully fill the pastry bag with your chilled chocolate pastry cream. Insert the pastry tip into the drying hole you previously poked under each éclair. Gently but firmly pipe the cream into the éclair until it feels pleasantly heavy and completely full. To ensure the éclairs are filled evenly, especially towards the ends, you may need to poke additional small holes towards the tips of the éclair and pipe a little more cream into those sections.
As an alternative, and often quicker, method favored by many bakers, you can carefully cut off the top third of each éclair horizontally using a sharp serrated knife to create a neat “lid.” Gently scoop out any uncooked dough from inside the shells, if present, to create maximum space for the filling. Then, use a spoon or the pastry bag to generously fill the bottom half of the éclair with the chocolate pastry cream, before carefully placing the “lid” back on top. Both methods are effective, so choose the one you find most comfortable and efficient.
Step 6: Glazing and Decorating Your Chocolate Éclairs with Elegance
The final touch that transforms your chocolate éclairs into truly irresistible masterpieces is the luscious glaze and thoughtful decoration. Let’s prepare a rich and glossy dark chocolate ganache glaze:
Rich Dark Chocolate Ganache Glaze
- ¾ cup [175 ml] heavy cream
- 8 oz [226 g] semisweet or bittersweet chocolate, finely chopped for smooth and quick melting
- Optional: 1 tbsp [15 ml] liqueur of your choice, such as Grand Marnier for a subtle orange hint, Kahlua for a coffee note, or even a good quality dark rum, to deepen and enhance the flavor profile.
Instructions for the Ganache Glaze:
In a small saucepan, bring the heavy cream to a gentle simmer, just until small bubbles appear around the edges. As soon as it simmers, remove the saucepan from the heat and immediately add the finely chopped chocolate. Let it sit undisturbed for 1-2 minutes to allow the residual heat from the cream to begin melting the chocolate. Then, whisk gently until most of the chocolate is melted and the mixture is largely smooth. Cover the saucepan and let it stand for an additional 10 minutes; this allows any remaining chocolate pieces to fully melt. Finally, whisk again gently until the ganache is completely smooth, beautifully glossy, and perfectly emulsified. If you are using liqueur, stir it in at this stage. Pour the prepared ganache glaze into a shallow bowl with a wide surface; this makes the dipping process much easier and cleaner.
To Glaze the Éclairs:
Carefully pick up one filled éclair, holding it gently but firmly. Turn it upside down and delicately dip the entire top surface of the éclair into the prepared ganache glaze. Ensure an even coating. Lift the éclair, allowing any excess glaze to drip off naturally, then turn it right side up and place it onto a clean baking sheet lined with parchment paper or directly onto your chosen serving plate. (If you opted to cut off the tops of your éclairs to fill them, simply dip only the individual “lids” into the glaze and then carefully place them back onto the filled bases).
To Decorate Your Éclairs:
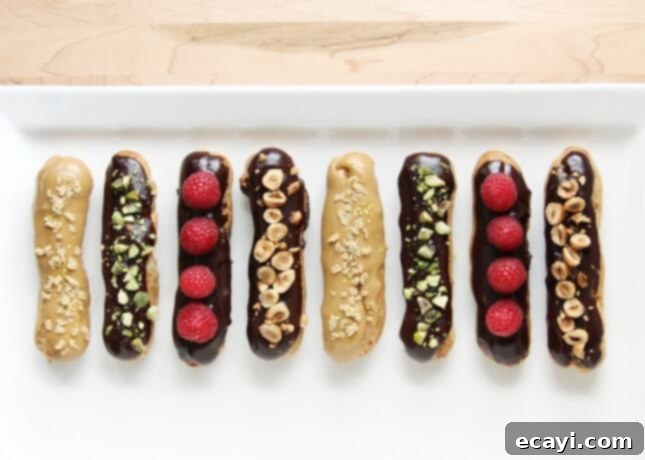
For an extra flourish that enhances both visual appeal and introduces wonderful textural contrasts, while the glaze is still wet and pliable, sprinkle your éclairs with one or more of these delightful toppings:
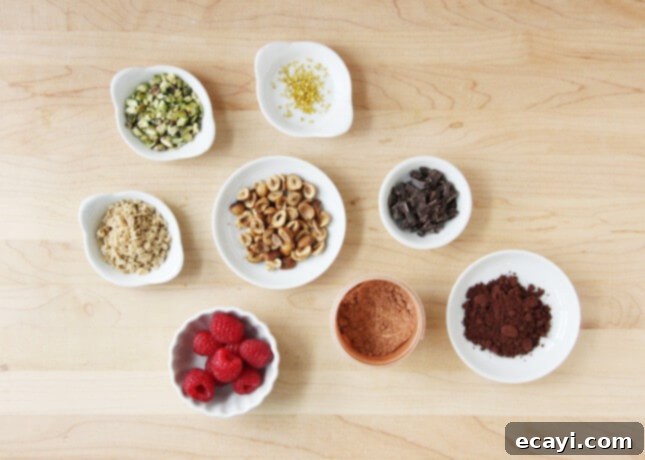
- Crunchy chopped toasted hazelnuts, adding a rich, nutty flavor
- Bright green chopped pistachios for both vibrant color and a distinct, delicate taste
- Additional finely chopped bittersweet chocolate for an intensified double chocolate effect
- A delicate dusting of sifted cocoa powder for a sophisticated, matte finish and subtle bitterness
- Fresh, juicy raspberries placed strategically for a delightful pop of color, freshness, and tartness
- Sparkling edible glitter for an eye-catching, festive touch, perfect for celebrations
- Whimsical edible stars, adding a playful and elegant element
- Textural coarse maple sugar for a unique sweetness and pleasant crunch
- Any other creative topping of your choice – feel free to experiment with toasted coconut flakes, candied orange peel, a contrasting drizzle of white chocolate, or even a sprinkle of sea salt for a salted caramel chocolate éclair!
Once glazed and beautifully decorated, gently refrigerate your chocolate éclairs until the glaze is fully set and firm, or until you are ready to serve them. This will ensure the glaze hardens beautifully and the éclairs are perfectly chilled for optimal enjoyment, allowing the flavors to meld and the textures to shine.
Recipe Acknowledgements and Sources: The foundational ingredients for our Chocolate Pastry Cream recipe were thoughtfully adapted and inspired by the timeless culinary classic, The Joy of Cooking. Similarly, the core ingredients for the choux pastry and integral parts of its preparation method are rooted in the well-regarded recipe also found in The Joy of Cooking. All additional contents, detailed methods, expert tips, creative suggestions, and complementary recipes within this comprehensive guide have been expertly developed and provided by Marie Asselin.
Full Disclosure and Support: Please be advised that this post contains carefully selected affiliate links. When you choose to purchase recommended tools, ingredients, or books through these links on my site, I may earn a small referral fee. This modest commission comes at no extra cost to you and plays a vital role in supporting Food Nouveau, enabling me to continue producing high-quality, engaging culinary content and bringing you more delicious recipes. Your valuable contribution through these links is sincerely appreciated!
Dive Deeper into the World of Éclairs: Further Reading & Resources
Expand your knowledge, refine your understanding, and deepen your appreciation for this magnificent and evolving French pastry with these insightful articles and guides from leading culinary voices and publications:
- The Éclair Affair: Revamping a Classic (AFAR Magazine) – Explore how contemporary chefs and pâtissiers are reimagining and modernizing éclairs for the discerning modern palate.
- Éclairs in Paris (David Lebovitz) – A beloved and influential food writer’s personal perspective on seeking out and savoring the best éclairs in their historic birthplace.
- Where to Find the Best Éclairs in Paris (Saveur Magazine) – Your essential guide to navigating the vibrant pâtisserie scene in Paris to discover top-tier éclairs and unforgettable culinary experiences.
- The Trend: Éclairs with Flair (Financial Times) – An in-depth analysis of the creative trends and innovative approaches that are currently transforming the classic éclair into a modern sensation.
- It’s Choux Time: Move Over, Cupcakes – Éclairs Are Having a Makeover (The Independent) – A compelling look at the éclair’s impressive resurgence and its rise as a leading modern dessert icon, moving beyond its traditional image.
- Over-the-Top Éclairs Are the New Multi-Colored Macarons (ABC News) – Further confirming the éclair’s elevated status as a premier culinary sensation, rivaling other popular French pastries.
- There’s An All-Éclair Cafe Opening On The Lower East Side (Gothamist) – Highlighting the growing dedication and specialized focus on éclair establishments, signaling their increasing popularity and market presence.
