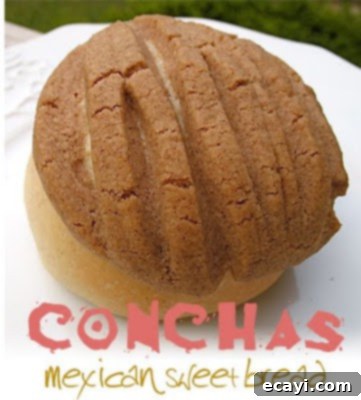
Authentic Mexican Conchas Recipe: Your Guide to Baking Perfect Pan Dulce
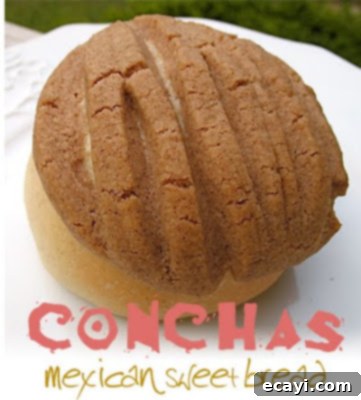
The vibrant and bold flavors of Mexican cuisine have always held a special place in my heart, from savory tacos to zesty salsas. Yet, for a long time, my culinary adventures hadn’t fully explored the sweet side of Mexico. That changed the moment I discovered Conchas, a truly iconic Mexican sweet bread known for its soft, fluffy texture and unique, shell-like sugar topping. When I stumbled upon a recipe for these delightful pastries in the BHG magazine “Ultimate Mexican,” I knew instantly that I had to try my hand at baking them.
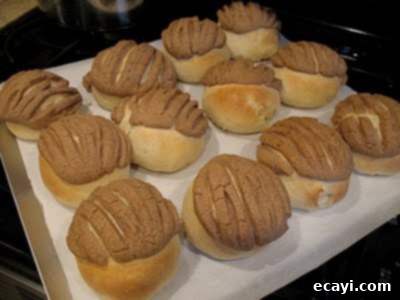
While my first attempt resulted in a few toppings sliding a bit – a common learning curve for any new baker – the overall experience was incredibly rewarding. The process was straightforward, and the taste? Absolutely fabulous! These homemade Conchas offer a warmth and comfort that store-bought versions often can’t replicate, especially when served fresh from the oven.
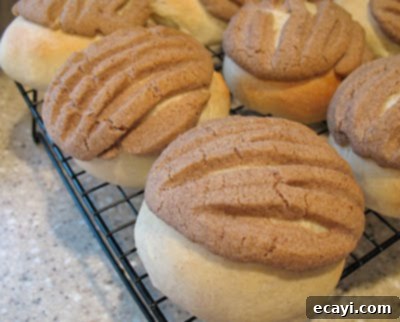
Imagine biting into a perfectly golden-brown Concha, its delicate crumb infused with a hint of cinnamon, complemented by the crisp, sweet sugar topping. It’s an experience that truly melts your heart, just like the best Mexican food. These sweet treats are not just bread; they are a piece of culinary art and a staple of Mexican breakfast tables and afternoon coffee breaks. They are especially delicious when paired with a rich, thick Champurrado, creating a harmonious blend of flavors and textures.
Whether you’re an experienced baker or just starting your journey into the world of traditional pastries, making Conchas at home is a rewarding endeavor. They are wonderful, though arguably best enjoyed the very same day they are baked. If you happen to have any leftovers that have cooled, a quick 10-second pop in the microwave will bring them back to their warm, comforting best, ready to be savored with your favorite hot beverage.
What Exactly Are Conchas? The Quintessential Mexican Sweet Bread
Conchas, literally meaning “shells” in Spanish, are a beloved variety of *pan dulce*, or “sweet bread,” a broad category of Mexican pastries. Their distinctive name comes from the characteristic seashell pattern imprinted on their sugary crust. This topping is typically made from a simple mixture of butter, sugar, and flour, often flavored with vanilla or cinnamon, which gives them their iconic look and adds a delightful textural contrast to the soft, pillowy bread beneath.
More than just a delicious treat, Conchas are a cultural cornerstone in Mexico. They are a common sight in Mexican bakeries (panaderías), enjoyed by families for breakfast, as an afternoon snack with coffee or hot chocolate, or simply as a comforting indulgence. Their visual appeal, combined with their inviting aroma and sweet taste, makes them instantly recognizable and universally loved. While often appearing complex, the beauty of baking Conchas lies in the simple, wholesome ingredients and a methodical process that yields incredibly satisfying results.
A Brief History of Pan Dulce and the Rise of Conchas
The tradition of *pan dulce* in Mexico has a rich history, deeply intertwined with European baking techniques introduced during the colonial era. French, Spanish, and Italian bakers brought their knowledge of leavened doughs, brioches, and elaborate pastries, which were then adapted and enriched with indigenous ingredients and flavors. Over centuries, these influences merged with local culinary traditions, giving birth to a unique genre of sweet breads.
Conchas emerged as one of the most popular and enduring forms of *pan dulce*. The simplicity of its ingredients – flour, sugar, yeast, milk, and eggs – combined with the visually appealing topping, made it a household favorite. Bakeries began perfecting the distinctive shell pattern, which requires a special cutter or a steady hand with a knife, transforming a simple sweet bun into an artistic creation. The widespread availability and affordability of Conchas made them accessible to all social classes, cementing their status as a national culinary treasure.
Why Embrace the Joy of Homemade Conchas?
While picking up a fresh Concha from a local panadería is always a delight, there’s an unparalleled joy in baking them at home. The aroma that fills your kitchen as the dough rises and the bread bakes is simply intoxicating. Plus, making them yourself gives you complete control over the quality of ingredients, allowing you to ensure freshness and tailor the flavors to your preference. It’s a therapeutic process, a culinary journey that culminates in a batch of warm, tender, and incredibly satisfying sweet rolls that taste even better because you made them with your own hands. The reward extends beyond the taste; it’s the satisfaction of sharing a piece of Mexican culinary heritage with loved ones, fresh from your oven.
The Conchas Recipe: Mexican Sweet Bread
Recipe adapted from BHG Ultimate Mexican magazine
Conchas – Mexican Sweet Bread
Often, helpful tips and FAQs are embedded throughout the blog post. Scroll up to discover more!
Ingredients
For the Dough
- 1 package active dry yeast
- ½ cup warm water (115-120°F / 46-49°C)
- ½ cup warm evaporated milk (115-120°F / 46-49°C)
- ⅓ cup granulated sugar
- ⅓ cup butter, melted
- 1 large egg
- 1 teaspoon salt
- 4 cups all-purpose flour
- ½ teaspoon ground cinnamon
For the Topping
- ½ cup unsalted butter, softened
- ⅔ cup granulated sugar
- 1 cup all-purpose flour
- 2 teaspoons ground cinnamon
- 1 teaspoon vanilla extract
Instructions
-
Prepare the Yeast Mixture: In a large mixing bowl, combine the active dry yeast with ½ cup of warm water (ensure the temperature is between 115-120°F to properly activate the yeast). Let this mixture stand for about 10 minutes until it becomes foamy, indicating the yeast is active. This step is crucial for a good rise.
-
Combine Wet Ingredients: To the activated yeast mixture, stir in the warm evaporated milk (also 115-120°F), ⅓ cup of granulated sugar, the melted butter, the egg, and the salt. Mix well until everything is thoroughly combined.
-
Form the Dough: Gradually add the flour to the wet ingredients. First, stir in 2 cups of the all-purpose flour until just combined. Then, gradually incorporate the remaining 2 cups of flour along with ½ teaspoon of ground cinnamon. Continue mixing until a soft, shaggy dough forms.
-
Knead the Dough: Turn the dough out onto a lightly floured surface. Knead the dough for 3-5 minutes. The goal is to achieve a smooth, elastic consistency. This develops the gluten, which is essential for the bread’s soft texture. Shape the kneaded dough into a ball and transfer it to a lightly greased bowl, turning once to coat the entire surface.
-
First Rise: Cover the bowl with plastic wrap or a clean kitchen towel. Let the dough rise in a warm, draft-free place until it has doubled in size. This typically takes about 60-75 minutes, but rising times can vary depending on your kitchen’s temperature and humidity.
-
Prepare the Topping: While the dough is rising, prepare the signature Concha topping. In a medium bowl, beat the softened butter with an electric mixer on medium speed for about 30 seconds until creamy. Add ⅔ cup of granulated sugar and continue beating until the mixture is light and well combined. Stir in 1 cup of all-purpose flour, 2 teaspoons of ground cinnamon, and the vanilla extract. Mix until a soft, uniform dough-like consistency is achieved. You may want to chill this topping slightly to make it easier to handle.
-
Punch Down and Divide Dough: Once the dough has doubled, gently punch it down to release the air. Cover it again and let it rest for another 10 minutes. This helps relax the gluten. Then, divide the dough into 12 equal pieces.
-
Shape Conchas: Roll each piece of dough into a smooth ball. Place these balls about 3 inches apart on a baking sheet lined with parchment paper. Gently press each dough ball down slightly to flatten it into a thick disc.
-
Apply the Topping: Divide the prepared topping mixture into 12 equal portions. Take each portion and pat it flat into a thin, round disc, roughly the same size as your flattened dough balls. Carefully place one round of topping onto each dough ball. Ensure the topping adheres well to the dough.
-
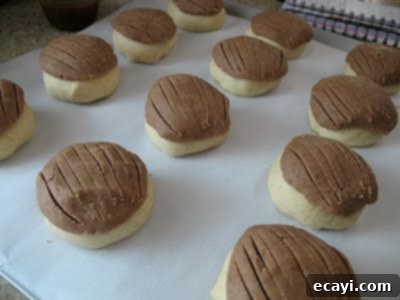
Score the Topping: Using a sharp paring knife or a specialized Concha cutter, gently cut grooves into the topping of each dough ball to resemble a scallop shell pattern. Be careful not to cut too deeply into the dough underneath.
-
Second Rise: Cover the rolls loosely with plastic wrap or a kitchen towel and let them rise again in a warm place until they have doubled in size. This usually takes about 45 minutes.
-
Bake: While the Conchas are on their second rise, preheat your oven to 375°F (190°C). Bake the rolls for 18-20 minutes, or until the bread is light golden brown and the topping is lightly set.
-
Cool and Serve: Carefully remove the baked Conchas from the baking sheet and transfer them to wire racks to cool slightly. Conchas are best enjoyed warm, ideally on the day they are baked, to fully appreciate their soft texture and aromatic flavor.
Tried this Recipe? Pin it for Later!
Follow on Pinterest @AmandasCookin or tag #AmandasCookin!
Tips for Baking Perfect Conchas
- Temperature is Key for Yeast: Ensure your water and evaporated milk are truly between 115-120°F (46-49°C). Too cold, and the yeast won’t activate; too hot, and it will kill the yeast. A kitchen thermometer is your best friend here.
- Don’t Over-Flour the Dough: While you need flour for kneading, resist the urge to add too much. A slightly sticky dough often yields a softer bread. Over-flouring can lead to dry, dense Conchas.
- Patience with Rising: Dough rising is a delicate process that shouldn’t be rushed. Find a warm, draft-free spot. If your kitchen is cool, slightly warm your oven to its lowest setting (then turn it off!) and let the dough rise inside.
- Topping Consistency: For a topping that doesn’t slide, make sure your butter is softened but not melted. If the topping mixture is too soft, it can melt and slip during the rise or bake. If it’s too sticky, chill it in the fridge for 15-20 minutes before shaping.
- Scoring Technique: When scoring the topping, use a light hand. You want to cut through the sugar topping to create the pattern, but not deeply into the bread dough itself, which could hinder its rise. A Concha cutter offers the most consistent results, but a sharp paring knife works well with practice.
Creative Variations and Serving Suggestions
While the classic cinnamon topping is undeniably delicious, don’t hesitate to experiment with variations:
- Chocolate Conchas: Replace half of the cinnamon in the topping with unsweetened cocoa powder for a rich, chocolatey flavor.
- Vanilla Conchas: Omit the cinnamon entirely from the topping and add an extra ½ teaspoon of vanilla extract for a pure, sweet vanilla taste.
- Colored Conchas: A tiny drop of food coloring in your topping mixture can create beautiful pastel Conchas, perfect for festive occasions.
- Coffee Conchas: Add a teaspoon of instant espresso powder to the topping for a subtle coffee flavor.
Conchas are traditionally enjoyed with a warm beverage. As mentioned, Champurrado (a thick Mexican hot chocolate) is an exquisite pairing. A simple cup of coffee, café con leche, or even a glass of cold milk are also perfect companions to these sweet, comforting rolls.
Storage and Reheating
Conchas are at their absolute best when eaten fresh, ideally on the day they are baked. Their delicate texture and aroma are most pronounced immediately after cooling. However, if you have leftovers, you can store them in an airtight container at room temperature for up to 2-3 days. For longer storage, Conchas can be frozen for up to one month. Wrap them individually in plastic wrap and then place them in a freezer-safe bag or container.
To reheat cooled or thawed Conchas, a quick zap in the microwave for about 10-15 seconds will restore their warmth and softness. If reheating from frozen, allow them to thaw at room temperature first, then microwave briefly.
Frequently Asked Questions About Conchas
- Q: My Concha topping slid off during baking. What went wrong?
- A: This is a common issue! It often happens if the topping is too soft or if the dough surface is too heavily floured where the topping sits. Ensure your butter for the topping is softened, not melted, and consider chilling the topping mixture for 15-20 minutes before applying. Also, avoid excessive flour on the shaped dough balls where the topping will be placed.
- Q: My dough didn’t rise. What could be the cause?
- A: The most likely culprits are inactive yeast or incorrect liquid temperatures. Make sure your yeast is fresh and the water/milk is within the 115-120°F range. Also, ensure your rising environment is warm and free from drafts.
- Q: Can I make the dough ahead of time?
- A: Yes! After the first rise, you can punch down the dough, shape the Conchas with their topping, and then cover them and refrigerate overnight. Allow them to come to room temperature and complete their second rise (which might take longer) before baking. Alternatively, you can refrigerate the dough after the first rise, then shape and rise on baking day.
- Q: Can I use different flavors for the topping?
- A: Absolutely! Experiment with different spices like cardamom or nutmeg, or incorporate zest from citrus fruits like orange or lime for a fresh twist. Cocoa powder is also a popular alternative for chocolate Conchas.
- Q: How do I get the perfect seashell pattern?
- A: A specialized Concha cutter is ideal for uniform patterns. However, a sharp paring knife can be used to carefully score the pattern. The key is to press firmly enough to mark the topping but not cut through the dough below.
The recipes on this blog are typically tested with a conventional gas oven and gas stovetop. Please note that oven performance can vary, especially with age. Using an inexpensive oven thermometer can confirm your oven’s true temperature. If you use a toaster oven or countertop oven, be aware that heat distribution might differ, potentially requiring adjustments to cooking or baking times. For baking recipes where measurements are provided by weight, using cups instead may lead to different results, and success with that method cannot be guaranteed.
Subscribe to my newsletter, Foodie in the Craftroom, for updates and tips from both Amanda’s Cookin’ and Crafts by Amanda! Visit https://amandascookin.com/p/subscribe-to-newsletter.html
