Easy & Juicy Air Fryer Shrimp: The Ultimate 10-Minute Recipe for Perfectly Cooked Seafood
Craving succulent, perfectly cooked shrimp but short on time? Look no further! This air fryer shrimp recipe delivers incredibly tender and juicy shrimp, generously coated in butter and a harmonious blend of seasonings. From start to finish, you’ll have a mouthwatering meal or appetizer ready in just 10 minutes, making it an ideal choice for busy weeknights or impromptu gatherings. Forget soggy, overcooked shrimp – the air fryer transforms humble prawns into a culinary delight with minimal effort and maximum flavor.
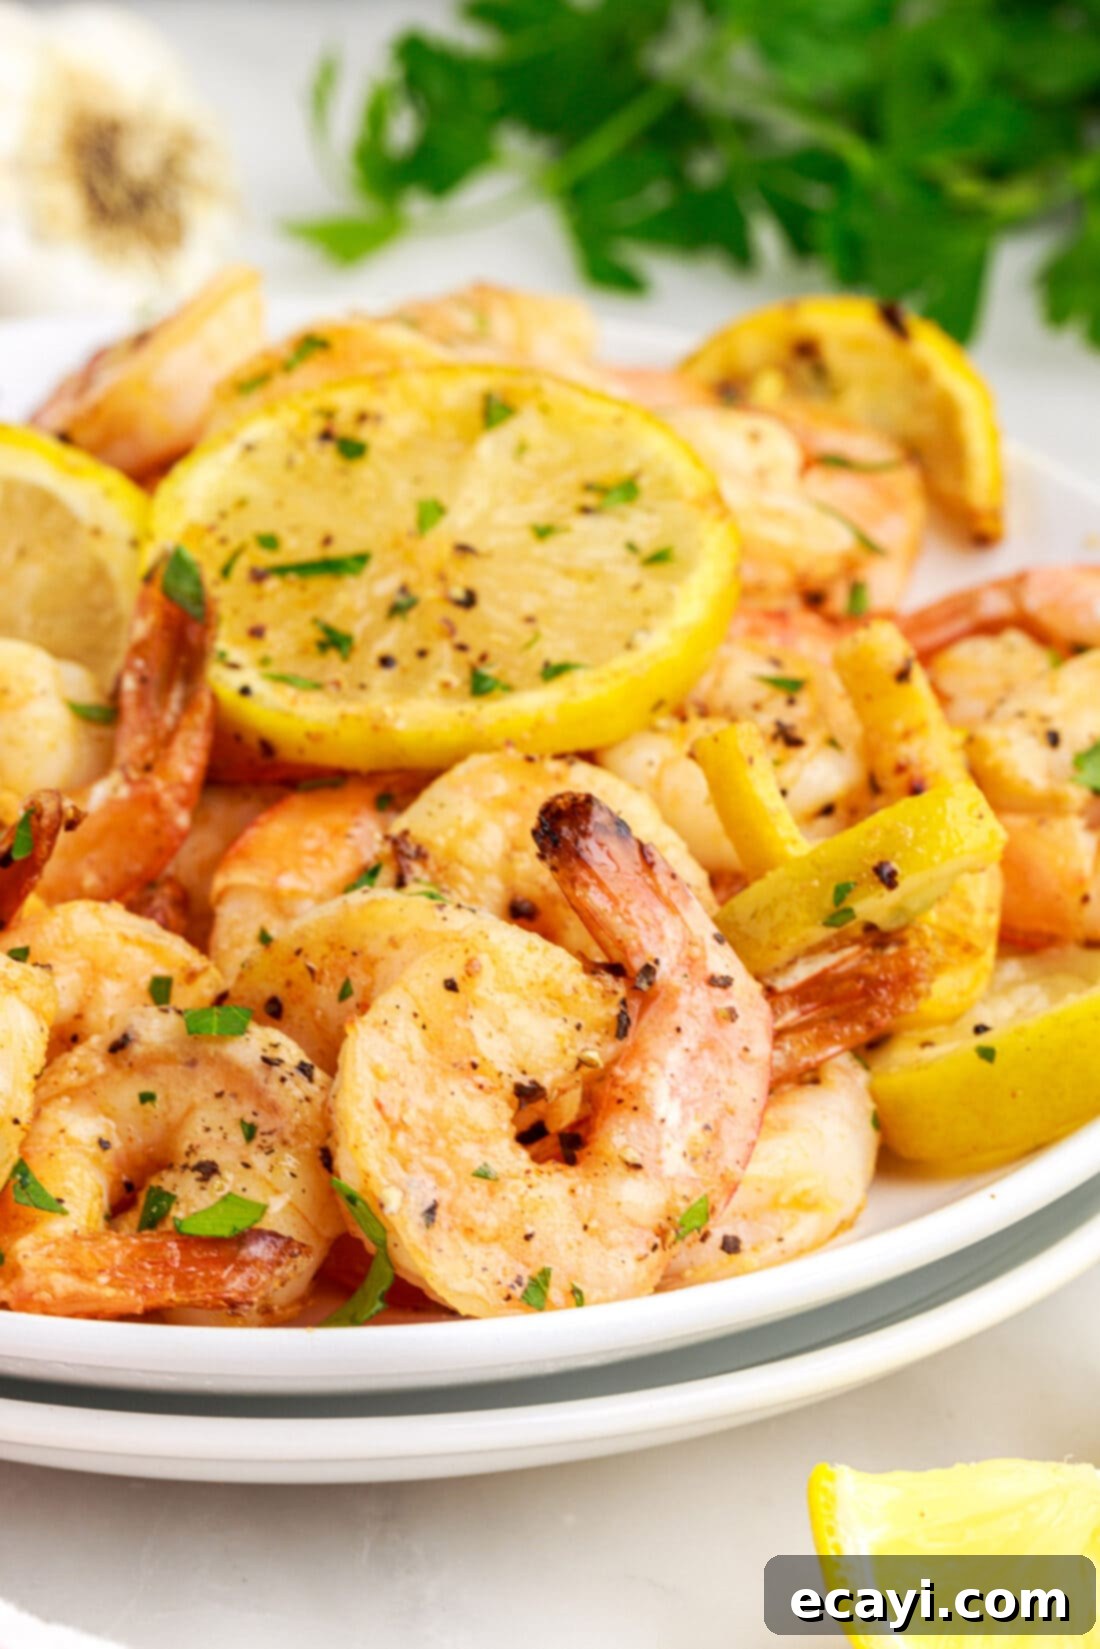
Why This Air Fryer Shrimp Recipe Works So Well
If you’re seeking a quick, delicious, and foolproof method for how to make air fryer shrimp, you’ve found your go-to recipe. The magic of the air fryer lies in its ability to circulate hot air rapidly, creating a crispy exterior while locking in moisture, resulting in shrimp that are perfectly tender and ultra juicy. The sweet spot for achieving this ideal texture is typically around 4 minutes in a preheated air fryer, ensuring no chewy or tough shrimp ever grace your plate!
This recipe provides an excellent foundation for cooking up beautifully golden jumbo shrimp. Its simplicity allows for incredible versatility; you can easily customize the seasoning blend to match your personal taste preferences or the specific meal you’re preparing. Enjoy these flavorful shrimp as a stand-alone appetizer, mix them into your favorite pasta dishes – like a creamy shrimp pasta – or serve them elegantly over a fluffy bed of rice or crisp salad greens. The rapid cooking time also means less time slaving over a hot stove and more time enjoying your culinary creation, making it a healthy and convenient option for any day of the week.
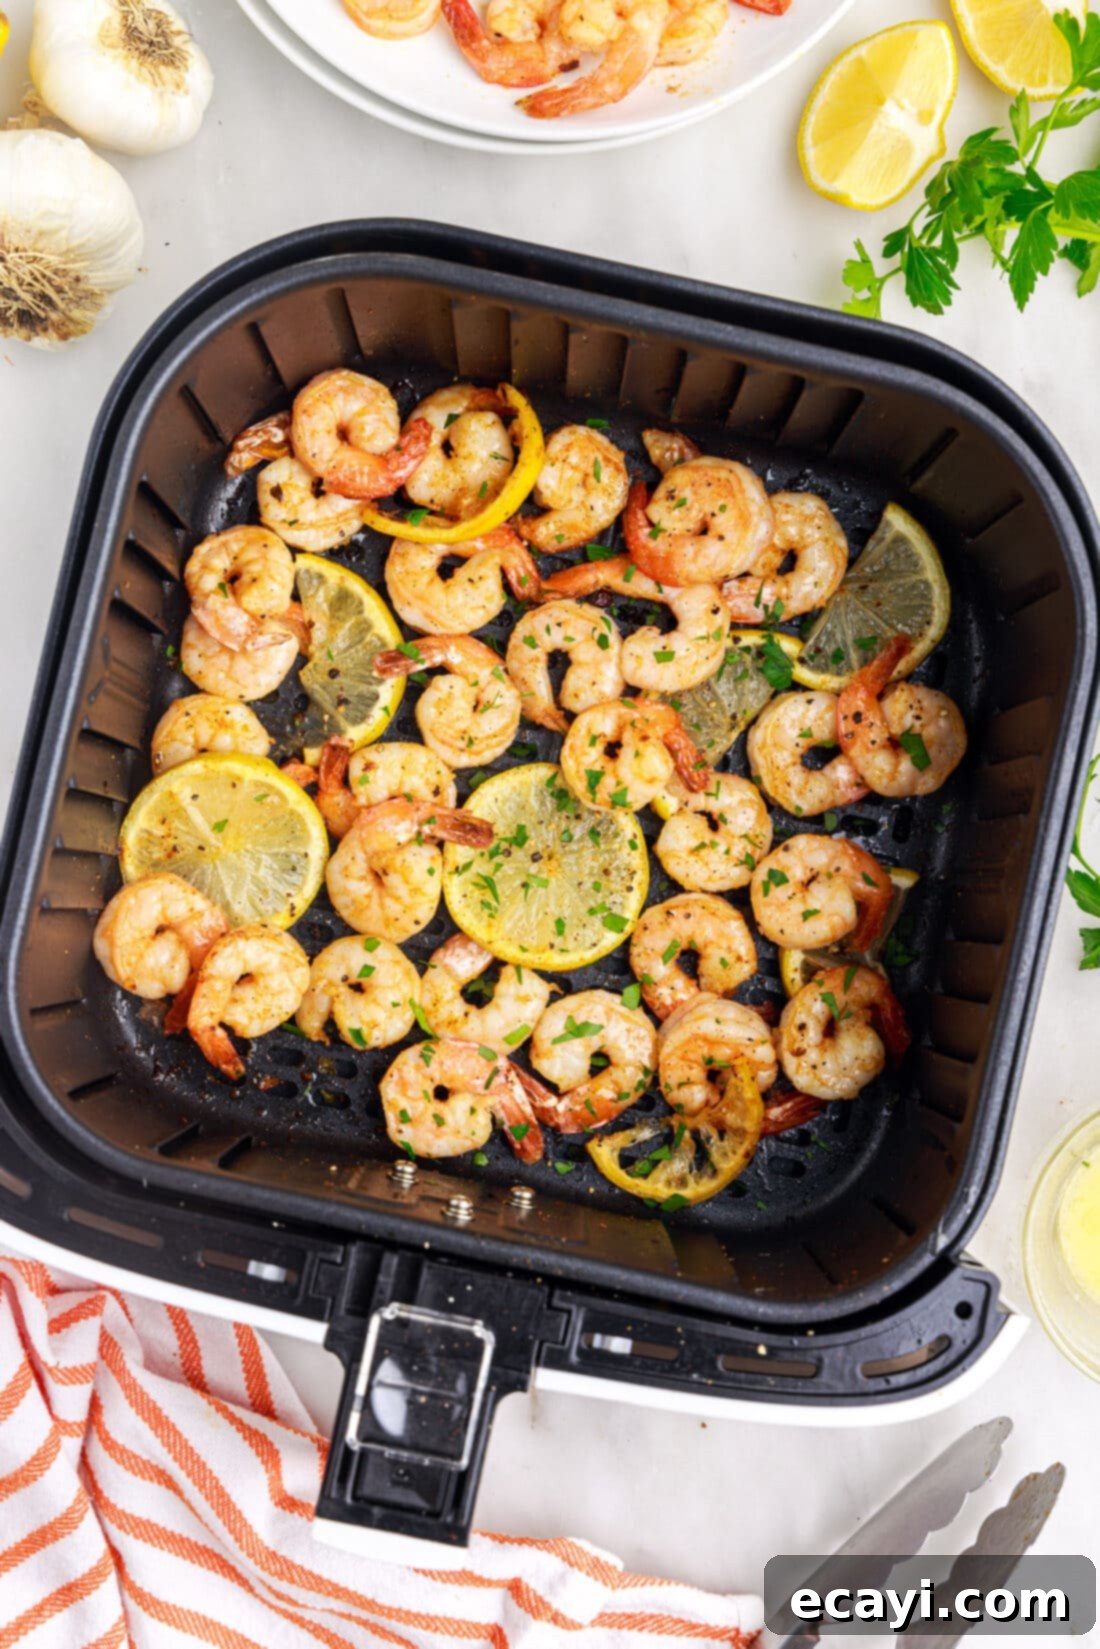
Essential Ingredients for Your Air Fryer Shrimp
Crafting perfect air fryer shrimp starts with a few simple, high-quality ingredients. You’ll find all precise measurements, ingredient details, and comprehensive instructions in the printable recipe card located at the very end of this post. Gather these basics, and you’ll be well on your way to a delightful seafood experience.
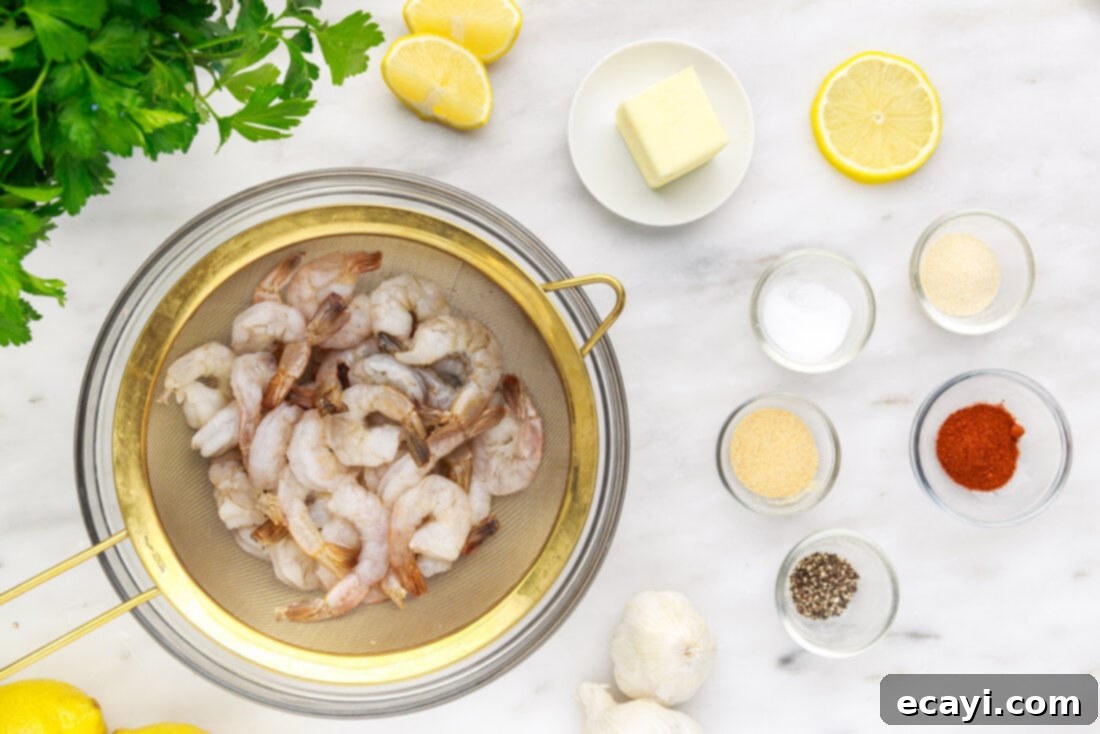
Ingredient Spotlight & Customization Tips
Understanding your ingredients and knowing how to make smart substitutions can elevate your cooking and cater to various dietary needs. Here’s a closer look at the components of this irresistible air fryer shrimp recipe:
- SHRIMP: You will need 1 lb of raw jumbo shrimp, preferably peeled and deveined to save you time and effort. While fresh shrimp are always ideal for flavor and texture, frozen shrimp are a perfectly acceptable alternative, provided they are completely thawed before you begin. It’s crucial to thoroughly pat them dry to remove as much moisture as possible. Technically, yes, you can air fry shrimp while still frozen, but this method comes with a significant drawback: frozen shrimp will not hold onto seasonings effectively, meaning all those delicious spices will likely slide right off as the shrimp thaws and warms up in the air fryer, resulting in a less flavorful final product. For the best results, always thaw your shrimp first. Consider the size of your shrimp too; larger shrimp (like jumbo or colossal) will generally take a minute or two longer to cook than smaller ones.
- BUTTER: Melted salted butter is key to achieving that rich flavor and golden-brown finish. However, if you’re looking for alternatives or a dairy-free option, olive oil, avocado oil, or even melted ghee can be used. Each will impart a slightly different flavor profile. We’ve found that butter provides the richest taste and best texture, but oil options still yield delicious results, often with a slightly shorter cooking time than a completely dry rub.
- SEASONING BLEND: Our base blend includes sea salt, black pepper, onion powder, garlic powder, and chili powder. This combination offers a savory, slightly smoky, and universally appealing flavor. Don’t be afraid to get creative and customize!
- For an extra kick, add a pinch of cayenne pepper or red pepper flakes.
- If you love a smoky depth, smoked paprika is a fantastic addition.
- For classic seafood flavor, incorporate Old Bay seasoning.
- Lemon pepper seasoning can enhance the citrus notes.
- Mediterranean herbs like dried oregano, thyme, or a touch of dill can give a fresh, aromatic twist.
- Even a dash of cumin can add an unexpected warmth to your shrimp.
Remember to taste your seasoning blend before applying it to ensure it hits your desired notes.
- LEMON SLICES (Optional): Adding fresh lemon slices to the air fryer basket with the shrimp infuses them with a bright, zesty aroma and flavor. A fresh squeeze of lemon juice just before serving is also a fantastic way to brighten the entire dish.
- FRESH CHOPPED PARSLEY (Garnish): A sprinkle of fresh, finely chopped parsley not only adds a pop of color but also brings a fresh, herbaceous note that beautifully complements the rich flavor of the shrimp. Other fresh herbs like cilantro or chives could also be used for garnish.
Step-by-Step Guide: How to Make Air Fryer Shrimp
These step-by-step photos and instructions are designed to help you visualize exactly how to prepare this delicious recipe. For a convenient printable version, complete with precise measurements and full instructions, you can Jump to Recipe at the bottom of this page.
- Preheat Your Air Fryer: Begin by preheating your air fryer to 400°F (200°C). Preheating is a crucial step that ensures the shrimp start cooking immediately upon entering the basket, promoting even cooking and that desirable crispy exterior.
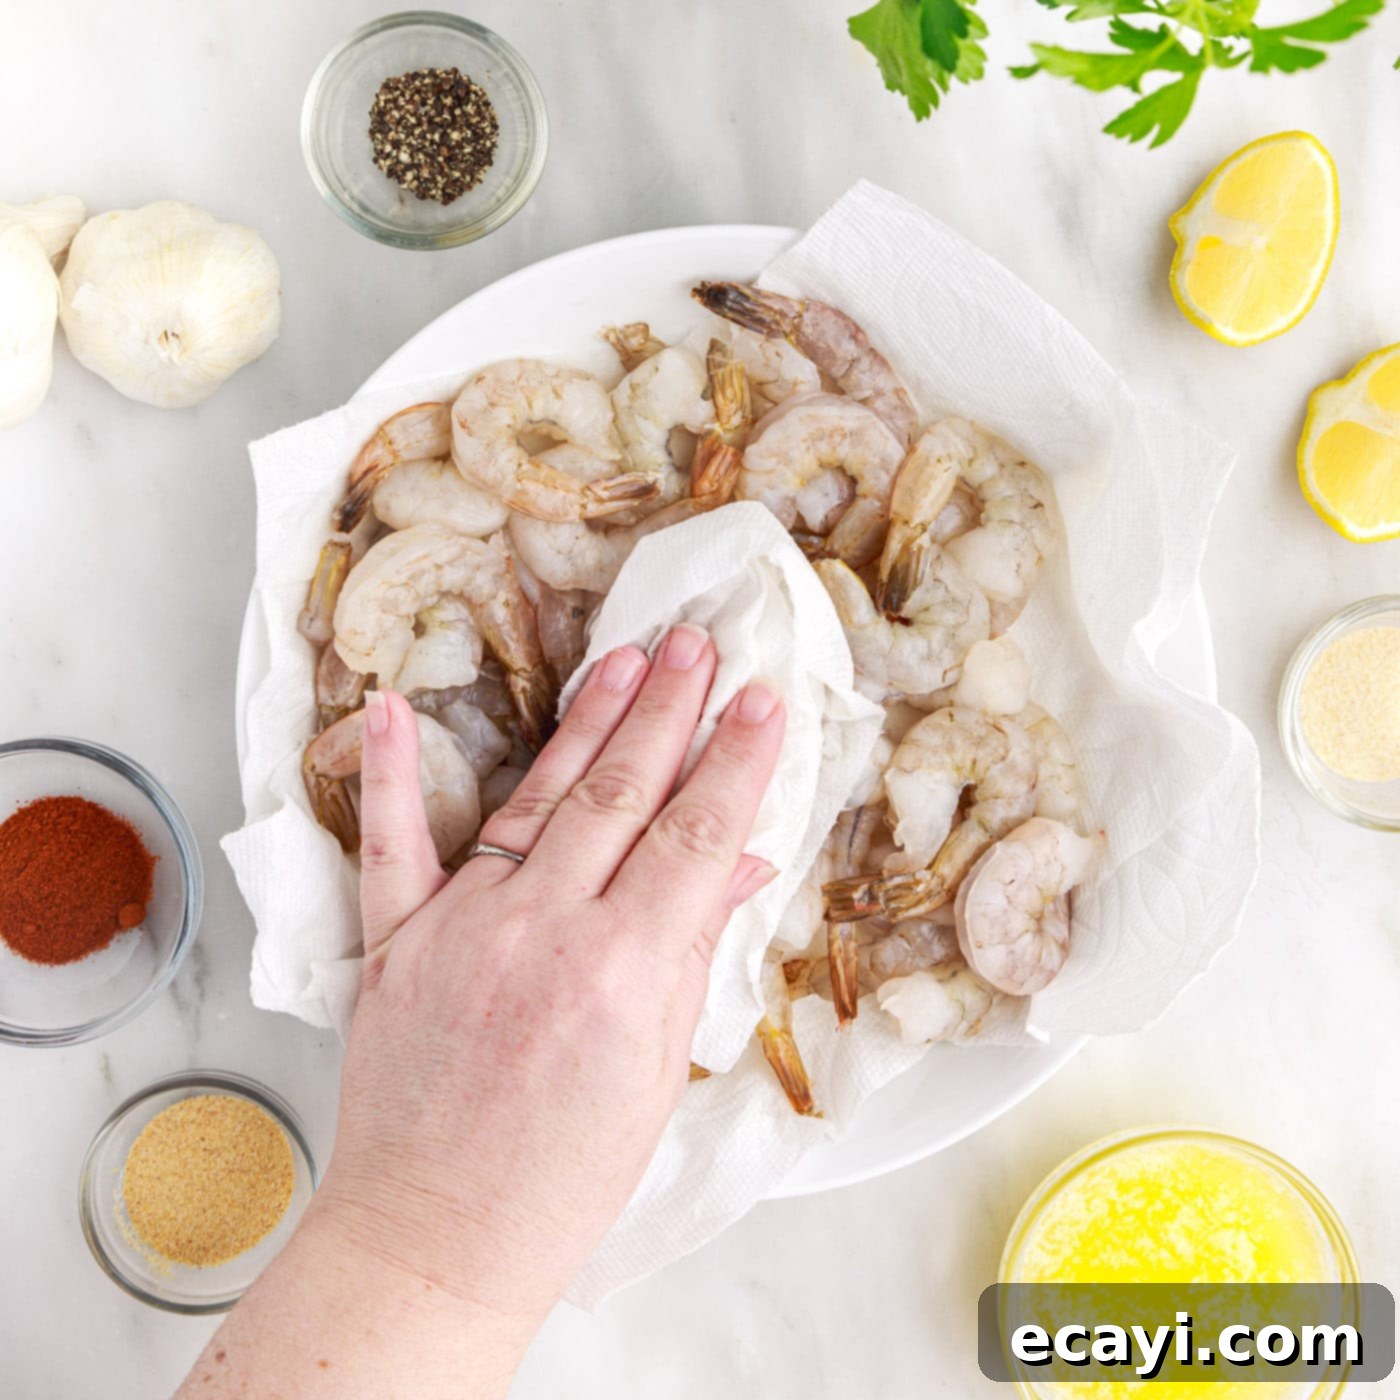
- Prepare the Shrimp: Ensure your shrimp are completely thawed (if using frozen), peeled, and deveined. Once ready, thoroughly rinse the shrimp under cold water. Then, place the rinsed shrimp on several layers of paper towels and pat them as dry as possible. Removing excess moisture is key for seasonings to adhere properly and for the shrimp to achieve a beautiful golden crust in the air fryer.

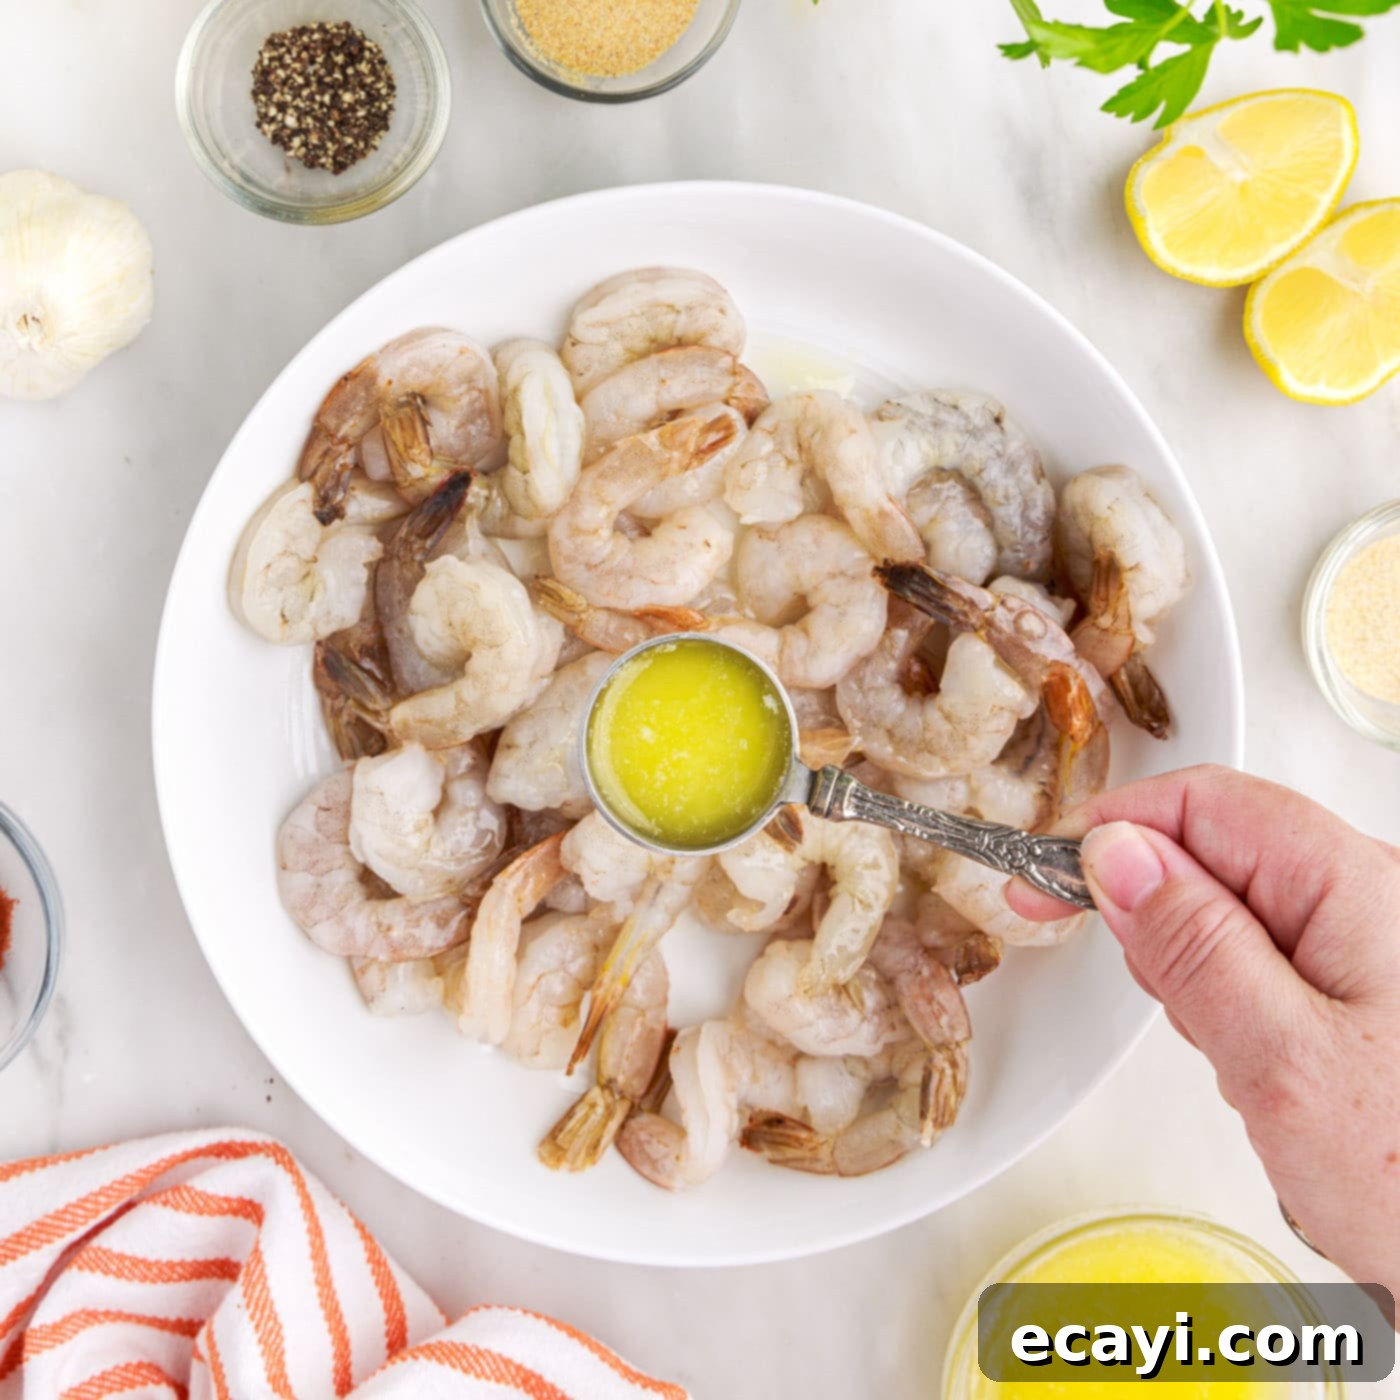
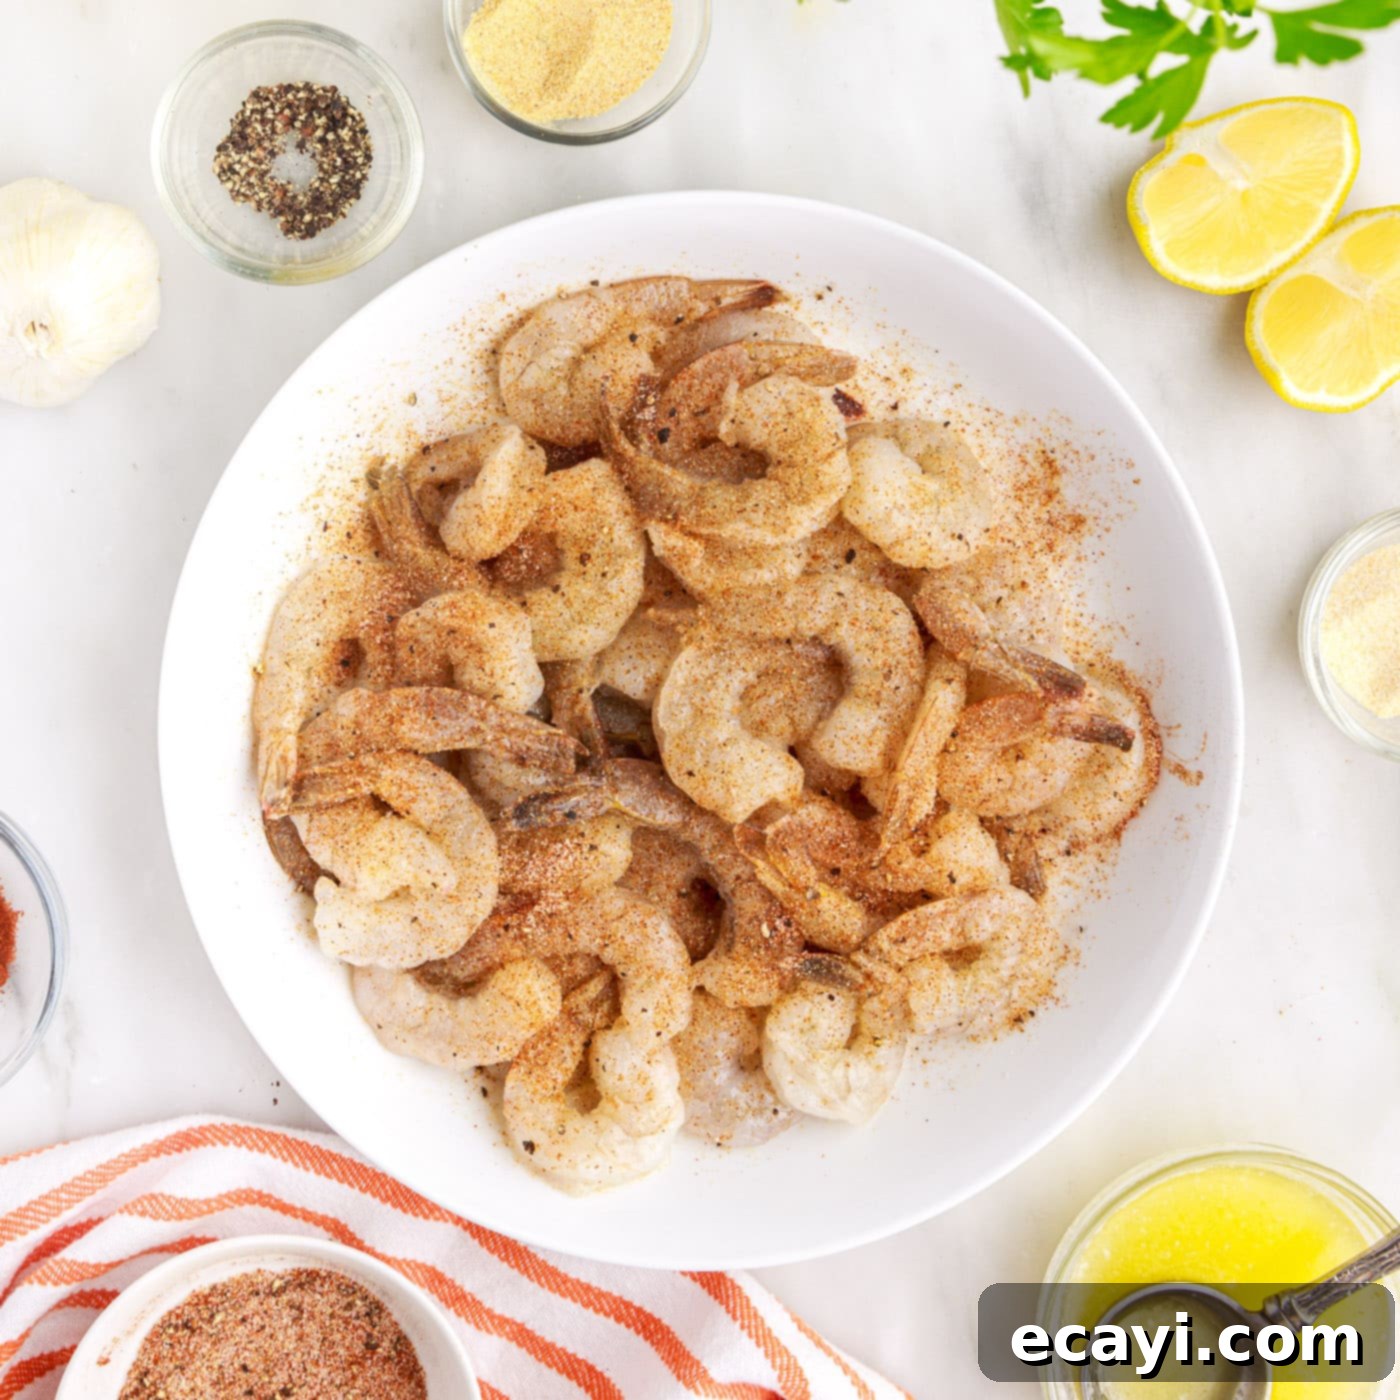
- Butter the Shrimp: Transfer the dried shrimp to a spacious mixing bowl. Pour 2 tablespoons of the melted butter over the shrimp. Toss gently but thoroughly to ensure each shrimp is evenly coated. The butter not only adds incredible flavor but also helps the seasonings stick.

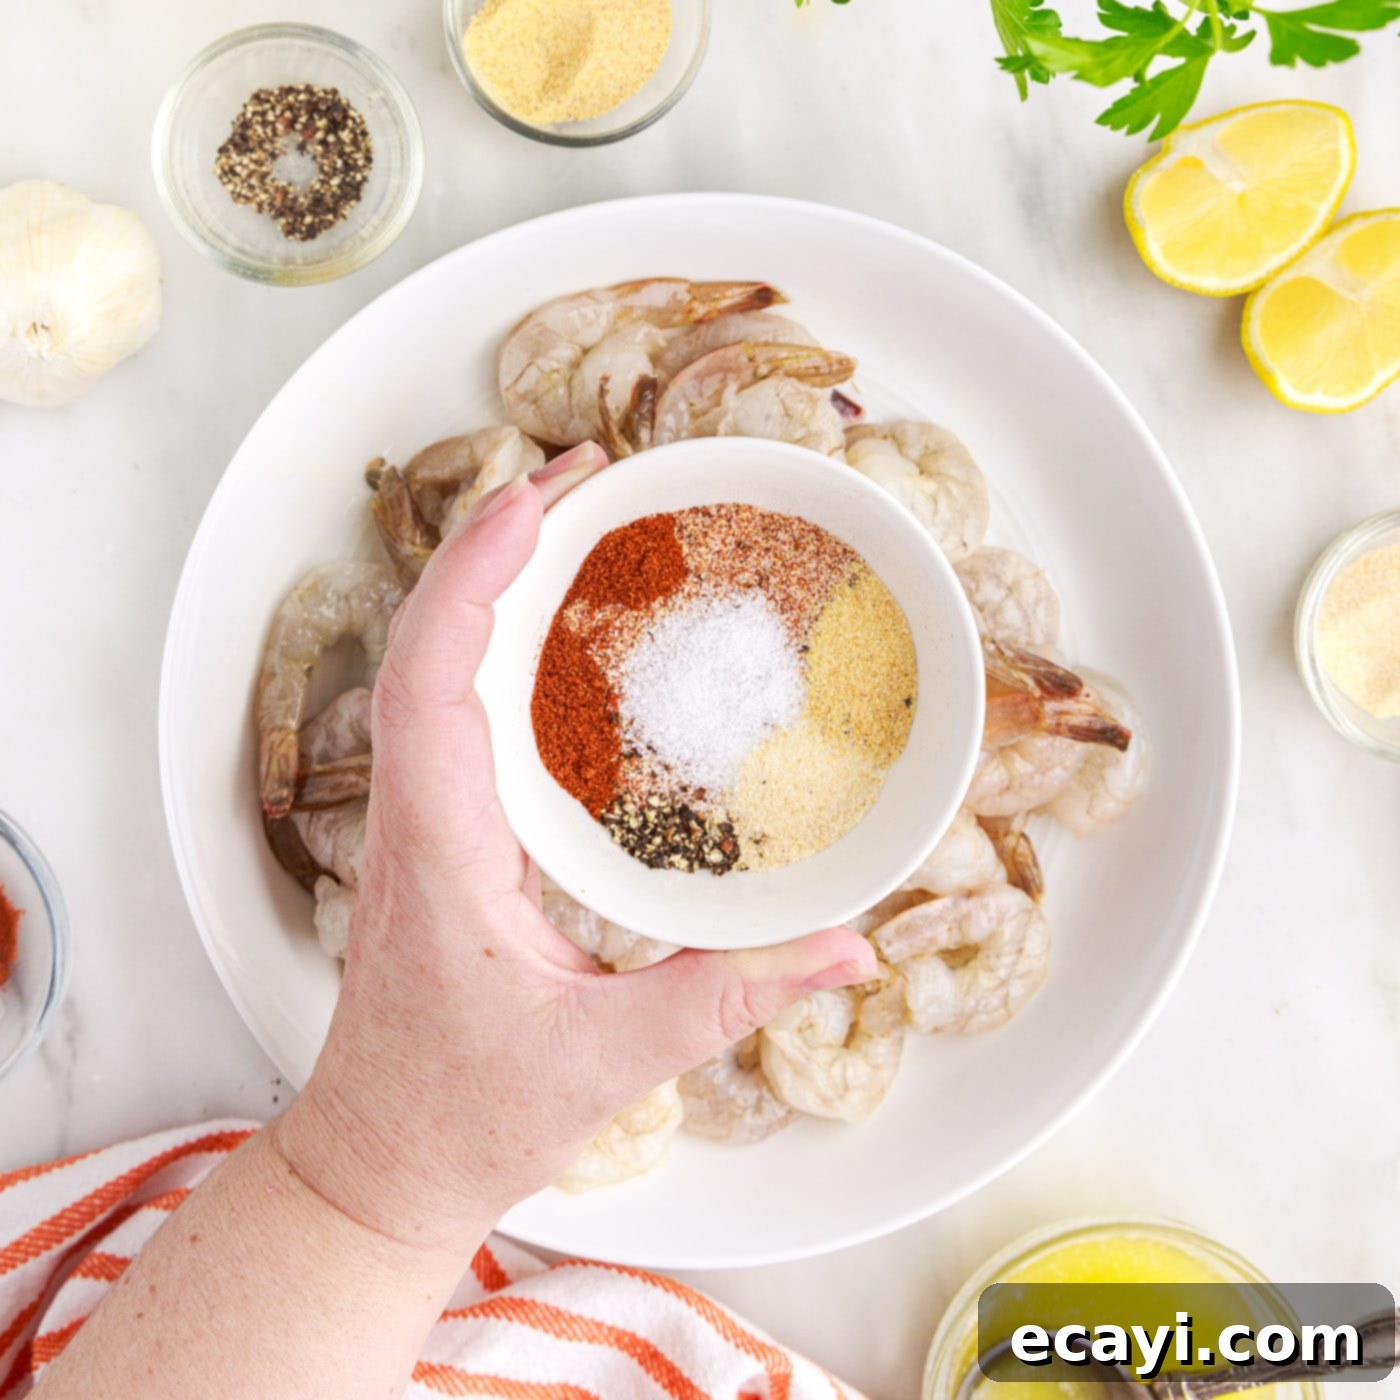
- Prepare the Seasoning Blend: In a separate small bowl, combine the sea salt, black pepper, onion powder, garlic powder, and chili powder. Mix them well to create a uniform spice blend.
- Season the Shrimp: Sprinkle the prepared spice mixture generously over the butter-coated shrimp in the mixing bowl. You may not need to use all of it; add seasoning to your desired level of taste and coverage. Toss again to ensure every shrimp is beautifully coated with the flavorful spices.


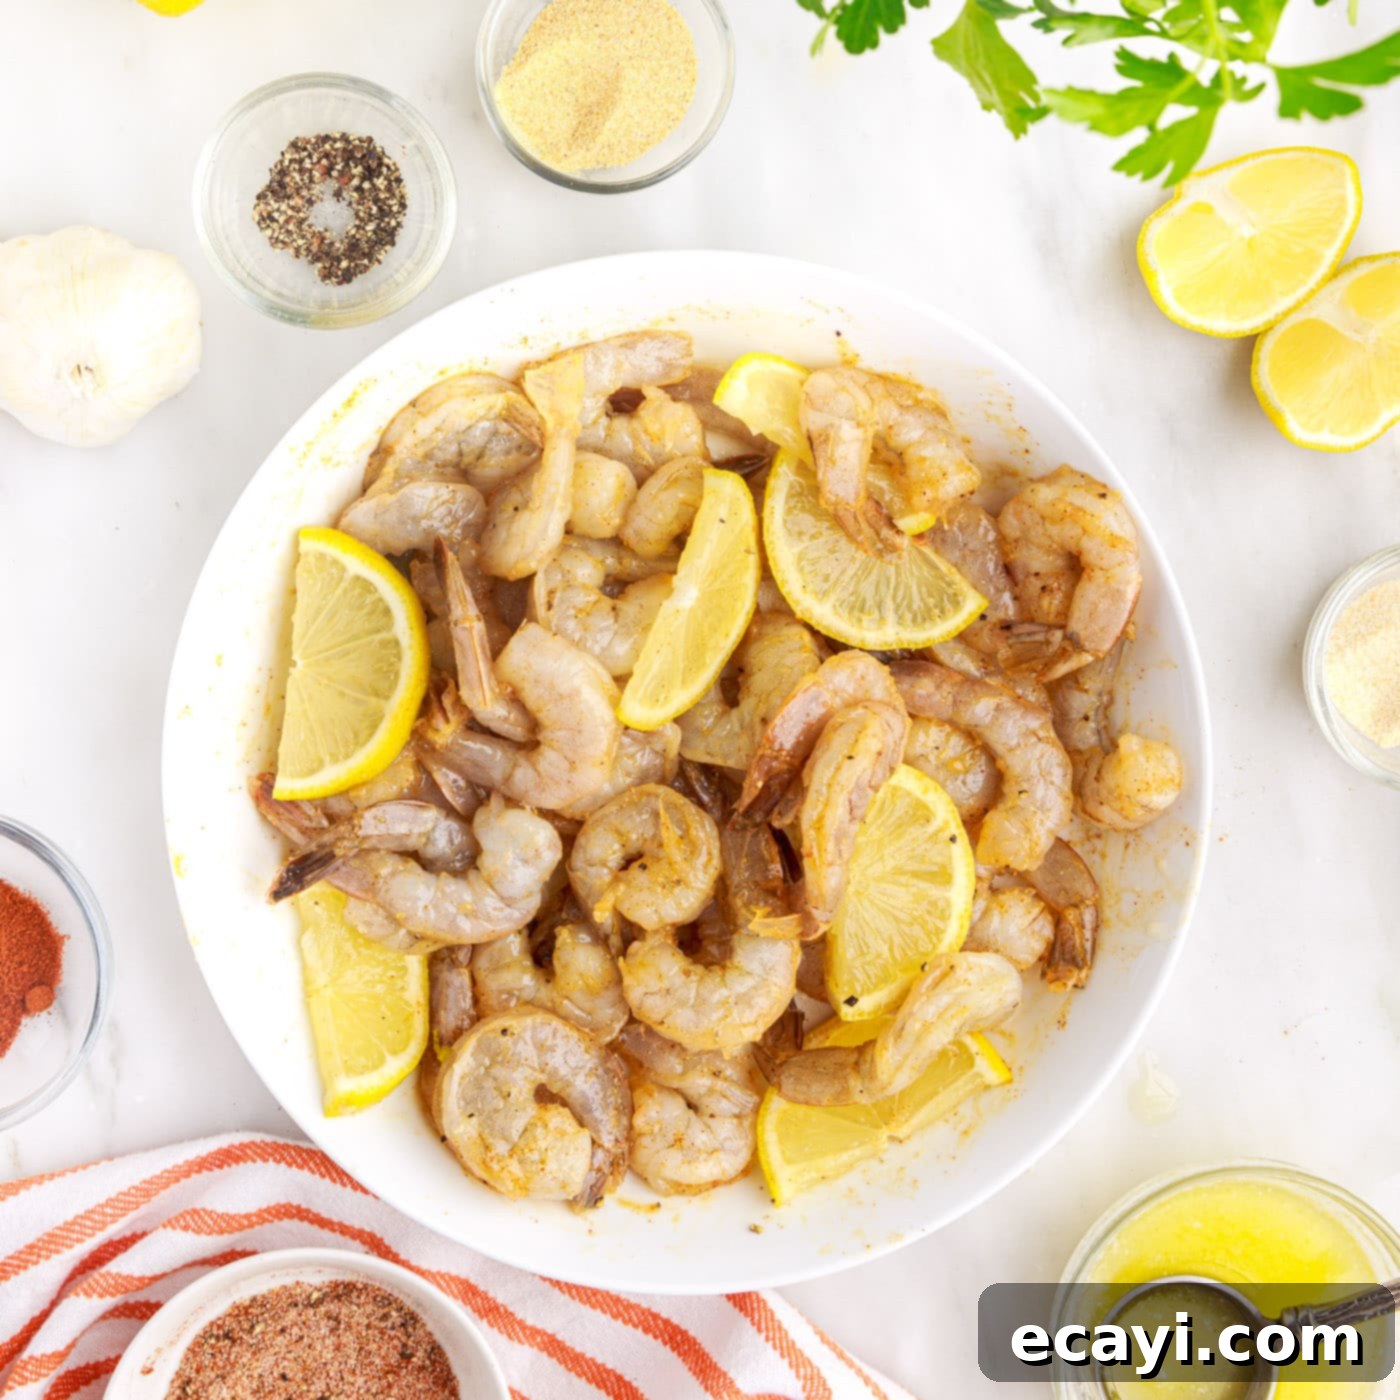
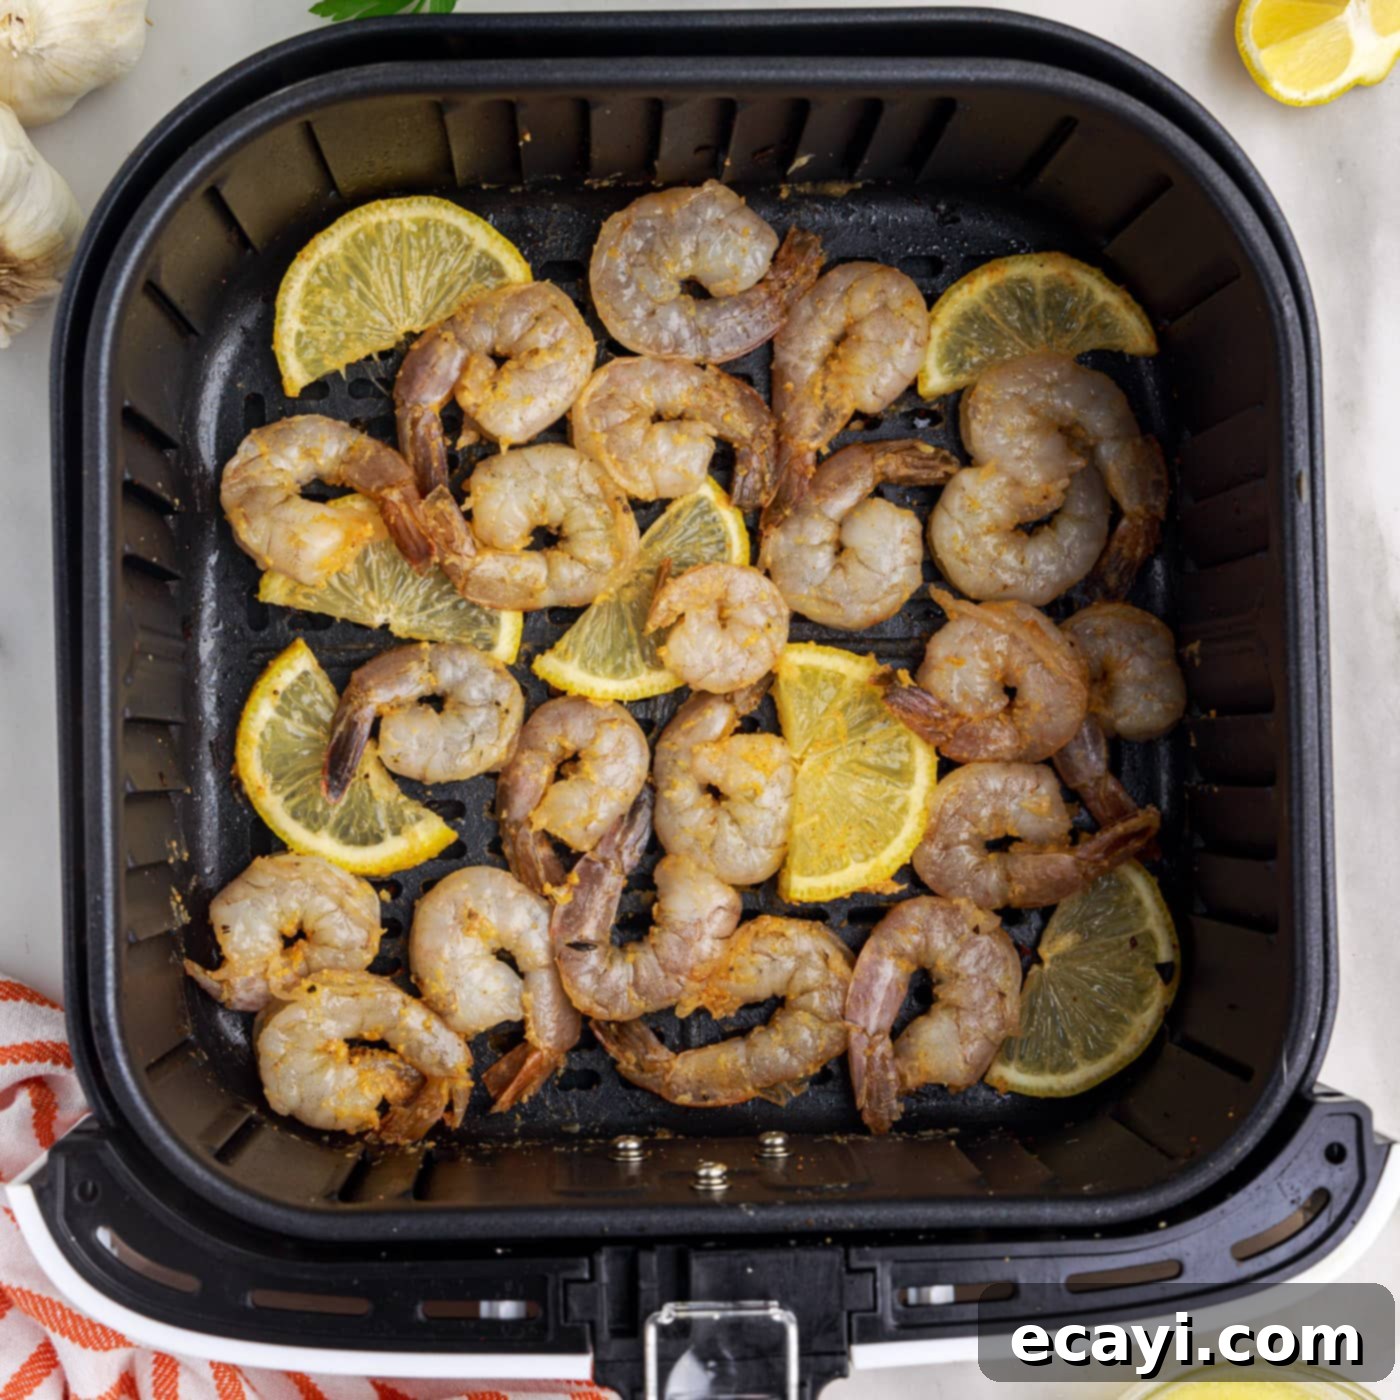
- Load the Air Fryer: Carefully place the seasoned shrimp in a single layer in your preheated air fryer basket. It’s critical not to overcrowd the basket, as this can steam the shrimp instead of frying them, preventing them from crisping up. If necessary, divide the shrimp into batches to ensure there’s enough room for air to circulate around each piece. If using, add the lemon slices alongside the shrimp; they can be mixed with the butter and seasonings or simply placed in the basket.


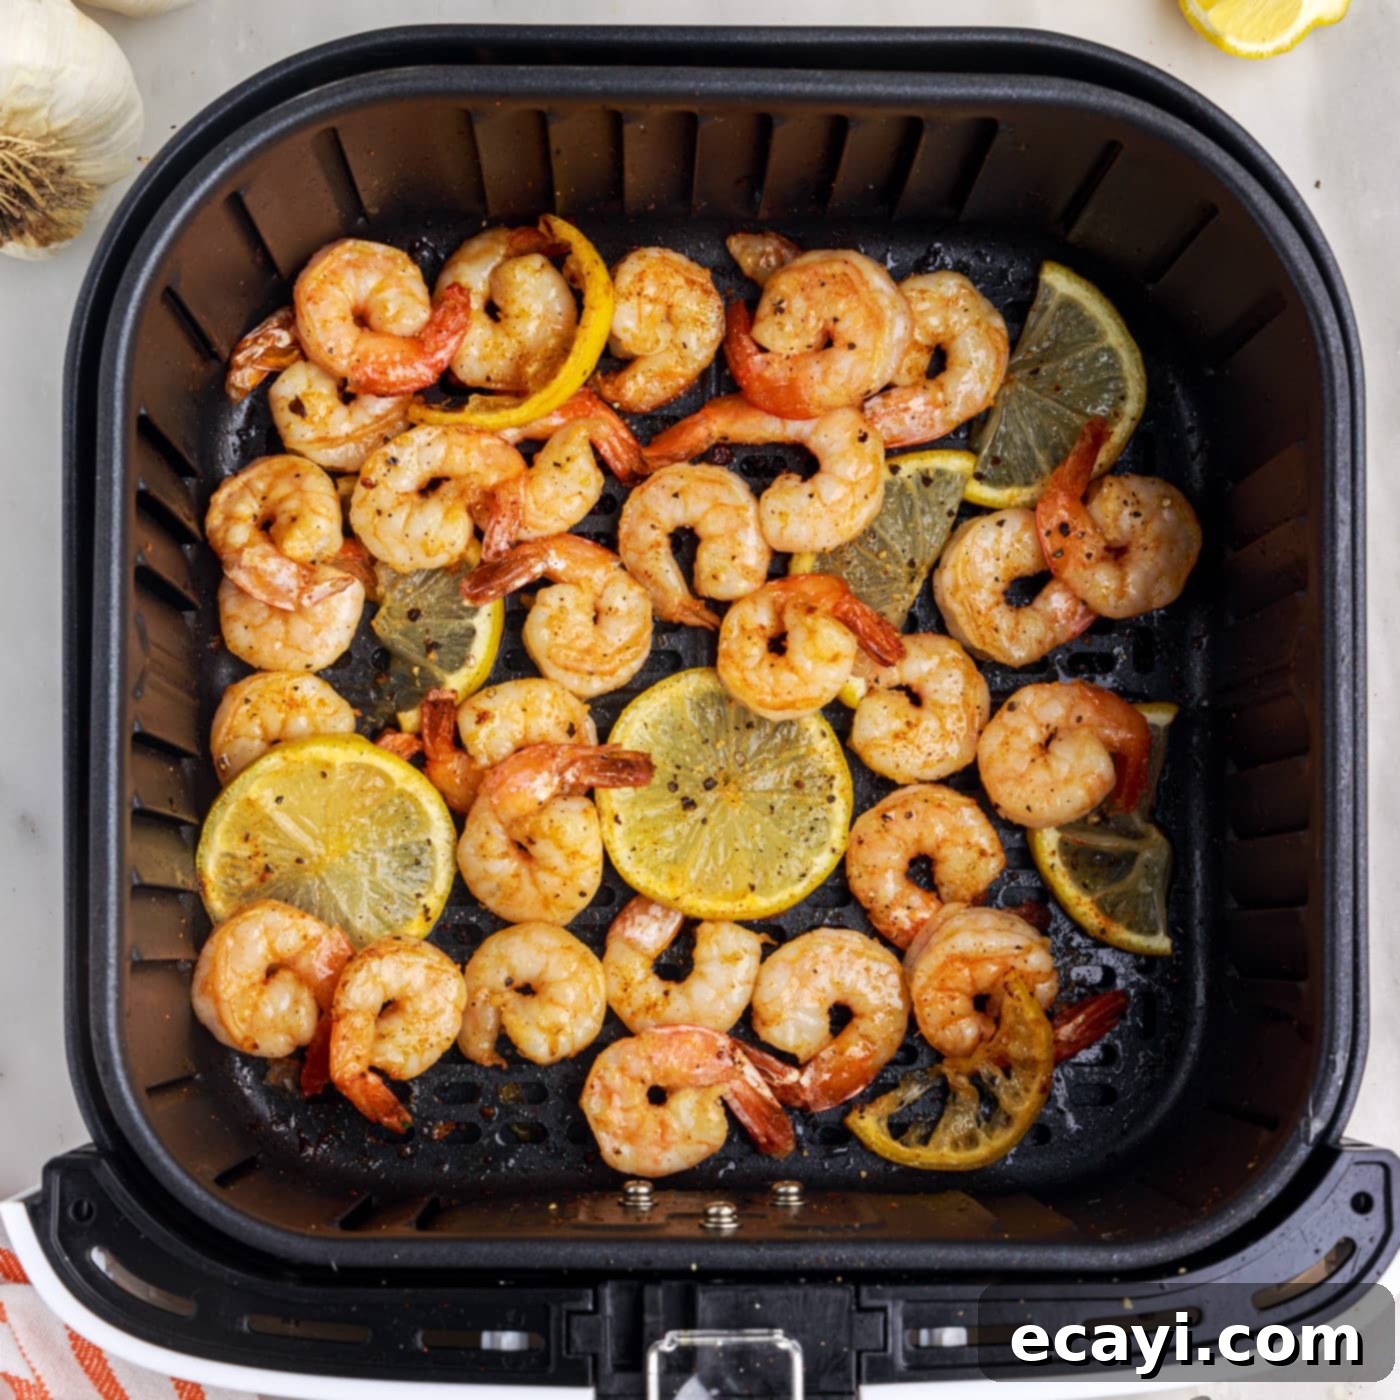
- Air Fry to Perfection: Cook the shrimp for approximately 4 minutes. The exact cooking time can vary slightly depending on the size of your shrimp and the specific model of your air fryer. The shrimp are perfectly cooked when they have curled slightly into a “C” shape and are uniformly pink throughout. Avoid overcooking, as this is the primary cause of rubbery shrimp.
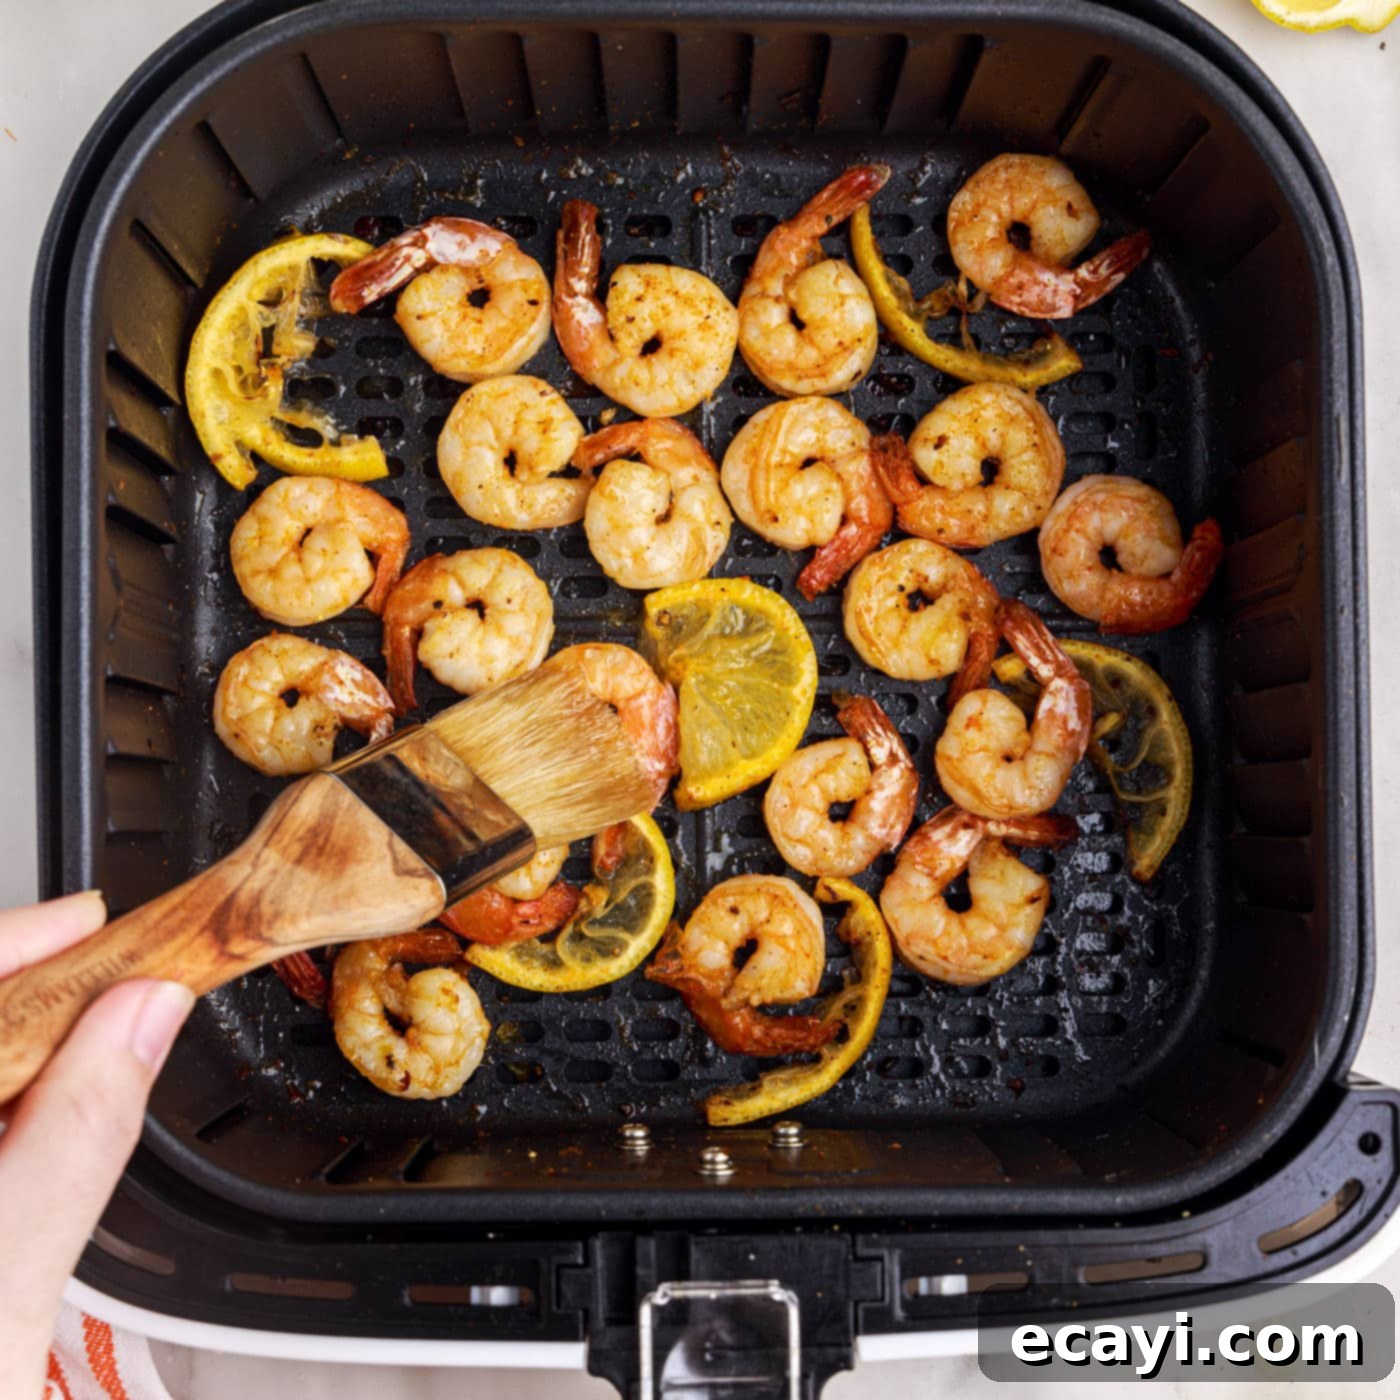
- Optional Butter Brush: For an extra layer of richness and a beautiful glossy finish, you can brush the cooked shrimp with additional melted butter immediately after removing them from the air fryer. This step enhances both flavor and appearance.

- Serve Immediately: Sprinkle the finished air fryer shrimp with finely chopped fresh parsley for a burst of color and herbaceous freshness. Serve them hot and fresh to best enjoy their tender texture and vibrant flavor!
Frequently Asked Questions & Expert Tips for Air Fryer Shrimp
Store any leftover cooked shrimp in an airtight container in the refrigerator for up to 2-3 days. To reheat, the air fryer is your best friend! Simply place the shrimp back in the air fryer basket at 350°F (175°C) for 2-3 minutes, or until heated through. This method helps maintain their texture. Avoid reheating in the microwave, as it can often make shrimp rubbery.
This recipe has been rigorously tested three ways: using just a dry rub, using olive oil with seasonings, and coated in butter with seasonings. Of the three tests, using no oil resulted in a slightly longer cook time – typically 4-5 minutes instead of 3-4 minutes – and a slightly less succulent finish. Both the dry rub and the olive oil with spice rub options tasted great and are excellent choices if you prefer to avoid butter or are looking for a lighter alternative. However, for the absolute best flavor profile and most tender, juicy results, we found that drizzling with butter, sprinkling with seasoning, cooking, and then brushing with a touch more melted butter yielded the most superior outcome. Depending on your personal taste or dietary needs, any of these options will work wonderfully, so feel free to experiment!
While it is possible to cook frozen shrimp in an air fryer, we highly recommend thawing them first for this recipe. When cooked from frozen, shrimp release a lot of water, which can prevent seasonings from adhering properly and result in a steamed, rather than air-fried, texture. If you must cook from frozen, increase the cooking time by 2-4 minutes and be prepared for a slightly less flavorful and potentially less crispy result.
The key to tender shrimp is to avoid overcooking. Shrimp cook very quickly! Watch them closely; they are done when they turn opaque pink and curl into a loose “C” shape. If they form a tight “O” shape, they are likely overcooked. Four minutes is often the sweet spot for jumbo shrimp in a preheated air fryer, but always monitor the visual cues.
Yes, absolutely! Smaller shrimp (like medium or large) will cook faster, potentially in 3-4 minutes. Larger shrimp (jumbo or colossal) might need closer to 5-6 minutes. Always adjust your cooking time based on the size of your shrimp and keep an eye on those visual cues for doneness.
While air fryer shrimp are best enjoyed fresh, you can prep them ahead. Peel and devein your shrimp, pat them dry, and even toss them with the butter and seasonings, then store them in an airtight container in the refrigerator for up to 24 hours. When you’re ready to cook, simply pop them into the preheated air fryer. This cuts down on weeknight prep time significantly!
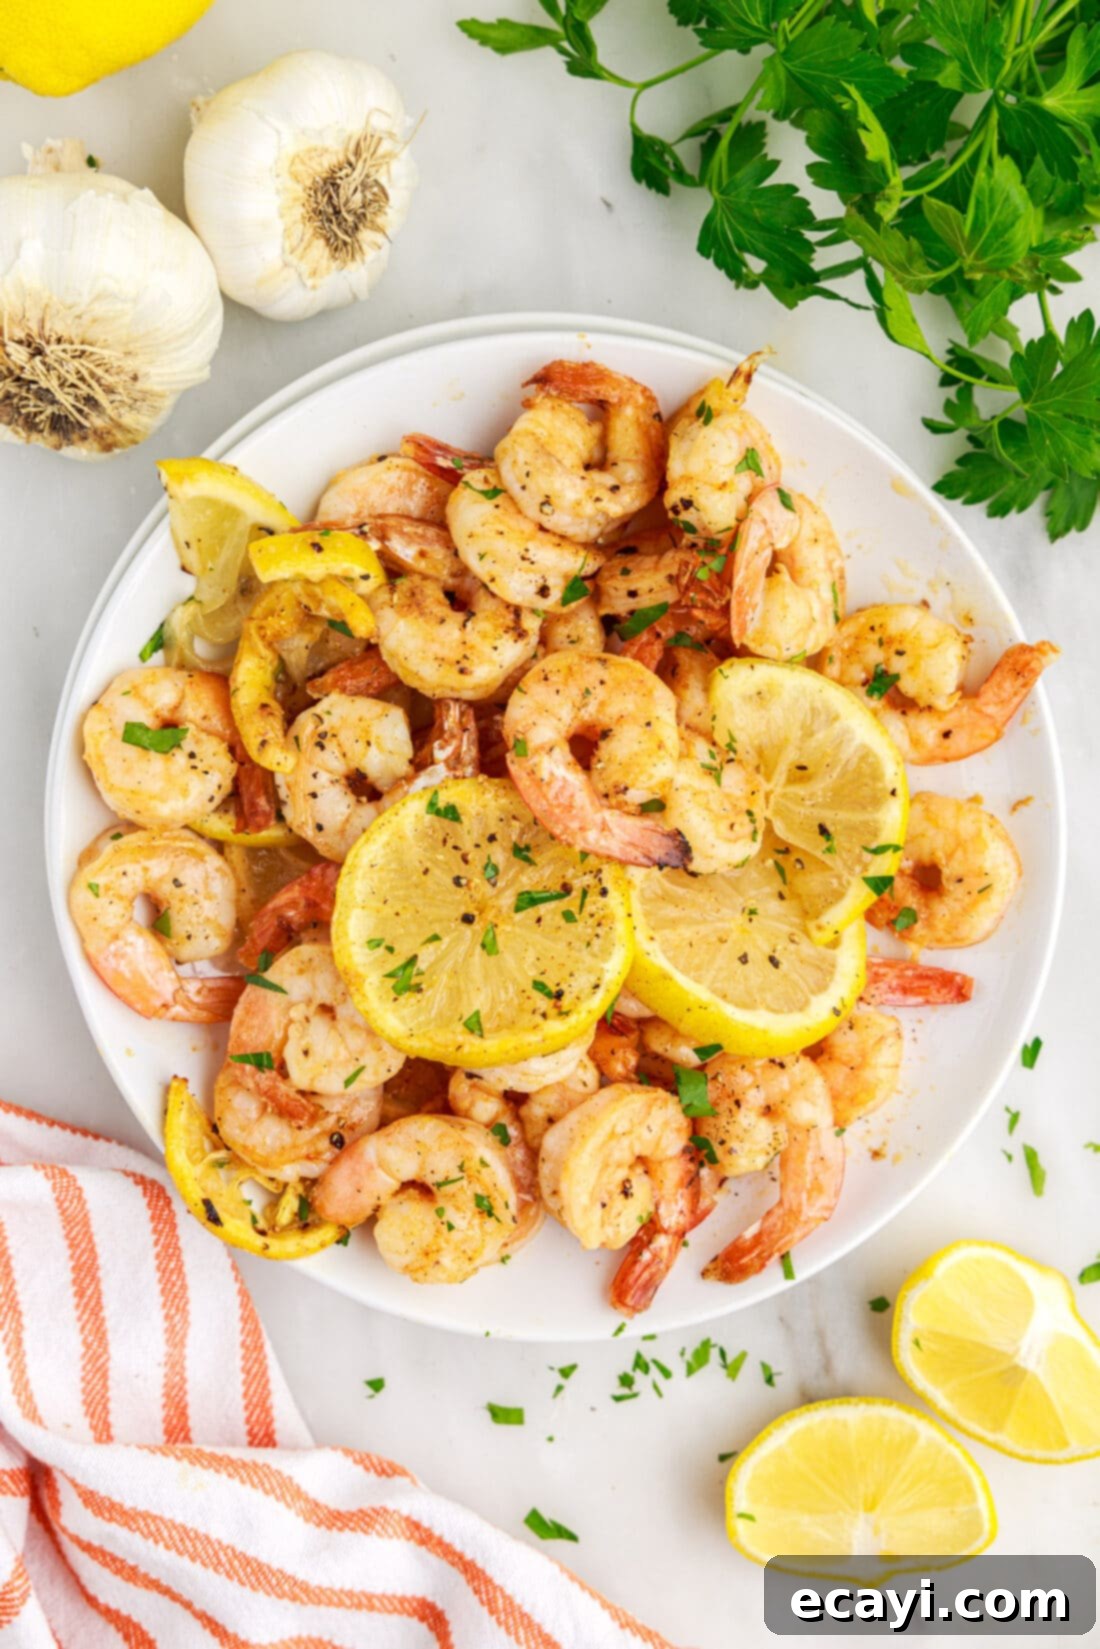
Delicious Serving Suggestions for Air Fryer Shrimp
Once your air fryer shrimp are cooked to perfection, the serving possibilities are endless! Their versatile flavor profile makes them a fantastic addition to a variety of dishes. Here are some of our favorite ways to enjoy these tender morsels:
- As an Appetizer: Serve hot and fresh with an extra squeeze of lemon and a selection of dipping sauces. Classic cocktail sauce, a creamy garlic aioli, a zesty remoulade, or even a simple lemon butter sauce would be delightful.
- Pasta Perfection: Toss them into your favorite pasta dishes. They pair wonderfully with a light lemon-garlic butter pasta, a spicy arrabiata, a rich alfredo, or even a simple spaghetti aglio e olio. Don’t forget our recommended shrimp pasta recipe!
- Hearty Salads: Elevate any crisp salad by adding these flavorful shrimp. They’re excellent in a Caesar salad, a Mediterranean-inspired salad with feta and olives, or simply a fresh garden salad with a light vinaigrette.
- Over Grains: Serve them over a fluffy bed of white rice, savory pilaf, quinoa, or even couscous for a complete and satisfying meal. For an Asian-inspired twist, add them to fried rice.
- Tacos and Wraps: Stuff them into warm tortillas for delicious shrimp tacos, or create vibrant lettuce wraps with a touch of slaw and a drizzle of spicy mayo.
- Soups and Stews: Add the cooked shrimp to a steaming bowl of chowder, gumbo, or a light vegetable soup just before serving to add protein and flavor.
- Skewers: For a fun presentation, thread them onto skewers with colorful vegetables like bell peppers and cherry tomatoes after cooking, or skewer and then air fry for a charred effect.
- Sandwiches & Po’ Boys: Create a delectable shrimp sandwich or a classic New Orleans-style shrimp po’ boy with a crusty baguette, lettuce, tomato, and remoulade sauce.
Explore More Air Fryer Delights
The air fryer is a remarkably versatile appliance, perfect for whipping up everything from crispy appetizers to healthy main courses. If you loved this shrimp recipe, you’re in for a treat with our other popular air fryer creations. Expand your air fryer repertoire with these fantastic recipes:
- Air Fryer Crab Cakes
- Air Fryer Chicken Kabobs
- Air Fryer Baked Potatoes
- Air Fryer Chicken Tenders
- Air Fryer Coconut Shrimp
- Air Fryer Fish
- Air Fryer Scallops
I genuinely love to bake and cook, and it brings me immense joy to share my kitchen experiences and culinary adventures with all of you! Remembering to come back each day for new recipes can sometimes be a challenge, which is why I offer a convenient newsletter delivered right to your inbox every time a new recipe posts. Simply subscribe today and start receiving your free daily recipes – a constant source of inspiration for your next delicious meal!
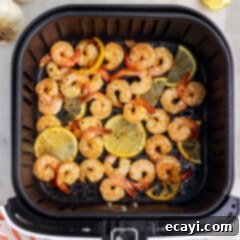
Air Fryer Shrimp
IMPORTANT – There are often Frequently Asked Questions within the blog post that you may find helpful. Simply scroll back up to read them!
Print It
Pin It
Rate It
Save ItSaved!
Ingredients
- 1 lb jumbo shrimp raw – or thawed if frozen, peeled and deveined
- 4 Tbsp salted butter melted (or olive oil/avocado oil for dairy-free)
- ½ tsp sea salt
- ¼ tsp black pepper
- ¼ tsp onion powder
- ¼ tsp garlic powder
- ¼ tsp chili powder
- 1 lemon cut into slices, optional, plus extra for serving
- fresh chopped parsley for garnish
Things You’ll Need
-
Air fryer
-
Mixing bowls
Before You Begin: Essential Tips for Success
- I experimented with cooking shrimp in three ways: dry-rubbed, tossed with olive oil and seasoning, and coated in butter with spices. I discovered that cooking without any oil leads to a slightly longer cook time – approximately 4-5 minutes compared to the 3-4 minutes when oil or butter is used. Both the dry rub and the olive oil with spice rub yielded delicious results and are great options if you’re looking to avoid butter. However, for the absolute best flavor and juiciest texture, the optimal method was to drizzle with butter, sprinkle with seasoning, cook, and then brush on additional melted butter after cooking. Depending on your personal taste preferences or dietary needs, any of these approaches will work beautifully.
- To ensure even cooking and a crispy texture, it is crucial not to overcrowd the air fryer basket. Always arrange the shrimp in a single layer, allowing enough space for air to circulate freely around each piece. You will likely need to cook the shrimp in multiple batches, especially if you have a smaller air fryer. The shrimp are perfectly cooked when they turn opaque pink in color, are no longer translucent, and have curled into a gentle “C” shape. Overcooking can lead to tough, rubbery shrimp, so keep a close eye on them!
- Make sure your shrimp are thoroughly patted dry after rinsing. Excess moisture creates steam, which will prevent the shrimp from getting that desirable crispy outer layer in the air fryer. The dryer the shrimp, the better the crisping!
- Preheating your air fryer is key to consistent cooking. Just like an oven, a preheated air fryer ensures that your food starts cooking at the right temperature immediately, preventing undercooked centers and promoting even browning.
Instructions
-
Preheat your air fryer to 400°F (200°C). This ensures immediate and even cooking for perfect results.
-
Confirm that your shrimp are completely thawed (if frozen), peeled, and deveined. After rinsing the shrimp under cold water, place them on several layers of paper towels and pat them thoroughly dry. Removing as much moisture as possible is essential for achieving a good crisp and allowing seasonings to adhere.
-
Transfer the dried shrimp to a mixing bowl. Pour 2 tablespoons of the melted butter over the shrimp and toss gently to coat each piece evenly.
-
In a small separate bowl, combine the sea salt, black pepper, onion powder, garlic powder, and chili powder. Mix well to create your uniform spice blend.
-
Sprinkle the spice mixture over the butter-coated shrimp in the mixing bowl. You may not need to use all of the seasoning; add it to your desired level of taste. Toss again to ensure all shrimp are well-coated.
-
Arrange the seasoned shrimp in a single layer in the preheated air fryer basket. It’s crucial to avoid overcrowding; if necessary, cook in batches to allow proper air circulation around each shrimp. Add lemon slices into the basket alongside the shrimp if desired; they can be mixed with the shrimp or simply placed in the basket.
-
Cook for approximately 4 minutes. The shrimp are ready when they have curled slightly into a ‘C’ shape and are opaque pink throughout. Cooking times may vary by air fryer model and shrimp size, so monitor closely to prevent overcooking.
-
For an extra rich flavor and glossy finish, brush the cooked shrimp with additional melted butter immediately after removing them from the air fryer. This step is optional but highly recommended.
-
Sprinkle with finely chopped fresh parsley for a vibrant garnish and serve immediately while hot and juicy.
Nutrition
The recipes on this blog are tested with a conventional gas oven and gas stovetop. It’s important to note that some ovens, especially as they age, can cook and bake inconsistently. Using an inexpensive oven thermometer can assure you that your oven is truly heating to the proper temperature. If you use a toaster oven or countertop oven, please keep in mind that they may not distribute heat the same as a conventional full sized oven and you may need to adjust your cooking/baking times. In the case of recipes made with a pressure cooker, air fryer, slow cooker, or other appliance, a link to the appliances we use is listed within each respective recipe. For baking recipes where measurements are given by weight, please note that results may not be the same if cups are used instead, and we can’t guarantee success with that method.
