Crispy Parmesan Smashed Cauliflower: Your Ultimate Low-Carb & Flavorful Side Dish
Say goodbye to bland vegetables and hello to your new favorite side! This recipe for **crispy smashed cauliflower** transforms humble florets into irresistible, golden-brown bites, generously sprinkled with savory Parmesan cheese, a hint of pepper, and perfectly balanced with salt. It’s a truly delicious, low-carb, and gluten-free side dish that proves you never have to compromise on flavor, even when eating healthy. Prepare to be amazed by the delightful crunch and tender interior that makes this dish a standout addition to any meal.

Why This Crispy Smashed Cauliflower Recipe Is a Must-Try
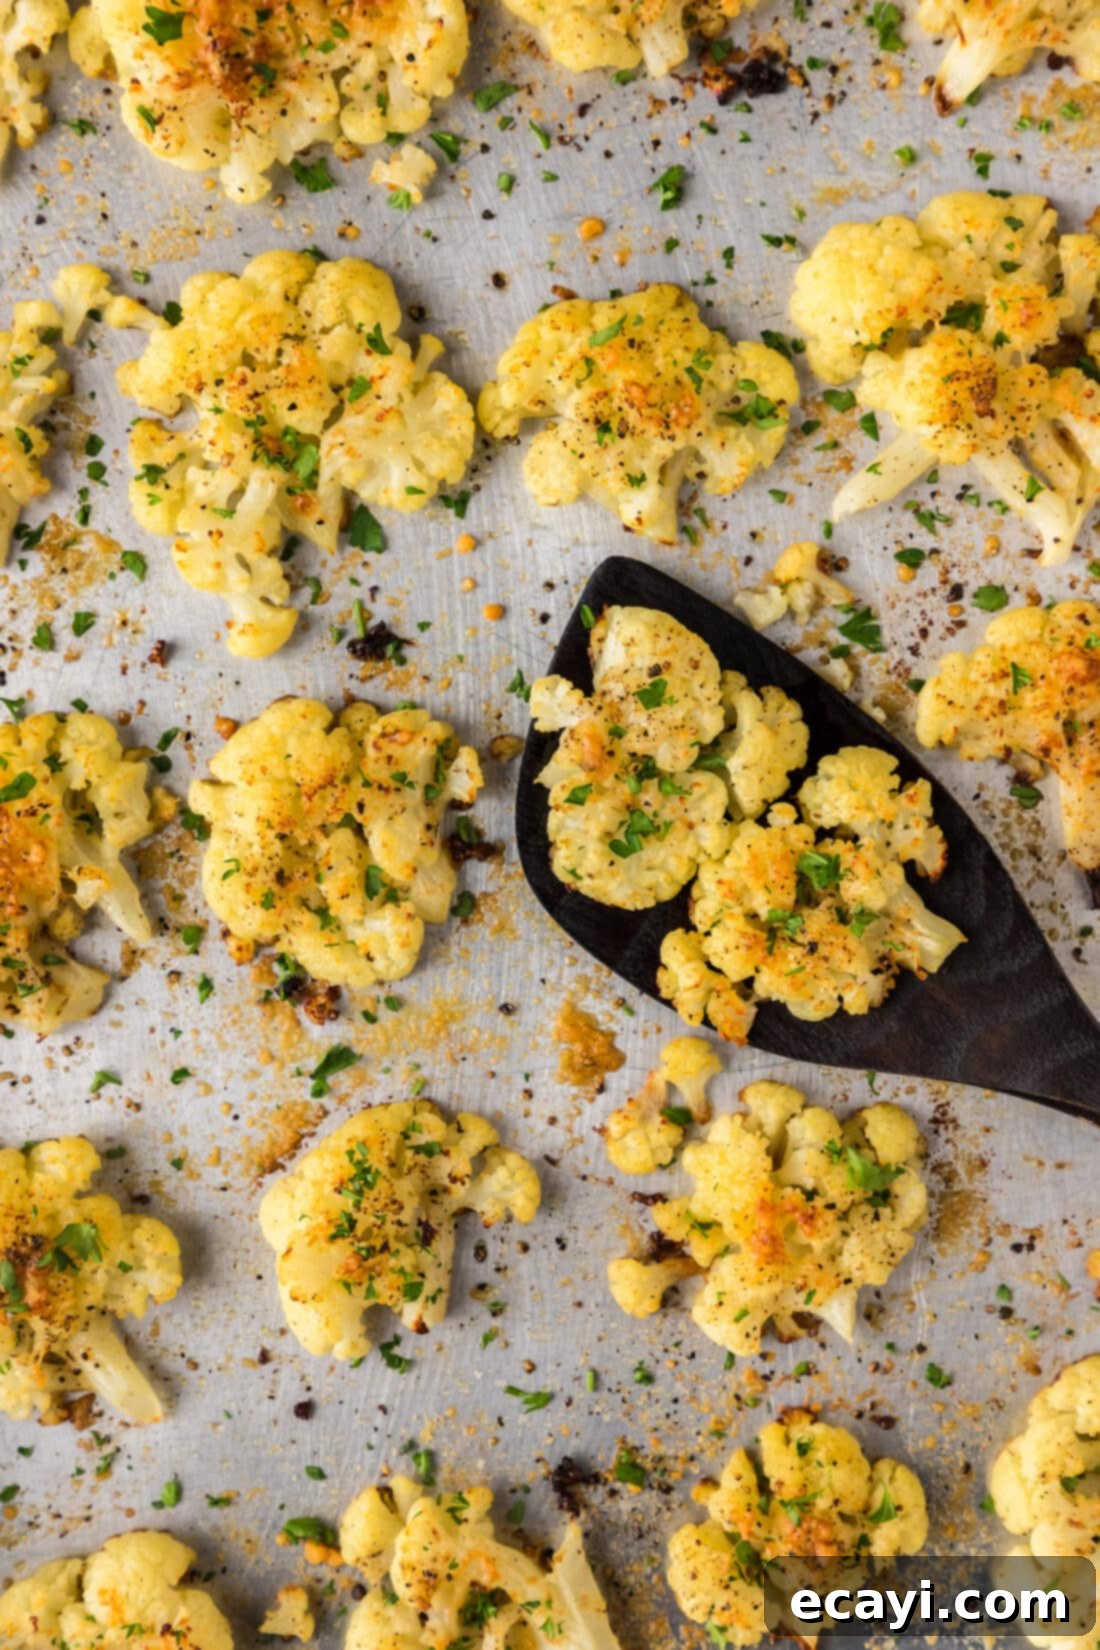
If you’re searching for a healthy, delicious, and surprisingly satisfying alternative to traditional carb-heavy sides, our **smashed cauliflower recipe** is exactly what you need. This ingenious method elevates cauliflower from a simple vegetable to a star player on your dinner plate, making it an excellent low-carb substitute for smashed potatoes. The magic happens when the tender-boiled florets are gently flattened, allowing for maximum surface area to get gloriously crispy in the oven. Seasoned simply with salty Parmesan cheese, fresh black pepper, and a touch of salt, these little “crispy bombs” offer a fun and exciting way to enjoy cauliflower.
The beauty of smashed cauliflower lies in its incredible texture contrast. A robust, golden-brown crust forms on the outside, creating an addictive crunch with every bite, while the inside remains wonderfully tender and creamy. This perfect balance between textures is what makes this dish so appealing and deeply satisfying. Beyond its inherent deliciousness, cauliflower boasts a wonderfully neutral flavor profile, making it a culinary chameleon that pairs exceptionally well with an array of herbs, spices, and seasonings. Don’t hesitate to customize this recipe to your heart’s content! You can easily dial up the heat with a dash of red pepper flakes, introduce a smoky kick with paprika, or infuse a vibrant, savory note with a sprinkle of Cajun seasoning. Imagine the possibilities with Italian herbs, a hint of lemon zest, or even a touch of everything bagel seasoning!
Moreover, this recipe isn’t just about taste and texture; it’s also about mindful eating. Cauliflower is a powerhouse of nutrition, rich in vitamins C and K, fiber, and antioxidants, all while being remarkably low in calories and carbohydrates. This makes smashed cauliflower an ideal choice for anyone following a ketogenic, paleo, or simply a health-conscious diet. It’s an easy way to boost your vegetable intake and add an exciting element to weeknight dinners or special gatherings. The visual appeal of these golden, rustic cauliflower pieces also makes them a fantastic conversation starter and a guaranteed crowd-pleaser.
Gather Your Simple Ingredients for Smashed Cauliflower
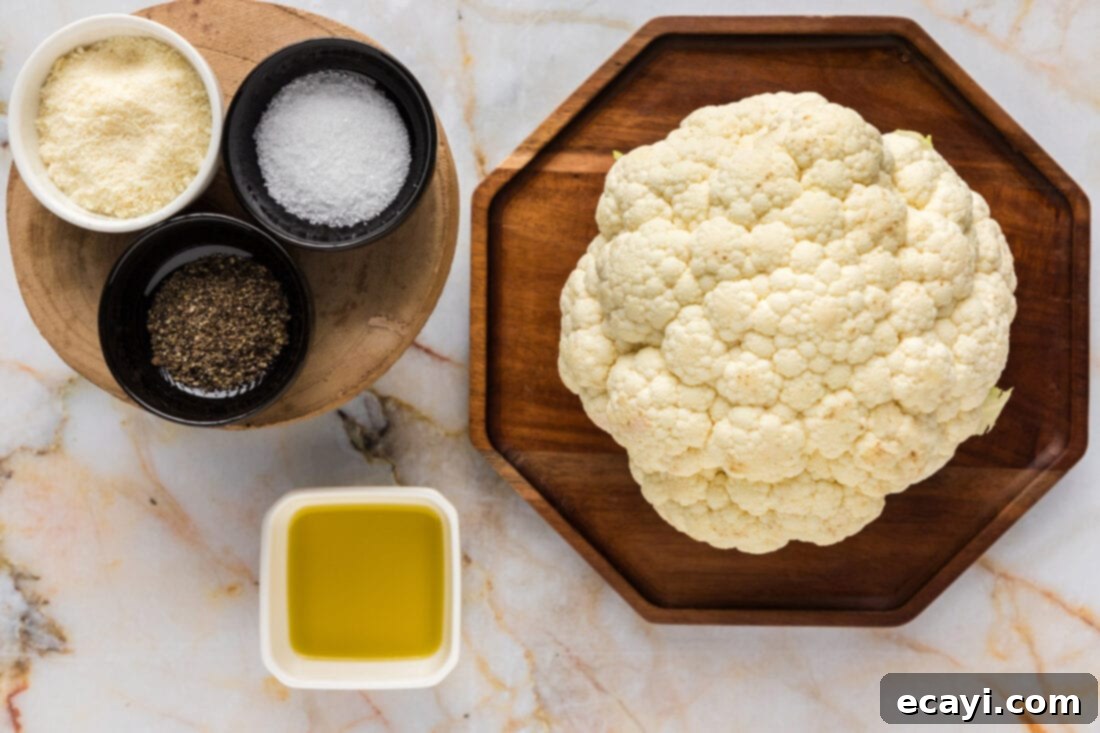
One of the many appealing aspects of this **crispy smashed cauliflower** recipe is its reliance on just a few basic, fresh ingredients. You’ll be surprised how much flavor you can achieve with such a straightforward list. For precise measurements, a comprehensive list of ingredients, and detailed instructions, please refer to the printable version of this recipe located at the end of this post. However, here’s a general overview of what you’ll need to get started on this delightful culinary journey:
Essential Ingredient Information and Easy Substitution Suggestions
Understanding your ingredients is key to culinary success. Here’s a deeper dive into the components of this **smashed cauliflower recipe** and how you can adapt them to your preferences or dietary needs:
CAULIFLOWER – The star of our show! When selecting a head of cauliflower, aim for one that is creamy white or off-white in color, indicating freshness and quality. Avoid any with brown spots or discoloration. The head should feel firm and compact, with tightly packed florets and green leaves that appear fresh and vibrant. For optimal results in this recipe, cutting the cauliflower into large, relatively even florets is crucial. This ensures consistent cooking and smashing. When it comes to boiling, the objective is to achieve a texture that is tender enough to pierce easily with a knife, but crucially, not so soft that it begins to fall apart. Overcooked cauliflower will turn mushy when smashed, rather than creating those desirable crispy edges. Remember, the goal here is to gently smash the florets, not to create a cauliflower mash!
OLIVE OIL – A good quality extra virgin olive oil is essential for helping the cauliflower achieve that beautiful golden crispness and for binding the seasonings. It also contributes a subtle fruity flavor. If you prefer, you can substitute with avocado oil, which also has a high smoke point and a neutral taste, or even melted coconut oil for a slightly different flavor profile. The key is to use enough oil to coat the florets evenly, promoting browning and preventing sticking.
GRATED PARMESAN CHEESE – This ingredient adds a wonderful depth of salty, umami flavor and contributes significantly to the irresistible crispy crust. As the cauliflower bakes, the Parmesan melts and then crisps up, forming a delicious, savory topping. For the best taste and texture, opt for freshly grated Parmesan cheese. Pre-grated varieties can sometimes contain anti-caking agents that affect melting. If you’re looking for a dairy-free alternative, nutritional yeast can offer a cheesy, savory flavor, though the texture of the crisp won’t be exactly the same.
GARLIC SALT – While the original recipe mentions garlic salt, you have options! Garlic salt provides a convenient blend of garlic flavor and salinity. However, for more control over your seasoning, you can use separate garlic powder (about 1/2 teaspoon per head of cauliflower, or to taste) and adjust the kosher salt independently. Fresh minced garlic can also be added, but be mindful that it can burn easily if finely chopped; brushing it on with the olive oil just before baking works best.
KOSHER SALT & BLACK PEPPER – These fundamental seasonings are vital for enhancing the natural flavors of the cauliflower and bringing everything together. Kosher salt has a larger flake size than table salt, which makes it easier to distribute and results in a less concentrated salty taste per crystal. Freshly ground black pepper offers the most aromatic and pungent flavor. Always adjust the amounts to your personal taste; some prefer a bolder seasoning, while others like it subtle.
Mastering the Art of Making Crispy Smashed Cauliflower
These step-by-step photos and instructions are designed to visually guide you through the process of creating this incredibly delicious and crispy side dish. For your convenience, you can Jump to Recipe to access the full printable version, complete with precise measurements and comprehensive instructions, located at the bottom of this page.
- **Prepare Your Oven:** Begin by preheating your oven to a robust 425°F (220°C). A properly preheated oven is crucial for achieving that desired crisp exterior and ensuring even cooking throughout the cauliflower florets. Don’t rush this step!
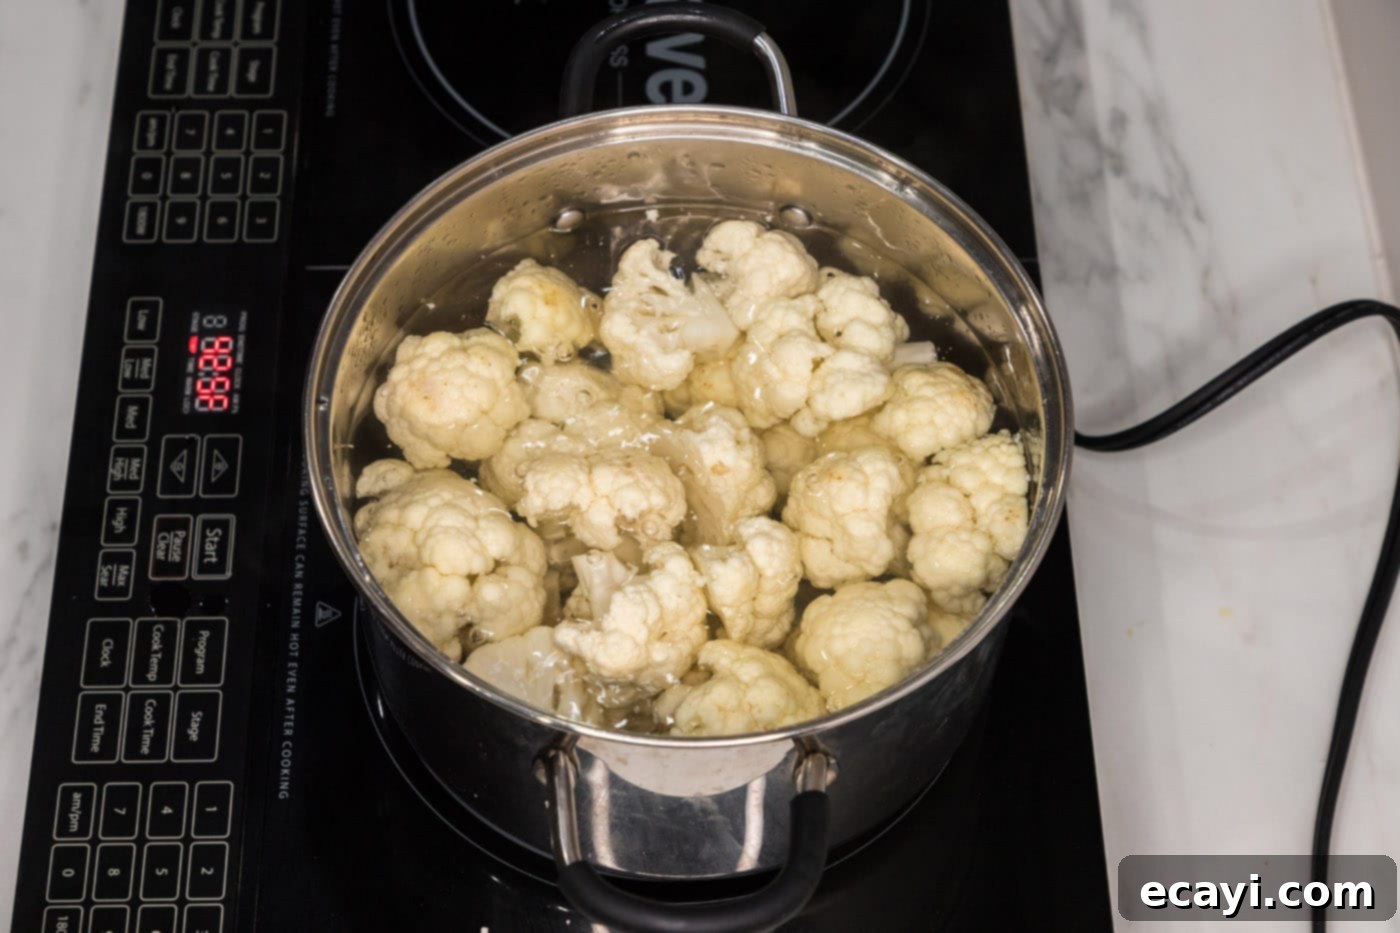
- **Boil the Cauliflower:** Fill a large stockpot about three-quarters full with water. Bring this water to a rolling boil over medium-high heat. While the water heats, cut your head of cauliflower into large, bite-sized florets, trying to keep them relatively uniform in size for consistent cooking. Once the water is boiling vigorously, carefully add the cauliflower florets. Allow the water to return to a boil and cook for just 1 minute, or until the florets are tender enough to be easily pierced with a knife but still hold their shape firmly. They should not be mushy. Immediately drain the cauliflower thoroughly through a colander, ensuring all excess water is removed. Pat them lightly with a paper towel if they seem too wet.

- **Prepare the Baking Sheet:** Lightly spray a large baking sheet with cooking spray, or line it with parchment paper for easy cleanup and to prevent sticking. A generously sized baking sheet is important to avoid overcrowding, which can lead to steaming instead of crisping.

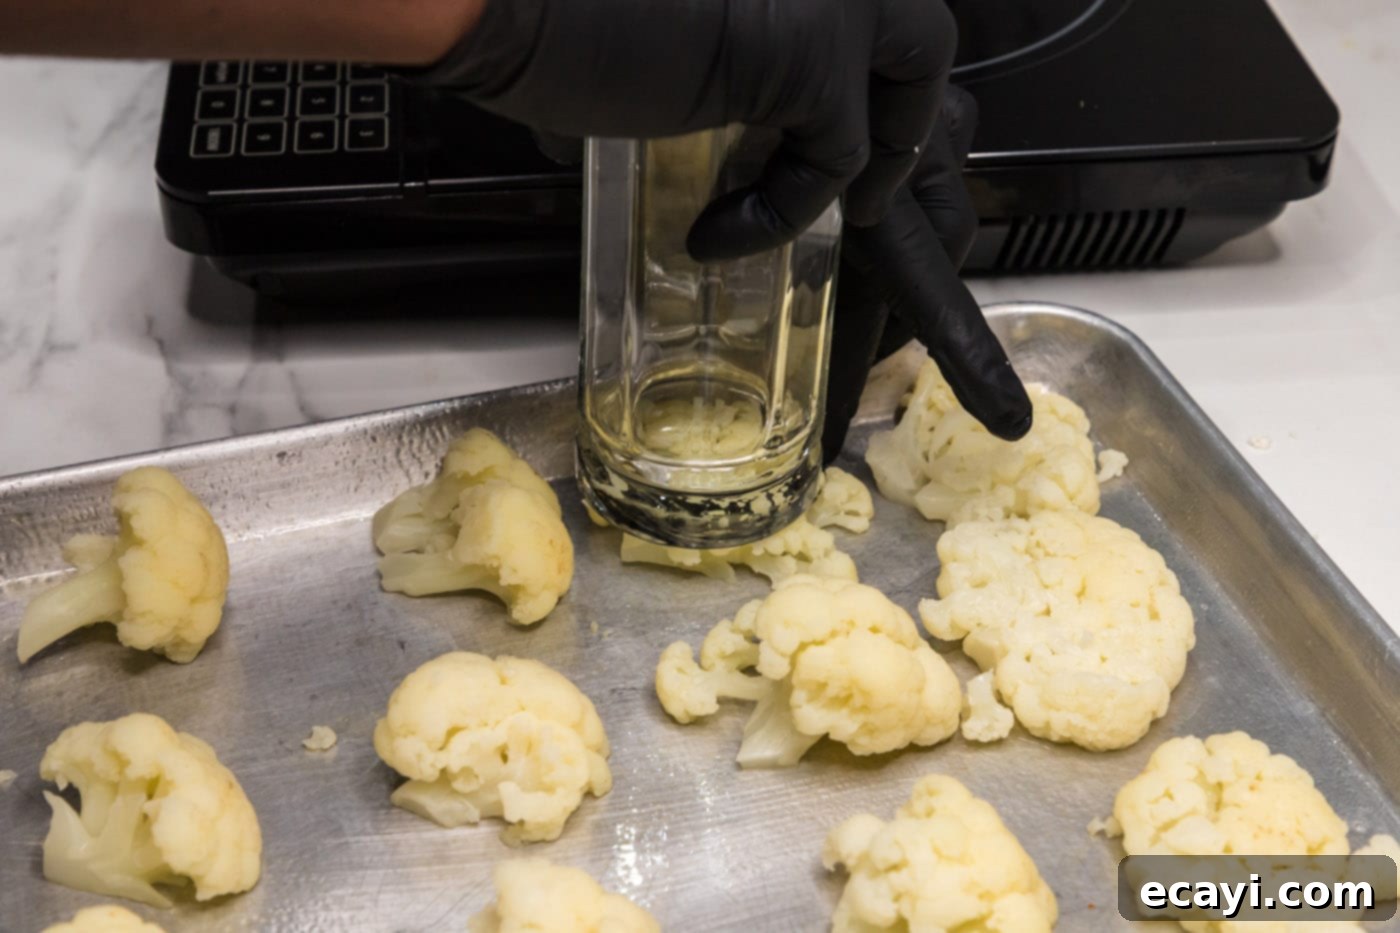
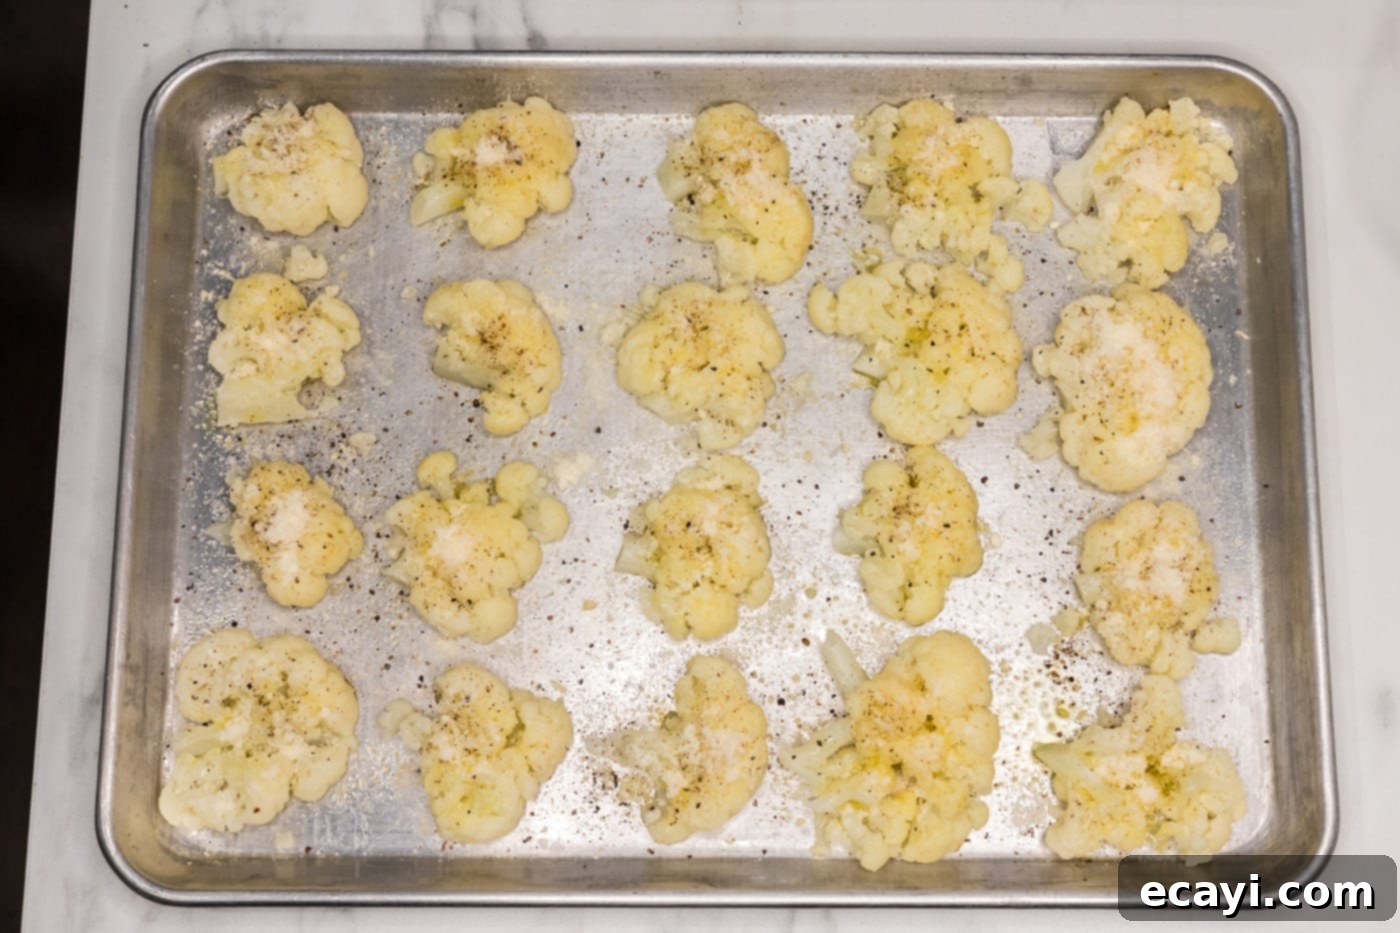
- **Smash the Florets:** Arrange the drained, tender cauliflower florets onto the prepared baking sheet, leaving some space between each piece. Now comes the fun part! Use the flat bottom of a sturdy drinking glass or a potato masher to gently flatten each floret. The goal is to create a disc-like shape, exposing more surface area to the heat, but without completely pulverizing them. You want them “smashed,” not “mashed.”

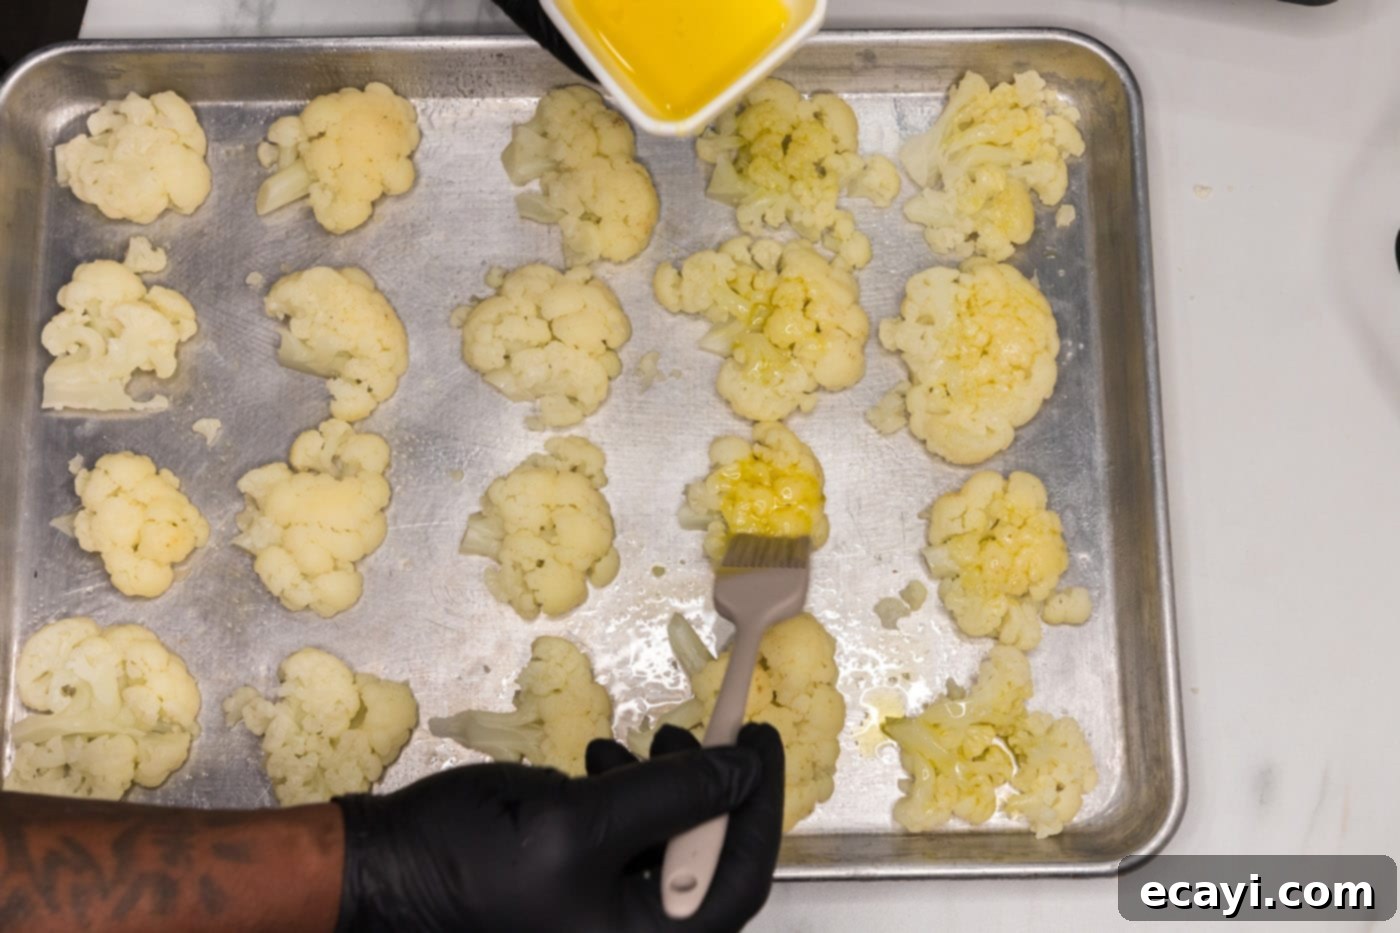
- **Season and Top:** Evenly brush the smashed cauliflower florets with olive oil. This oil layer is crucial for achieving that beautiful golden-brown color and crispy texture. Next, season generously with garlic salt (or separate garlic powder and kosher salt) and black pepper. Finally, sprinkle a generous amount of grated Parmesan cheese over each piece. The Parmesan will melt and crisp up, forming a savory, crunchy topping that is truly irresistible.


- **Bake to Perfection:** Transfer the baking sheet to your preheated oven and bake for 15-17 minutes. During this time, the cauliflower will soften further and begin to brown and crisp around the edges.
- **Broil for Extra Crispness:** For that ultimate crispy finish, turn your oven’s broiler on high. Carefully place the baking sheet under the broiler for an additional 2 minutes. Watch constantly during this step, as broilers can vary greatly, and food can go from perfectly golden to burnt in a matter of seconds. Remove once the tops are beautifully browned and crisp to your liking. Serve immediately and enjoy!
Frequently Asked Questions & Expert Tips for Perfect Smashed Cauliflower
To maintain freshness and flavor, store any leftover crispy smashed cauliflower in an airtight container in the refrigerator for up to 4 days. While it won’t be quite as crispy as when freshly made, it will still be delicious.
For the best results, smashed cauliflower is ideally reheated in a 350°F (175°C) oven until thoroughly warmed through and re-crisped, typically about 10-15 minutes. Alternatively, you can use an air fryer on its reheat function or at 375°F (190°C) for 5-8 minutes. Both methods are superior to a microwave, as they help to restore that delightful crispy texture.
We’ve found that using the flat bottom of a drinking glass or a sturdy mug works exceptionally well for smashing. A potato masher is also a great tool. The key is gentle but firm pressure. It’s vital not to overcook the florets during the initial boiling step. If the cauliflower is too soft, it will simply become “smushed” rather than “smashed” into nice, flat discs that crisp up beautifully. You want them tender enough to pierce with a knife, but still holding their form. That’s your signal they are ready for smashing and roasting.
- **Don’t Overcrowd the Pan:** For maximum crispiness, ensure your cauliflower florets are arranged in a single layer on the baking sheet with plenty of space between each piece. Overcrowding traps steam, preventing them from browning and crisping properly. Use two baking sheets if necessary.
- **Even Florets:** Try to cut your cauliflower florets into similar sizes. This ensures they cook evenly during both boiling and roasting stages.
- **Pat Dry:** After boiling and draining, a quick pat with a paper towel can remove any lingering surface moisture, which is key for a truly crispy texture.
- **Experiment with Seasonings:** While Parmesan, garlic salt, and pepper are classic, don’t shy away from other flavors! Try smoked paprika, onion powder, a pinch of cayenne for heat, dried herbs like oregano or thyme, or even a squeeze of lemon juice after baking for brightness.
- **Freshly Grated Parmesan:** It makes a noticeable difference. Fresh Parmesan melts and crisps better than pre-shredded varieties.
- **Watch the Broiler Closely:** The broiler can quickly turn delicious into burnt. Stay near the oven and keep a close eye on your cauliflower to achieve that perfect golden-brown crispness without charring.

Delicious Serving Suggestions for Smashed Cauliflower
The versatility of **crispy smashed cauliflower** makes it an incredibly flexible dish that can complement almost any main course. Its robust flavor and satisfying texture pair beautifully with a wide variety of proteins. Serve it alongside perfectly cooked beef, tender pork chops, roasted chicken, or flaky fish for a complete and wholesome meal. Beyond being a fantastic side dish, these delightful bites can also be enjoyed as a light appetizer. Arrange them on a platter with a side of your favorite dipping sauce, such as a creamy yum yum sauce, a spicy aioli, or even a simple lemon-tahini dressing, and watch them disappear!
To further enhance their appeal and flavor, consider a few simple garnishes. A fresh squeeze of lemon juice just before serving adds a bright, zesty note that cuts through the richness of the Parmesan. A sprinkle of fresh chopped parsley, chives, or cilantro provides a pop of color and an additional layer of herbaceous freshness. For an extra touch of indulgence, a drizzle of balsamic glaze can add a sweet and tangy finish. No matter how you choose to serve them, these crispy smashed cauliflower florets are sure to impress with their ease of preparation and undeniable deliciousness.
Explore More Delicious Cauliflower Recipes
Cauliflower is a truly magnificent and adaptable vegetable, offering a wealth of culinary possibilities beyond just smashing. If you’ve fallen in love with this crispy creation, you’ll be thrilled to discover how many other incredible dishes you can make with it. Here are some more of our favorite cauliflower-centric recipes that are sure to inspire your kitchen adventures:
- Creamy Mashed Cauliflower: A comforting, low-carb alternative to mashed potatoes.
- Zesty Cauliflower Pizza Bites: Perfect for snacks or appetizers, packed with pizza flavor.
- Spicy Roasted Cauliflower: For those who love a little heat, this dish brings the kick.
- Flavorful Mexican Cauliflower Rice: A versatile side that’s perfect for taco nights or burrito bowls.
I absolutely adore spending time in the kitchen, experimenting with new flavors, and sharing my culinary experiences with all of you! Remembering to come back each day for fresh inspiration can be a challenge, which is why I’ve made it easy for you. I offer a convenient newsletter delivered straight to your inbox every time a new recipe posts. Simply subscribe today and start receiving your free daily recipes and kitchen tips!

Smashed Cauliflower
IMPORTANT – There are often Frequently Asked Questions within the blog post that you may find helpful. Simply scroll back up to read them!
Print It
Pin It
Rate It
Save ItSaved!
Ingredients
- 1 large head of cauliflower
- 2 Tablespoons olive oil
- 2 Tablespoons grated parmesan cheese
- 2 teaspoons kosher salt
- 1 teaspoon black pepper
Things You’ll Need
-
Stockpot
-
Colander
-
Baking sheet
-
Potato Masher or a drinking glass with a flat bottom
Before You Begin
- Choose a cauliflower head that is creamy white or off-white in color. The head should be firm and compact with tightly packed florets.
- When you boil the cauliflower, you want it tender enough to pierce but not so soft that it begins falling apart. The goal is to gently smash the florets, not mush them!
- You can easily spice these up with a dash of red pepper flakes or a sprinkle of Cajun seasoning, or any other herbs and spices you enjoy.
Instructions
-
Preheat oven to 425 F (220 C).
-
Fill a large stock pot 3/4 full with water. Bring to a rapid boil over medium-high heat.
-
Cut cauliflower into large florets. When water is boiling, carefully add the cauliflower. When water comes back to a boil, cook for just 1 minute, or until tender enough to pierce with a knife but still firm. Drain thoroughly through a colander and pat dry.
-
Lightly spray a large baking sheet with cooking spray, or line with parchment paper.
-
Place the boiled florets onto the prepared baking sheet, ensuring they are spaced apart. Use the flat end of a drinking glass or a potato masher to gently flatten each floret into a disc.
-
Brush the smashed cauliflower with olive oil and season evenly with garlic salt and pepper. Then, generously top each piece with grated parmesan cheese.
-
Bake in the preheated oven for 15-17 minutes, until edges are beginning to crisp.
-
For extra crispiness, turn your oven up to broil (high setting). Place the baking sheet under the broiler for 2 minutes, or until the cauliflower is nicely browned and crispy. Watch constantly to prevent burning. Serve immediately.
Expert Tips & FAQs (Concise)
- Store leftovers in an air-tight container in the refrigerator for up to 4 days.
- Smashed cauliflower is best reheated in a 350F oven or an air-fryer until warmed through and re-crisped.
- Avoid overcooking the cauliflower during boiling; it should be tender but still firm enough to smash without falling apart.
- For even crisping, don’t overcrowd the baking sheet.
- Feel free to experiment with different seasonings like smoked paprika, onion powder, or a squeeze of lemon post-baking.
Nutrition Information
The recipes on this blog are tested with a conventional gas oven and gas stovetop. It’s important to note that some ovens, especially as they age, can cook and bake inconsistently. Using an inexpensive oven thermometer can assure you that your oven is truly heating to the proper temperature. If you use a toaster oven or countertop oven, please keep in mind that they may not distribute heat the same as a conventional full sized oven and you may need to adjust your cooking/baking times. In the case of recipes made with a pressure cooker, air fryer, slow cooker, or other appliance, a link to the appliances we use is listed within each respective recipe. For baking recipes where measurements are given by weight, please note that results may not be the same if cups are used instead, and we can’t guarantee success with that method.

