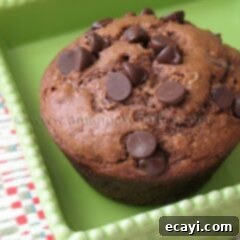
Indulge in Homemade Bliss: The Ultimate Chocolate Chocolate Chip Muffins Recipe
There’s something uniquely comforting about homemade muffins. They fill the kitchen with an irresistible aroma and offer a perfect start to the day or a delightful afternoon treat. Recently, a request for muffins came from a very special person in my life – my daughter. But not just any muffins; she specifically asked for rich, decadent chocolate chocolate chip muffins. This request sparked a creative baking session, prompting me to revisit a beloved kitchen staple: my homemade Master Mix.
For years, I relied on a versatile homemade baking mix, a simple concoction akin to Bisquick, to whip up everything from fluffy pancakes to quick breads and, of course, muffins. The convenience of having this mix on hand is unparalleled, significantly cutting down on preparation time when baking whims strike. Bringing that master mix back into my pantry was a game-changer, and it provided the perfect foundation to develop a new, irresistible chocolate chocolate chip muffin recipe. What made it even more exciting was having some instant chocolate oatmeal tucked away in the cabinet, ready to add an extra layer of chocolatey goodness and moist texture to these delightful treats.
Crafting the Perfect Chocolate Muffin: Tips and Tricks
This recipe is incredibly flexible, designed to accommodate what you have on hand while still delivering exceptional results. While I used instant chocolate oatmeal for an extra flavor boost, you can absolutely use regular instant oatmeal. The beauty of baking is its adaptability, and I’ve tailored these instructions so you can achieve delicious muffins regardless of your specific oat choice. The key is to understand how different oat types behave in baking.
Choosing Your Oats: Instant vs. Old-Fashioned
If your pantry holds old-fashioned rolled oats instead of instant, don’t fret! A quick modification is all that’s needed. Old-fashioned oats have a coarser texture and require more time to cook than their instant counterparts. To ensure they blend seamlessly into your muffin batter and bake evenly, simply give them a whirl in a food processor until they reach a finer, more instant-like consistency. This step ensures your muffins have that perfectly tender crumb without any chewy surprises. The goal is to mimic the quick-cooking nature of instant oats, which absorb moisture rapidly and contribute to a wonderfully soft texture in baked goods.
A Touch of Healthy Goodness (Optional)
Looking to sneak in a little extra nutrition? Consider adding a tablespoon of wheat germ to your batter. Wheat germ is packed with vitamins, minerals, and fiber, and its subtle, nutty flavor will complement the rich chocolate without overpowering it. It’s an easy way to boost the nutritional profile of these indulgent muffins, making them a slightly guilt-free pleasure. Baking is all about balance, and a small addition like wheat germ can make a difference.
The Importance of Proper Storage
These chocolate chocolate chip muffins are truly magnificent, but like most baked goods, they are best enjoyed fresh. To maintain their delicious flavor and moist texture, it’s crucial not to let them sit out exposed to air for too long. If you’re not planning to devour them all immediately (which can be a challenge!), store them in an airtight container at room temperature. This will keep them wonderfully fresh for a couple of days, ensuring every bite is as delightful as the first. For longer storage, you can even freeze them, then thaw and warm gently when a craving strikes.
The Recipe for Irresistible Chocolate Chocolate Chip Muffins
This recipe leverages the convenience of a homemade Master Mix, making the process quick and straightforward. If you don’t have a Master Mix on hand, you can easily use a store-bought baking mix like Bisquick, or prepare your own homemade Master Mix using this recipe. The blend of cocoa and chocolate chips creates a deeply satisfying chocolate experience that will leave you wanting more.
Essential Ingredients for Your Baking Adventure
Gathering your ingredients ahead of time is key to a smooth baking process. This recipe calls for common pantry staples, ensuring these delicious muffins are always within reach:
- Milk: Provides moisture and helps create a tender crumb. Any type of milk (dairy or non-dairy) will work.
- Packed Brown Sugar: Adds sweetness and a subtle molasses flavor, contributing to the muffins’ moistness. Packing it ensures you get the right amount.
- Canola Oil: A neutral oil that contributes to a moist texture. Vegetable oil or melted coconut oil can also be used.
- Egg: Acts as a binder and adds richness, helping the muffins hold their shape.
- Master Mix: The star of convenience! This homemade baking mix replaces flour, baking powder, and salt. If using store-bought Bisquick, the results will be very similar.
- Cocoa Powder: Unsweetened cocoa powder is essential for that deep, rich chocolate flavor. Use good quality cocoa for the best taste.
- Quick Cooking Oats or Instant Chocolate Oatmeal: Adds a delightful chewiness and extra moisture. If using chocolate oatmeal, it boosts the chocolate intensity.
- Chocolate Chips: The generous amount of chocolate chips, divided for mixing into the batter and sprinkling on top, ensures chocolate in every bite.
Step-by-Step Baking Instructions for Perfect Muffins
Follow these simple steps to create bakery-worthy chocolate chocolate chip muffins right in your own kitchen:
- Prepare Your Oven and Pan: Begin by preheating your oven to 400°F (200°C). This initial high temperature is a secret trick for creating beautifully domed muffin tops. While the oven heats, prepare your muffin pan. For jumbo muffins, lightly spray only the bottoms of a 6-cup jumbo muffin pan with non-stick cooking spray. This prevents sticking while encouraging the muffins to rise upwards, creating those desirable tall tops.
- Combine Wet Ingredients: In a large mixing bowl, whisk together the milk, packed brown sugar, canola oil, and egg until they are well combined and smooth. This ensures an even distribution of liquid and sugar throughout the batter.
- Add Dry Ingredients: Carefully stir in the Master Mix, cocoa powder, and oats into the wet mixture. Mix just until the dry ingredients are moistened. It’s perfectly normal for the batter to appear lumpy – in fact, lumpy is good for muffins! The crucial step here is to avoid overmixing. Overmixing can develop the gluten in the flour, leading to tough, chewy muffins instead of light and tender ones.
- Fold in Chocolate Chips: Gently fold in 2/3 cup of the chocolate chips into the batter. This ensures a delightful burst of chocolate throughout each muffin. Divide the batter evenly among the prepared muffin cups. For that extra visual appeal and chocolate punch, sprinkle the remaining 1/3 cup of chocolate chips on top of each muffin before baking.
- Bake with a Two-Temperature Method: Place the muffin pan into the preheated 400°F (200°C) oven and bake for 8 minutes. This initial burst of high heat helps the muffins achieve that impressive rise. After 8 minutes, reduce the oven temperature to 350°F (175°C) and continue baking for an additional 18-20 minutes, or until a wooden skewer or toothpick inserted into the center of a muffin comes out clean.
- Cool and Enjoy: Once baked, remove the pan from the oven and let the muffins cool in the pan for about 5 minutes. This brief cooling period helps them firm up, making them easier to remove. After 5 minutes, carefully transfer the muffins to a wire rack to cool completely. Cooling on a rack prevents the bottoms from becoming soggy. Serve them warm for a melty chocolate chip experience, or at room temperature.
Master Mix and Pan Conversion Notes
As mentioned, the recipe for the Master Mix I use is readily available. Feel free to substitute with your preferred homemade baking mix or a commercial brand like Bisquick. It’s all about convenience and creating deliciousness with ease.
*Muffin Pan Conversion: This recipe is designed for a 6-cup jumbo muffin pan. If you prefer to make standard-sized muffins using a 12-cup pan, simply adjust the baking time: bake at a consistent 350°F (175°C) for 20-25 minutes, or until golden brown and a toothpick comes out clean.
For more delicious baking ideas, don’t forget to try my friend Jenn’s Chocolate Chip Banana Bread – another fantastic way to enjoy chocolate chips in a comforting baked good!

Chocolate Chocolate Chip Muffins
IMPORTANT – There are often Frequently Asked Questions within the blog post that you may find helpful. Simply scroll back up to read them!
Print It
Pin It
Rate It
Save ItSaved!
Ingredients
- ⅔ cup milk
- ⅓ cup packed brown sugar
- 2 tablespoons canola oil
- 1 egg
- 2 cups Master Mix
- 3 tablespoons cocoa
- scant 1/2 cup quick cooking oats or instant chocolate oatmeal
- 1 cup chocolate chips divided
Instructions
-
Preheat oven to 400 F and spray bottoms only of a 6 cup jumbo muffin pan*. In large bowl, whisk together milk, brown sugar, oil and egg. Stir in master mix, cocoa, and oats just until moistened. Mix only until moistened, batter may be lumpy, do not over mix. Fold in 2/3 cup of the chocolate chips and divide batter evenly among muffin cups. Sprinkle remaining 1/3 cup of chocolate chips on top of muffins.
-
Bake 8 minutes at 400 F, then reduce temperature to 350 F and bake an additional 18-20 minutes. Cool in pan for 5 minutes then remove to rack to cool completely.
The recipes on this blog are tested with a conventional gas oven and gas stovetop. It’s important to note that some ovens, especially as they age, can cook and bake inconsistently. Using an inexpensive oven thermometer can assure you that your oven is truly heating to the proper temperature. If you use a toaster oven or countertop oven, please keep in mind that they may not distribute heat the same as a conventional full sized oven and you may need to adjust your cooking/baking times. In the case of recipes made with a pressure cooker, air fryer, slow cooker, or other appliance, a link to the appliances we use is listed within each respective recipe. For baking recipes where measurements are given by weight, please note that results may not be the same if cups are used instead, and we can’t guarantee success with that method.

Beyond the Recipe: Stay Connected!
Did you savor every word and delicious detail of this post? We’d love for you to stay connected and never miss out on our latest culinary creations and crafting inspirations! Why not subscribe to our feed for instant updates? Better yet, join our vibrant community by subscribing to our free newsletter – Foodie in the Craftroom! This exclusive newsletter brings you a delightful blend of mouth-watering recipes, innovative cooking tips, and charming craft ideas from my other blog, Crafts by Amanda. It’s the perfect way to infuse your home and kitchen with creativity and flavor.
NEW! Be sure to subscribe to my newsletter, Foodie in the Craftroom, to receive updates and tips from both Amanda’s Cookin’ and Crafts by Amanda! Visit https://amandascookin.com/p/subscribe-to-newsletter.html to sign up today and become a part of our growing family of foodies and crafters. We can’t wait to share more delicious and creative adventures with you!
