Easy 4-Ingredient Oreo Truffles: Your Ultimate No-Bake Dessert Guide
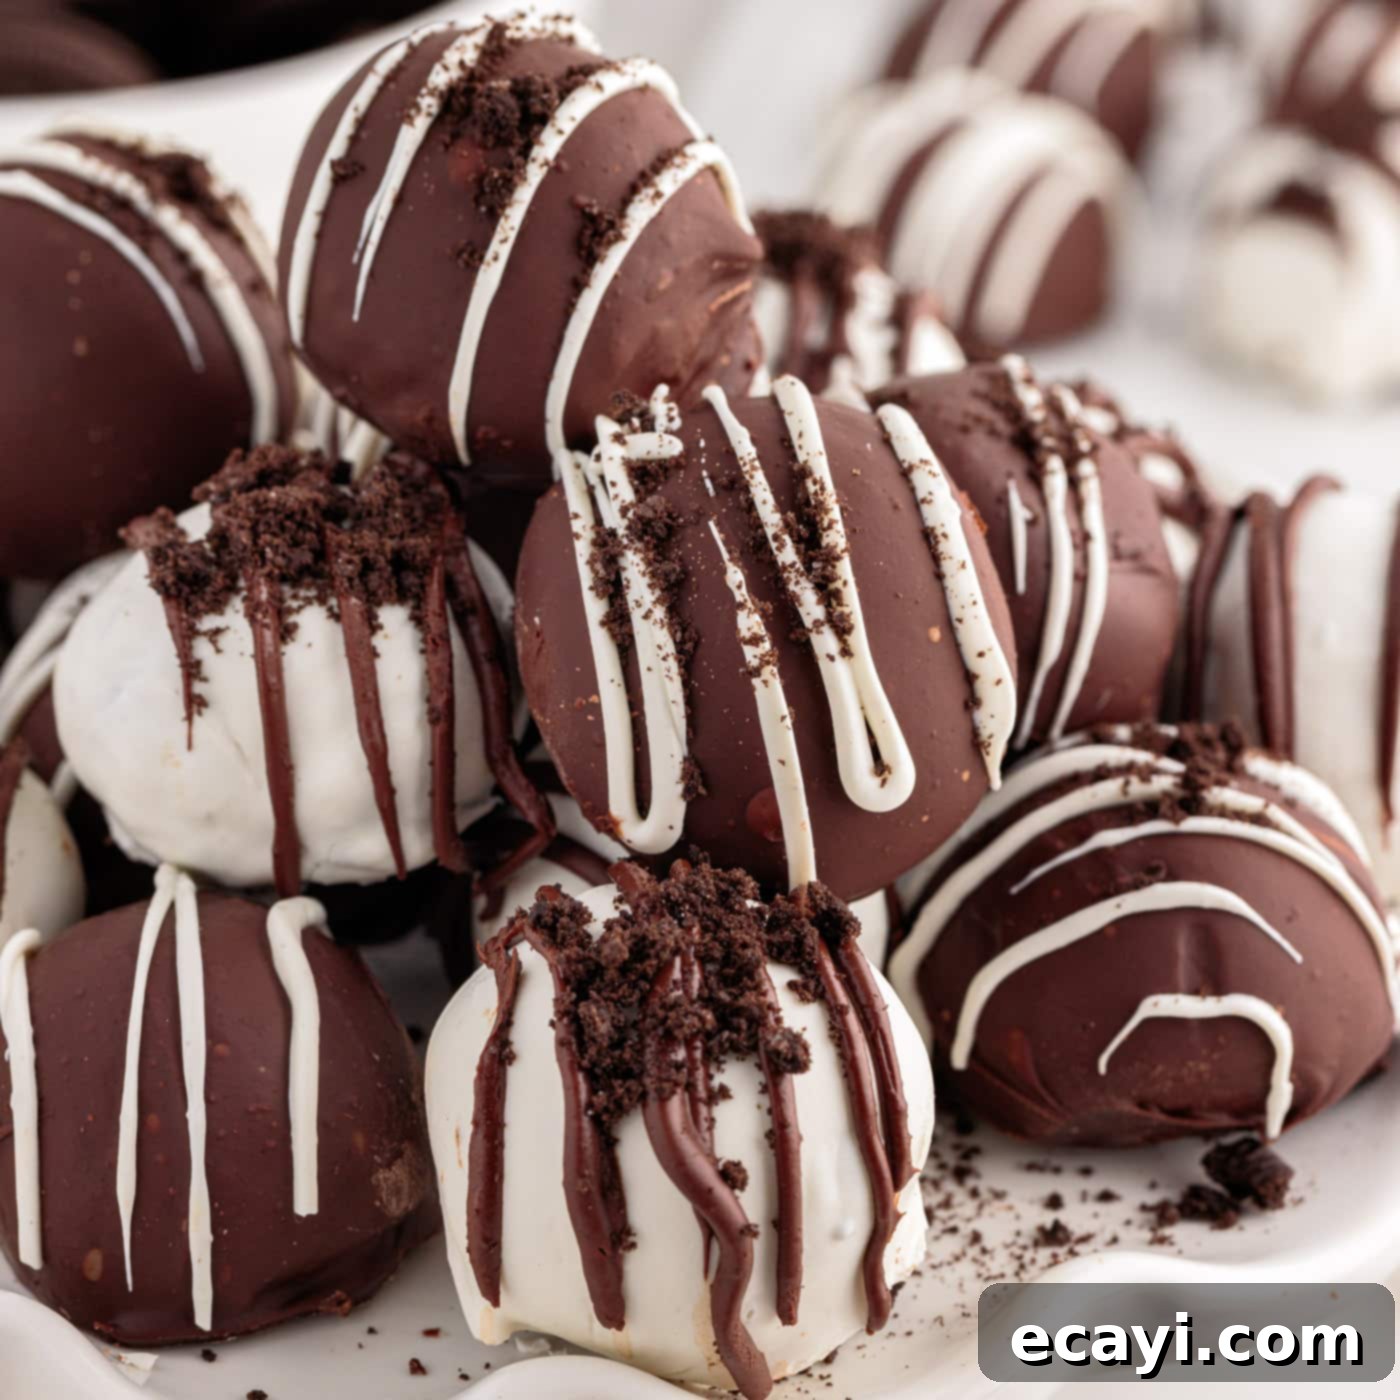
Welcome to the delightful world of homemade confections, where simplicity meets decadence! These 4-ingredient Oreo truffles are the epitome of an effortless, no-bake dessert that promises to impress at any gathering or satisfy that sweet tooth craving. Imagine a rich, creamy interior crafted from crushed Oreo cookies and luscious cream cheese, all enveloped in a crisp, shiny coating of your favorite chocolate. Whether you opt for the elegant sweetness of white chocolate or the classic allure of semi-sweet, these customizable treats are a special delight waiting to be decorated however your heart desires. They’re not just a dessert; they’re a canvas for your creativity, perfect for holidays, parties, or simply a cozy night in.
Why This Simple Oreo Truffle Recipe Will Be Your New Go-To
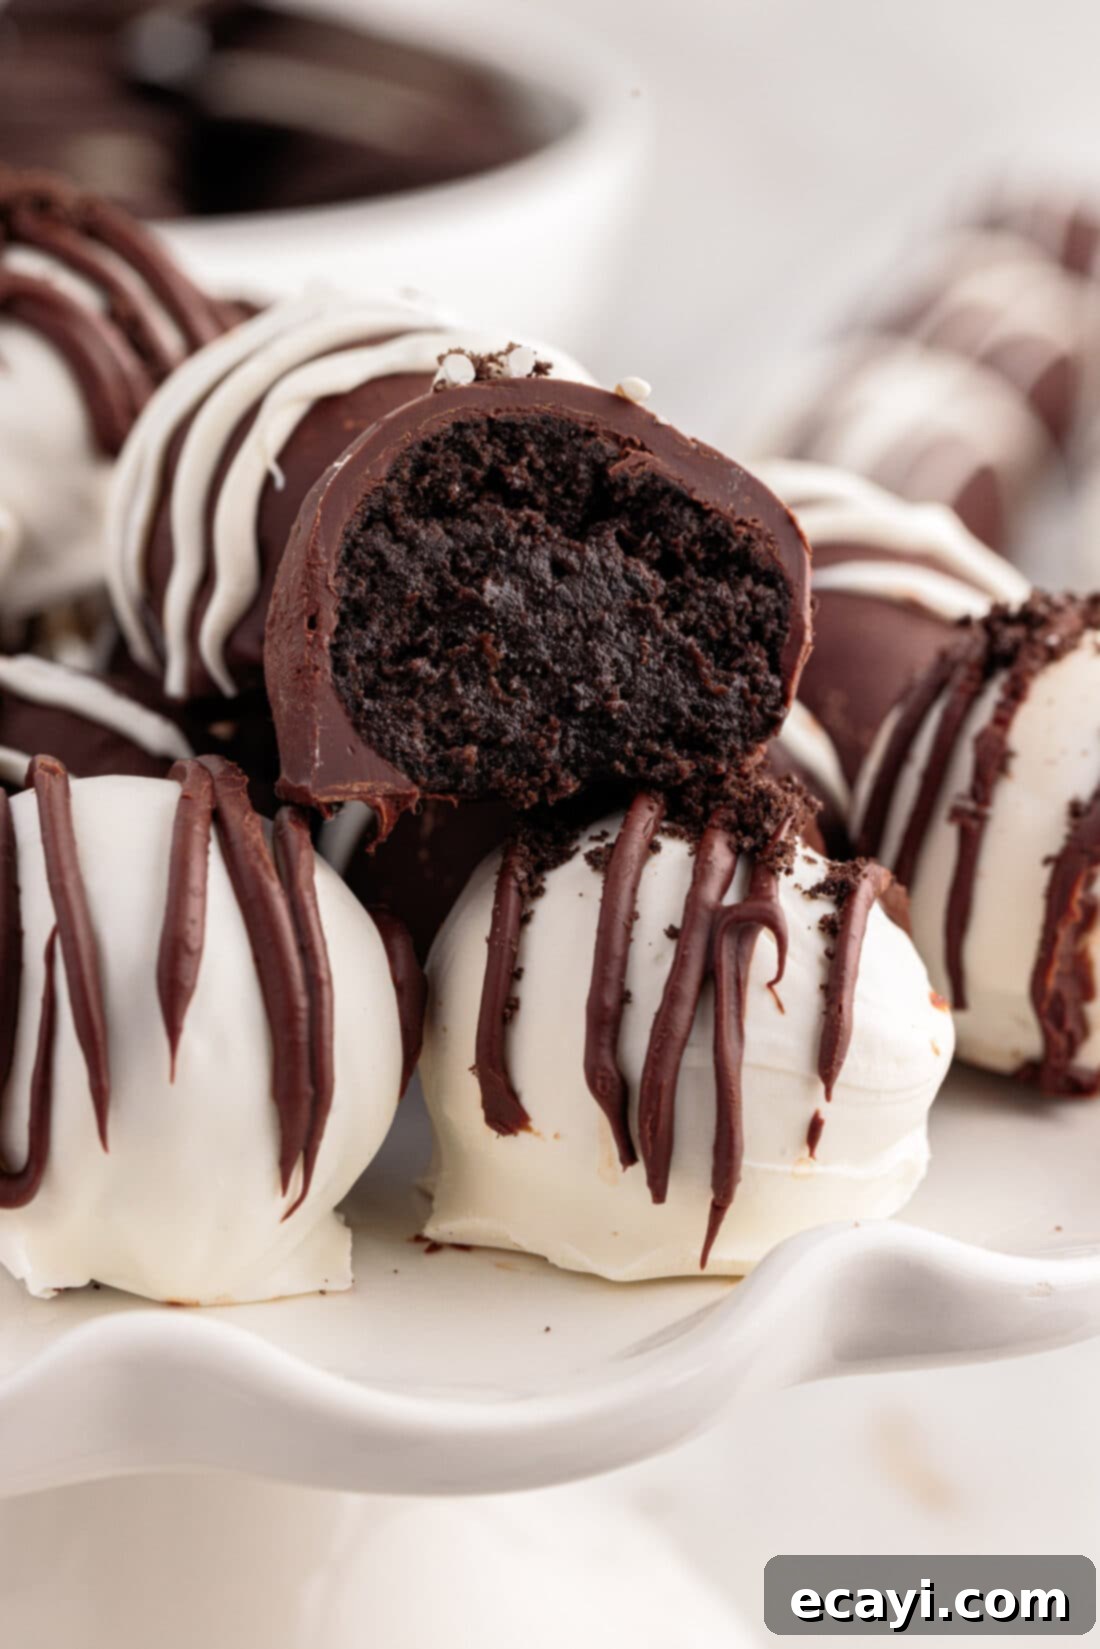
Oreo truffles, affectionately known as Oreo balls, are a culinary marvel: incredibly simple to prepare yet possessing the luxurious taste of a gourmet dessert. Their magic lies in the minimal ingredient list – just three core components are needed to bring these delightful bites to life: classic Oreo sandwich cookies, velvety cream cheese, and your chosen chocolate for coating. It truly is astonishing how such a basic combination can yield a treat so utterly irresistible and enchantingly delicious. This recipe works not only because of its simplicity but also due to the delightful contrast in textures and flavors it offers: the soft, sweet, cookie-infused cream cheese filling against the satisfying snap of a chocolate shell.
Beyond their ease of creation, these chocolate-coated morsels offer unparalleled versatility, making them a fantastic choice for any occasion. The possibilities for customization are genuinely endless! You can experiment with different Oreo flavors – from mint to peanut butter, or even seasonal varieties – to create unique taste experiences. We’ve explored the delightful potential of Golden Oreo Truffles, which are exquisite in their own right, showcasing just how much fun you can have with the vast array of Oreo offerings. Furthermore, these truffles are a dream for holiday and party decorations. Imagine festive red, white, and blue truffles for patriotic celebrations, or truffles adorned with sprinkles for birthdays. Just like our Red White and Blue Oreo Truffles, you can easily adapt them to any color scheme or theme, transforming a simple dessert into a stunning centerpiece. This adaptability, combined with their crowd-pleasing flavor, is precisely why this recipe is destined to become a staple in your dessert repertoire.
Essential Ingredients for Your Perfect Oreo Truffles
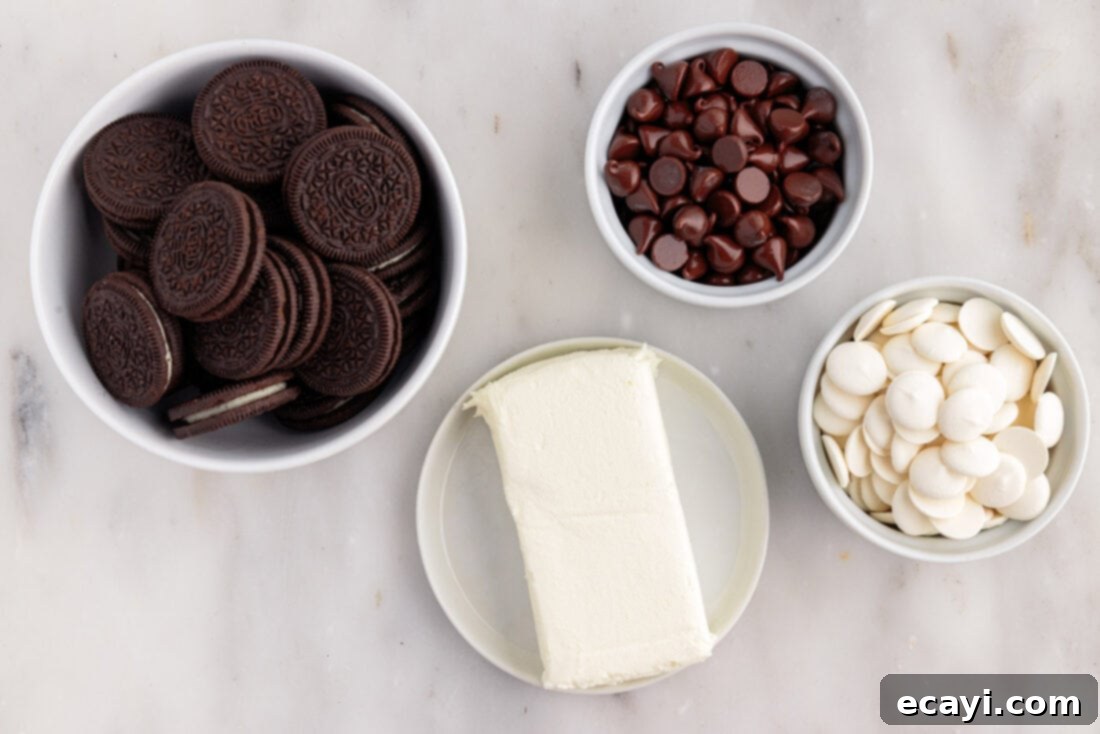
Crafting these delectable Oreo truffles requires just a handful of ingredients, making it a remarkably accessible recipe for bakers of all skill levels. While the core recipe shines with only three main components, we include a fourth to ensure the best possible chocolate coating, bringing the total to a simple yet powerful four. For precise measurements, detailed ingredient lists, and comprehensive instructions, you’ll find a printable version of this recipe conveniently located at the end of this post. But before you dive into the kitchen, let’s take a closer look at each star ingredient and why it plays such a crucial role in achieving truffle perfection.
Ingredient Spotlight & Expert Tips for Substitutions
Understanding each ingredient and its role is key to mastering these easy Oreo truffles. Here’s a breakdown of what you’ll need and some helpful tips for successful preparation or mindful substitutions:
OREOS
For this recipe, you’ll use whole Oreo cookies, including their creamy filling. There’s absolutely no need to separate the cookie from its delicious center, as the filling contributes essential moisture and flavor, helping bind the truffle mixture together beautifully. To achieve the ideal consistency and ensure the truffles hold their shape, it’s best to stick to regular-sized Oreo cookies. Avoid the “double stuffed” variety, as the extra filling can make the mixture too soft and difficult to form into balls. Similarly, “thin” Oreos may not provide enough bulk or moisture for the ideal truffle texture. Standard Oreos offer the perfect balance for crushing and blending. Don’t forget, this is where your creativity can shine! While classic Oreos are fantastic, feel free to experiment with different flavored Oreos like mint, peanut butter, birthday cake, or any seasonal edition that catches your eye, keeping the “regular size” rule in mind for best results.
CHOCOLATE
The chocolate coating is what elevates these truffles from simple cookie balls to elegant confections. For the smoothest, most professional-looking finish, high-quality melting wafers are highly recommended. Brands like Ghirardelli semi-sweet or white chocolate melting wafers are excellent choices because they are formulated to melt evenly and set beautifully without tempering. If melting wafers aren’t available, a good quality bar of baking chocolate, finely chopped, can also work wonderfully. While chocolate chips can be used, be aware that white chocolate chips, in particular, tend not to melt as smoothly and can seize (become grainy and stiff) more easily when heated. If using chocolate chips, consider adding a teaspoon of shortening or coconut oil while melting to help achieve a smoother, more fluid consistency. In the past, almond bark (available in vanilla or chocolate flavors) has also been a successful coating option, offering a convenient and budget-friendly alternative. However, for a truly rich and superior flavor experience, we find that baking chocolate or premium chocolate melts like Ghirardelli provide a more luxurious taste and texture.
CREAM CHEESE
Cream cheese is the binder that brings the crushed Oreos together, creating that wonderfully moist and tangy-sweet interior. The most crucial tip for working with cream cheese in this recipe is to ensure it reaches room temperature before you begin. When a recipe specifies “softened” cream cheese, this is what it means. To achieve this, simply cut the block of cream cheese into smaller cubes and allow it to rest on a plate at room temperature for approximately 30-40 minutes. This softening process is essential because it makes the cream cheese much easier to blend smoothly and thoroughly with the cookie crumbles in your food processor, preventing lumps and ensuring a consistently creamy “dough.” Using full-fat cream cheese is also recommended for the best texture and flavor, contributing to the truffle’s rich mouthfeel.
Step-by-Step Guide: How to Make Irresistible Oreo Truffles
These step-by-step photos and instructions are here to help you visualize how to make this recipe perfectly. For a concise, printable version of this recipe, complete with precise measurements and instructions, you can Jump to Recipe at the bottom of this post.
- Crush the Oreos: Begin by placing all your Oreo cookies into the bowl of a food processor. Pulse until the cookies are pulverized into fine, even crumbs. The consistency should resemble coarse sand. If you wish to garnish your truffles later, set aside one crushed cookie before proceeding. If you don’t have a food processor, you can place the cookies in a large Ziploc bag and crush them with a rolling pin or the bottom of a heavy glass, aiming for the same fine crumb consistency.
- Combine with Cream Cheese: Add the softened cream cheese cubes into the food processor with the Oreo crumbs. Process the mixture on high until all ingredients are fully combined. Continue processing until the mixture comes together and clumps into a thick, uniform “dough.” It should be sticky but firm enough to hold its shape when rolled.
- Form the Truffle Balls: Using a tablespoon or a cookie dough scoop, portion out equal amounts of the Oreo-cream cheese mixture. Roll each portion between your palms to form smooth, bite-sized balls. Place these balls onto a baking sheet that has been lined with parchment paper. This parchment paper will prevent sticking and make the next steps much easier.
- Initial Chill: Once all the balls are formed and on the baking sheet, place the tray into the freezer for 5-10 minutes. This quick chill will help firm up the dough slightly, making it less sticky and easier to handle in the next rolling step. It’s a crucial step for achieving perfectly round truffles.
- Refine & Chill Again: After the initial chill, gently roll each ball again between your palms to ensure they are perfectly smooth and round. This helps eliminate any imperfections. Return the tray to the freezer for an additional 10-15 minutes, or if you prefer, chill them in the refrigerator for about 30 minutes. This longer chill is essential to ensure the truffles are firm enough to withstand the warm chocolate coating without losing their shape or creating cracks in the chocolate.
- Melt the Chocolate: Prepare your chocolate coatings. Place the white chocolate melting wafers and semi-sweet chocolate melting wafers (or chocolate chips) into separate microwave-safe bowls. Heat each bowl in 30-second increments, stirring thoroughly between each interval, until the chocolate is completely melted and beautifully smooth. Be careful not to overheat the chocolate, as this can cause it to seize. If you’re working with both types of chocolate, you might find it easier to melt one type, dip half the truffles, and then melt the second type just before dipping the remaining truffles, preventing the chocolate from hardening too quickly. Alternatively, use a double boiler for a more controlled melt.
- Dip the Truffles: Working with one firm truffle ball at a time, gently drop it into the melted chocolate. Use a fork or a candy dipping tool to toss and turn the truffle, ensuring it’s completely coated. Carefully lift the truffle out of the chocolate with the fork, gently tapping the fork against the side of the bowl to allow any excess chocolate to drip off. This step helps ensure a thin, even coating and prevents pooling at the bottom. Once excess chocolate has dripped, transfer the coated truffle onto a fresh sheet of parchment paper.
- Alternate Coatings: Continue this dipping process, coating approximately half of your truffles in the white chocolate and the other half in the semi-sweet chocolate. If your chocolate starts to thicken or harden during the process, pop it back into the microwave for a short 10-15 second burst, stirring until smooth again. A helpful trick: if the chocolate is too thick, stir in a teaspoon of shortening or coconut oil to thin it out slightly, making it easier to achieve a smooth coat.
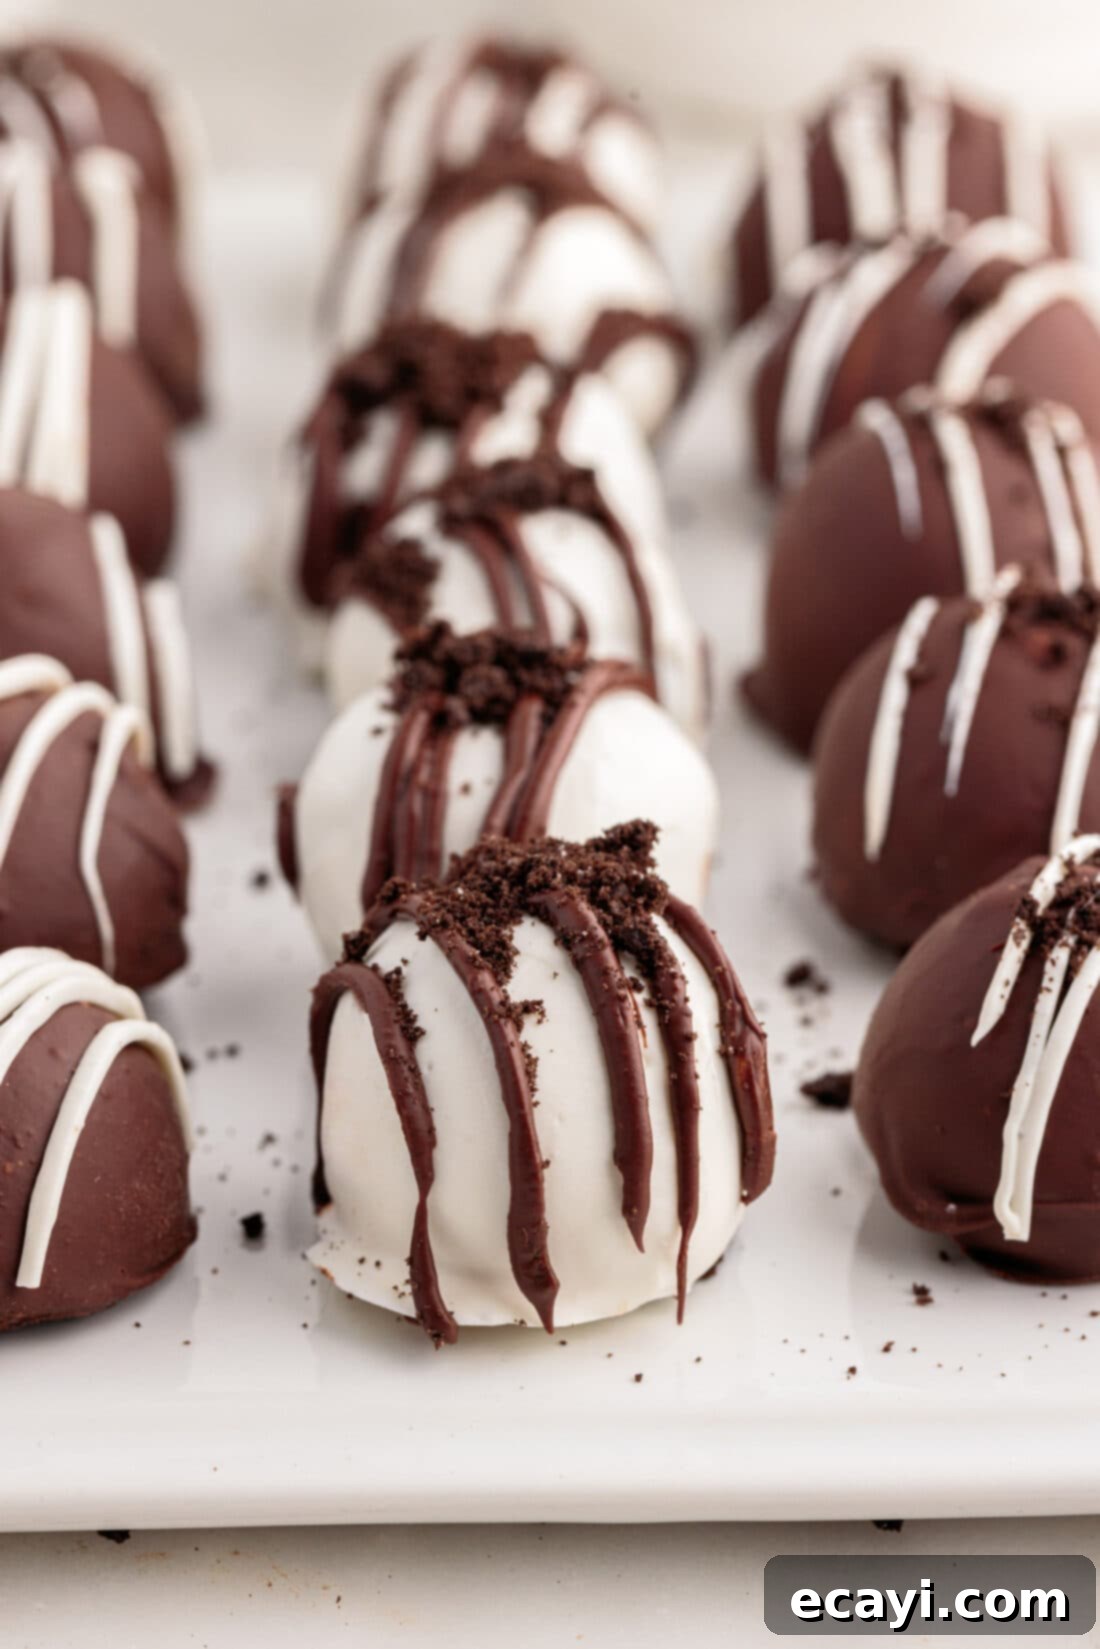
- Decorate with Drizzles and Crumbs: For an artistic touch, take any remaining melted chocolate and transfer it into small plastic bags. Snip off a tiny corner of each bag. Drizzle the contrasting chocolate over the dipped truffles (e.g., semi-sweet drizzle over white chocolate truffles, and vice-versa) for an elegant design. If desired, sprinkle some of the reserved cookie crumbs over the truffles immediately after drizzling, before the chocolate has a chance to set, for added texture and visual appeal.
- Allow to Set & Serve: Once all your truffles are dipped and decorated, allow the chocolate coating to fully set. You can do this by letting them sit at room temperature for about an hour, or by placing the baking sheet in the refrigerator for 15-20 minutes for a quicker set. Once the chocolate is firm and dry to the touch, your gorgeous and delicious Oreo truffles are ready to be enjoyed!
Frequently Asked Questions & Expert Tips for Oreo Truffles
Here are some common questions and essential tips to ensure your Oreo truffles turn out perfectly every time:
Due to the cream cheese content, Oreo truffles must be stored in the refrigerator. Place them in an airtight container, preferably layered between pieces of parchment paper to prevent sticking. When stored correctly, they will remain fresh and delicious for up to 2 weeks. It’s important to note that when removed from the fridge, they may develop some condensation on the chocolate coating due to temperature changes. This is entirely normal and will not affect the taste or quality of the truffles themselves.
Absolutely! This is one of the most exciting aspects of making Oreo truffles. This recipe is incredibly adaptable and will work beautifully with virtually any flavor of Oreo cookie. Feel free to get creative and experiment with varieties like mint, peanut butter, golden, birthday cake, or any seasonal special edition you find. Just remember to stick to the regular-sized Oreos, avoiding the thin or double-stuffed varieties, as their different cookie-to-filling ratios can affect the overall consistency of the truffle mixture.
Yes, Oreo truffles freeze exceptionally well, offering a fantastic make-ahead option. You have two convenient methods for freezing:
- Freeze the balls without the chocolate coating: After rolling the truffle mixture into balls, place them on a baking sheet and flash-freeze until they are solid (about 1-2 hours). This prevents them from sticking together. Once solid, transfer the un-coated balls to a large freezer-safe zip-top bag or an airtight container. They can be frozen for up to 3 months. When ready to use, thaw slightly in the refrigerator before coating in chocolate as per the recipe instructions.
- Freeze them with the chocolate coating: After the truffles are fully dipped and the chocolate coating has completely set, arrange them in a single layer in a freezer-safe airtight container, or layer them with parchment paper in between. Freeze for up to 3 months. To enjoy, simply move them to the refrigerator to thaw for a few hours, or let them sit at room temperature for about 30 minutes before serving.
Certainly! Oreo truffles are an ideal dessert for making in advance, which is especially helpful when preparing for parties or busy holidays. You can easily prepare them a day or two in advance and store them in an airtight container in the refrigerator until you are ready to serve. This allows the flavors to meld beautifully and frees up your time on the day of your event. For longer storage, refer to the freezing instructions above.
Achieving a smooth, even chocolate coating is simpler than you might think. The easiest and most effective method is to work with one truffle at a time. Gently drop a firm truffle ball into the melted chocolate. Using a fork (or a specialized candy dipping tool), scoop the truffle out of the chocolate. Hold it over the bowl and gently tap the fork a couple of times against the side of the bowl. This allows any excess chocolate to drip back into the bowl, preventing a thick, uneven coat and unsightly puddles on your parchment paper. For an even cleaner transfer, use a toothpick to gently nudge the truffle off the fork onto your lined baking tray. If your chocolate starts to get too thick, reheat it in 15-second intervals in the microwave, stirring well, or stir in a teaspoon of shortening or coconut oil to thin it out slightly.
Chocolate seizing means it turns thick, grainy, and unworkable. This usually happens due to overheating or, more commonly, from even a tiny drop of water getting into the chocolate. If your chocolate seizes, it’s very difficult to reverse. However, if it’s just a little thick, you can try stirring in a teaspoon of vegetable oil or shortening at a time until it loosens up. If it’s truly seized and grainy, it’s best to discard it and start fresh with new chocolate, being extra careful with heating and moisture.
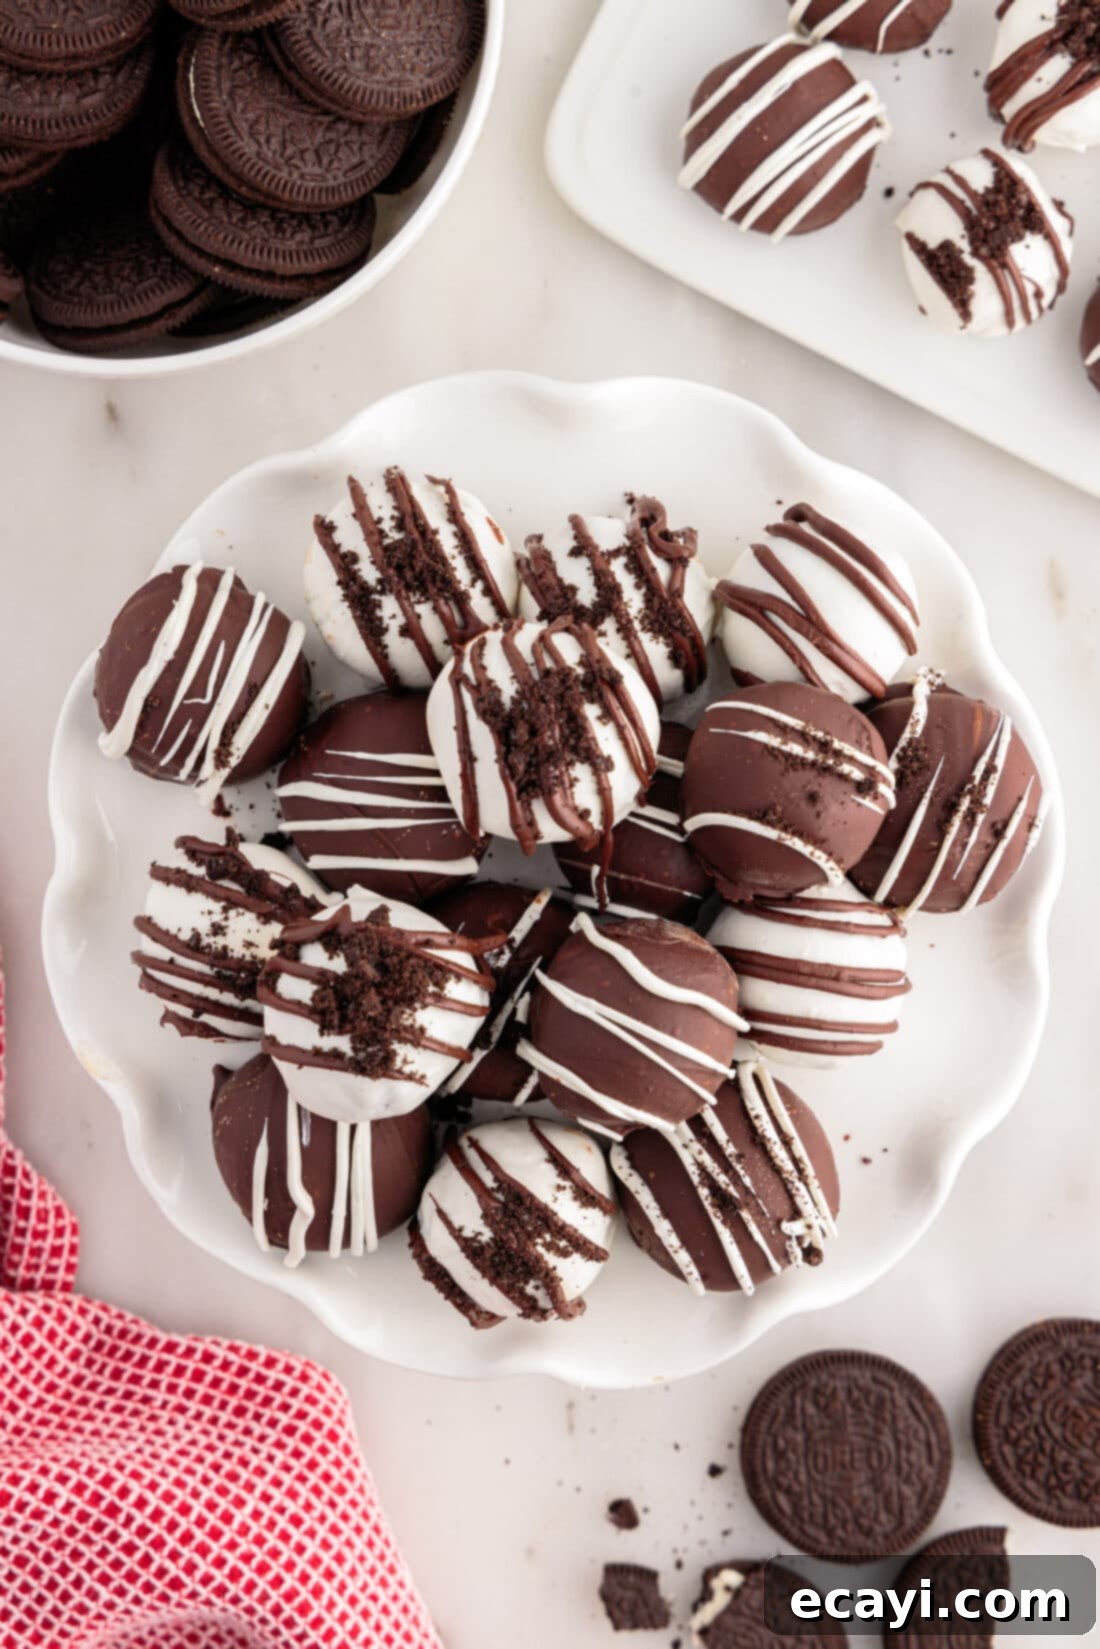
Creative Serving and Decorating Suggestions for Oreo Truffles
Oreo truffles are not only a delight to eat but also incredibly fun to decorate, offering endless possibilities for customization. We love keeping it classic by using both white chocolate and semi-sweet chocolate for coating, then artfully drizzling the contrasting melted chocolate over the top for a sophisticated visual appeal. For an added touch of elegance and an unmistakable Oreo flavor, a sprinkle of extra crushed Oreos over the still-wet chocolate coating creates a beautifully textured and professional presentation!
But don’t stop there! These versatile Oreo balls can be easily transformed to match any theme, holiday, or special event. Think beyond the basic and consider these creative ideas:
- Holiday Themes: Use colored candy melts (available in a rainbow of hues) to match holiday themes – green and red for Christmas, pastels for Easter, orange and black for Halloween, or pink and red for Valentine’s Day.
- Party Favors: Dip truffles in colors coordinating with a baby shower, birthday party, or bridal shower. Wrap them individually in cellophane bags with a pretty ribbon for charming party favors.
- Team Spirit: For sports fans, use melting wafers in your favorite team’s colors to create spirited treats.
- Decorative Toppings:
- Sprinkles: A classic choice! Nonpareils, jimmies, sanding sugar, or themed sprinkle mixes instantly add color and festivity.
- Crushed Nuts: Finely chopped pecans, walnuts, or almonds provide a lovely crunch and nutty flavor contrast.
- Coconut Flakes: Toasted or plain coconut flakes offer a tropical twist.
- Edible Glitter or Dust: For a truly glamorous touch, brush or sprinkle edible glitter onto set truffles.
- Mini Chocolate Chips: Press mini chocolate chips into the top of the wet chocolate for extra chocolatey goodness.
- Zests: A tiny sprinkle of orange or lemon zest can add a surprising burst of freshness.
- Presentation: Arrange your decorated truffles on a beautiful platter, in decorative cupcake liners, or even in a tiered display for an impressive dessert spread.
With just a little imagination, your Oreo truffles can become a personalized and memorable treat for any occasion.
Discover More Delicious Dessert Recipes
If you’ve fallen in love with the ease and deliciousness of these Oreo truffles, you’ll be thrilled to explore other similar no-bake and bite-sized dessert recipes. These treats are perfect for satisfying sweet cravings, entertaining guests, or just enjoying a little something special. Check out these related recipes that are sure to become new favorites:
- Cake Balls: Another fantastic way to repurpose cake and frosting into delightful, dippable bites.
- Mocha Truffles: For coffee and chocolate lovers, these rich truffles offer a sophisticated flavor profile.
- Classic Chocolate Truffles: The ultimate indulgence, simple and elegant.
- Heart Oreo Truffles: A charming variation perfect for Valentine’s Day or expressing love.
- Golden Oreo Truffles: A delicious alternative to the classic, using vanilla-flavored Golden Oreos for a unique twist.
- Chocolate Peanut Butter Balls: A beloved combination of sweet and salty, these are always a hit.
Each of these recipes offers a unique flavor and texture experience, but all share the joy of simple, delicious homemade desserts. Happy baking (and no-baking)!
I love to bake and cook and share my kitchen experience with all of you! Remembering to come back each day can be tough, that’s why I offer a convenient newsletter every time a new recipe posts. Simply subscribe and start receiving your free daily recipes!

Oreo Truffles
IMPORTANT – There are often Frequently Asked Questions within the blog post that you may find helpful. Simply scroll back up to read them!
Print It
Pin It
Rate It
Save ItSaved!
Ingredients
- 36 Oreo cookies filling included. 1 regular size package
- 8 ounces cream cheese cut into pieces and softened
- 12 ounces white chocolate melting wafers
- 12 ounces semi-sweet chocolate melting wafers or chocolate chips
Things You’ll Need
-
Food processor
-
Cookie scoop or Tablespoon
Before You Begin
- You will use whole Oreo cookies in this recipe. No need to separate the cookie from its filling as the filling will lend moisture and flavor. *Stick to regular Oreos, not the double stuffed or the thin variety. *
- Ghirardelli semi-sweet or white chocolate melts are great for this recipe, but you can also chop up a bar of baking chocolate. Chocolate chips will also work but we’ve found that the white chocolate chips don’t melt as smoothly and easily seize when warming. We have had success making Oreo truffles in the past using almond bark (vanilla or chocolate), however, we prefer the flavor of baking chocolate or the Ghirardelli chocolate melts/chips for a richer experience.
- It’s best to let your cream cheese come to room temperature before beginning. To do so, cut the cream cheese into cubes and let it rest at room temperature on a plate for around 30-40 minutes.
- Keep a paper towel nearby to wipe off the fork and/or toothpick while dipping. It’s helpful to use a fork to lift the truffle and tap off excess chocolate and then use a toothpick to help move the truffle from the fork onto the parchment paper.
Instructions
-
Place cookies in the bowl of a food processor and pulverize into small crumbs. (Reserve a cookie to crumble for garnish, if you wish.)
-
Add the cream cheese into the food processor and process until the mixture is fully combined and clumps into a “dough.”
-
Use a tablespoon or a cookie dough scoop to make balls of the mixture and place each ball on a baking sheet lined with parchment paper.
-
Chill in the freezer for 5-10 minutes to firm the dough a bit.
Freezing the dough balls for a short period of time is really helpful to get them firm enough to hold their shape for dipping, but if they are overly cold, the chocolate coating may crack. This can happen when the warm coating comes into contact with the very cold center – the center expands and the coating cracks or the insides start squirting out a hole in the coating. About 15 minutes in the freezer should be a good balance between cold enough and not too cold.
-
Roll each ball between the palms of your hands to form a smooth ball. Place the tray back into the freezer for an additional 10-15 minutes or the refrigerator for about 30 minutes.
-
Place the melting wafers and chocolate chips in separate microwave-safe bowls and heat in 30 second increments, stirring between each interval, until the chocolate is melted through and is smooth. You can do one type of dipping chocolate at a time so that the other doesn’t harden while you’re dipping the first half of the balls.
-
Working on one ball at a time, dip the firm ball into the melted chocolate, tossing it to coat completely. Lift from the chocolate using a fork. Tap off excess chocolate and place the ball on a clean sheet of parchment paper.
TIP – If the chocolate starts to harden or thicken while dipping, place it back into the microwave in 15 second increments and stir until smooth. You can also add a teaspoon of shortening to the chocolate when heating it to help thin it so it smooths out over the chocolate evenly.
-
Continue dipping half of the truffles in white chocolate and half of the truffles in semi-sweet chocolate.
-
Place the remaining melted chocolate in small plastic bags and snip off the corner. Drizzle a bit of each contrasting chocolate over the top of the truffles for decoration. Sprinkle with some cookie crumbs before the chocolate sets, if desired.
-
Once the chocolate has set, the truffles are ready to eat!
Expert Tips & FAQs
- Store the Oreo truffles in an air-tight container layered between pieces of parchment paper. Store in the refrigerator for up to 2 weeks. They should be refrigerated as they contain cream cheese, however, do note that they will develop condensation when removed from the fridge. This won’t affect the truffles themselves.
- To Freeze: You have two options of doing so – freeze the balls without the chocolate coating, or freeze them with the chocolate coating. For freezing the balls without the coating, place them on a baking sheet and flash-freeze them until solid, this way they don’t stick together. Once solid, transfer them to a large ziptop bag and freeze for up to 3 months. To freeze with the coating, simply allow the chocolate coating to fully set before transferring to a large ziptop bag or air-tight container. Freeze for up to 3 months.
Nutrition
The recipes on this blog are tested with a conventional gas oven and gas stovetop. It’s important to note that some ovens, especially as they age, can cook and bake inconsistently. Using an inexpensive oven thermometer can assure you that your oven is truly heating to the proper temperature. If you use a toaster oven or countertop oven, please keep in mind that they may not distribute heat the same as a conventional full sized oven and you may need to adjust your cooking/baking times. In the case of recipes made with a pressure cooker, air fryer, slow cooker, or other appliance, a link to the appliances we use is listed within each respective recipe. For baking recipes where measurements are given by weight, please note that results may not be the same if cups are used instead, and we can’t guarantee success with that method.
