Delightful DIY Red Velvet Hot Cocoa Bombs: The Ultimate Festive Treat & Gift Idea
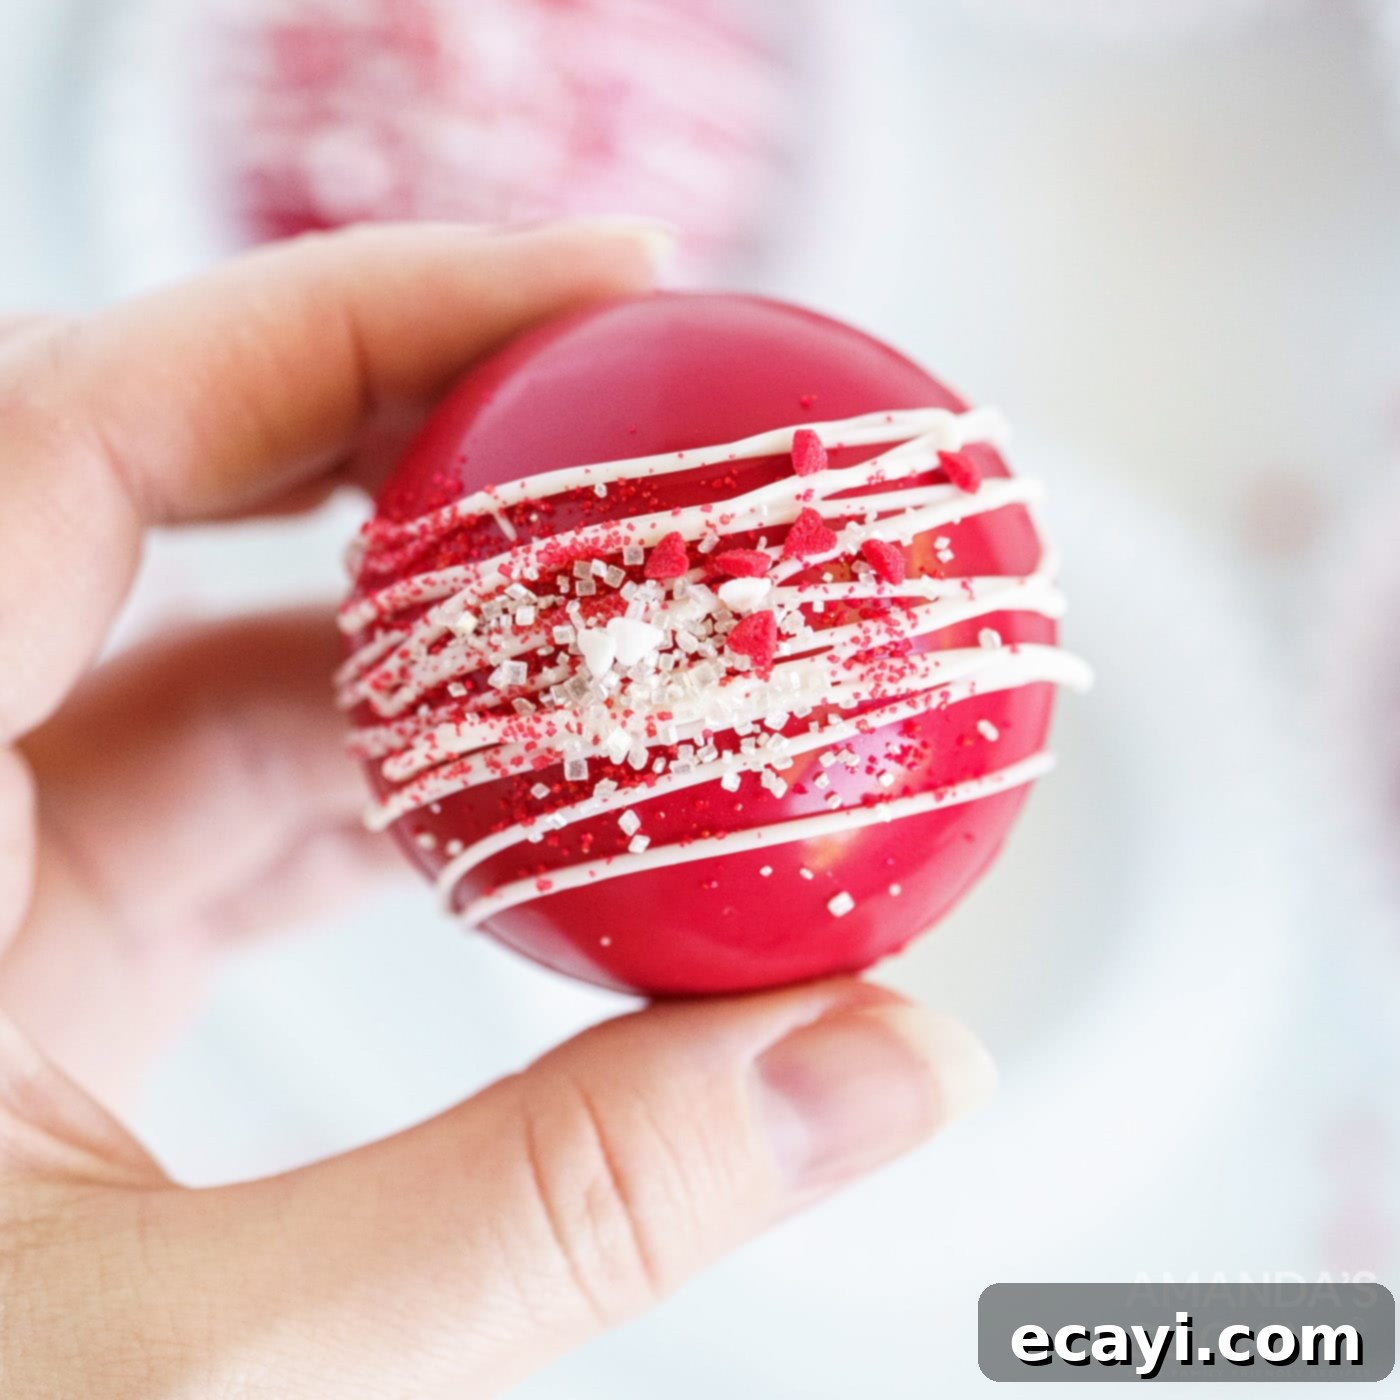
Unleash your inner chocolatier and create these stunning Red Velvet Hot Cocoa Bombs, a truly enchanting experience for any hot chocolate lover. Crafted with vibrant red candy melts, these edible masterpieces are not just a beverage component, but an awesome edible gift idea, perfect for expressing affection on Valentine’s Day, or a magical, fun recipe to make with kids on a cozy snow day. Imagine the delight as one of these spheres dissolves in hot milk, revealing a treasure trove of cocoa mix and marshmallows!
Why This Easy Red Velvet Hot Cocoa Bomb Recipe is a Must-Try
If you’ve ever thought about making hot cocoa bombs but felt intimidated, this Red Velvet Hot Cocoa Bomb recipe is here to change your mind. It’s surprisingly simple and incredibly rewarding, making it an ideal project even for those who aren’t seasoned bakers. The beauty of cocoa bombs lies in their straightforward construction: you essentially coat a specialized mold with your chosen candy melts or tempered chocolate, allow it to harden in the refrigerator, and then carefully remove the formed shells. The fun really begins when you fill these shells with hot cocoa mix and any delightful add-ins you desire, like mini marshmallows or festive sprinkles. The entire process culminates in the truly satisfying moment when you place a finished cocoa bomb into a mug of warm milk and watch it dramatically dissolve, transforming into a rich, creamy cup of hot chocolate. It’s a culinary spectacle that brings joy with every sip!
The “red velvet” aspect of these hot cocoa bombs makes them particularly special for holiday gifting and celebrations. The striking red color, often achieved with red candy melts or food coloring in white chocolate, instantly evokes feelings of love, warmth, and festivity. For Valentine’s Day, red velvet is an iconic flavor and color, and incorporating a few red heart sprinkles makes these bombs an undeniably romantic gesture. But their versatility extends beyond February 14th; by simply swapping out the heart sprinkles for a mix of red and green, these treats become perfect for Christmas and other winter festivities. The subtle cocoa flavor typically associated with red velvet, combined with its distinctive color, elevates a classic hot chocolate into something truly extraordinary.
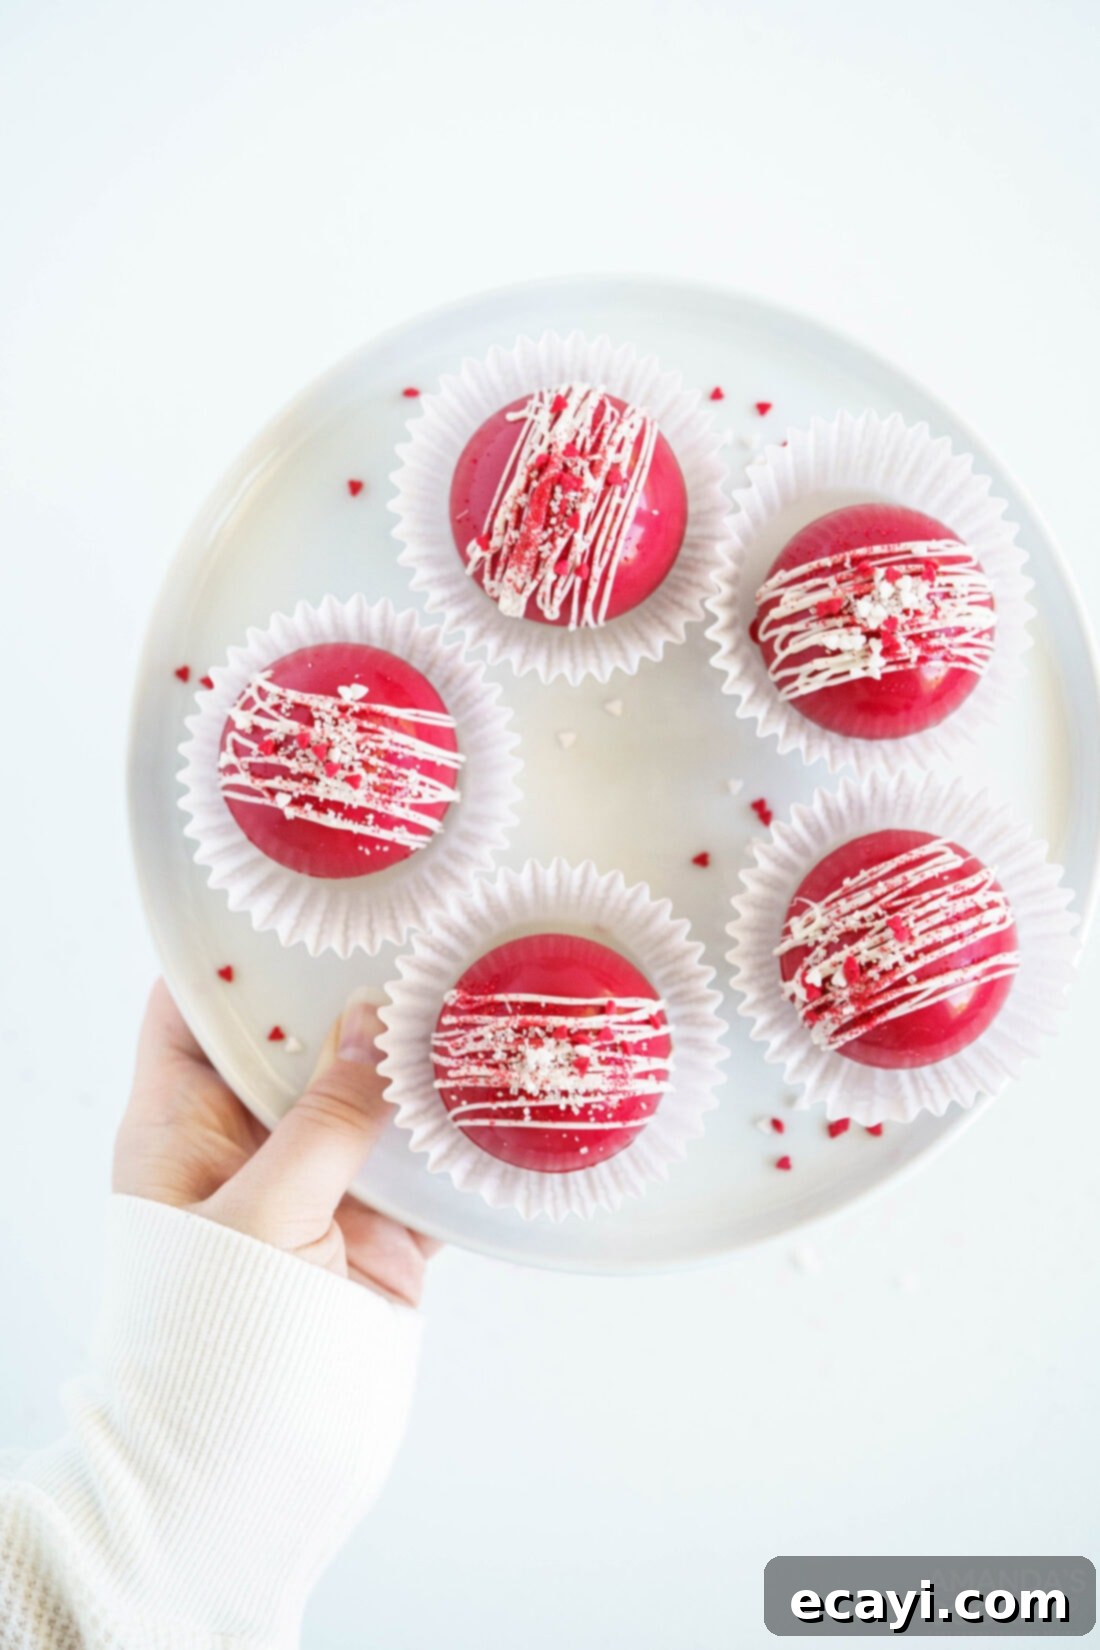
Essential Ingredients for Your Red Velvet Hot Cocoa Bombs
Gathering your ingredients is the first exciting step in crafting these beautiful red velvet hot cocoa bombs. The primary component for the vibrant shells will be **red candy melts**. These are a fantastic choice because they melt smoothly and temper easily, providing a consistent, brilliant red color without the need for additional food coloring. Inside each bomb, you’ll want a good quality **hot cocoa mix**—choose your favorite brand for the best flavor experience. **Mini marshmallows** are a classic hot chocolate topping and are essential for that delightful “reveal” when the bomb melts. For a festive touch, especially for Valentine’s Day, **heart sprinkles** in red or pink are perfect. If you’re making these for Christmas, consider red and green sprinkles or even small edible snowflakes. Finally, **white candy melts** will be used for an elegant drizzle, adding a beautiful contrast and another layer of flavor. Don’t forget any additional sprinkles you might want for extra decoration!
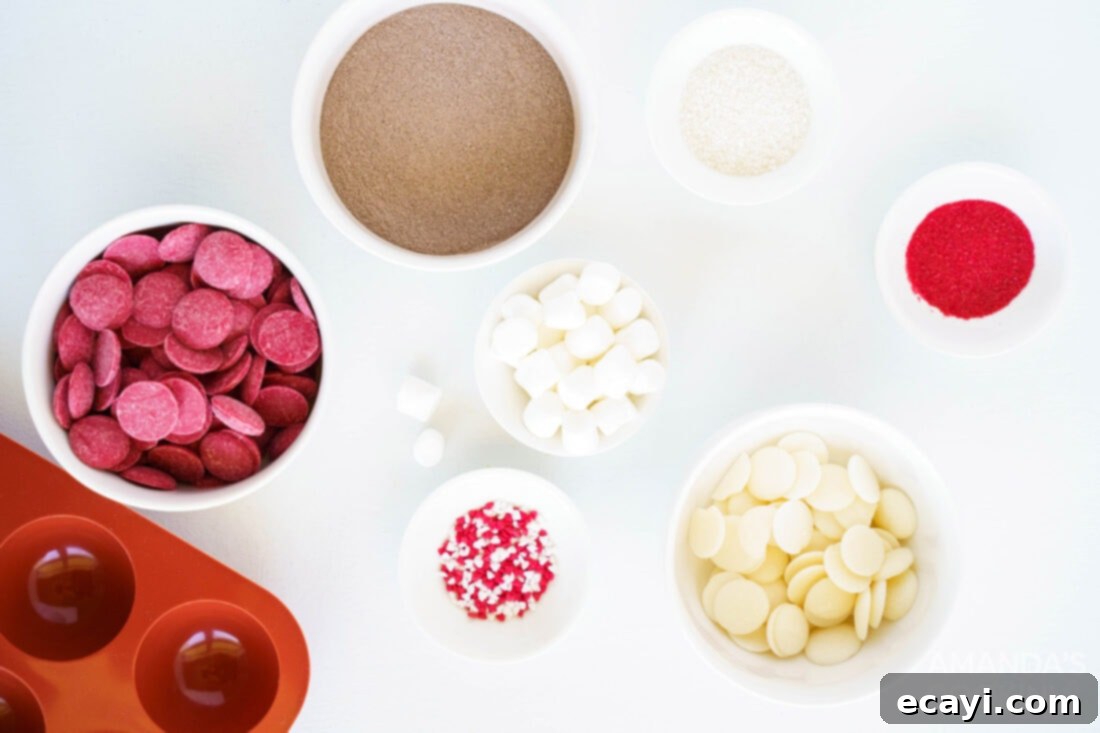
Step-by-Step Guide: Crafting Your Red Velvet Hot Cocoa Bombs
These detailed step-by-step photos and instructions are provided to help you visually guide through the process of making this delightful recipe. For your convenience, you can easily Jump to the full printable recipe card, complete with exact measurements and comprehensive instructions, found at the bottom of this page.
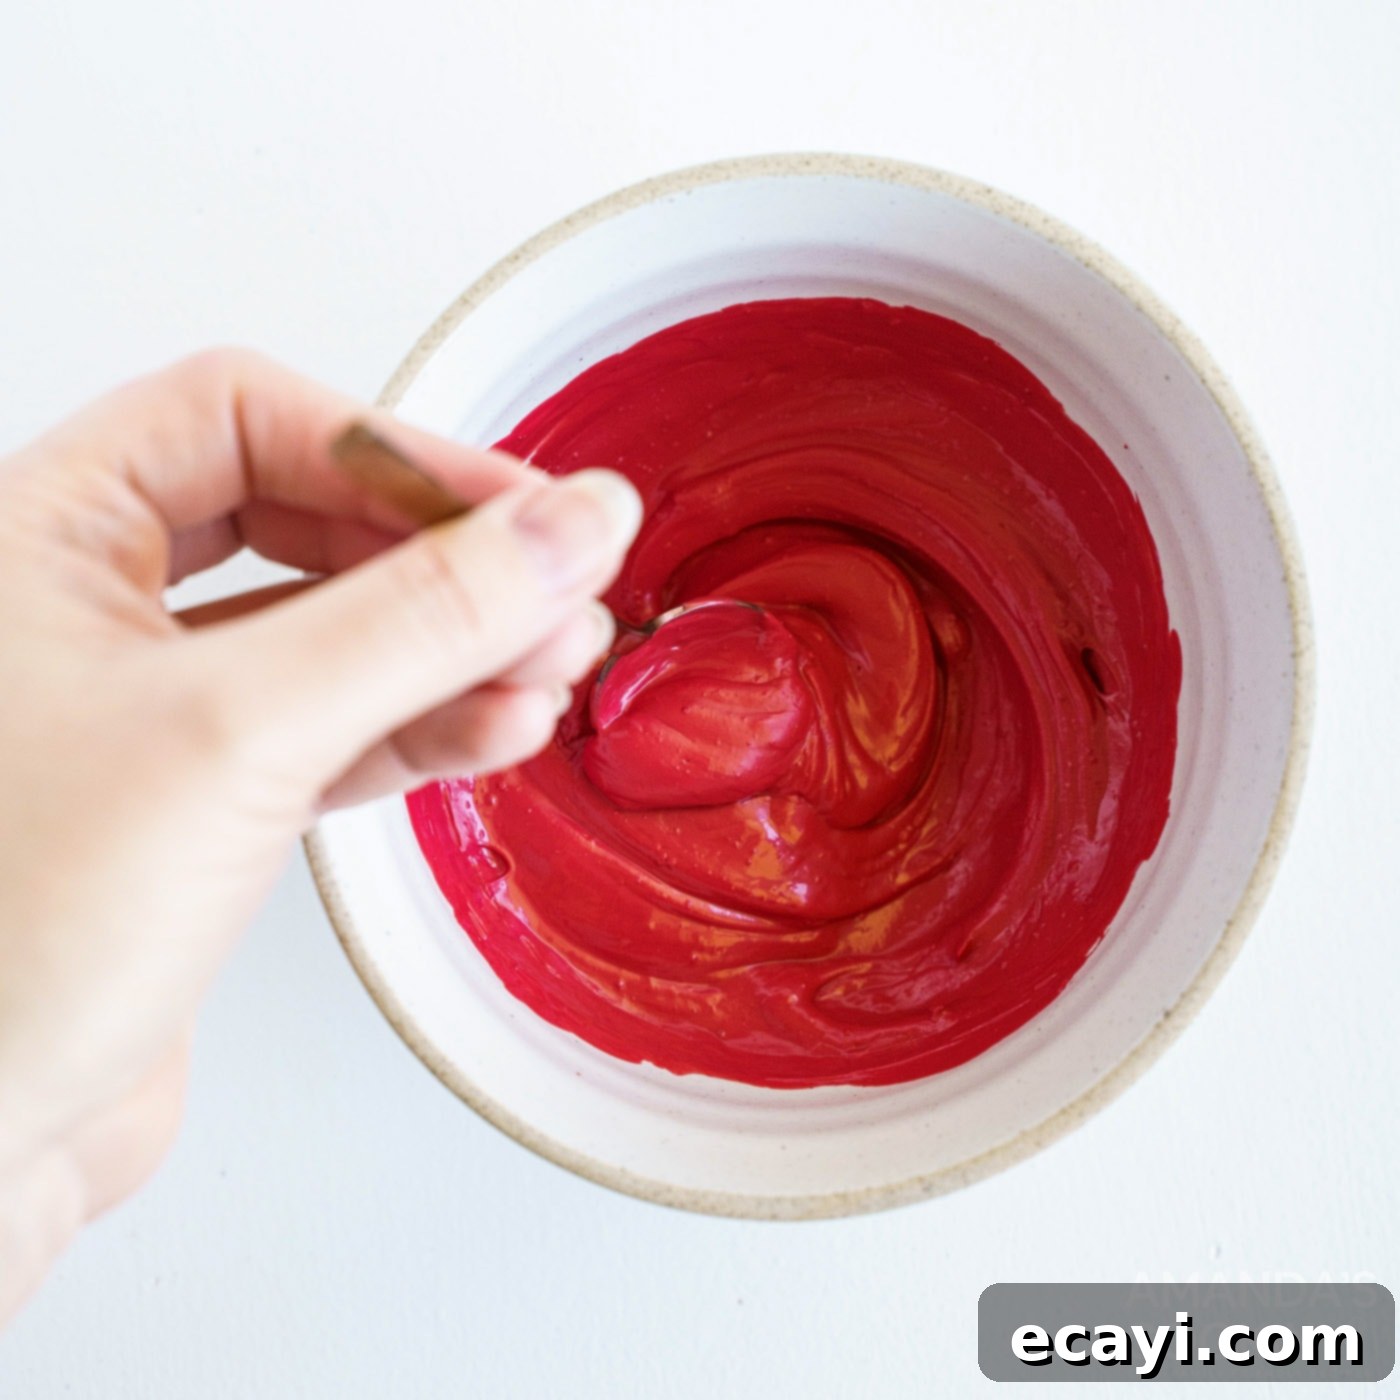
- **Melt the Red Candy Melts:** Begin by melting your red candy melts. You can achieve a smooth, consistent melt using a double boiler, which provides gentle, indirect heat, or by carefully using a microwave-safe bowl in the microwave. If using a microwave, heat in short 30-second intervals, stirring thoroughly after each interval to prevent scorching, until the candy is completely smooth and free of lumps. This creates the perfect base for your vibrant red shells.

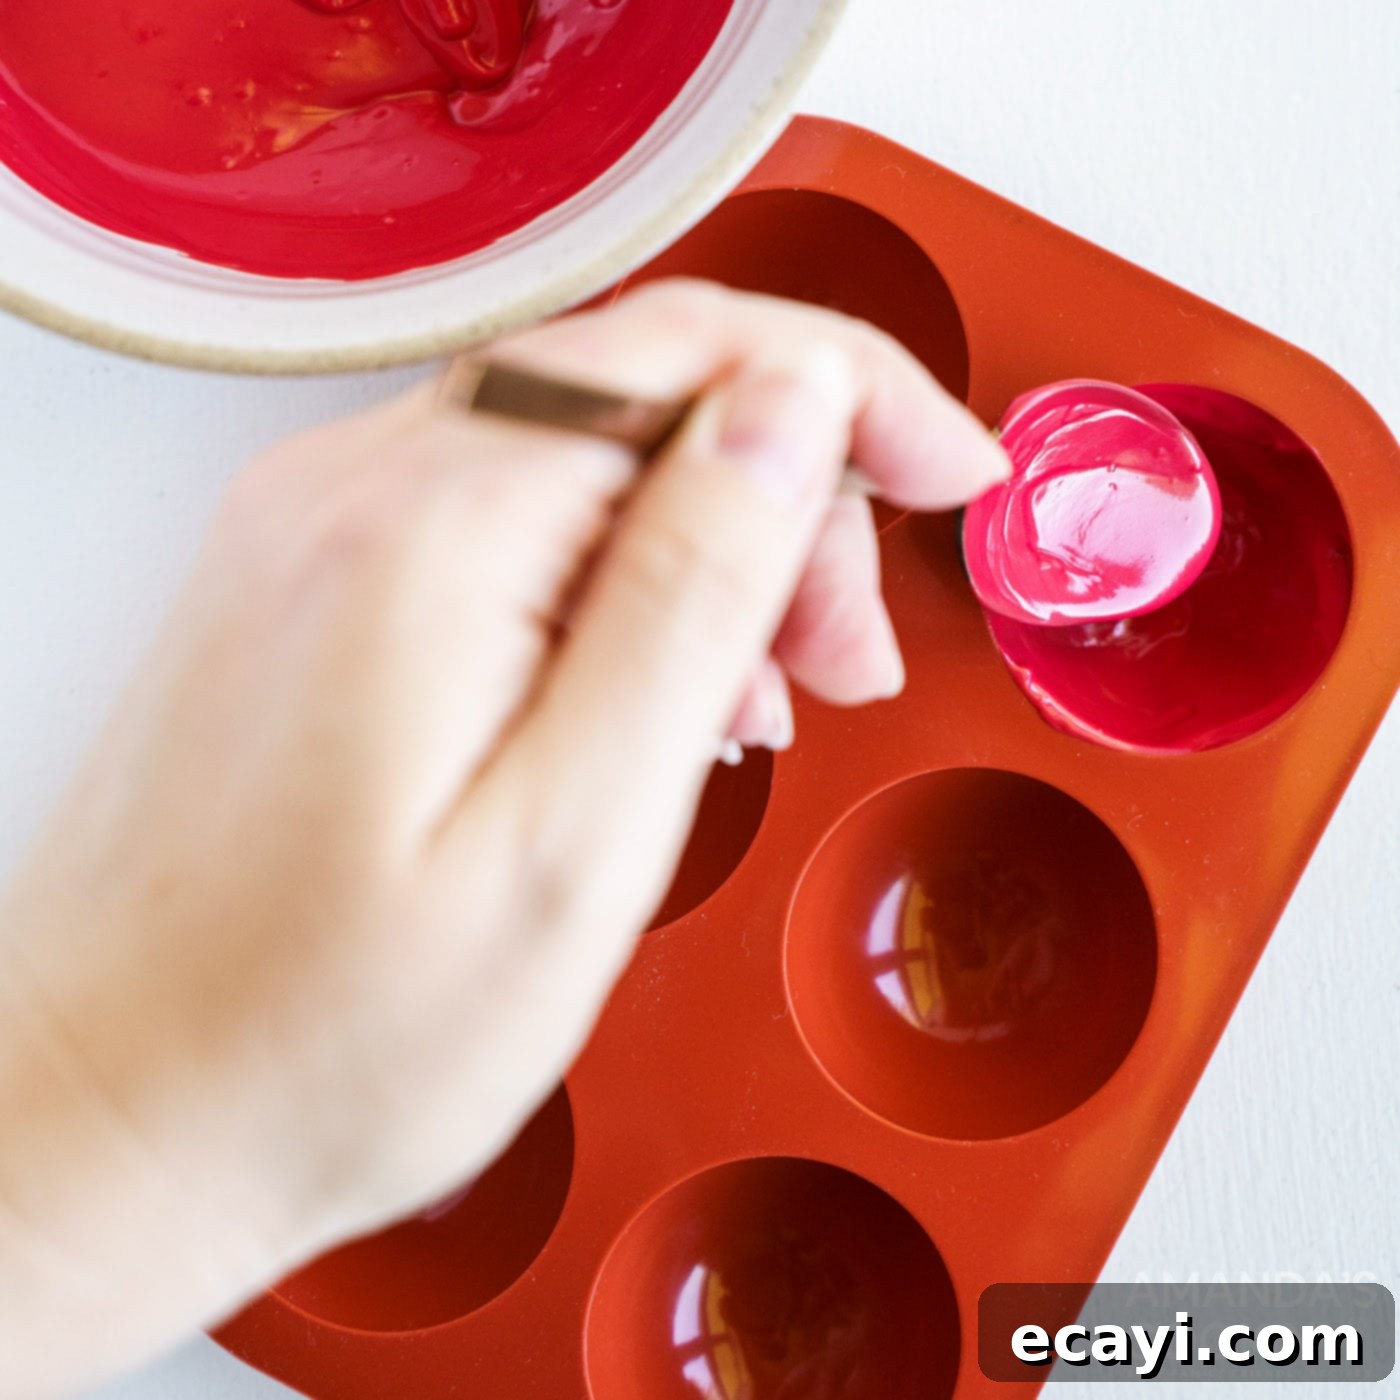
- **Fill the Silicone Molds:** Once your red candy melts are perfectly smooth, spoon the melted candy into the wells of your silicone sphere molds. Ensure each well is coated evenly, pushing the candy up the sides of the mold to create a sturdy shell. This recipe typically uses molds with 12 wells to create 6 full cocoa bombs.

- **First Chill & Thicken:** Place the silicone molds into the refrigerator. Allow the candy to set and harden for approximately 5 minutes. After the first chill, remove the molds and repeat the process of spooning in more melted red candy and coating the spheres. This second layer is crucial for creating robust candy shells that won’t easily break and will hold their shape beautifully.
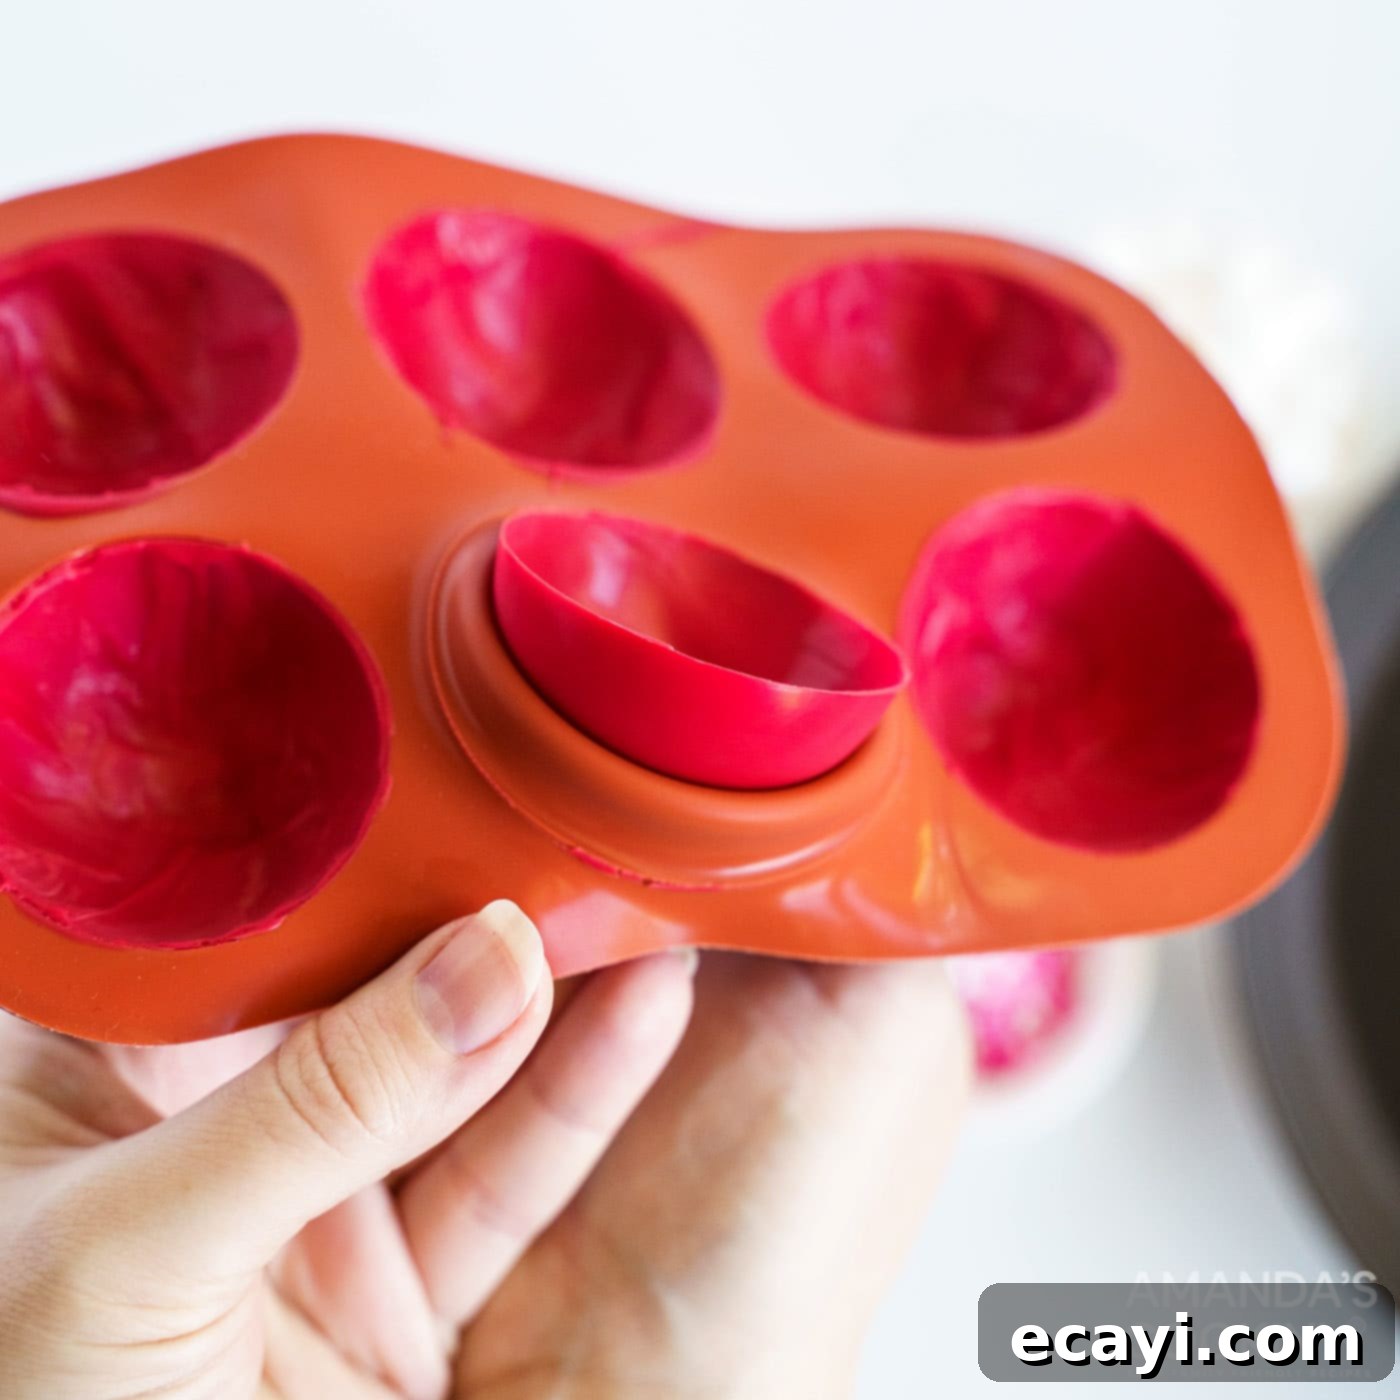
- **Second Chill & Release:** Return the molds to the refrigerator for another 5 minutes, or until the candy is completely set and firm. Once hardened, gently and carefully remove the candy half-spheres from the silicone molds. Flex the mold slightly to ease them out, being mindful not to crack the delicate shells. You should now have 12 perfect red half-spheres.

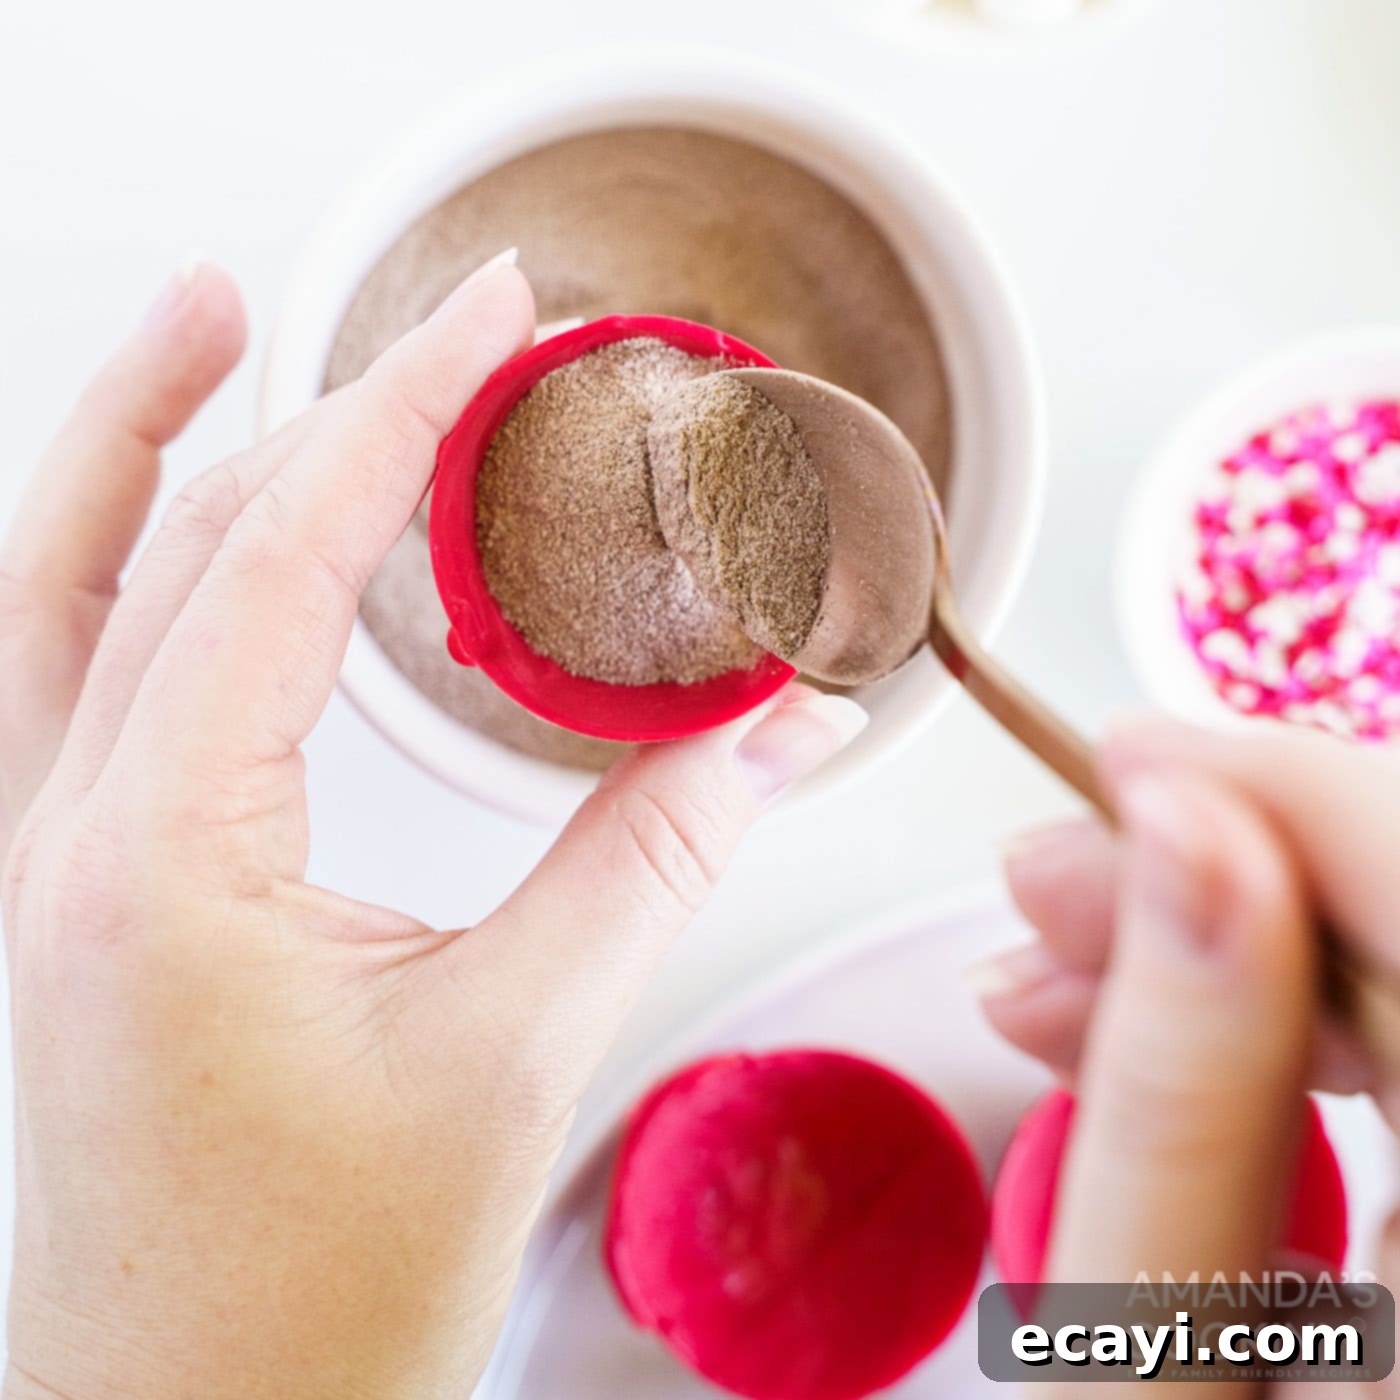
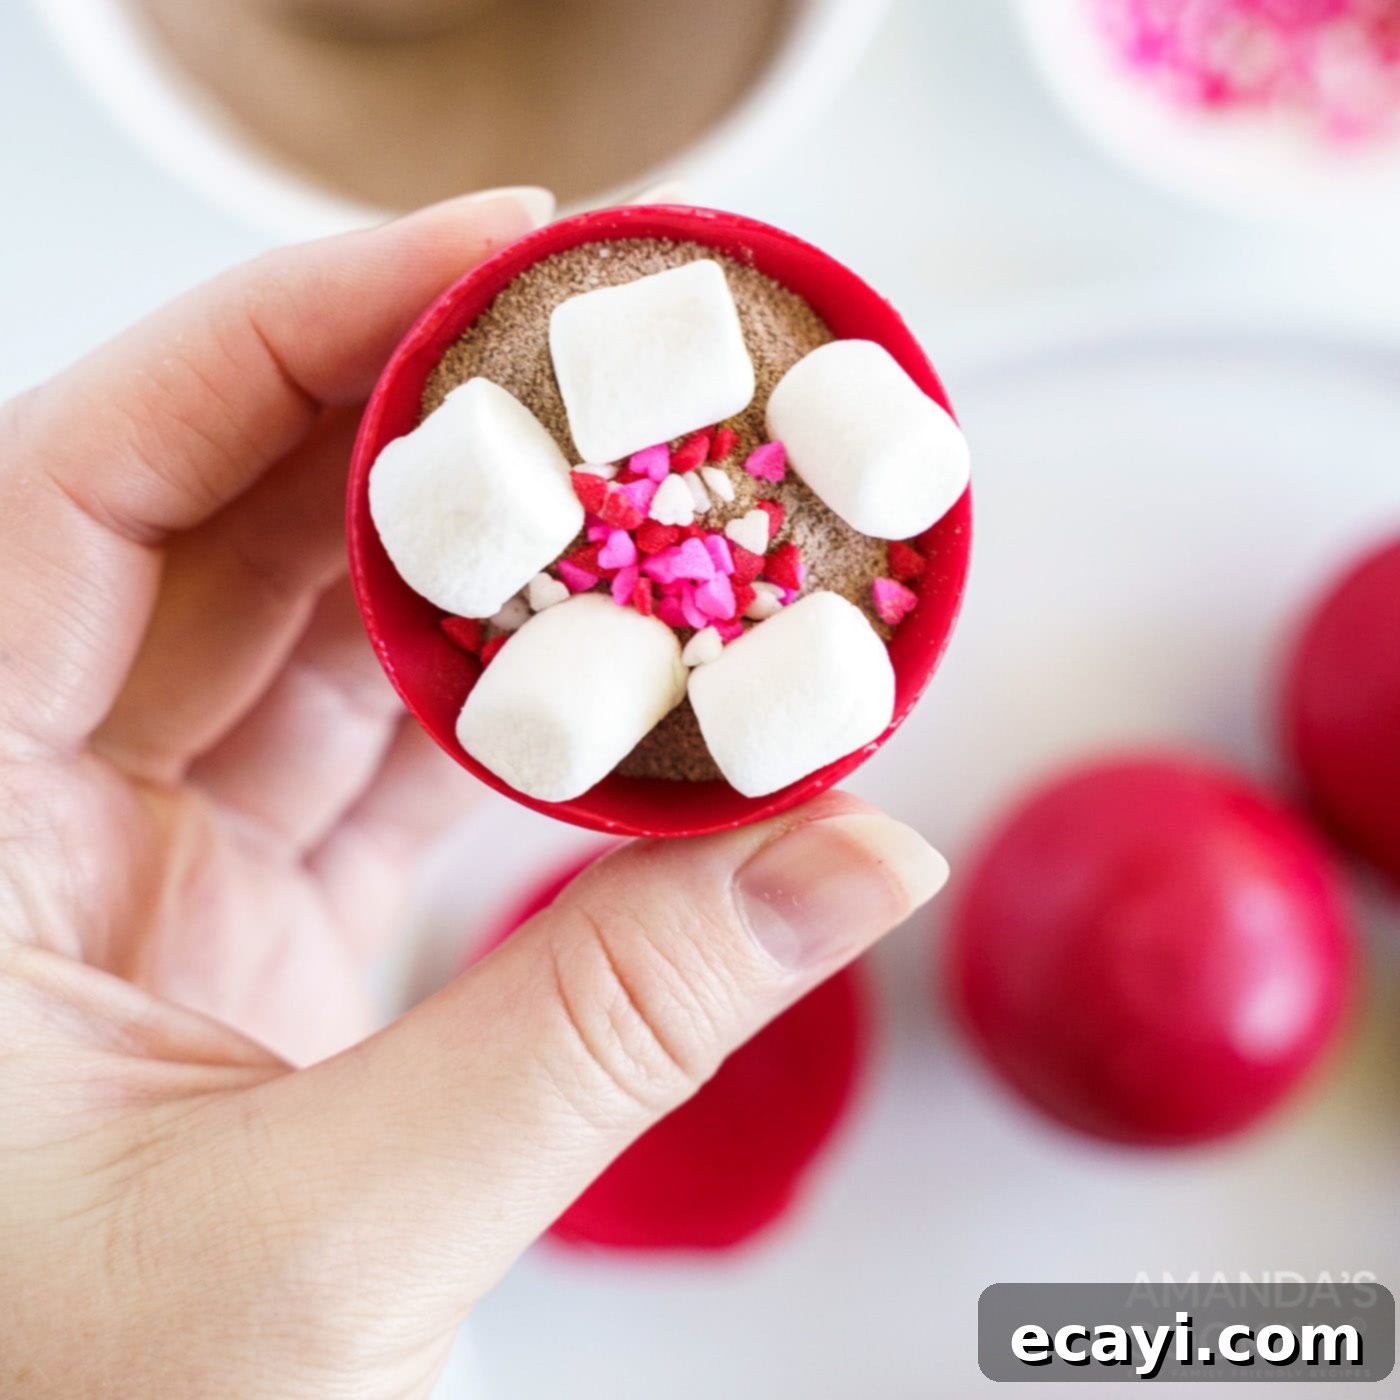
- **Fill the Half Spheres:** Take 6 of your candy half-spheres. Into each of these, carefully add 1 tablespoon of your chosen hot cocoa mix, followed by 5 delightful mini marshmallows, and 1/4 teaspoon of heart sprinkles. You can also experiment with other fillings like chocolate chips, a pinch of cinnamon, or even a tiny amount of instant coffee for a mocha twist.


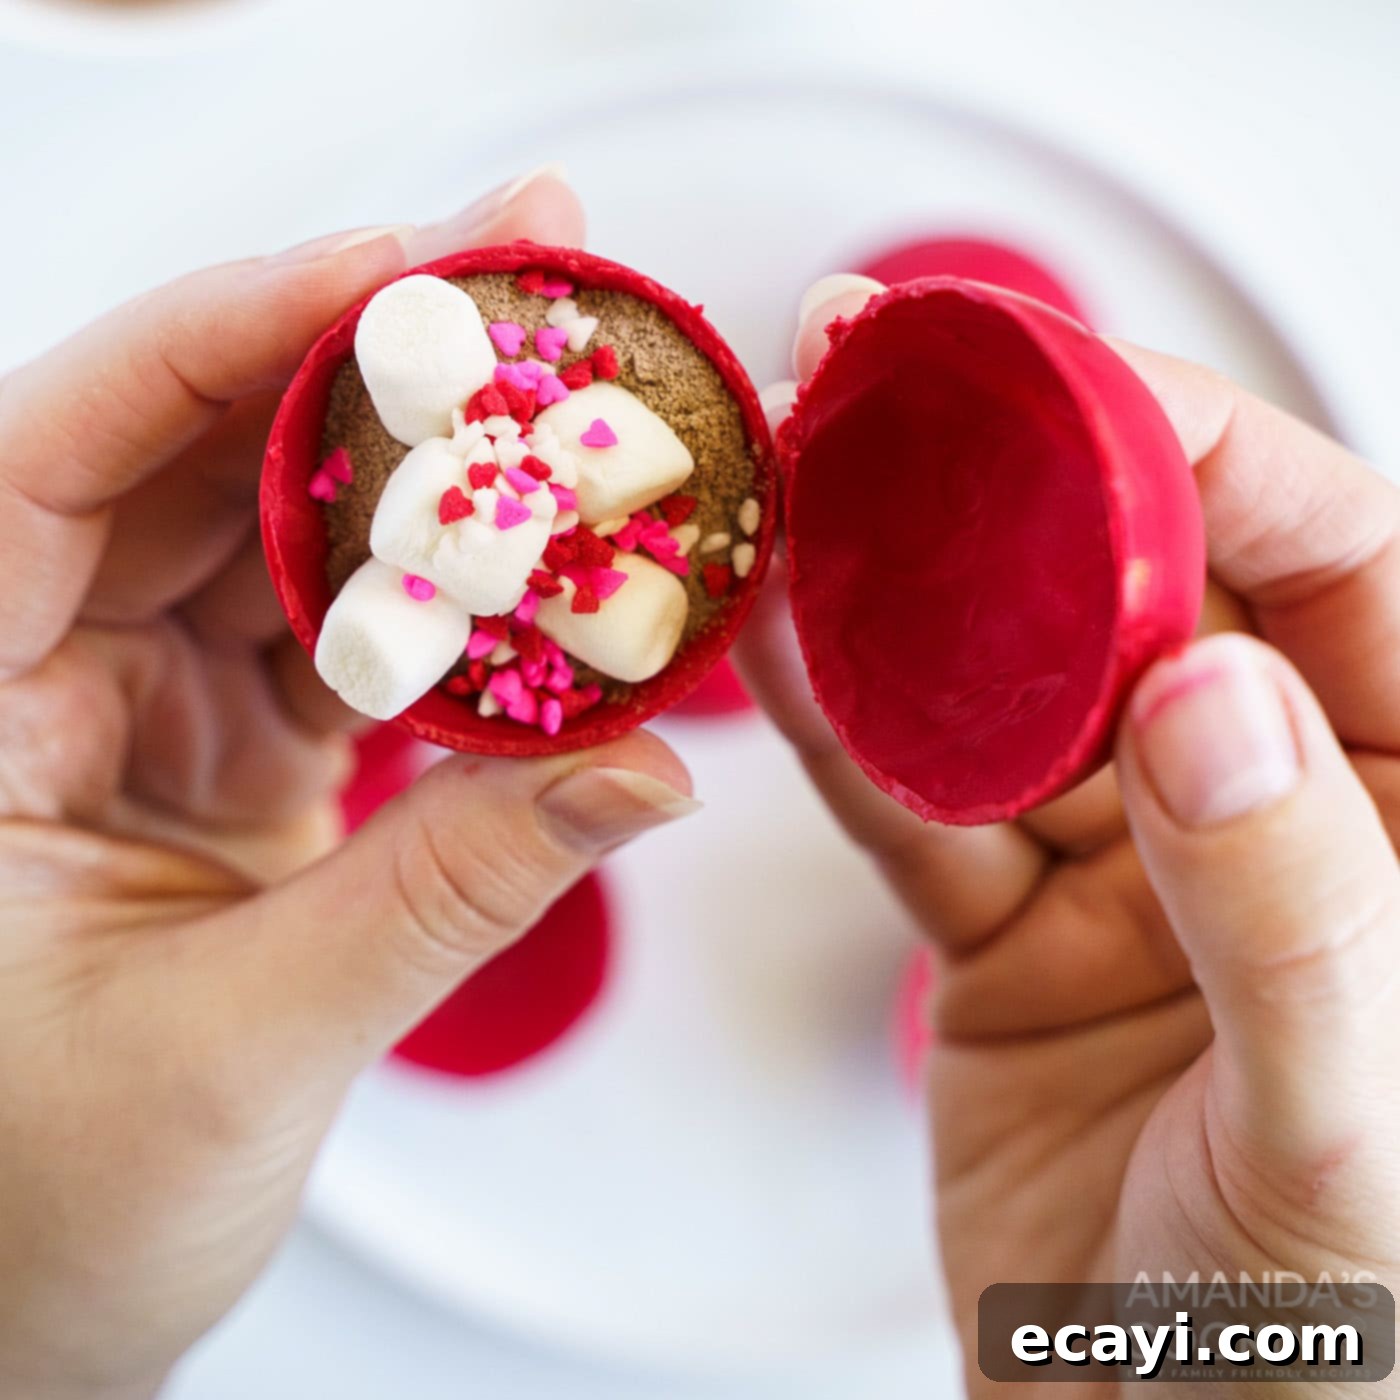
- **Seal the Hot Cocoa Bombs:** To seal your cocoa bombs, heat a non-stick pan over low heat until it’s just warm to the touch (not hot). Remove the pan from the heat. Gently place one of the empty candy half-spheres onto the warm pan, allowing its rim to melt slightly for a few seconds. Carefully pick up this slightly melted half-sphere and place it precisely on top of one of the filled half-spheres. The melted edges will fuse together, creating a perfectly sealed sphere. Run your finger along the seam to smooth it out and ensure a tight seal. Repeat this process until all 6 hot cocoa bombs are complete.

- **Prepare for Decoration:** Lay out a piece of wax paper or parchment paper on a tray or flat surface. This will make decorating easier and cleanup a breeze. Carefully transfer your sealed hot cocoa bombs onto this surface, leaving a little space between each one.
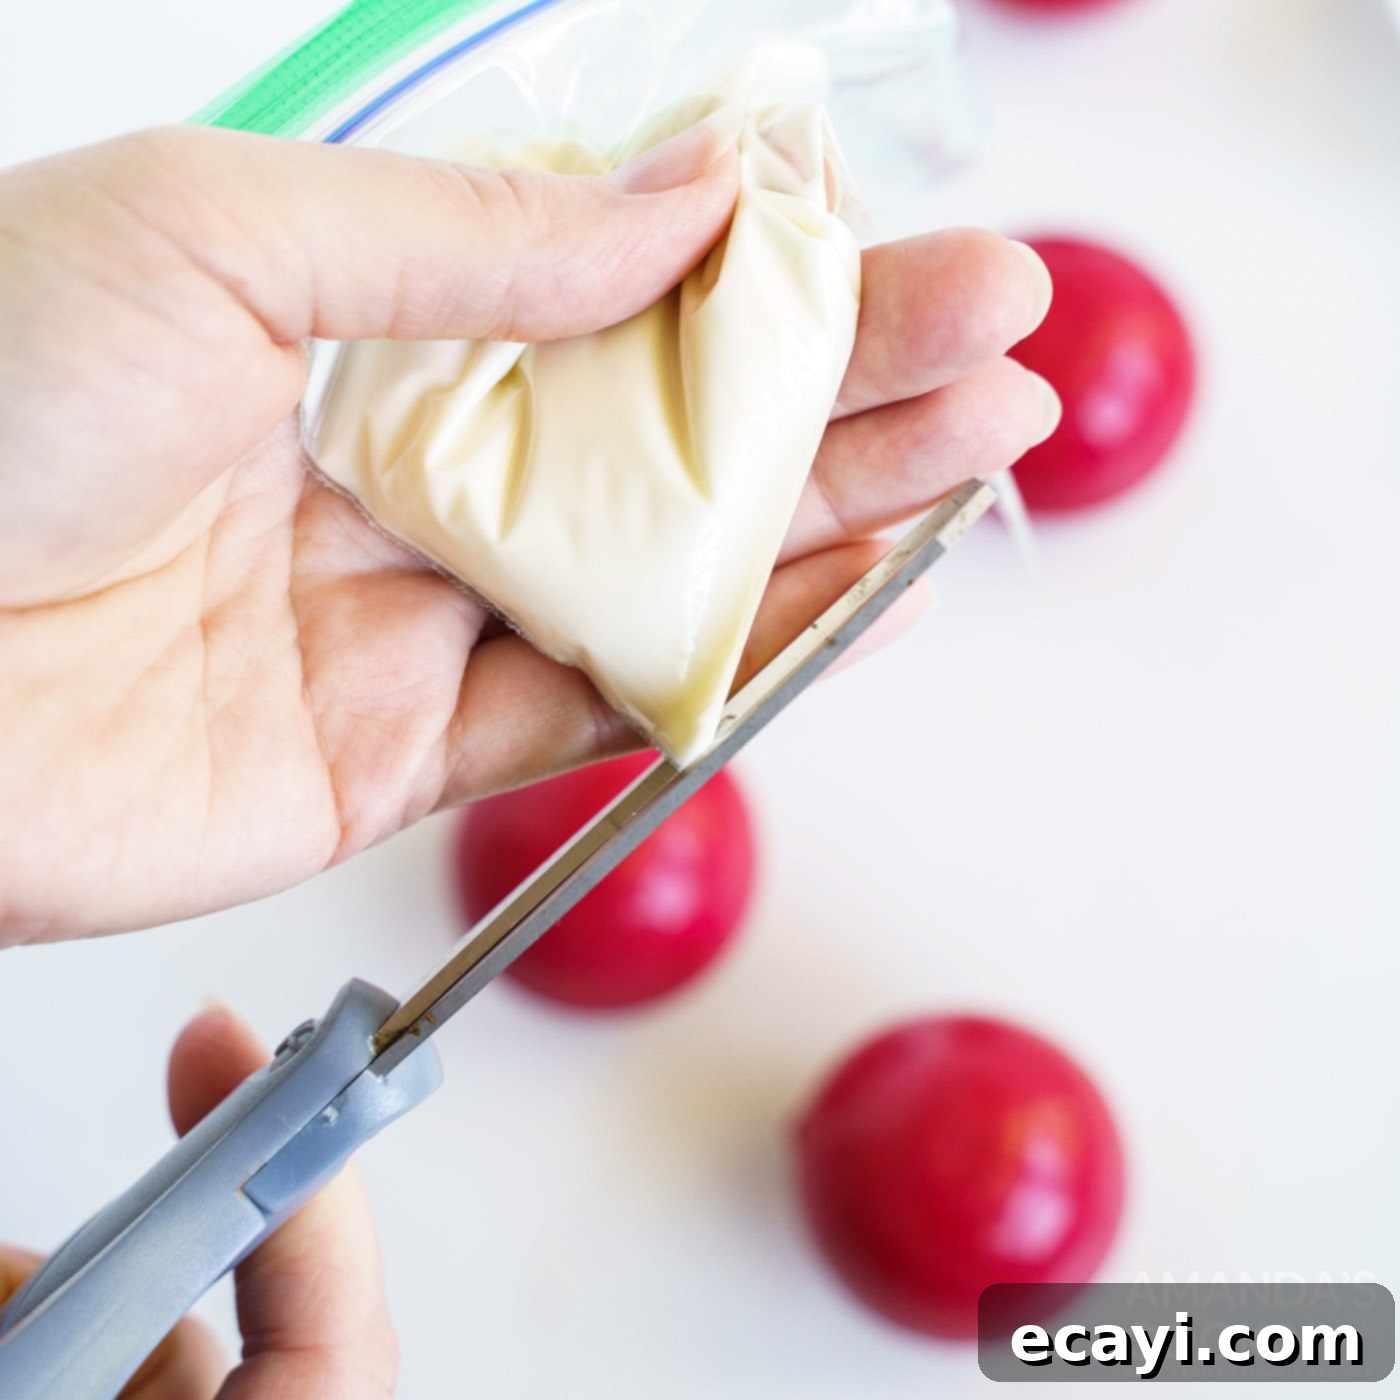
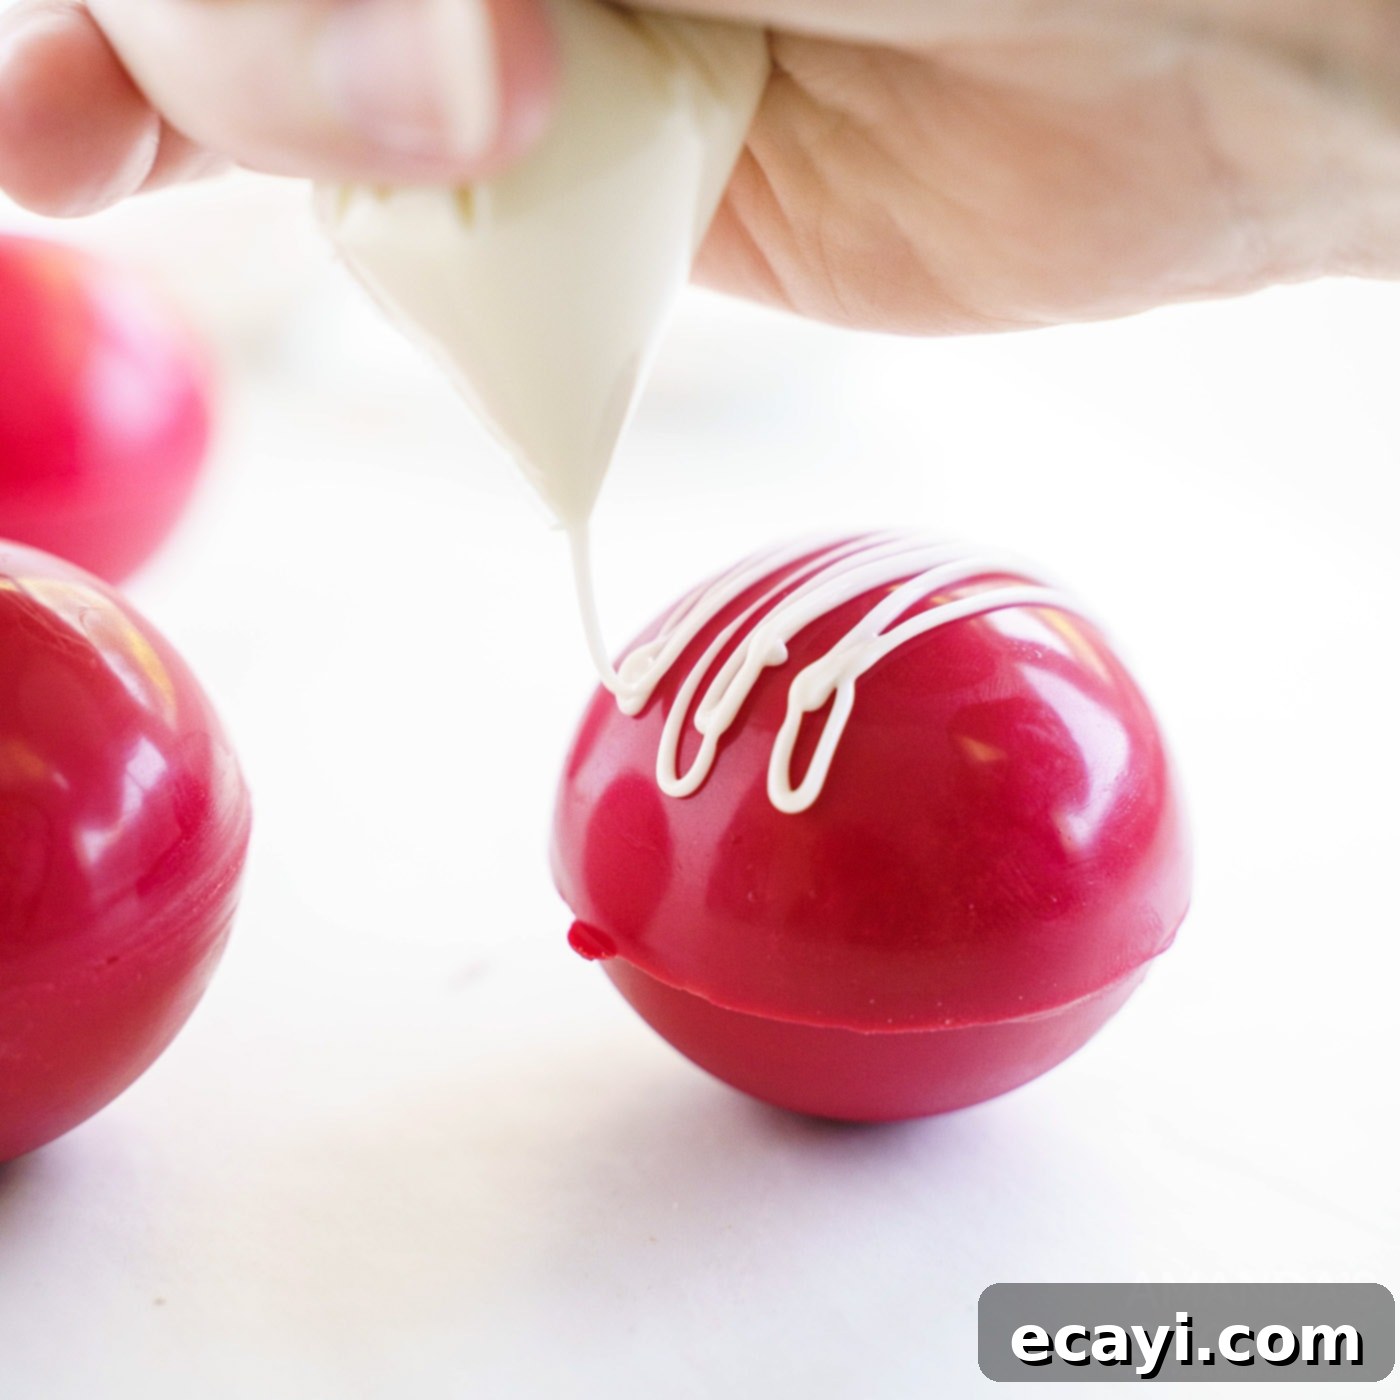
- **Melt the White Candy Melts:** In a double boiler or a microwave-safe bowl, melt the white candy melts, following the same gentle melting process as with the red candy. Stir until it’s completely smooth and free of lumps. Once melted, carefully pour the white candy into a small zip-top plastic bag. Snip off one tiny corner of the bag; the smaller the snip, the finer your drizzle will be.

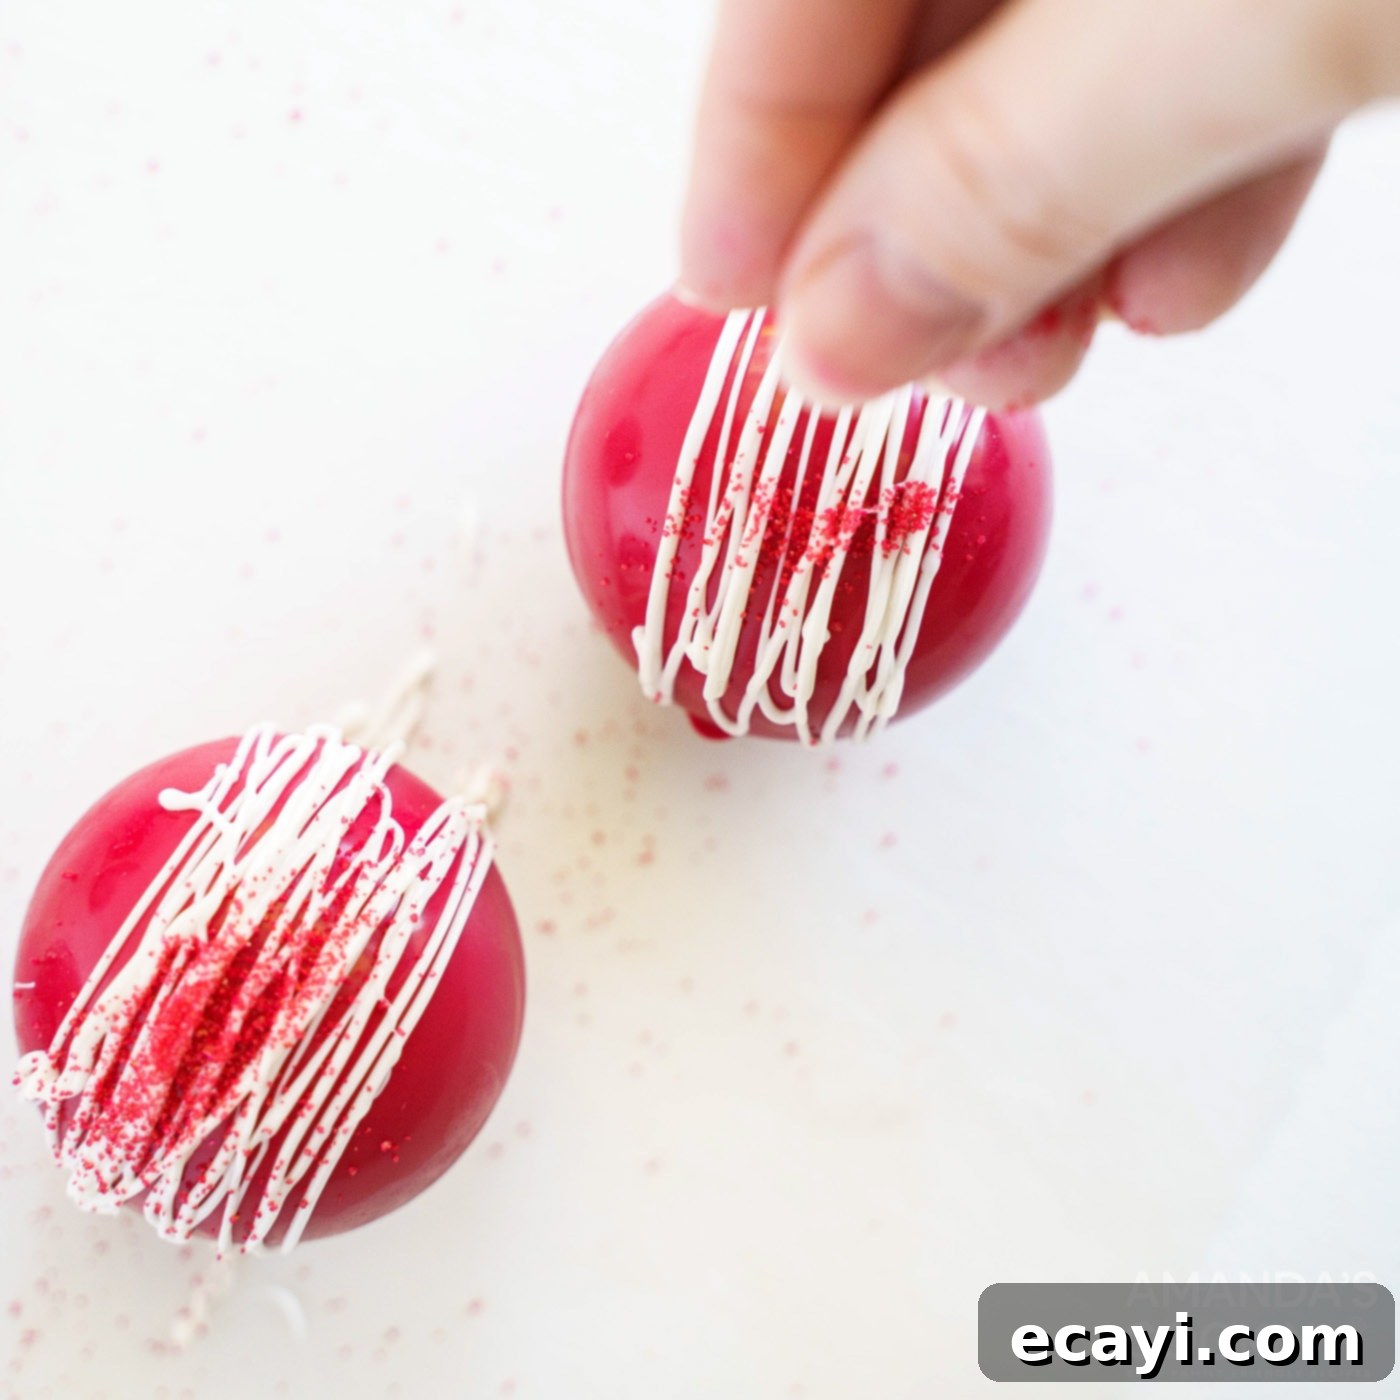
- **Drizzle & Decorate:** Gently squeeze the melted white candy from the snipped bag onto the tops of your red velvet hot cocoa bombs, creating an appealing decorative drizzle pattern. Work quickly, as candy melts set relatively fast. If you wish to add more sprinkles, do so immediately while the white candy is still wet, ensuring they adhere beautifully to the surface of the bombs. This is where you can truly personalize each creation!


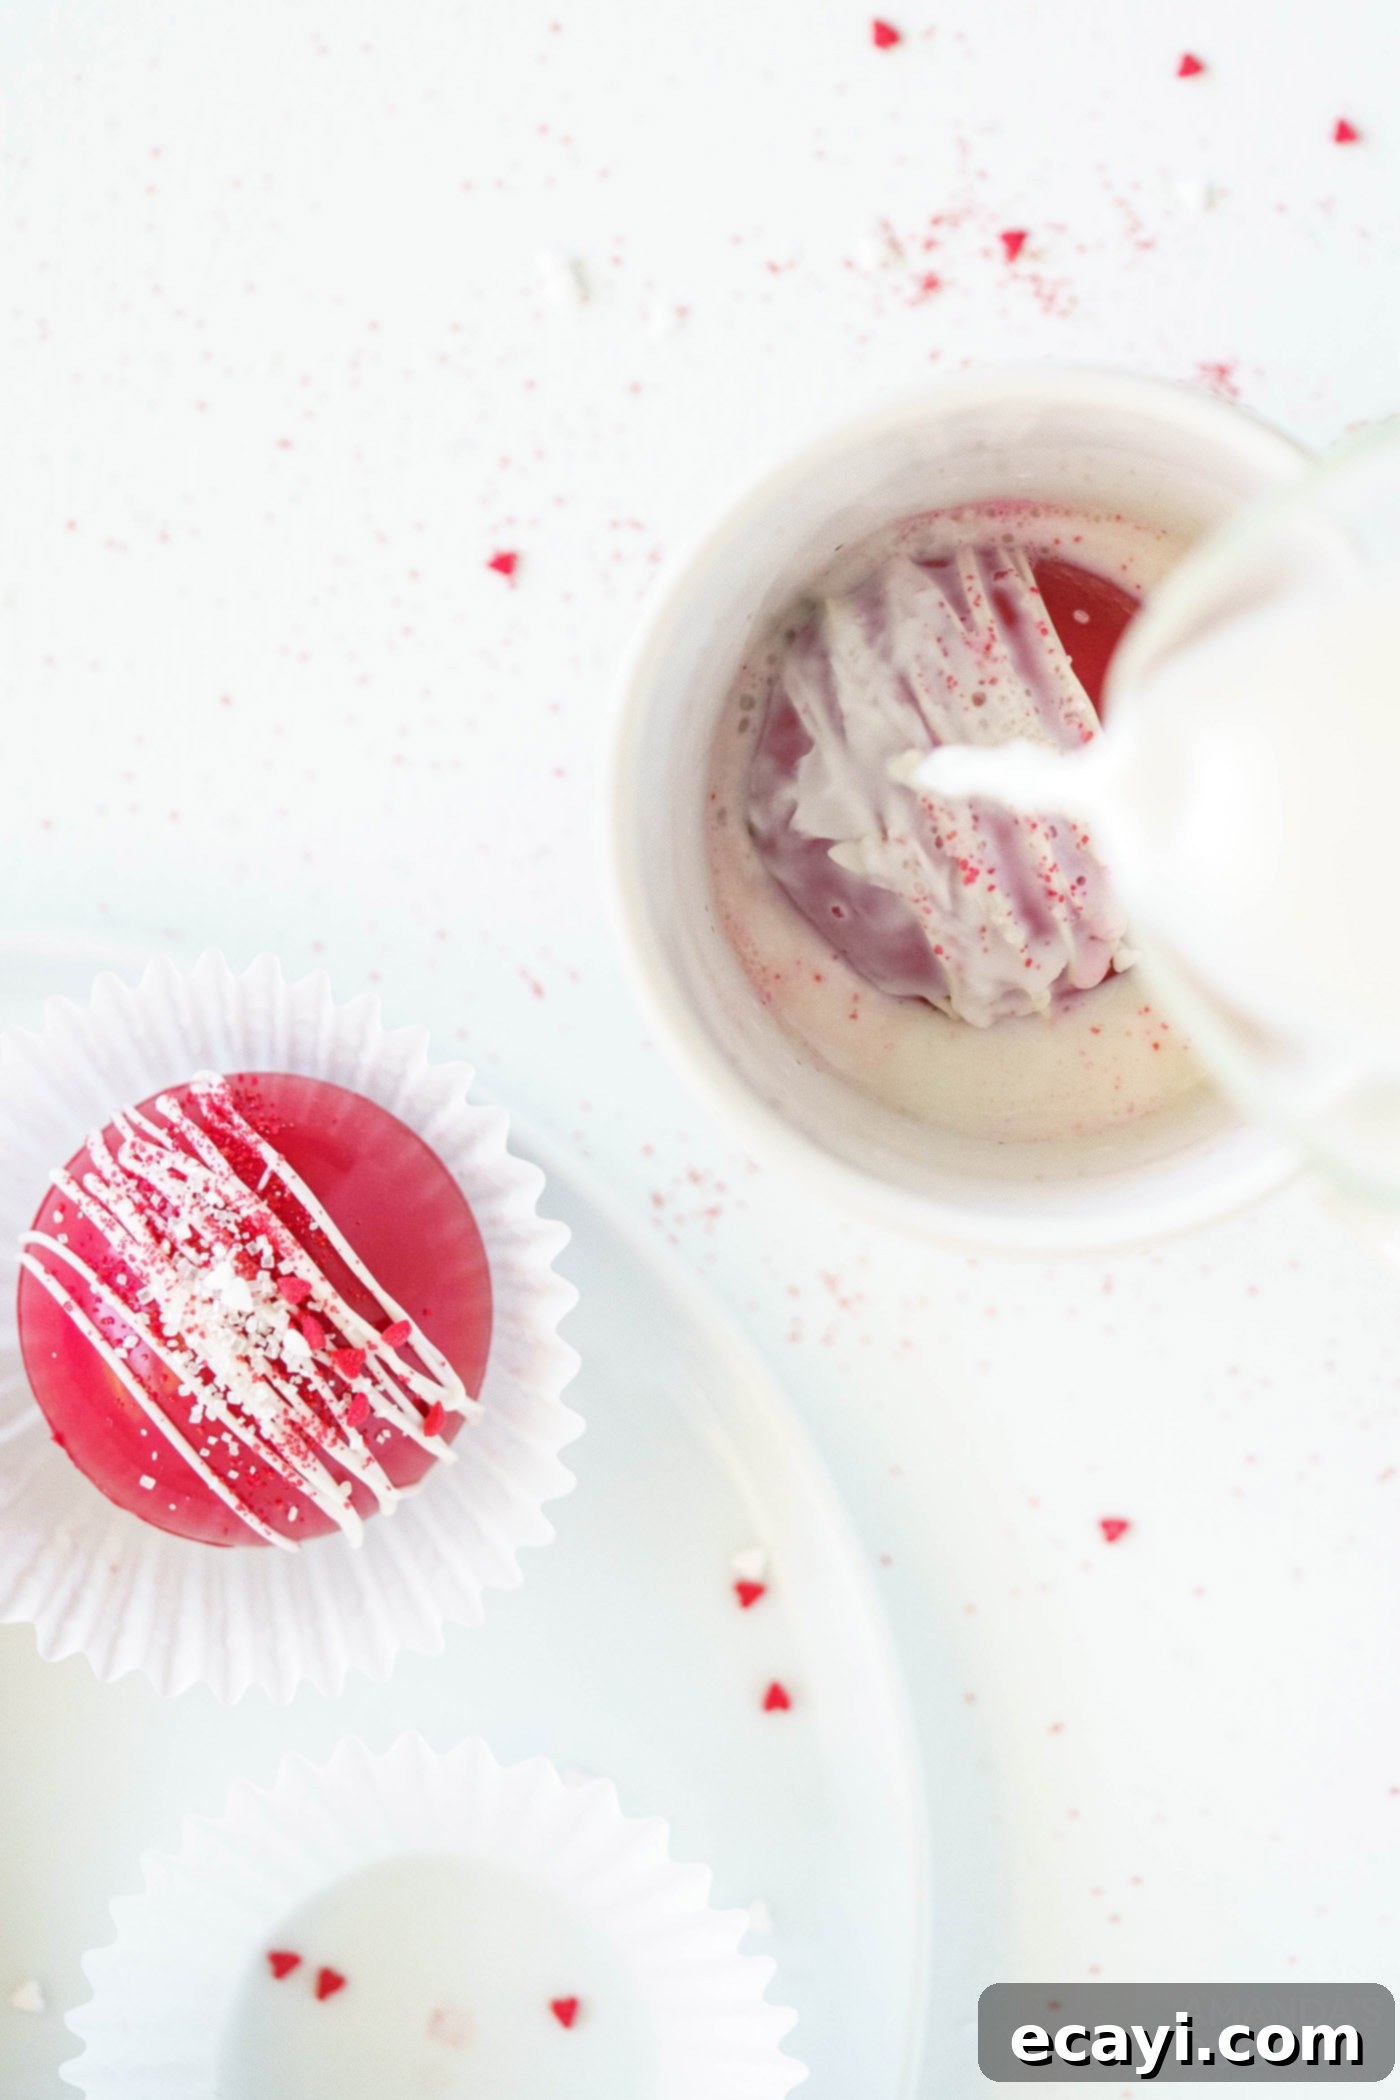
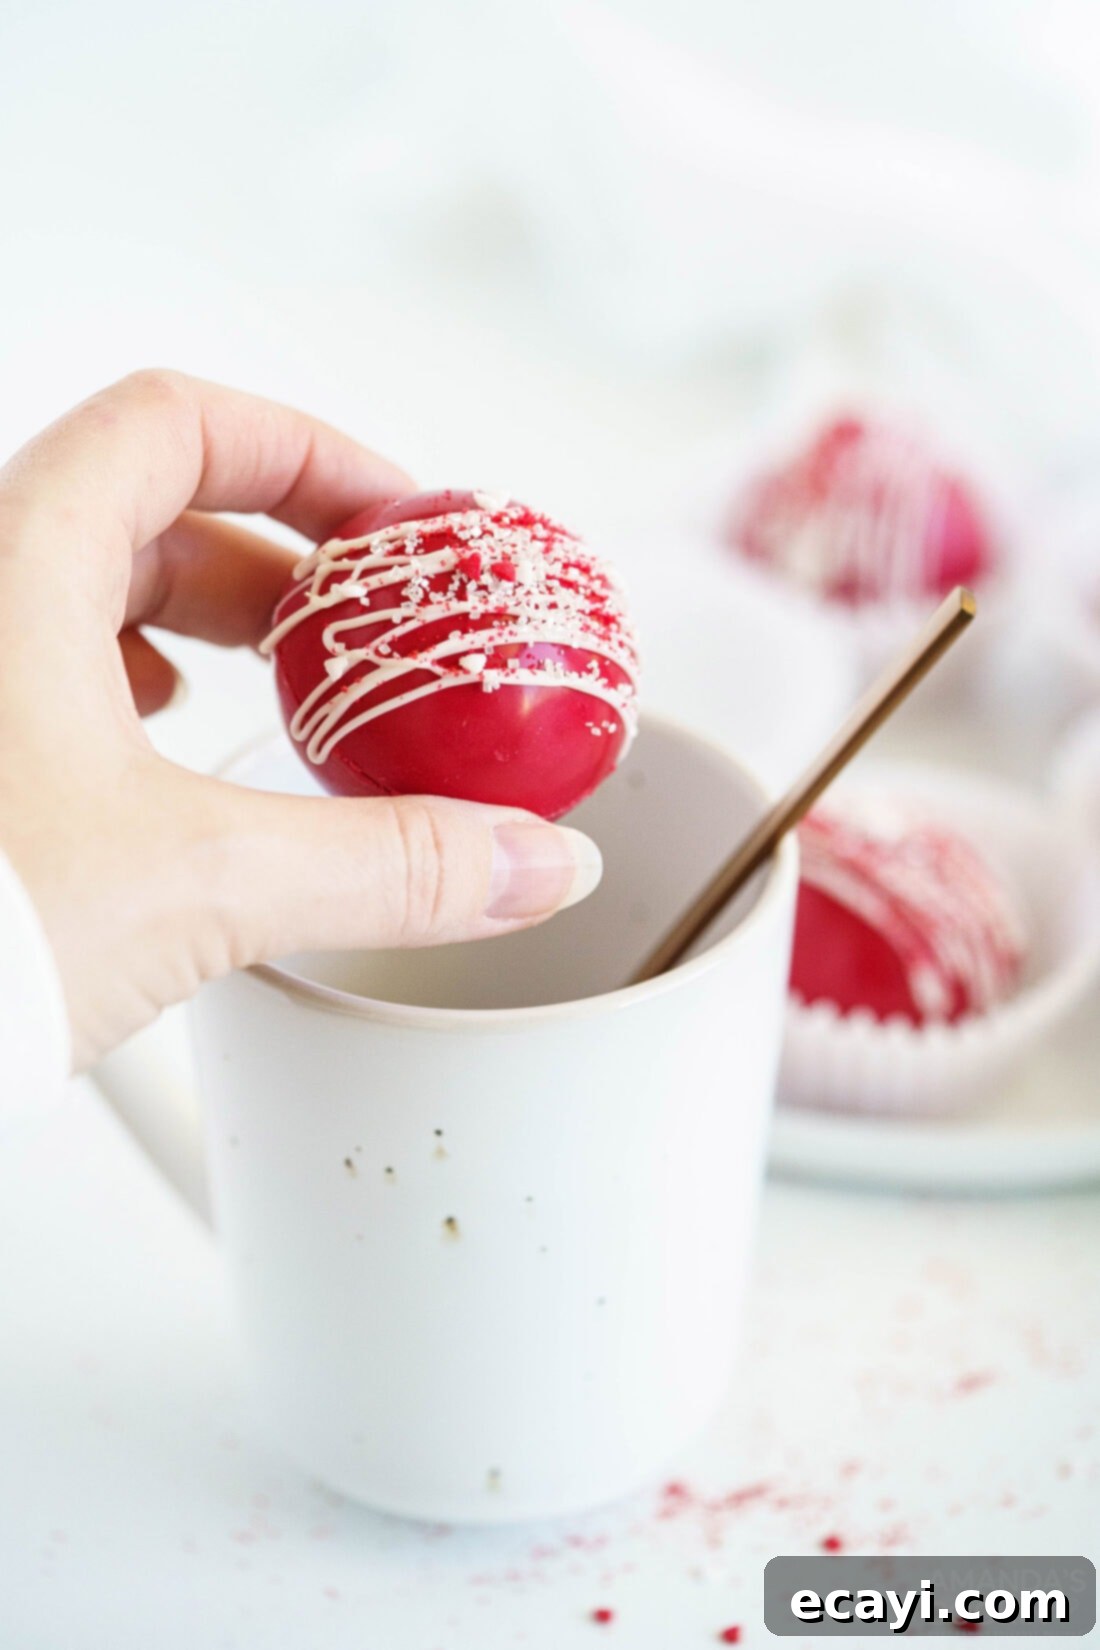
- **Serve & Enjoy:** To serve, simply place one dazzling hot cocoa bomb into your favorite mug. Heat 8 to 10 ounces of milk (dairy or non-dairy) until steaming hot, then carefully pour it over the bomb. As the hot milk melts the candy shell, the cocoa mix and marshmallows will burst forth, creating a rich, decadent hot chocolate. Give it a gentle stir to combine all the ingredients, and serve immediately. Enjoy your homemade, magical red velvet hot cocoa!

The Irresistible Appeal of Homemade Hot Cocoa Bombs
Hot cocoa bombs have captured the hearts of many, and for good reason! Beyond being incredibly delicious, they offer a unique blend of visual appeal, interactive fun, and customizability that makes them truly special. The vibrant red hue of these Red Velvet Hot Cocoa Bombs, combined with a contrasting white drizzle, makes them stand out, turning a simple hot drink into an extraordinary experience.
Perfect Edible Gifts for Any Occasion
These homemade treats are an absolute triumph as edible gifts. Whether it’s for Valentine’s Day, Christmas, birthdays, or just a thoughtful “thinking of you” gesture, a beautifully packaged hot cocoa bomb speaks volumes. They are personal, handcrafted, and show a level of effort and care that store-bought gifts often lack. Imagine gifting a set of these red velvet delights, nestled in charming paper liners and sealed in cellophane bags with pretty ribbons. You can even add a small tag with serving instructions and a personal message. This makes them not only a delicious present but also a memorable one that recipients are sure to adore.
A Fun and Engaging Family Activity
Making hot cocoa bombs is an excellent activity to share with family, especially children. The process involves various steps that kids can actively participate in, from spooning melted candy into molds to adding the cocoa mix and sprinkles. It’s a fantastic way to introduce them to basic kitchen skills in a fun, low-pressure environment. Watching the candy melt, seeing the shells form, and then finally witnessing the “explosion” of cocoa and marshmallows in a mug provides an exciting and interactive experience that creates lasting memories. Plus, everyone gets to enjoy the fruits of their labor with a delicious cup of hot chocolate!
Endless Customization and Flavor Possibilities
While red velvet is a fantastic flavor for its festive appearance and subtle cocoa notes, the world of hot cocoa bombs is ripe for customization. You can easily adapt this recipe to fit any holiday or personal preference. Consider different colored candy melts for other themes – green for St. Patrick’s Day, pastels for Easter, or even marbled colors for a unique touch. The fillings can also be varied: swap mini marshmallows for larger ones, add chocolate chips (white, milk, or dark), crushed peppermint, caramel bits, or even a dash of espresso powder for a mocha kick. The possibilities are truly endless, ensuring that each batch of hot cocoa bombs can be a fresh and exciting creation.
Frequently Asked Questions About Hot Cocoa Bombs
Proper storage is key to maintaining the quality and appearance of your hot cocoa bombs. As with most chocolate or candy items, it’s best to keep them in a cool, dark place, away from any direct heat sources or sunlight, which can cause the candy melts to soften or bloom. An airtight container at room temperature is usually sufficient for a few days. If you plan to store them for a longer period, such as over a week or two, placing them in an airtight container in the refrigerator is recommended. Just be sure to bring them to room temperature for about 15-20 minutes before serving to ensure the best melting experience.
These red velvet hot cocoa bombs are already incredibly appealing on their own due to their vibrant color and delicate drizzle. To enhance their presentation for gifting, simply placing them into a crisp white or clear paper liner will dress them up elegantly. If you are distributing them individually, carefully place each paper-lined bomb into a clear cellophane bag. Tie the top with a festive ribbon – perhaps red, pink, or gold for Valentine’s Day, or red and green for Christmas. For multiple bombs, you could arrange them in a small decorative box, cushioning them with crinkle paper. Adding a small, handwritten tag with a “To/From” and simple serving instructions (e.g., “Add to 8-10 oz hot milk, stir, and enjoy!”) adds a lovely personal touch that recipients will appreciate.
Cracking or breaking shells can be a common issue, often due to the shells being too thin. The key is to ensure you create a sturdy shell with at least two coats of candy melt. After the first layer, chilling briefly, and then applying a second coat, significantly strengthens the shells. Also, when removing them from the molds, be gentle and flex the silicone mold carefully rather than pulling aggressively. Ensure the candy is fully set before attempting to unmold. If a shell does crack, you can sometimes “patch” small cracks with a tiny bit of melted candy on a clean finger or a small brush before the final assembly.
When stored correctly in a cool, dark, airtight container, hot cocoa bombs can last for about 2-3 weeks at room temperature. If refrigerated, their shelf life can extend to about a month. The primary factors for shelf life are the freshness of the hot cocoa mix and any inclusions like marshmallows (which can get stale over time). For the best flavor and experience, it’s always recommended to enjoy them within a week or two of making them.
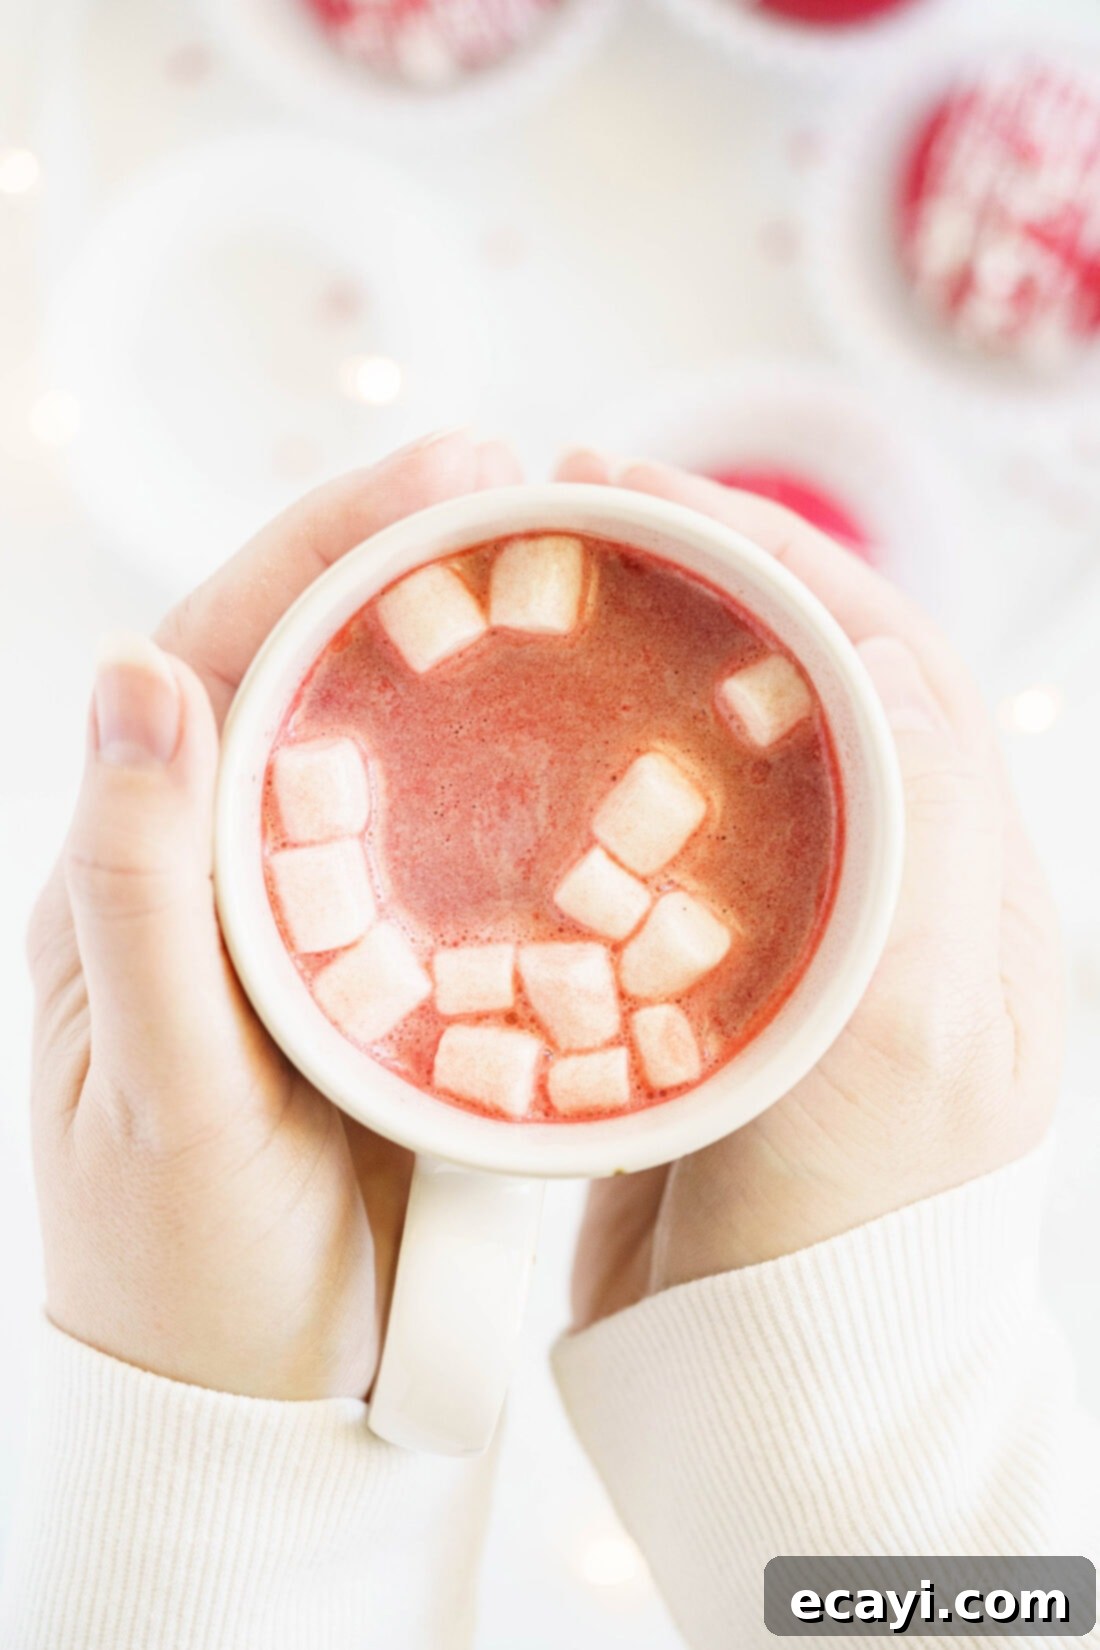
These Red Velvet Hot Cocoa Bombs offer a simple yet incredibly elegant way to infuse a burst of color and a touch of magic into the classic hot chocolate experience. The festive red shells, adorned with a delicate drizzle of white chocolate and a scattering of mini heart sprinkles, create a truly beautiful and delicious treat. They are perfect for gifting, entertaining, or simply enjoying a moment of luxurious indulgence.
P.S. If you’re a devoted coffee or espresso aficionado, you might also love exploring these equally impressive Marbled Mocha Hot Cocoa Bombs for a delightful caffeinated twist!
Discover More Irresistible Red Velvet Recipes
Can’t get enough of that unique red velvet flavor? Explore these other delightful recipes that celebrate the classic combination of cocoa, vanilla, and a hint of tang:
- Classic Red Velvet Cake
- Decadent Red Velvet Fudge
- No-Bake Red Velvet Lasagna Dessert
- Soft & Chewy Red Velvet Crinkle Cookies
- Rich Red Velvet Oatmeal Fudge Bars

I absolutely adore spending time in the kitchen, crafting delicious recipes, and sharing my culinary adventures with all of you! It can be challenging to remember to check back every day for new ideas, which is why I offer a convenient newsletter delivered straight to your inbox every time a new recipe is published. Simply subscribe today and start receiving your free daily dose of deliciousness!

Red Velvet Hot Cocoa Bombs
IMPORTANT – There are often Frequently Asked Questions within the blog post that you may find helpful. Simply scroll back up to read them!
Print It
Pin It
Rate It
Save ItSaved!
Ingredients
- 6 ounces red candy melts
- 6 tablespoons hot cocoa
- 30 mini marshmallows
- 1 ½ teaspoons heart sprinkles
- 2 ounces white candy melts
- Sprinkles if desired
Things You’ll Need
-
Silicone sphere molds
-
Double boiler
Before You Begin
Instructions
-
Melt the red candy melts thoroughly in a double boiler for even heating, or in a microwave-safe bowl using short bursts and frequent stirring until perfectly smooth.
-
Carefully spoon the melted red candy into each well of your silicone sphere molds, ensuring a complete and even coating around the edges and bottom (12 wells total).
-
Refrigerate the molds for approximately 5 minutes until the candy is firm. Remove and apply a second, thin layer of melted candy to thicken the spheres for durability.
-
Chill the molds again for another 5 minutes, or until fully set. Then, gently flex the silicone molds to carefully remove the hardened candy half-spheres.
-
Take 6 of the candy half spheres and fill each one with 1 tablespoon of hot cocoa mix, 5 mini marshmallows, and 1/4 teaspoon of red heart sprinkles.
-
To seal: Warm a pan (remove from heat). Place an empty half sphere on the pan briefly to melt the edge. Quickly place this melted edge on top of a filled half sphere. Smooth the seam with your finger. Repeat for all 6 hot cocoa bombs.
-
For decorating, arrange the sealed hot cocoa bombs on a tray or a sheet of wax paper.
-
Melt the white candy melts until smooth (using a double boiler or microwave). Pour into a small zip-top plastic bag and snip off a tiny corner.
-
Gently squeeze the bag to create an elegant white candy drizzle over the tops of the cocoa bombs. Add additional sprinkles immediately if desired, before the white candy sets.
-
To serve: Place one hot cocoa bomb in a mug. Pour 8 to 10 ounces of hot milk over it, stir gently until dissolved, and enjoy your homemade red velvet hot chocolate!
Nutrition
The recipes on this blog are meticulously tested with a conventional gas oven and gas stovetop to ensure accuracy. It’s important to acknowledge that ovens, particularly older models, can sometimes heat and bake inconsistently. To ensure optimal results, using an inexpensive oven thermometer can help verify that your oven is consistently reaching and maintaining the correct temperature. If you opt for a toaster oven or a countertop oven, please be aware that their heat distribution might differ from a conventional full-sized oven, potentially requiring adjustments to your cooking or baking times. For recipes prepared with appliances like pressure cookers, air fryers, or slow cookers, a direct link to the specific appliances we use is provided within each respective recipe. When it comes to baking recipes where measurements are given by weight, please note that using volume measurements (cups) instead may lead to varying results, and we cannot guarantee the same level of success with that alternative method.
