Ultimate Fudgy Peanut Butter Brownie Skillet: A Decadent Swirled Cheesecake Dessert Recipe
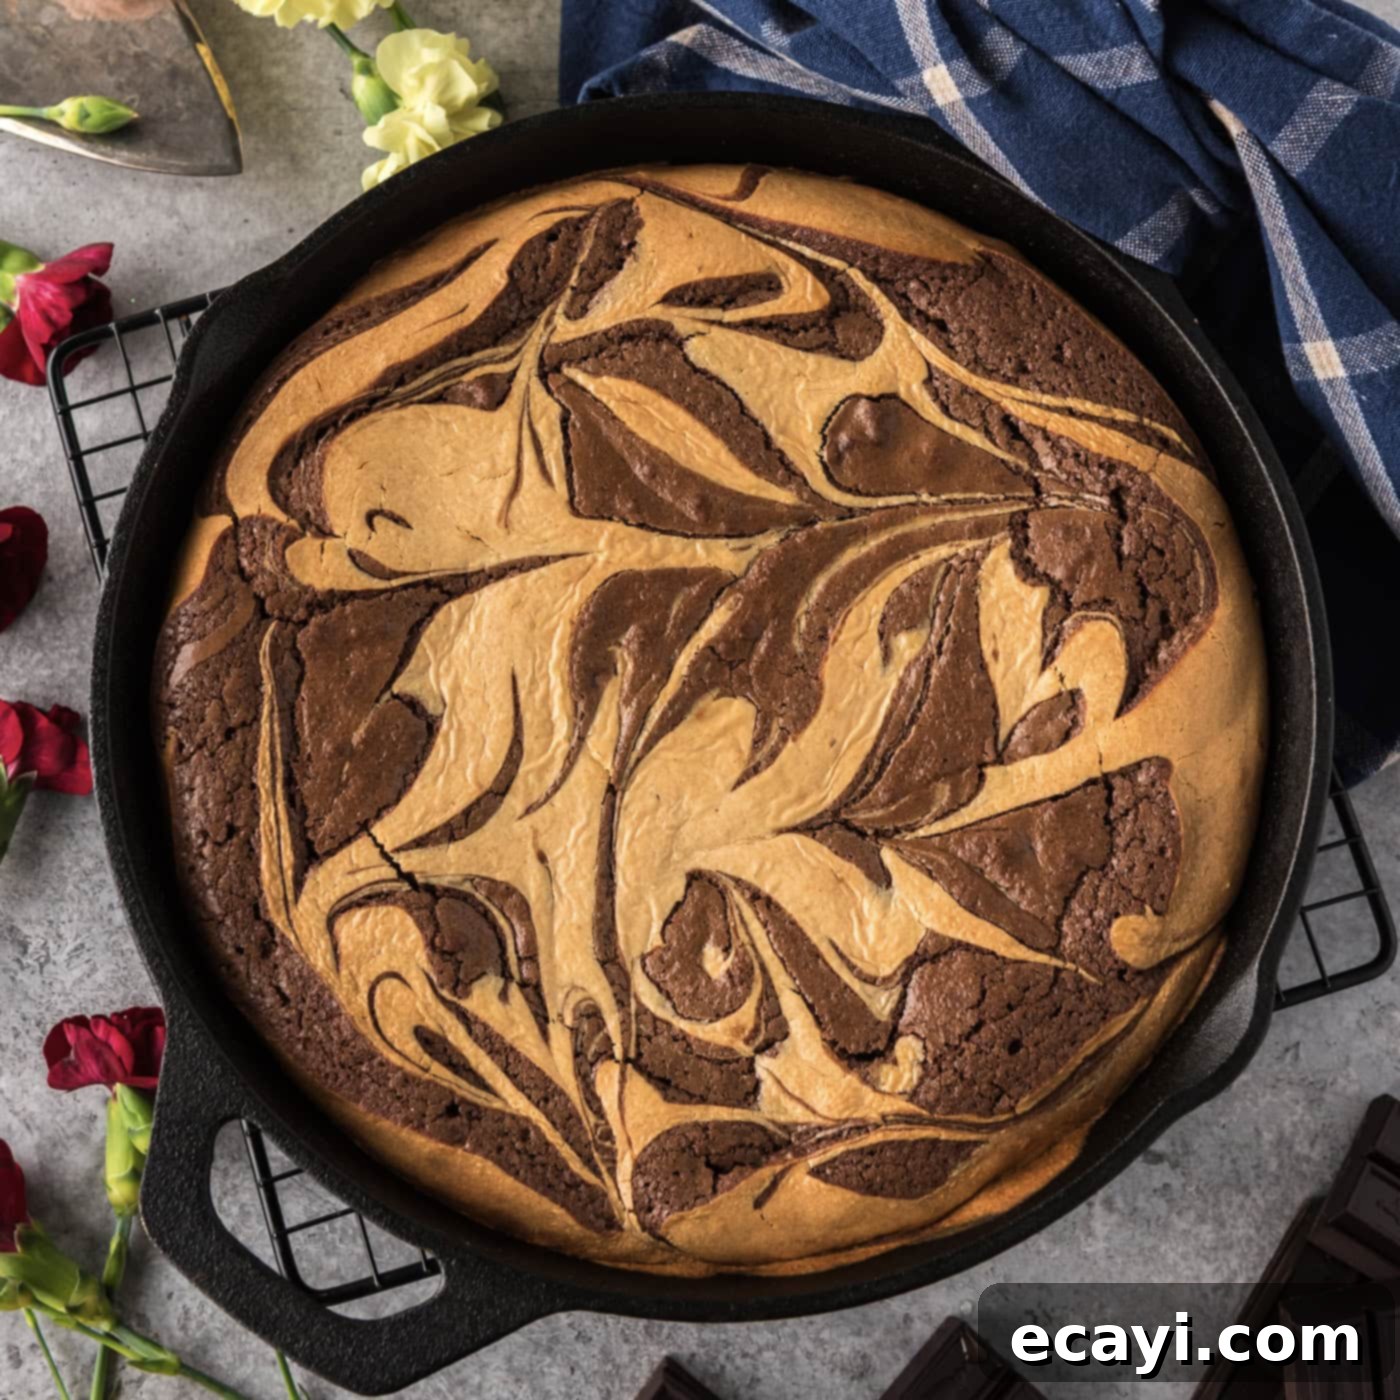
Prepare for an extraordinary dessert experience with this peanut butter brownie skillet recipe! It masterfully combines the irresistible richness of fudgy brownies with a luscious peanut butter cheesecake swirl, all baked to perfection in a single cast iron skillet. This creation transcends a simple dessert, offering a harmonious blend of textures and flavors that establishes it as one of the best chocolate-peanut butter combinations you’ll ever taste. Forget deciding between a rich brownie and a creamy cheesecake – this skillet dessert delivers the best of both worlds in every single indulgent bite.
Why This Peanut Butter Brownie Skillet Recipe is a Must-Try
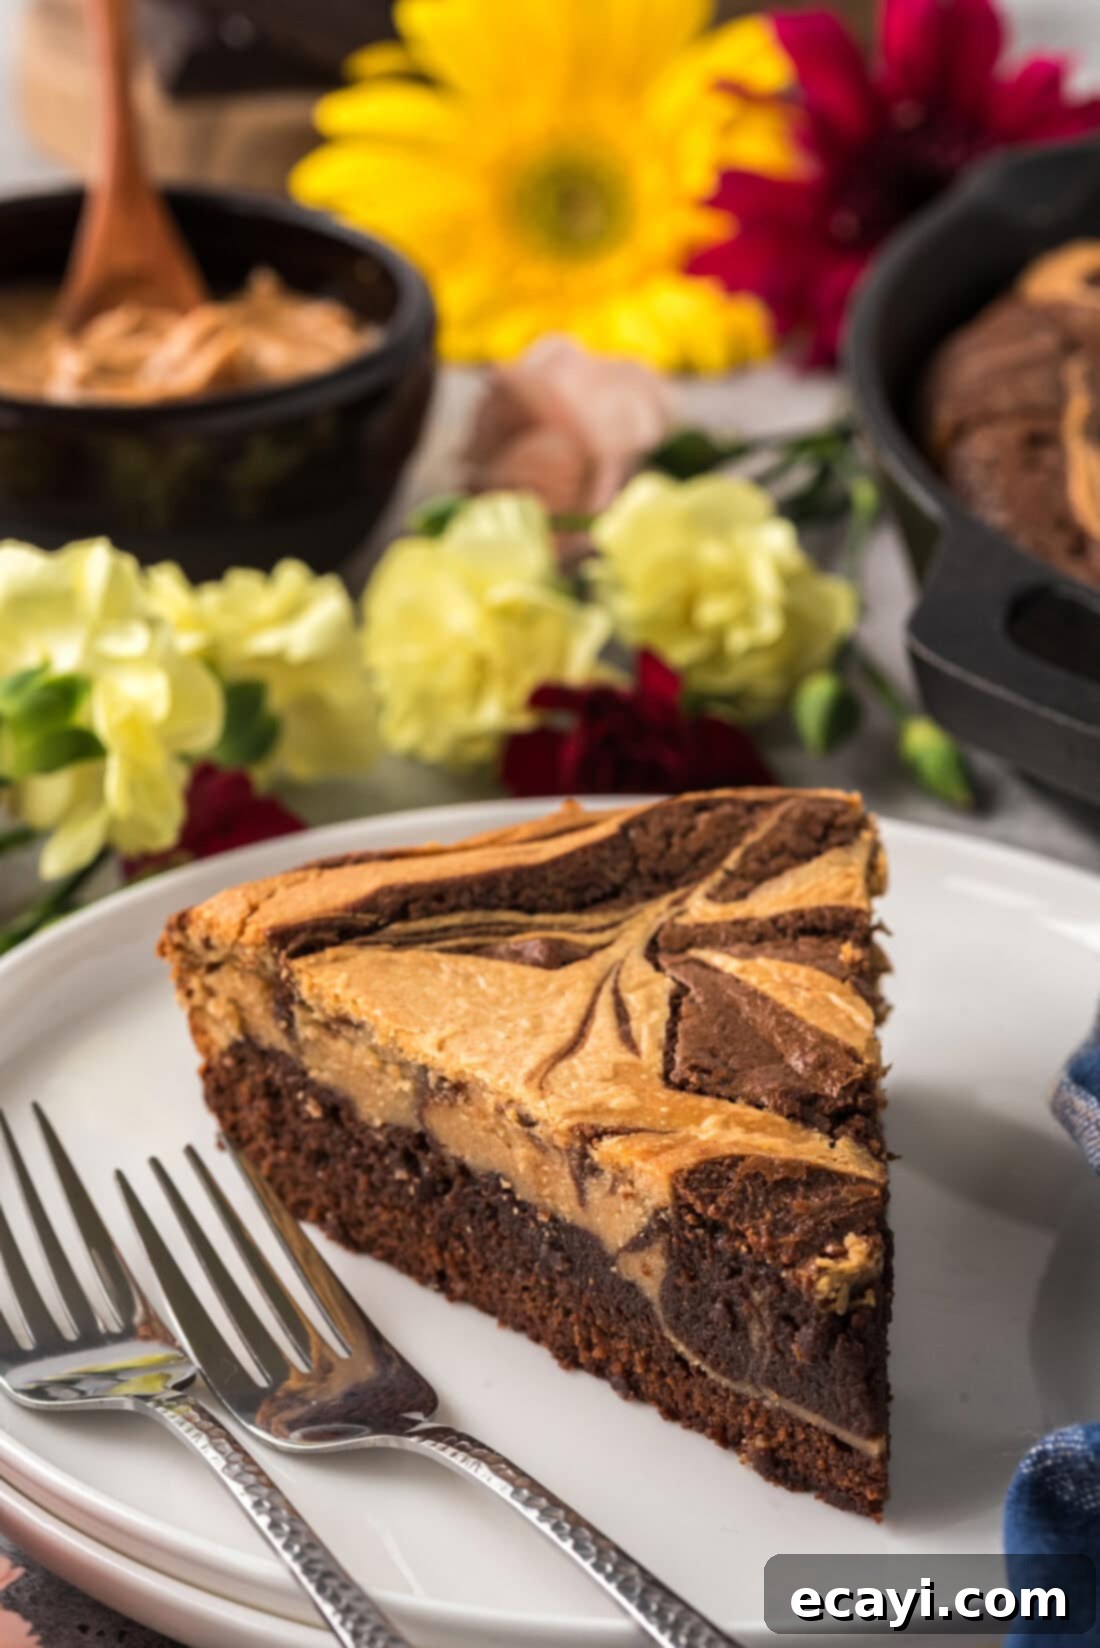
This isn’t just another brownie recipe; it’s a full-fledged dessert masterpiece. What truly sets this peanut butter brownie skillet apart is its incredible textural diversity and depth of flavor. You get those coveted chewy-crisp edges that many brownie enthusiasts adore, perfectly complemented by a soft, intensely fudgy center that melts in your mouth. But it doesn’t stop there. The addition of a velvety peanut butter cheesecake layer transforms it into something truly magical. Instead of making separate brownies and then adding a scoop of peanut butter, this recipe integrates a rich, tangy peanut butter cheesecake swirl right into the brownie batter before baking, creating a symphony of flavors and textures in every single forkful.
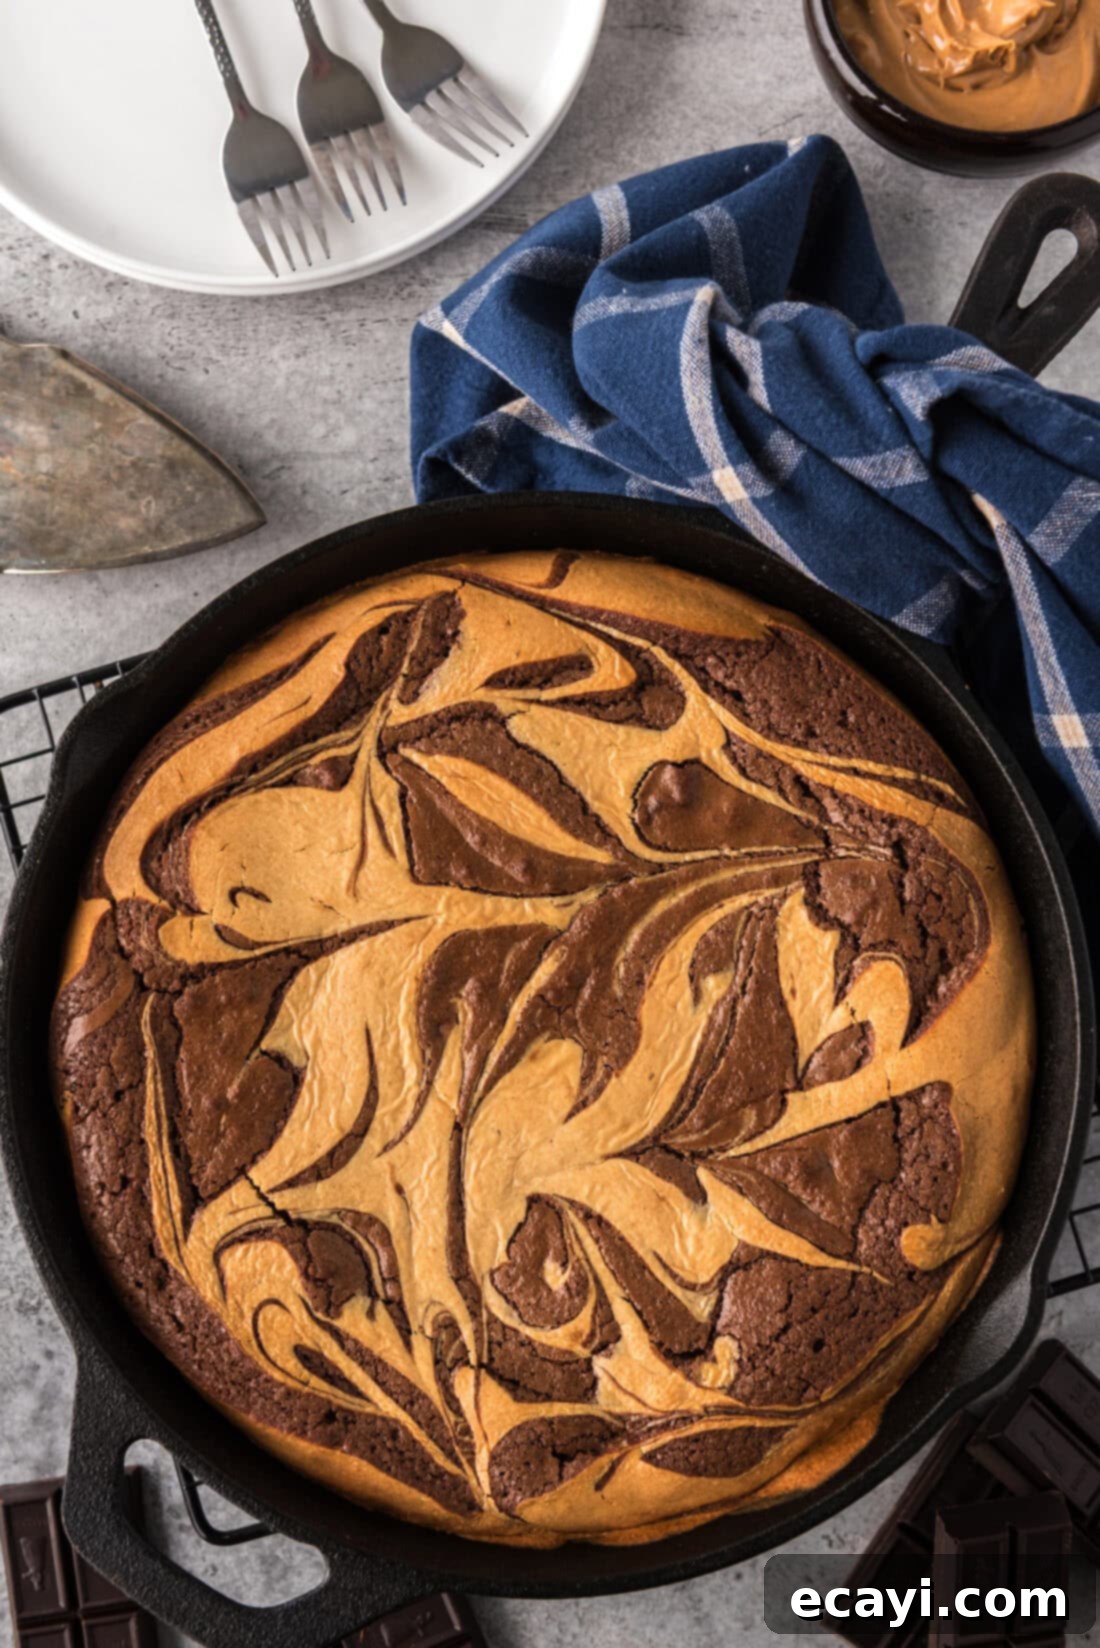
The beauty of a skillet dessert lies in its simplicity and rustic charm. Baking in a cast iron skillet not only ensures even heat distribution, which contributes to those perfect edges and moist interior, but also makes for an impressive presentation right from the oven to the table. This particular recipe originated way back in 2011 and has been refined over the years to achieve its current perfection. We started with a foundational recipe for classic brownies in a cast iron skillet, then ingeniously incorporated a creamy mixture of sugar, peanut butter, cream cheese, and eggs. This rich peanut butter cheesecake blend is carefully swirled into the brownie batter, creating a stunning marbled effect that is as appealing to the eye as it is to the palate. The result is far more than just brownies with a bit of peanut butter; it’s akin to a decadent brownie pie, with a luscious peanut butter cheesecake ripple woven throughout. It’s a dessert that truly has it all, satisfying every craving for chocolate, peanut butter, and creamy cheesecake in one glorious slice.
Gather Your Ingredients for This Indulgent Skillet Dessert
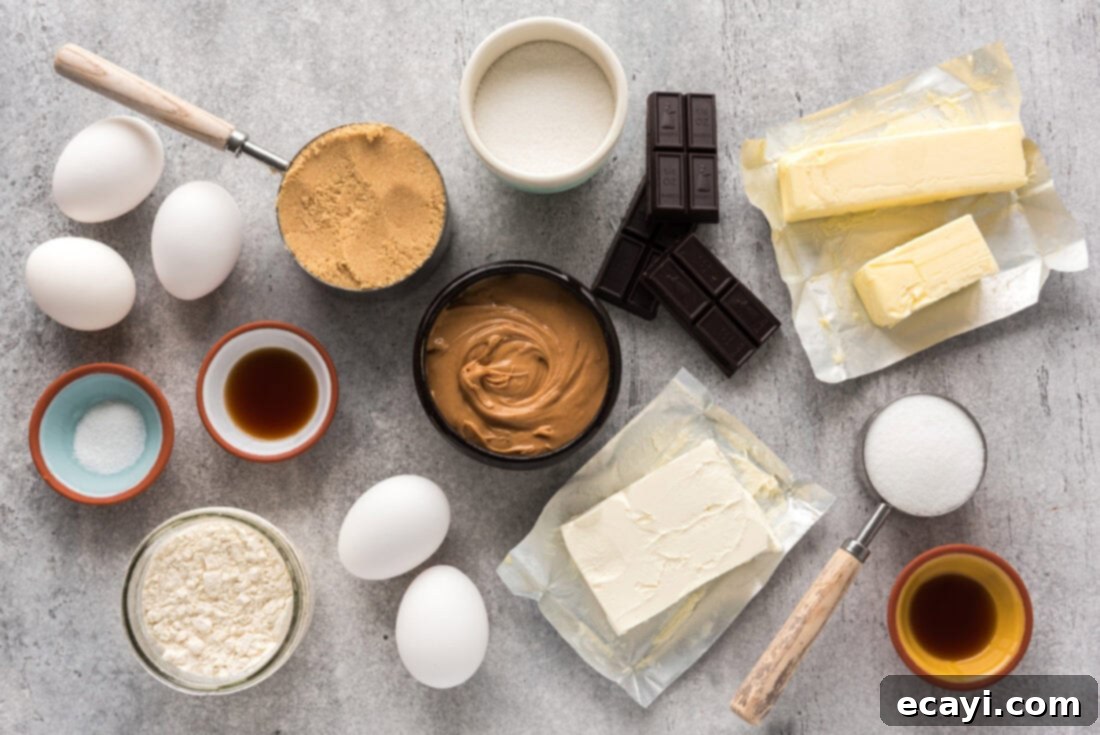
To embark on this delightful baking adventure, you’ll need a selection of high-quality ingredients for both the rich brownie base and the creamy peanut butter cheesecake swirl. We recommend gathering all your measurements and ingredients before you begin mixing to ensure a smooth and enjoyable baking process. You can find the complete, printable list of exact measurements and detailed instructions at the very end of this comprehensive guide. Having everything prepped and ready will make the assembly of this incredible dessert a breeze.
Key Ingredient Insights and Smart Substitutions
Understanding the role of each ingredient can significantly impact the success and flavor of your peanut butter brownie skillet. Here’s a closer look at some key components and potential substitutions:
CHOCOLATE: The Heart of the Brownie
For the deepest, most authentic chocolate flavor in your brownies, using an actual bar of unsweetened baking chocolate is highly recommended. Unlike cocoa powder, which can sometimes result in a drier, cake-like brownie, unsweetened chocolate adds crucial fat and moisture, contributing to that irresistible fudgy texture we’re aiming for. It delivers an intense chocolate punch that truly makes these brownies shine. If you prefer a slightly less intense chocolate flavor or a touch more sweetness, a bar of bittersweet baking chocolate can be substituted. Just be aware that it will alter the overall sweetness profile slightly, so you might consider slightly reducing the sugar in the brownie layer if you make this change.
PEANUT BUTTER MIXTURE: Creamy Perfection
The success of the creamy peanut butter swirl hinges on using the right kind of peanut butter. We strongly advise using creamy, processed peanut butters like Jif or Skippy for this recipe. These brands are formulated to be stable and consistent, ensuring a smooth, well-integrated cheesecake layer that won’t separate during baking. Natural peanut butters, while delicious on their own, tend to have a higher oil content that separates easily. This separation can lead to an oily, inconsistent texture in the cheesecake mixture and can negatively affect the overall stability and appearance of your finished brownie skillet. The emulsifiers in conventional creamy peanut butter provide the necessary structure for that perfect, ripple-through cheesecake consistency.
BUTTER: For Fudginess and Flavor
Unsalted butter allows you to control the overall salt content in your dessert. Melting it with the chocolate ensures a smooth, homogeneous base for your brownie batter, contributing significantly to its fudgy characteristics. If you only have salted butter, you can use it, but reduce the added salt in the brownie layer by ¼ teaspoon.
SUGAR: Balance of Sweetness and Texture
Both granulated sugar and light brown sugar are used in the brownie layer. Granulated sugar provides crispness and sweetness, while brown sugar adds moisture, chewiness, and a subtle molasses flavor that complements the chocolate beautifully. For the peanut butter layer, granulated sugar helps create that smooth, creamy cheesecake texture.
EGGS: Structure and Richness
Eggs play a vital role in both layers, acting as a binder and contributing to the rich, moist texture. In the brownie layer, they add richness and help create a stable emulsion. In the peanut butter cheesecake, they provide structure and creaminess, ensuring the layer sets properly during baking.
FLOUR: Just Enough Structure
Unbleached all-purpose flour provides the necessary structure without making the brownies tough. It’s crucial not to overmix the flour, as this can develop the gluten too much, leading to a cakey rather than fudgy brownie.
VANILLA EXTRACT: Flavor Enhancer
Pure vanilla extract boosts the flavor of both the chocolate and peanut butter layers, adding a warm, aromatic depth that rounds out the overall taste profile.
Step-by-Step Guide: Crafting Your Peanut Butter Brownie Skillet
These step-by-step photos and instructions are here to help you visualize how to make this recipe. For a quick reference, you can Jump to Recipe to get the printable version of this recipe, complete with measurements and instructions at the bottom of this post.
- Prepare Your Skillet and Oven: Begin by preheating your oven to 325 F (160 C). This ensures the oven is at the correct temperature when your skillet goes in, promoting even baking. Lightly grease the bottom and sides of a 10-inch cast iron skillet. Proper greasing is essential to prevent sticking and allow for easy removal and serving once cooled.
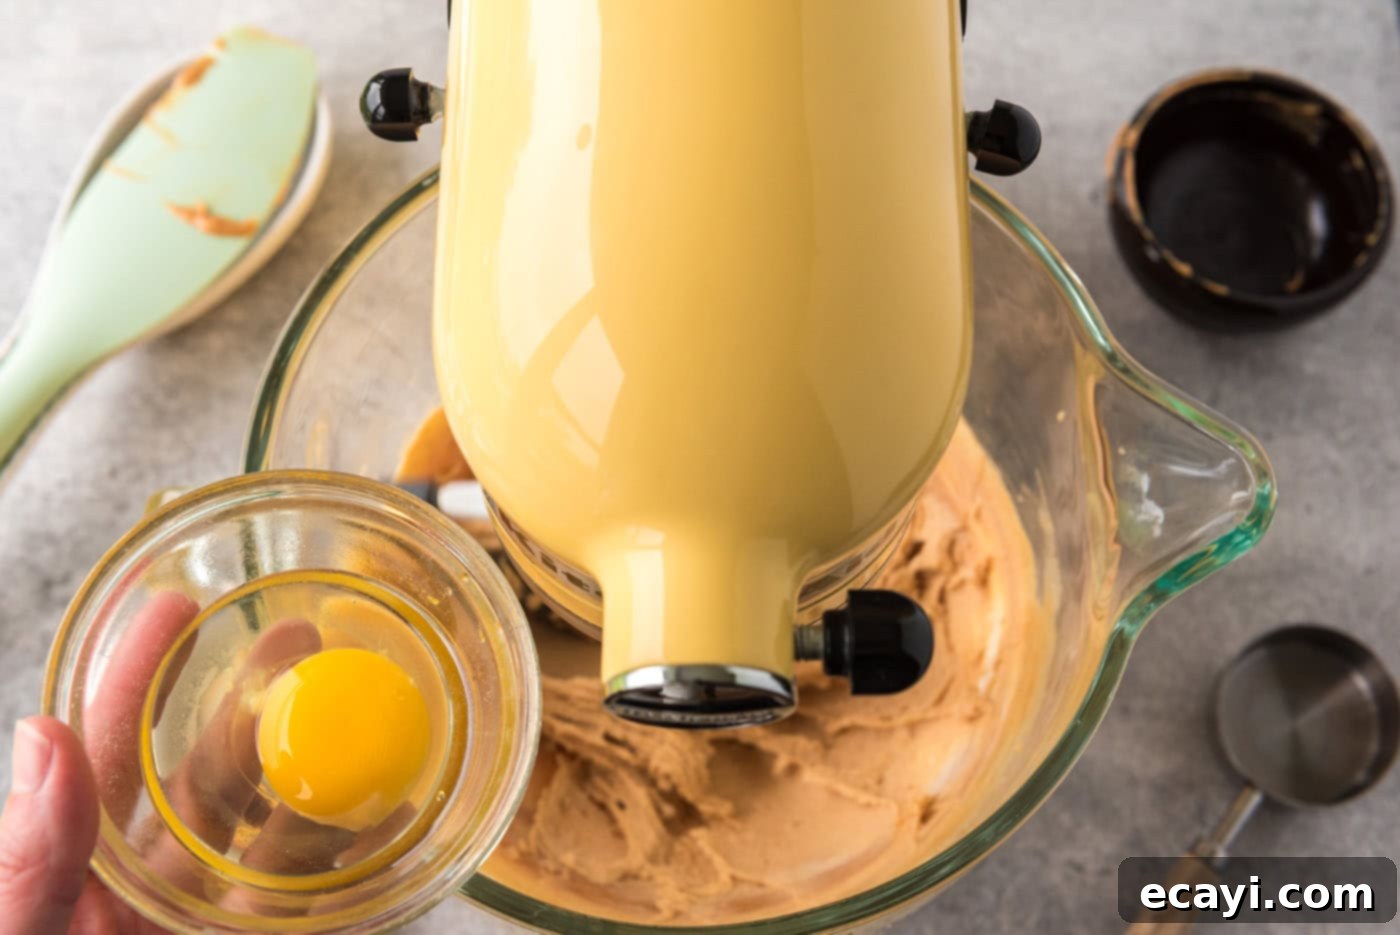
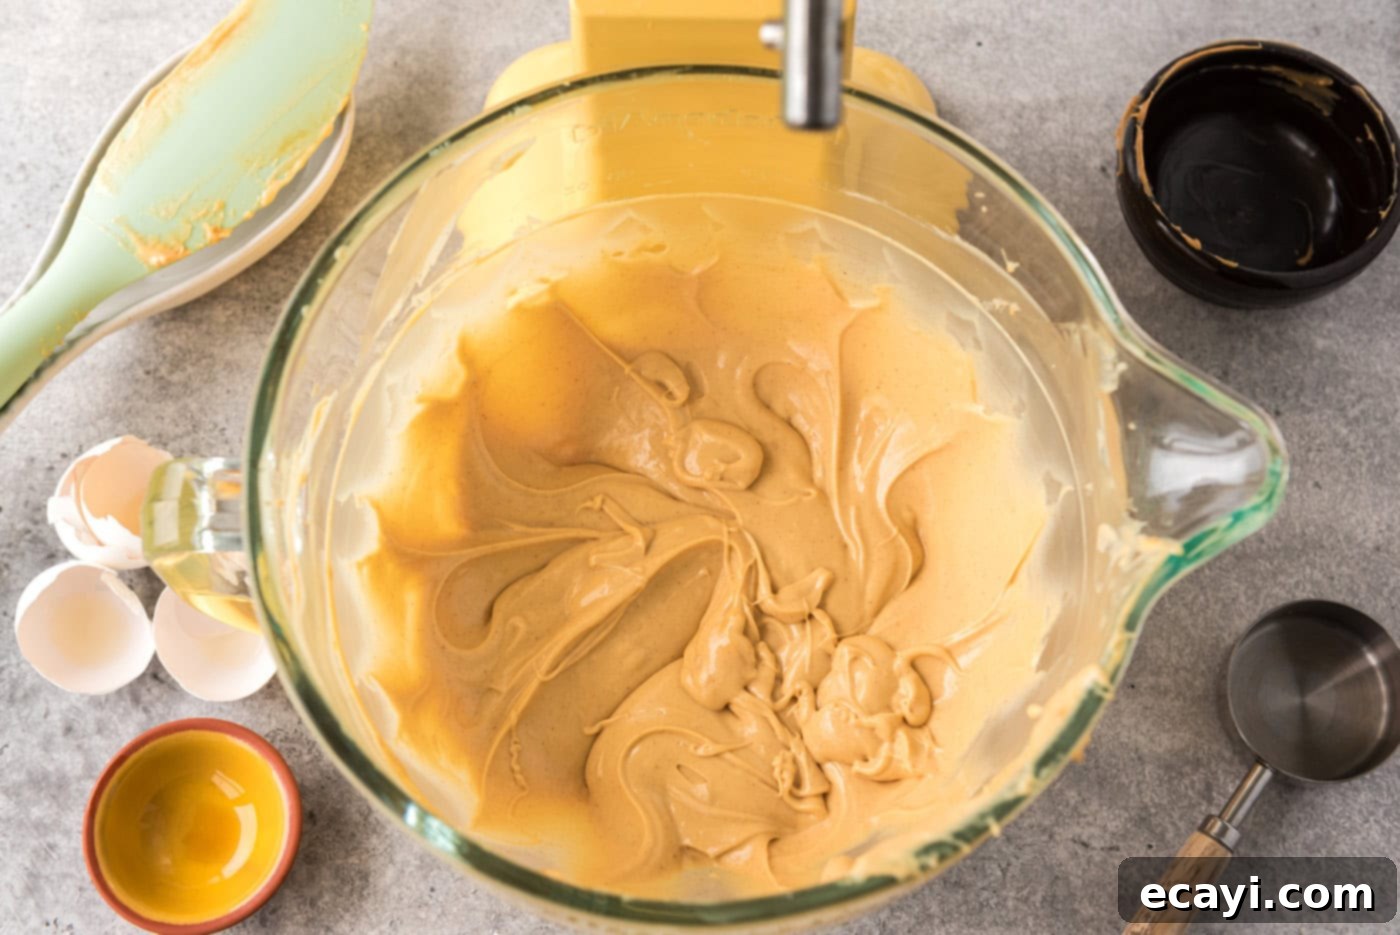
- Whip Up the Peanut Butter Cheesecake Layer: In a mixer (either a stand mixer or hand mixer) set to medium speed, combine the softened cream cheese, creamy peanut butter, and granulated sugar. Beat this mixture for about 2 minutes until it becomes light, fluffy, and well combined. This creaming process incorporates air, giving the cheesecake layer its desired texture. Next, add the eggs, one at a time, beating thoroughly after each addition to ensure they are fully integrated and the mixture remains smooth. Finish by beating in the pure vanilla extract. Once fully mixed, cover the bowl and set it aside. This allows the flavors to meld and keeps the mixture fresh while you prepare the brownie batter.


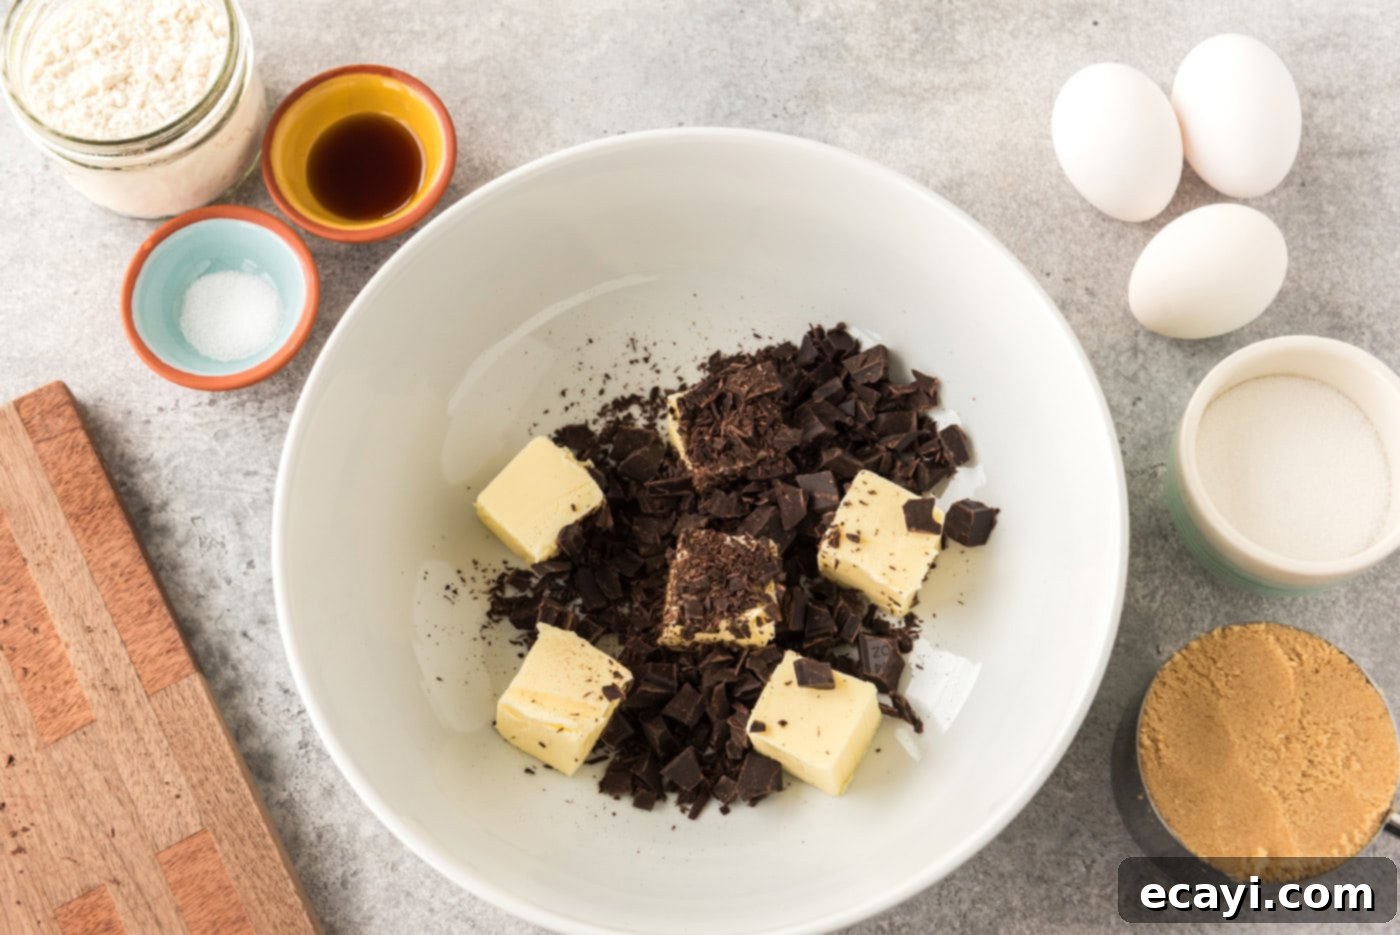
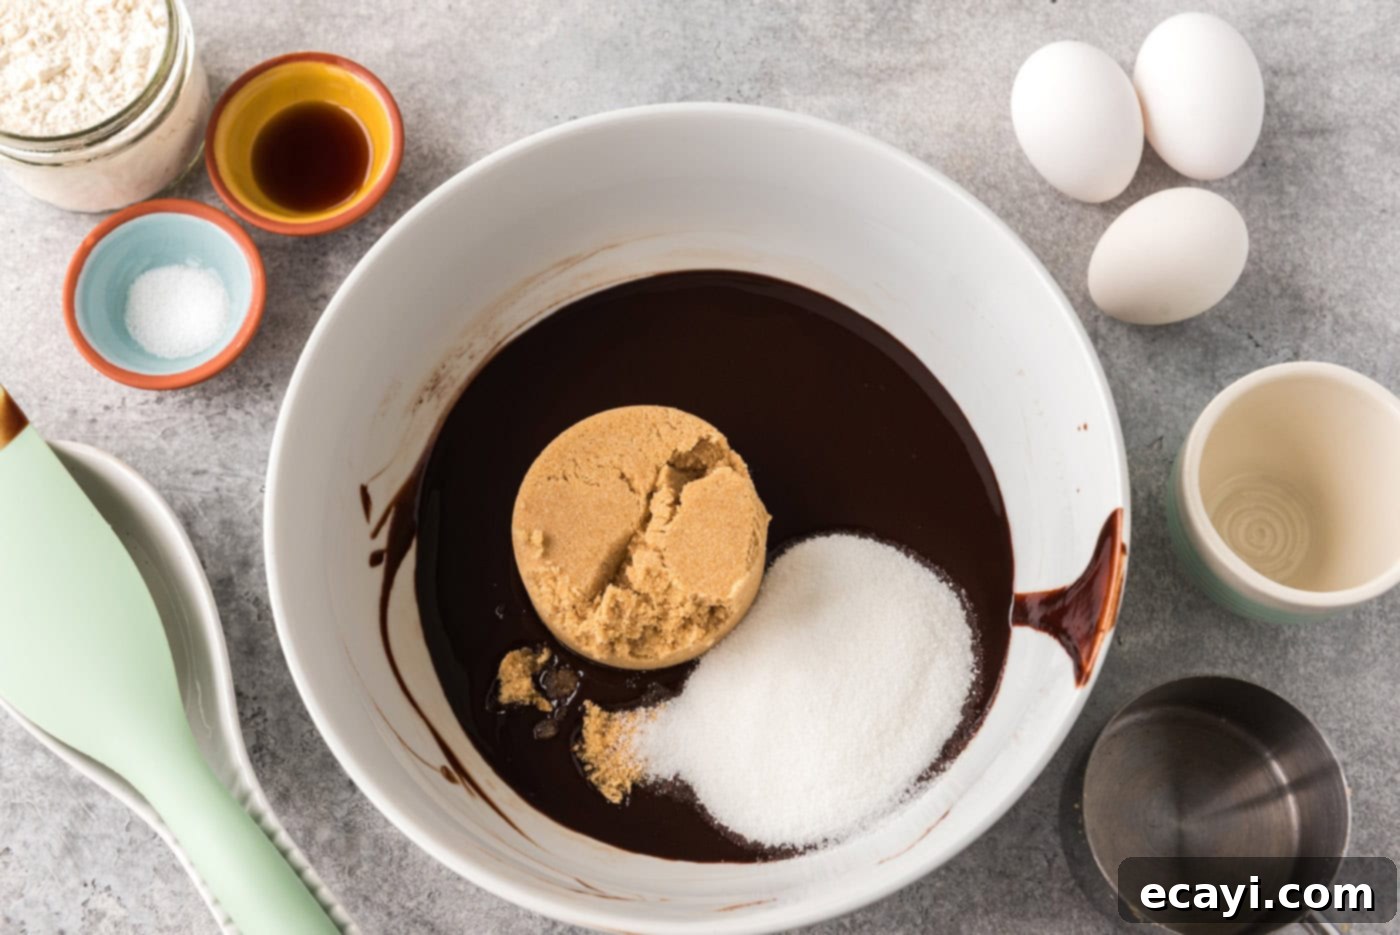
- Create the Decadent Brownie Base: Cut the unsalted butter into 6 small chunks to help it melt more evenly. Place these butter chunks and the coarsely chopped unsweetened baking chocolate into a microwave-safe bowl. Melt them together in the microwave, stirring every 30 seconds, until the mixture is smooth and completely combined. This method ensures a velvety chocolate base. To the melted chocolate and butter, add both the light brown sugar and granulated sugar. Stir vigorously until both sugars are fully dissolved and incorporated into the chocolate mixture, which will create a glossy, thick consistency.


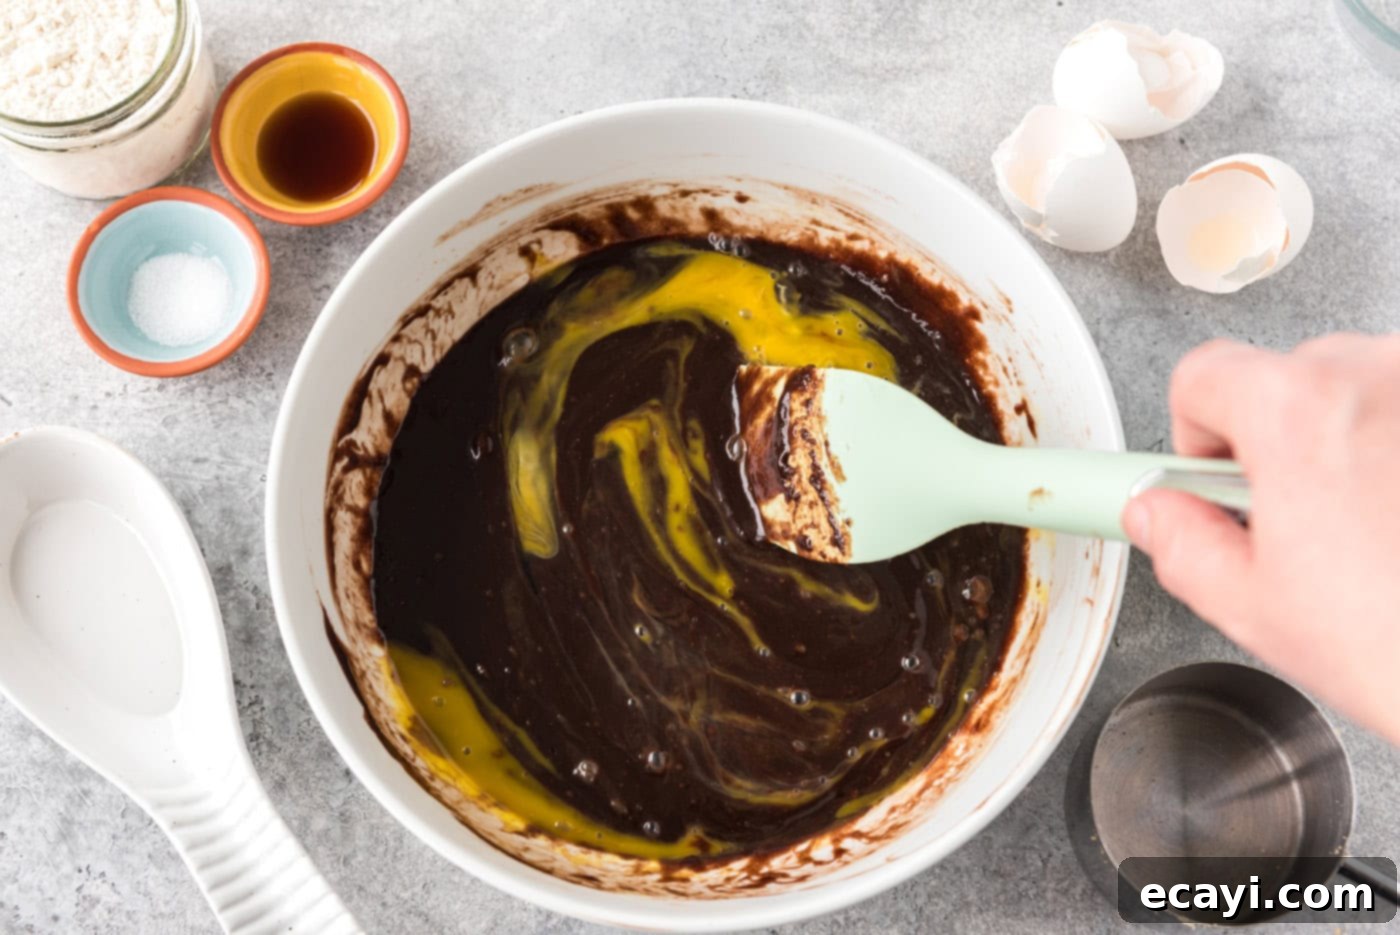
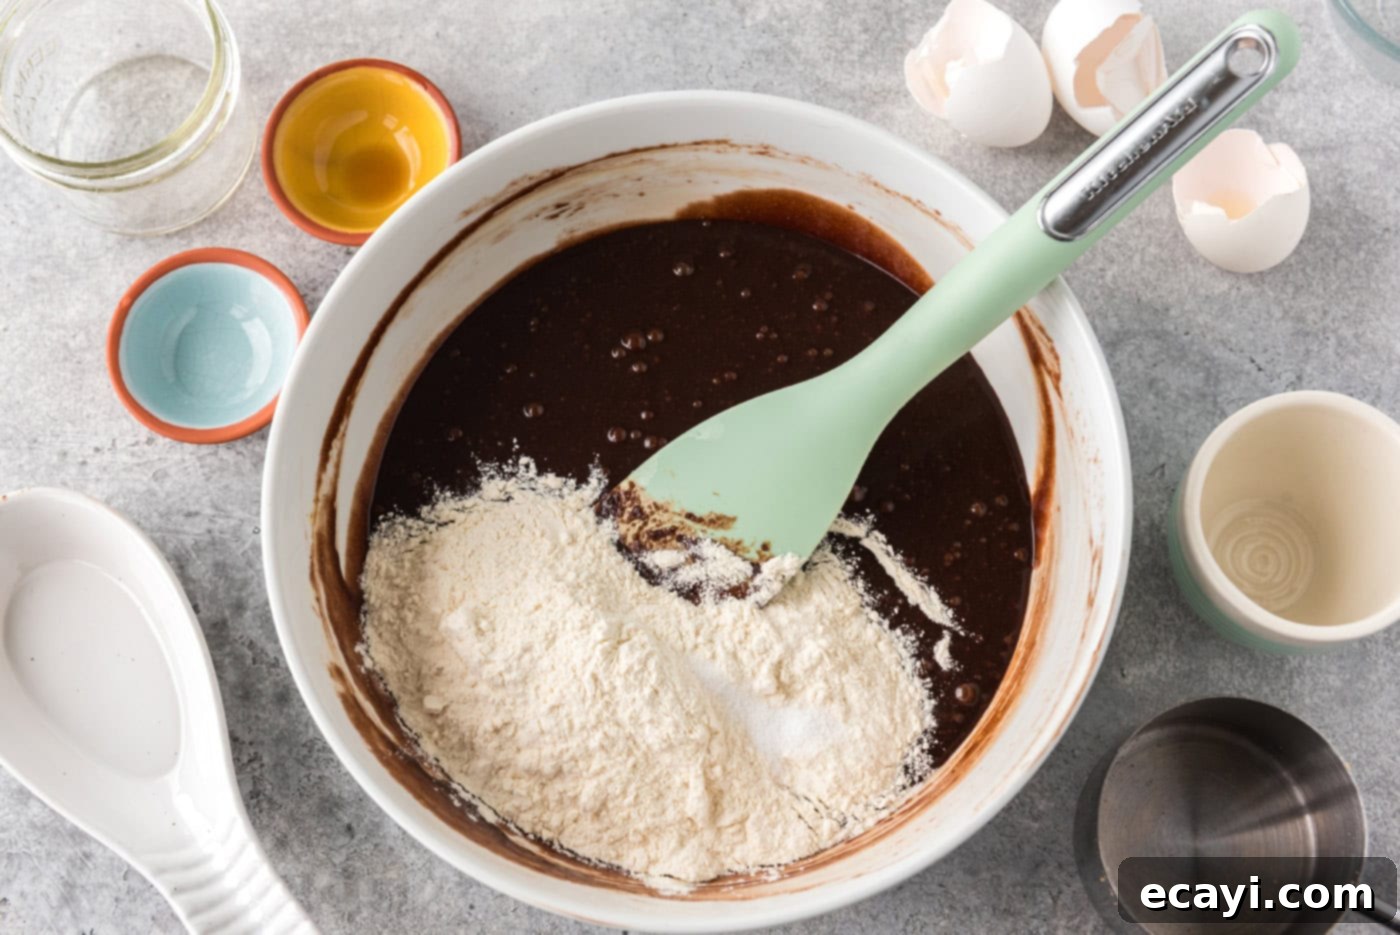
- Finish the Brownie Batter: Add the three large eggs to the chocolate-sugar mixture, one at a time. After each egg addition, stir well to ensure it is fully incorporated before adding the next. This step helps create the rich, dense texture of a fudgy brownie. Stir in the pure vanilla extract. Finally, add the unbleached all-purpose flour and salt. Stir gently until there are absolutely no traces of dry flour left in the batter. Be careful not to overmix at this stage, as overmixing can develop gluten, leading to a tougher, more cake-like brownie instead of the desired fudgy consistency.


- Assemble the First Layer: Set aside exactly one cup of the prepared brownie batter. This reserved portion will be used for the top swirl. Carefully pour the remaining brownie batter into your lightly greased 10-inch cast iron skillet, spreading it evenly across the bottom with a spatula. This forms the foundational layer of your skillet dessert.

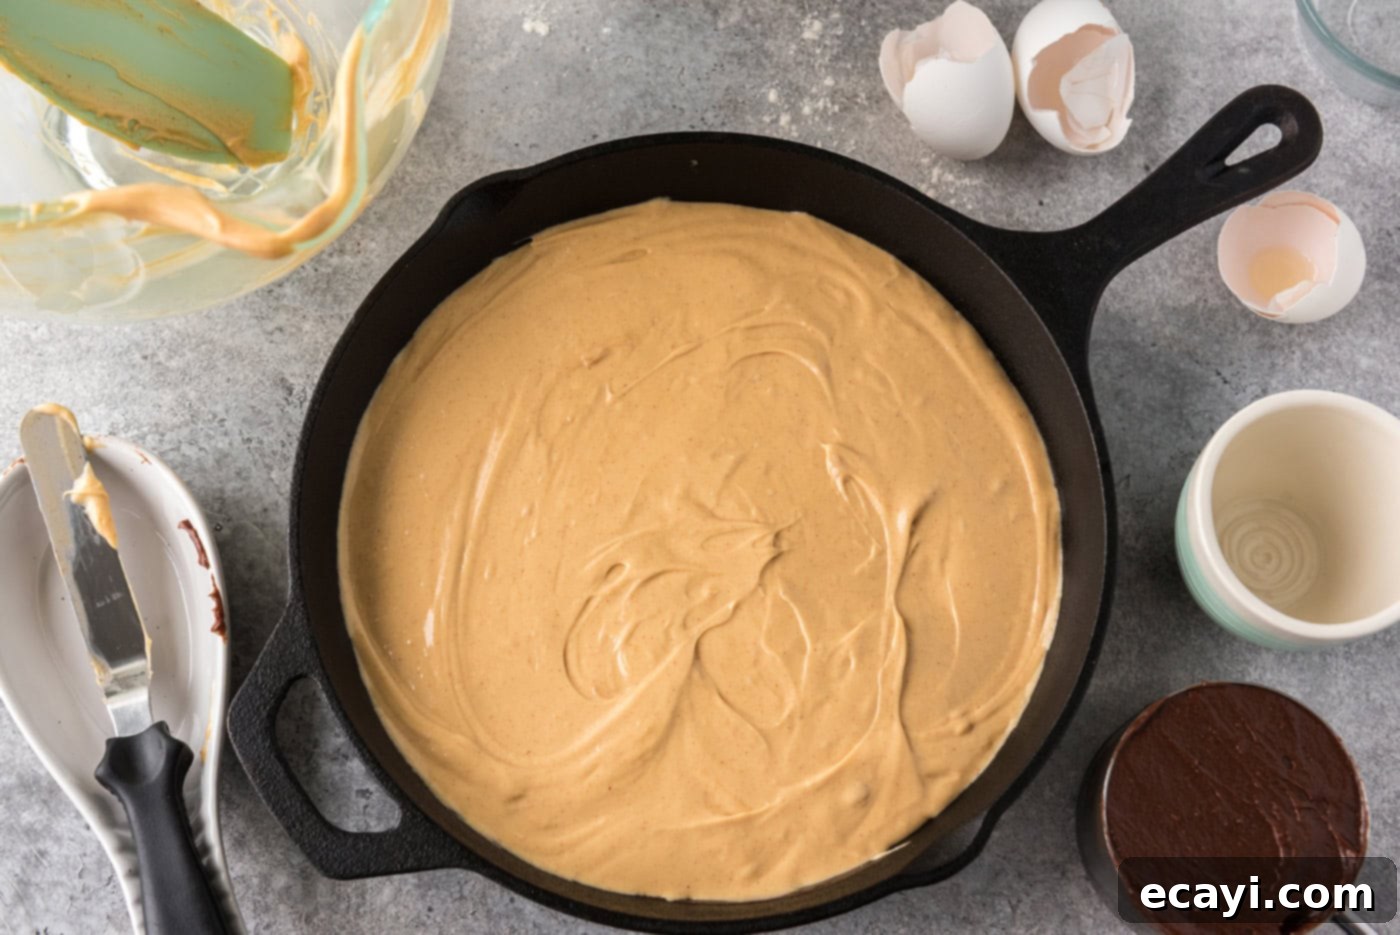
- Add the Creamy Peanut Butter Layer: Gently spoon the reserved peanut butter cheesecake mixture over the brownie batter in the skillet. Using a spatula or the back of a spoon, carefully spread it out evenly to create a distinct, smooth layer on top of the brownie base. Be mindful not to disturb the brownie layer too much.

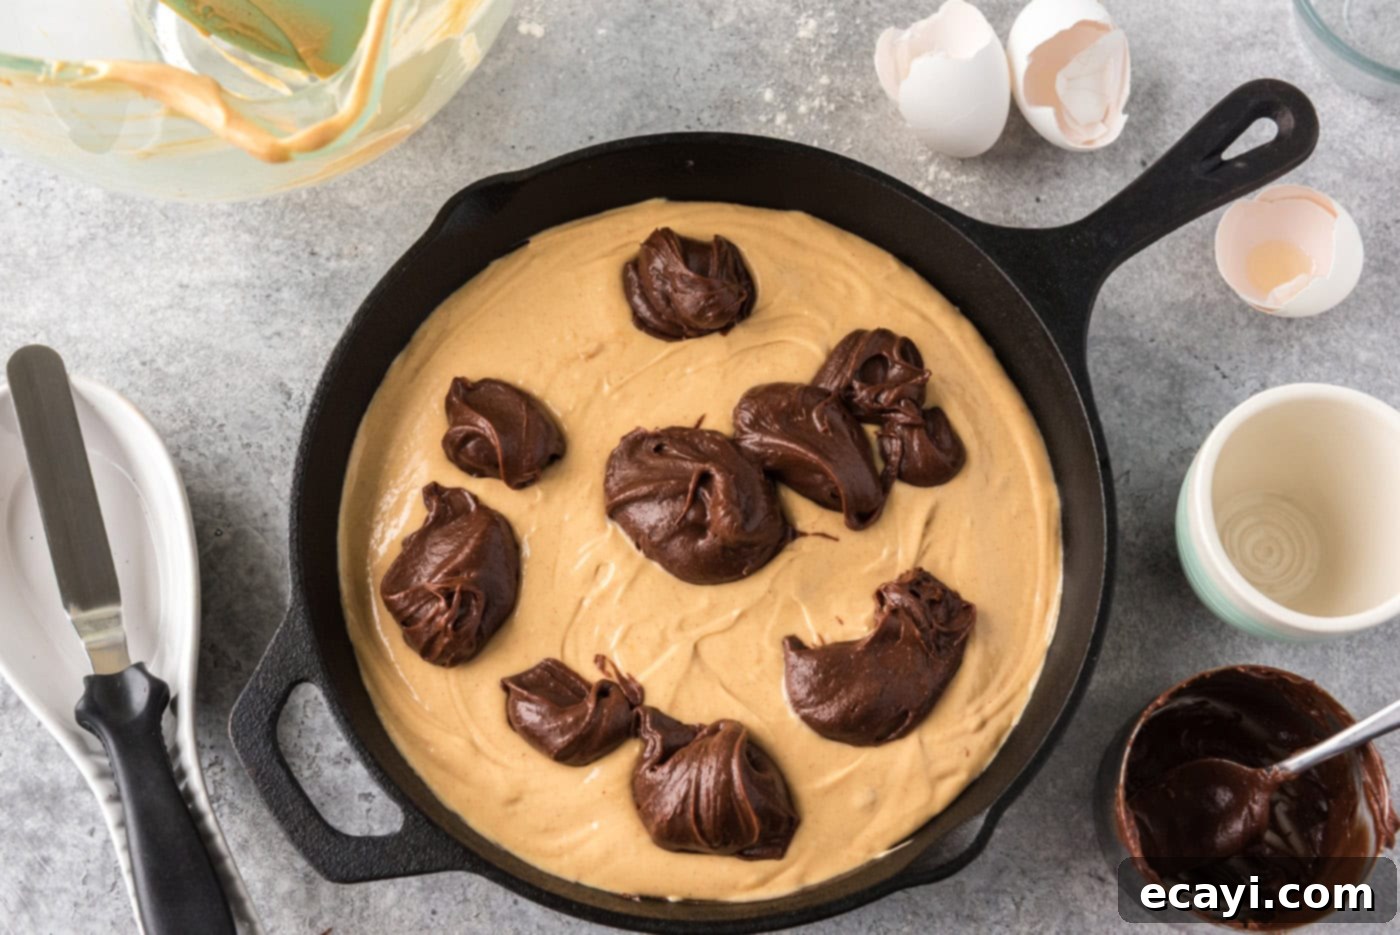
- Dollop for the Swirl: Now, take the one cup of brownie batter that you reserved earlier. Spoon this batter in several dollops onto the top of the peanut butter cheesecake mixture. Distribute these dollops somewhat evenly across the surface of the skillet, creating potential points for your beautiful marbled effect.

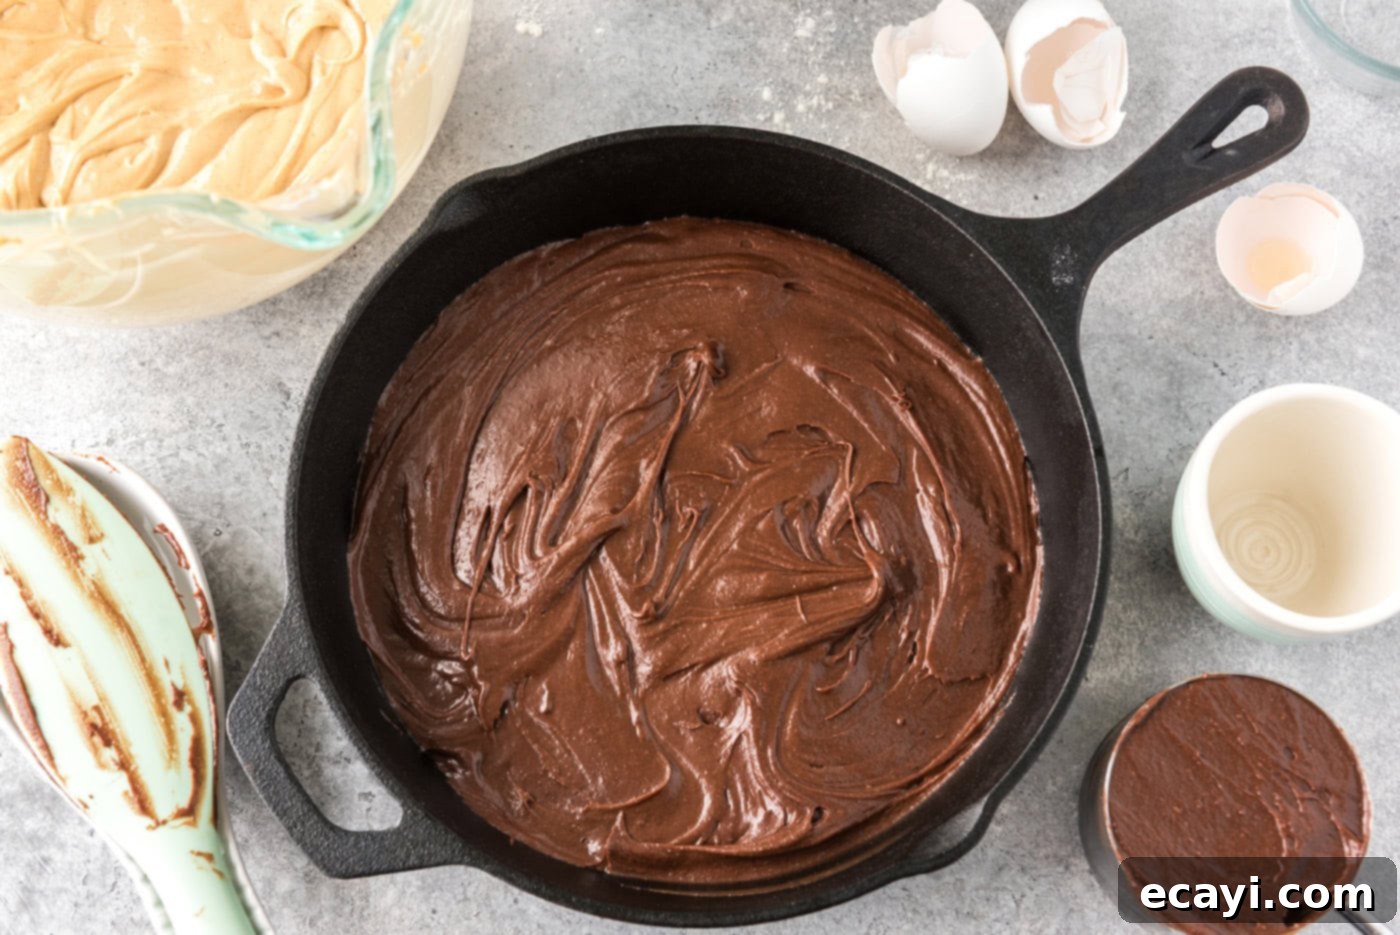
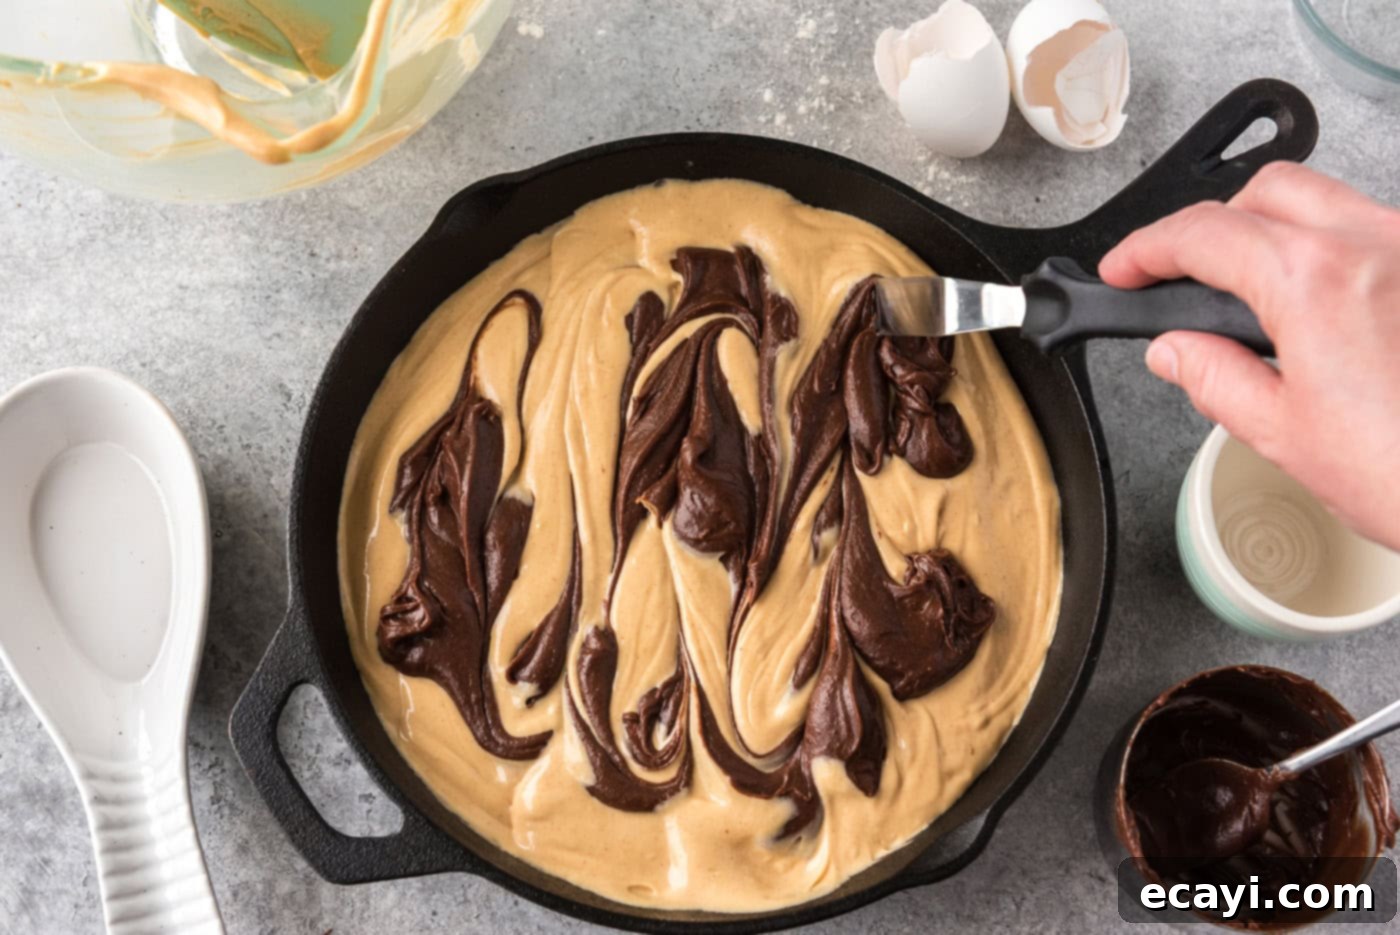
- Create the Perfect Marbled Effect: This step is key for the visual appeal. Insert an icing spatula, a thin knife, or even a butter knife into the batter. Hold the spatula straight up and down, then gently drag it through the mixtures in a swirling motion. Start from one side of the skillet and move to the other, making large, elegant swirls. The trick is not to overdo it! A few deliberate passes are all you need to create a beautiful marble pattern. Going over it repeatedly will muddy the distinct layers and you’ll lose the gorgeous swirl effect.

- Bake to Perfection and Cool: Place the skillet in your preheated oven and bake for approximately 55-65 minutes. Baking times can vary slightly depending on your oven; for reference, mine was perfectly done at 63 minutes. You’ll know it’s ready when the center has puffed up slightly and the edges begin to pull away from the sides of the pan. A toothpick inserted into the center should come out with moist crumbs, but not wet batter. Once baked, remove the skillet from the oven and allow it to cool completely on a wire rack. This cooling process is crucial! The brownies will continue to set and firm up as they cool, developing that incredible fudgy texture and ensuring the cheesecake layer is perfectly stable. Rushing this step might result in a crumbly or too-soft dessert.
Frequently Asked Questions & Expert Tips for Success
Here are answers to common questions and additional expert advice to help you achieve the best possible peanut butter brownie skillet:
We specifically designed this recipe for a 10-inch cast iron skillet. This size creates a wonderfully thick and substantial brownie, ensuring a perfect ratio of brownie to peanut butter cheesecake in every slice. If a 10-inch skillet isn’t available, you can use a slightly larger skillet, such as a 12-inch. However, please be aware that the brownies will be thinner, and consequently, they will likely require less baking time. Always keep an eye on your skillet and bake until a toothpick inserted into the center comes out clean or with moist crumbs, not wet batter.
Once your peanut butter brownie skillet has completely cooled to room temperature, any leftovers should be stored properly to maintain their freshness. You can cover the skillet tightly with aluminum foil directly, or for longer storage and better air circulation, transfer slices to an airtight container. This dessert keeps beautifully at room temperature for 3-4 days, remaining deliciously fudgy and moist.
Absolutely! While a cast iron skillet provides unique heat retention and a rustic presentation, you can use a 9×13 inch baking pan or a 9-inch round cake pan. If using a 9×13 inch pan, the brownies will be thinner and may bake faster, so start checking for doneness around 40-50 minutes. For a 9-inch round cake pan, the thickness will be similar, but it’s a good idea to line the bottom with parchment paper and grease the sides to ensure easy removal.
Several factors contribute to fudgy brownies. First, using melted butter and unsweetened chocolate provides a rich, dense base. Second, avoid overmixing the batter once the flour is added; stirring just until no streaks of flour remain prevents gluten development, which can lead to a cakey texture. Third, and most importantly, do not overbake! Brownies continue to cook slightly after being removed from the oven. They should look slightly underdone in the center when you pull them out.
Yes, this brownie skillet freezes exceptionally well! Once completely cooled, slice the skillet into individual portions. Wrap each slice tightly in plastic wrap, then place them in an airtight freezer-safe container or a heavy-duty freezer bag. They can be frozen for up to 2-3 months. Thaw individual slices at room temperature or warm gently in the microwave for a quick treat.
Delightful Serving Suggestions
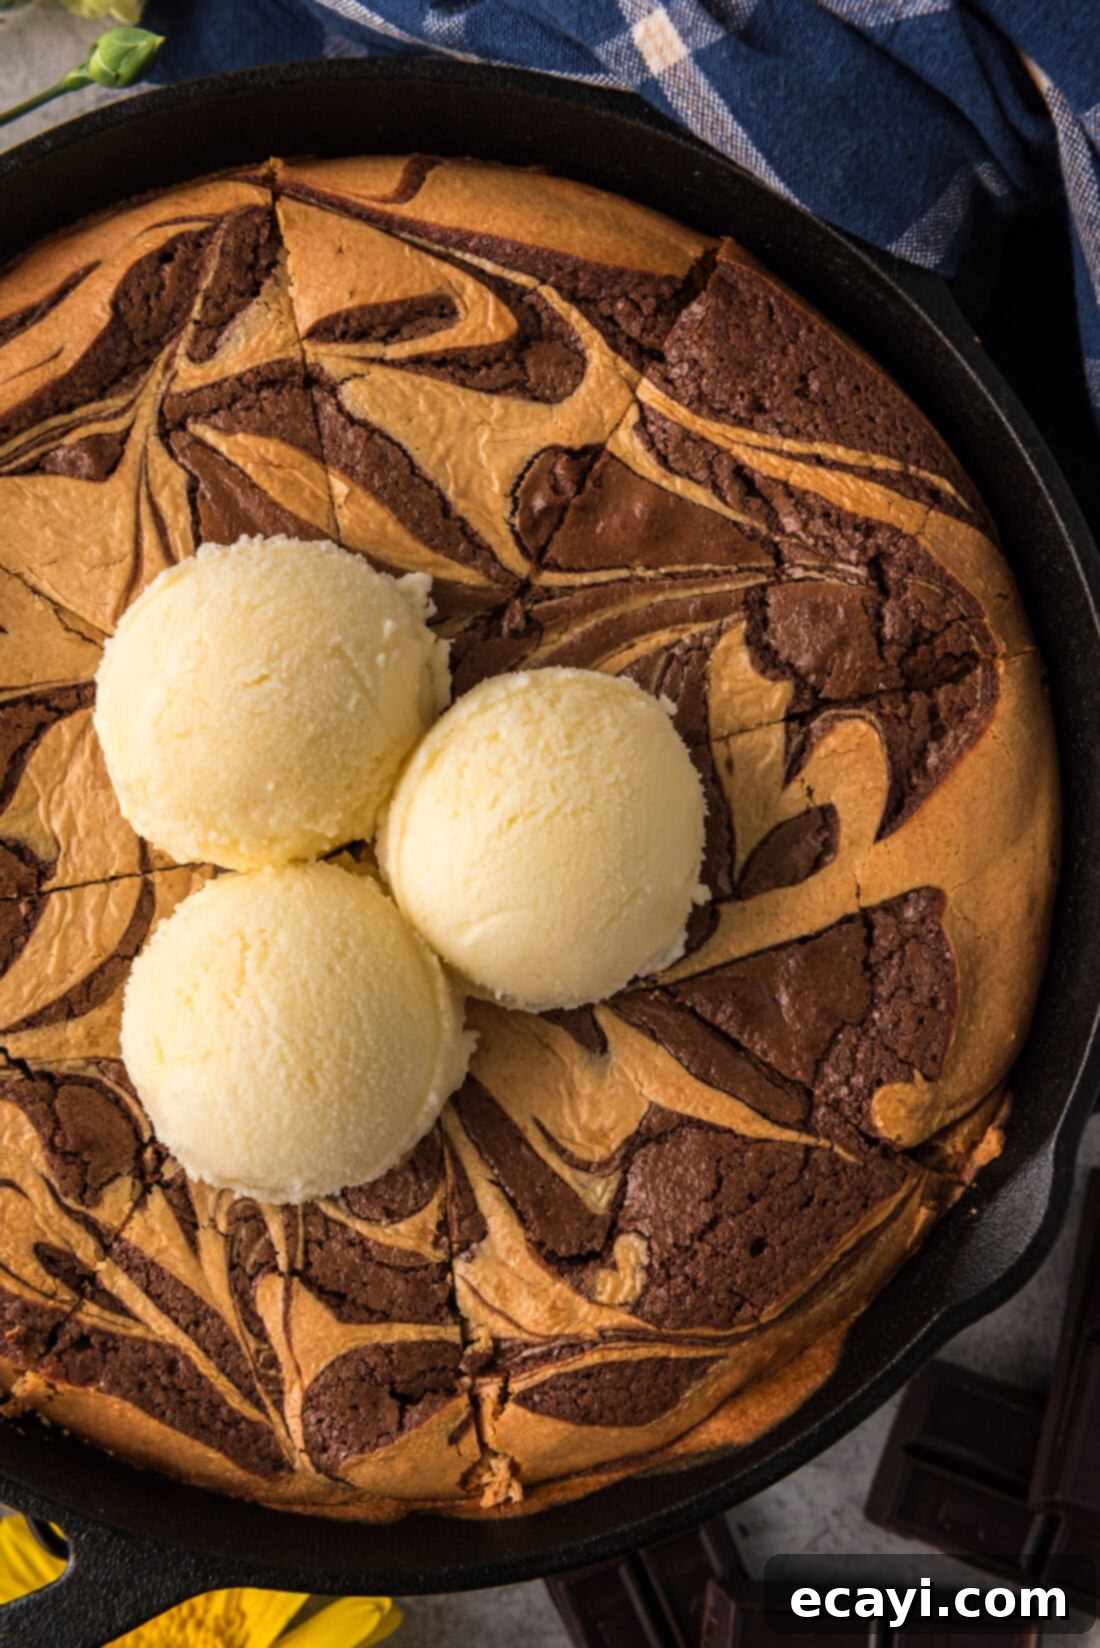
While this peanut butter brownie skillet is utterly divine on its own, especially after it has cooled completely and the flavors have had a chance to meld, there are countless ways to elevate this dessert to an even higher level of indulgence. For the ultimate warm and gooey experience, pair a generous slice of your skillet brownie with a heaping scoop of your favorite vanilla ice cream. The contrast between the warm brownie and the cold, creamy ice cream is simply heavenly. You could also experiment with other ice cream flavors like coffee, salted caramel, or even a classic chocolate chip for an extra chocolatey kick.
For an added touch of decadence, consider drizzling your warm brownie with a rich chocolate syrup or, for the true peanut butter aficionado, a generous swirl of warmed peanut butter. A sprinkle of flaky sea salt can also beautifully enhance the chocolate and peanut butter flavors, adding a sophisticated touch that balances the sweetness. While fantastic served warm, many, including myself, find that these brownies are even better the following day. The extra time allows the fudgy brownie and creamy cheesecake layers to fully set and for all the delightful flavors to deepen and harmonize, resulting in an even more profound taste experience. No matter how you choose to serve it, this peanut butter brownie skillet promises to be a memorable and much-loved dessert.
Discover More Delicious Peanut Butter & Chocolate Recipes
If you’ve fallen in love with the incredible combination of chocolate and peanut butter in this skillet brownie, you’re in luck! There’s a whole world of delightful recipes waiting to be explored that feature these two beloved flavors. Expand your baking repertoire with these other fantastic creations:
- Classic Peanut Butter Brownies
- Indulgent Chocolate Peanut Butter Pie
- Chewy Chocolate Peanut Butter Cookies
- Fudge Brownies with Silky Peanut Butter Frosting
I love to bake and cook and share my kitchen experience with all of you! Remembering to come back each day can be tough, that’s why I offer a convenient newsletter every time a new recipe posts. Simply subscribe and start receiving your free daily recipes!
Peanut Butter Brownie Skillet Recipe
IMPORTANT – There are often Frequently Asked Questions within the blog post that you may find helpful. Simply scroll back up to read them!
Print It
Pin It
Rate It
Save ItSaved!
Ingredients
Peanut Butter Layer
- 6 ounces cream cheese softened (168g)
- ⅔ cup creamy peanut butter (178g)
- ⅓ cup granulated sugar (73g)
- 2 large eggs
- ½ teaspoon pure vanilla extract
Brownie Layer
- ¾ cup unsalted butter (1.5 sticks or 169g)
- 3 ounces unsweetened baking chocolate coarsely chopped (86g)
- 1 cup light brown sugar firmly packed (217g)
- ½ cup granulated sugar (109g)
- 3 large eggs
- 1 teaspoon pure vanilla extract
- ¾ cup unbleached all purpose flour (119g)
- ¼ teaspoon salt
- vanilla ice cream optional, for topping
Equipment You’ll Need
-
10 inch cast iron skillet
-
Hand mixer or stand mixer
-
Rubber spatula
-
Icing spatula or butter knife
-
Wire cooling rack
Before You Begin: Important Notes & Tips
- For the richest, most authentic chocolate flavor and a truly fudgy texture in your brownies, it is highly recommended to use an actual bar of unsweetened baking chocolate instead of cocoa powder. This provides essential fat and moisture. If desired, you can substitute with a bar of bittersweet baking chocolate, but note that this will result in a slightly sweeter brownie.
- The creamy peanut butter mixture requires a stable peanut butter for optimal results. Creamy, processed peanut butters like Jif or Skippy are best. Natural peanut butters tend to separate oil more readily and lack the stability needed for the cheesecake layer, which can negatively affect the texture of the finished dessert.
- This recipe is designed for a 10-inch cast iron skillet, which yields beautifully thick and decadent brownies. If you opt to use a larger skillet, the brownies will be thinner and may bake through more quickly. Always monitor for doneness – a toothpick inserted into the center should come out with moist crumbs, not wet batter.
- To ensure a consistently fudgy brownie, avoid overmixing the batter once the flour is added. Mix just until no streaks of flour are visible. Overmixing develops gluten, which can lead to a tougher, more cake-like texture.
- Allow the brownie skillet to cool completely on a wire rack before slicing. This allows the brownie and cheesecake layers to fully set, guaranteeing that signature fudgy texture and clean slices.
Instructions
-
Preheat your oven to 325°F (160°C). Lightly grease the bottom and sides of a 10-inch cast iron skillet.
-
In a mixer at medium speed, cream together the softened cream cheese, creamy peanut butter, and granulated sugar. Beat for 2 minutes until smooth and light. Add the 2 large eggs, one at a time, beating well after each addition until fully incorporated. Beat in the ½ teaspoon of pure vanilla extract. Cover the mixture and set it aside.6 ounces cream cheese, 2/3 cup creamy peanut butter, 1/3 cup granulated sugar, 2 large eggs, 1/2 teaspoon pure vanilla extract
-
For the brownie layer, cut the ¾ cup unsalted butter into 6 chunks. Place the butter and 3 ounces of coarsely chopped unsweetened baking chocolate into a microwave-safe bowl. Melt in the microwave, stirring until smooth and completely combined. Add 1 cup of light brown sugar and ½ cup of granulated sugar to the melted chocolate mixture and stir thoroughly until both sugars are fully dissolved.3/4 cup unsalted butter, 3 ounces unsweetened baking chocolate, 1 cup light brown sugar, 1/2 cup granulated sugar
-
Add the 3 large eggs to the brownie mixture, one at a time, stirring well after each addition. Stir in 1 teaspoon of pure vanilla extract. Finally, add the ¾ cup unbleached all-purpose flour and ¼ teaspoon of salt, stirring gently until there are no traces of flour left. Do not overmix.3 large eggs, 1 teaspoon pure vanilla extract, 3/4 cup unbleached all purpose flour, 1/4 teaspoon salt
-
Reserve one cup of the brownie batter and set it aside. Pour the remaining brownie batter into your prepared 10-inch skillet, spreading it evenly across the bottom.
-
Carefully spread the reserved peanut butter cheesecake mixture evenly over the brownie batter in the skillet.
-
Spoon the remaining one cup of brownie batter in dollops onto the top of the peanut butter mixture, distributing them somewhat evenly.
-
Insert an icing spatula or butter knife into the batter (holding it straight up and down) and gently swirl the mixture to create a marbled effect. Do not overdo it; aim for a few deliberate swirls, starting from one side and finishing at the other.
-
Bake in the preheated oven for 55-65 minutes (mine was 63 minutes). The center will puff up slightly, and the edges will begin to pull away from the sides of the pan. Allow the skillet to cool completely on a wire rack until fully set.
Expert Tips & FAQs (Quick Reference)
- Store any cooled leftovers covered tightly with aluminum foil or in an airtight container at room temperature for 3-4 days.
- For the fudgiest brownies, ensure you don’t overmix the batter once flour is added, and avoid overbaking.
- The 10-inch skillet ensures thick brownies. If using a larger skillet, reduce baking time as they will be thinner.
- For best results, use creamy, processed peanut butter (like Jif or Skippy) as natural peanut butters can separate in the cheesecake layer.
Nutrition Information
The recipes on this blog are tested with a conventional gas oven and gas stovetop. It’s important to note that some ovens, especially as they age, can cook and bake inconsistently. Using an inexpensive oven thermometer can assure you that your oven is truly heating to the proper temperature. If you use a toaster oven or countertop oven, please keep in mind that they may not distribute heat the same as a conventional full sized oven and you may need to adjust your cooking/baking times. In the case of recipes made with a pressure cooker, air fryer, slow cooker, or other appliance, a link to the appliances we use is listed within each respective recipe. For baking recipes where measurements are given by weight, please note that results may not be the same if cups are used instead, and we can’t guarantee success with that method.
This post originally appeared here on May 1, 2011 and has since been updated with new photos and expert tips to provide the most current and helpful information for our readers.
