Easy Cheesy Easter Bunny Pull Apart Bread: A Fun & Festive Holiday Appetizer
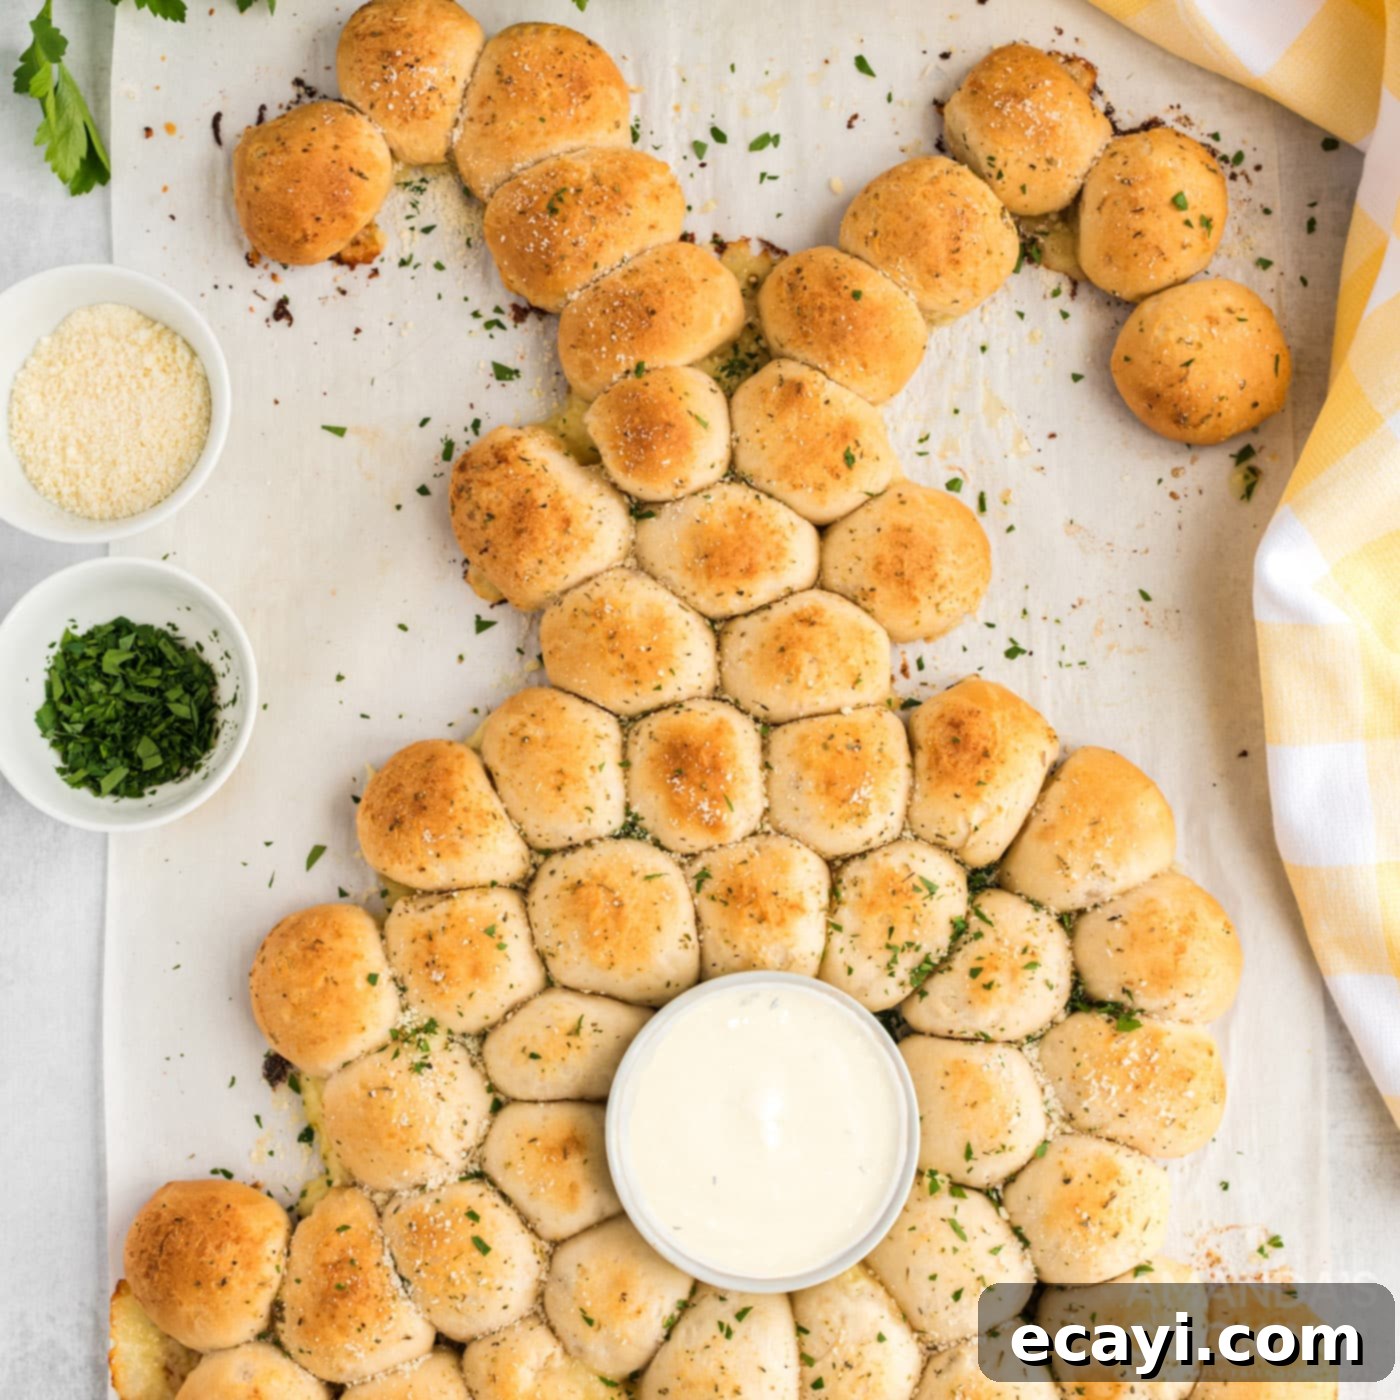
Celebrate Easter with a delightful and irresistible appetizer that’s as charming as it is delicious! This adorable Easter bunny pull apart bread is a quick and easy holiday treat, guaranteed to be the star of your festive spread. Crafted from humble canned biscuits and stuffed with gooey Mozzarella cheese, it’s a wonderfully interactive dish that kids and adults alike will love to pull apart and enjoy. Forget complicated recipes; this simple yet impressive bread brings joy and flavor to your Easter table with minimal effort.
Why This Easy Easter Bunny Bread is a Must-Try
There are countless reasons why this Easter bunny pull apart bread stands out as the perfect holiday appetizer. With its incredibly simple ingredients and straightforward prep steps, it’s a recipe truly everyone can master, regardless of their baking experience. The result is not just delicious, but also visually stunning – a cute, edible bunny shape that will undoubtedly impress your guests and bring a smile to every face. It’s more than just food; it’s an experience!
The inspiration for this charming bunny-shaped bread comes from the overwhelming success of our Christmas Tree Pull Apart Bread. That festive creation was a huge hit on our holiday table, beloved for its ease and delicious cheesiness. We’ve taken that winning concept and given it an adorable Easter twist, making it ideal for springtime celebrations. Just like its winter counterpart, this Easter version promises warm, soft, cheesy bites that are perfect for sharing. It’s a fantastic way to add a touch of whimsy and homemade comfort to your Easter brunch or dinner spread, making it a new tradition for your family.
This recipe truly works because it combines convenience with creativity. Using pre-made canned biscuits drastically cuts down on preparation time, allowing you to focus on the fun part – shaping the bunny and enjoying the process. The pull-apart nature makes it highly interactive and less messy than individual bread rolls, as each guest can easily grab a cheesy portion. Plus, the versatility means you can customize it with different cheeses and seasonings to suit your family’s preferences. It’s a guaranteed crowd-pleaser that delivers on both taste and visual appeal.
Essential Ingredients for Your Easter Bunny Pull Apart Bread
Gathering the right ingredients is the first step to creating this delightful Easter treat. This recipe relies on a handful of common pantry staples, making it accessible and simple. You’ll find all precise measurements, specific ingredients, and detailed instructions in the printable recipe card conveniently located at the end of this post. However, let’s dive into some more detail about each component and why they’re perfect for this festive cheesy bread.
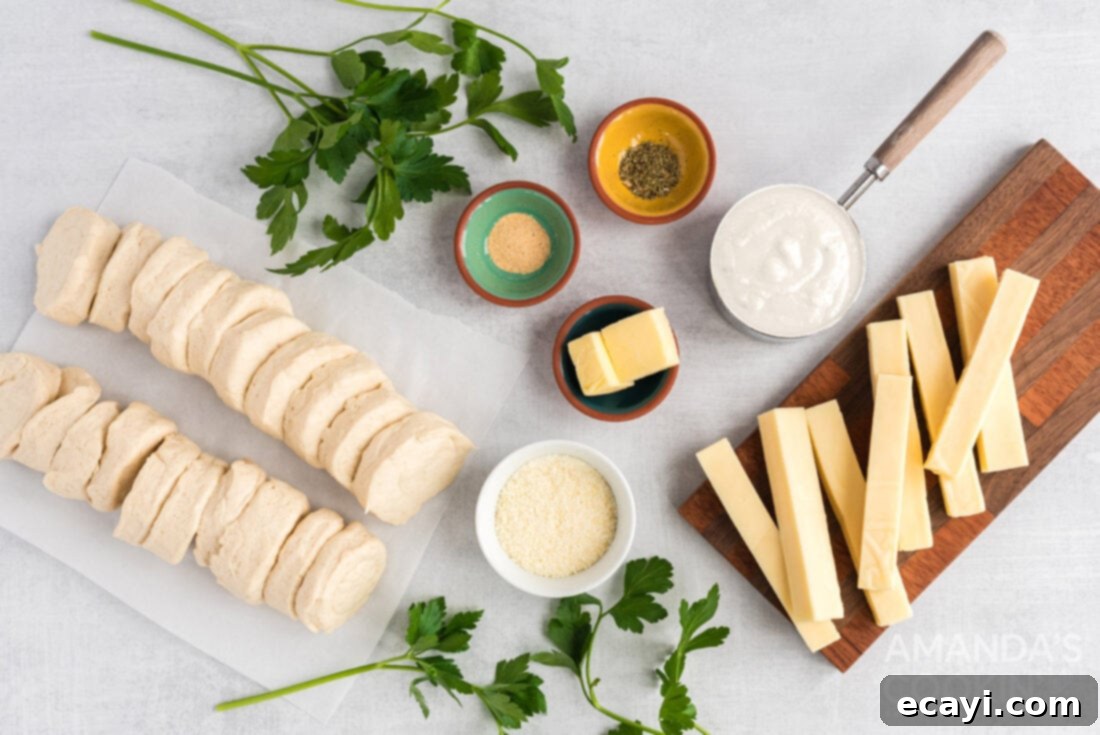
BISCUITS – The foundation of our pull-apart bread relies on large canned biscuits. These pre-made dough rounds are a true lifesaver for busy holiday prepping, eliminating the need for measuring flour, kneading dough, or waiting for yeast to rise. We highly recommend using larger varieties, such as Pillsbury Grands, as they provide a more substantial bite and are easier to work with when stuffing with cheese. While biscuits are our top choice for their flaky texture and rich flavor, crescent rolls can also be used as an alternative. Keep in mind that crescent rolls will yield a slightly lighter, more delicate texture, which can also be delightful, but might require a small adjustment in baking time.
CHEESE – What’s a pull-apart bread without gooey, melted cheese? Mozzarella cheese is the quintessential choice for this recipe due to its exceptional melting qualities and mild flavor that pairs beautifully with the biscuit dough and seasonings. String cheese is particularly convenient, as it comes pre-portioned and can be easily cut into smaller pieces. You can find string cheese in various flavors like Colby Jack, cheddar, or even a mixed variety, all of which would contribute a wonderful depth of flavor to these cheesy biscuits. If you prefer, a block of cheese (like a large block of low-moisture, part-skim mozzarella) works just as well and can be more economical. Simply cut it into small, uniform cubes, ensuring each piece is approximately 0.35 ounces to fit perfectly inside the biscuit dough balls.
SEASONINGS – To elevate the flavor of our savory bunny bread, we’ll be whisking melted unsalted butter with aromatic garlic powder and fragrant Italian seasoning. This simple yet effective combination infuses the bread with a classic savory profile, reminiscent of garlic bread or pizza. After baking, a sprinkle of fresh, chopped parsley adds a vibrant pop of color and a hint of fresh herbaceousness, while finely grated Parmesan cheese provides an extra layer of salty, umami goodness and a beautiful golden crust.
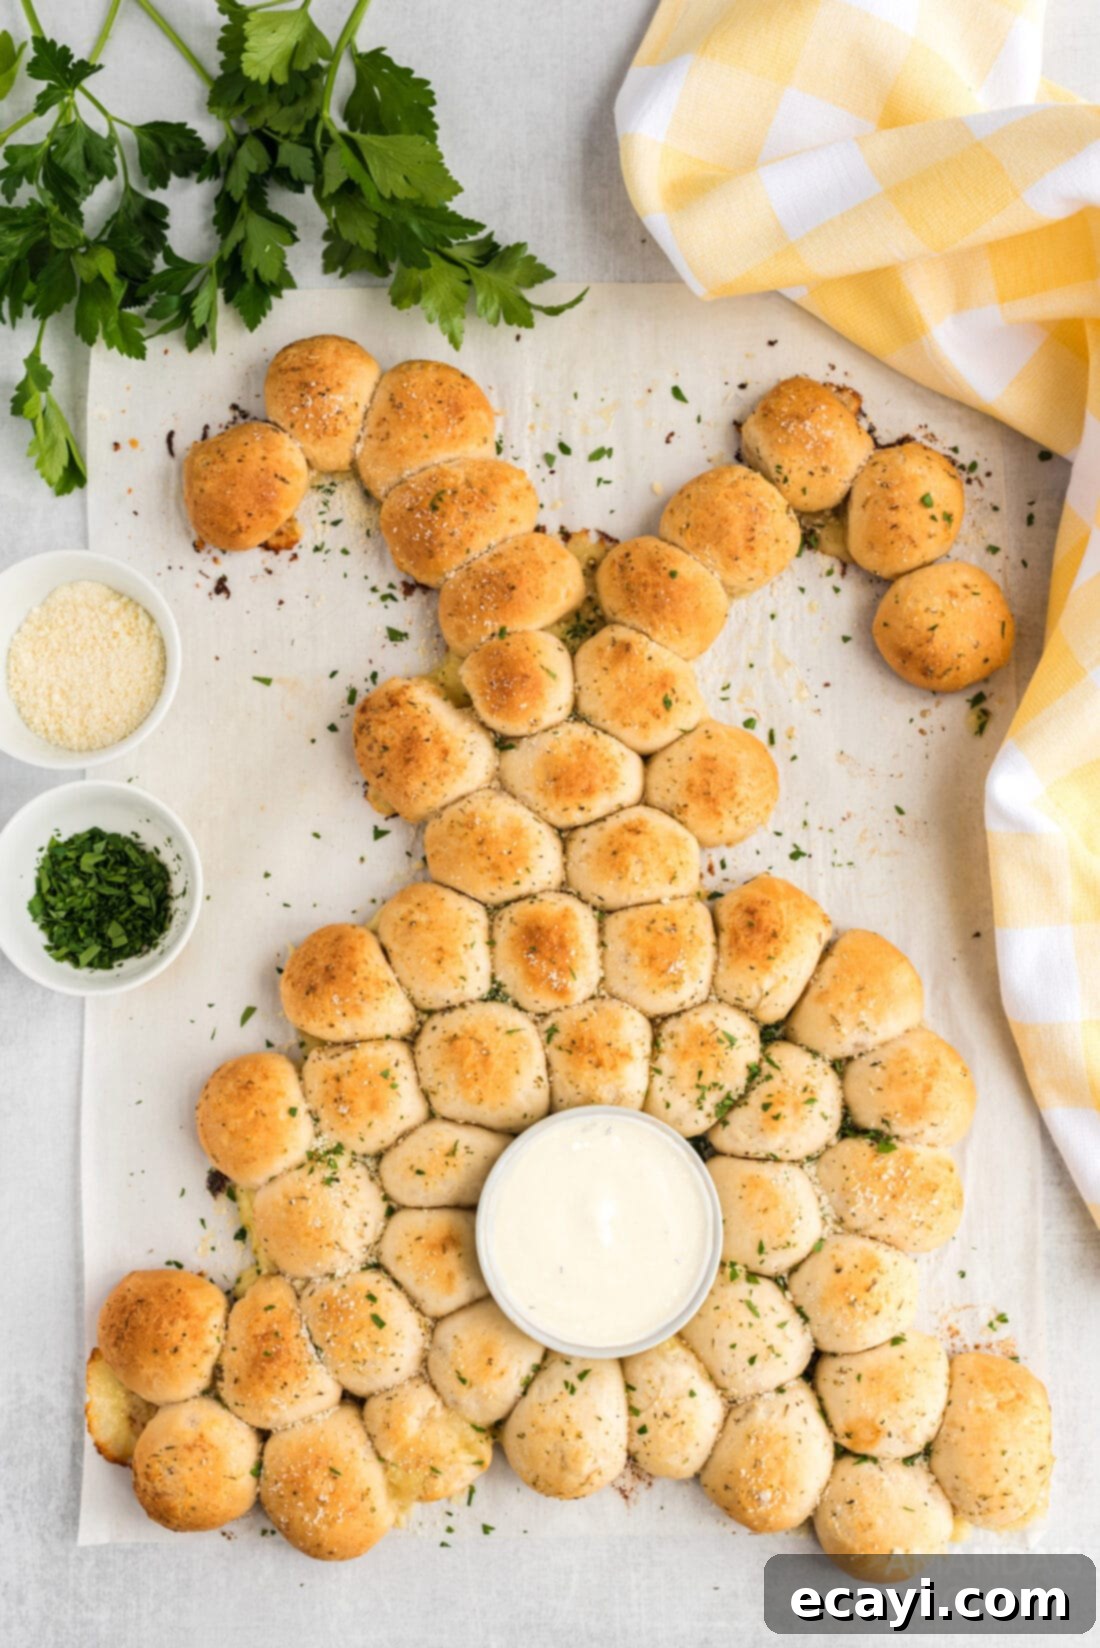
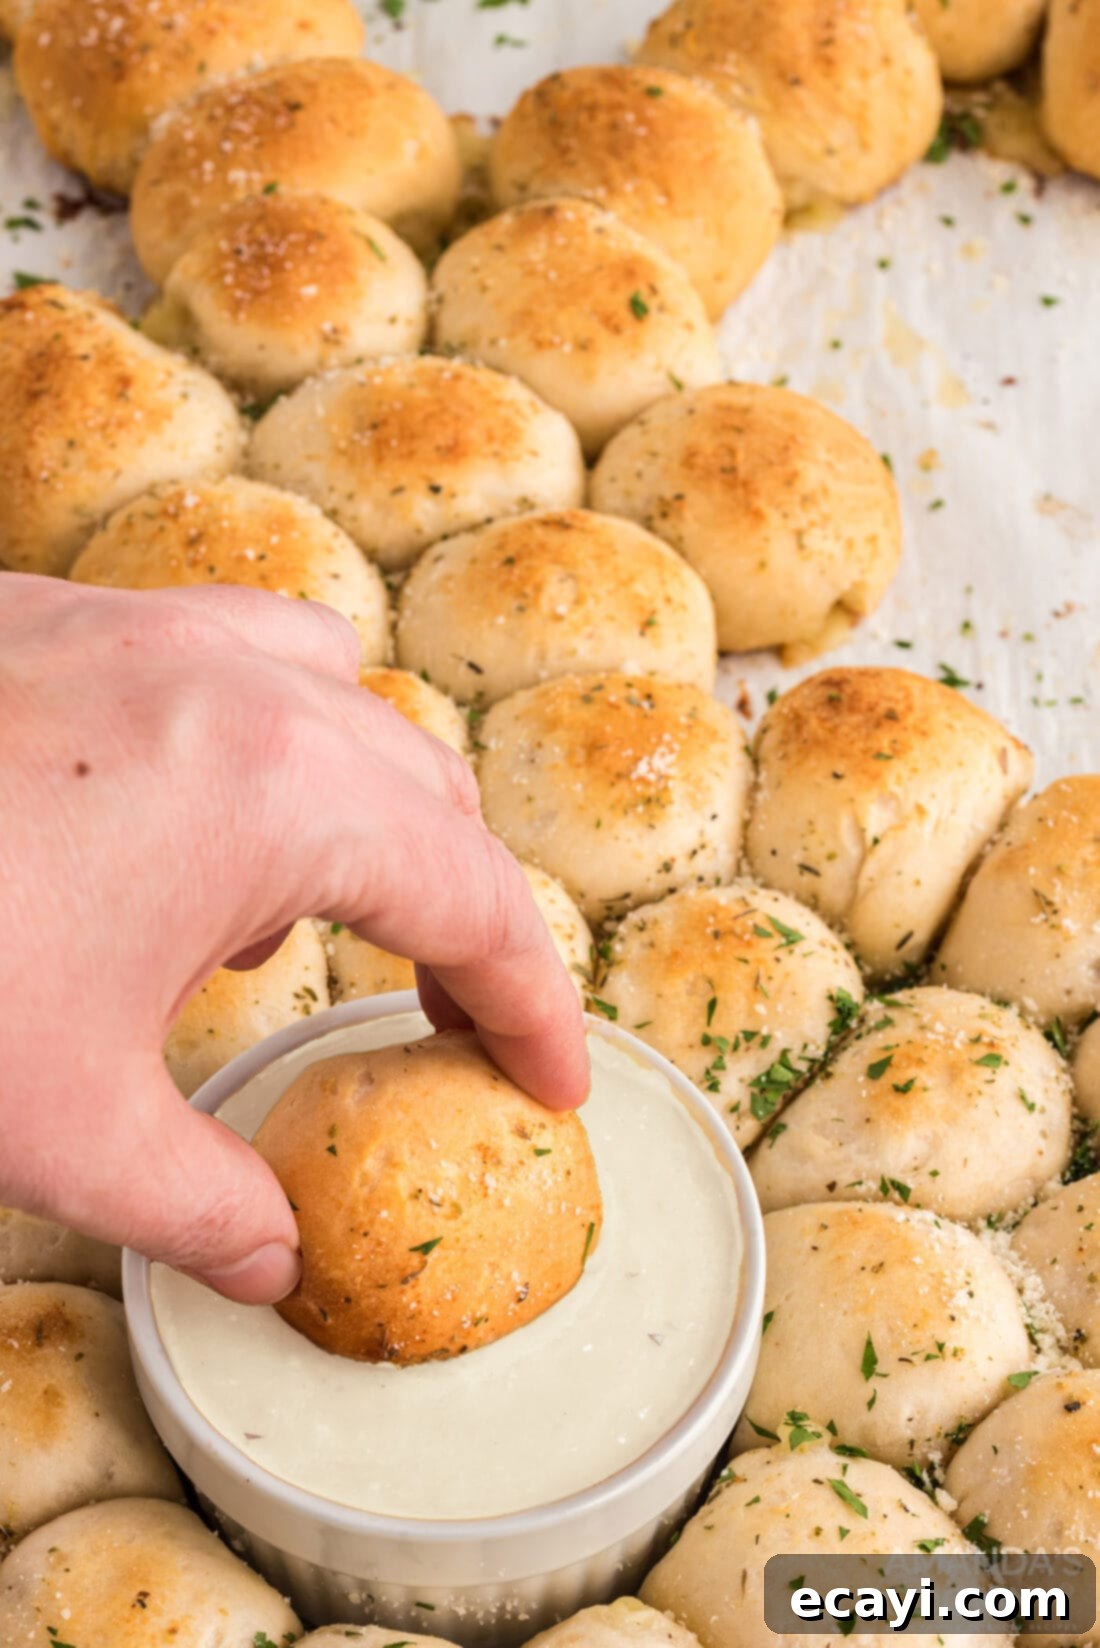
DIPPING SAUCE – While this cheesy bread is delicious on its own, a complementary dipping sauce takes it to the next level. For this Easter bunny rendition, we opted for ranch dressing, not just for its creamy, tangy flavor, but because its white color beautifully mimics the fluffy tail of a bunny, adding to the festive theme. However, your options are limitless! For a classic pairing, our homemade pizza sauce or a warm marinara would be fantastic. Other creamy options include our indulgent Buttermilk Ranch Dressing, the bright and herbaceous Creamy Dill Dressing, or our savory Creamy Onion Dip. For a little added texture in your dip, truly making it look like a fluffy bunny tail, consider our Skinny French Onion Dip. Feel free to choose your favorite!
How to Make Easter Bunny Pull Apart Bread: Step-by-Step Guide
These step-by-step photos and detailed instructions are provided to help you visualize each stage of making this delightful Easter appetizer. For a convenient printable version of this recipe, complete with precise measurements and comprehensive instructions, simply Jump to Recipe at the bottom of the page.
- Prepare Your Baking Sheet and Oven: First, preheat your oven to 375°F (190°C). This ensures your oven is at the optimal temperature for even baking when the bunny bread goes in. Line a baking sheet with parchment paper or a silicone baking mat. This crucial step not only prevents sticking but also makes cleanup incredibly easy and allows you to transfer the finished bunny bread effortlessly to a serving platter.
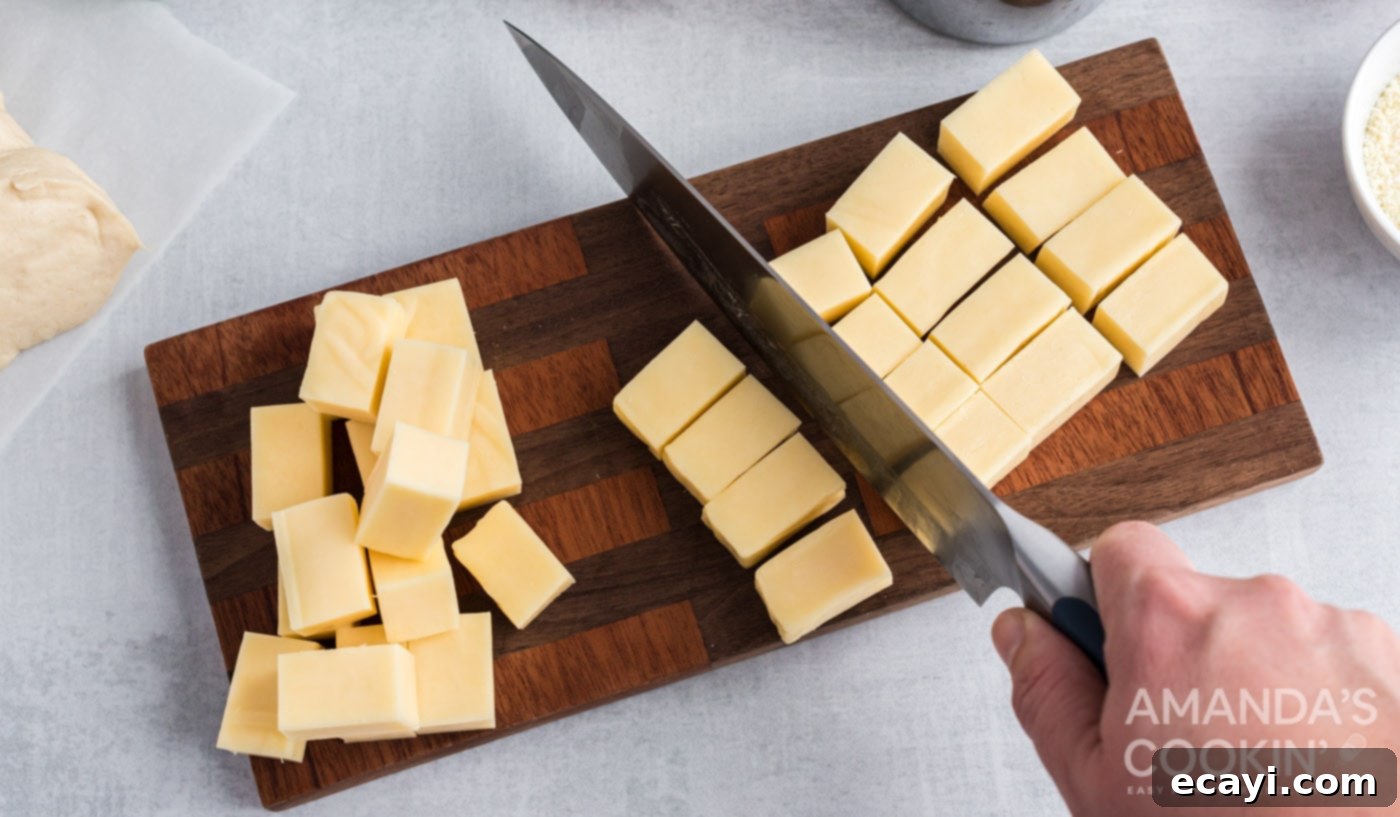
- Prepare the Cheese: Next, you’ll need to prepare your cheese filling. If using a block of Mozzarella cheese (as we did for this recipe), cut it into approximately 50 small pieces, each weighing about 0.35 ounces (or roughly 10 grams). This ensures a consistent amount of cheese in each biscuit ball and helps it melt evenly.
EXPERT TIP: For this cheesy bunny bread, we used a total of 18 ounces of block Mozzarella cheese. Aim for small, bite-sized cubes that will fit snugly inside the biscuit dough without tearing through. If you’re using string cheese, a 1-ounce stick can be cut into thirds, then each third cut in half, resulting in smaller pieces suitable for stuffing. Cutting them into smaller portions is essential to ensure you can fully enclose the cheese within the dough ball.

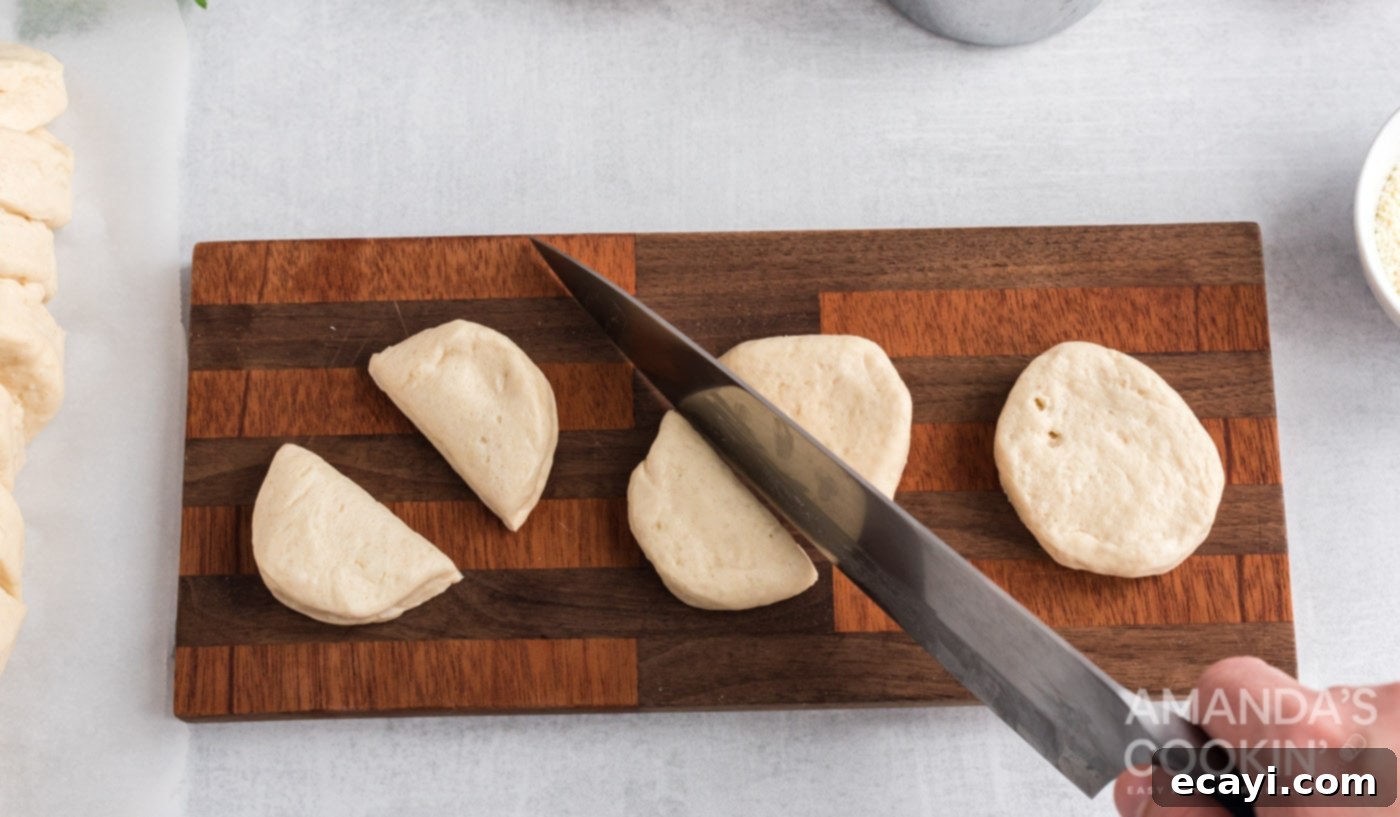
Precisely cut your mozzarella cheese for perfect melting inside each biscuit. - Prepare the Biscuits: Open your cans of large biscuits and separate the dough into 16 individual biscuits. From these, take 13 of the 16 biscuits and cut each one into fourths, creating a total of 52 smaller biscuit pieces. You will not use all of the original biscuits, so you’ll have a few left over for another use or a quick snack! Once cut, roll each small piece of biscuit dough into a smooth, round ball. This step ensures an even shape and helps create the “pull apart” texture.
EXPERT TIP: We found that two 16-ounce cans of Pillsbury Grands biscuits work perfectly for this recipe, providing enough dough to form the bunny shape with a few spare pieces. Rolling the dough tightly helps prevent cheese from leaking out during baking.

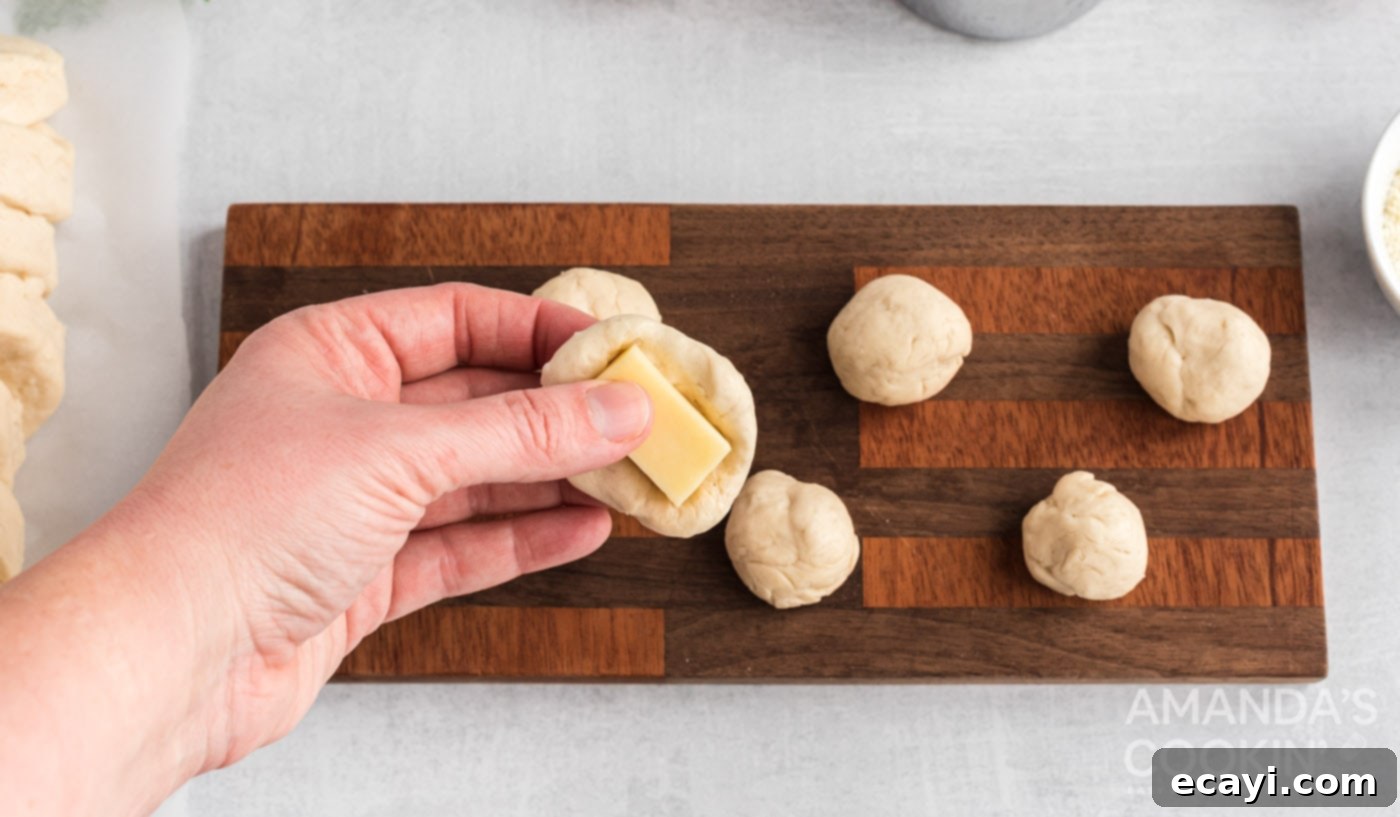
Quartering the biscuits makes them the ideal size for individual cheese-stuffed portions. - Stuff the Biscuits with Cheese: Take one of your biscuit dough balls and gently flatten it slightly. Place a piece of the prepared cheese in the center. Carefully bring the edges of the dough together around the cheese, pinching the seams firmly to seal it completely. Once sealed, roll the dough again into a smooth, tight ball. This ensures the cheese remains perfectly encapsulated and creates a beautiful, round bread piece.
EXPERT TIP: The key here is a tight seal! Any open seams can lead to melted cheese escaping during baking, which, while still delicious, can make your bunny bread less aesthetically pleasing. Work quickly, but deliberately, to form neat balls.

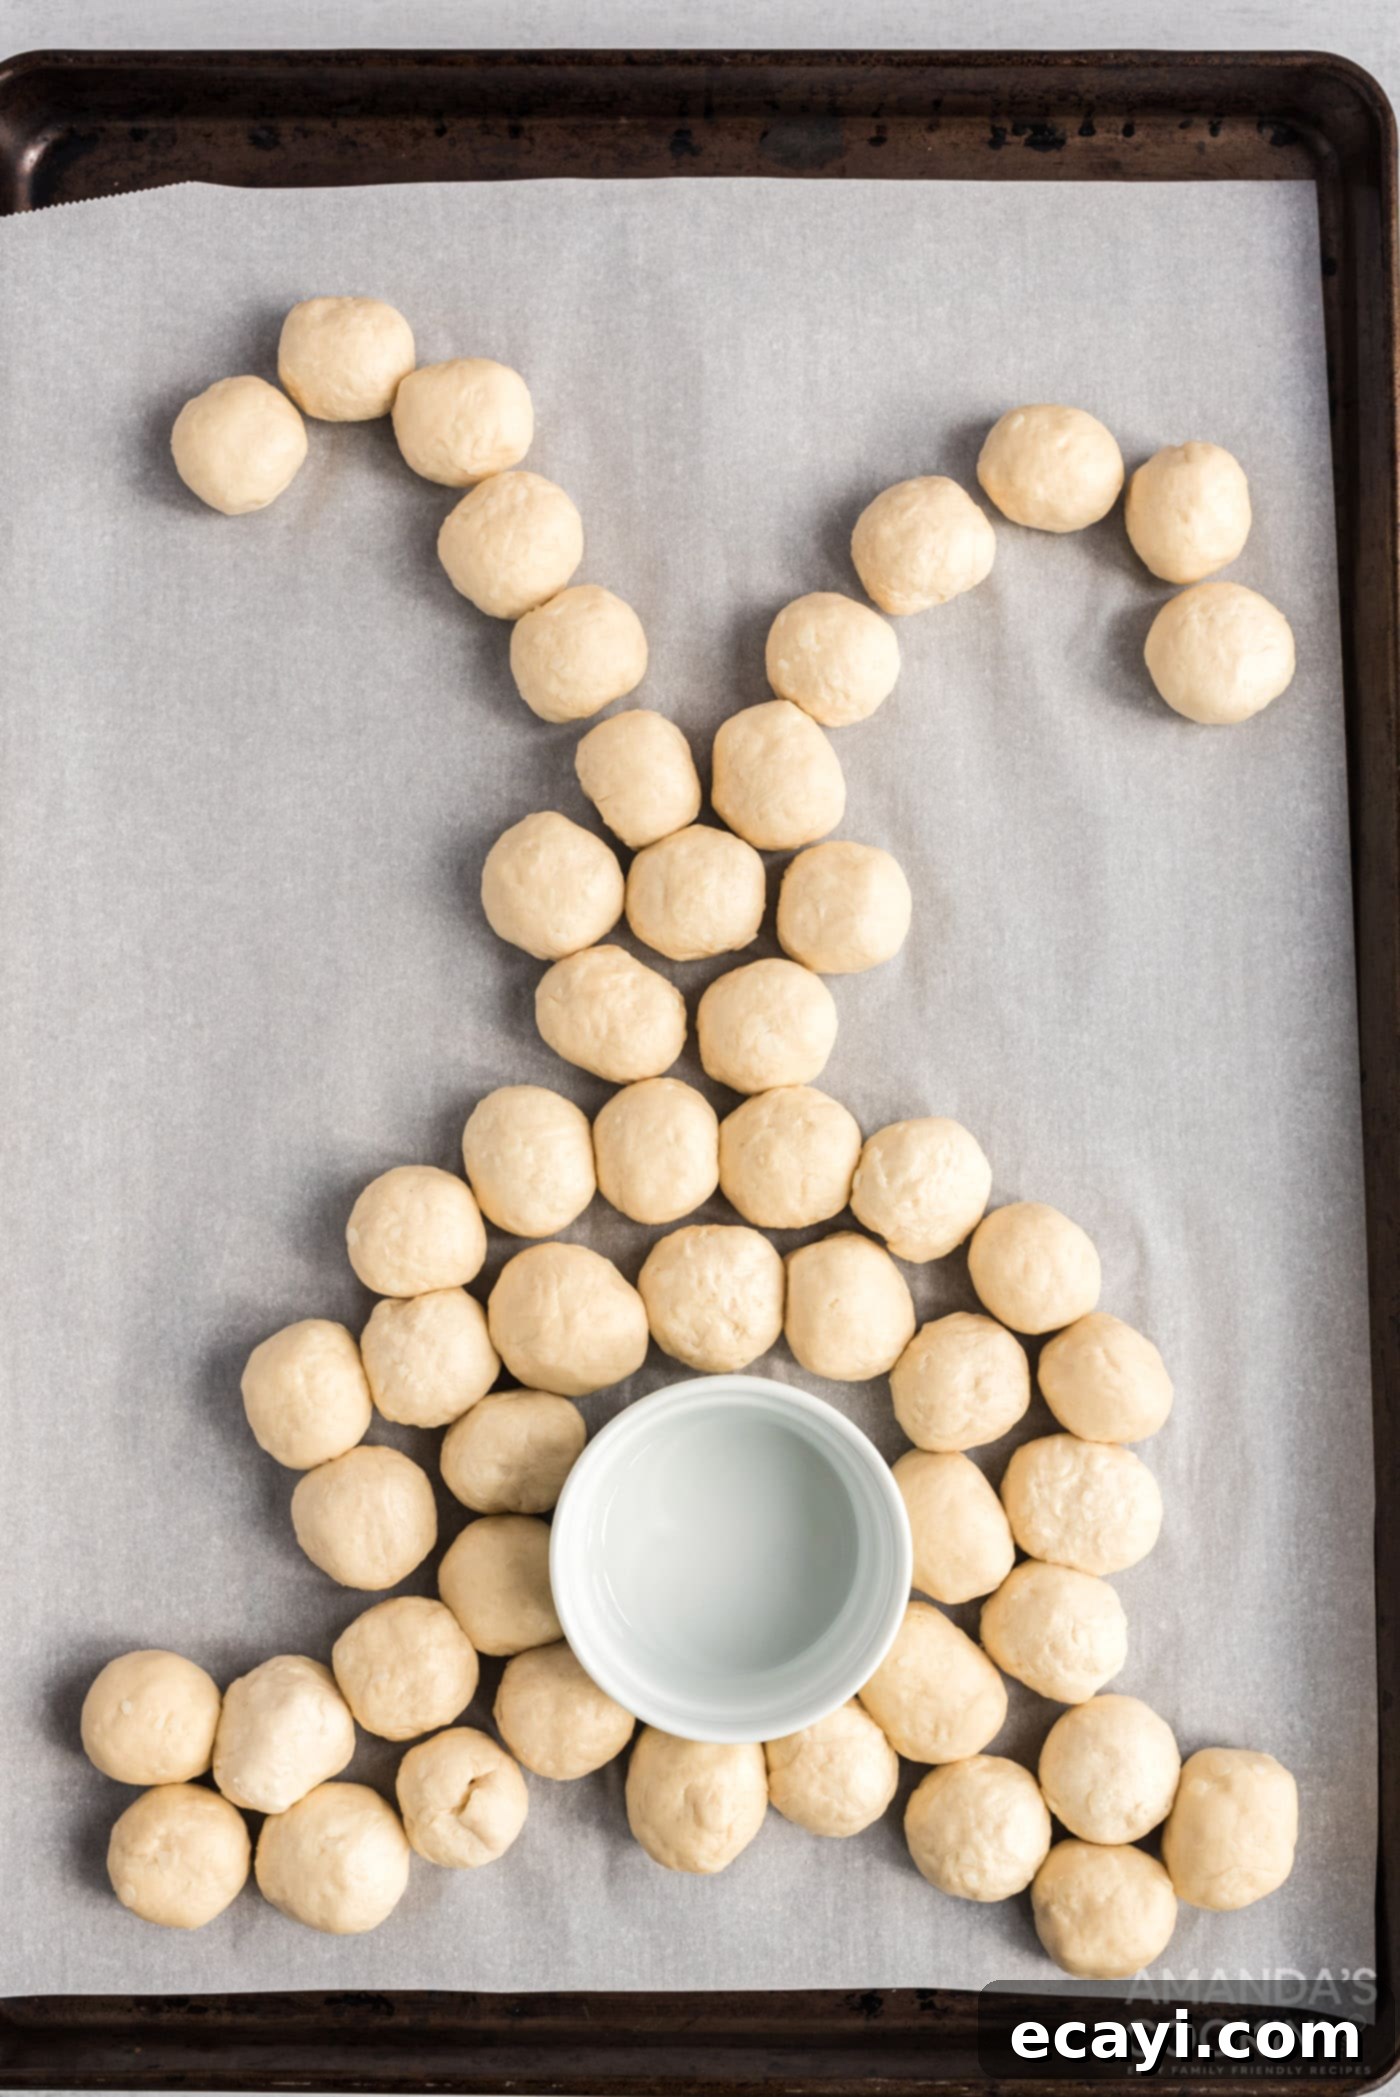
Encase each cheese cube carefully within the biscuit dough to prevent leaks. - Shape the Bunny: Before arranging the biscuit balls, place a small ramekin (for your dipping sauce) on the parchment-lined cookie sheet where the bunny’s tail will go. This helps define the space and ensures a perfectly round “tail” spot. Now, begin arranging the cheese-stuffed biscuit balls on the cookie sheet, seam-side down, forming the shape of a bunny rabbit. Start by forming the head, then the body, and finally the ears. Ensure the balls are placed next to each other, slightly touching, so they bake together to form a cohesive shape. Use our provided photo as a visual guide to achieve the perfect bunny silhouette.

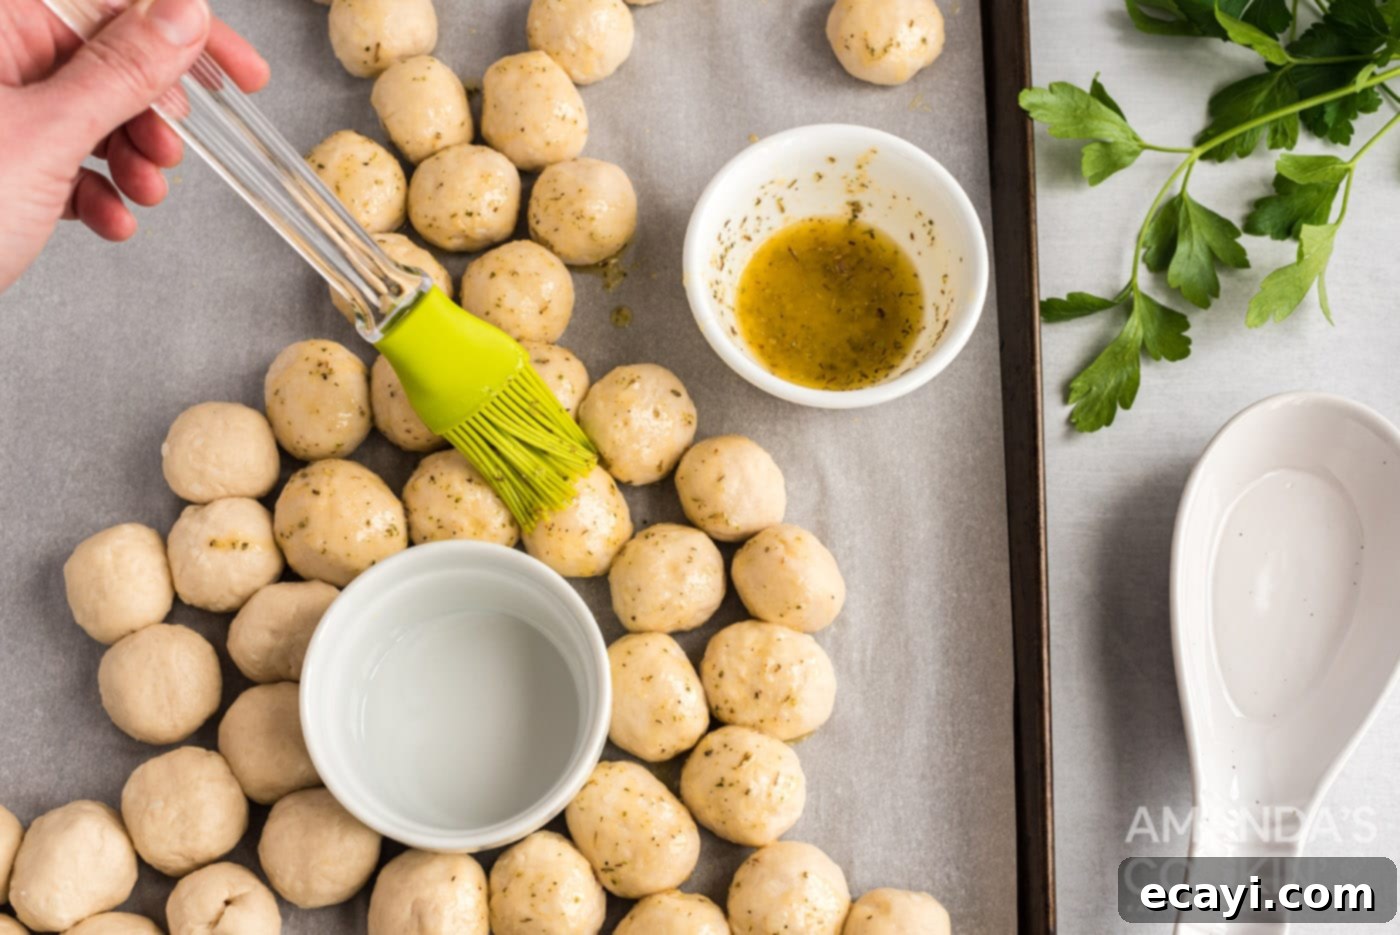
Carefully arrange the biscuit balls to create the adorable bunny shape. - Season with Butter Mixture: In a small, microwave-safe bowl, melt the unsalted butter. Once melted, stir in the garlic powder and Italian seasoning until well combined. This aromatic butter mixture will be brushed over the biscuit balls to give them a golden crust and a burst of savory flavor. Using a pastry brush, generously coat the entire surface of the bunny-shaped bread with this flavorful butter.

Brushing with garlic butter adds incredible flavor and helps achieve a beautiful golden-brown crust. - Bake to Golden Perfection: Place the baking sheet with your bunny bread into the preheated oven. Bake for approximately 15-17 minutes, or until the biscuits are beautifully golden brown and the cheese inside is melted and bubbling. Baking times can vary slightly depending on your oven, so keep an eye on it. If you desire an extra-crispy, golden-brown top, you can turn on the broiler for about a minute or so at the very end of baking, watching carefully to prevent burning.
- Garnish and Serve: Once baked, remove the Easter bunny pull apart bread from the oven. For a final flourish, sprinkle the top generously with fresh, chopped parsley, which adds a lovely green contrast and a hint of freshness. Then, dust with finely grated Parmesan cheese for an extra layer of savory flavor and visual appeal. While the bread cools slightly, fill the ramekin in the center with your chosen white dipping sauce, like ranch dressing, to complete the “bunny tail” effect. Serve warm and watch it disappear!
Frequently Asked Questions About Easter Bunny Pull Apart Bread
While you could technically assemble the bunny bread a little ahead of time (e.g., shaping the dough balls and arranging them on the baking sheet, then covering and refrigerating for up to an hour or two), it is genuinely best enjoyed warm, fresh from the oven. The magic of this dish is the melted, stretchy cheese and the soft, warm biscuits. Once it cools down, the cheese will firm up, and the texture won’t be quite as fun and gooey. However, you can prep the cheese cubes and roll the biscuit dough into balls a day in advance, storing them separately in airtight containers in the refrigerator. Then, assemble and bake just before serving for optimal freshness.
Absolutely! The choice of dipping sauce is entirely up to your personal preference. While we specifically chose ranch dressing because its white color beautifully mimics a fluffy bunny tail for the Easter theme, marinara sauce or our classic pizza sauce would be equally delicious, offering a more traditional savory pairing. You could also try a warm cheese sauce, a savory garlic butter dip, or even a pesto dip. Feel free to experiment with any dressing or sauce that your family loves – the goal is deliciousness!
Yes, you absolutely can customize! For cheese, while mozzarella offers the best melt, other semi-hard cheeses like cheddar, Colby Jack, or a provolone blend would work wonderfully, adding different flavor notes. Just ensure they are cut into small, manageable cubes. For biscuits, while large canned biscuits are recommended for their size and texture, you can experiment with crescent roll dough for a lighter, flakier bread. Keep an eye on baking times as different dough types may cook at varying rates.
Cheese leakage is often a sign that the biscuit dough balls weren’t sealed tightly enough around the cheese. To prevent this, make sure to firmly pinch all the seams of the dough together after inserting the cheese. Rolling the dough ball again after pinching helps create a smooth, sealed surface. Also, ensure your cheese pieces aren’t too large for the dough, which could cause tearing. A little leakage is okay, but a good seal will keep most of the gooey goodness inside!
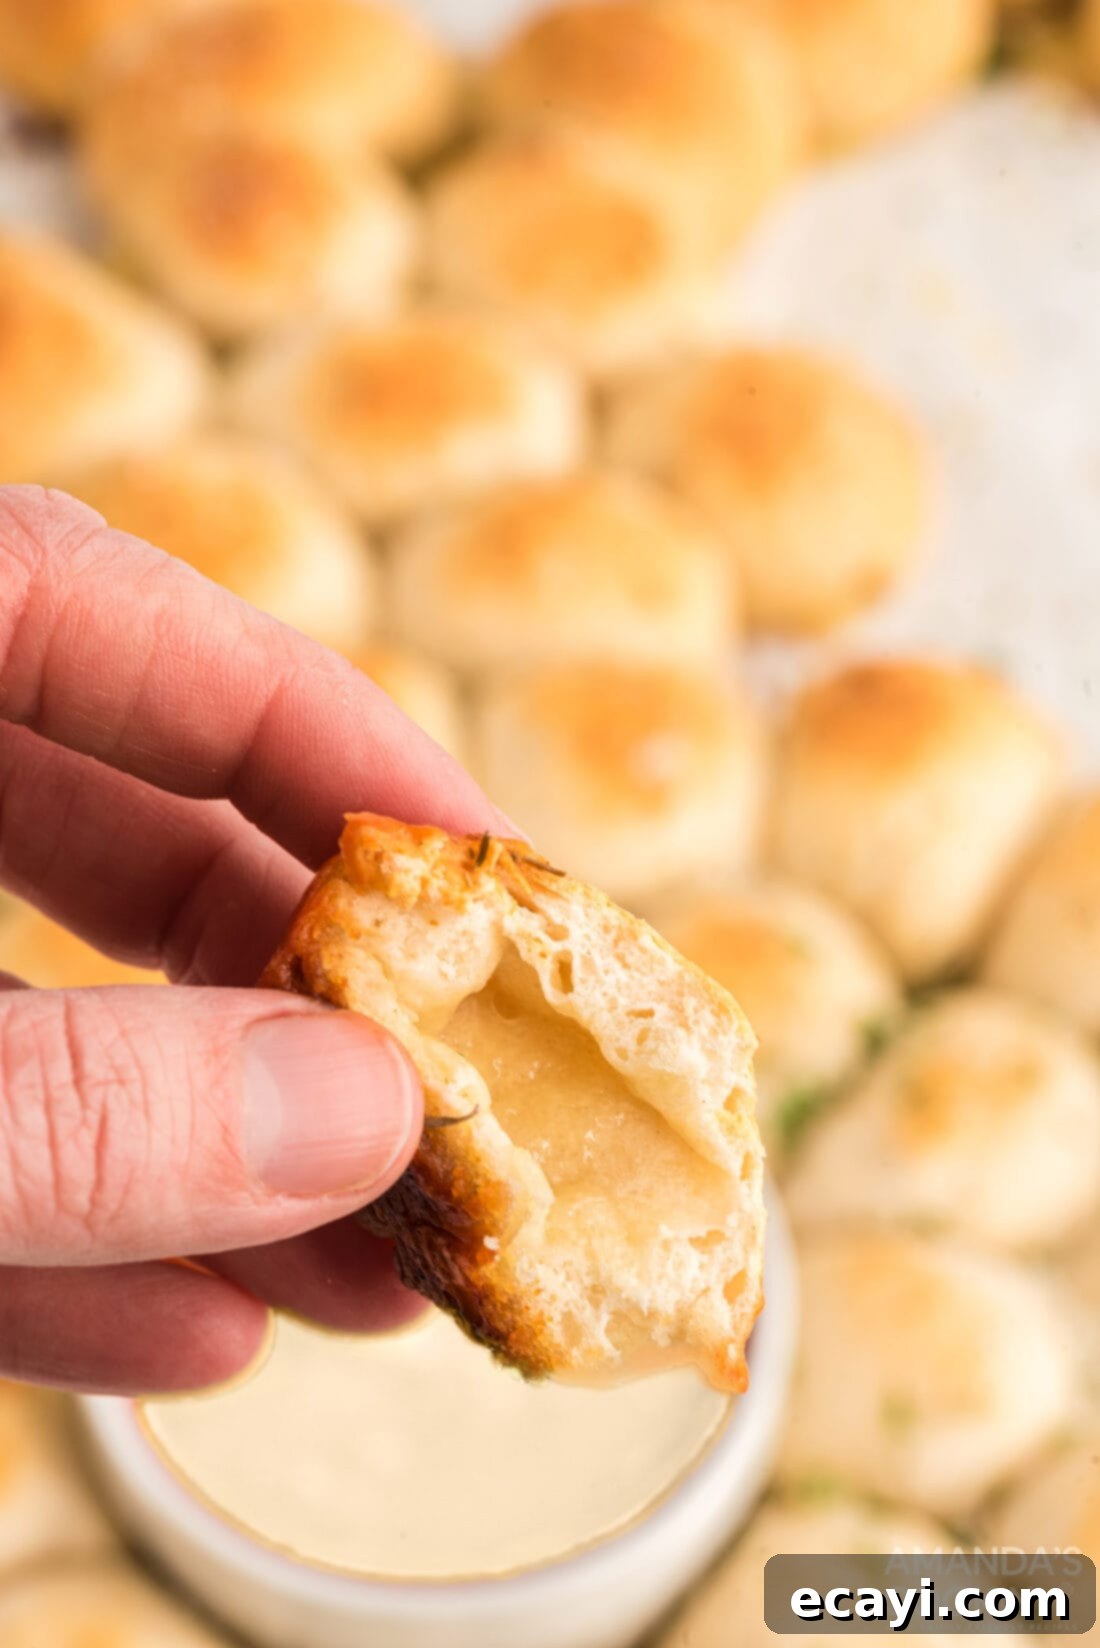
This easy Easter bunny pull apart bread is not just a festive appetizer for your Easter spread; it’s a delightful centerpiece that truly captures the spirit of the holiday. Its irresistible combination of warm, soft biscuits and gooey, melted cheese makes it a surefire hit. Kids and adults alike will delight in pulling apart the cheesy segments, creating a fun and interactive dining experience. Get ready for compliments and requests for this recipe!
Tips for a Perfect Easter Bunny Pull Apart Bread
- Don’t Overcrowd: Ensure there’s enough space on your baking sheet for the biscuits to expand without touching the edges too much. Parchment paper is essential for easy transfer.
- Seal Tightly: As mentioned, firmly pinch the dough seams around the cheese to prevent leakage. A well-sealed ball ensures all the cheesy goodness stays inside.
- Even Brushing: Brush the butter-garlic-Italian seasoning mixture evenly over all biscuit balls for a consistent golden-brown color and flavor.
- Serve Warm: This pull-apart bread is best served immediately after baking when the cheese is at its meltiest and the biscuits are softest.
- Broiler for Extra Crisp: If your bread isn’t as golden as you’d like after baking, a quick minute under the broiler (watch it closely!) can give it that perfect crisp finish.
Variations and Serving Suggestions
While the classic cheesy garlic butter version is a winner, don’t hesitate to get creative with your Easter bunny pull apart bread:
- Sweet Bunny Bread: For a dessert version, skip the savory seasonings. Brush with melted butter and sprinkle with cinnamon sugar before baking. After baking, drizzle with a simple cream cheese glaze or a vanilla icing.
- Pizza Bunny: Add mini pepperoni slices or cooked crumbled sausage along with the cheese for a pizza-inspired twist. Serve with marinara sauce for dipping.
- Herb Garden Bunny: Incorporate finely chopped fresh herbs like rosemary, thyme, or oregano into your butter mixture for an extra aromatic kick.
- Spicy Cheese: For those who love a bit of heat, add a pinch of red pepper flakes to the butter mixture or use a spicy jack cheese.
This festive bread makes an excellent centerpiece for an Easter brunch, a delightful appetizer before a holiday dinner, or even a fun snack for an afternoon gathering. Pair it with a fresh green salad to balance the richness, or serve it alongside other light finger foods.
Storage and Reheating
If by some miracle you have any leftovers, store them in an airtight container at room temperature for up to one day, or in the refrigerator for up to 2-3 days. To reheat, the best method is in the oven or an air fryer. Place the bread on a baking sheet and heat at 350°F (175°C) for 5-10 minutes, or until warmed through and the cheese is soft again. Avoid the microwave if possible, as it can make the biscuits chewy.
More Delightful Easter Recipes to Enjoy
Looking for more inspiration to complete your Easter menu? Here are some fantastic recipes that complement our cheesy bunny bread and will make your holiday celebration even more special:
- Easter Chick Cupcakes: Adorable and delicious, these cupcakes are a vibrant, kid-friendly dessert perfect for spring.
- Orange Bourbon Glazed Ham: A show-stopping main course, this ham is sweet, savory, and incredibly flavorful – ideal for your Easter feast.
- Easter Bunny Cupcakes: Another cute cupcake idea, these bunny-themed treats are a joy to decorate and eat.
- Rice Krispie Nests: A quick and easy no-bake dessert, these edible nests are perfect for holding candy eggs.
- Carrot Cake Trifle: Layers of moist carrot cake, creamy filling, and pecans make this an elegant and satisfying dessert.
- Hot Cross Buns: A traditional Easter staple, these spiced sweet buns with a cross on top are perfect for breakfast or brunch.
- Bunny Butt Pancakes: Start your Easter morning with these incredibly cute and fluffy pancakes, guaranteed to make everyone giggle.
- Bunny Rolls: Another creative way to shape bread, these savory rolls are shaped like little bunnies and are a great addition to any meal.
I absolutely love to bake and cook, and my greatest joy is sharing my kitchen experience with all of you! Remembering to come back each day for new recipe inspiration can sometimes be tough, which is why I offer a convenient newsletter delivered right to your inbox every time a new recipe posts. Simply subscribe today and start receiving your free daily recipes, ensuring you never miss out on delicious ideas!
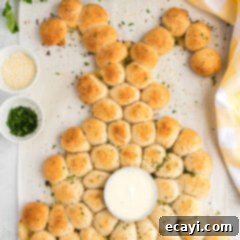
Easter Bunny Pull Apart Bread
IMPORTANT – There are often Frequently Asked Questions within the blog post that you may find helpful. Simply scroll back up to read them!
Print It
Pin It
Rate It
Save ItSaved!
Ingredients
- 18 ounces Mozzarella cheese
- 32 oz (2 cans) large biscuits we used Pillsbury Grands, 16 biscuits total
- 2 tablespoons unsalted butter
- ½ teaspoon garlic powder
- ½ teaspoon Italian seasoning
- 2 tablespoon chopped fresh parsley
- 3 tablespoons finely grated Parmesan
- 1 cup ranch dressing
Before You Begin
- If you line your baking sheet with parchment paper or a silicone baking mat, you will be able to easily lift the entire bunny bread off the baking sheet and onto a waiting platter or cutting board for a beautiful presentation.
- One cup of dipping dressing is probably plenty for most gatherings, but you can certainly put out more just in case your guests are extra enthusiastic dippers!
- A standard piece of string cheese weighs approximately 1 ounce, though this can vary slightly by brand. If using string cheese, cut a 1-ounce stick into thirds. Then, cut each of those thirds in half. We suggest cutting them in half again because one-third of a cheese stick would be too long to properly enclose in a small biscuit dough ball, making it difficult to form a neat sphere. Smaller pieces melt better and are easier to manage within the dough.
Instructions
-
Heat oven to 375°F. Line a baking sheet with parchment paper or silicone baking mat.
-
Cut cheese into small pieces (approximately 0.35 ounces each) to make 50 pieces.
-
Separate dough into 16 biscuits. Cut 13 of the 16 biscuits into fourths for a total of 52 biscuit pieces. YOU WILL NOT use all the biscuits, there will be a few left over. Roll each piece into a ball.
-
Push a piece of cheese into a dough ball, pinch the seams together and then roll into a ball again.
-
Position a ramekin on the cookie sheet where the bunny tail will go, centering it towards the bottom-middle of your desired bunny body area.
-
Place biscuit balls seam side down and next to each other to form a bunny shape around the ramekin on the cookie sheet. Refer to the photos in the blog post for guidance on shaping the head, body, and ears.
-
Melt butter in the microwave then stir in the garlic powder and Italian seasoning. Brush butter mixture generously over all the biscuit balls, ensuring an even coating.
-
Bake for 15-17 minutes or until golden brown. You can turn the oven to broil and brown the tops for a minute or so if you like, but watch very carefully to prevent burning.
-
Sprinkle the top of the “bunny” with fresh chopped parsley and finely grated Parmesan cheese immediately after removing from the oven.
-
Allow to cool slightly for a few minutes, then fill the ramekin in the center with ranch dressing or your preferred white dipping sauce to complete the bunny tail. Serve warm.
Nutrition
The recipes on this blog are tested with a conventional gas oven and gas stovetop. It’s important to note that some ovens, especially as they age, can cook and bake inconsistently. Using an inexpensive oven thermometer can assure you that your oven is truly heating to the proper temperature. If you use a toaster oven or countertop oven, please keep in mind that they may not distribute heat the same as a conventional full sized oven and you may need to adjust your cooking/baking times. In the case of recipes made with a pressure cooker, air fryer, slow cooker, or other appliance, a link to the appliances we use is listed within each respective recipe. For baking recipes where measurements are given by weight, please note that results may not be the same if cups are used instead, and we can’t guarantee success with that method.
