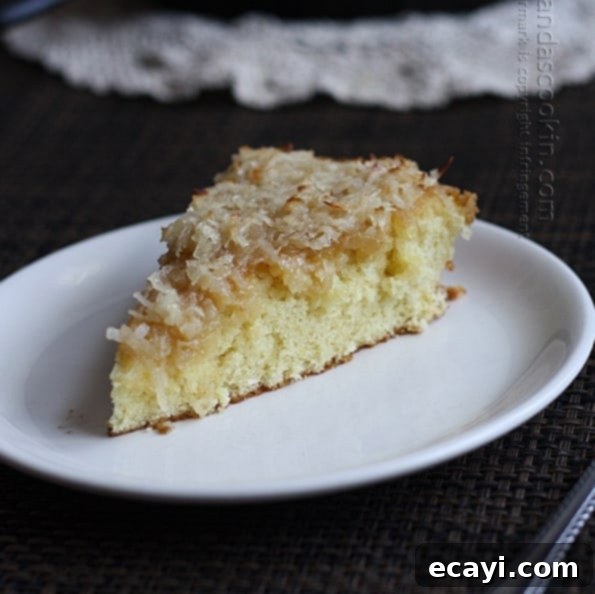
Effortlessly Delicious Lazy Daisy Cake: A Vintage Recipe with Caramelized Coconut Topping
Step into the past with a slice of pure comfort: the Lazy Daisy Cake. This delightful vintage dessert has charmed generations with its simplicity and irresistible flavor. Its name itself sparks curiosity and hints at its easy-going nature, making it a beloved choice for bakers of all skill levels. Whether you’re a seasoned chef or a novice in the kitchen, this cake promises a rewarding experience without the fuss of elaborate decorating or complex techniques. It’s the perfect treat for those moments when you crave something homemade and heartwarming, but time is of the essence.
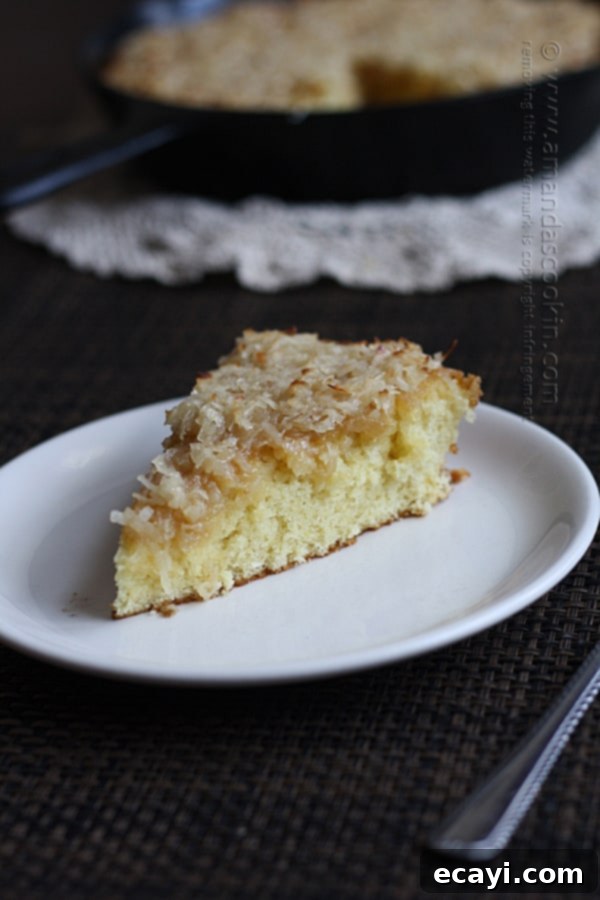
The Charming Origins of the Lazy Daisy Cake’s Name
The exact etymology of the name “Lazy Daisy Cake” remains a sweet mystery, contributing to its nostalgic allure. Some culinary historians suggest the moniker stems from the cake’s remarkable ease of preparation. It’s a single-layer cake, often baked in a simple pan, requiring no intricate frosting or complex decorations. This straightforward approach allows for a “lazy” baking day, making it an ideal dessert when you desire deliciousness without significant effort. It’s truly a no-fuss confection that lets even the busiest home cook enjoy the satisfaction of baking from scratch.
Another theory proposes that the name reflects the cake’s understated elegance. Like a wild daisy that thrives effortlessly and beautifully, this cake doesn’t need elaborate adornments to shine. Its charm lies in its wholesome ingredients and the delightful caramelized topping that speaks for itself. Originating primarily in the 1940s, a period when home baking was essential but time-saving methods were highly valued, the Lazy Daisy Cake perfectly embodies the spirit of efficiency and homely comfort. It quickly became a staple, serving as a quick, satisfying dessert that could be whipped up and served warm, reminiscent of simpler times.
Beyond its intriguing name, this cake’s enduring popularity is also due to its practical baking method. Being baked in a single pan, such as a traditional cake pan or a sturdy cast iron skillet, eliminates the need for stacking layers or preparing multiple frostings. This streamlined process not only saves time but also minimizes cleanup, further cementing its reputation as an easy-to-make, family-favorite dessert. It’s a prime example of vintage recipes that prioritize flavor and accessibility, making them relevant and cherished even today.
Essential Tips for Baking Your Perfect Lazy Daisy Cake
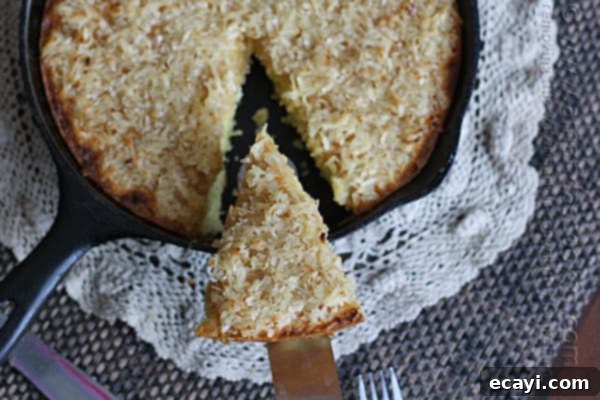
While the Lazy Daisy Cake is renowned for its simplicity, a few key considerations will ensure your baking success. This recipe traditionally calls for baking in a 9-inch round cast iron skillet, which is fantastic for even heat distribution and achieving that perfect golden crust. However, if you don’t own a cast iron skillet, a standard 9-inch round cake pan will work beautifully. The most crucial note is to avoid using a glass baking dish for this particular recipe.
The reason for this warning lies in the cake’s signature caramelized topping. After baking, the cake goes under the broiler for a brief minute or two, allowing the topping to bubble and turn a glorious golden-brown. Glass bakeware is generally not designed to withstand the intense, direct heat of a broiler and can shatter, posing a significant safety hazard. Stick to metal pans for this recipe to ensure a safe and successful caramelization process. Always ensure your oven rack is at an appropriate height (about 4-6 inches from the heat source) when broiling to prevent burning.
Preheating your oven accurately to 350°F (175°C) is also vital for an evenly baked cake. Using an oven thermometer can help verify your oven’s actual temperature, as many ovens can run hotter or cooler than their display indicates, especially older models. Once the cake batter is prepared, ensure your chosen pan is well-greased to prevent sticking, allowing for easy removal and serving of those delicious slices.
The Irresistible Caramelized Coconut Topping: A Game-Changer
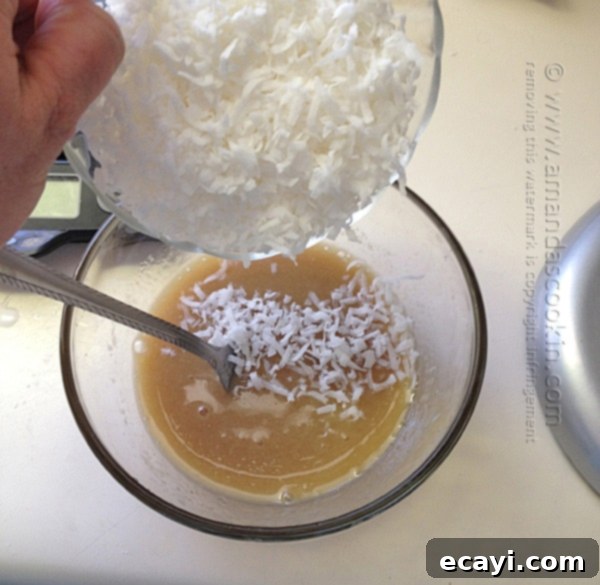
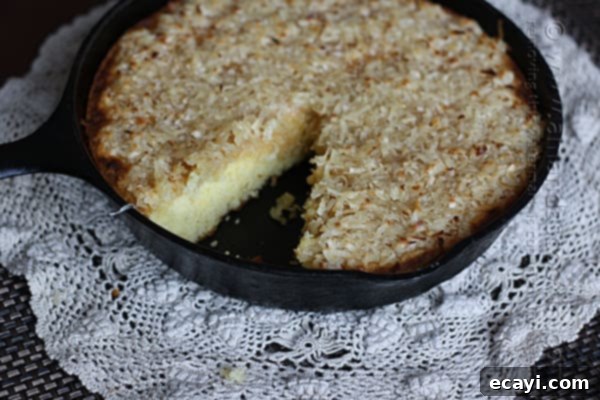
The true star of the Lazy Daisy Cake is undoubtedly its unique and utterly delicious coconut topping. This isn’t just any coconut topping; it’s a luscious blend of brown sugar, melted butter, milk, and flaked sweetened coconut that transforms under the broiler into a deeply flavorful, golden-brown caramel crust. It’s this caramelized magic that elevates the cake from a simple dessert to an unforgettable culinary experience.
What makes this topping truly special is its ability to convert even the most ardent “anti-coconut” individuals. The broiling process doesn’t just toast the coconut; it melds the sugars and fats, creating a rich, almost toffee-like flavor and a slightly chewy, crunchy texture. The intense heat of the broiler caramelizes the sugars, giving the coconut a depth and complexity that is entirely distinct from plain, untoasted coconut. This transformation results in a topping that is sweet, nutty, and wonderfully textural, perfectly complementing the soft, moist cake beneath. It’s a revelation for those who might typically shy away from coconut, offering a new, compelling reason to fall in love with this classic ingredient.
The combination of the warm, buttery cake and the sweet, caramelized coconut topping creates a symphony of textures and flavors that is both comforting and sophisticated. This perfect balance makes the Lazy Daisy Cake an ideal choice for any occasion, from a casual family dinner to a festive gathering. Serve it slightly warm to fully appreciate the gooey, delicious topping.
Serving Suggestions and Variations
While the Lazy Daisy Cake is magnificent on its own, it also pairs beautifully with a scoop of vanilla bean ice cream or a dollop of freshly whipped cream. The cool creaminess provides a wonderful contrast to the warm, caramelized topping and moist cake. For a touch of fruitiness, a side of fresh berries or a light berry compote can brighten the flavors.
Feeling adventurous? Consider a few subtle variations to personalize this vintage gem. A sprinkle of chopped toasted pecans or walnuts over the coconut topping before broiling can add an extra layer of crunch and nuttiness. A pinch of cinnamon or nutmeg in the cake batter can also introduce a warm, spicy undertone that complements the caramel and coconut wonderfully. However, the true beauty of this cake lies in its classic simplicity, so don’t feel pressured to deviate from the original perfection!
Discover More Vintage Delights
If you’ve fallen in love with the charm and ease of the Lazy Daisy Cake, you’ll be delighted to explore more culinary treasures from bygone eras. Vintage recipes offer a unique glimpse into the cooking traditions of the past, often featuring straightforward ingredients and methods that stand the test of time. These recipes evoke a sense of nostalgia and comfort, bringing classic flavors back to your modern kitchen. We celebrate these timeless dishes because they connect us to culinary heritage and prove that sometimes, the old ways are truly the best ways. Just do a search on this blog for the word “vintage,” or explore a few of our hand-picked favorites below to continue your journey through culinary history.
- 1963 Homemade White Bread
- Ambrosia Salad
- Wacky Cake
- Oven Swiss Steak
Lazy Daisy Cake
IMPORTANT – There are often Frequently Asked Questions within the blog post that you may find helpful. Simply scroll back up to read them!
Print It
Pin It
Rate It
Save ItSaved!
Ingredients
Cake:
- 2 large eggs
- 1 cup sugar
- 1 teaspoon vanilla extract
- 1 cup all-purpose flour
- 1 teaspoon baking powder
- ¼ teaspoon salt
- 1 cup whole milk
- 2 tablespoons unsalted butter cubed
Topping:
- ¼ cup packed brown sugar
- 3 tablespoons unsalted butter melted
- 3 tablespoons whole milk
- 3 ounces 3/4 cup flaked sweetened coconut
Before You Begin
Instructions
-
Preheat oven to 350 F.
-
In a large bowl, beat the eggs, sugar and vanilla until thick and pale yellow, about 4 minutes.
-
Combine the flour, baking powder and salt; add to egg mixture and beat just until combined.
-
In a saucepan, bring milk and butter to a boil, stirring constantly. Add to batter and beat until combined. Pour into a greased 9-inch cast iron skillet.
-
Bake for 30-35 minutes or until a toothpick inserted near the center comes out clean. Remove cake from oven and turn the temperature up to broil.
-
Combine topping ingredients and spread over warm cake. Broil 4 inches from heat until lightly browned, about 3-4 minutes.
Nutrition
The recipes on this blog are tested with a conventional gas oven and gas stovetop. It’s important to note that some ovens, especially as they age, can cook and bake inconsistently. Using an inexpensive oven thermometer can assure you that your oven is truly heating to the proper temperature. If you use a toaster oven or countertop oven, please keep in mind that they may not distribute heat the same as a conventional full sized oven and you may need to adjust your cooking/baking times. In the case of recipes made with a pressure cooker, air fryer, slow cooker, or other appliance, a link to the appliances we use is listed within each respective recipe. For baking recipes where measurements are given by weight, please note that results may not be the same if cups are used instead, and we can’t guarantee success with that method.
I originally created this delightful vintage recipe for Recipe Lion. This recreation brings its timeless charm to your kitchen.
