White Chocolate Candy Cane Crescents: Your Ultimate Festive Holiday Treat

The holiday season ushers in a magical time, filled with warmth, cheer, and, of course, delicious baked goods. There’s something truly special about the aroma of sweet treats wafting from the kitchen, inviting everyone to gather and celebrate. Among the many festive delights, crescent rolls hold a particular charm. Their flaky, buttery texture provides a versatile canvas for countless sweet and savory creations. If you’ve ever experienced the joy of biting into traditional chocolate crescents, those delightful pastries generously filled with melty chocolate chips and baked to golden perfection, then you already know just how utterly irresistible they are. That classic combination of flaky dough and rich chocolate is a comfort food staple for many.
Building on that beloved concept, I envisioned a festive twist that would be just as fabulous, if not more so, for the holiday season. My thoughts immediately turned to the creamy, sweet indulgence of white chocolate. I knew it would pair beautifully with the delicate crescent rolls, but it needed something extra to truly elevate it to a holiday masterpiece. And that’s when it hit me: candy canes! The vibrant red and white swirls, coupled with their refreshing peppermint flavor, were the absolute perfect solution to add that unmistakable holiday magic and a delightful crunch.

The Inspiration Behind This Holiday Creation
The idea for these particular crescents blossomed when the wonderful team at Pillsbury reached out, challenging me to conjure up a unique holiday recipe using their beloved crescent rolls. Pillsbury crescent rolls are a pantry staple for busy bakers, offering unparalleled convenience without sacrificing that homemade taste. Their ready-to-use dough makes whipping up a special treat quick and effortless, which is a huge advantage during the often-hectic holiday period. As I pondered ideas, my mind instantly gravitated towards those chocolate-filled crescents that have been a sensation across the Internet, a testament to their simple charm and universal appeal. I knew I wanted to create something equally popular, but with a distinctive festive flair.

Literally mere seconds after considering the classic chocolate crescent, my culinary imagination took flight. My brain was already in overdrive, combining the sweet, creamy notes of white chocolate with the cool, invigorating crunch of candy canes. The concept sparked an immediate feeling of certainty; I just knew, without a shadow of a doubt, that these two flavors together in a flaky crescent roll would be an absolute taste sensation. The combination of sweet and minty, rich and refreshing, seemed destined for holiday success.

And I was absolutely right! The moment these White Chocolate Candy Cane Crescents emerged from the oven, filling the kitchen with an enchanting aroma, I knew I had a winner. The ultimate validation came from my toughest critic, my fourteen-year-old son, who, after taking a bite, exclaimed, “These are amazing!” That’s a ringing endorsement any baker would cherish, confirming that this festive creation was a definite hit with the younger generation too, ensuring it would be a crowd-pleaser for all ages.

The Magic of White Chocolate and Peppermint
One of the unique aspects of working with white chocolate chips, as opposed to their darker counterparts, is how they behave during baking. Unlike milk or dark chocolate, which tend to melt into a smooth, liquid consistency, white chocolate chips soften beautifully while largely retaining their shape. Initially, this might cause a moment of concern, as you might worry they haven’t melted enough to be soft and gooey inside. I confess, I had that fleeting worry myself. However, I was pleasantly mistaken! Upon biting into these crescents, you’ll discover that despite holding their shape, the white chocolate chips are wonderfully soft and incredibly good, offering a creamy texture that perfectly complements the flaky dough and crunchy peppermint. This unique softening provides delightful pockets of sweet, vanilla-flavored indulgence within each crescent.

The addition of candy canes brings not just a burst of refreshing peppermint flavor but also a delightful textural contrast. The crushed candy cane pieces offer a satisfying crunch that plays wonderfully against the soft crescent and creamy white chocolate. The vibrant red and white specks also add an immediate festive visual appeal, making these crescents not only delicious but also incredibly charming on any holiday table. This combination creates a truly balanced and exciting flavor profile that screams “holiday!”
Given the enthusiastic reception and their undeniable deliciousness, I can confidently say that these White Chocolate Candy Cane Crescents will be a recurring feature in my kitchen throughout the entire holiday season. They’re perfect for Christmas morning breakfast, a festive brunch, a delightful dessert, or even a thoughtful homemade gift for friends and neighbors.
Preparing Your Festive Crescents: A Step-by-Step Guide
The preparation for these delightful pastries is straightforward, making them an ideal project for even novice bakers, or a fun activity to share with family. The secret to integrating the candy cane flavor and texture effectively lies in preparing the peppermint correctly.
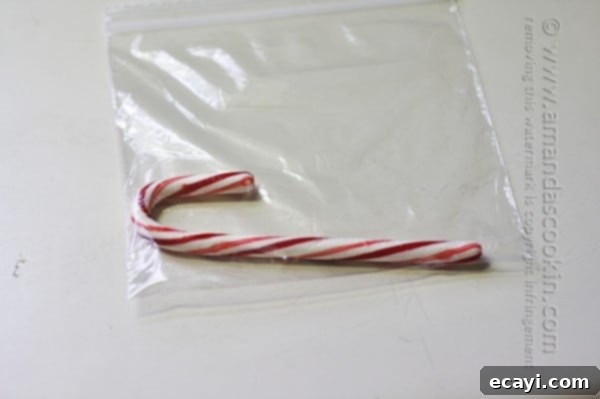
You will need two standard-sized candy canes for this recipe, and the key is to crush them with two different consistencies. This dual approach ensures you get both a deep peppermint flavor infused into the crescents and a beautiful, crunchy topping.
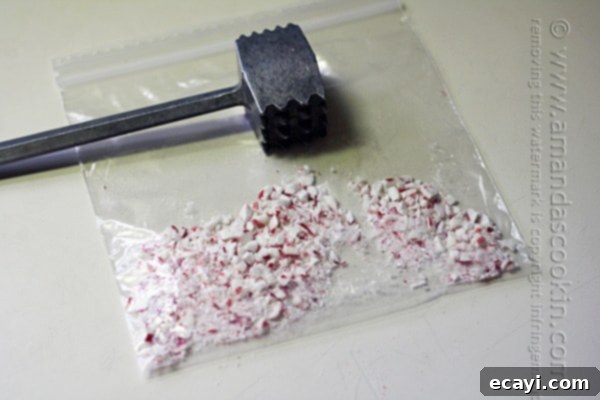
For the first candy cane, you’ll crush it into smaller, visible pieces. Think of these as your festive sprinkles. Place one candy cane inside a sturdy zipper-top plastic bag and, using the flat side of a meat mallet or a rolling pin, gently but firmly pound it until you have small, distinct peppermint pieces. These larger pieces are reserved for the final garnish, providing that delightful crunch and vibrant color. Make sure the pieces aren’t too large to be uncomfortable to eat, but not so fine that they disappear.
The second candy cane needs to be crushed more thoroughly, ideally to a fine powder or “dust.” This fine powder will be incorporated directly into the filling, ensuring that every bite of the crescent roll is infused with a subtle yet distinct peppermint flavor. For this, place the second candy cane in a separate zipper-top bag and pound it vigorously until it’s completely pulverized, resembling a fine powder. This consistency ensures it melts slightly and blends seamlessly with the white chocolate chips.
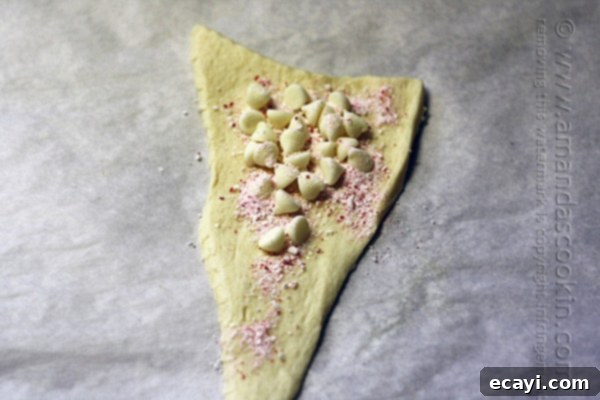
Once your candy canes are prepared, assembling the crescents is quick and easy. Simply unroll your Pillsbury crescent dough, separating it into the individual triangles. On the wider end of each dough triangle, place a tablespoon of white chocolate chips. Then, take a small pinch of your finely crushed candy cane powder and sprinkle it generously over the white chocolate chips and along the dough. This ensures the peppermint flavor is distributed throughout the crescent. Carefully roll up each triangle from the wide end towards the narrow tip, forming the classic crescent shape. Place them on a parchment-lined baking sheet, allowing a little space between each, and bake until they are beautifully golden brown and the kitchen smells like a winter wonderland.

As the crescents bake, prepare your simple yet elegant glaze. Sift powdered sugar into a bowl and gradually add milk, starting with just one teaspoon. Whisk until smooth, adding additional drops of milk sparingly until you achieve a thick, drizzling consistency. This glaze adds a lovely touch of sweetness and helps the coarser candy cane pieces adhere. Once the crescents are out of the oven and slightly cooled on a rack, drizzle them with the prepared glaze. Immediately, while the glaze is still wet, sprinkle them generously with the larger, crushed candy cane pieces. Work in small batches of 2-3 crescents at a time to ensure the glaze doesn’t set before you can add the festive topping. Serve them warm for the best experience, and prepare for rave reviews!
You might also enjoy exploring other delightful crescent roll recipes for more holiday baking inspiration, such as these cranberry and apple pocket pies, which offer a fruity autumn twist, or perhaps a beautiful and impressive crescent Danish wreath, perfect for a special breakfast or brunch gathering.
Frequently Asked Questions About White Chocolate Candy Cane Crescents
Q1: Can I use store-brand crescent rolls instead of Pillsbury?
Absolutely! While Pillsbury is a popular choice and widely available, most store-brand crescent rolls will work just as well for this recipe. Just be sure to check the baking instructions on the package, as times might vary slightly.
Q2: Can I use dark chocolate chips instead of white chocolate?
Yes, you can! If you prefer dark chocolate, feel free to substitute it for white chocolate chips. The flavor profile will change, offering a more intense cocoa taste paired with the peppermint. You could even try a mix of dark and white chocolate for a beautiful marbled effect!
Q3: How do I store leftover White Chocolate Candy Cane Crescents?
These crescents are best enjoyed fresh and warm. However, if you have leftovers, store them in an airtight container at room temperature for up to 2-3 days. You can gently reheat them in a microwave for 10-15 seconds or in a toaster oven for a few minutes to restore some of their warmth and flakiness.
Q4: My candy canes are too sticky to crush. What can I do?
Humidity can make candy canes sticky. If this happens, try placing them in the freezer for about 15-20 minutes before crushing. This will make them more brittle and easier to break into pieces or powder.
Q5: Can I prepare these crescents ahead of time?
You can assemble the crescents (filling them with chocolate and candy cane powder) and store them unbaked in the refrigerator for up to an hour before baking. However, for the best flaky texture, it’s recommended to bake them fresh. The glaze and topping should always be applied immediately after baking and cooling slightly.

White Chocolate Candy Cane Crescents
IMPORTANT – There are often Frequently Asked Questions within the blog post that you may find helpful. Simply scroll back up to read them!
Print It
Pin It
Rate It
Save ItSaved!
Ingredients
- 1 can crescent rolls
- 2 candy canes
- ⅔ cup white chocolate chips
Topping
- ¼ cup powdered sugar
- 1-2 teaspoons milk divided
Instructions
-
Preheat oven to 350 F. Line an insulated baking sheet with parchment paper.
-
Place 1 candy cane inside a zipper plastic sandwich bag and pound with the flat side of a meat mallet to create peppermint pieces. Place into a small bowl and set aside.
-
Place the other candy cane inside a zipper plastic sandwich bag and pound with and meat mallet until candy is completely crushed and turns to “dust”. Pour into a separate bowl and set aside.
-
Place a crescent dough triangle onto the baking sheet. Place one tablespoon of white chocolate chips at the wide end. Sprinkle the chocolate chips and all down the dough with 1/2 teaspoon of the candy cane dust. Roll up crescent roll style. Repeat for all crescents and bake for 14-16 minutes or until golden brown.
-
While the crescents are baking, mix the glaze by sifting the powdered sugar and adding ONE teaspoon of the milk. Continue adding drops of milk until a thick drizzling consistency is achieved.
-
Remove from oven and carefully transfer hot crescents to a cooling rack.
-
Use a spoon to lightly spread glaze on 2-3 crescents. Immediately sprinkle with candy cane pieces. Repeat in batches of 2-3 at a time so that glaze doesn’t begin to harden before you can add the candy.
-
Serve warm!
The recipes on this blog are tested with a conventional gas oven and gas stovetop. It’s important to note that some ovens, especially as they age, can cook and bake inconsistently. Using an inexpensive oven thermometer can assure you that your oven is truly heating to the proper temperature. If you use a toaster oven or countertop oven, please keep in mind that they may not distribute heat the same as a conventional full sized oven and you may need to adjust your cooking/baking times. In the case of recipes made with a pressure cooker, air fryer, slow cooker, or other appliance, a link to the appliances we use is listed within each respective recipe. For baking recipes where measurements are given by weight, please note that results may not be the same if cups are used instead, and we can’t guarantee success with that method.
