Irresistibly Rich Millionaire’s Bars: A Step-by-Step Guide to the Ultimate Three-Layer Dessert
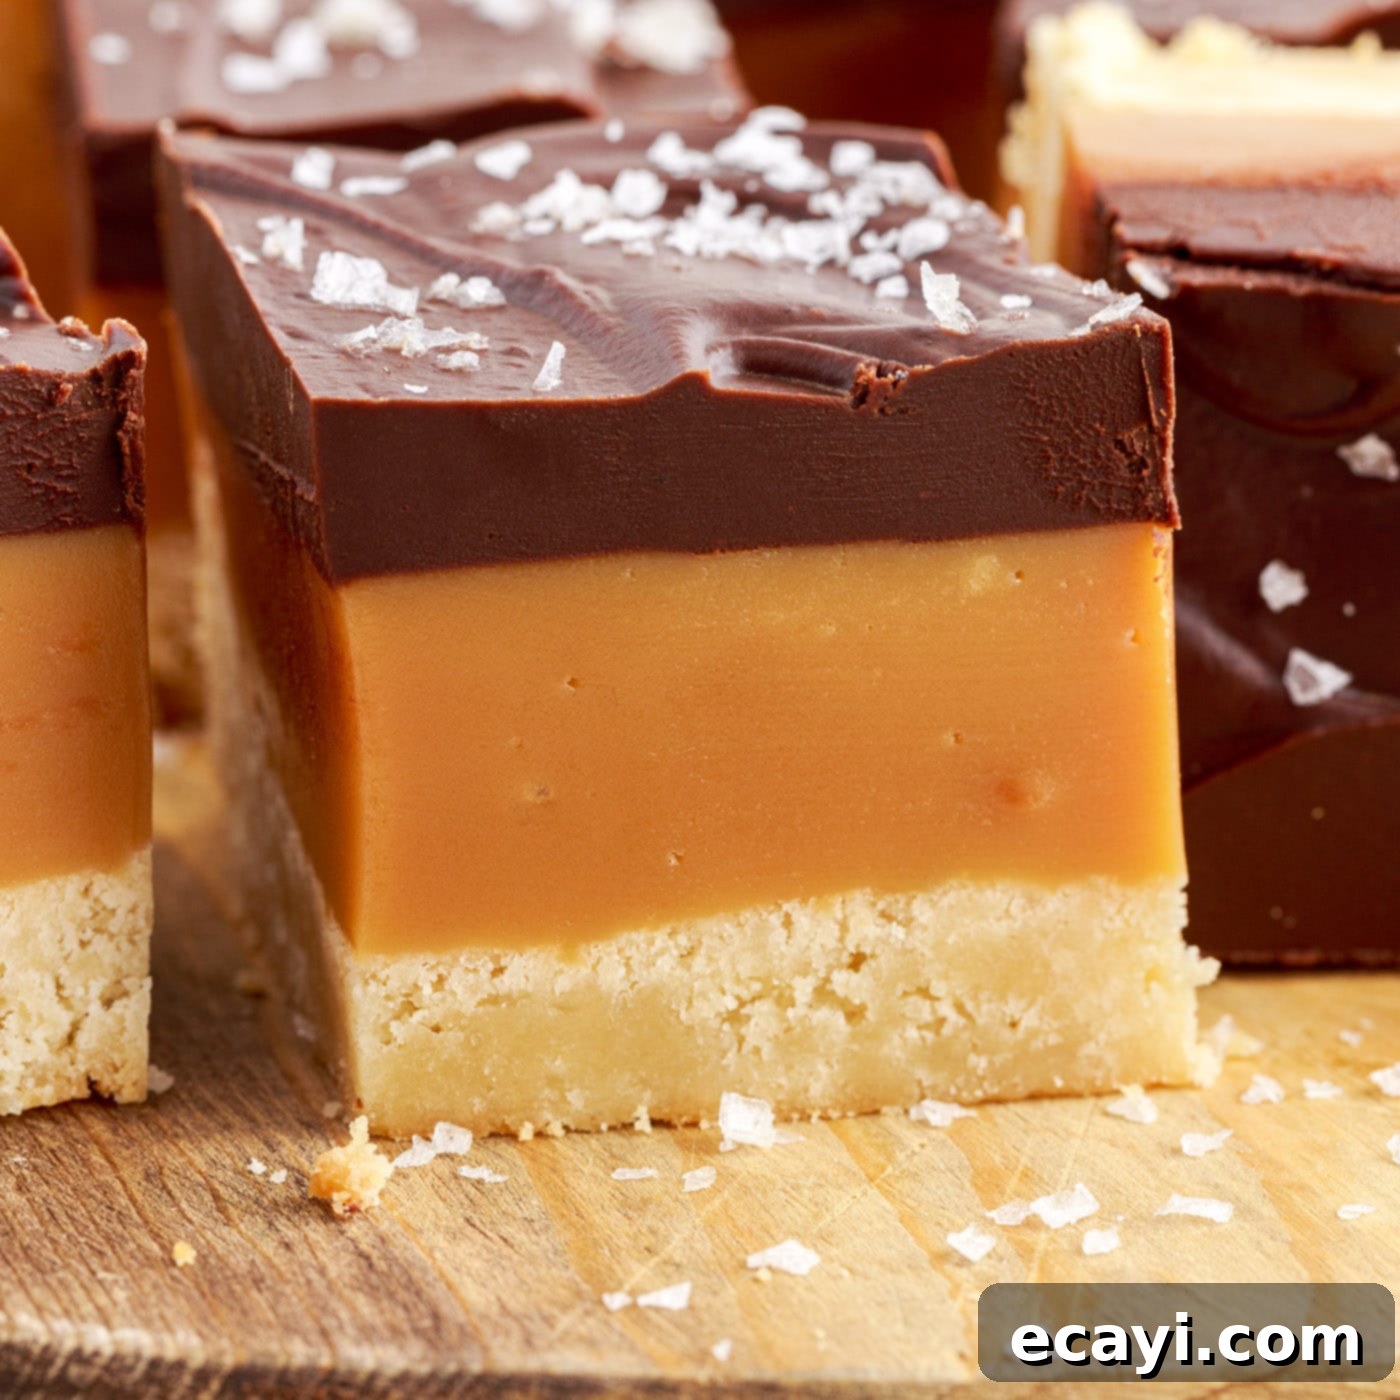
Indulge in a truly luxurious homemade treat with these exquisite Millionaire’s Bars. Also affectionately known as Millionaire’s Shortbread, these decadent bars are a symphony of textures and flavors, combining a rich, buttery shortbread crust, a luscious, chewy caramel filling, and a smooth, silky chocolate ganache topping. Each bite offers an unparalleled experience, blending the comforting crispness of the base with the sweet, gooey embrace of caramel and the bittersweet finish of chocolate. Perfect for sharing at gatherings or savoring as a personal indulgence, these bars live up to their name, tasting like a million bucks without requiring a millionaire’s effort.
Why This Millionaire’s Bar Recipe Works So Well
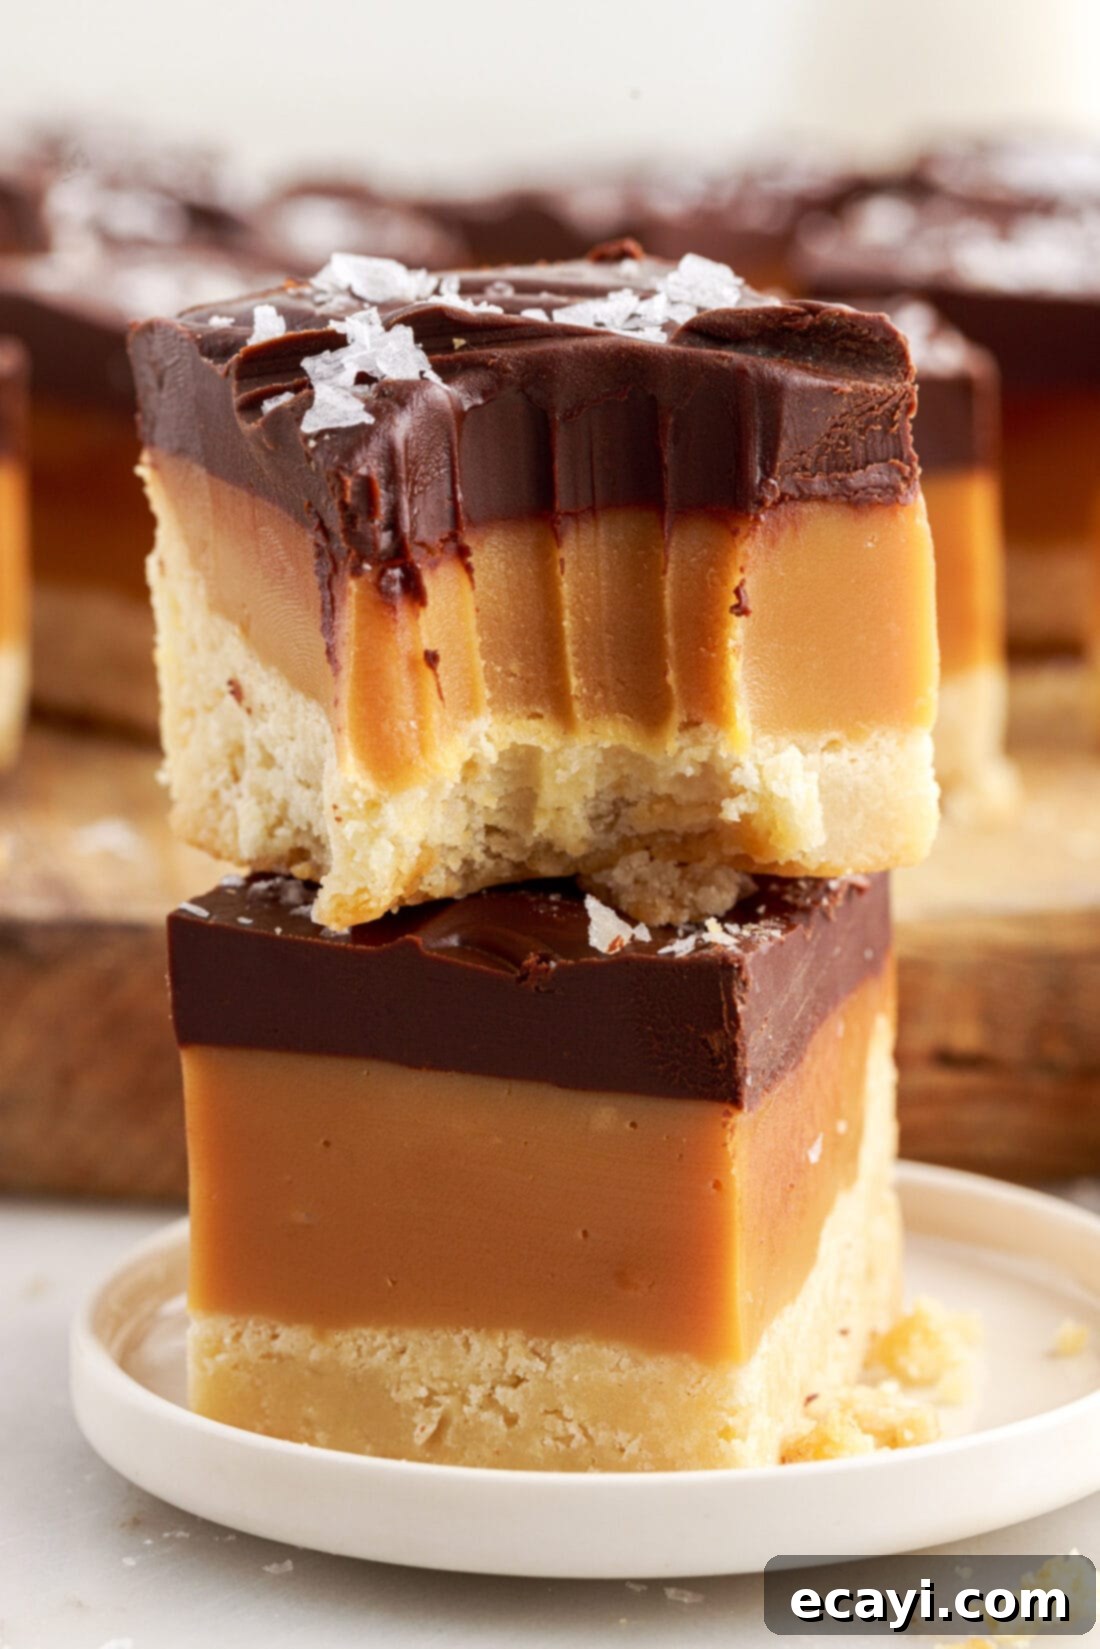
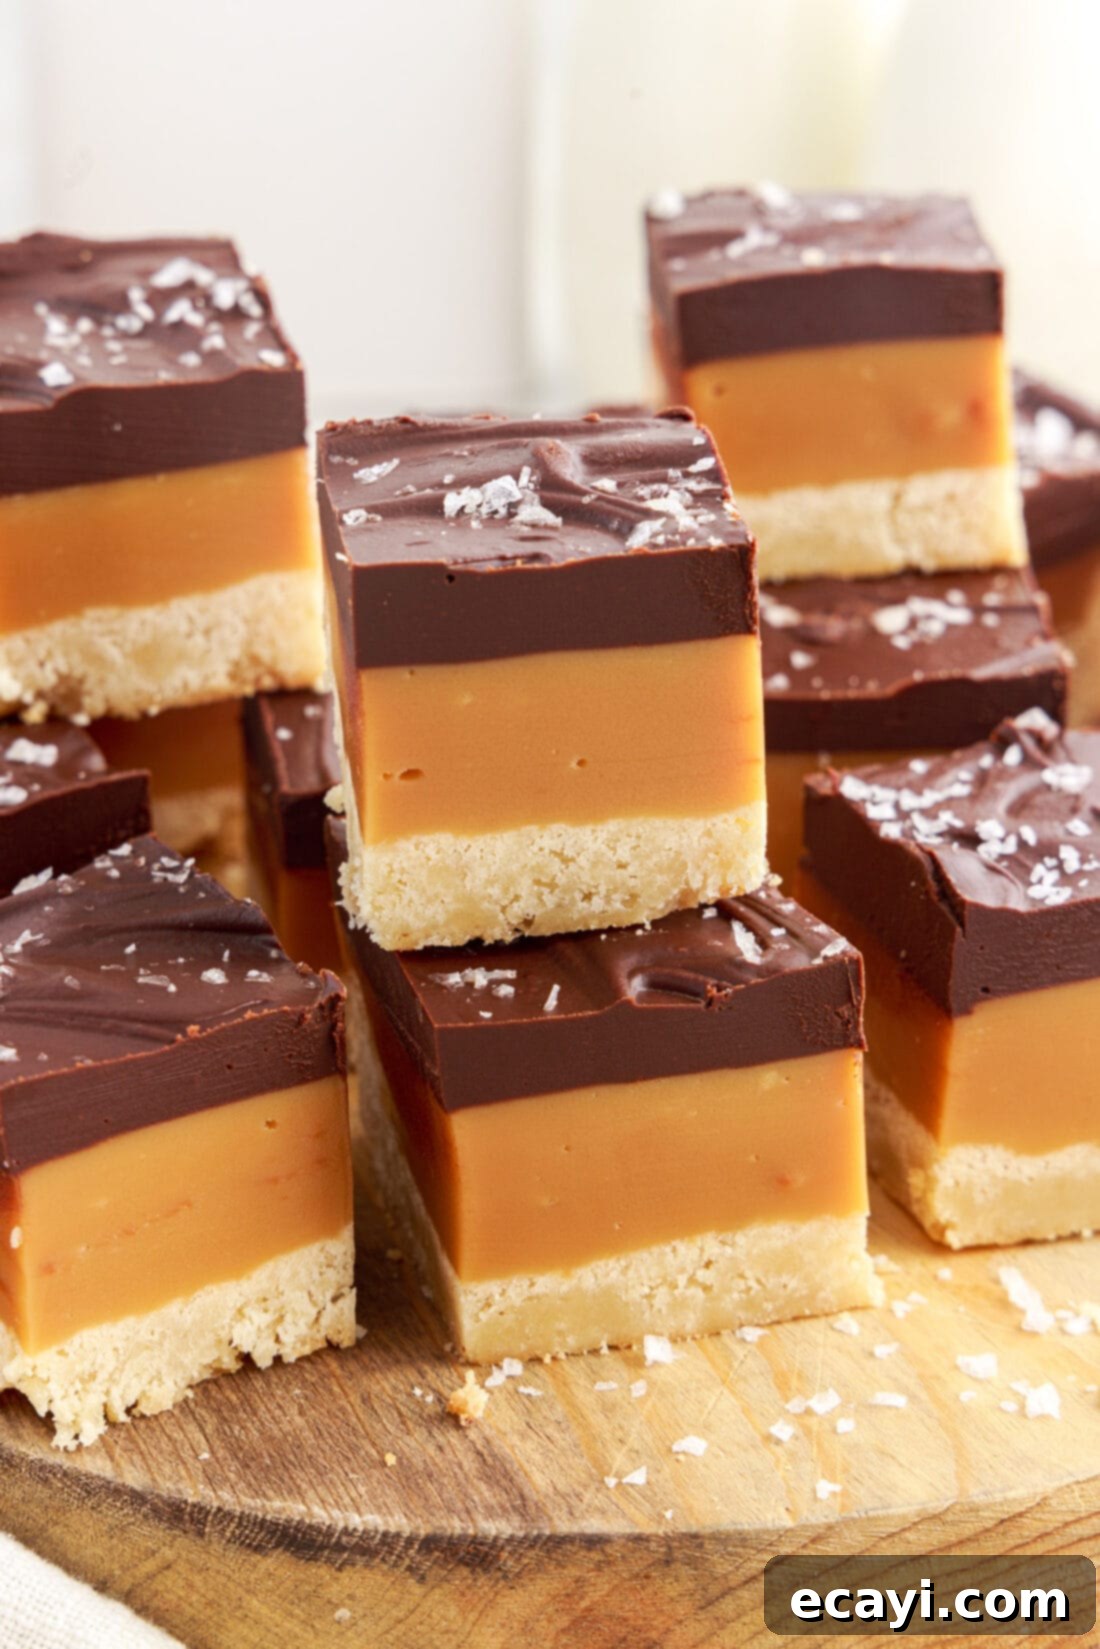
This Millionaire’s Shortbread recipe isn’t just another dessert; it’s an elevated experience, often described as a sophisticated, thick Twix candy bar. What makes our recipe truly exceptional lies in the careful balance and execution of its three distinct layers, each contributing uniquely to the final masterpiece. The secret to its success is rooted in a few key elements that ensure a perfect outcome every time:
- The Perfect Shortbread Crust: Unlike traditional shortbread, our recipe incorporates both granulated and brown sugar, and creams the butter and sugars together. This method yields a crust that is buttery and flaky, yet slightly chewier and softer than a standard crisp shortbread. This softer texture makes the bars incredibly easy to slice cleanly and bite into without crumbling, providing a sturdy yet tender foundation for the rich layers to come.
- Velvety Homemade Caramel: The heart of these bars is a thick, gooey, and intensely flavorful homemade caramel. We guide you through the process of making caramel from scratch, ensuring a chewy texture that holds its shape beautifully while melting in your mouth. The addition of sweetened condensed milk and corn syrup helps achieve that signature smooth, unctuous consistency, preventing crystallization and creating a truly irresistible middle layer.
- Rich Chocolate Ganache Topping: A generous layer of smooth, glossy chocolate ganache caps off these bars. Made with semi-sweet chocolate chips and heavy cream, this ganache provides a decadent contrast to the sweetness of the caramel and the buttery shortbread. It sets beautifully, creating a satisfying snap when bitten, and its slight bitterness perfectly balances the overall sweetness of the dessert.
These Millionaire’s Bars truly taste like a million bucks and are consistently the first to disappear from any dessert table. Prepare to share them only if you dare, because their deliciousness makes them incredibly hard to resist!
Key Ingredients You Will Need for Millionaire’s Bars
Crafting the perfect Millionaire’s Bar requires a selection of high-quality ingredients for each of its three delightful layers. While all specific measurements and detailed instructions are available in the printable recipe card at the very end of this post, let’s take a moment to highlight the crucial components and why they matter. Gathering your ingredients before you begin will ensure a smooth and enjoyable baking process.
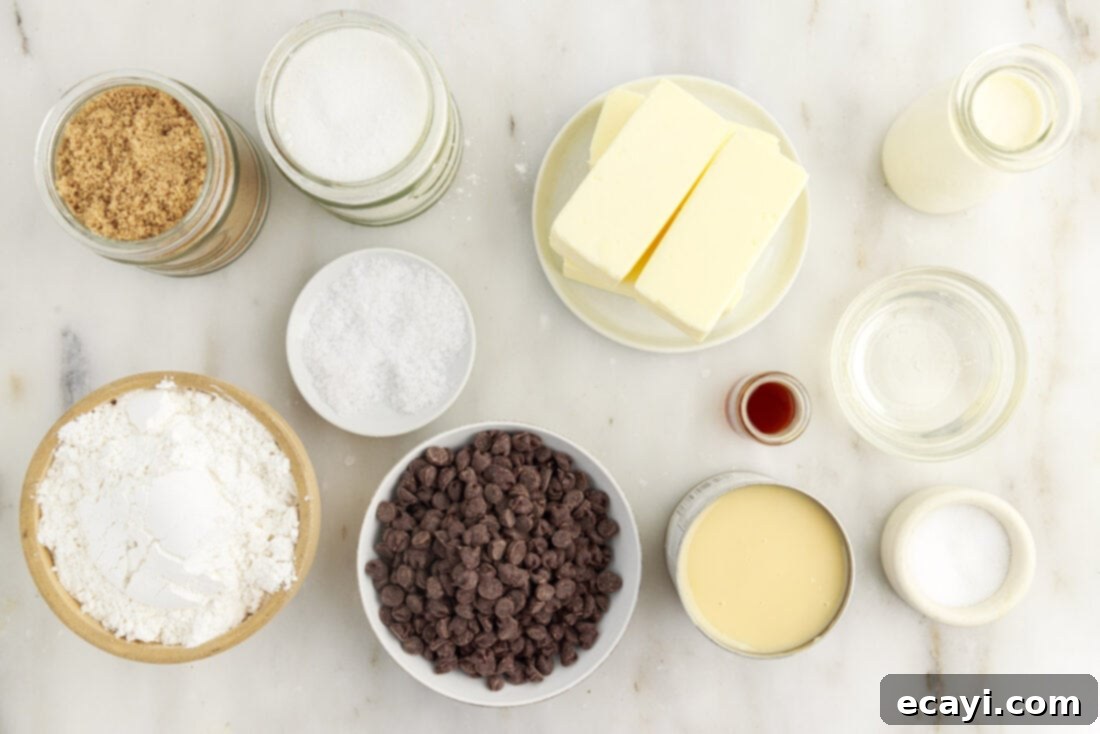
Ingredient Information and Expert Substitution Suggestions
Understanding the role of each ingredient can elevate your baking and help you troubleshoot or make informed substitutions. Here’s a deeper dive into the key components of our Millionaire’s Bars:
The Shortbread Crust
The foundation of our Millionaire’s Bar is a truly unique shortbread. While traditional shortbread typically calls for just flour, butter, and sugar, resulting in a very crisp, crumbly texture, our recipe takes a slightly different approach for a superior bar. We cream the butter and sugars together, incorporating both granulated and light brown sugar. This small change makes a big difference:
- Butter: Use unsalted butter, softened to room temperature. This allows it to cream properly with the sugars, creating a smooth base. While salted butter can be used, you might want to reduce the added salt in the recipe by half a teaspoon to prevent it from becoming too salty. Butter is crucial for the rich, melt-in-your-mouth flavor and tender texture.
- Sugars: The combination of granulated sugar and light brown sugar is key. Granulated sugar provides crispness, while brown sugar adds moisture, a subtle molasses flavor, and contributes to a chewier, less crumbly texture. This makes our shortbread buttery, flaky, and delicious, but importantly, it’s softer and easier to cut neatly into bars and bite into without falling apart, which is ideal for a layered dessert.
- Cake Flour: We specifically call for cake flour. Cake flour has a lower protein content than all-purpose flour, which results in a more tender, delicate crumb. This is essential for achieving the shortbread’s desired soft, yet firm texture. If you don’t have cake flour, you can create a substitute: for every cup of cake flour needed, measure 1 cup of all-purpose flour, remove 2 tablespoons, and replace it with 2 tablespoons of cornstarch. Sift this mixture together well before using.
- Vanilla Extract & Salt: These are flavor enhancers. Good quality vanilla extract adds warmth and depth, while salt balances the sweetness and brings out the buttery notes.
The Chewy Caramel Layer
The caramel layer is where the indulgence truly begins, and making it from scratch ensures the best flavor and texture.
- Unsalted Butter: As with the shortbread, unsalted butter is preferred for controlling the overall saltiness.
- Light Brown Sugar: This is essential for the caramel’s deep flavor and rich color. Packed brown sugar will give you the most accurate measurement.
- Sweetened Condensed Milk: This ingredient is a game-changer for homemade caramel, providing a creamy richness and helping to achieve that perfect chewy, gooey consistency without much fuss. Ensure you use sweetened condensed milk, not evaporated milk.
- Light Corn Syrup: Corn syrup acts as an anti-crystallization agent, preventing the sugar in the caramel from forming grainy crystals. It also contributes to the caramel’s smooth and chewy texture. Don’t skip it!
- Vanilla Extract & Salt: Again, these enhance the caramel’s flavor, adding complexity and balancing the sweetness.
The Silky Chocolate Ganache Topping
The final touch is a glossy, rich chocolate ganache that perfectly complements the caramel and shortbread.
- Semi-Sweet Chocolate Chips: These are a classic choice for ganache, offering a balanced chocolate flavor that isn’t overly sweet or bitter. You can use chocolate bars (chopped) of similar quality for a smoother melt. Dark chocolate (70% cocoa or higher) can also be used for a more intense chocolate flavor, while milk chocolate will yield a sweeter, creamier ganache. Adjust the heavy cream amount slightly if using different chocolate types, as darker chocolate absorbs more liquid.
- Heavy Whipping Cream: The high fat content of heavy cream (at least 36% milk fat) is essential for creating a stable, smooth, and rich ganache. Lighter creams will not yield the same luxurious texture.
- Flakey Sea Salt (for garnish): A sprinkle of flakey sea salt on top of the ganache is optional but highly recommended. It provides a delightful textural contrast and an exquisite pop of savory flavor that cuts through the sweetness, enhancing the overall taste profile of the Millionaire’s Bars.
How to Make Millionaire’s Bars: A Detailed Step-by-Step Guide
These step-by-step photos and instructions are here to help you visualize how to make this recipe. You can Jump to Recipe to get the printable version of this recipe, complete with measurements and instructions at the bottom.
- Preheat your oven to 350°F (175°C). Prepare an 8×8-inch or 9×9-inch baking dish by lining it with parchment paper. Allow the parchment paper to extend slightly over the sides of the pan; these “overhangs” will act as handles, making it incredibly easy to lift the entire batch of cooled bars out of the pan later. Set the prepared pan aside.
EXPERT TIP – Using an 8×8-inch or 9×9-inch pan will result in generously thick bars, giving you that truly luxurious, multi-layered experience. If you prefer thinner bars, you can use a 9×13-inch pan, but be aware that the shortbread bake time will be slightly shorter. The finished bars will be less thick, but still absolutely delicious. Adjust baking time accordingly.
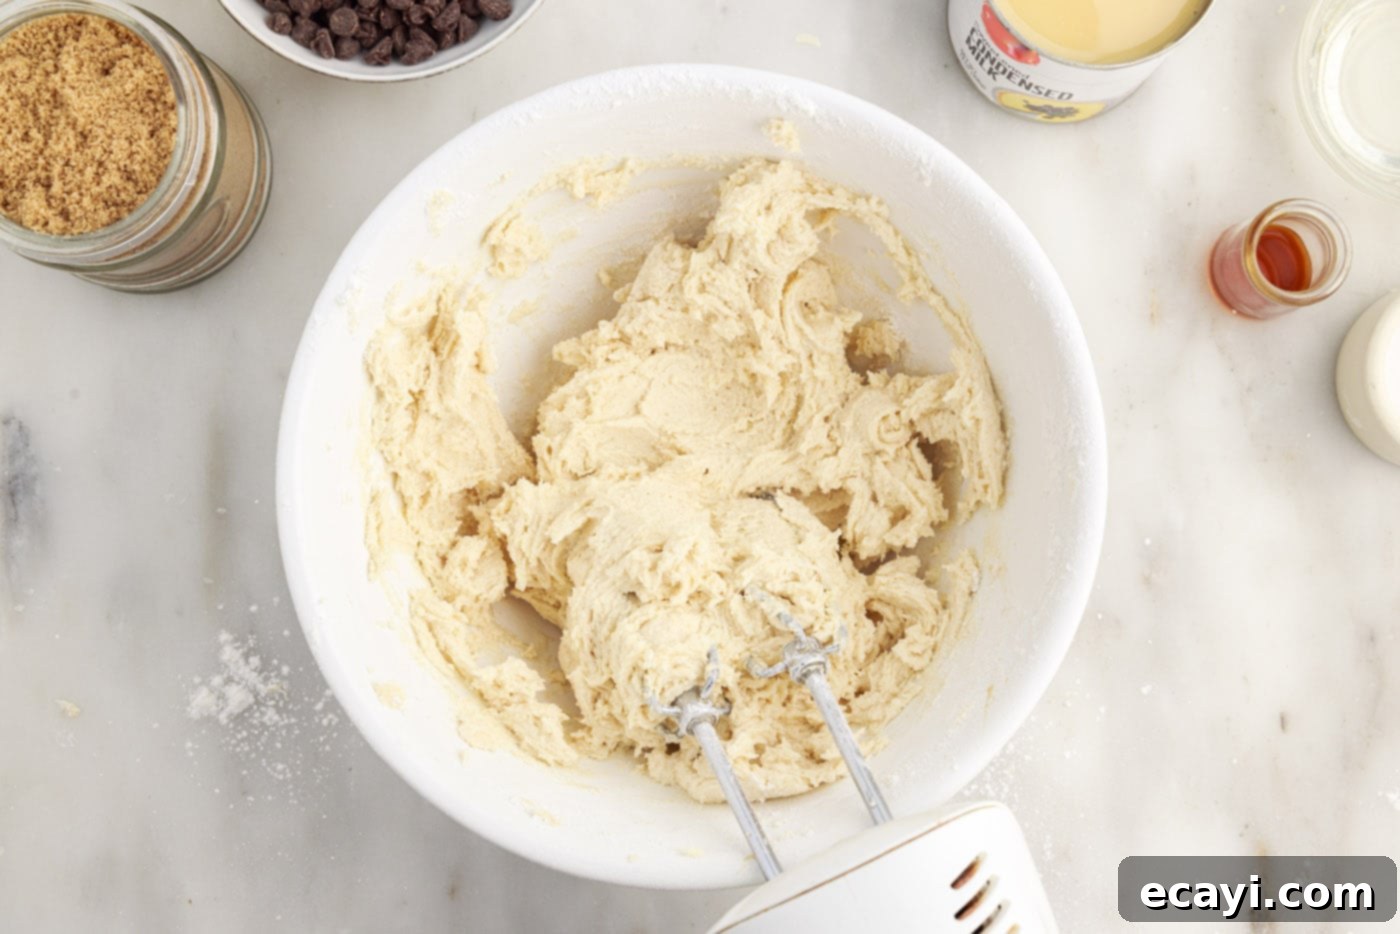
- In a large mixing bowl, using a hand mixer or stand mixer, beat the softened unsalted butter until it is light and fluffy. This process incorporates air into the butter, contributing to the shortbread’s tender texture.
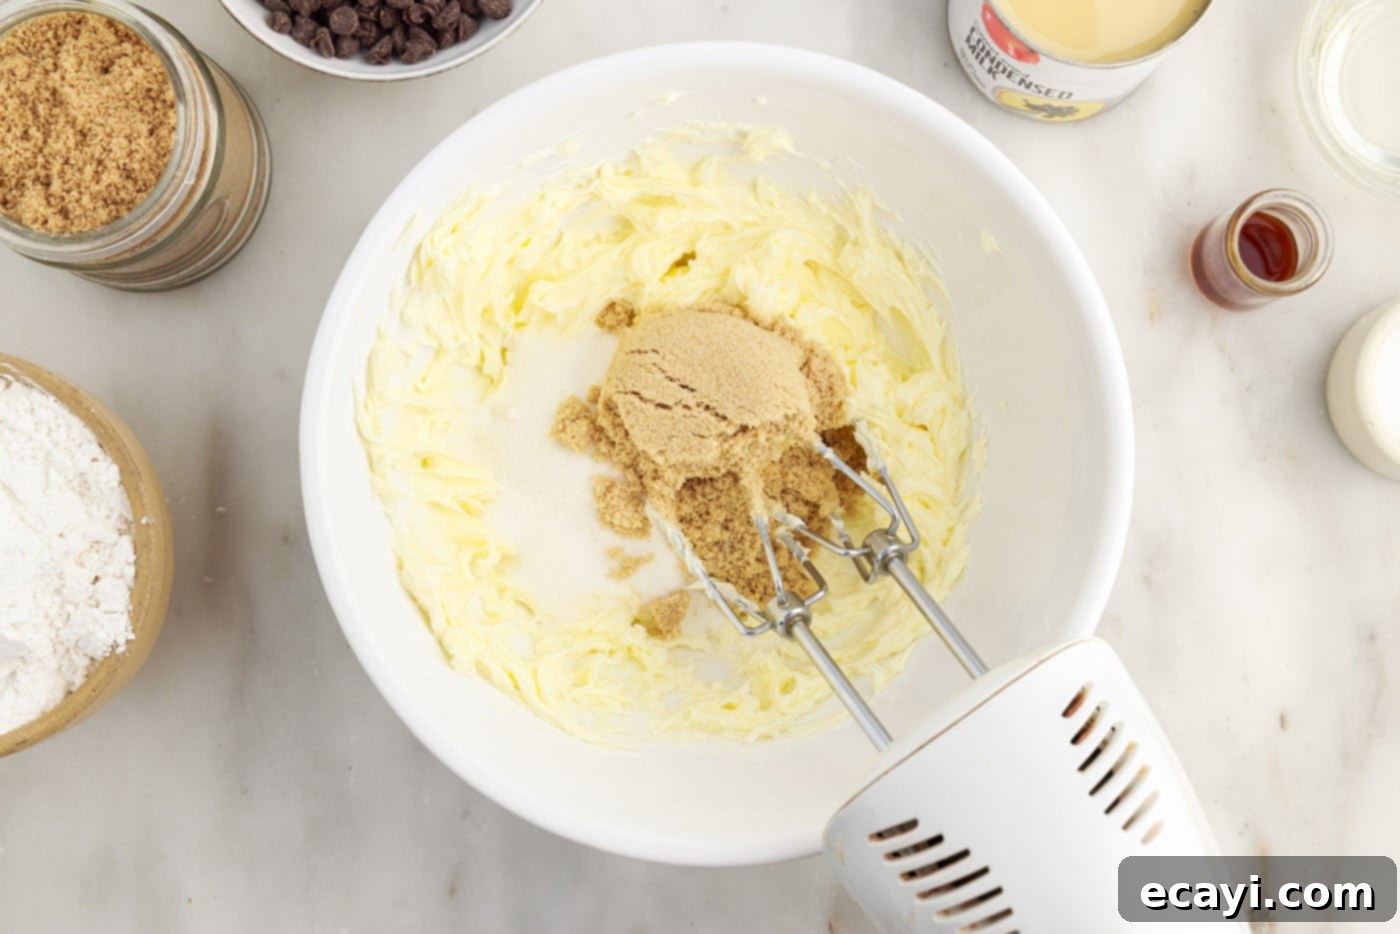
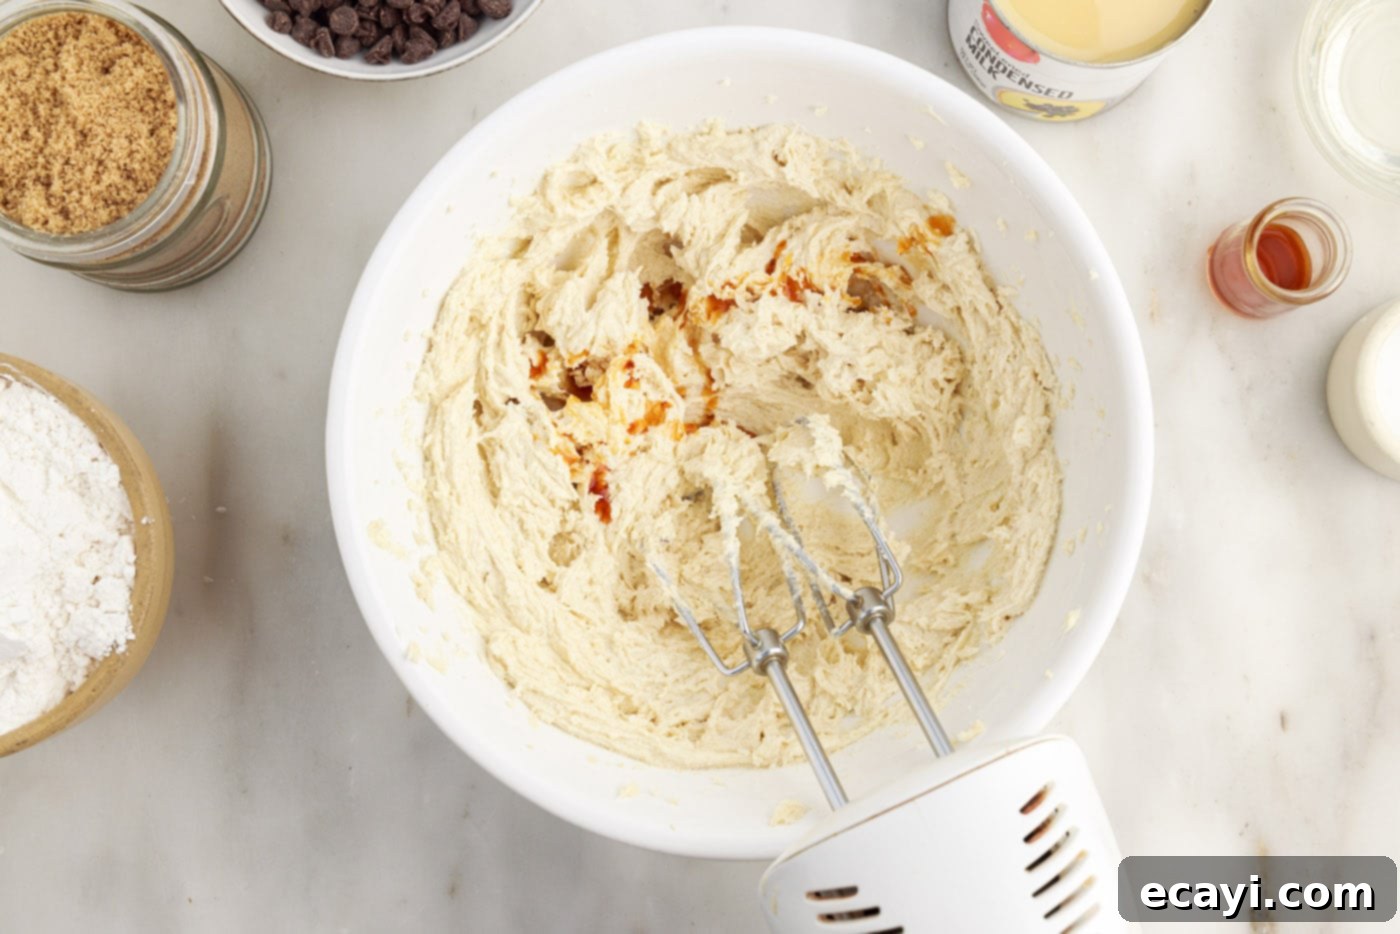
- Add both the granulated sugar and the packed light brown sugar to the fluffy butter. Continue to beat until the sugars and butter are well creamed together, creating a pale and homogenous mixture. Beat in the vanilla extract until just combined, ensuring its flavor is evenly distributed.


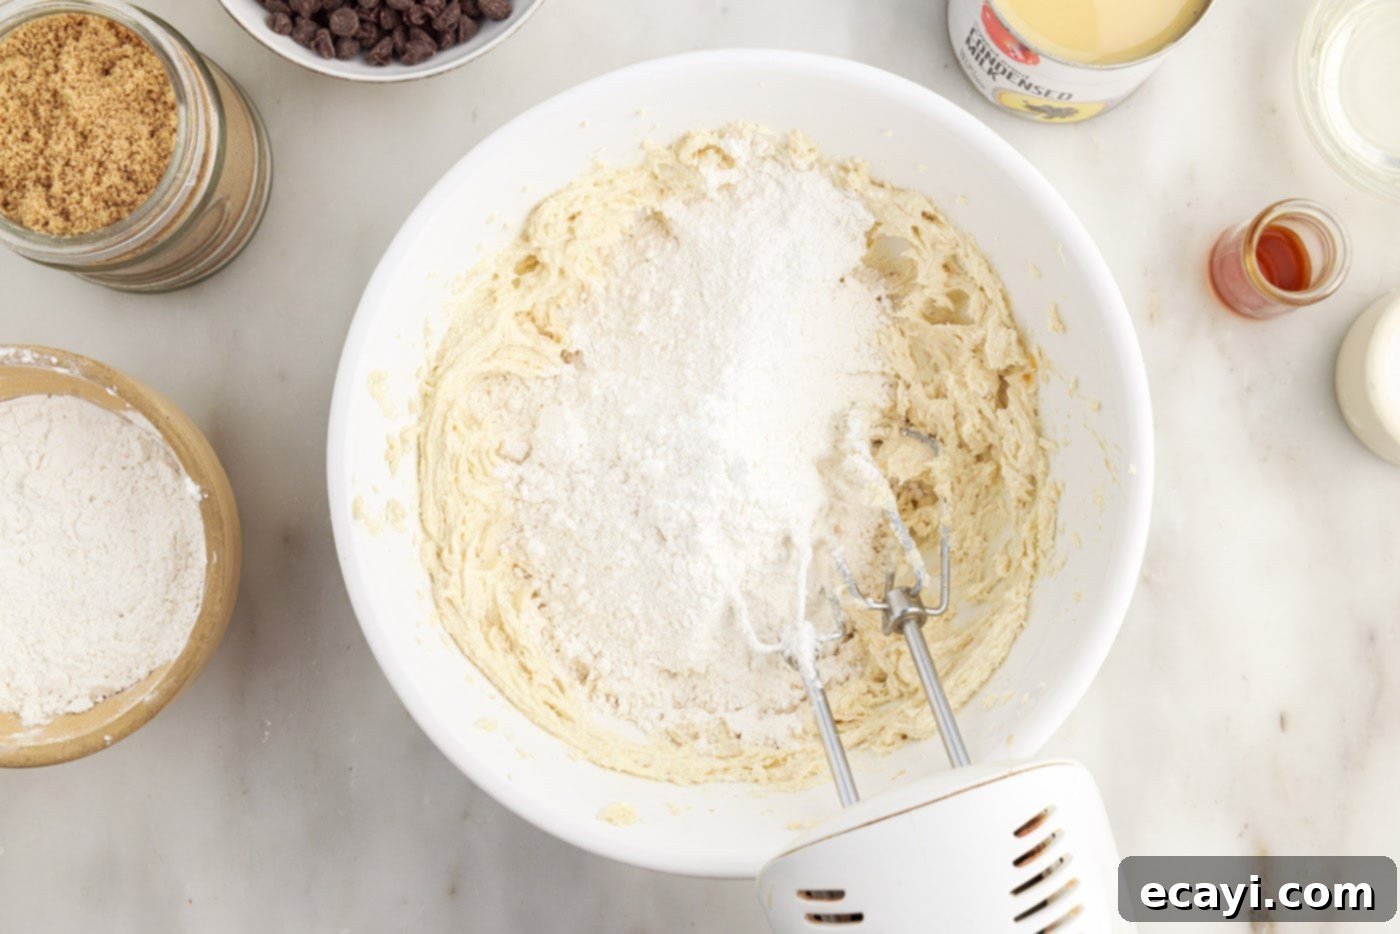
- Add the cake flour and salt to the wet ingredients. Mix on low speed, just until the dry ingredients are combined and no streaks of flour remain. Be careful not to overmix, as this can develop the gluten in the flour and result in a tough shortbread.


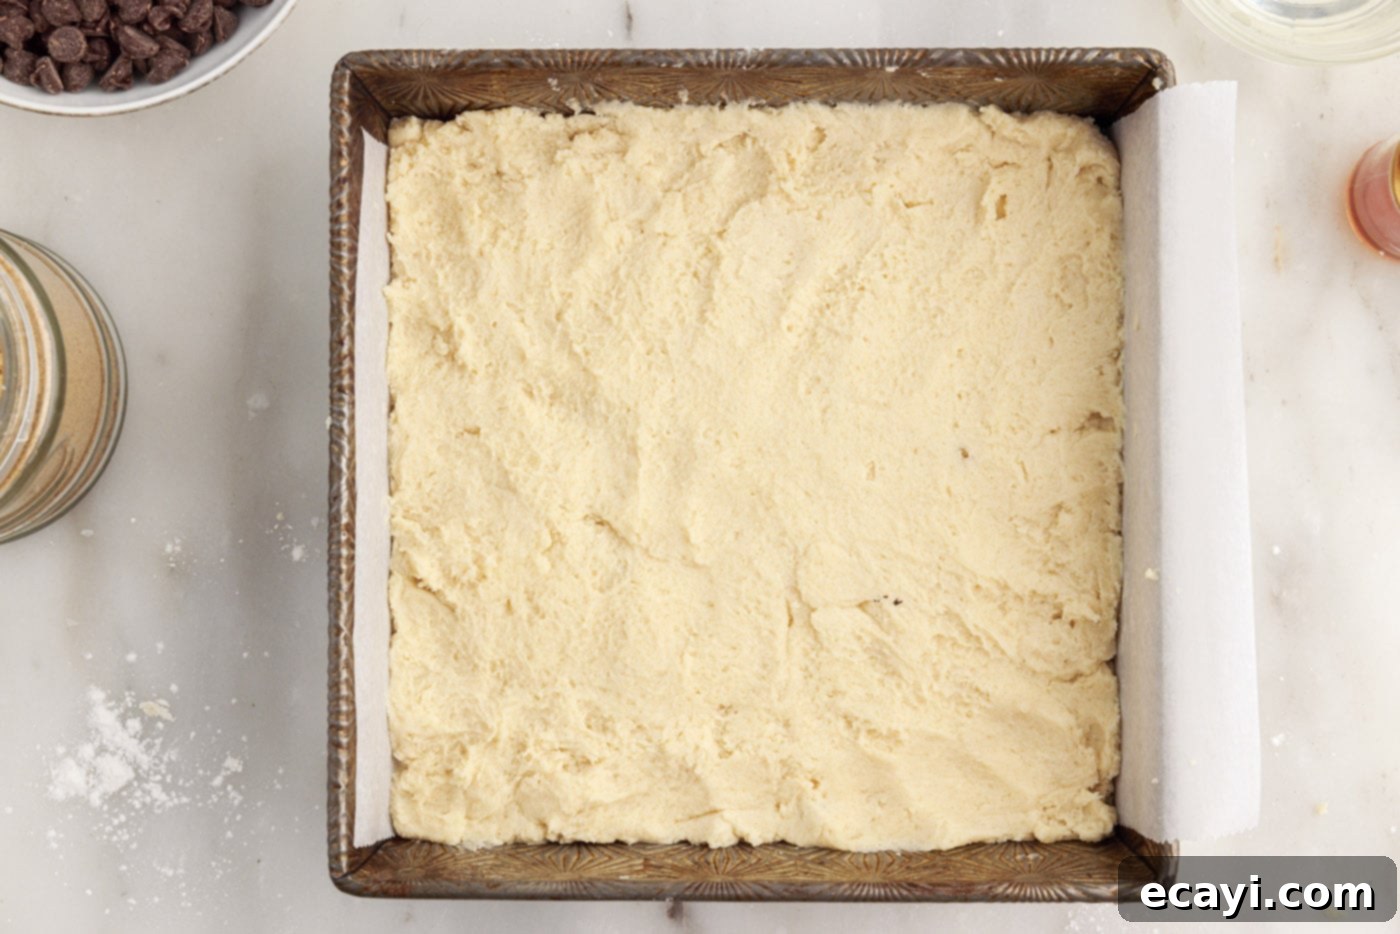
- Use a greased spatula or your clean fingers to firmly press the shortbread mixture evenly into the bottom of the prepared baking dish. Ensure it reaches all corners and forms a compact, uniform layer.

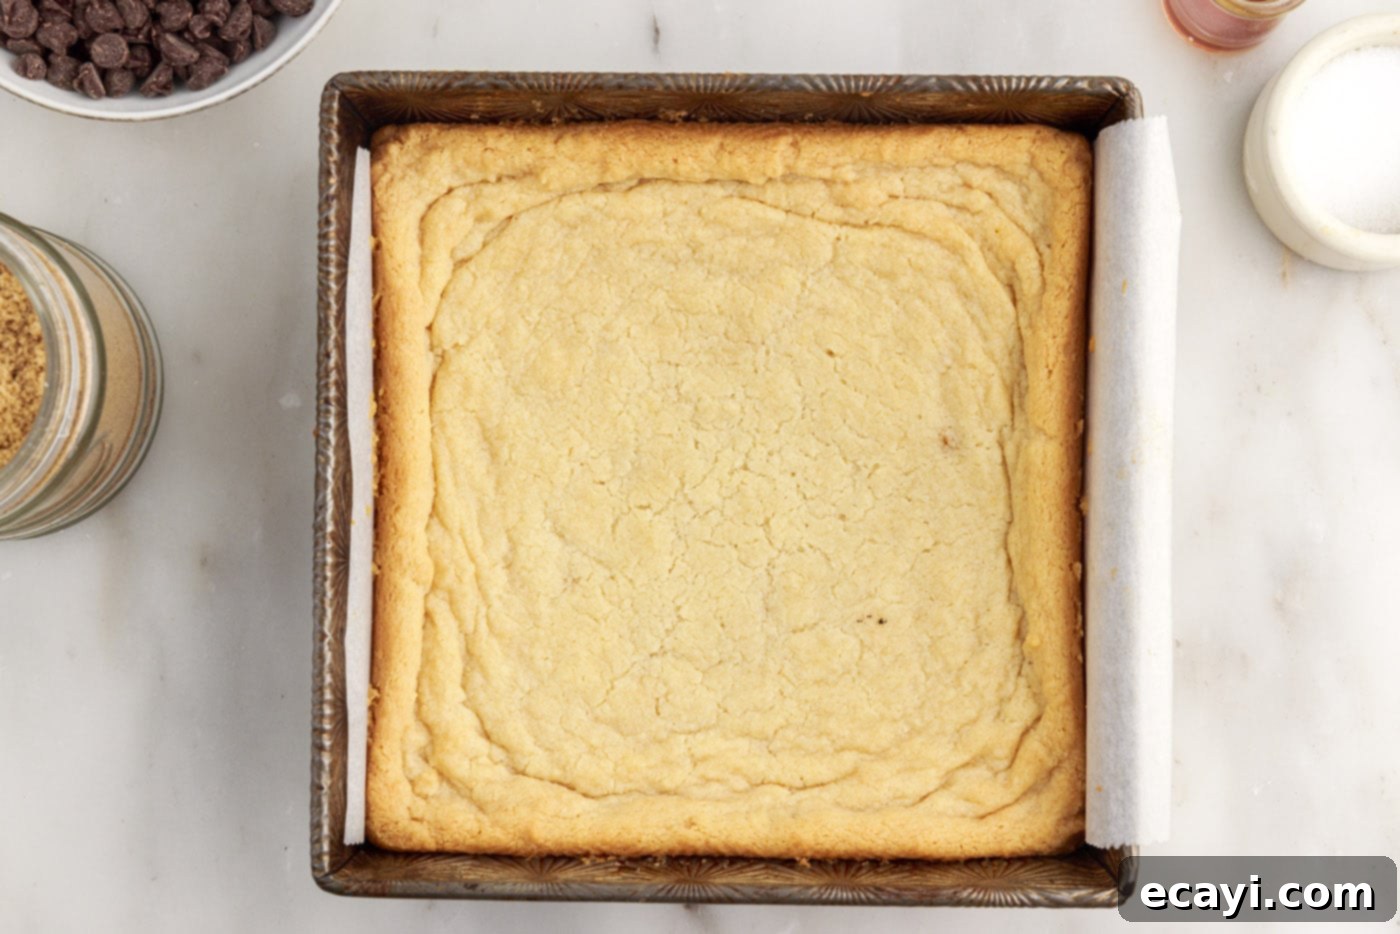
- Bake the shortbread crust for 30-35 minutes, or until the edges are beautifully golden brown and the center appears set. Once baked, remove from the oven and allow it to cool completely in the pan on a wire rack. Cooling is crucial before adding the caramel.

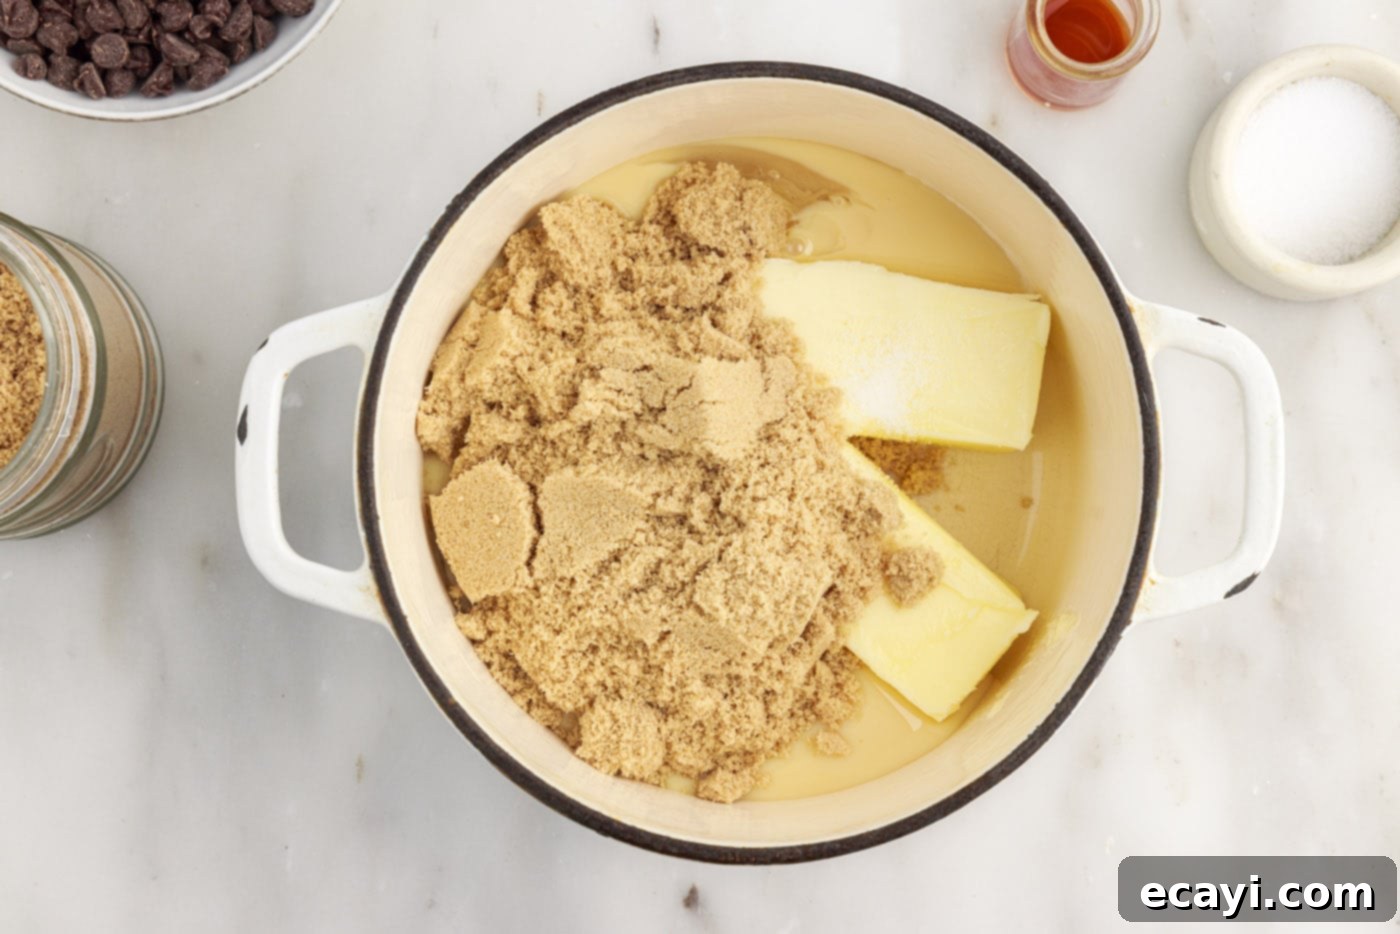
- While the shortbread is cooling, begin preparing the caramel. Combine all the caramel ingredients (unsalted butter, light brown sugar, sweetened condensed milk, light corn syrup, vanilla extract, and salt) in a medium to large heavy-bottomed saucepan over medium heat.

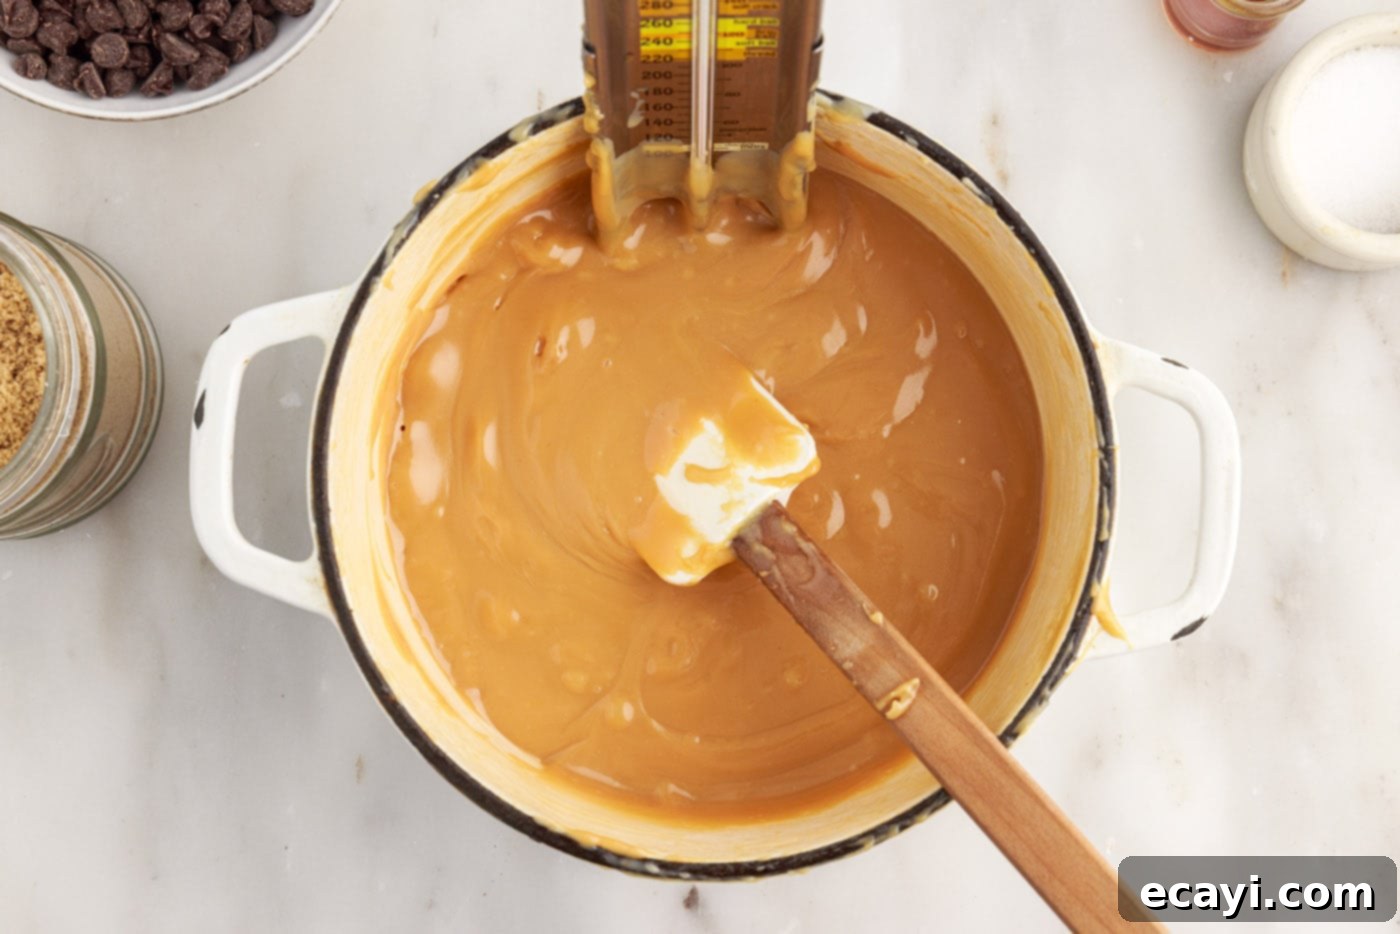
- Whisk the caramel mixture constantly as it heats. Continue whisking until all ingredients are fully melted and the mixture comes to a gentle boil. It is vital not to increase the temperature beyond medium heat; patience is key to prevent scorching the caramel. Continue to stir throughout the entire cooking process to ensure even heating and prevent sticking.
- Attach a candy thermometer to the side of the saucepan, ensuring the tip does not touch the bottom. Continue whisking and cooking the caramel until it reaches the soft ball stage, which is 225°F (107°C) on the candy thermometer. This process can take a considerable amount of time, typically 20-30 minutes, so be prepared to stir continuously.

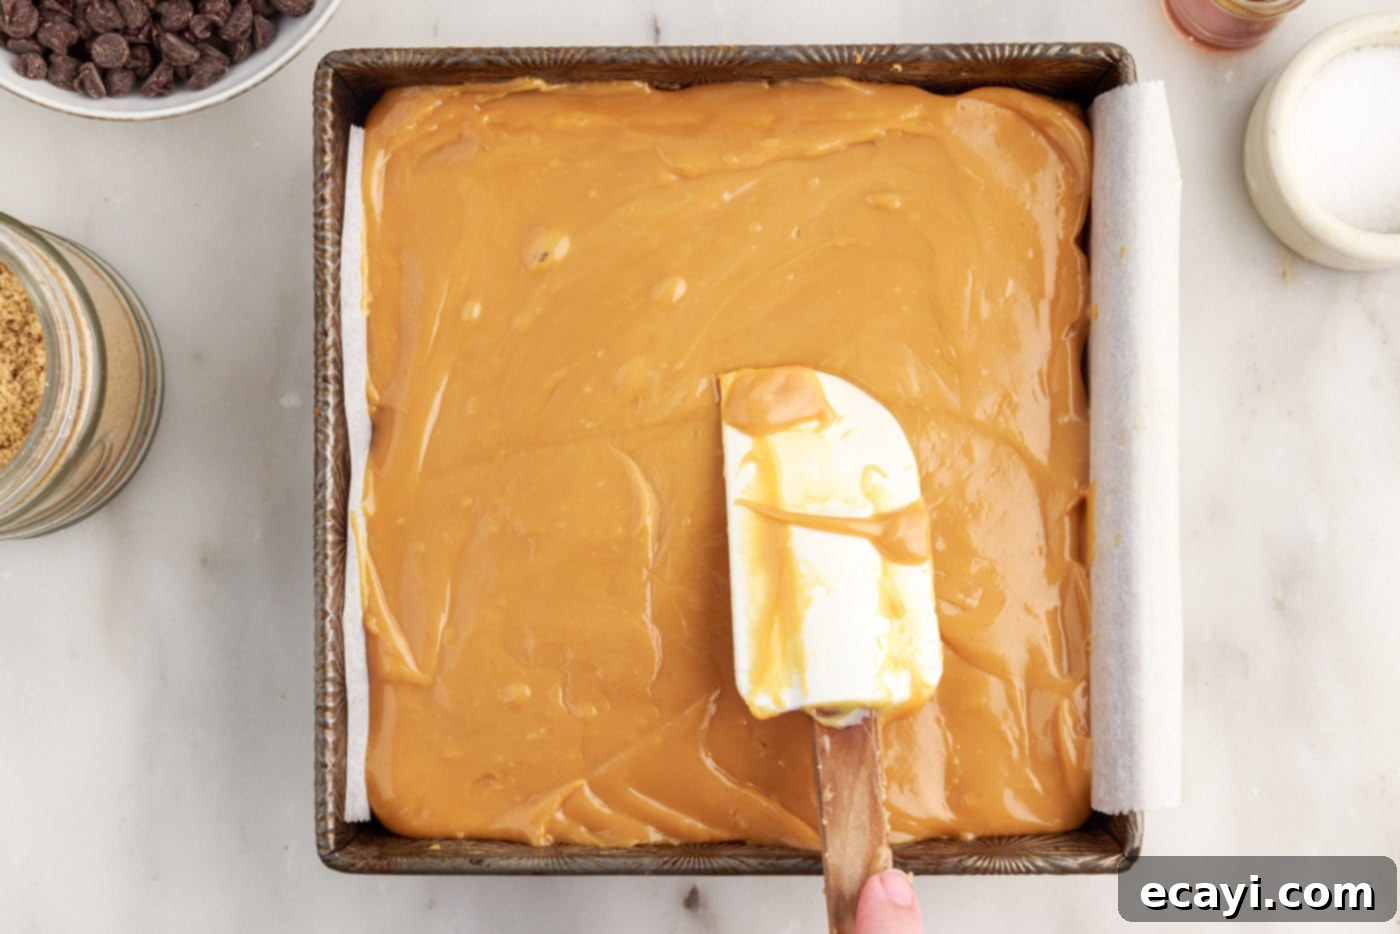
- Once the caramel reaches 225°F, immediately remove the saucepan from the heat. Carefully pour the hot caramel evenly over the cooled shortbread crust, using a rubber spatula to spread it smoothly to the edges of the pan.

- Chill the caramel layer in the refrigerator for at least 30 minutes. This chilling period is crucial as it allows the caramel to firm up sufficiently so that it won’t displace or mix with the chocolate ganache when the final layer is added.
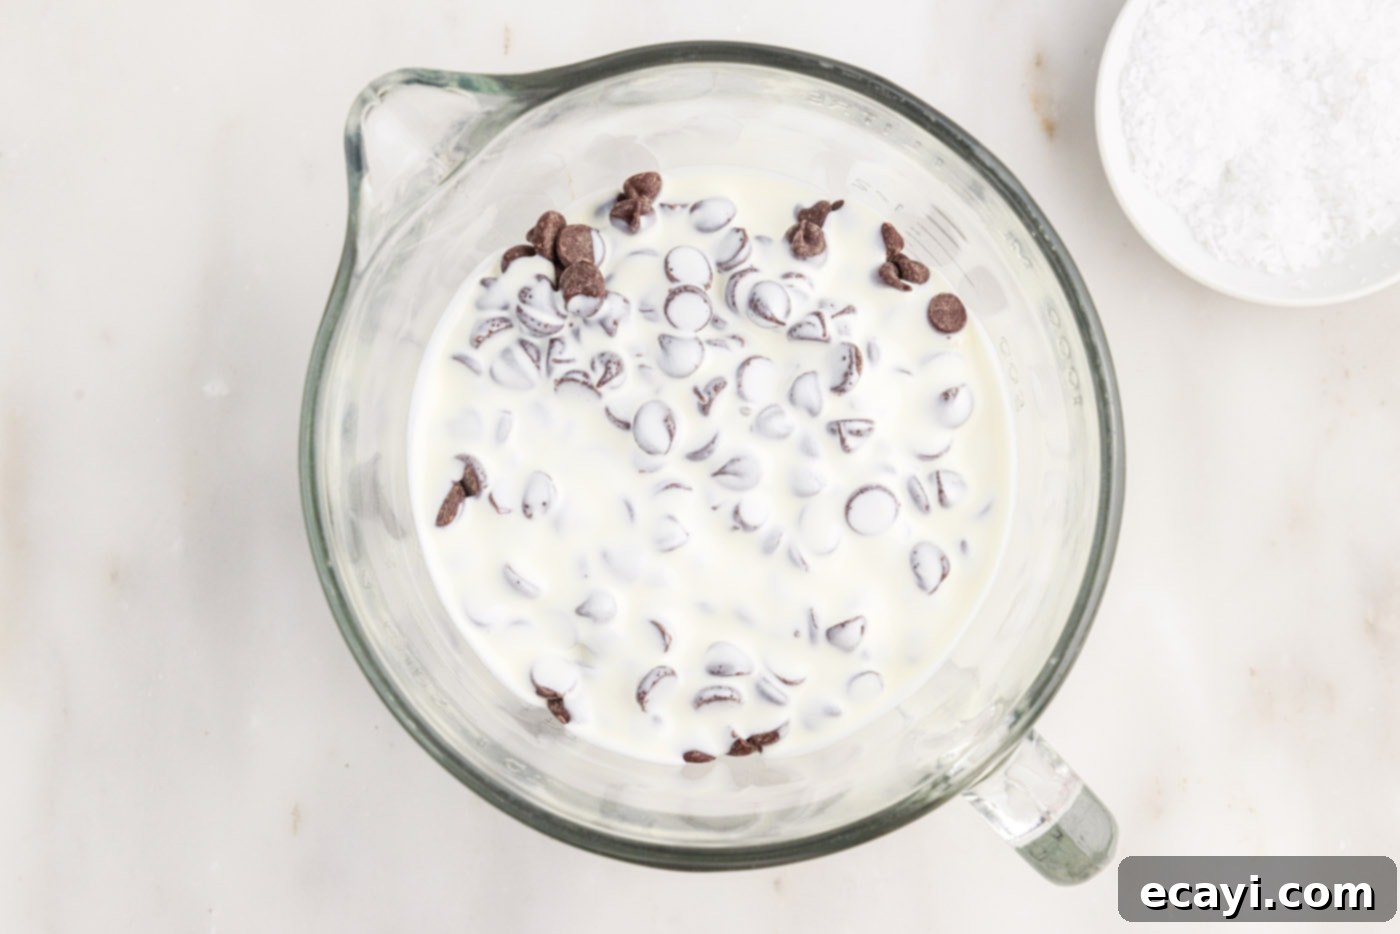
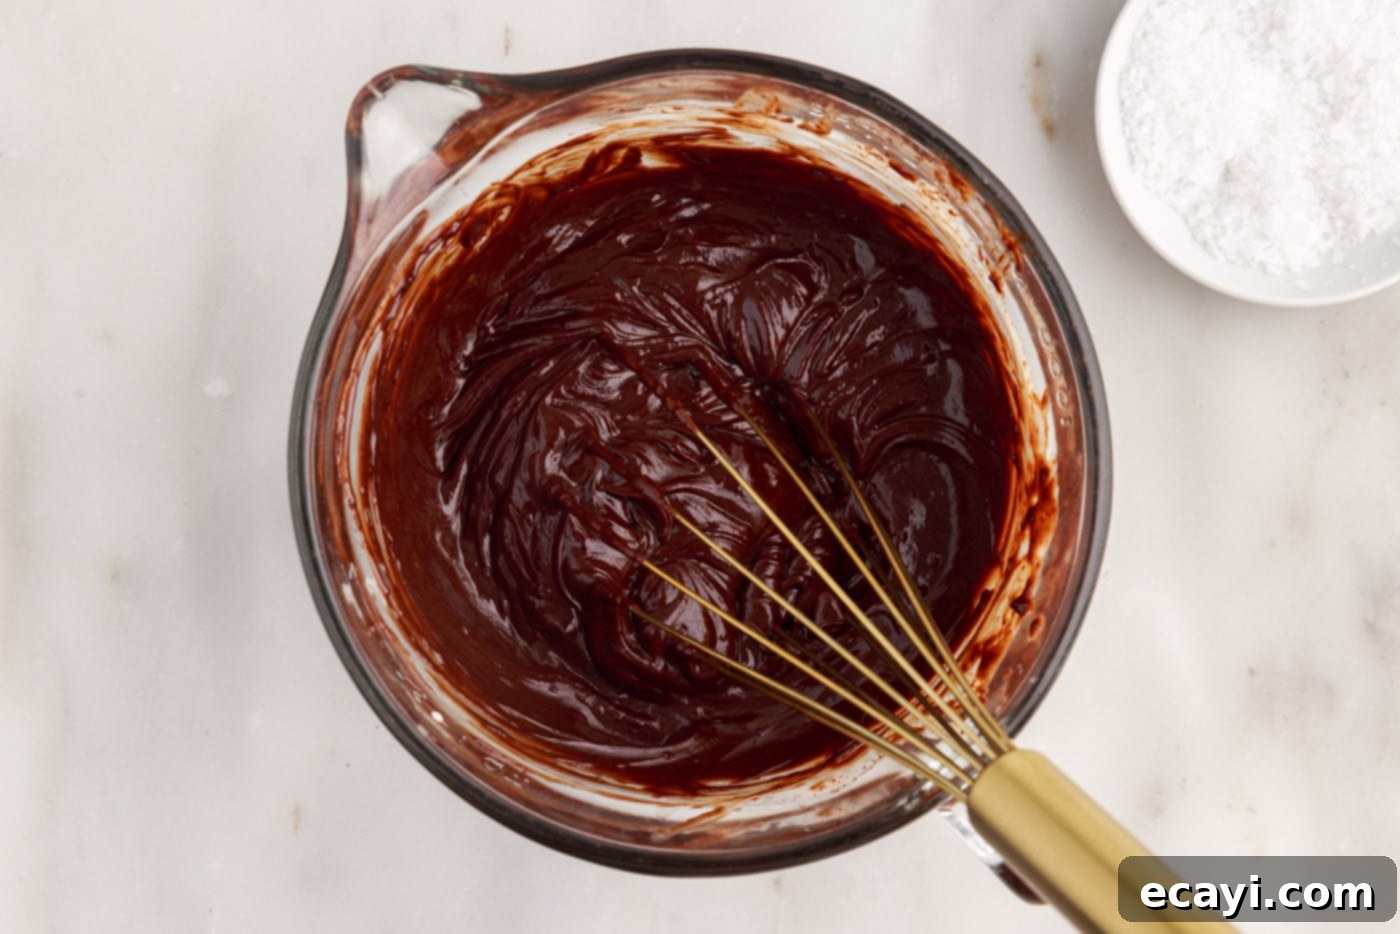
- To prepare the chocolate ganache, combine the semi-sweet chocolate chips and heavy cream in a microwave-safe bowl. Heat the mixture in 30-second intervals, stirring or whisking thoroughly between each interval. Continue this process until the chocolate chips are fully melted and the ganache comes together in a thick, smooth, and glossy mixture. Alternatively, you can melt the chocolate and cream over a double boiler.


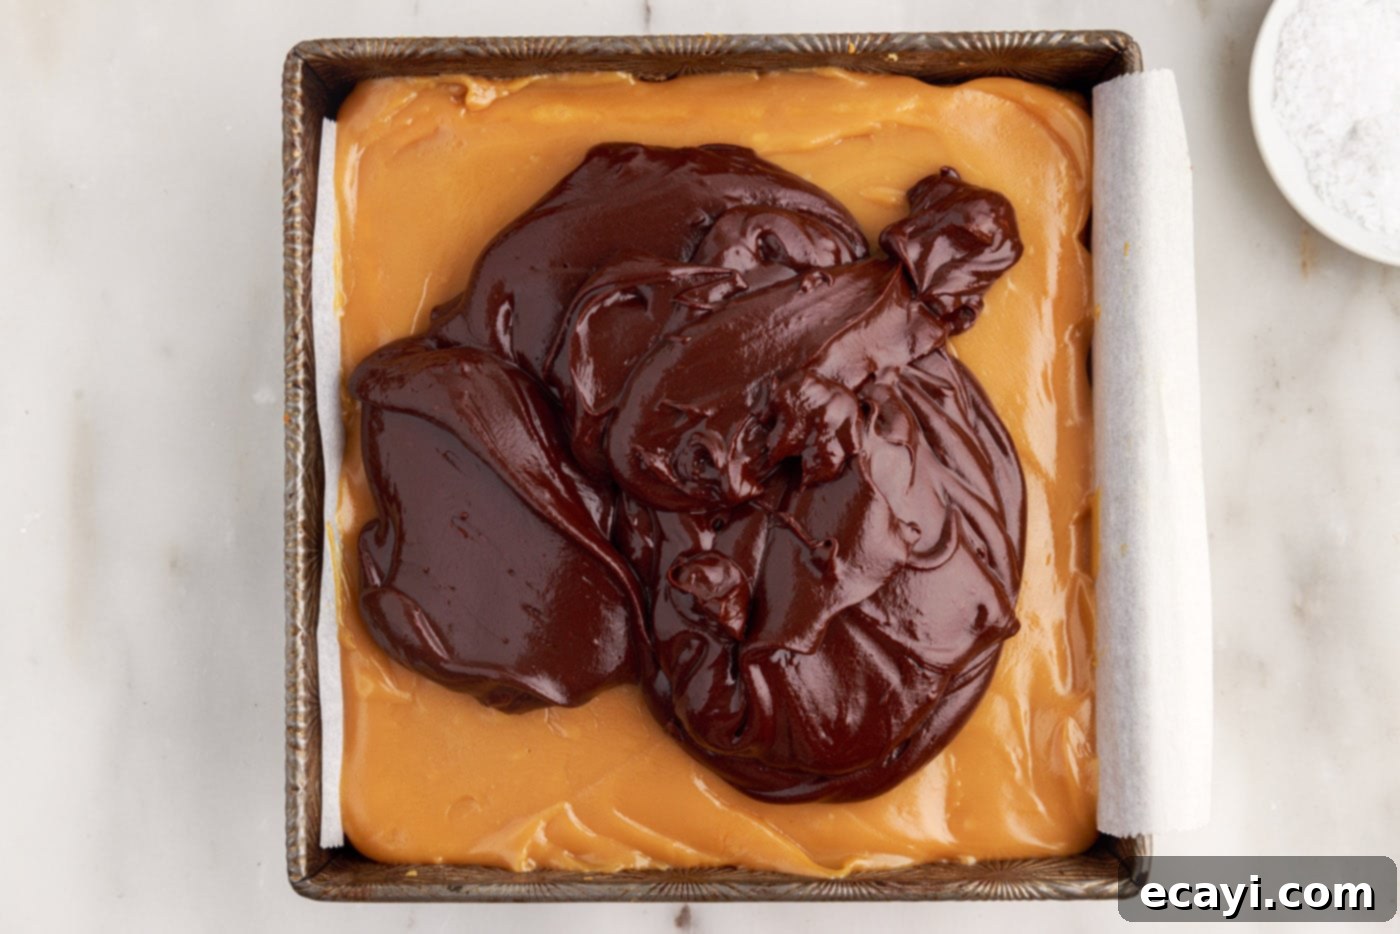
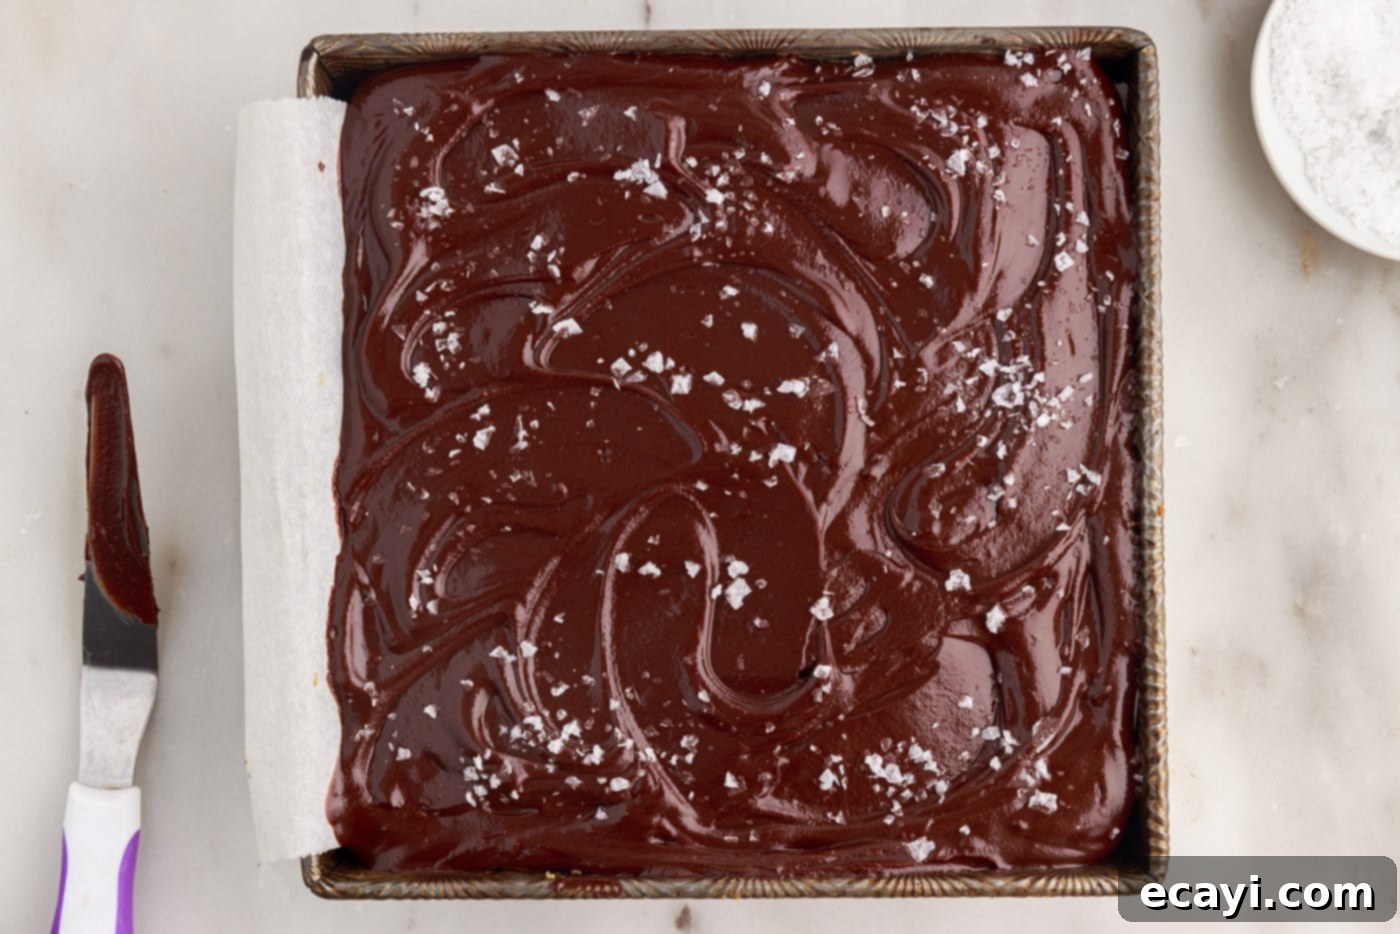
- Carefully pour the prepared ganache over the chilled caramel layer, spreading it evenly across the entire surface. If desired, immediately sprinkle flakey sea salt over the top of the still-wet ganache for a beautiful finish and a contrasting flavor. Place the pan back into the refrigerator to chill for at least 30 minutes, or until the ganache is completely set and firm.


- Once fully chilled and set, use the parchment paper overhangs to lift the entire dessert block from the pan. Place it on a cutting board. For clean cuts, use a sharp knife that has been warmed under hot water and wiped dry between each slice. Cut the block into individual bars of your desired size. Enjoy your homemade Millionaire’s Bars!
Frequently Asked Questions & Expert Tips for Perfect Millionaire’s Bars
To maintain their freshness and incredible flavor, store your Millionaire’s Bars in an airtight container. They can be kept at room temperature for 6-7 days. The temperature at which you store them will influence their texture: if you prefer a softer, gooier caramel filling and slightly softer ganache, keep them at room temperature. For a firmer, chewier caramel and a snappier chocolate layer, chilling them in the refrigerator is recommended. I personally like to chill them initially, especially if I’m transporting them, then allow them to come to a slightly warmer temperature during the commute or just before serving for the best balance of textures.
Absolutely! Millionaire’s Bars freeze exceptionally well, making them a great make-ahead dessert. To freeze, ensure the bars are completely cooled and set. Wrap each individual bar tightly in plastic wrap, then place the wrapped bars into a large freezer-safe zip-top bag or an airtight container. They can be frozen for up to 3 months. When you’re ready to enjoy them, simply thaw the frozen bars at room temperature for a few hours, or overnight in the refrigerator.
Caramel consistency is all about temperature. If your caramel turned out too hard, it likely cooked past the soft ball stage (225°F/107°C). If it’s too runny, it didn’t reach the correct temperature. A reliable candy thermometer is your best friend here. Always ensure it’s calibrated and that its tip isn’t touching the bottom of the pan, which can give an inaccurate reading. Constant stirring also helps ensure even cooking.
For perfectly clean cuts, there are a few tricks. First, ensure the bars are thoroughly chilled and firm. Second, use a very sharp knife. For the cleanest edges, warm your knife under hot running water, wipe it completely dry, then make one clean cut. Repeat this process – warm, wipe, cut – for each slice. This prevents the chocolate and caramel from sticking and dragging, resulting in beautiful, defined layers.
Yes, these Millionaire’s Bars are an excellent make-ahead dessert! You can prepare them 2-3 days in advance and store them in an airtight container in the refrigerator. This even allows the flavors to meld beautifully. If freezing, follow the instructions above, and thaw completely before serving.
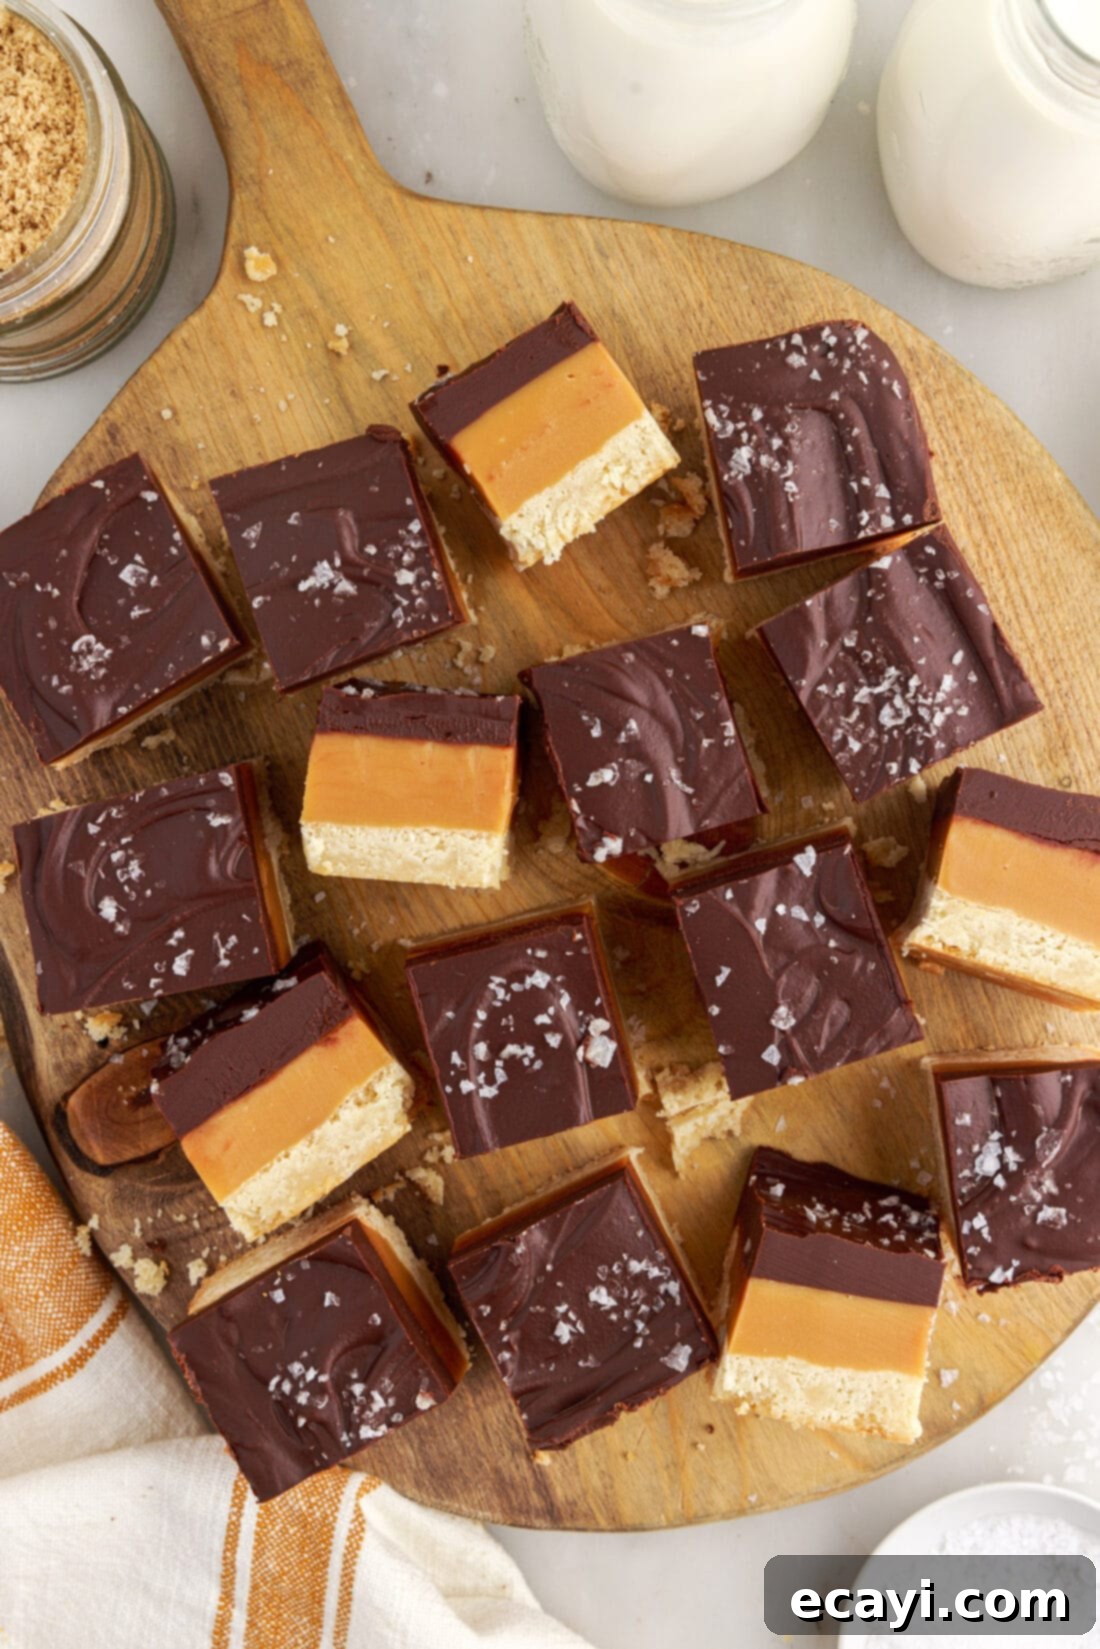
Serving Suggestions for Millionaire’s Bars
Millionaire’s Bars are incredibly rich and satisfying on their own, making them a perfect standalone dessert. A sprinkle of flakey sea salt on top of the ganache is highly recommended to enhance their flavor profile and provide a pleasant textural contrast. You can enjoy them chilled for a firmer bite or at room temperature for a softer, gooier experience – the choice is entirely yours! Due to their decadence, these bars are best served in smaller squares; even a small piece delivers a burst of luxurious flavor. They pair wonderfully with a hot cup of coffee, a robust tea, or even a scoop of vanilla bean ice cream for an extra indulgent treat.
More Delicious Dessert Bar Recipes to Try
If you love the convenience and deliciousness of dessert bars, explore some of our other fantastic recipes:
- Zesty Lemon Bars with Sweet Sour Cream Topping
- Classic Nanaimo Bars
- Irresistible S’mores Bars
- Creamy Oreo Cheesecake Bars
- Easy Cake Mix Cookie Bars
- Decadent No-Bake Peanut Butter Bars
I absolutely adore spending time in the kitchen, creating and sharing my culinary experiences with all of you! Remembering to check back for new recipes daily can be a challenge, which is why I offer a convenient newsletter delivered straight to your inbox every time a new recipe is posted. Simply subscribe here and start receiving your free daily recipes to inspire your next delicious creation!
Millionaire’s Bars
IMPORTANT – There are often Frequently Asked Questions within the blog post that you may find helpful. Simply scroll back up to read them!
Print It
Pin It
Rate It
Save ItSaved!
Ingredients
Shortbread Ingredients
- 1 cup unsalted butter softened at room temperature
- ⅓ cup granulated sugar
- ⅓ cup light brown sugar packed
- 1 teaspoon vanilla extract
- 2 cups cake flour
- ½ teaspoon salt
Caramel Ingredients
- 1 cup unsalted butter softened
- 1 cup light brown sugar packed
- 14 ounces sweetened condensed milk 1 can
- ¼ cup light corn syrup
- 1 teaspoon vanilla extract
- ½ teaspoon salt
Ganache Ingredients
- 2 cups semi-sweet chocolate chips
- ½ cup heavy whipping cream
- flakey sea salt for garnish
Things You’ll Need
-
8×8 baking dish or 9×9
-
Mixing bowls
-
Hand mixer
-
Large saucepan
-
Candy thermometer
Before You Begin
- We used unsalted butter, but salted butter will work just fine in this recipe. If using salted butter, consider reducing the added salt in the shortbread and caramel layers by half, then adjust to taste.
- The shortbread crust in this recipe is intentionally designed for a slightly chewier, easier-to-cut bar, distinct from a traditional crisp shortbread that uses only flour, butter, and granulated sugar. Our version creams butter with both granulated and brown sugars, resulting in a buttery, flaky, and tender base that holds its shape beautifully under the caramel and ganache.
- The pan size affects the thickness of your bars. Using an 8×8-inch or 9×9-inch pan will produce nice, thick, indulgent bars. If you opt for a 9×13-inch pan, your bars will be less thick, but still delicious. Be sure to reduce the shortbread baking time slightly (by about 5-10 minutes) if using a larger pan, as it will bake faster.
- Because these Millionaire’s Bars are so rich, a little goes a long way! You can easily get away with cutting them into smaller portions (e.g., 20-25 smaller squares instead of 16 larger bars) for serving, especially when offering them as part of a dessert platter.
Instructions
Make the Shortbread
-
Preheat the oven to 350°F (175°C). Line an 8×8-inch or 9×9-inch baking dish with parchment paper, leaving some overhang on the sides. This makes it easier to remove the cooled bars later. Set aside.
-
In a large mixing bowl, beat the softened unsalted butter until it is light and fluffy.
-
Add the granulated and brown sugar to the butter and beat until creamed together well. Incorporate the vanilla extract thoroughly.
-
Add the cake flour and salt. Mix on low speed just until the ingredients are combined and a soft dough forms. Avoid overmixing.
-
Press the shortbread mixture evenly into the bottom of the prepared baking dish using a greased spatula or your fingers. Ensure it is compact and smooth.
-
Bake for 30-35 minutes, or until the shortbread is golden brown around the edges and set in the center. Allow it to cool completely in the pan before proceeding.
Make the Caramel
-
While the shortbread cools, prepare the caramel. Combine all caramel ingredients (butter, brown sugar, sweetened condensed milk, corn syrup, vanilla, and salt) in a medium heavy-bottomed saucepan over medium heat.
-
Whisk constantly until the mixture is fully melted and comes to a boil. Do not increase the temperature beyond medium.
*Be sure to stir the caramel constantly and keep the heat at or just below medium so that the caramel doesn’t burn on the bottom of the pan and cooks evenly.
-
Attach a candy thermometer to the saucepan. Continue whisking and cooking until the caramel reaches the soft ball stage (225°F/107°C). This process typically takes 20-30 minutes of continuous stirring.
-
Remove the caramel from the heat and immediately pour it evenly over the cooled shortbread crust, spreading it smooth to the edges with a spatula.
-
Chill the pan in the refrigerator for at least 30 minutes to allow the caramel to firm up. This prevents it from mixing with the ganache.
Make the Ganache
-
To make the ganache, combine the chocolate chips and heavy cream in a microwave-safe bowl. Heat in 30-second intervals, stirring or whisking well between each interval, until the chocolate is fully melted and the ganache is smooth and thick.
-
Spread the warm ganache evenly over the chilled caramel layer. If desired, sprinkle flaky sea salt over the top. Place the pan in the refrigerator to chill for at least 30 minutes, or until the ganache is completely set.
-
Once fully chilled and set, use the parchment paper overhangs to lift the entire slab of Millionaire’s Bars out of the pan. Place on a cutting board and cut into individual bars using a sharp knife that has been warmed and wiped clean between each cut for the cleanest edges.
Nutrition
The recipes on this blog are tested with a conventional gas oven and gas stovetop. It’s important to note that some ovens, especially as they age, can cook and bake inconsistently. Using an inexpensive oven thermometer can assure you that your oven is truly heating to the proper temperature. If you use a toaster oven or countertop oven, please keep in mind that they may not distribute heat the same as a conventional full sized oven and you may need to adjust your cooking/baking times. In the case of recipes made with a pressure cooker, air fryer, slow cooker, or other appliance, a link to the appliances we use is listed within each respective recipe. For baking recipes where measurements are given by weight, please note that results may not be the same if cups are used instead, and we can’t guarantee success with that method.
