Irresistible Baked Jalapeño Poppers with Cream Cheese & Bacon
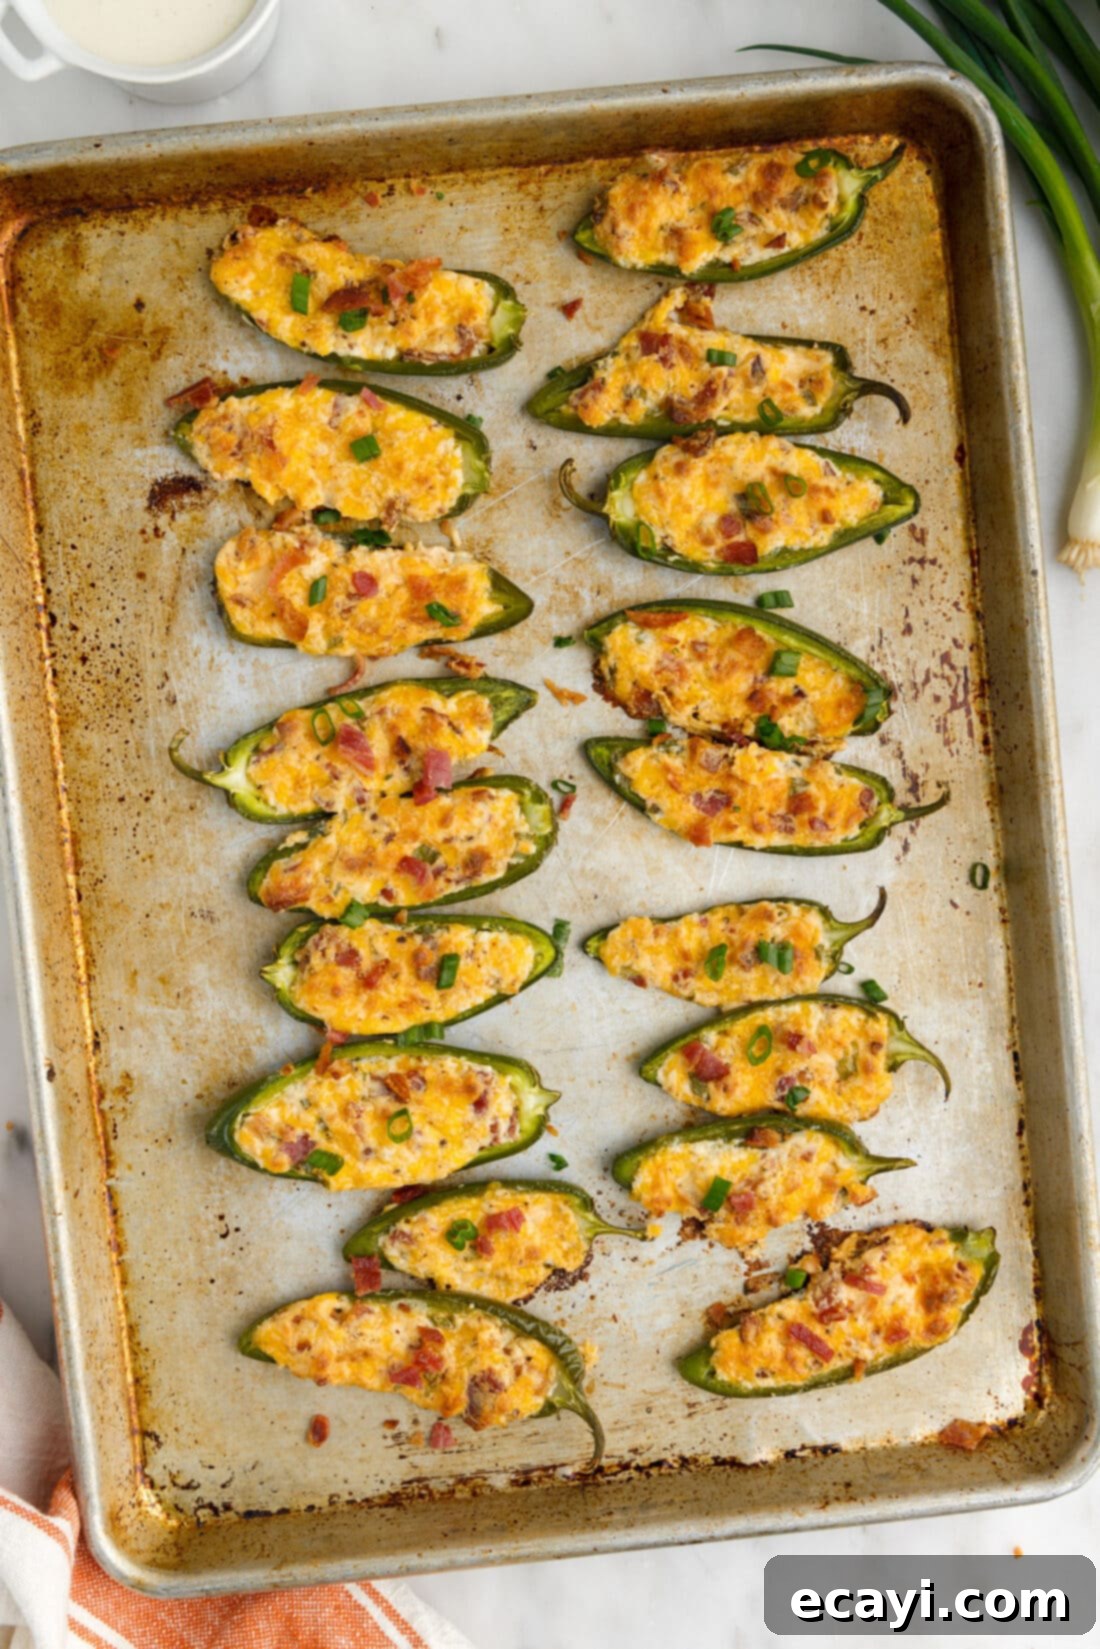
Get ready to ignite your taste buds with these sensational baked jalapeño poppers! Bursting with flavor and a perfect balance of creamy, cheesy, and savory, these appetizers are guaranteed to be a hit at any gathering. We’re stuffing fresh, vibrant jalapeños with a luxurious blend of softened cream cheese, sharp cheddar, crispy bacon bits, fragrant green onion, and just the right touch of garlic salt and pepper. Forget the deep fryer – our oven-baked method ensures a golden-brown, bubbly exterior and a tender, melt-in-your-mouth filling every time, making them a healthier yet equally delicious alternative.

Why These Jalapeño Poppers Will Be Your New Favorite Appetizer
Our jalapeño popper recipe isn’t just easy; it’s a culinary triumph for several reasons. First, the simplicity is unmatched. With just seven core ingredients, including the essential seasonings, you can whip up a batch of these delectable bites in no time. The process is straightforward: halve fresh jalapeños, generously fill them with our signature creamy cheese and bacon mixture, and bake until they reach a beautiful golden brown, bubbling perfection. This hands-on approach takes less effort than you might think, making it an ideal choice for last-minute party preparations or a spontaneous weekend snack.
What truly makes this recipe shine is the incredible flavor synergy. The natural heat of the jalapeño is beautifully tempered by the cool, tangy cream cheese, while the sharp cheddar adds a robust, savory depth. Crispy crumbled bacon introduces a smoky, salty crunch that elevates every bite, and fresh green onions provide a subtle, aromatic finish. It’s a harmonious blend of textures and tastes that keeps everyone coming back for more. These poppers are not just appetizers; they’re conversation starters, ideal for game days, holiday parties, casual get-togethers, or even a cozy movie night at home. They disappear so quickly, I often find myself making a double batch!
If you find yourself with an abundance of jalapeños, don’t limit yourself to just poppers! You can also transform them into crispy air fryer jalapeño fries by slicing them into spears, coating them in a buttermilk and panko mixture, and air frying them to golden perfection. But for that classic, crowd-pleasing cheesy experience, these baked poppers are simply unbeatable.
Essential Ingredients for Perfect Jalapeño Poppers
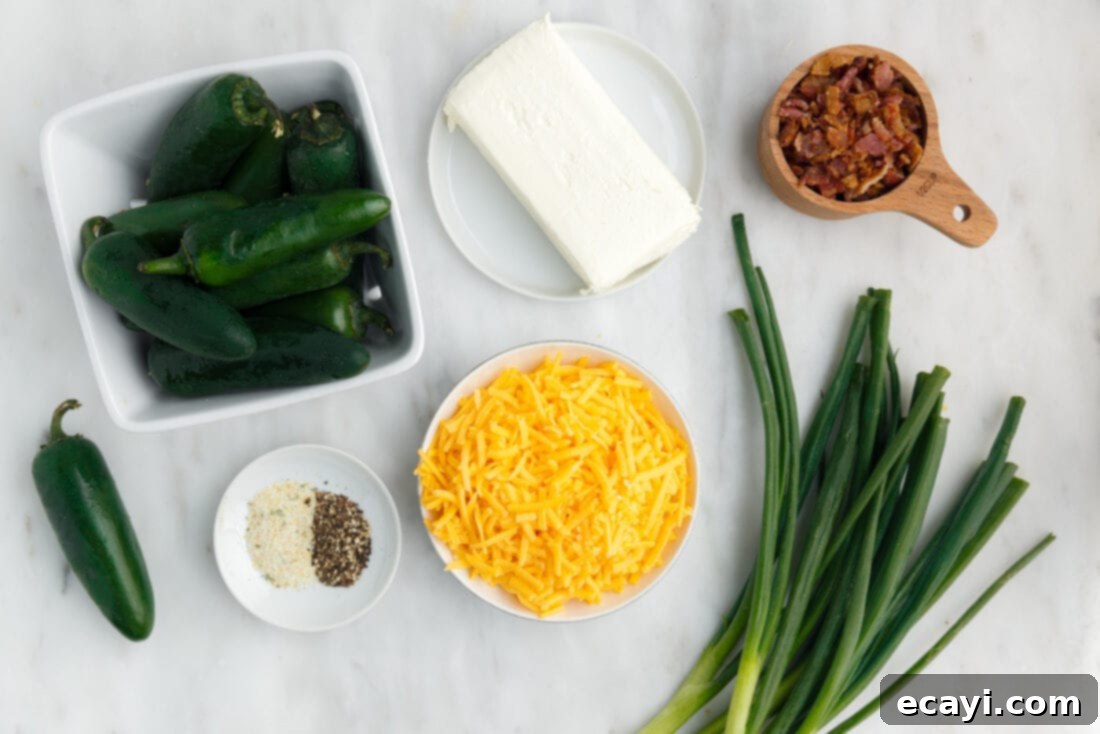
Ready to gather your ingredients? You’ll find all the precise measurements, a full list of ingredients, and detailed instructions in the convenient printable recipe card located at the very end of this post. For now, let’s explore the key components that bring these incredible jalapeño poppers to life.
Ingredient Spotlight & Smart Substitutions
Getting the right ingredients and knowing how to adapt them is key to making truly exceptional jalapeño poppers. Here’s everything you need to know about each component and how you can customize this recipe to your liking:
Jalapeños: The Heart of the Poppers
When selecting your jalapeños, aim for ones that are firm, smooth, and vibrant green. For easier stuffing and to ensure the cheese mixture stays put during baking, **choose larger jalapeños** whenever possible. Smaller, flatter peppers tend to let the delicious filling escape, which can lead to a messy baking sheet. The heat level of jalapeños can vary greatly from pepper to pepper, even from the same plant! To control the spice:
- For more heat: Leave some of the white ribbing (the placenta) and a few seeds inside the pepper. These are where most of the capsaicin, the compound responsible for the heat, resides. You can also add a pinch of cayenne pepper to the cheese mixture for an extra kick.
- For milder poppers: Thoroughly scrape out all seeds and white ribbing. You can even soak the hollowed jalapeño halves in ice water for about 15-30 minutes to further reduce their pungency.
Safety Tip: Always wear gloves when handling and seeding jalapeños, as the oils can cause skin irritation and a severe burning sensation if they come into contact with your eyes. Wash your hands thoroughly with soap and water after handling, even if wearing gloves.
Cheese: The Creamy, Cheesy Core
Our recipe calls for a dynamic duo of cheeses: cream cheese and cheddar. This combination provides both creamy richness and a sharp, savory flavor. For the **cream cheese**, it’s crucial to let it soften at room temperature for about 20-30 minutes before mixing. This ensures a smooth, lump-free filling that’s easy to combine with the other ingredients. Full-fat cream cheese offers the best texture and flavor, but reduced-fat can be used if preferred, though it might result in a slightly softer filling.
For the **cheddar cheese**, a medium or sharp cheddar works wonderfully, providing that classic cheesy tang. While pre-shredded cheese is convenient, shredding cheese from a block yourself often melts more smoothly and tastes fresher. Feel free to experiment with other shredded cheeses to customize the flavor profile. **Monterey Jack** is a fantastic choice for its excellent melting properties and mild, creamy flavor. **Pepper Jack** will add another layer of subtle spice, complementing the jalapeños beautifully. Other great options include Colby Jack, a blend of mozzarella and provolone, or even a smoked gouda for a richer, deeper flavor.
Bacon: The Ultimate Savory Crunch
Bacon is more than just an ingredient here; it’s a flavor powerhouse. You’ll need about 1 lb of cooked and crumbled bacon. For ultimate convenience and to save on cleanup, you can opt for **pre-cooked bacon bits**. However, if you have the time, cooking your own bacon until it’s perfectly crisp and then crumbling it will always yield superior flavor and texture. Cook it in a skillet, bake it in the oven, or even microwave it on paper towels until golden and crunchy. The fat rendered from cooking bacon can also be reserved for other culinary uses.
Bacon Alternatives: For those avoiding pork, **turkey bacon** can be a suitable substitute, offering a similar salty, smoky element. For a vegetarian option, consider crispy smoked paprika-dusted plant-based bacon alternatives, or even toasted breadcrumbs mixed with smoked paprika for a textural and smoky addition.
Green Onion, Garlic Salt, and Pepper: The Finishing Touches
Green onions (scallions) add a fresh, mild oniony bite and a pop of color to the filling. We use them both in the mixture and as a garnish, ensuring freshness in every bite. Garlic salt is a convenient way to incorporate both saltiness and a subtle garlic flavor. If you don’t have garlic salt, you can substitute with garlic powder and regular salt (approx. ¼ tsp garlic powder + ¼ tsp salt per ½ tsp garlic salt). Freshly ground **black pepper** offers a more robust flavor than pre-ground, so grind it fresh if you can.
Optional Enhancements: A pinch of onion powder, a dash of your favorite hot sauce (like Cholula or Tabasco) in the cream cheese mixture, or a tiny bit of smoked paprika can further enhance the depth of flavor in your poppers.
How to Craft Your Perfect Jalapeño Poppers
These step-by-step photos and detailed instructions are designed to help you visualize each part of the recipe and ensure your success. For a convenient printable version of this recipe, complete with precise measurements and comprehensive instructions, simply Jump to Recipe at the bottom of this post.
- Prepare Your Oven: Begin by preheating your oven to 400°F (200°C). Proper preheating is essential for even baking and achieving that desirable golden-brown finish on your poppers.
- Create the Creamy Filling: In a medium mixing bowl, combine all your delicious filling ingredients. This includes the softened cream cheese, ½ teaspoon black pepper, ½ teaspoon garlic salt, 2 tablespoons of finely sliced green onions, 1 cup of shredded cheddar cheese, and approximately ½ cup of the crumbled bacon. Using a strong spatula or a sturdy wooden spoon, mash and stir these ingredients together thoroughly until they are well combined and form a smooth, uniform mixture. The softened cream cheese will make this process much easier.
- Prepare the Jalapeños: First, rinse your fresh jalapeños under cool water and pat them completely dry with a paper towel. Next, carefully slice each pepper in half lengthwise, from stem to tip. The crucial step for heat control is removing the seeds and ribbing. Using a small spoon or, ideally, gloved fingers (to protect your skin from the spicy capsaicin oils), scoop out all the seeds and the white membrane (ribbing) from the inside of each pepper half. Remember, the more ribbing you remove, the milder the popper will be.
- Stuff and Arrange: Place the hollowed-out jalapeño halves on a sheet pan, ensuring there’s a little space between each one for even cooking. For easier cleanup, you can line your baking sheet with parchment paper or aluminum foil. Now, take a small spoon and generously scoop the cheese mixture into each jalapeño “boat.” Don’t overfill, but make sure each half is packed with that creamy goodness.
- Bake to Golden Perfection: Transfer the sheet pan to your preheated oven. Bake the stuffed jalapeños for approximately 20 minutes, or until the cheese mixture is beautifully melted, bubbly, and lightly browned on top. The jalapeño peppers themselves should also be tender but still hold their shape. Keep an eye on them towards the end of the baking time, as oven temperatures can vary.
- Garnish and Serve: Once baked, carefully remove the sheet pan from the oven. Immediately sprinkle the reserved green onions and the remaining crumbled bacon over the warm poppers. Serve these irresistible bites immediately while the cheese is still wonderfully gooey and the flavors are at their peak.
Frequently Asked Questions & Expert Tips for Jalapeño Poppers
If you have any delicious poppers left over (a rare occurrence!), store them in an airtight container or covered tightly with plastic wrap in the refrigerator for up to 4-5 days. They reheat beautifully in the microwave (for quick warming), in the oven (at 350°F for 10-15 minutes to crisp them up), or even in an air fryer (at 375°F for 3-5 minutes for extra crispiness).
Absolutely! Jalapeño poppers are an excellent make-ahead appetizer. You can easily prep them right up until the baking stage. Once you’ve stuffed the jalapeño halves, arrange them on a baking sheet, then wrap the entire pan tightly with plastic wrap or transfer the stuffed peppers to an airtight container. Store them in the refrigerator for up to 24 hours. When you’re ready to bake, simply pop them into the preheated oven. This is especially convenient if you’re transporting them to a party or preparing for a busy game day.
There are a few tricks to keep that creamy filling contained. First, ensure you’re using larger jalapeño halves that can act as sturdy “boats” for the mixture. Second, don’t overfill the peppers; leave a slight margin at the top. Third, making sure your cream cheese mixture isn’t too runny (ensure cream cheese isn’t overly softened or watery) helps. Lastly, wrapping each stuffed jalapeño half with a thin strip of bacon (secured with a toothpick) before baking not only adds incredible flavor and crispiness but also acts as a delicious barrier, holding the cheese firmly in place.
Yes, you can! To freeze unbaked poppers: stuff them as directed, then place them on a baking sheet in a single layer and freeze until solid (about 2 hours). Transfer the frozen poppers to an airtight freezer bag or container. They can be stored for up to 2-3 months. When ready to bake, place them directly from the freezer onto a baking sheet and bake at 400°F (200°C) for 25-30 minutes, or until golden and bubbly. If you have baked leftovers, they can also be frozen, then reheated from frozen in the oven until warmed through.

Perfect Pairings & Serving Suggestions
These baked jalapeño poppers are utterly delicious on their own, but they truly shine when paired with the right dipping sauce. Classic choices include cool and creamy ranch dressing or a tangy blue cheese dressing, which beautifully complements the spice and richness of the poppers. You can also offer a variety of dips to suit different preferences, such as a zesty sriracha mayo for an extra kick, a dollop of sour cream or Greek yogurt to cool things down, fresh guacamole, or even a classic tomato salsa.
Beyond dipping sauces, these poppers make a fantastic addition to any appetizer spread. Serve them alongside other party favorites, or as a vibrant side dish for casual meals like burgers, grilled chicken, or BBQ ribs. They are always a crowd-pleaser and disappear quickly!
More Irresistible Appetizer Recipes to Try
If you love these jalapeño poppers, you’re sure to enjoy these other fantastic appetizer ideas that are perfect for any occasion:
- Crockpot Cheese Dip
- Buffalo Chicken Dip
- Grape Jelly Meatballs
- Appetizer Veggie Pizza
- Bacon Wrapped Little Smokies
- Bacon Cheeseburger Meatballs
- Jalapeno Popper Dip
I love to bake and cook and share my kitchen experience with all of you! Remembering to come back each day can be tough, that’s why I offer a convenient newsletter every time a new recipe posts. Simply subscribe and start receiving your free daily recipes!

Baked Jalapeño Poppers with Cream Cheese & Bacon
IMPORTANT – There are often Frequently Asked Questions within the blog post that you may find helpful. Simply scroll back up to read them!
Print It
Pin It
Rate It
Save ItSaved!
Ingredients
- 8 oz cream cheese softened
- ½ teaspoon coarse black pepper
- ½ teaspoon garlic salt
- 2 green onions sliced, the green parts – about 3 Tablespoons
- 1 cup medium cheddar cheese grated
- 1 lb bacon cooked and crumbled
- 12 Jalapeños sliced in half
Things You’ll Need
-
Baking sheet
-
Large mixing bowl
Before You Begin
- Choose larger jalapenos, if available. They are easier to stuff with the cheese mixture and hold the mixture better once cooked. Smaller jalapenos are fairly flat once sliced in half and the cheeses tend to spill out.
- You can up the spice level by leaving some of the seeds ribbing in the jalapenos (this will make them spicier) or by adding additional black pepper.
- Alternatively, lower the spiciness by removing more of the rib inside. Fresh, green jalapenos tend to lean on the milder side, but it’s always a gamble with jalapenos as you never know their individual heat level.
- The filling is thick and will fill about 12 jalapenos (24 halves total). Double the recipe for a larger crowd.
Instructions
-
Preheat oven to 400°F (200°C).
-
Using a strong spatula or wooden spoon, mash together all of the filling ingredients: softened cream cheese, ½ teaspoon black pepper, ½ teaspoon garlic salt, 2 tablespoons sliced green onions, 1 cup shredded cheddar cheese, and about ½ cup of the crumbled bacon. Mix until well combined.
-
Rinse jalapeños and pat dry. Slice each pepper in half lengthwise. Use a spoon or gloved fingers to scoop out the seeds and ribbing from the peppers. (Gloved hands will keep the oils off of your fingers, which can cause irritation and burning to your skin and eyes if your fingers touch your eyes).
-
Place the pepper halves on a sheet pan with a bit of space between each. Use a small spoon to generously scoop the cheese mixture into each pepper “boat”.
-
Bake stuffed jalapeños for about 20 minutes or until the cheese mixture is melted, bubbly, and browned on top.
-
Sprinkle reserved green onions and remaining crumbled bacon over the poppers and serve immediately.
Nutrition
The recipes on this blog are tested with a conventional gas oven and gas stovetop. It’s important to note that some ovens, especially as they age, can cook and bake inconsistently. Using an inexpensive oven thermometer can assure you that your oven is truly heating to the proper temperature. If you use a toaster oven or countertop oven, please keep in mind that they may not distribute heat the same as a conventional full sized oven and you may need to adjust your cooking/baking times. In the case of recipes made with a pressure cooker, air fryer, slow cooker, or other appliance, a link to the appliances we use is listed within each respective recipe. For baking recipes where measurements are given by weight, please note that results may not be the same if cups are used instead, and we can’t guarantee success with that method.
This post was originally published here on January 20, 2022.
