The Ultimate Cheesy Tuna Melt: A Classic Comfort Food Recipe Guide
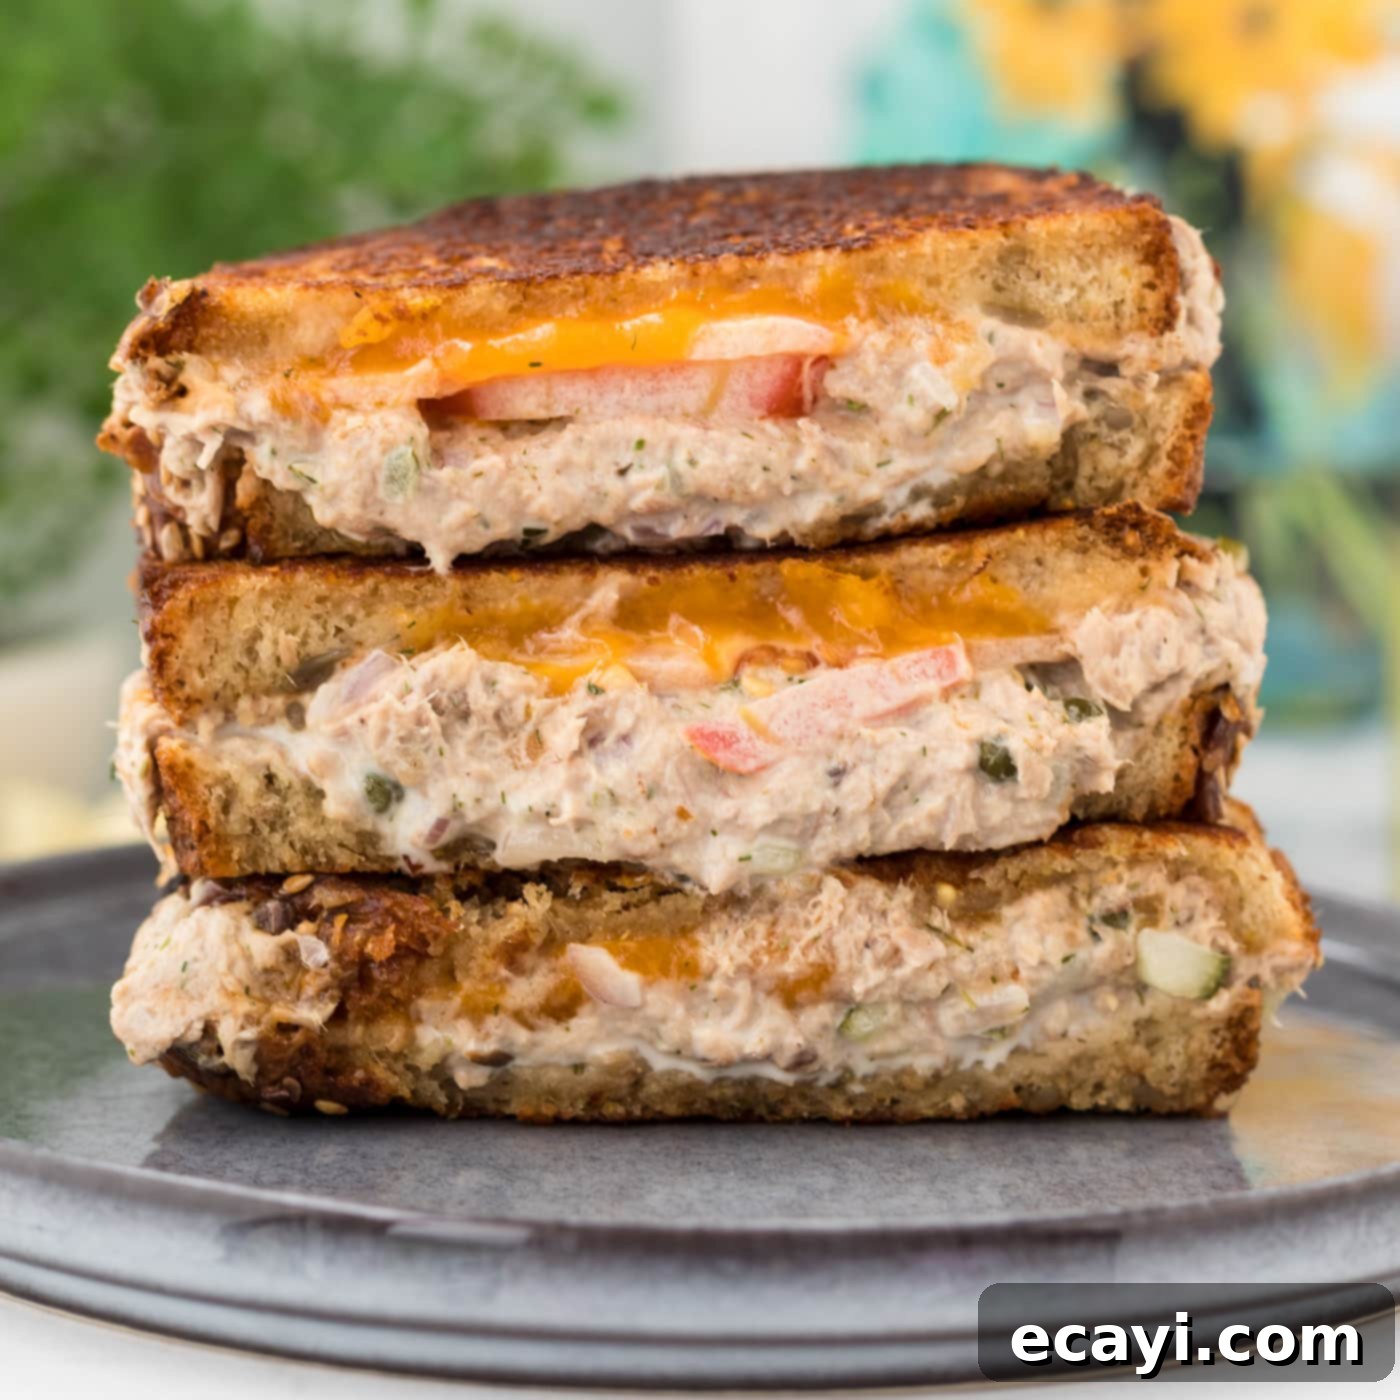
Indulge in the perfect comfort food: an easy, incredibly satisfying tuna melt. This recipe delivers a symphony of flavors and textures, featuring rich, melty cheese and a robust, savory tuna salad, all perfectly nestled between slices of golden, buttery multigrain bread. Each bite offers a delightful crunch followed by a warm, gooey interior that will transport you straight to culinary bliss.
Why This Tuna Melt Recipe Is Unbeatable
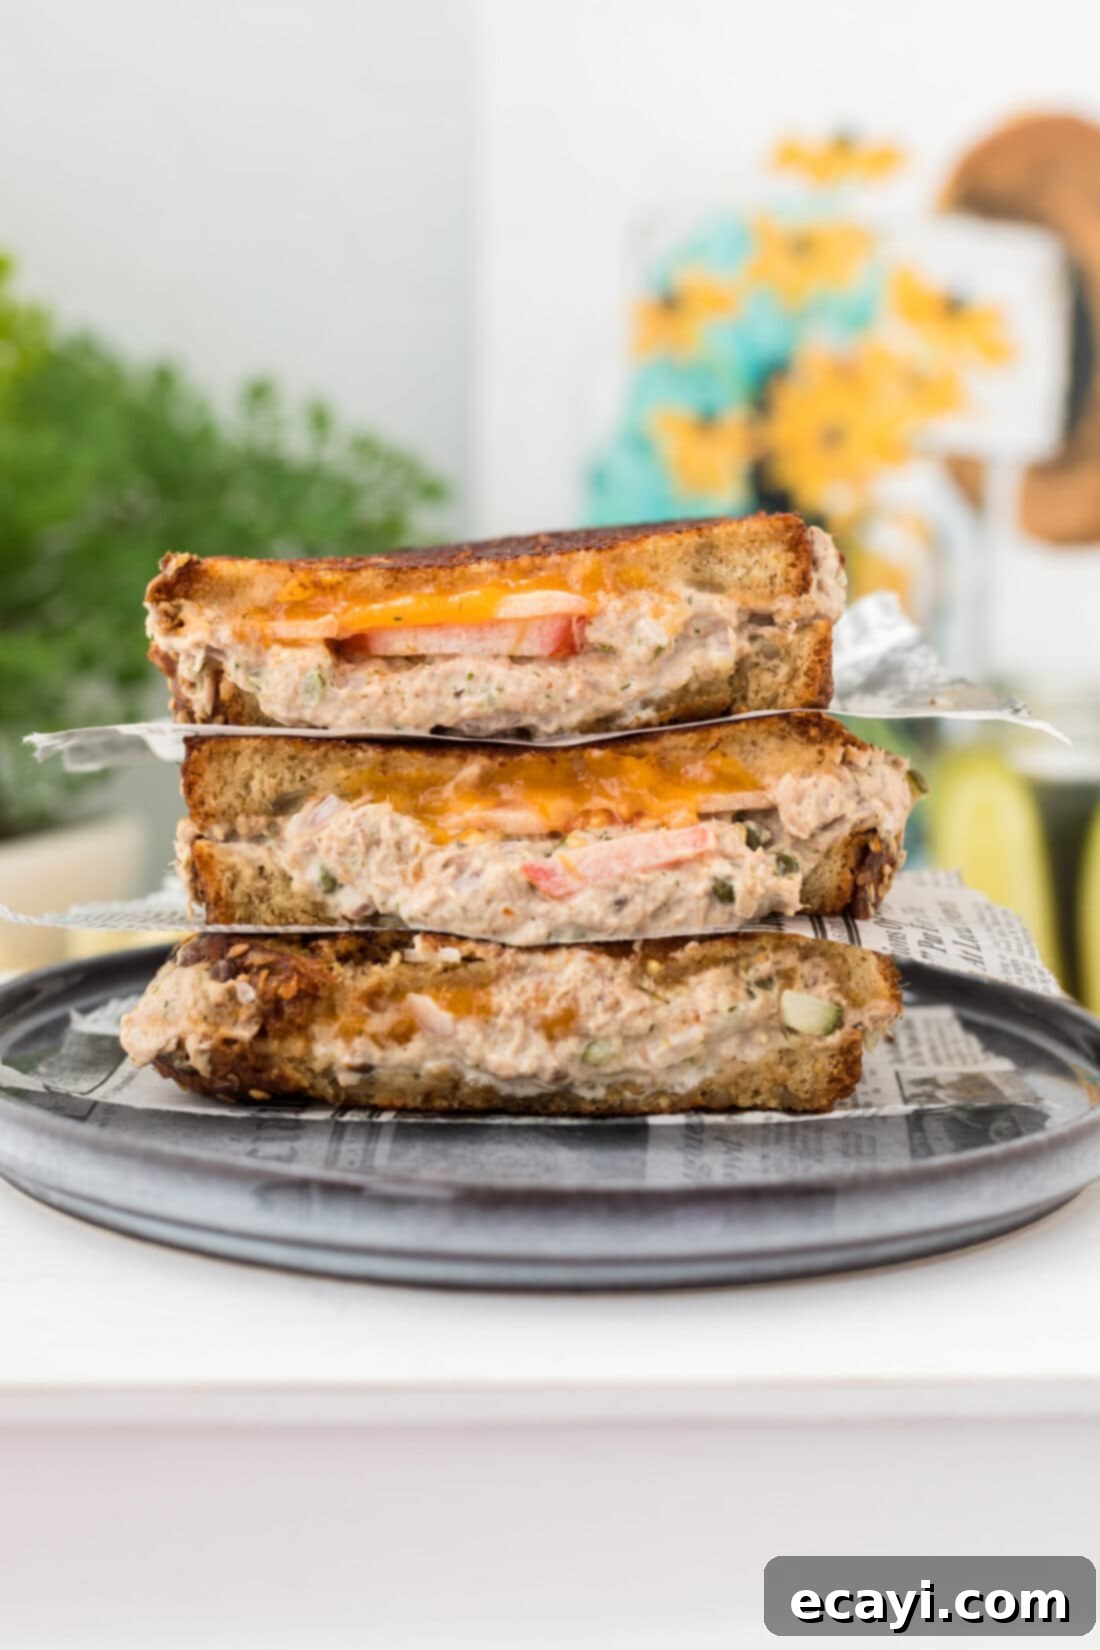
The tuna melt stands as a groundbreaking classic sandwich, brilliantly combining the comforting indulgence of a gooey grilled cheese with the fresh, savory profile of tuna salad. It’s a testament to the idea that, in some culinary cases, fish and cheese are a match made in heaven. Our specific recipe elevates this beloved dish, making it more than just a quick meal; it’s an experience.
What makes this particular tuna melt truly shine? It’s all about the layers of thoughtfully chosen, flavorful components. The tuna salad isn’t just a simple mix; it’s a vibrant blend of finely minced shallots, briny capers, fresh dill, and tangy pickles. These ingredients work in harmony with creamy mayonnaise and a hint of horseradish mayo, creating a rich, savory, and undeniably mouth-watering filling. Each bite bursts with complex flavors, from the savory tuna and sharp cheese to the bright acidity of lemon and the herbaceous notes of dill. The multigrain bread adds essential texture and nutty flavor, creating a robust vessel that perfectly holds all the deliciousness together, toasting to a beautiful golden brown and achieving that ideal crispy exterior.
Key Ingredients for the Perfect Tuna Melt
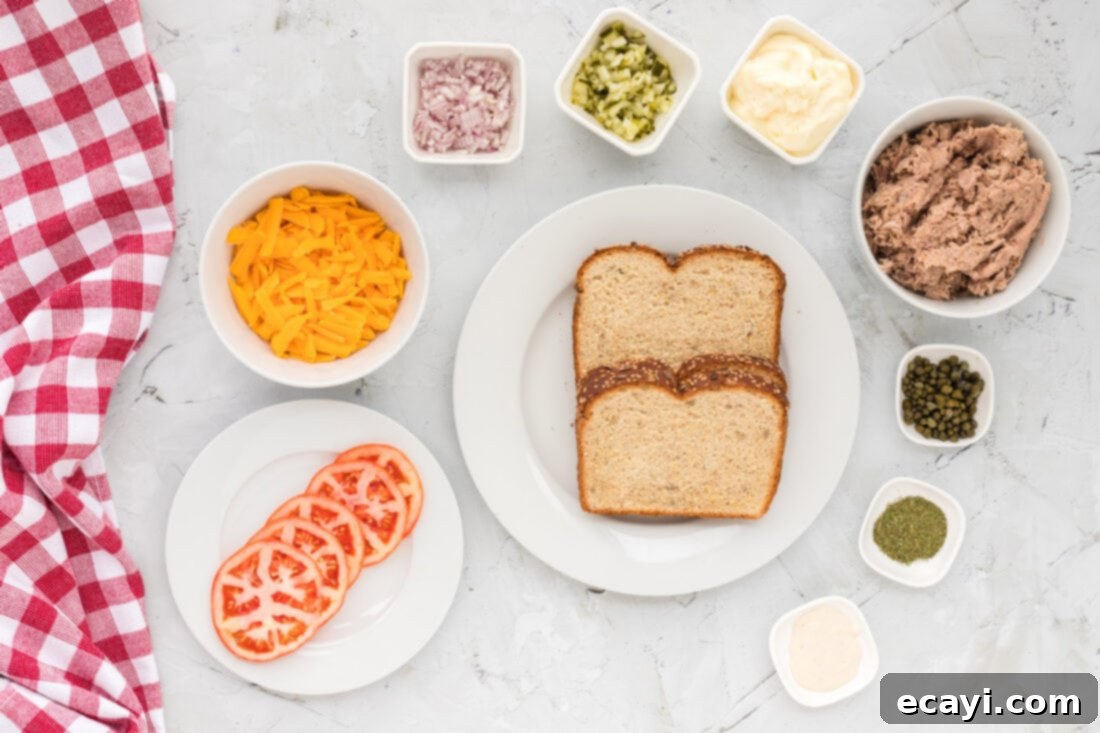
Crafting an exceptional tuna melt begins with selecting the right ingredients. Below, you’ll find a detailed breakdown of what you’ll need, along with expert tips and potential substitutions to customize your sandwich to perfection. For exact measurements and a printable recipe card, please scroll to the end of this post.
Ingredient Spotlight & Smart Substitutions
BREAD: We highly recommend using multigrain bread for this recipe. Its robust texture holds up beautifully to the rich tuna salad and melty cheese, preventing sogginess, while also offering additional nutrients and a delightful nutty flavor. If multigrain isn’t available or you prefer other options, excellent substitutions include sourdough for a tangy contrast, hearty whole wheat for added fiber, or rye bread for a distinctive, savory note that complements the tuna wonderfully. Ensure your bread slices are sturdy enough to support the generous filling.
TUNA: The heart of our sandwich, the tuna salad, is made using high-quality canned tuna packed in water. Using tuna in water typically results in a lighter, less oily salad compared to tuna in oil, allowing the other fresh flavors to shine through. Four 5oz cans of tuna, thoroughly drained, are ideal. The flavor profile is enhanced by:
- Minced Shallots: Offering a milder, sweeter onion flavor than traditional onions, shallots provide aromatic depth without being overpowering. Roughly one small shallot, minced, should be sufficient.
- Capers: These tiny, briny flower buds add a distinct salty, tangy pop that cuts through the richness of the tuna and mayonnaise. If you’re not a fan of their intense flavor, you can certainly reduce the amount or omit them entirely.
- Mayonnaise: The essential binder that brings all the tuna salad ingredients together, providing creaminess and moisture. We use ½ cup.
- Dried Dill: This herb pairs exceptionally well with fish, imparting a fresh, slightly tangy, and aromatic quality to the salad.
- Lemon Juice: A splash of fresh lemon juice is crucial for brightening the flavors and adding a zesty counterpoint to the creamy dressing.
- Chopped Pickles: Diced pickles (dill or sweet, depending on your preference) add a delightful crunch and a tangy, vinegary zing.
- Horseradish Mayo: A secret ingredient for an extra kick! Just ½ tablespoon provides a subtle warmth and complex flavor. If you prefer a milder sandwich, simply substitute this with additional regular mayonnaise.
CHEESE: For that ultimate gooey experience, we’re featuring shredded cheddar cheese. A vital tip for any recipe calling for shredded cheese: always shred it yourself! Pre-packaged shredded cheeses often contain anti-caking agents like cellulose, which can prevent the cheese from melting smoothly and sometimes give your dish a grainy texture. Freshly shredded cheese melts beautifully and tastes superior. While cheddar is a fantastic choice, feel free to experiment with your favorite melty cheeses. Other excellent options that pair wonderfully with tuna include spicy Pepper Jack for a kick, Swiss for its nutty notes, or creamy Havarti for a luxurious melt.
TOMATOES: Although not explicitly listed in the main ingredient bullet points in the original text, the instructions include “2 slices tomato.” Tomatoes add a fresh, juicy element and a touch of acidity that complements the richness of the tuna melt. Ensure they are ripe but firm enough to hold their shape during grilling.
Crafting the Perfect Tuna Melt: Step-by-Step Instructions
These step-by-step photos and detailed instructions are designed to help you visualize each stage of making this delicious recipe. For a convenient printable version, complete with all measurements and instructions, simply Jump to Recipe at the bottom of this post.
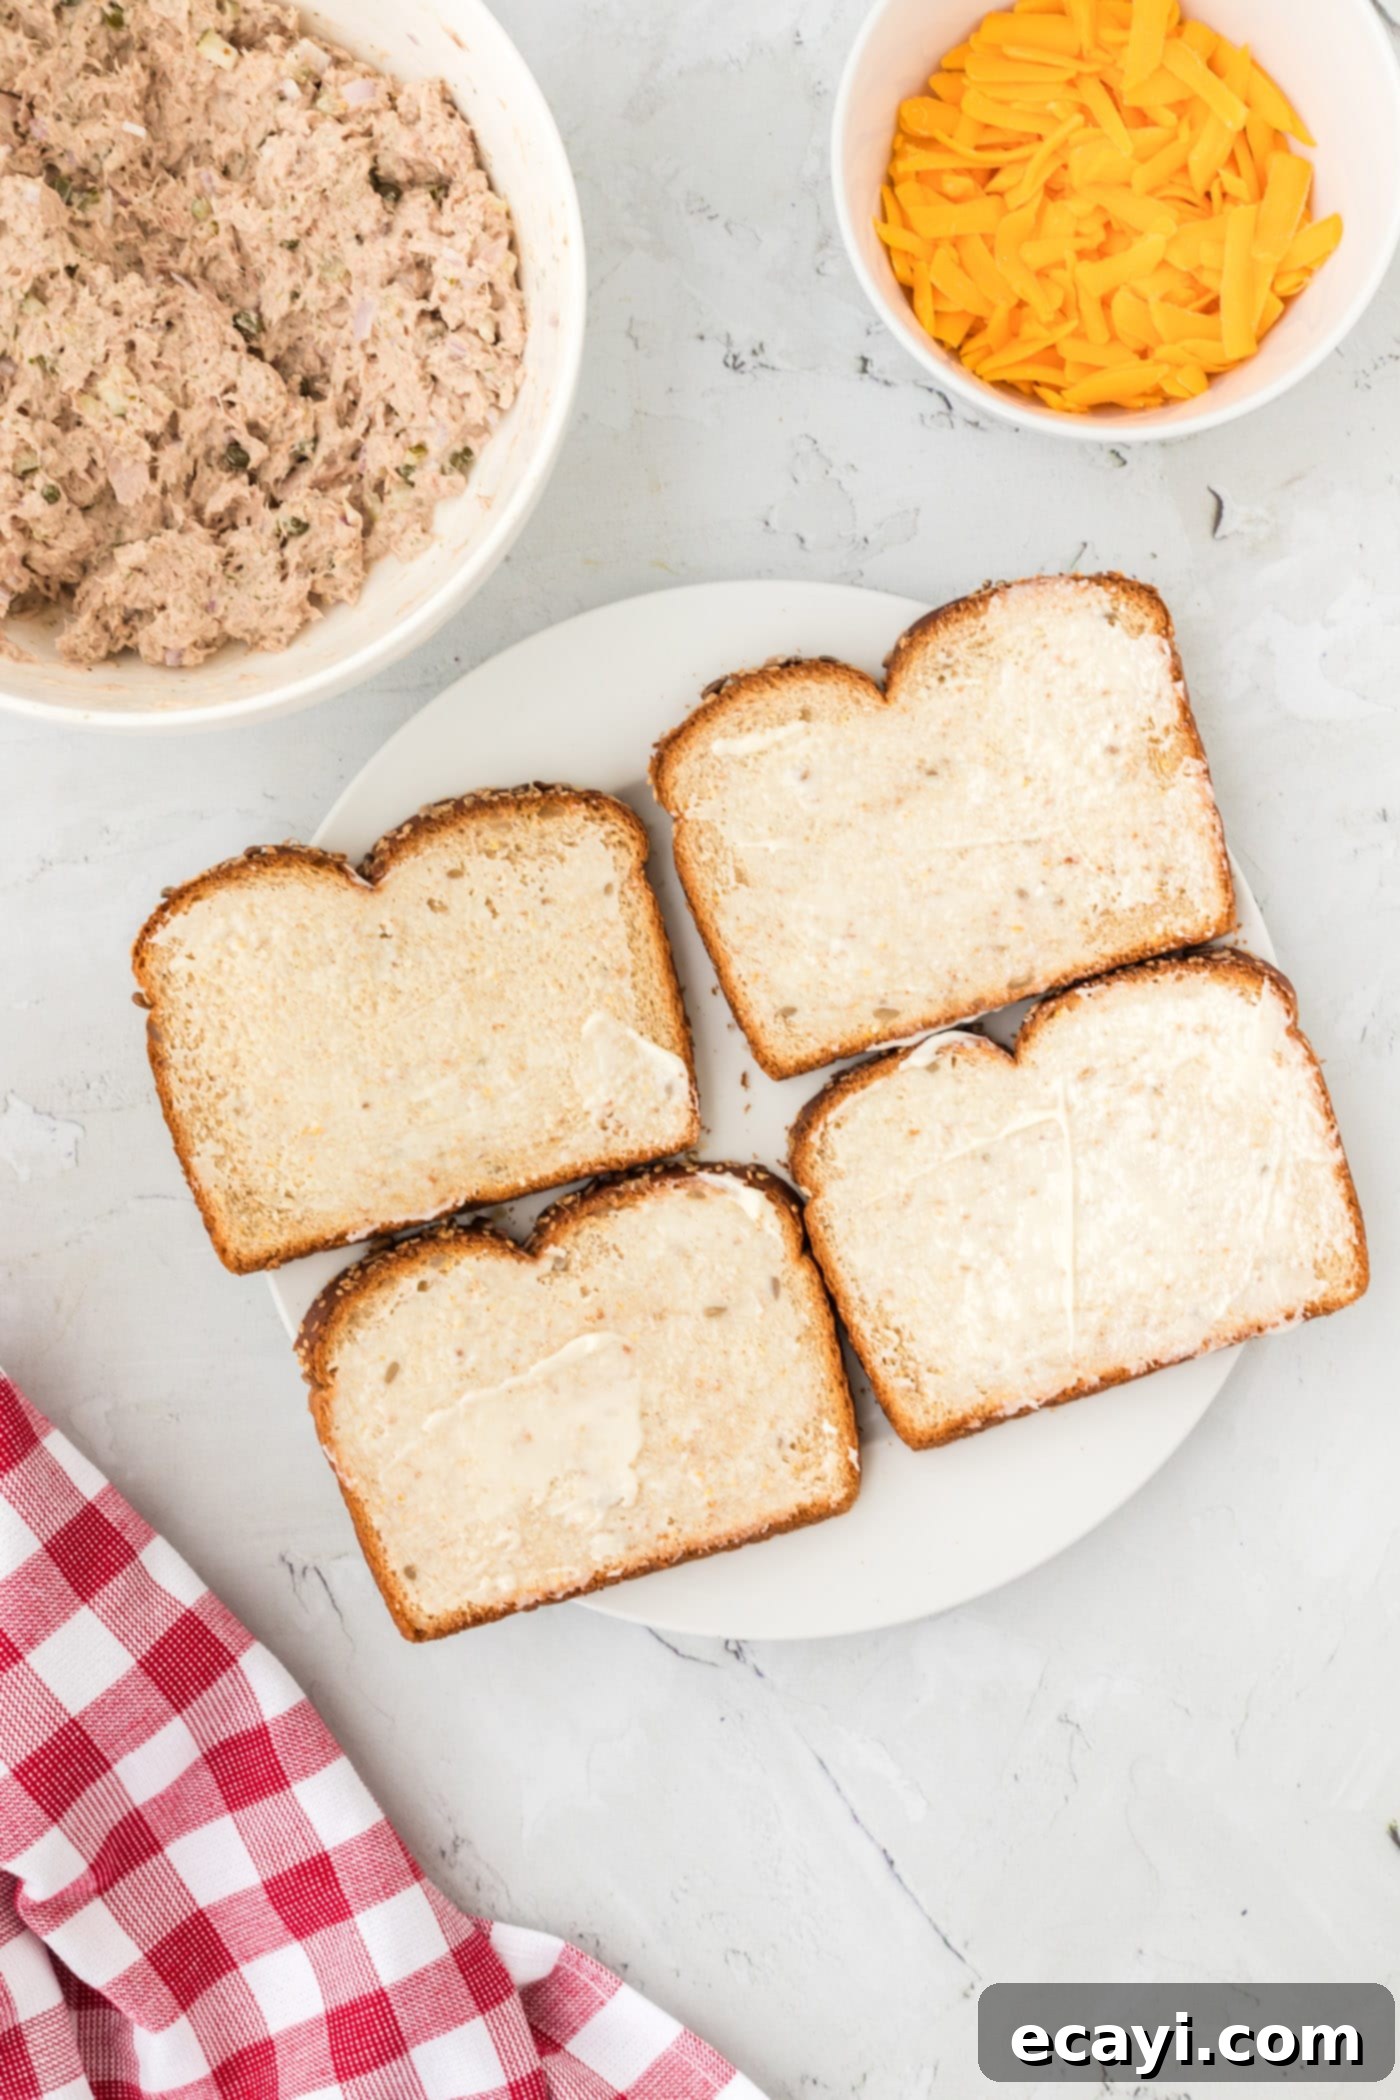
- Prepare the Bread: Begin by generously buttering one side of each slice of multigrain bread. This buttered side will become beautifully golden and crispy when toasted in the skillet.

- Assemble the Tuna Salad: In a medium-sized bowl, combine the drained tuna, minced shallots, capers, mayonnaise, dried dill, fresh lemon juice, chopped pickles, and horseradish mayo (if using). Mix thoroughly until all ingredients are well combined and the tuna is flaked to your desired consistency.
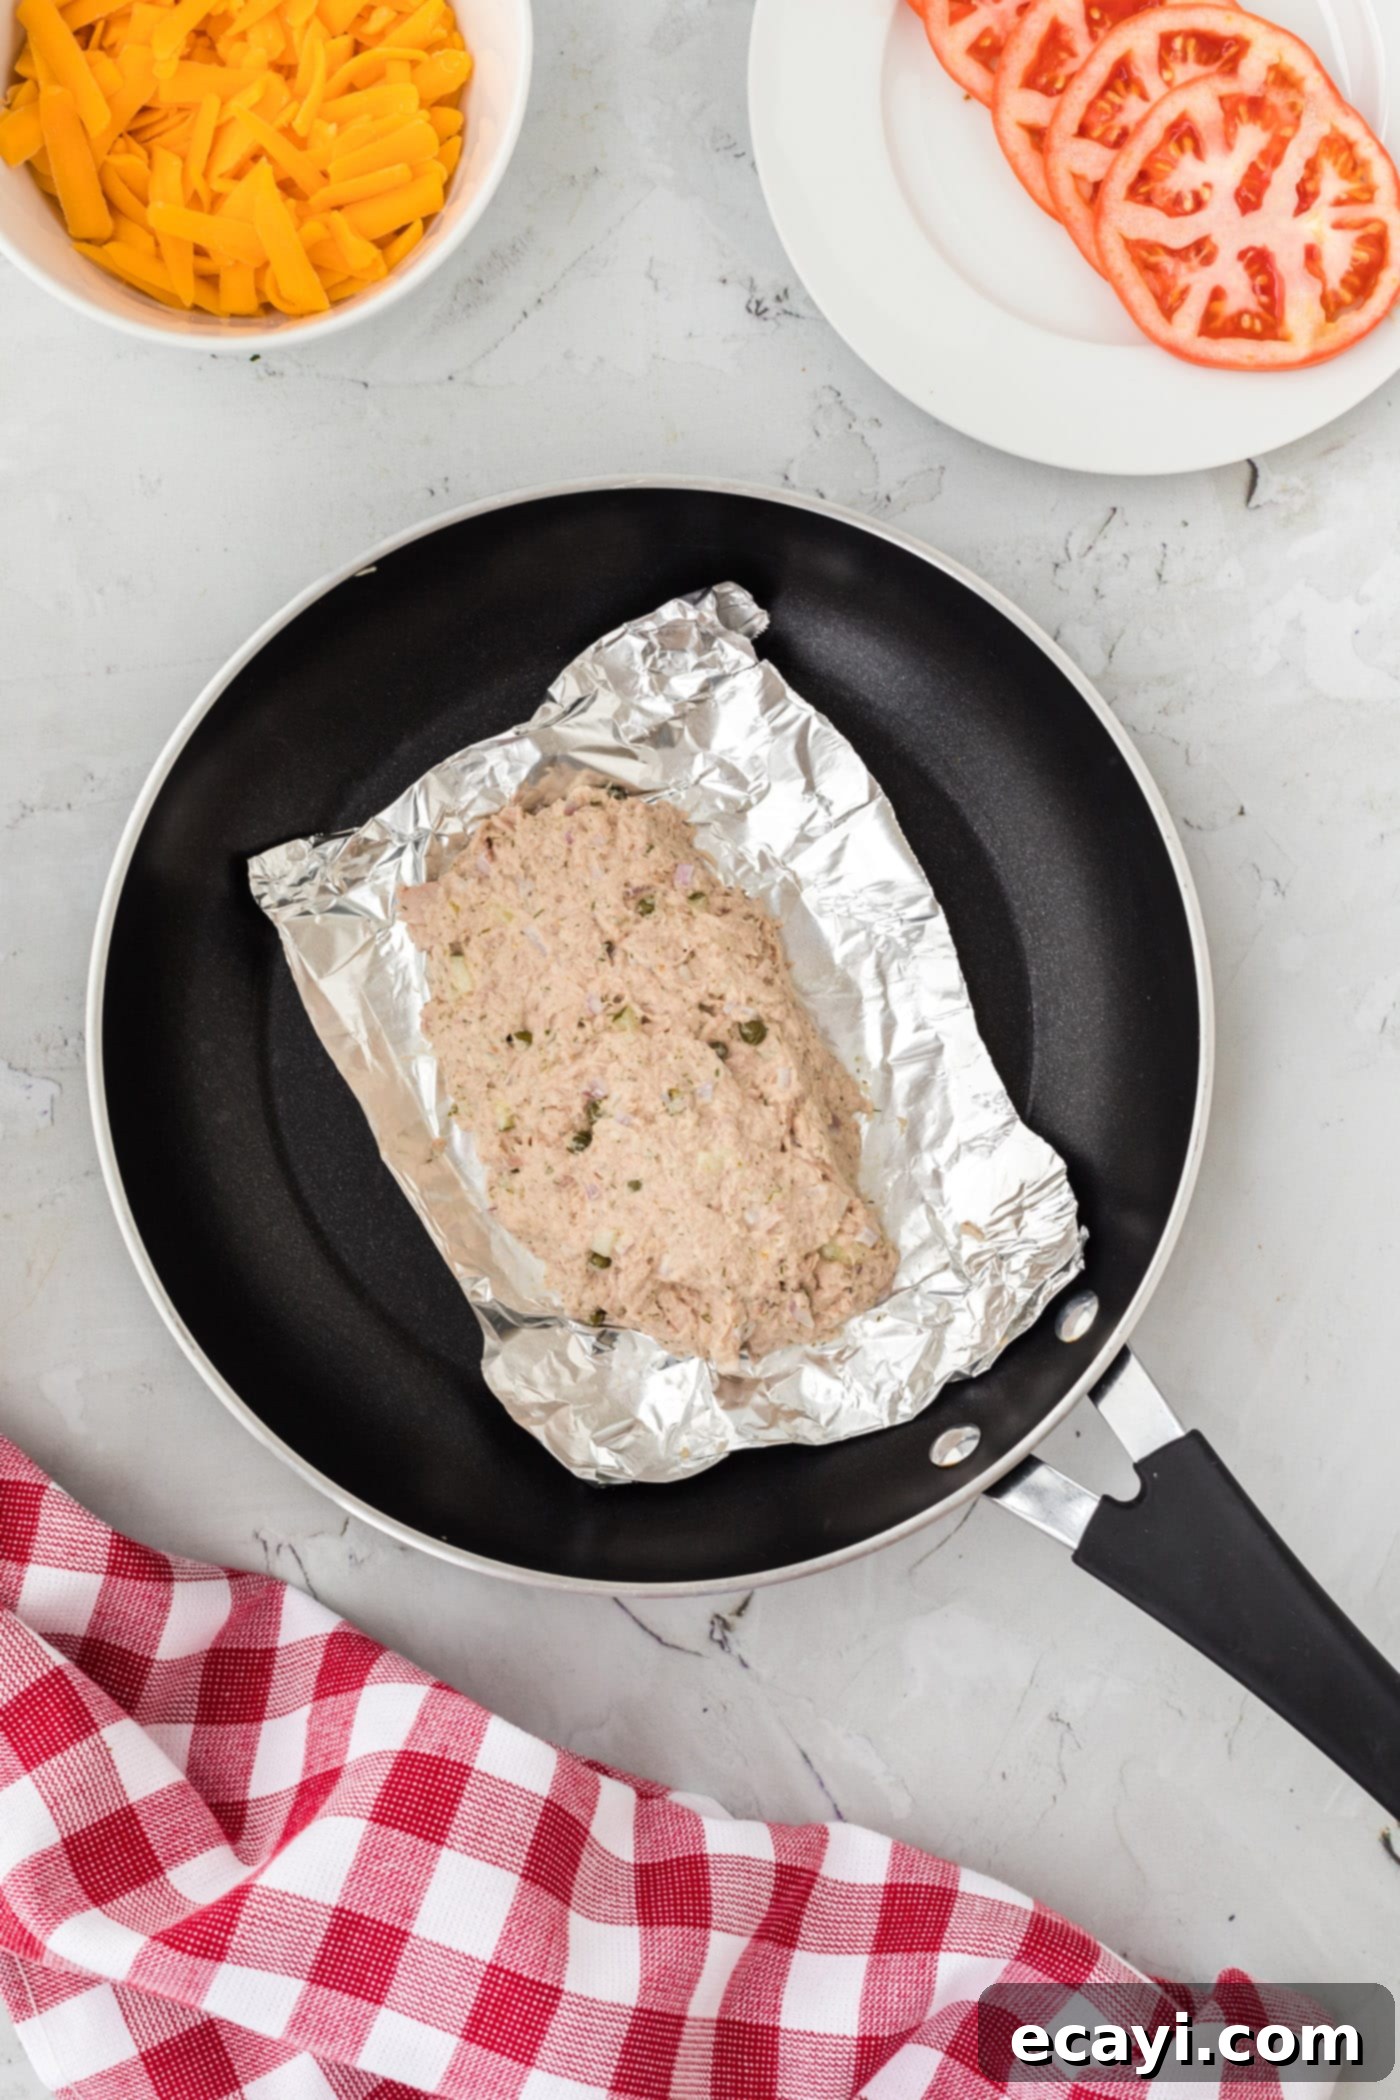
- Create Foil Bowls: For each sandwich you are making, take a piece of aluminum foil slightly larger than one slice of bread. Gently press the foil into a shallow bowl shape. This clever trick will help contain the tuna and cheese while they heat and melt, ensuring an even cook without making a mess in your skillet.
- Fill the Foil Bowls: Place one foil bowl into a skillet. Spoon half of your prepared tuna salad mixture into this foil bowl, spreading it out evenly. Repeat this process for the second sandwich, placing the other half of the tuna salad into a second foil bowl.

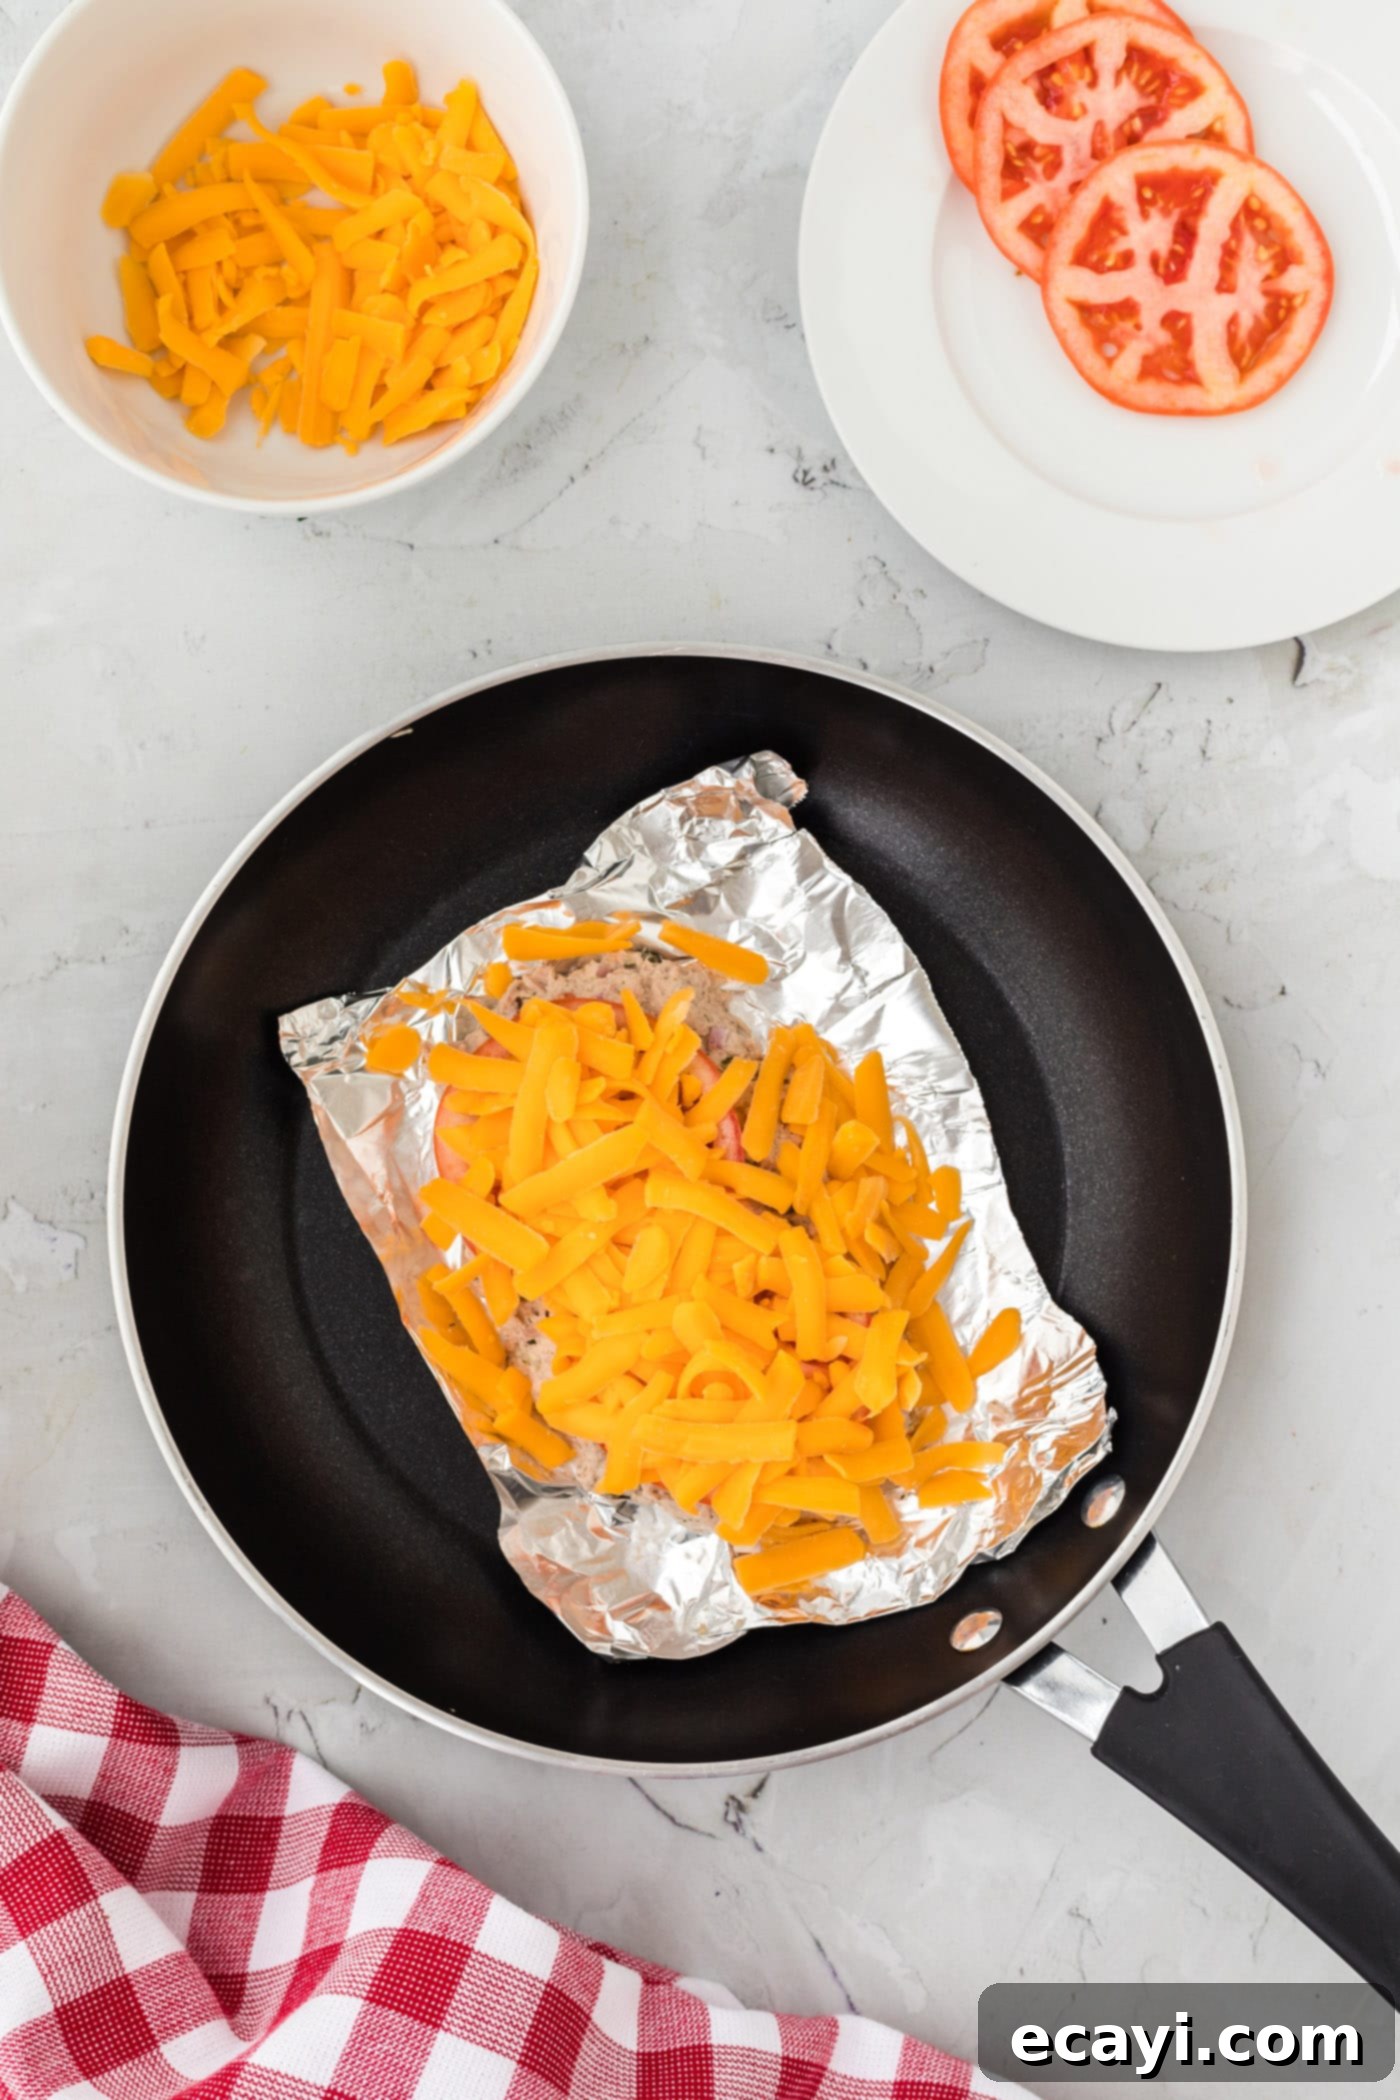
- Layer with Tomato and Cheese: On top of the tuna salad in each foil bowl, lay two slices of fresh tomato. Then, generously sprinkle half of the shredded cheddar cheese over the tomato and tuna. The cheese will melt down, encapsulating all the delicious flavors.

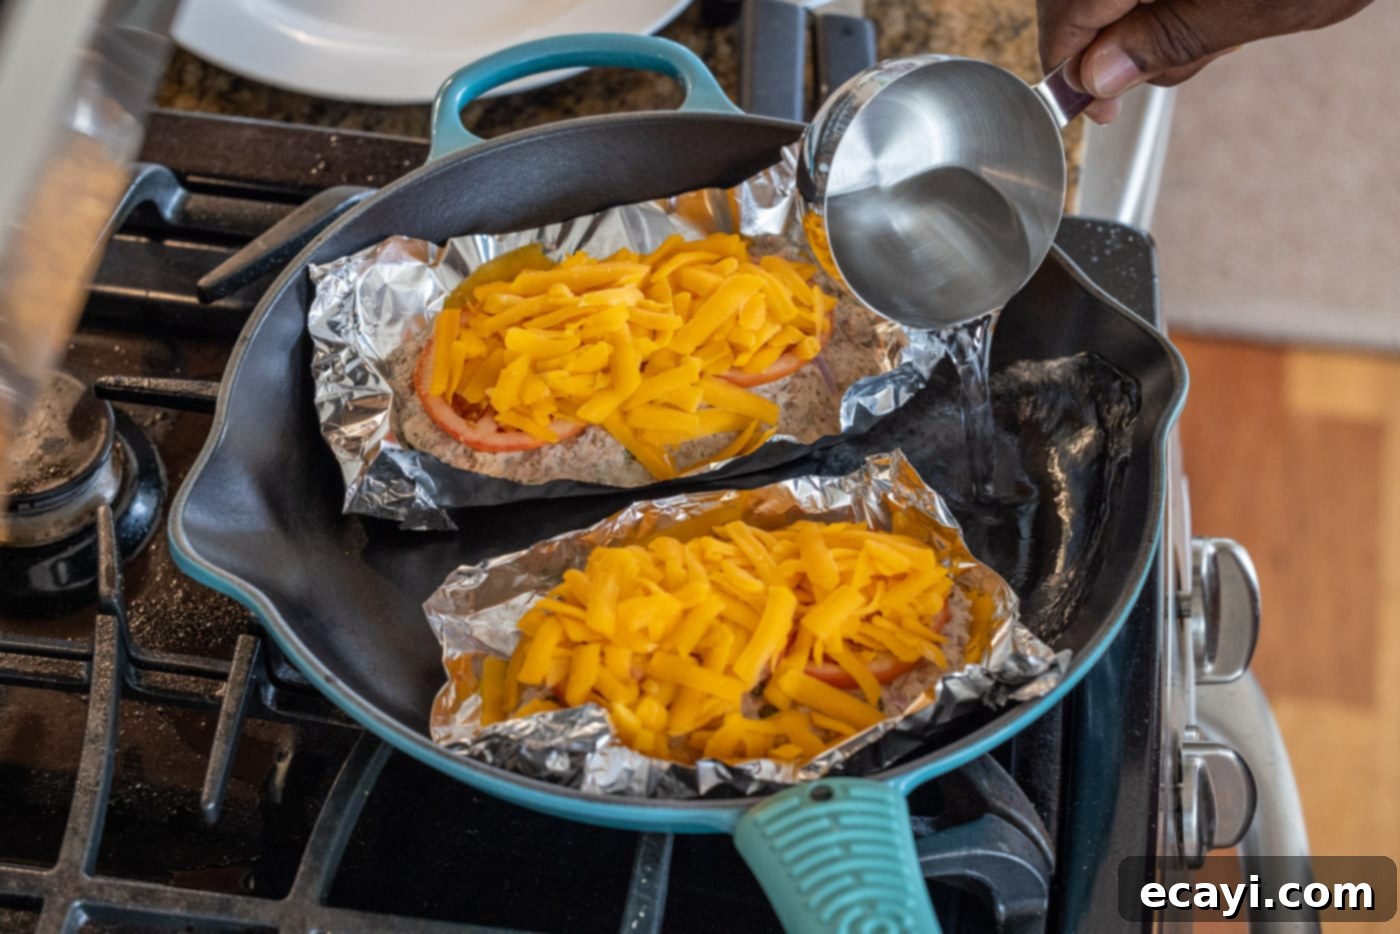
- Steam to Melt the Cheese: Place the skillet (with the foil bowls inside) onto the stove over medium heat. As the tuna salad starts to gently bubble, carefully add about ¼ cup of water to the pan, ensuring the water does not go into the foil bowls with the tuna and cheese.

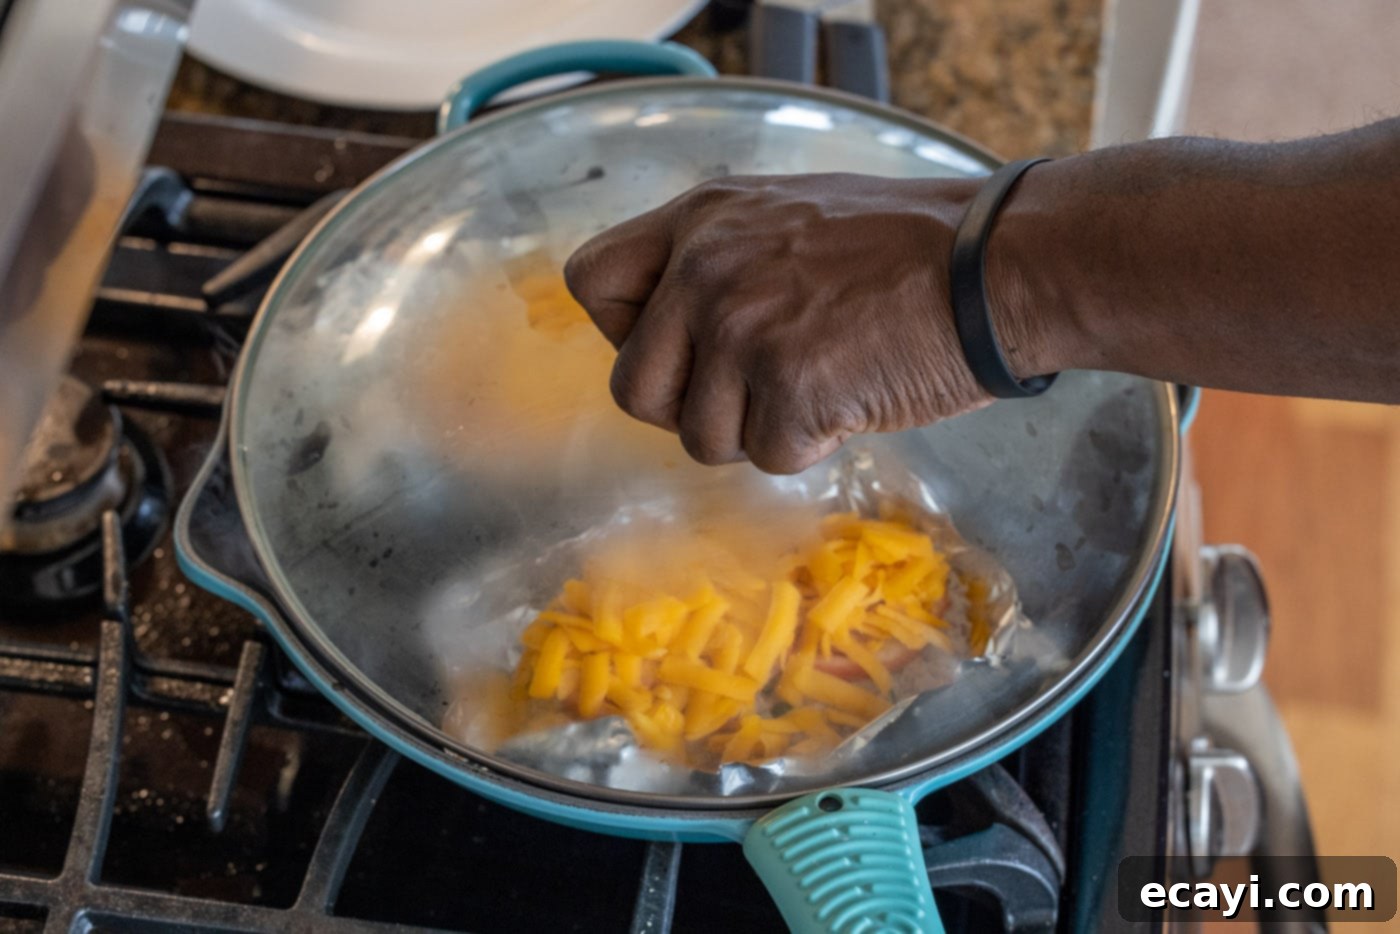
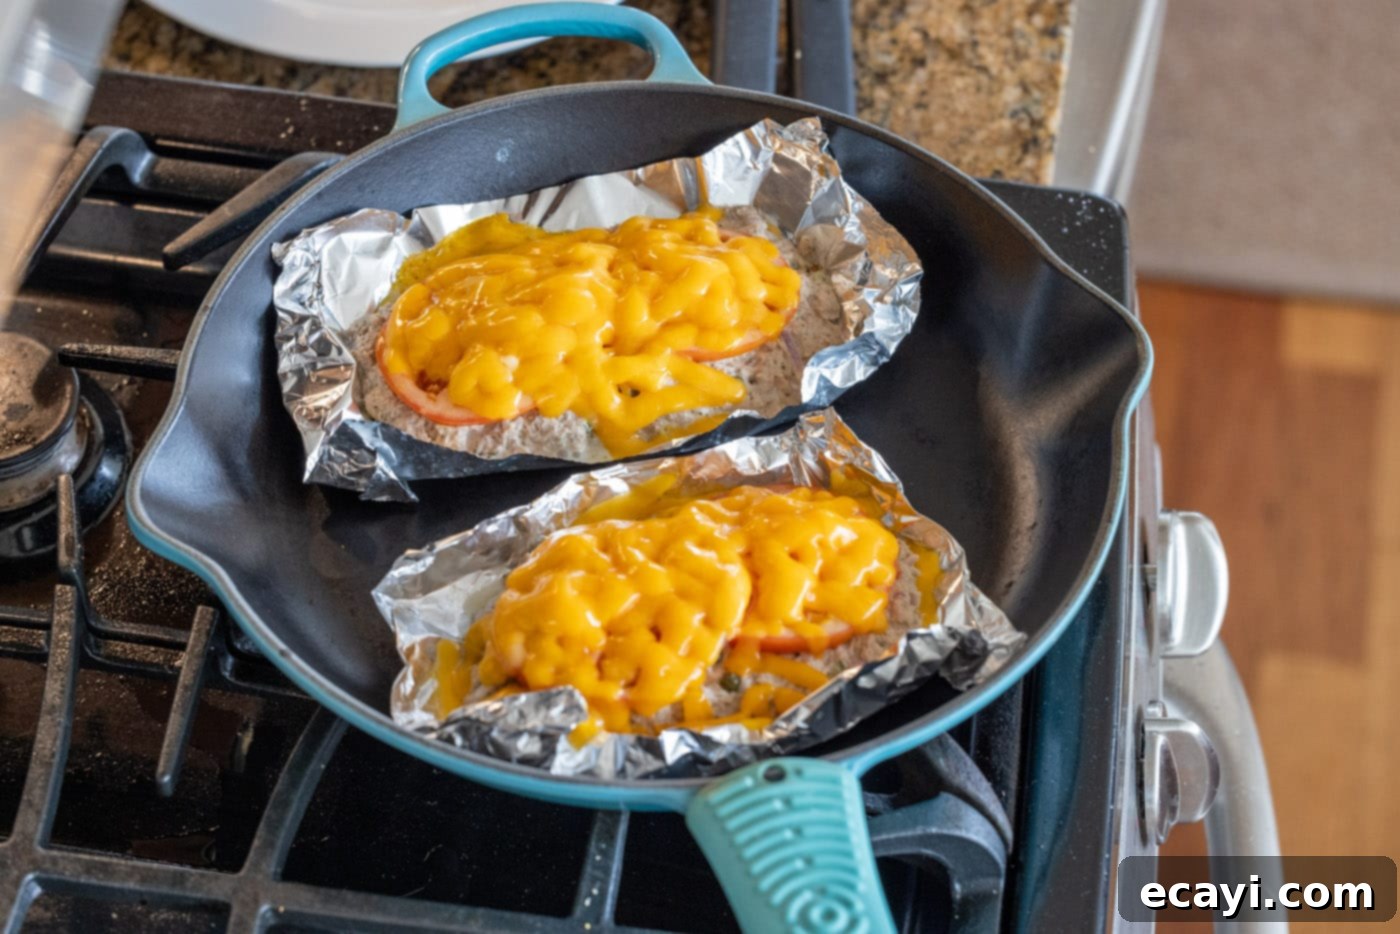
- Cover and Cook: Immediately place a lid on the skillet. The steam generated from the added water will rapidly and efficiently melt the cheese to a beautifully gooey consistency. Keep the lid on until the cheese is completely melted, usually just a few minutes.

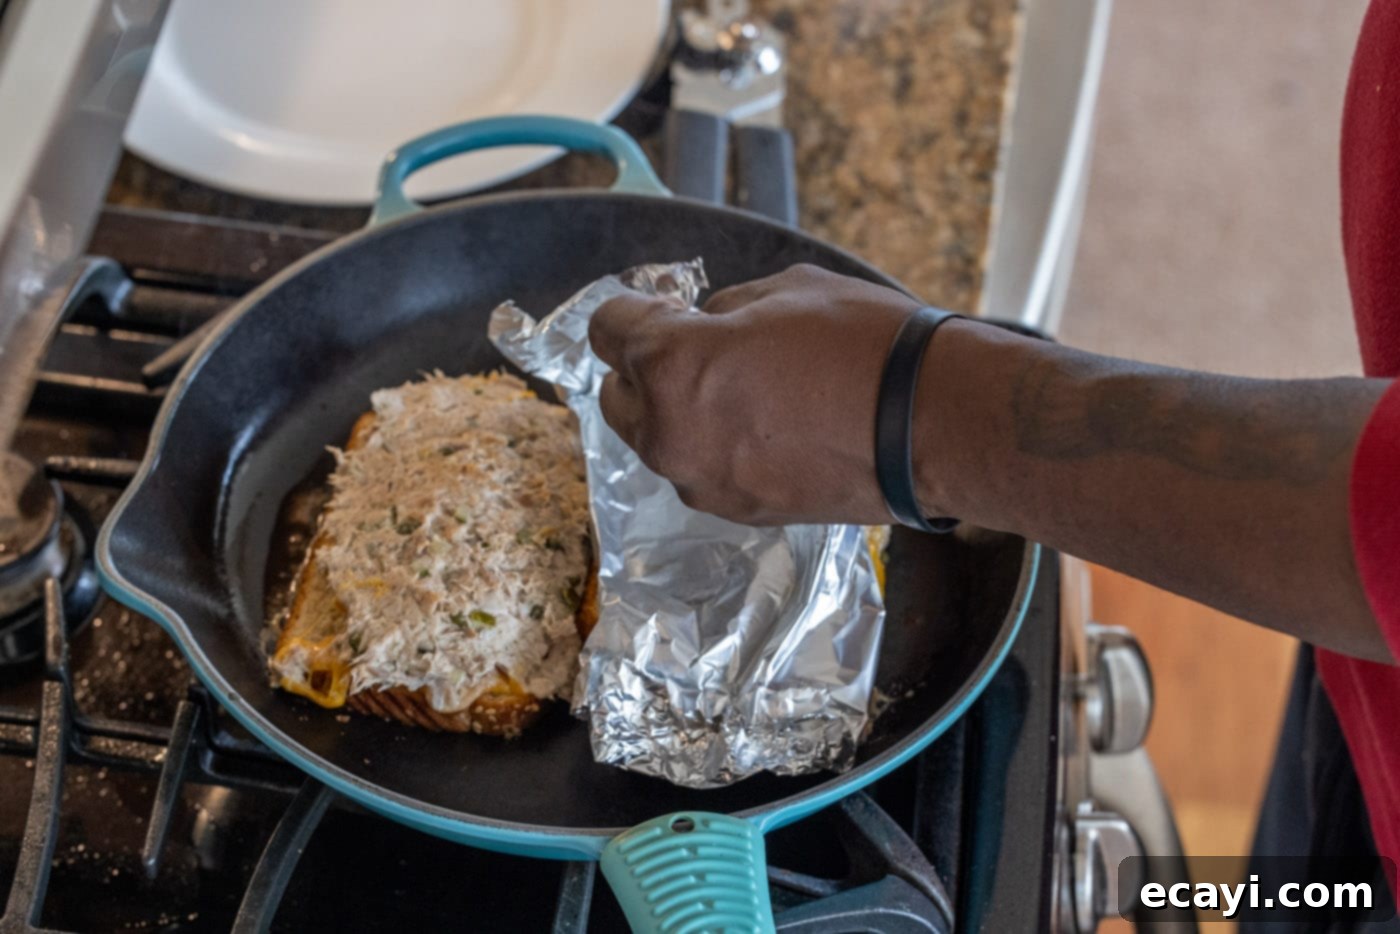
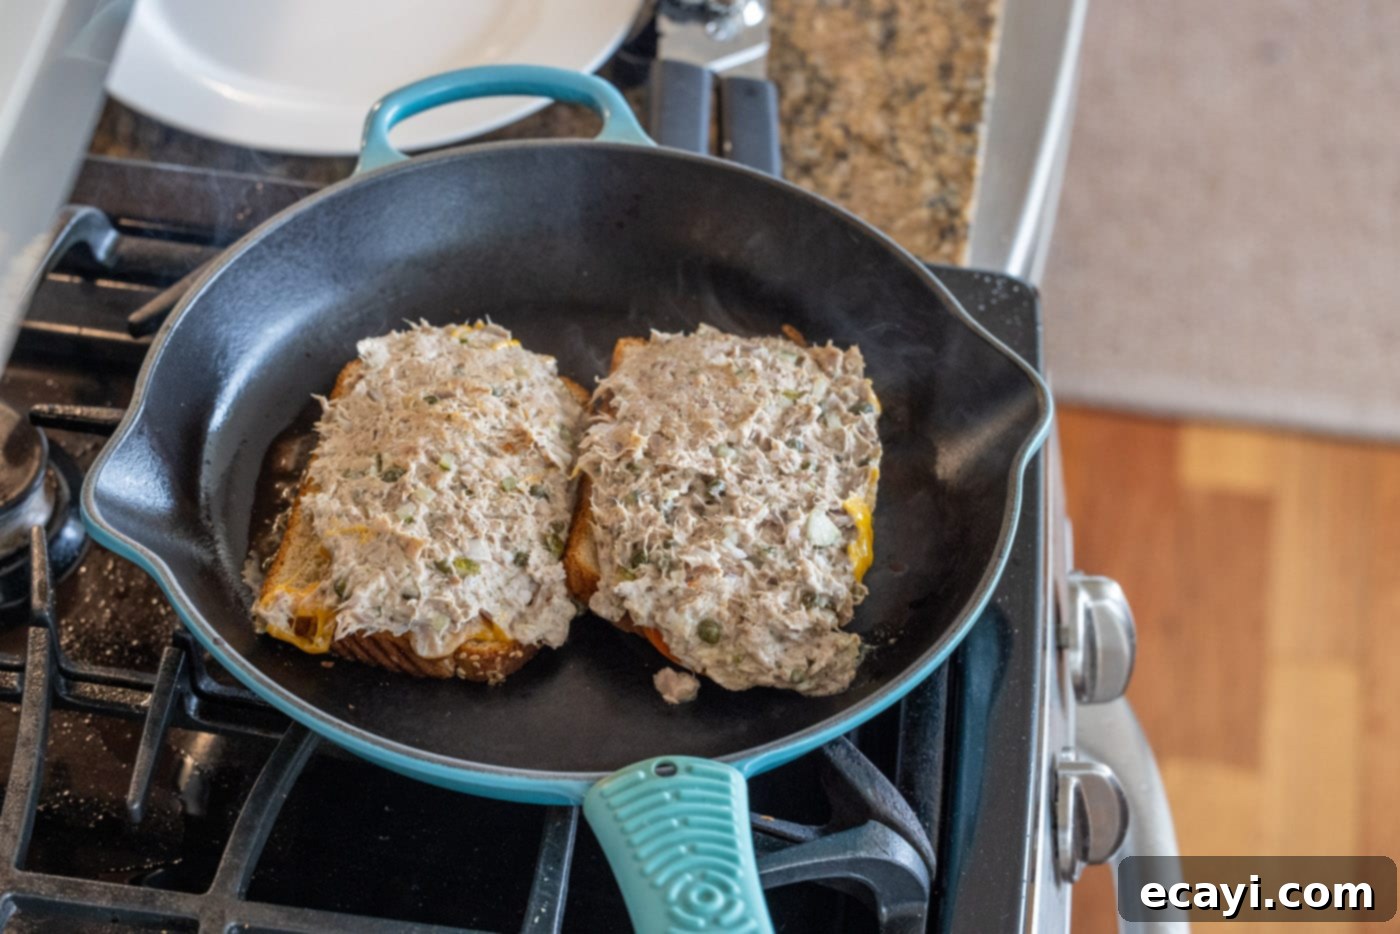
- Remove Melted Filling: Once the cheese is perfectly melted, turn off the heat. Using a fish turner spatula, carefully remove the foil bowls with the melted tuna and cheese mixture from the skillet.

- Prepare Skillet for Toasting: Add a small dab of butter to the skillet if needed, to prevent the bread from sticking and to help achieve that perfect golden-brown crust.
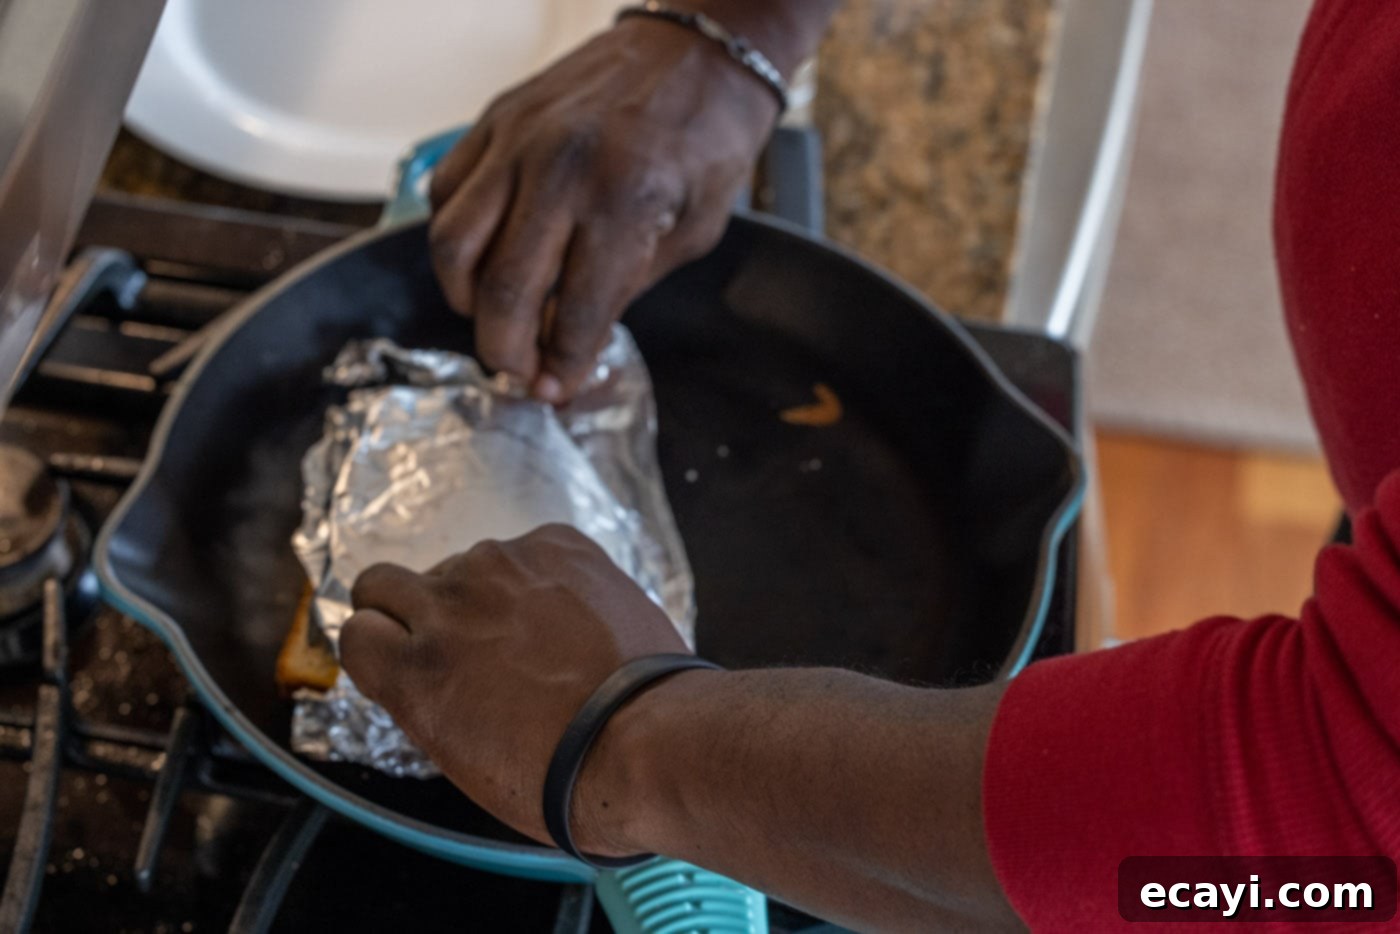
- Assemble and Grill: Place one slice of buttered bread, butter-side down, into the warm skillet. Quickly and carefully invert one of the foil bowls on top of the bread, peeling the foil off immediately. Some tuna may lightly stick to the foil, which is normal. Cover the tuna and cheese mixture with a second slice of bread, butter-side up.


- Repeat for Second Sandwich: If making two sandwiches, repeat step 10 for the second tuna melt.

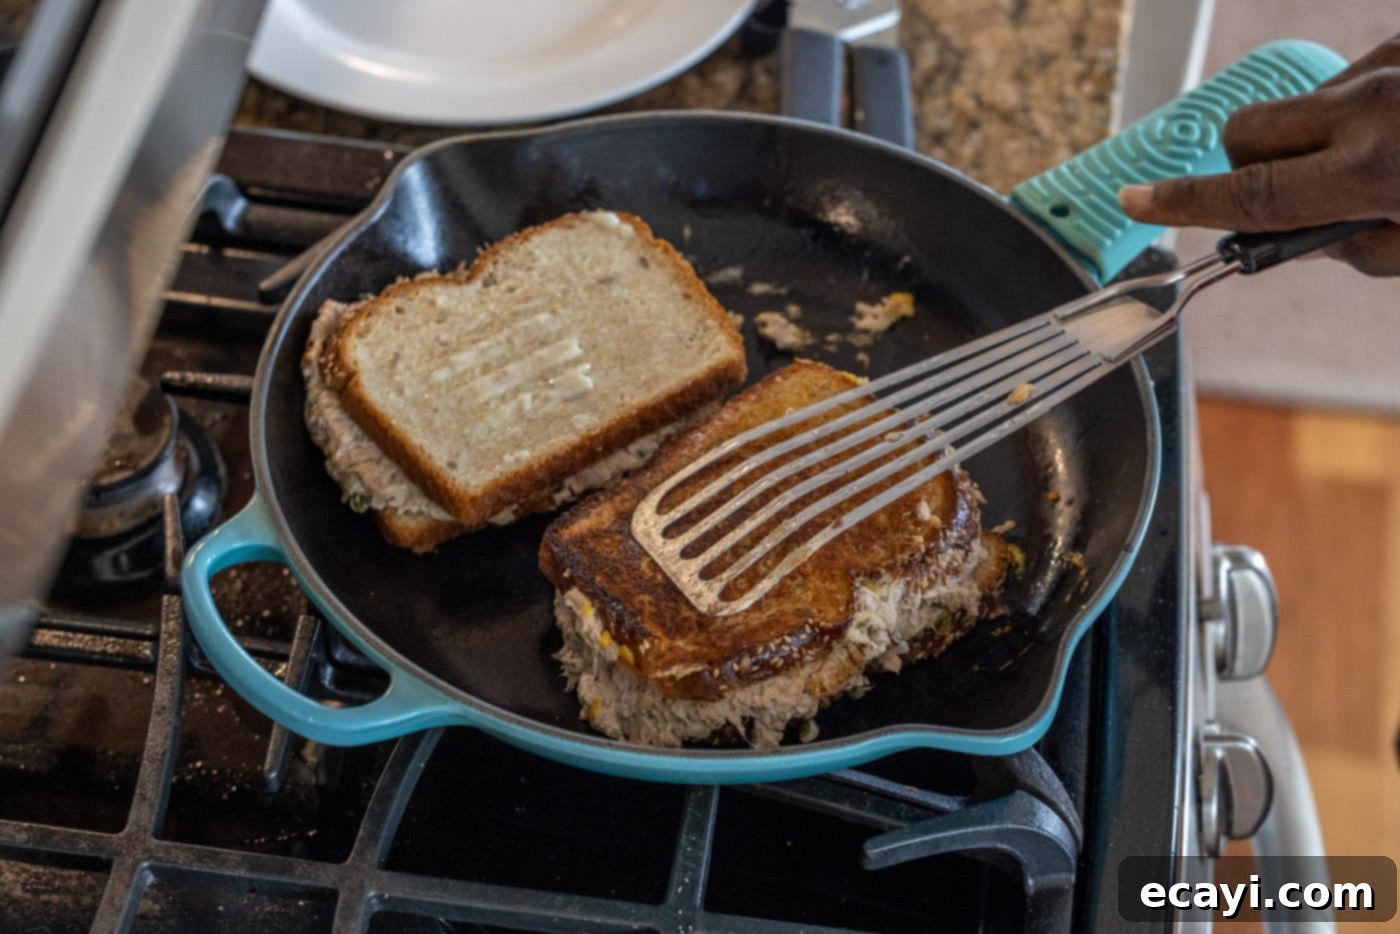
- Toast to Golden Perfection: Allow the sandwich to cook for 1-2 minutes on the first side, or until the bread is a beautiful golden brown and crispy. Then, carefully flip the sandwich over with your spatula and cook the other side for another 1-2 minutes, or until similarly golden. Repeat this grilling process for the second sandwich.

- Serve Immediately: Remove the finished tuna melts from the pan and prepare to serve.
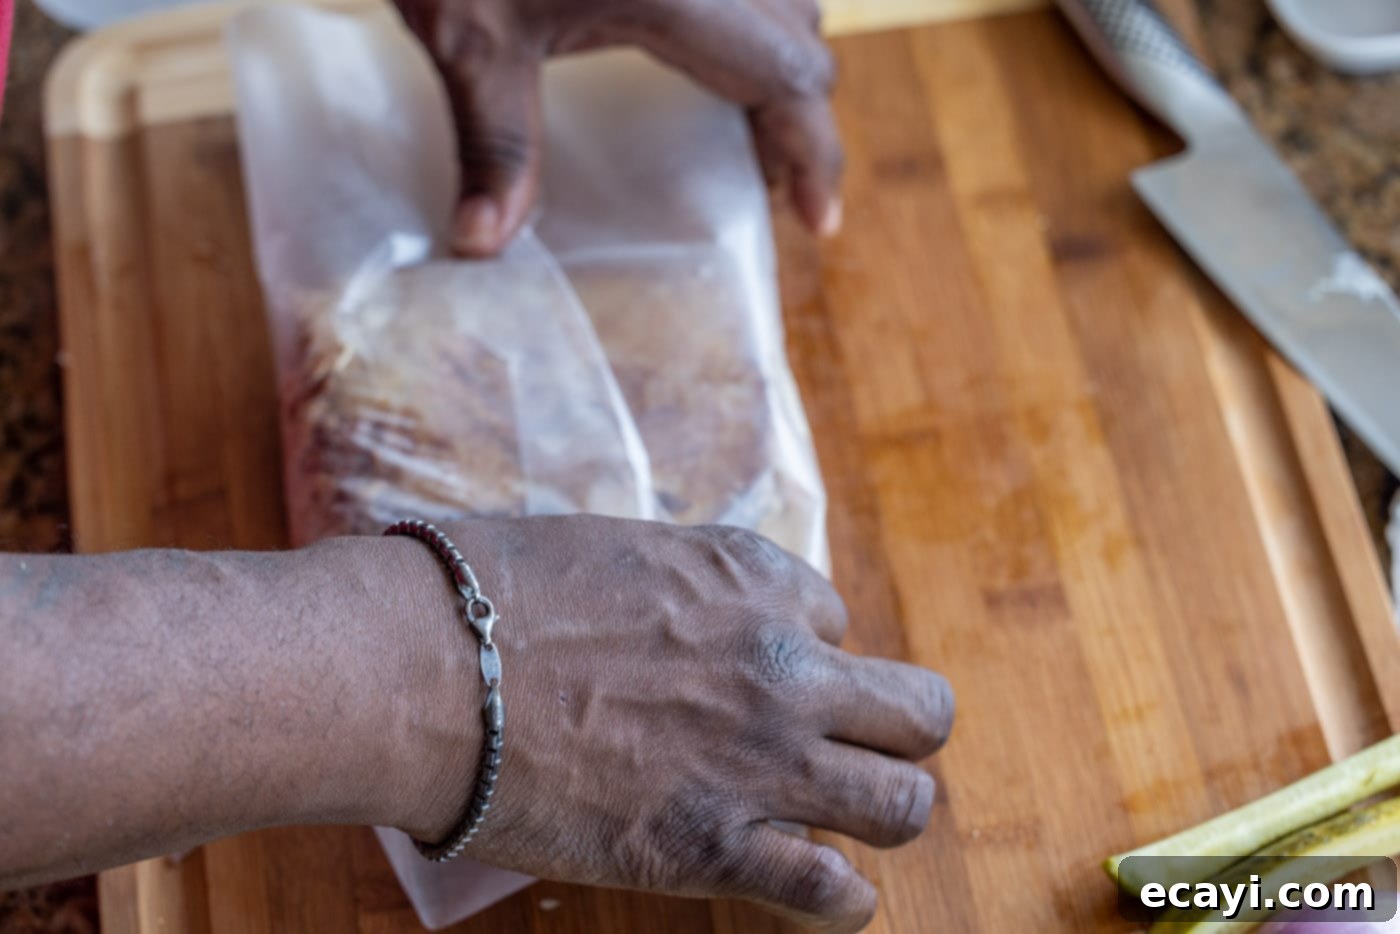
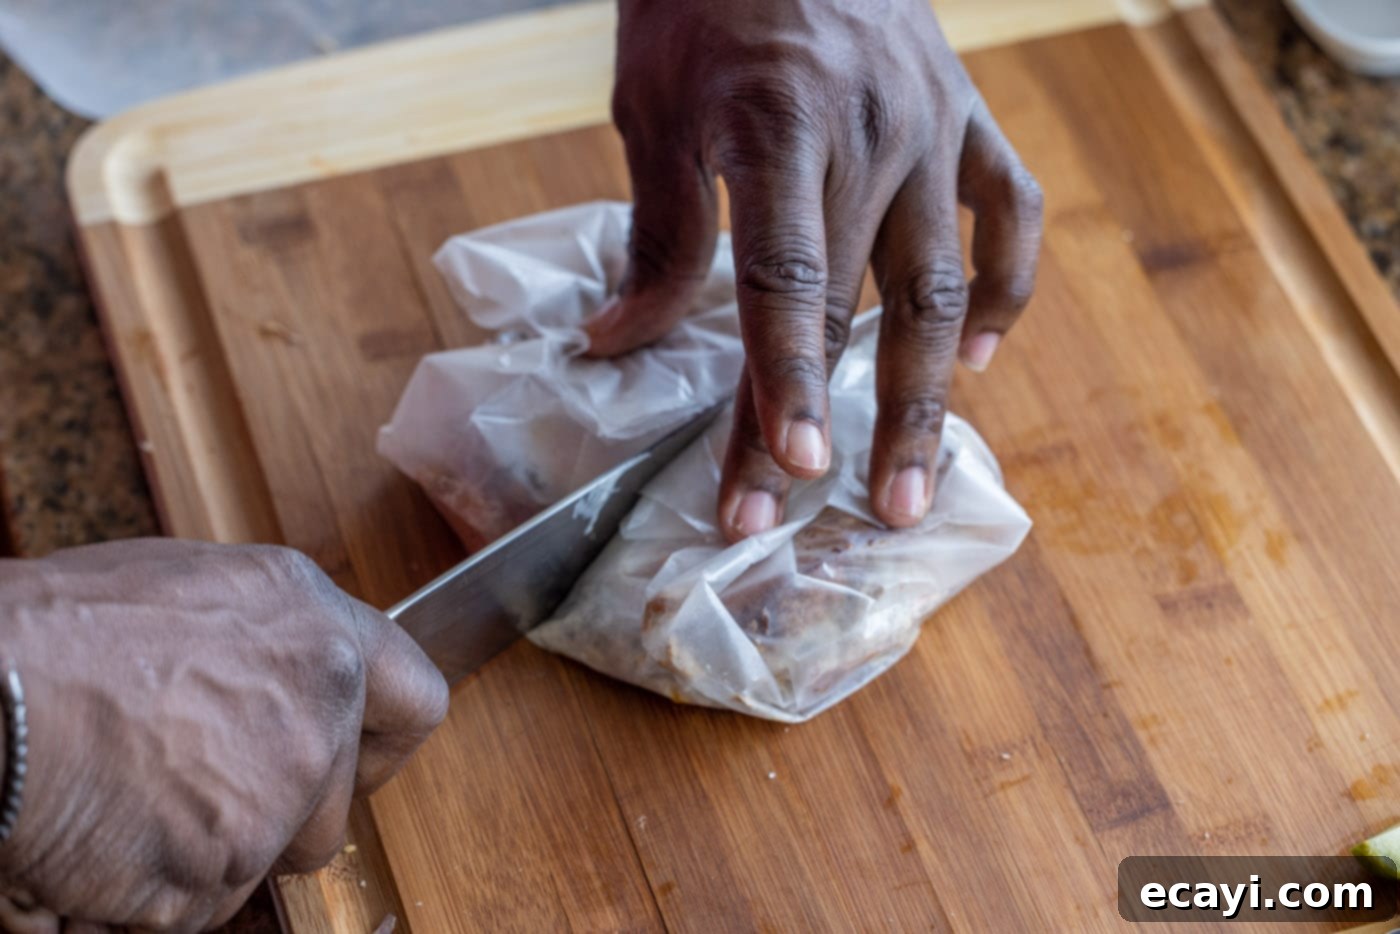
- Expert Slicing Technique: To cut a tuna melt without the delicious filling oozing out, gently wrap the entire sandwich in parchment paper. Then, use a sharp knife to slice it in half. The parchment paper will help hold everything together, ensuring a clean cut and preventing any leakage.


Frequently Asked Questions & Expert Tips for Tuna Melt Success
Absolutely! You can prepare the tuna salad a day or two ahead of time. Simply store it in an airtight container in the refrigerator. In fact, allowing the ingredients to mingle overnight often results in an even more flavorful tuna salad as the flavors have time to meld. When you’re ready to eat, simply assemble the sandwiches with the cheese, tomato, and bread right before cooking in the skillet for the freshest results.
The beauty of a tuna melt is its versatility! Feel free to get creative with your additions. Consider adding crisp lettuce, thinly sliced red onion (for a sharper bite), or pickled onions alongside the tomato when assembling the sandwich. You can also switch up the tuna salad fillings with ingredients like finely diced celery for extra crunch, sweet peas, bell peppers, or even a dash of hot sauce for a spicy kick. If capers aren’t your preference, you can substitute them with finely chopped olives for a different briny element, or simply omit them without losing too much flavor, though their salty touch is highly recommended.
A large non-stick skillet or a cast-iron pan works best. Non-stick will prevent sticking and make flipping easier. If using a cast iron pan, keep in mind it retains heat very well, so you might need to adjust your heat downward or allow the pan to cool slightly before toasting the bread to prevent burning and ensure an even golden crust.
The key to avoiding a soggy tuna melt lies in several steps. First, ensure your tuna is very well drained. Excess moisture is the enemy! Second, use sturdy bread like multigrain, sourdough, or whole wheat, as it holds up better than white bread. Third, toast your bread properly to create a barrier. Lastly, serve your tuna melt immediately after cooking. The longer it sits, the more likely moisture from the filling will seep into the bread.
Yes, while tuna in water is recommended for a lighter flavor, you can use tuna in oil if that’s what you have. Just make sure to drain it exceptionally well to prevent an overly oily or soggy sandwich. If you’re a fan of solid white albacore, it works beautifully for its firm texture and mild flavor.
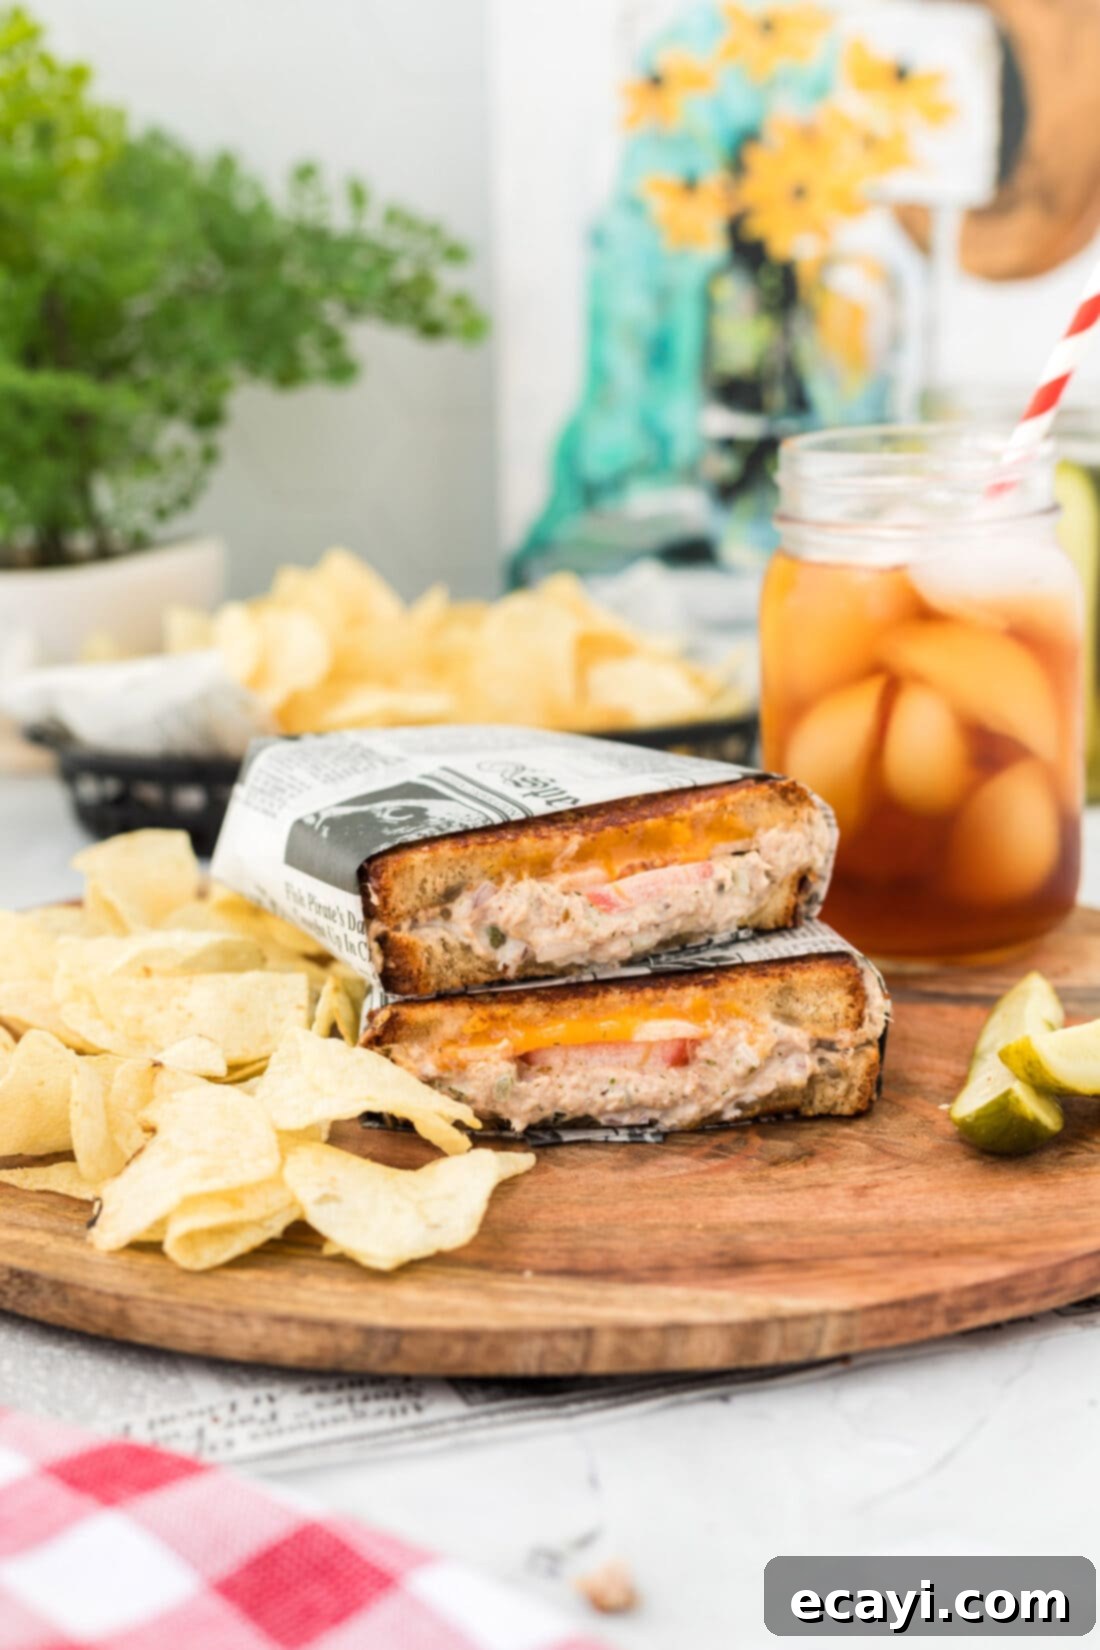
Delicious Serving Suggestions for Your Tuna Melt
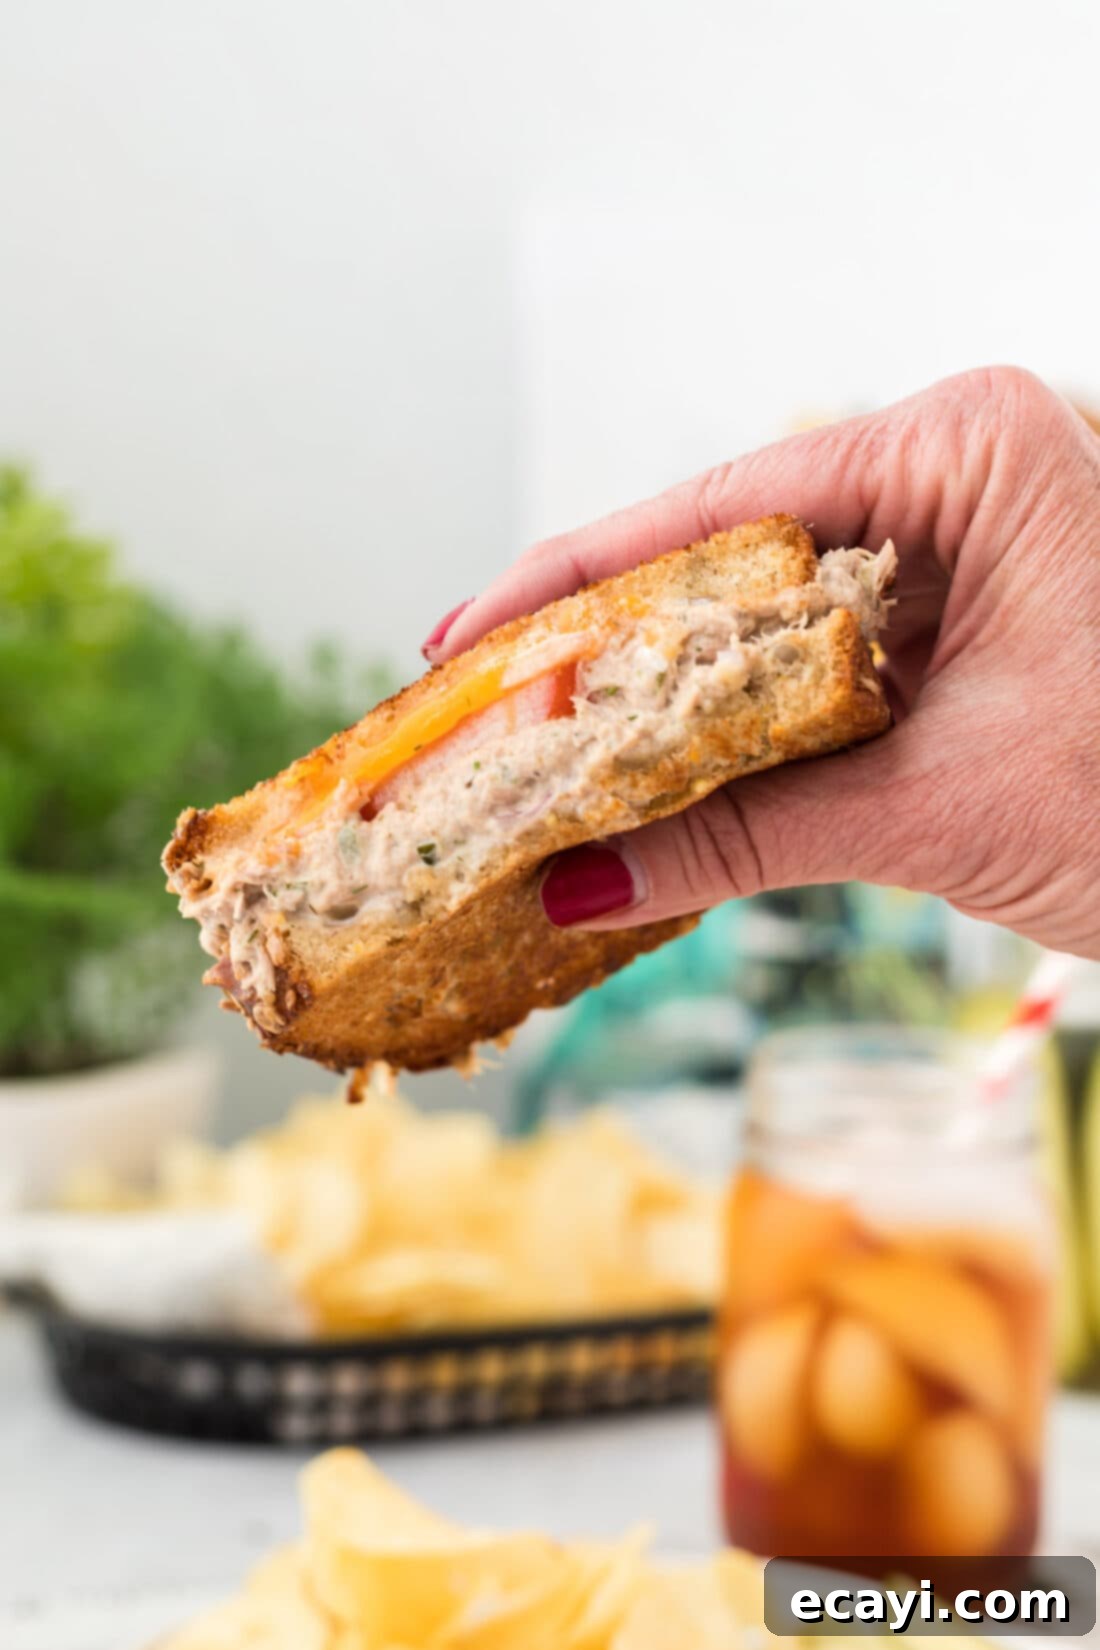
A classic tuna melt is a meal in itself, but it pairs wonderfully with a variety of sides to complete your lunch or dinner. For a traditional diner experience, serve your hot, cheesy tuna melt sandwich with a generous helping of crispy potato chips or golden french fries. If you’re looking for a healthier alternative, baked sweet potato fries offer a delicious and nutritious option. Refreshing pickle spears on the side provide a tangy crunch that perfectly complements the rich sandwich. For something lighter, a simple green salad or a cup of tomato soup makes an excellent companion. Remember, tuna melts are always best served immediately, straight from the skillet, while the cheese is still wonderfully melted and the bread is perfectly crisp. Enjoy every savory bite!
Explore More Dinner Sandwich Recipes
If you’re a fan of hearty, satisfying sandwiches for dinner, you’ll love these other culinary creations:
- Patty Melt: A juicy burger patty with caramelized onions and Swiss cheese on rye.
- Sloppy Joe: A messy, flavorful classic with seasoned ground meat in a sweet and savory sauce.
- Lobster Roll: A luxurious sandwich featuring succulent lobster meat, lightly dressed, in a toasted bun.
- Reuben Sandwich: Piled high with corned beef, sauerkraut, Swiss cheese, and Russian dressing on rye.
- Cuban Sandwich: A pressed sandwich with roast pork, ham, Swiss cheese, pickles, and mustard.
- Monte Cristo Sandwich: A delightful sweet and savory combination of ham, turkey, and Swiss cheese, dipped in egg batter and fried.
I’m passionate about baking and cooking, and I love sharing my kitchen experiences with all of you! To make sure you never miss a delicious new recipe, I offer a convenient newsletter delivered right to your inbox every time a new post goes live. Simply subscribe and start receiving your free daily recipes!
Tuna Melt Sandwich
IMPORTANT – There are often Frequently Asked Questions within the blog post that you may find helpful. Simply scroll back up to read them!
Print It
Pin It
Rate It
Save ItSaved!
Ingredients
For the Sandwiches:
- 4 slices multigrain bread (or sourdough, whole wheat, rye)
- butter or margarine for spreading on bread and skillet
For the Tuna Salad Filling:
- 20 ounces tuna in water drained (approx. four 5oz cans)
- 2 Tablespoons minced shallots about 1 small shallot
- 1 ½ Tablespoons capers (optional, or adjust to taste)
- ½ cup mayonnaise
- 1 teaspoon dried dill
- 1 teaspoon lemon juice
- 2 Tablespoons chopped pickles
- ½ Tablespoons horseradish mayo (optional, substitute with regular mayo for milder flavor)
For Assembly:
- ¾ cup shredded cheddar cheese (or other favorite melting cheese)
- 4 slices tomato
Equipment You’ll Need
-
Large skillet
-
Fish turner spatula
Chef’s Notes & Expert Tips
- Pan Choice: If you are using a cast iron pan, remember it retains significantly more heat than a non-stick skillet. To prevent your bread from burning, allow the cast iron skillet to cool slightly before adding the first slice of buttered bread for grilling. This ensures a beautifully golden, non-stick crust.
- Shred Your Own Cheese: For the best melty results, always shred your own cheese from a block. Pre-packaged shredded cheeses often contain anti-caking agents that can hinder smooth melting and sometimes lead to a grainy texture in your dishes. Freshly shredded cheese guarantees a superior, gooey melt.
- Bread Selection: Multigrain bread is recommended for its sturdy texture and added nutrients, providing an excellent foundation for your tuna melt. However, feel free to experiment with sourdough for a tangy kick, whole wheat for a hearty base, or rye bread for a distinctive, savory flavor.
- Perfect Toasting: Cook your tuna melts over medium heat. This allows the bread to gradually crisp and turn golden brown without burning, while the inside heats through and the cheese remains perfectly melted.
Instructions
-
Generously butter one side of each of your four slices of bread. Set aside.
-
In a medium bowl, combine the drained tuna, minced shallots, capers, mayonnaise, dried dill, lemon juice, chopped pickles, and horseradish mayo. Mix well until all ingredients are evenly distributed.
-
Prepare two shallow foil bowls, each slightly larger than a slice of bread. These will hold the tuna mixture during the initial melting phase.
-
Place one foil bowl into a skillet. Spoon half of the tuna salad mixture into this bowl. Place the remaining tuna salad into the second foil bowl.
-
On top of the tuna salad in each foil bowl, arrange 2 slices of fresh tomato. Then, generously sprinkle half of the shredded cheddar cheese over the tomato and tuna.
-
Place the skillet with the foil bowls on the stove over medium heat. As the tuna begins to gently bubble, carefully add approximately ¼ cup of water to the pan, being very careful not to get any water into the foil bowls themselves.
-
Immediately place a lid on the skillet. The steam created by the water will quickly and efficiently melt the cheese to a wonderfully gooey consistency.
-
Once the cheese is fully melted, turn off the heat. Using a fish turner spatula, carefully remove the foil bowls containing the melted tuna and cheese mixture from the skillet.
-
If necessary, add a small amount of butter to the skillet to ensure the bread doesn’t stick and toasts evenly.
-
Place one slice of buttered bread (butter side down) into the heated skillet. Quickly invert one foil bowl directly on top of the bread and gently peel the foil off. Cover with a second slice of bread, butter side up.
-
Repeat the assembly process for the second sandwich in the skillet.
-
Allow the sandwiches to cook for 1-2 minutes per side, or until the bread is a beautiful golden brown and crispy. Carefully flip them over to toast the other side. Remove from the pan once cooked to perfection.
-
For neat slicing and to prevent the filling from oozing out, wrap each tuna melt in parchment paper before slicing it in half with a sharp knife. Serve immediately and enjoy!
Nutrition Information
The recipes on this blog are tested with a conventional gas oven and gas stovetop. It’s important to note that some ovens, especially as they age, can cook and bake inconsistently. Using an inexpensive oven thermometer can assure you that your oven is truly heating to the proper temperature. If you use a toaster oven or countertop oven, please keep in mind that they may not distribute heat the same as a conventional full sized oven and you may need to adjust your cooking/baking times. In the case of recipes made with a pressure cooker, air fryer, slow cooker, or other appliance, a link to the appliances we use is listed within each respective recipe. For baking recipes where measurements are given by weight, please note that results may not be the same if cups are used instead, and we can’t guarantee success with that method.
