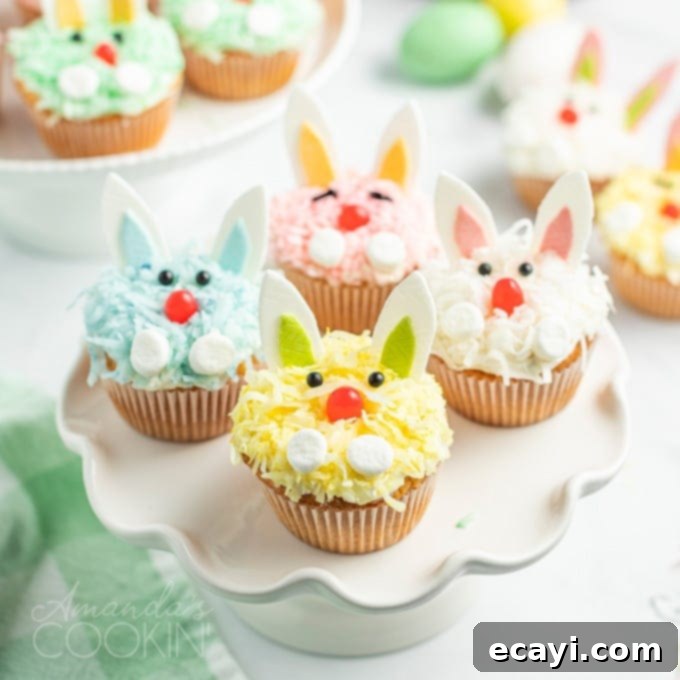
Hop into Spring with These Adorable Easter Bunny Cupcakes: An Easy Recipe & Decorating Guide
Get ready to delight everyone this Easter with these unbelievably adorable Easter bunny cupcakes! You don’t need to be a professional cake decorator to bring these cute characters to life. This recipe is designed to be simple and enjoyable for bakers of all skill levels, especially since it starts with a convenient cake mix. Imagine the smiles when your family and friends see these festive treats alongside our equally charming Easter Chick Cupcakes. You’re guaranteed to be the star of the holiday celebration!
Create Unforgettable Easter Memories with Sweet Bunny Cupcakes
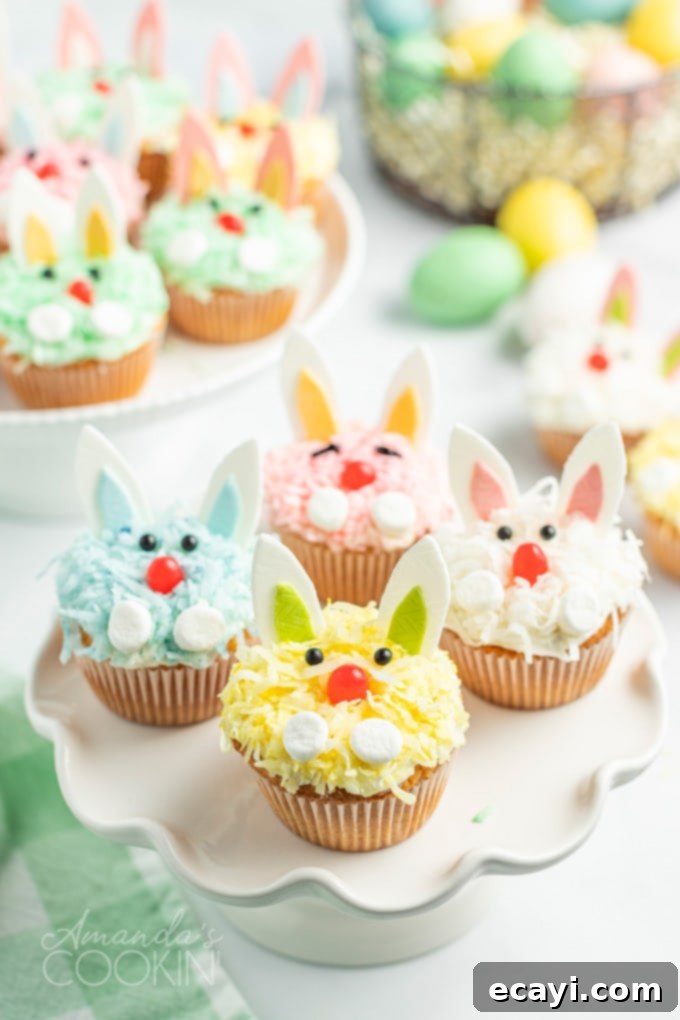
Aren’t these bunny cupcakes simply irresistible? Their charm is undeniable, making them a fantastic and easy Easter dessert idea that’s almost too cute to eat – almost! Each cupcake is a miniature work of art, featuring colorful details that capture the joyful spirit of Easter. They’re perfect for brightening up any holiday gathering, from family brunches to school parties or even as a cheerful surprise for colleagues.
The beauty of this recipe lies in its simplicity. By starting with a boxed cake mix and canned frosting, you significantly cut down on prep time, allowing you to focus on the fun and creative decorating process. This makes it an ideal activity for involving children, who will love transforming plain cupcakes into delightful bunnies. The whimsical gum ears, soft marshmallow paws, and vibrant jelly bean noses come together to create a dessert that is not only delicious but also visually spectacular. Get ready to sprinkle some extra joy into your Easter celebrations!
Why These Easy Easter Bunny Cupcakes Are a Must-Make This Spring
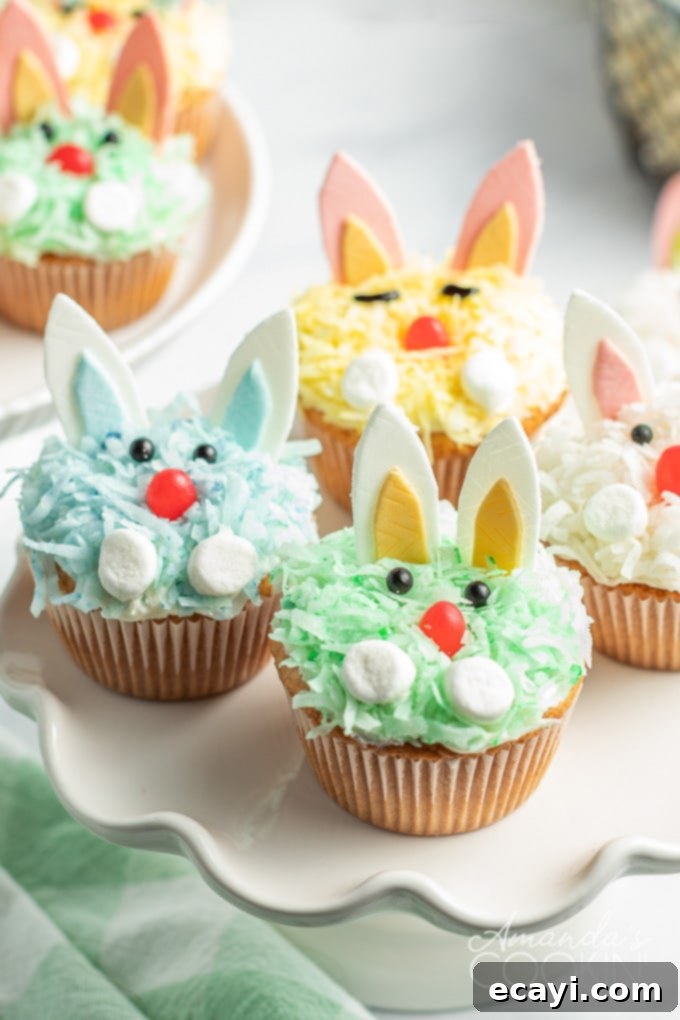
These Easter bunny cupcakes aren’t just desserts; they’re a celebration in themselves! Here’s why they’ll become your new favorite holiday tradition:
- Effortless Preparation: Forget complicated recipes. With a standard cake mix and ready-made frosting, you’re halfway to success before you even begin decorating. This saves precious time, allowing you to enjoy the holiday more.
- Kid-Friendly Fun: The decorating process is simple enough for even little hands to help. Coloring coconut, placing ears, and adding features are wonderful activities that will engage children and create lasting memories. It’s a fantastic way to bond over baking!
- Visually Stunning: The vibrant colors of the coconut, the playful gum ears, and the sweet little faces make these cupcakes incredibly eye-catching. They instantly add a festive touch to any dessert table and are sure to be a conversation starter.
- Perfect for Any Occasion: Whether it’s a grand Easter feast, a casual family get-together, a school potluck, or an office party, these cupcakes are guaranteed to be a hit. They travel well and are individually portioned, making serving a breeze.
- Customizable Creativity: While we provide a guide, feel free to let your imagination run wild! Experiment with different colored gums for ears, various jelly bean shades for noses, or even different types of sprinkles for added sparkle.
- Delicious Every Time: At their core, these are delightful cupcakes, and who can resist a moist, fluffy cupcake topped with sweet frosting and fun decorations? They taste as good as they look!
Ingredients You’ll Need for Your Adorable Bunny Cupcakes
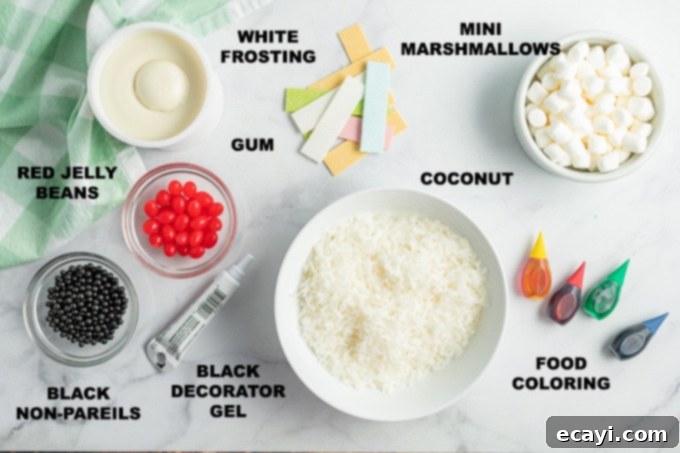
Gathering your ingredients is the first step to creating these delightful Easter treats. Most items are readily available at your local grocery store, and the decorations allow for a touch of creative flair!
- One 15-ounce box of white cake mix, prepared as 24 cupcakes (follow package directions, and check our tips below for enhancing boxed cake mix!)
For the Charming Decorations:
- One 16-ounce container of vanilla or white frosting (canned works perfectly for convenience)
- 48 sticks of gum in white or other bright colors such as yellow, blue, or green (see our “Kitchen Tips” section for specific brand and color suggestions!)
- 24 sticks of pink or red gum (for the inner ear details)
- 24 miniature marshmallows, white or various colors (for the bunny paws)
- 24 pink or red jelly beans (these make the cutest bunny noses!)
- One 0.67-ounce tube of black decorating gel and/or black nonpareils (for adding expressive eyes)
- 2 ½ cups of sweetened flaked coconut
- 1 drop each of liquid food coloring: red, green, blue, and yellow
Essential Kitchen Tools for Perfect Cupcakes
Having the right tools on hand makes the baking and decorating process smoother and more enjoyable. Here are the items you’ll want to have ready:
- Muffin pan (to bake your cupcakes)
- Hand mixer (for preparing the cake mix)
- Food coloring (for vibrant coconut)
- Wire cooling racks (essential for cooling cupcakes evenly)
- Mixing bowls (for preparing cake mix, coloring coconut)
- Measuring cups and spoons
- Rubber spatula or spoon (for mixing and spreading)
- Kitchen shears or a small knife (for shaping gum ears)
- Toothpicks (for creating ear slits and precise eye details)
Pro Tips for Baking & Decorating Success
Even with a simple recipe, a few insider tips can elevate your Easter bunny cupcakes from great to absolutely spectacular. Pay attention to these details for the best results!
- Enhancing Your Boxed Cake Mix: To make your cupcakes taste more homemade, try these simple swaps:
- Replace the water called for on the box with an equal amount of milk.
- Add an extra egg to the mix.
- Substitute butter for the oil, using the same quantity, melted and slightly cooled.
These small changes will result in a richer, moister, and more flavorful cupcake.
- Gum Selection for Ears: The type of gum stick is crucial for creating sturdy and colorful ears. The “Extra” brand of gum sticks is highly recommended as it comes in several useful colors. Here’s a quick guide:
- Polar Ice: Perfect for classic white bunny ears.
- Peppermint: Great for blue ears.
- Smooth Mint: Offers a lovely light blue option.
- Spearmint: Provides a natural green shade.
- Cinnamon: Ideal for red ears.
- For bright yellow ears, look for Juicy Fruit Original gum.
Ensure you have a good selection of colors to make your bunny ears pop!
- Optimal Serving and Storage: These cupcakes are undoubtedly at their best when served immediately after decorating. The gum ears will be firm and the coconut fresh. However, if you need to prepare them in advance, store the decorated cupcakes in the refrigerator. Gum can become soft or even melt in warm or moist conditions, so covering cupcakes at room temperature could lead to your adorable gum ears losing their shape and falling over. A cool, dry environment is key to keeping your bunnies looking their best.
- Prepping for Perfect Eyes: Before piping on the eyes with black decorating gel, gently pat down the coconut flakes in the area where the eyes will be. This simple step creates a smoother surface, making it much easier to pipe neat, defined eyes. For a whimsical, “sleeping bunny” look, use the gel to draw small, delicate half-circles. You can also use black nonpareils for bright, dotted eyes, or even small chocolate chips!
- Cooling is Crucial: Always allow your cupcakes to cool completely on wire racks before frosting and decorating. Attempting to frost warm cupcakes will cause your frosting to melt and slide right off, ruining your hard work.
- Frosting Consistency: If your canned frosting seems too stiff, you can warm it slightly in the microwave for 5-10 seconds to make it more spreadable. If it’s too runny, chilling it in the refrigerator for a short period can help firm it up.
Step-by-Step Guide: How to Make Your Easter Bunny Cupcakes
Now for the fun part! Follow these simple steps to transform your cupcakes into charming Easter bunnies.
- Bake Your Cupcakes: Begin by preheating your oven to the temperature specified on your cake mix box, typically 350°F (175°C). Line 24 regular-size muffin cups with paper baking cups. Prepare the cake mix according to the package instructions for cupcakes. Once baked, let them cool in the muffin pans for about 10 minutes. This allows them to set slightly before transferring. Then, carefully remove the cupcakes from the pans and place them on wire cooling racks to cool completely, which usually takes around 30 minutes. Ensuring they are fully cooled is vital for successful frosting!
Preparing Your Adorable Decorations
While your cupcakes are cooling, you can start on the colorful and creative decorations. This is where the magic begins!
- Coloring the Coconut: Divide your sweetened flaked coconut evenly among five small bowls, aiming for about ½ cup in each. Add 1 drop of red food coloring to one bowl and stir with a spoon. For best results and even color distribution, finish mixing the coconut using your fingers. Gently lift and rub the coconut between your fingertips until the color is consistent. Repeat this process for each of the other colors: yellow, blue, and green, using a separate bowl for each. Keep the fifth bowl of coconut white. This creates a vibrant palette for your bunny “fur.”
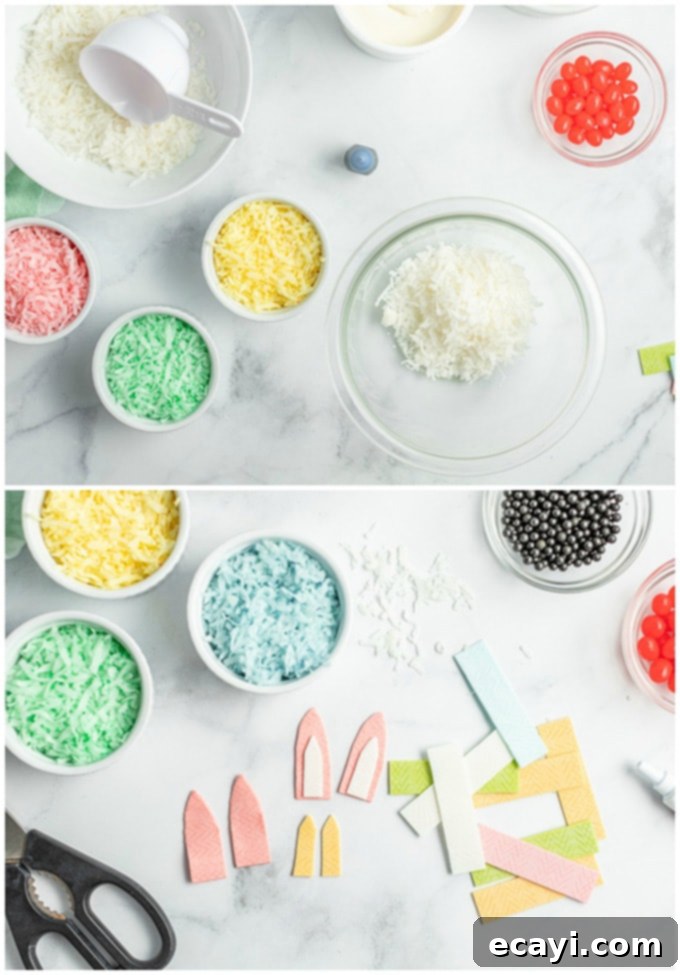
- Crafting the Outer Gum Ears: For each bunny, you’ll need two sticks of the same color gum. Stack two gum sticks directly on top of each other. Using clean kitchen shears or a small, sharp knife, carefully trim the stacked gum into a pointed bunny ear shape. The goal is to create a slightly rounded base and a gently pointed tip. Repeat this for all 24 cupcakes, yielding 48 outer ear shapes.
- Making the Inner Ear Detail: Take a stick of pink or red gum. Cut it in half lengthwise, creating two thinner strips. From these strips, trim off about half an inch from one end and then shape the remaining piece to fit snugly inside the larger ear shape. You want it to be a slightly smaller, more delicate ear shape that will peek out from the center of the outer ear.
- Assembling the Ears: Apply a tiny dab of frosting to the back of the pink (or red) inner ear piece. Gently press this onto the center of the larger, colored gum ear. The frosting acts as a “glue,” holding the two pieces together to form a complete, two-toned bunny ear. Set these aside to firm up slightly.
Decorating Your Cupcakes with Bunny Features
Now that your cupcakes are cool and your decorations are ready, it’s time to bring your bunnies to life!
- Frosting and Coconut Application: To ensure that the colored coconut adheres perfectly to your cupcakes, work one cupcake at a time. Frost the top of one cupcake generously with your vanilla or white frosting. Immediately, before the frosting has a chance to dry, turn the frosted cupcake upside down and gently dip its top into one of your bowls of colored coconut. Lightly press to ensure the coconut sticks well, creating a fluffy, colorful “fur” coat for your bunny. Repeat this frosting and dipping process for all 24 cupcakes, using a variety of coconut colors for a truly festive look.
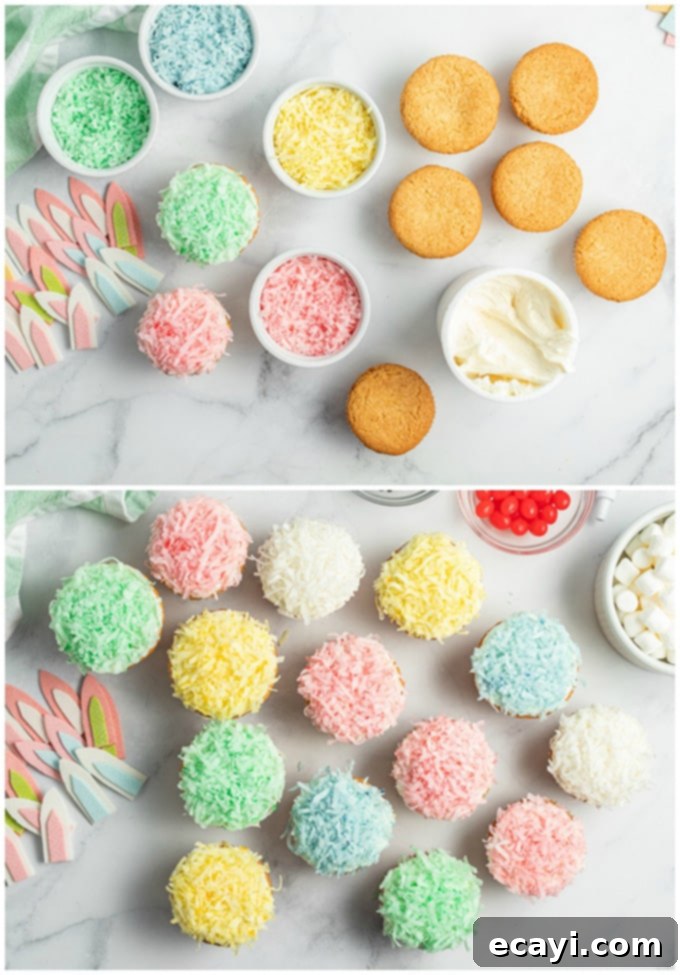
- Adding the Ears: With a toothpick, carefully create two small, parallel slits in the top of each coconut-covered cupcake, where you want the ears to stand. Gently insert the assembled gum ears into these slits. If the ears feel wobbly, add a tiny bit more frosting behind them to secure them in place.
- Creating Bunny Paws: Take a miniature marshmallow and cut it in half crosswise. Add a small dot of frosting to the cut side of each marshmallow half. Press two marshmallow halves onto the front of each cupcake, just below where the ears are placed, to create the impression of cute little bunny paws.
- Placing the Nose: Gently press one pink or red jelly bean onto the cupcake, centered just above the marshmallow paws, to serve as the bunny’s adorable nose.
- Drawing the Eyes: Before adding the eyes, gently pat down any stray coconut flakes in the eye areas to create a smoother surface for piping. Using your black decorating gel (or black nonpareils for dot eyes), carefully add the bunny’s eyes. For a charming “sleeping bunny” effect, pipe small, delicate half-circles. For wide-awake bunnies, use dots or small ovals. You can even use a toothpick to gently adjust the gel for precise details.
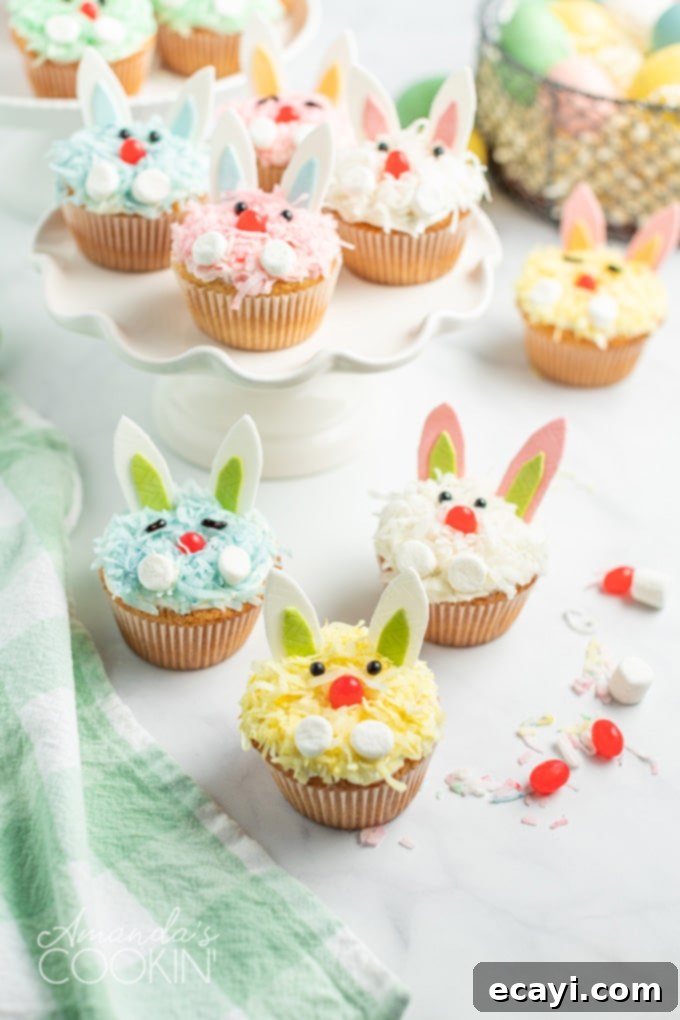
And there you have it! These darling little Easter bunny cupcakes are not only incredibly fun to make but will undoubtedly be the highlight of your Easter celebrations. They are perfect for family gatherings, school events, or even a festive office party. Get ready for an influx of compliments and happy smiles!
More Festive Easter Treat Ideas
Looking for more ways to celebrate Easter with delicious treats? Check out these other fun and creative ideas:
- Bunny Butt Cupcakes
- Rice Krispie Nests
- Frosted Sugar Cookie Bars
- Rainbow Deviled Eggs
- Cracked Colored Eggs
- Bunny Butt Pancakes
- Bird Nest Cookies
Easter Bunny Cupcakes
Boxed cake mix, canned frosting, flaked coconut, and fun decorations make these darling Easter Bunny Cupcakes an easy and impressive dessert for the holiday.
IMPORTANT – There are often Frequently Asked Questions within the blog post that you may find helpful. Simply scroll back up to read them!
Course: Desserts | Cuisine: American | Servings: 24 cupcakes | Total Time: 45 mins | Calories: 125 | Author: Amanda Davis
Ingredients
- 15 ounce box white cake mix, PREPARED as 24 cupcakes
- 16 ounce container vanilla or white frosting
- 48 sticks gum in white or other colors such as yellow, blue, green (Extra gum comes in colors, see the tip section!)
- 24 sticks pink or red gum
- 24 miniature marshmallows white or colors
- 24 pink or red jelly beans
- 0.67 ounce tube black decorating gel and/or black nonpareils
- 2 ½ cups sweetened flaked coconut
- 1 drop each food color: red green, blue, yellow
Things You’ll Need
- Muffin pan
- Hand mixer
- Food coloring
- Wire cooling racks
- Kitchen shears or small knife
- Toothpicks
Before You Begin
- The brand of “Extra” gum sticks come in multiple colors. Here’s a list:
- Polar Ice – white.
- Peppermint – blue.
- Smooth Mint – light blue.
- Spearmint – green.
- Cinnamon – red.
- Juicy Fruit Original gum is yellow.
- It’s best to serve these immediately, however if they must be made ahead, store them in the refrigerator until ready to serve. Gum will melt in warm or moist conditions, so covering the cupcakes at room temperature could cause your gum ears to fall.
- Before adding the eyes, gently pat down the coconut in the eye areas to give you a smooth surface to pipe onto. For “sleeping” eyes, use gel to create half circles.
- To enhance boxed cake mix: replace water with milk, add an extra egg, and use melted butter instead of oil.
Instructions
- Preheat oven to 350°F. Place a paper baking cup in each of 24 regular-size muffin cups. Prepare cake mix as directed on box for cupcakes. Cool in pans 10 minutes; remove from pans to cooling racks. Cool completely, about 30 minutes.
Prepare Decorations
- Meanwhile, divide coconut among five small bowls, about 1/2 cup each. Add 1 drop of red food color to one bowl and mix with a spoon. Finish mixing using your fingers to lift and gently rub coconut. Repeat for each color. You should have a bowl of yellow, blue, pink, and green. Keep one of the bowls of coconut white.
- Prepare ears by stacking two of the same color gum sticks on top of each other; trim into bunny ears using kitchen shears or a small knife.
- For the center of each ear, cut a red/pink stick of gum in half lengthwise, trim about half an inch off of the end to trim into ear shape.
- Use a little frosting to “glue” the pink centers to the white gum ears.
Decorating the Cupcakes
- To ensure that the coconut sticks to your frosting, frost one cupcake then immediately turn upside down, dipping top of the frosted cupcake into coconut. This ensures that the frosting does not have a chance to dry. Repeat frosting and dipping for all cupcakes.
- To add the bunny features, use a toothpick to create two slits in the top of the cupcake, then insert the ears into the slits.
- Cut a miniature marshmallow in half. Add a dot of frosting to the cut side of the marshmallows; press onto the front of the cupcake to create the paws.
- Gently press a jelly beans on for nose.
- Before adding the eyes, gently pat down the coconut in the eye areas to give you a smooth surface to pipe onto. Use black decorator gel and/or black nonpareils to add the eyes. For “sleeping” eyes, use gel to create half circles.
Nutrition
Serving: 1 cupcake | Calories: 125cal | Carbohydrates: 19g | Protein: 1g | Fat: 6g | Saturated Fat: 3g | Sodium: 61mg | Potassium: 38mg | Fiber: 1g | Sugar: 16g | Calcium: 2mg | Iron: 1mg
Tried this Recipe? Pin it for Later!
Follow on Pinterest @AmandasCookin or tag #AmandasCookin!
The recipes on this blog are tested with a conventional gas oven and gas stovetop. It’s important to note that some ovens, especially as they age, can cook and bake inconsistently. Using an inexpensive oven thermometer can assure you that your oven is truly heating to the proper temperature. If you use a toaster oven or countertop oven, please keep in mind that they may not distribute heat the same as a conventional full sized oven and you may need to adjust your cooking/baking times. In the case of recipes made with a pressure cooker, air fryer, slow cooker, or other appliance, a link to the appliances we use is listed within each respective recipe. For baking recipes where measurements are given by weight, please note that results may not be the same if cups are used instead, and we can’t guarantee success with that method.
This delightful recipe for Easter bunny cupcakes was originally created for Betty Crocker in 2012, and we’re thrilled to share it with you here!
