Festive Snowman Cheeseball: A Smoked Gouda Holiday Appetizer That Will Dazzle Your Guests
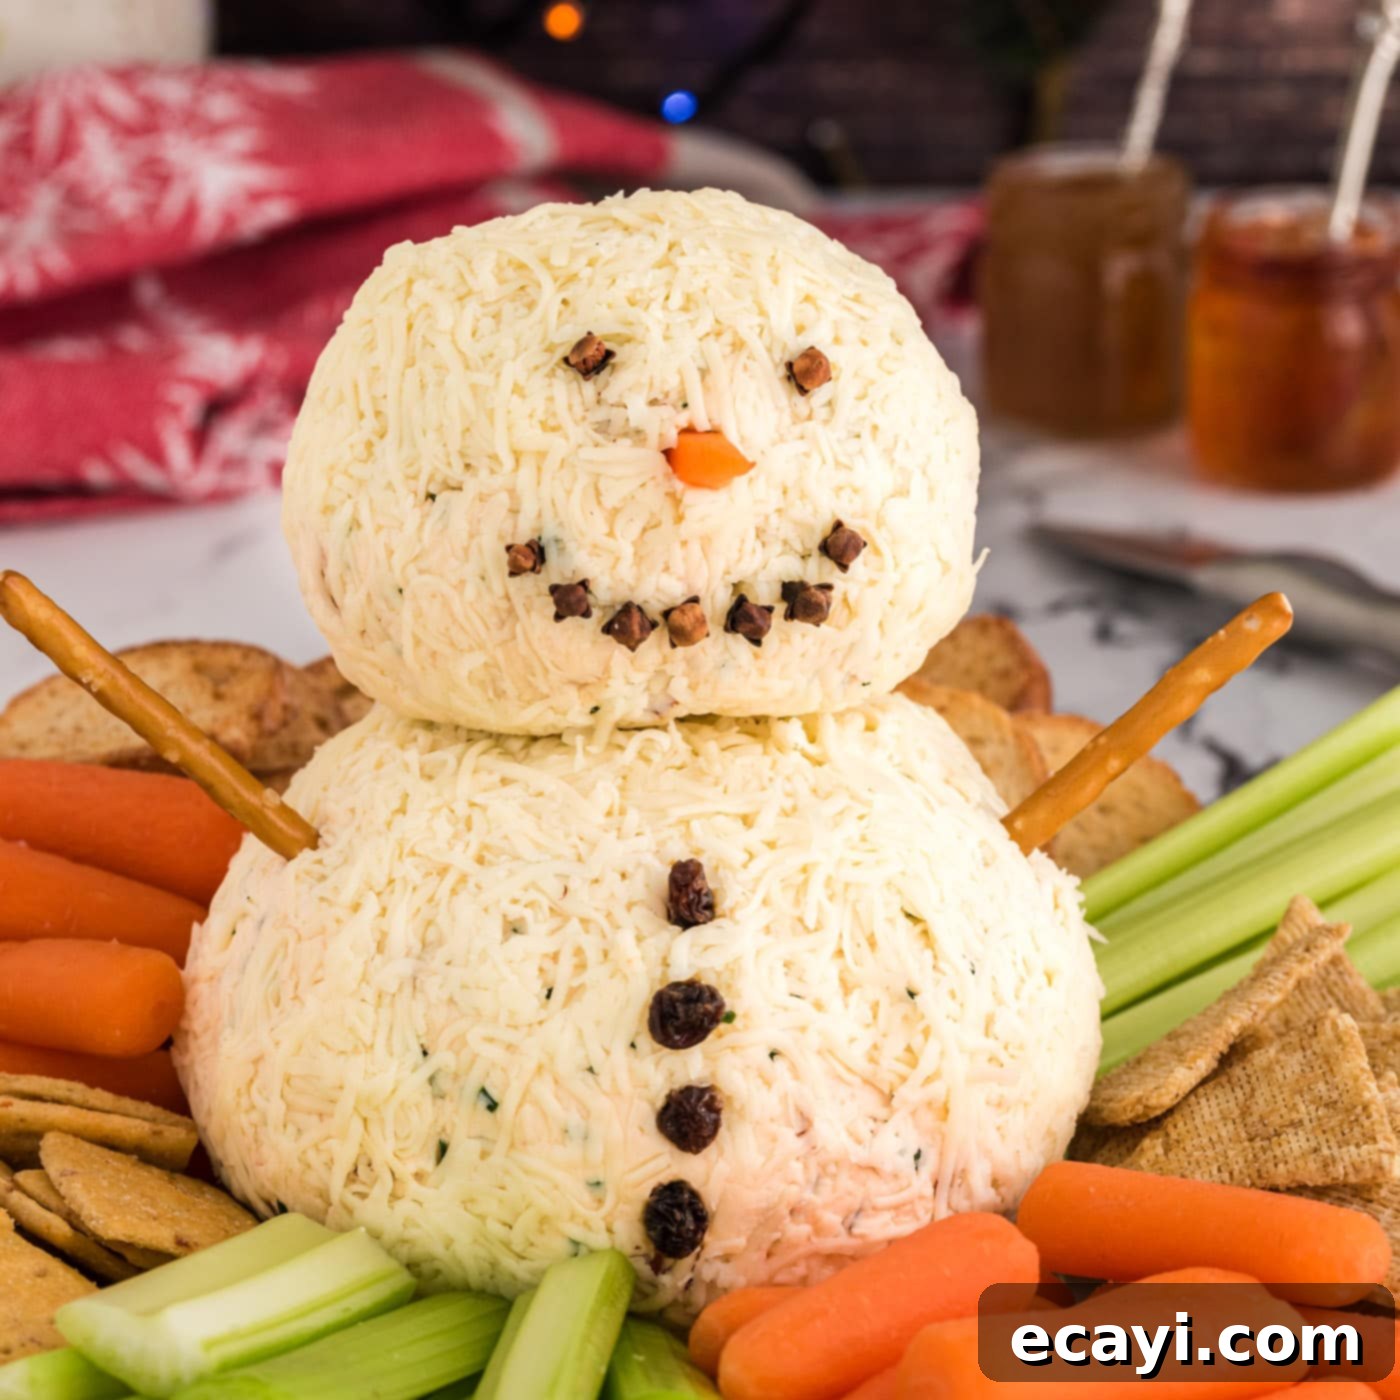
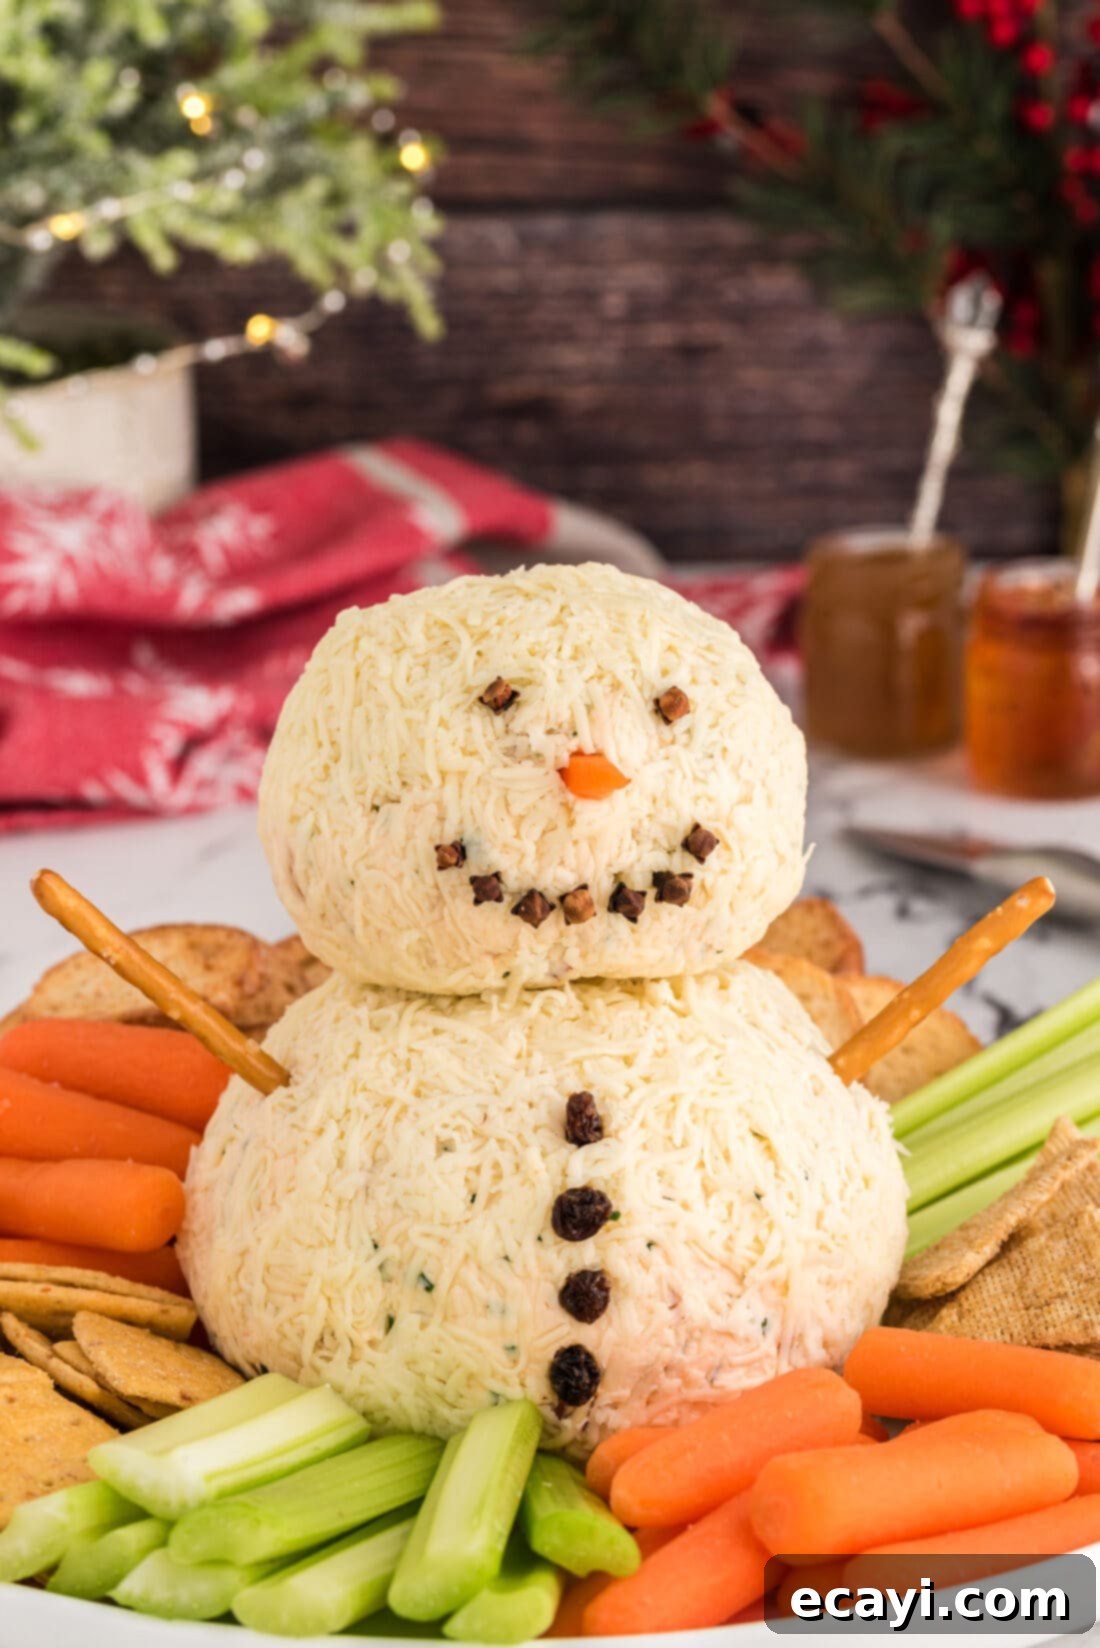
The holiday season is a magical time, filled with joy, warmth, and, of course, delicious food. As you plan your festive gatherings, finding appetizers that are both impressive and easy to prepare can be a delightful challenge. Look no further than this enchanting snowman cheeseball! Bursting with rich, smoky Gouda flavor and adorned with whimsical decorations, this adorable creation is not just a dish; it’s a conversation starter and a guaranteed showstopper. Imagine a centerpiece so charming, so irresistibly creamy, that it brings smiles to every face – this festive snowman cheeseball is exactly that.
Why This Festive Snowman Cheeseball Recipe Is a Holiday Must-Make
What makes this snowman cheeseball recipe truly exceptional for your holiday spread? Its ingenious design combines irresistible flavor with an undeniably festive presentation, making it a beloved holiday appetizer year after year. The beauty of this recipe lies in its incredible versatility; while our version features the rich, smoky depth of Gouda and the tangy sweetness of sun-dried tomatoes, the basic snowman shape allows for endless customization. Not a fan of sun-dried tomatoes? You can easily adapt the base flavor to suit your preferences. For example, our cranberry cheeseball offers a different delightful sweet and savory twist that would work perfectly with the snowman design.
The holidays often inspire us to get creative in the kitchen, transforming simple ingredients into memorable culinary experiences. We were particularly inspired by the charming cheeseball snowman concept from No. 2 Pencil, which sparked the idea for our unique version. We started with our tried-and-true Gouda and sun-dried tomato cheeseball recipe, known for its creamy texture and robust flavor profile, and then added a few key modifications to bring this adorable snowman to life. This recipe is more than just an appetizer; it’s an interactive and fun project that guests of all ages will appreciate, from the moment they see its festive appearance to the first delicious bite. It’s truly a fantastic way to add personality and deliciousness to any Christmas party or holiday gathering.

Gather Your Ingredients for a Perfect Snowman Cheeseball
To craft this delightful holiday appetizer, you’ll need a selection of fresh and flavorful ingredients. We’ve chosen components that not only create a wonderfully creamy and savory cheeseball base but also lend themselves beautifully to our charming snowman design. For precise measurements, a full list of ingredients, and detailed instructions, please refer to the printable recipe card available at the end of this post. Make sure to have everything ready before you begin for a smooth and enjoyable preparation process.
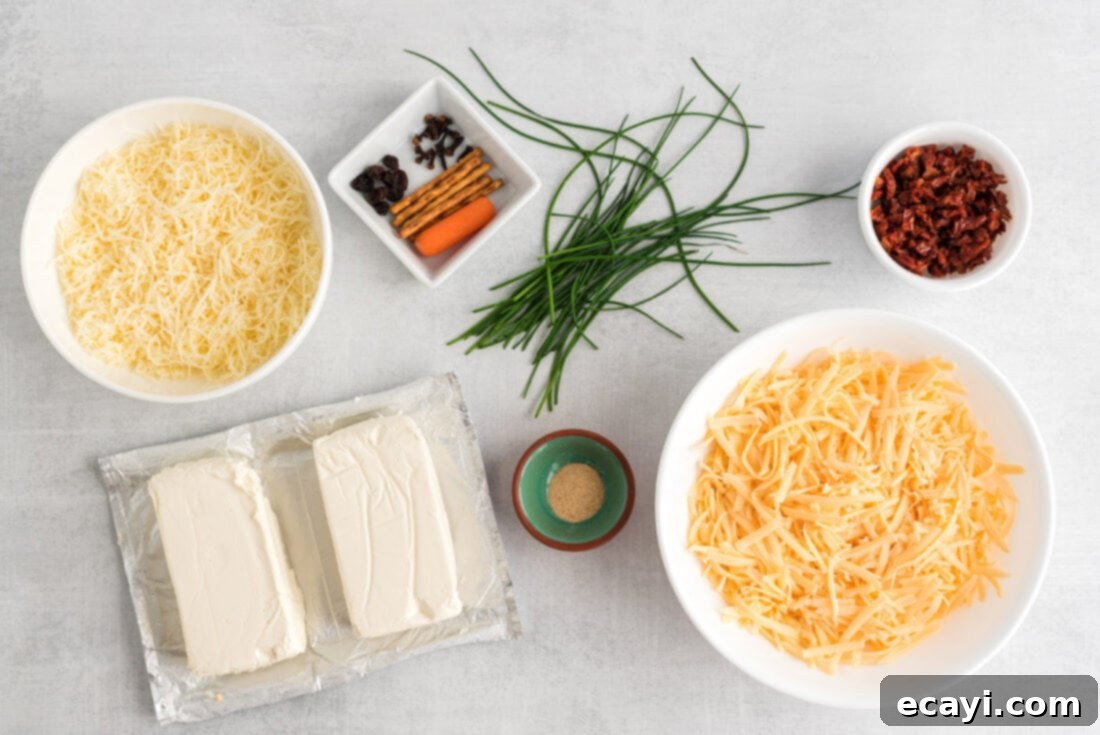
Key Ingredient Insights and Smart Substitution Tips
Let’s dive into the specifics of each ingredient, along with some helpful substitution suggestions to ensure your snowman cheeseball is perfect every time, tailored to your taste and what you have on hand.
CHEESE Base: Cream Cheese and Gouda Perfection
- Cream Cheese: This forms the essential creamy foundation of our cheeseball. Ensure your cream cheese is softened to room temperature before mixing. This is crucial for achieving a smooth, lump-free consistency that blends beautifully with the other cheeses and mix-ins. Full-fat cream cheese offers the richest flavor and best texture, but you can use a reduced-fat version if preferred, though the final product might be slightly less firm.
- Gouda Cheese: The star of the show, Gouda brings a delightful, slightly sweet, and nutty flavor profile. We particularly love using smoked Gouda for an extra layer of complexity and depth that truly elevates this holiday appetizer, making it taste incredibly gourmet. However, regular Gouda works wonderfully too. For the best flavor and melting consistency, I always recommend shredding a block of cheese yourself rather than using pre-packaged shredded cheese, which often contains anti-caking agents that can affect texture. That said, pre-packaged shredded Gouda will certainly still do the trick if you’re short on time.
Flavor Enhancers: The Heart of the Cheeseball
- Chives: Freshly chopped chives add a mild oniony flavor and a vibrant green speckle throughout the cheeseball, complementing the cheeses beautifully. If fresh chives aren’t available, you can substitute with finely chopped green onions (scallions) or a small amount of dried chives, though fresh is always best for flavor and color.
- Oil-Packed Sun-Dried Tomatoes: These provide a concentrated burst of sweet and tangy tomato flavor that pairs exceptionally well with Gouda. Make sure to drain and chop them finely to distribute their taste evenly and ensure a smooth texture in the cheeseball. If sun-dried tomatoes aren’t your preference, consider finely chopped roasted red peppers, a small amount of finely minced jalapeño (for a spicy kick), or even finely chopped black olives for an alternative savory note.
- Garlic Powder: A touch of garlic powder adds a subtle warmth and savory depth without the intensity or moisture of fresh garlic. This ensures the cheeseball remains smooth and well-balanced.
Decorations: Bringing Your Snowman to Life
- Finely Shredded Mozzarella Cheese: This is ingeniously used as the “snow” coating for your snowman, giving it that classic white, frosty appearance. Ensure it’s finely shredded for the best, most realistic texture. White cheddar or even a very finely grated Parmesan could be considered for a different aesthetic, but mozzarella offers the purest white and softest texture for a snowman.
- Whole Cloves: These are perfect for creating the snowman’s eyes and the dotted smile. They offer a strong visual contrast against the white cheese. If you don’t have whole cloves, black peppercorns or even tiny pieces of black olive can work as substitutes for the eyes and mouth.
- Raisins: Used for the snowman’s “buttons,” raisins provide a dark, slightly textured contrast. You can also use dried cranberries, chopped pecans, or even small pretzels for a different button look.
- Pretzel Sticks: These are the ideal candidates for the snowman’s arms, offering a nice salty crunch if guests choose to eat them (though they are primarily for decoration). Thin carrot sticks or even rosemary sprigs could also be used for a more natural, twig-like arm appearance.
- Baby Carrot: A small piece of baby carrot, shaped into a cone, makes the perfect festive nose. Its vibrant orange color stands out beautifully.
Step-by-Step Guide: Crafting Your Adorable Snowman Cheeseball
These step-by-step photos and detailed instructions are provided to help you visualize each stage of making this delightful recipe. For your convenience, you can skip directly to the printable version of this recipe, complete with all measurements and instructions, located at the bottom of this page. Just click Jump to Recipe to get started!
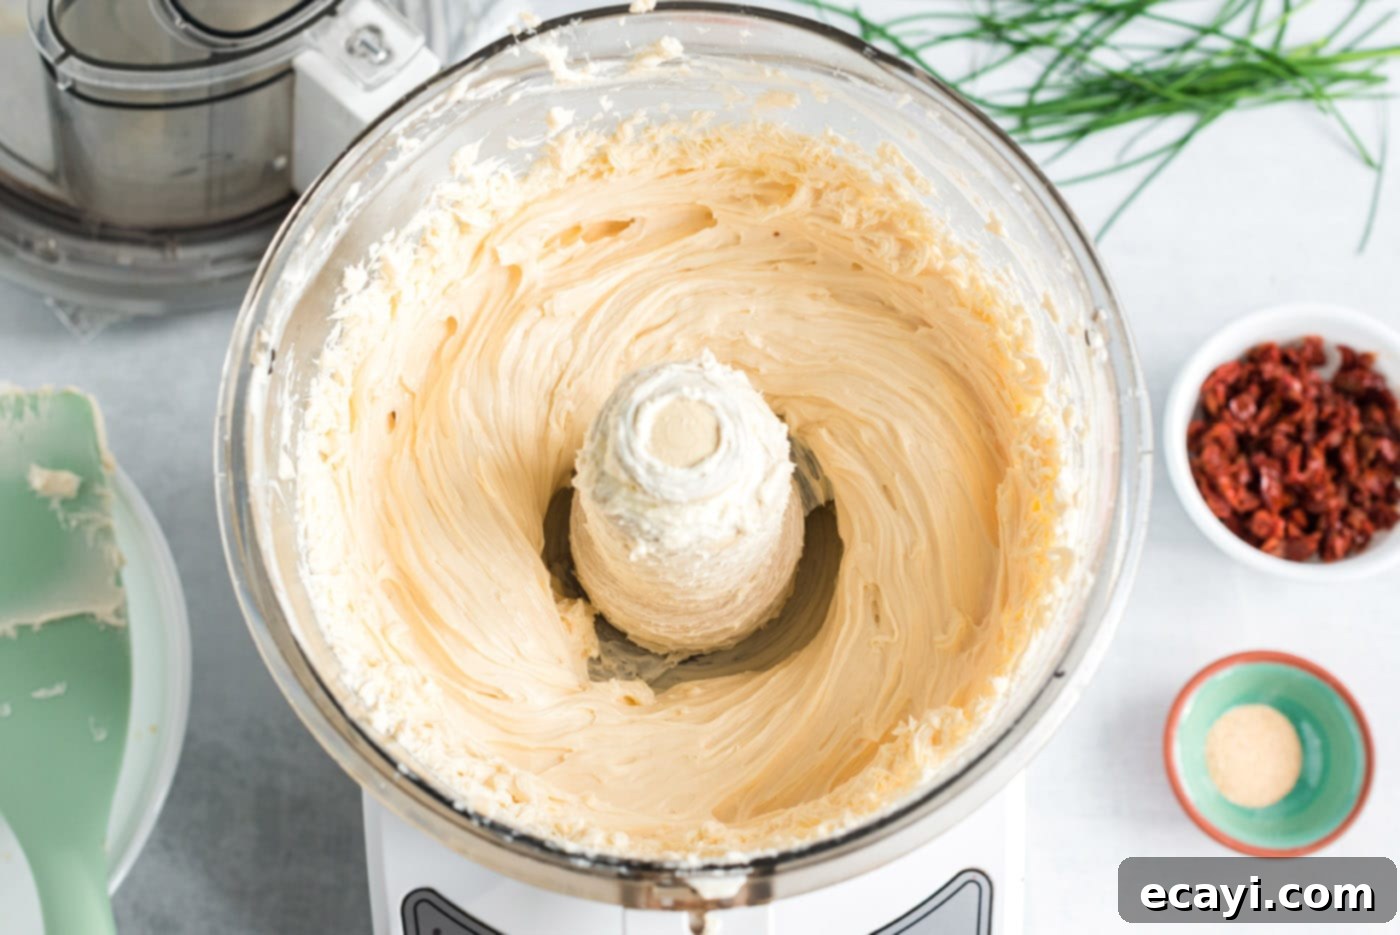
- Prepare the Cheese Base: Begin by combining the softened cream cheese and the shredded Gouda cheese in your food processor. Pulse and blend until the mixture becomes wonderfully creamy and smooth. This process thoroughly integrates the cheeses, creating a consistent and spreadable texture. Once achieved, carefully remove the cheese mixture from the food processor and transfer it to a medium-sized mixing bowl. Then, gently fold in the chopped chives, sun-dried tomatoes, and garlic powder. Stir until all the ingredients are evenly distributed throughout the cheese mixture.
EXPERT TIP – While I highly recommend using a food processor for the creamiest and most uniform results, you can certainly mix everything by hand with a sturdy wooden spoon or spatula. However, using the food processor truly creams the shredded Gouda into the softened cream cheese much more efficiently and effectively, resulting in a smoother, more luxurious texture that’s harder to achieve by hand.


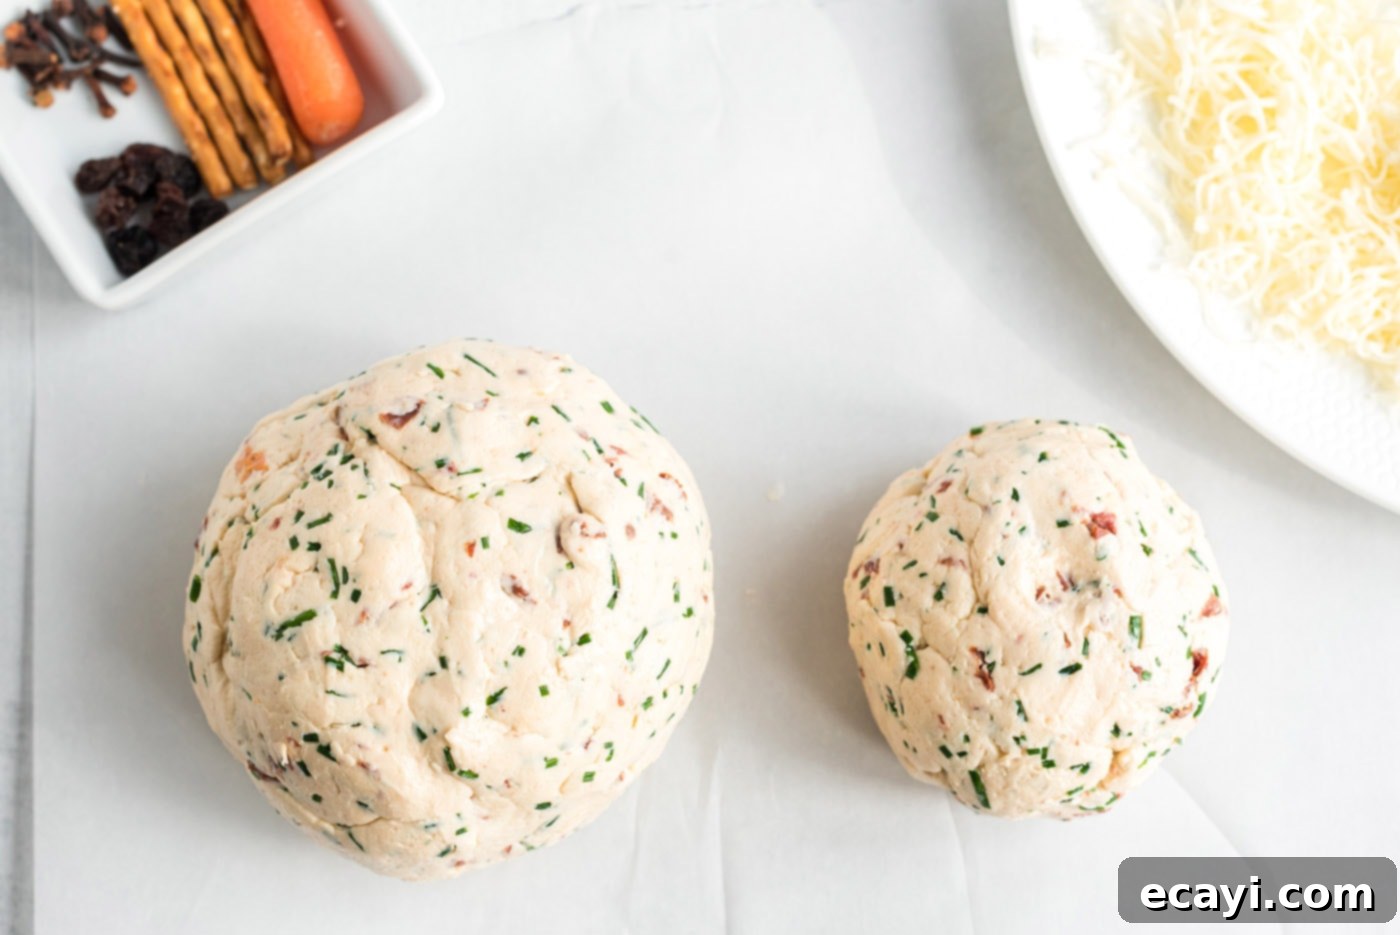
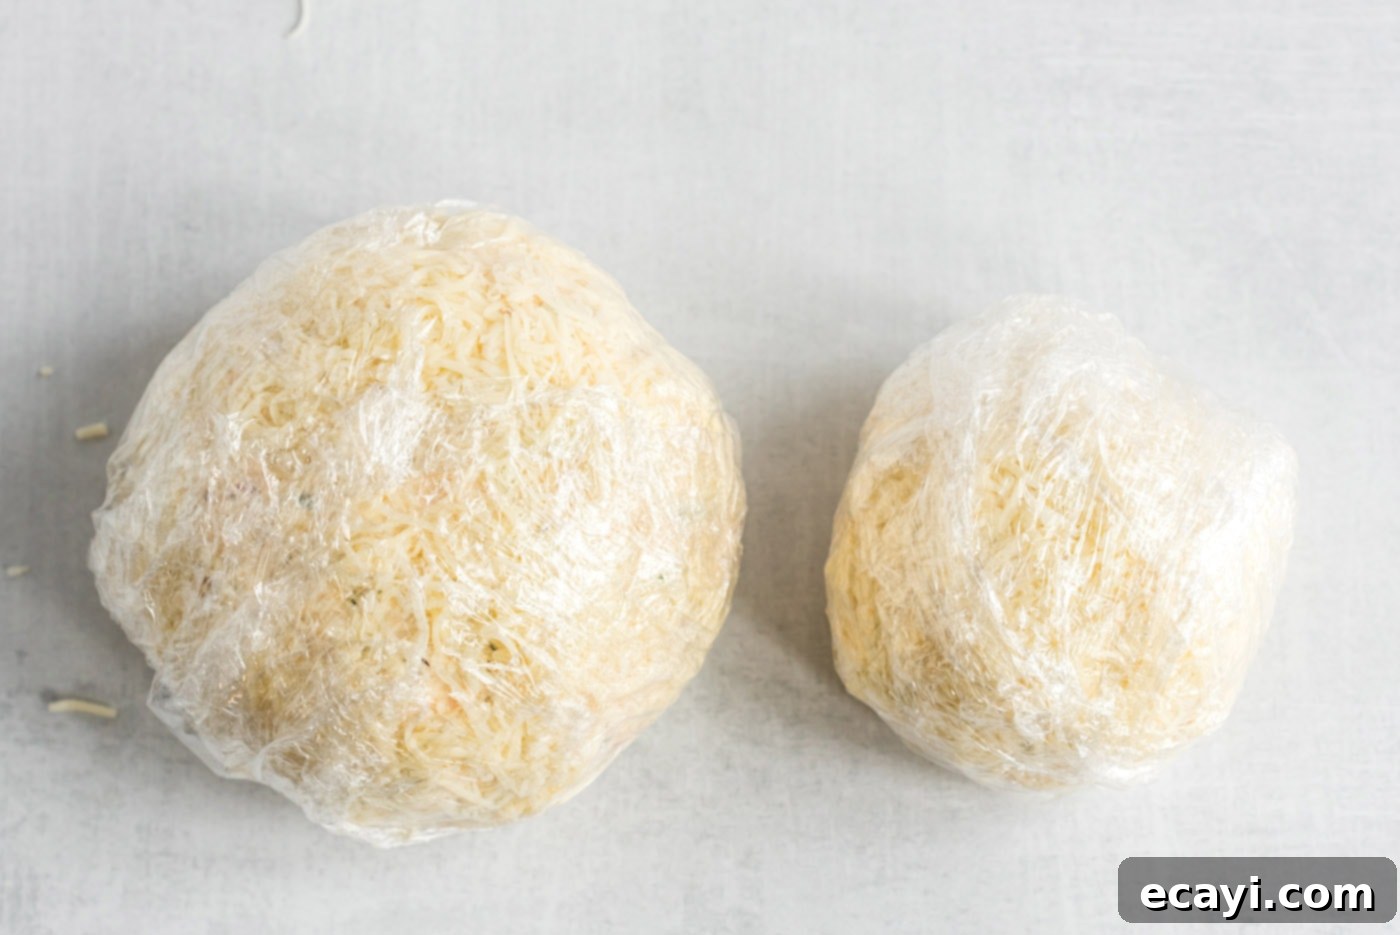
- Shape Your Snowman Bodies: Divide the cheese mixture into two portions. Shape one portion into a larger ball for the snowman’s body and the remaining portion into a slightly smaller ball for the head. Aim for smooth, well-rounded shapes that will stack easily.

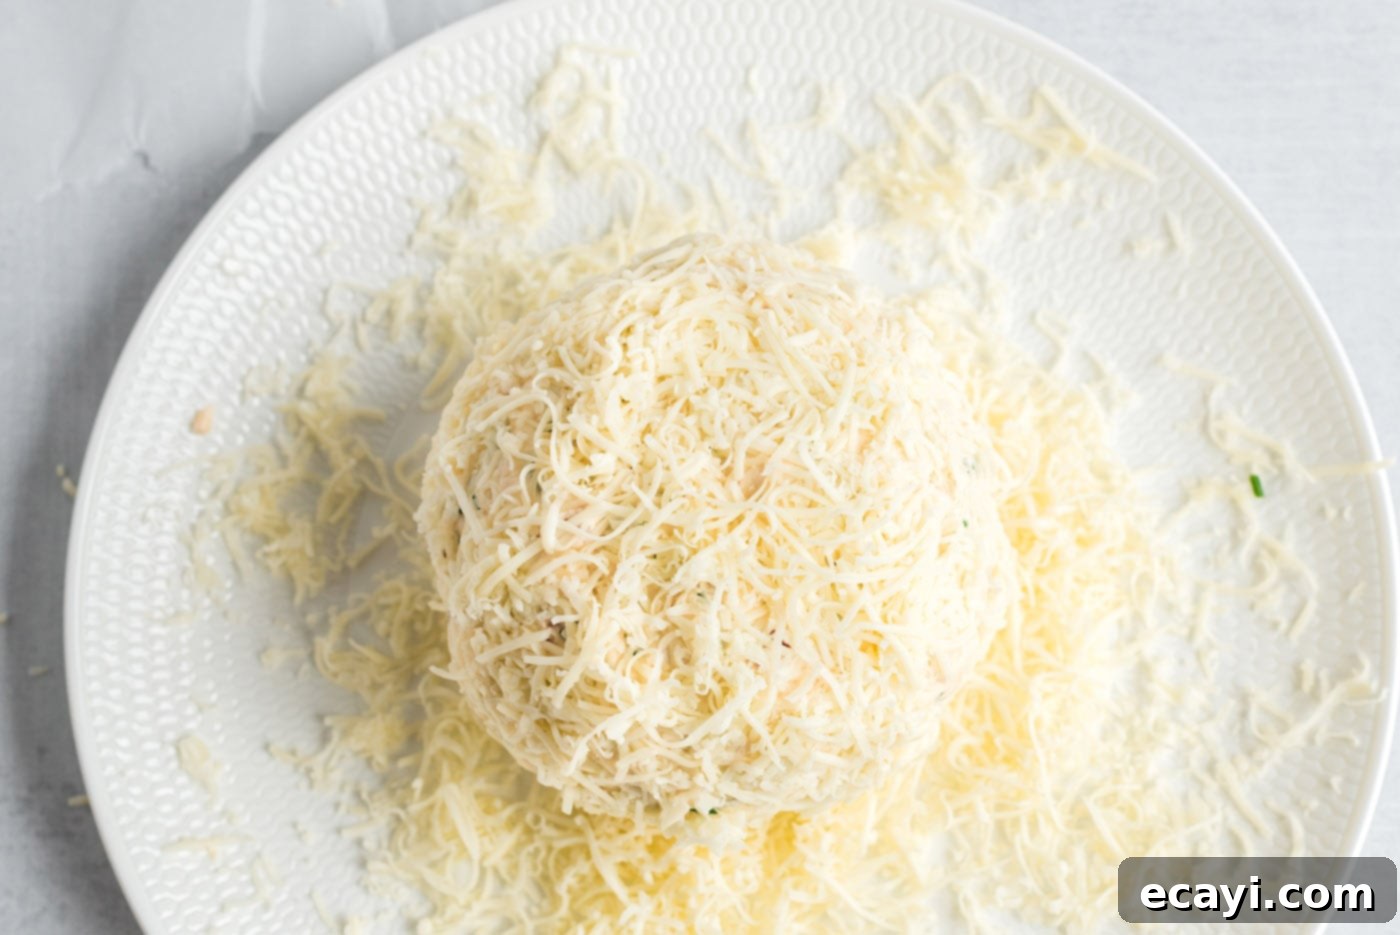
- Coat with Mozzarella and Chill: Carefully press the finely shredded mozzarella cheese onto the surface of both cheese balls, ensuring they are completely and evenly covered. The mozzarella will give your snowman its iconic white, snowy appearance. Once coated, wrap each cheese ball individually in plastic wrap. Place them in the refrigerator and chill until firm, which will take at least 2 hours. This chilling step is essential to help the cheese balls hold their shape and make them easier to handle for assembly and decoration.


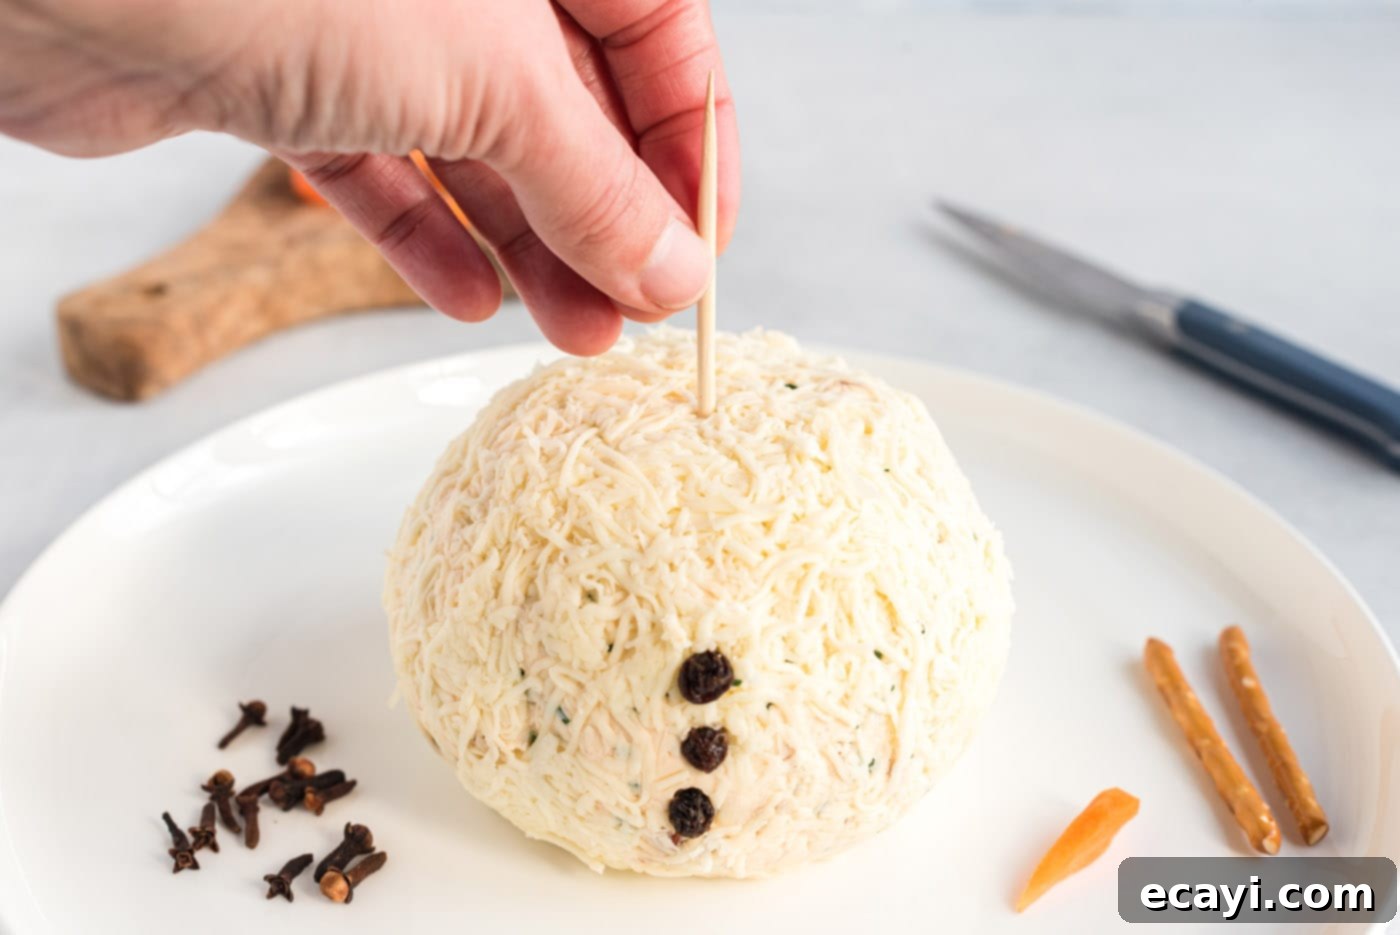
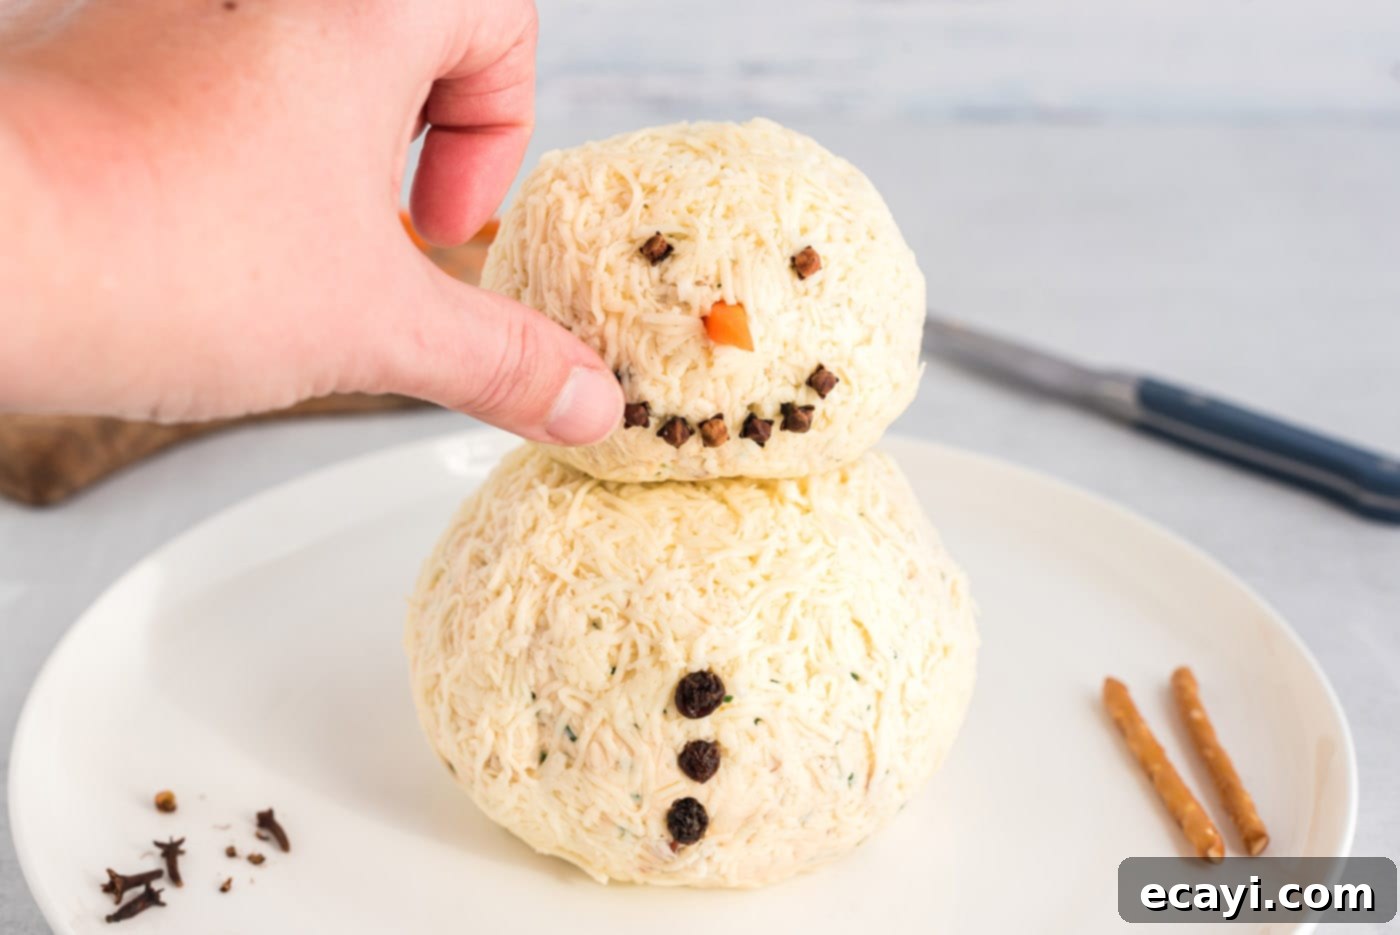
- Assemble the Snowman: Once the cheese balls are thoroughly chilled and firm, it’s time to assemble your snowman. Carefully stack the smaller head cheese ball on top of the larger body cheese ball. To provide stability and prevent your snowman from toppling, insert a long toothpick or a small wooden dowel through the center of both cheese balls, securing them together.
- Add the Buttons: For the snowman’s buttons, gently press raisins sideways into the larger body cheeseball. You’ll typically want 3-4 raisins spaced vertically. If you prefer, whole cloves can also be used here for a different look and a hint of spice.

- Craft the Carrot Nose: To create the classic snowman nose, take one baby carrot and slice it in half lengthwise. Then, take one of these halves and cut it again lengthwise, tapering it slightly to resemble a small cone. Gently press this carrot piece into the head of the snowman, right in the center, for its adorable nose.
- Create the Eyes and Mouth: Use two whole cloves to form the snowman’s eyes, pressing them gently into the upper part of the head. For the mouth, arrange about seven more whole cloves in a gentle curve below the nose to create a cheerful smile. The dark contrast of the cloves against the white mozzarella truly brings the snowman’s face to life.

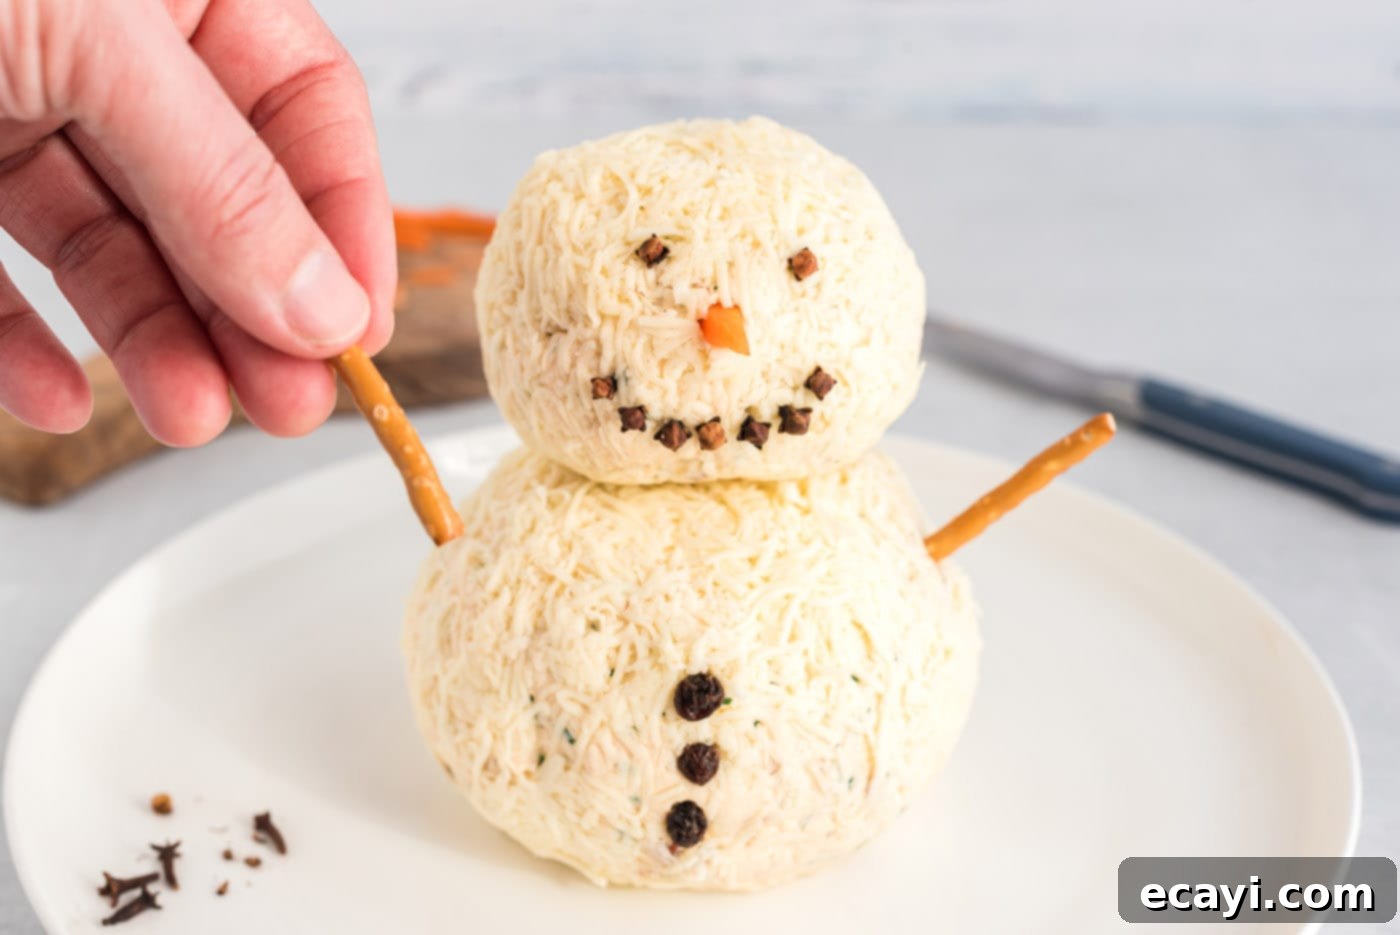
- Attach the Pretzel Arms: For the finishing touch, carefully insert two pretzel sticks into the sides of the larger body cheeseball, angling them slightly upwards to resemble arms. These add a playful element and a textural contrast. Serve your completed snowman cheeseball immediately with a variety of sturdy crackers and fresh veggies for dipping.

Frequently Asked Questions & Expert Tips for Your Snowman Cheeseball
Absolutely! This snowman cheeseball is an excellent make-ahead appetizer, which is perfect for busy holiday entertaining. You can prepare the cheeseball mixture and shape the two balls according to the directions, but hold off on adding the mozzarella coating, eyes, nose, mouth, and arms until just before you’re ready to serve. Wrap the shaped cheese balls tightly in plastic wrap to prevent them from drying out and store them in the refrigerator. For optimal freshness and flavor, you can make it 3-4 days in advance. However, with proper storage, it can genuinely be made up to a week in advance, allowing you to focus on other aspects of your party planning!
The best dippers for a cheeseball are sturdy enough to scoop up the creamy goodness without breaking. Excellent choices include buttery crackers (like Ritz or Club crackers), whole wheat crackers, pita chips, bagel chips, pretzels, or thinly sliced baguette or crostini. For a healthier option, offer an array of fresh vegetables such as celery sticks, carrot sticks, bell pepper strips (red, yellow, or orange for color), cucumber slices, or sugar snap peas. The combination of textures and flavors will appeal to everyone.
Yes, you absolutely can! While Gouda offers a unique smoky flavor, feel free to experiment with other semi-hard cheeses. Sharp cheddar, white cheddar, Monterey Jack, or even a blend of cheddar and Swiss would work well. Just ensure the cheese you choose has a good flavor profile that complements cream cheese and your chosen mix-ins. The key is to use cheese that shreds easily and blends smoothly when softened.
To store any leftovers, carefully remove any decorative elements that aren’t edible (like wooden dowels if used for stability) and wrap the remaining cheeseball tightly in plastic wrap. Place it in an airtight container in the refrigerator. It will stay fresh for up to 3-4 days. For the best taste and texture, allow it to come to room temperature for about 15-20 minutes before serving again.
If your cheese ball is too soft, it might not have been chilled long enough, or your cream cheese might have been too warm to begin with. Ensure all cheese is at a workable but not overly soft room temperature. If it’s too crumbly, it could be that the cheeses weren’t adequately blended in the food processor, or the cream cheese wasn’t soft enough to incorporate the shredded Gouda smoothly. A good chilling period usually helps firm up a softer mixture. If it’s still too crumbly, try adding a tiny bit more softened cream cheese and re-mixing.
Elevate Your Presentation: Serving Suggestions
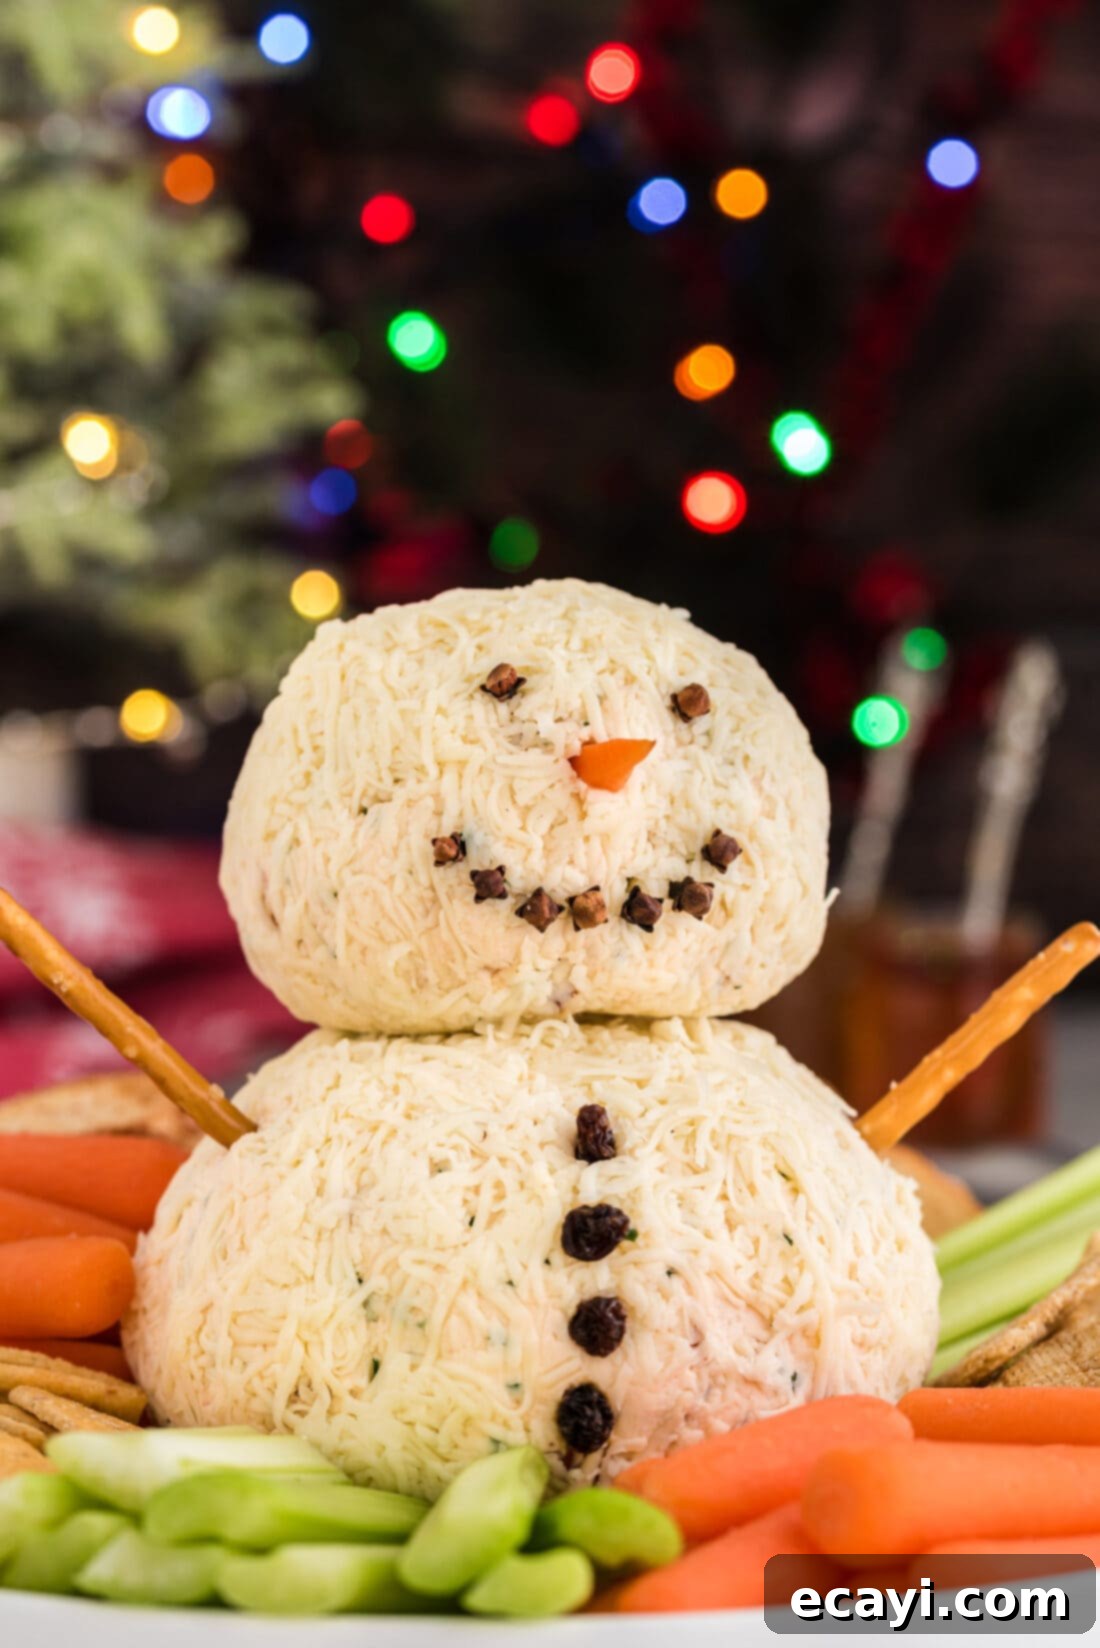
Serving your festive snowman cheeseball is just as important as making it! Presentation is key for this charming holiday appetizer. Arrange your snowman on a large, beautiful platter surrounded by a colorful assortment of sturdy crackers, crunchy celery sticks, vibrant carrot sticks, various types of pretzels (sticks and twists work well), and slices of fresh baguette or crostini. You might also include other colorful raw vegetables like red bell pepper strips, cucumber slices, or cherry tomatoes to add more visual appeal and dipping options.
For the best texture and flavor, it’s advisable to take your snowman cheeseball out of the refrigerator about an hour or so before serving. This allows the cheese to soften slightly, making it much easier and more enjoyable for your guests to spread onto their crackers or veggies. Consider placing a small spreader knife near the cheeseball for convenience. For an extra touch of holiday cheer, garnish the platter with fresh rosemary sprigs, which can resemble tiny pine branches, or a sprinkle of edible glitter for a “snowy” effect around the base.
Creative Decorating Ideas for Your Snowman Cheeseball
While our recipe provides a classic snowman decoration, don’t be afraid to get creative and personalize your festive cheeseball! Here are some additional ideas to make your snowman truly unique:
- Buttons with Flair: Instead of raisins, use dried cranberries, mini chocolate chips (for a sweeter touch), or finely chopped pecans for the buttons. You could even use small pieces of bell pepper for colorful buttons.
- Alternative Facial Features: Raisins can also be used effectively for both the mouth and eyes, offering a softer, less intense look than cloves. Black peppercorns work exceptionally well in place of cloves for the eyes and mouth, providing a similar dark contrast.
- Fashionable Scarves: Give your snowman some holiday fashion! Tie a “scarf” around the neck using fresh rosemary sprigs, a thin strip of roasted red pepper, or even a piece of thinly sliced deli meat cut into a decorative strip.
- Edible Hat: Create a mini top hat using a large black olive or a round piece of pumpernickel bread, secured with a toothpick.
- Snowy Touches: Sprinkle a tiny bit of edible glitter over the mozzarella for a glistening, freshly fallen snow effect, or arrange some shredded coconut around the base for an extra snowy landscape.
- Rosy Cheeks: A tiny dab of red food coloring (applied with a toothpick) can give your snowman adorable rosy cheeks.
Discover More Holiday Recipe Inspiration
If you’re looking for more delicious recipes to complete your holiday menu, we’ve got you covered! Explore some of our other festive favorites that are perfect for Christmas parties, family dinners, and seasonal gatherings:
- Saltine Toffee – An incredibly addictive and easy-to-make sweet treat.
- Homemade Eggnog – Rich, creamy, and wonderfully traditional holiday beverage.
- Christmas Tree Cheese Platter – Another visually stunning cheese-based appetizer.
- Christmas Tree Pull Apart Bread – A fun and savory bread perfect for sharing.
- 12 Days of Christmas Cookies – A collection of delightful cookie recipes for every taste.
- Antipasto Wreath – A savory, colorful, and impressive Italian-inspired appetizer.
I love to bake and cook and share my kitchen experience with all of you! Remembering to come back each day can be tough, that’s why I offer a convenient newsletter every time a new recipe posts. Simply subscribe and start receiving your free daily recipes!

Snowman Cheeseball
IMPORTANT – There are often Frequently Asked Questions within the blog post that you may find helpful. Simply scroll back up to read them!
Print It
Pin It
Rate It
Save ItSaved!
Ingredients
- 16 oz cream cheese softened
- 4 cups gouda cheese shredded
- ½ cup chives chopped
- ½ cup oil-packed sun dried tomatoes drained and chopped
- ½ tsp garlic powder
Decorations
- 1 ½ cups mozzarella cheese finely shredded
- 9 whole cloves for eyes and mouth
- 4 raisins 3-4, for buttons
- 2 pretzel sticks for arms
- 1 baby carrot for nose
Things You’ll Need
-
Food processor
-
Large mixing bowl
Before You Begin
- For the best spreadable consistency, you might want to take the cheeseball out of the refrigerator an hour or so ahead of time to let it soften up a bit before guests arrive.
- This recipe leverages a food processor to achieve an incredibly smooth and creamy base. While you can certainly mix everything by hand with a wooden spoon, using the food processor will thoroughly cream the shredded Gouda in with the cream cheese, combining it much better than by hand and resulting in a superior texture.
Instructions
-
Combine cream cheese and Gouda cheese in food processor until creamy. Remove cheese mixture from processor and place in a bowl. Stir in chives, tomatoes and garlic powder.
-
Shape mixture into 1 large and 1 small ball. Press on the finely shredded mozzarella, covering both balls well. Wrap in plastic wrap. Refrigerate until firm, at least 2 hours.
-
Once chilled, stack the cheese balls onto each other using a toothpick or small dowel in the center to stabilize.
-
To make the nose, slice a baby carrot in half lengthwise. Take one half and cut it again lengthwise. Press into the head of the snowman.
-
Use two whole cloves for the eyes, and about 7 to create the mouth.
-
Press raisins sideways into the cheeseball for the buttons. You may also use whole cloves for this if preferred.
-
Lastly, add two pretzel sticks for the arms! Serve with sturdy crackers and veggies.
Nutrition
The recipes on this blog are tested with a conventional gas oven and gas stovetop. It’s important to note that some ovens, especially as they age, can cook and bake inconsistently. Using an inexpensive oven thermometer can assure you that your oven is truly heating to the proper temperature. If you use a toaster oven or countertop oven, please keep in mind that they may not distribute heat the same as a conventional full sized oven and you may need to adjust your cooking/baking times. In the case of recipes made with a pressure cooker, air fryer, slow cooker, or other appliance, a link to the appliances we use is listed within each respective recipe. For baking recipes where measurements are given by weight, please note that results may not be the same if cups are used instead, and we can’t guarantee success with that method.
This post originally appeared on this blog on November 17, 2021.
