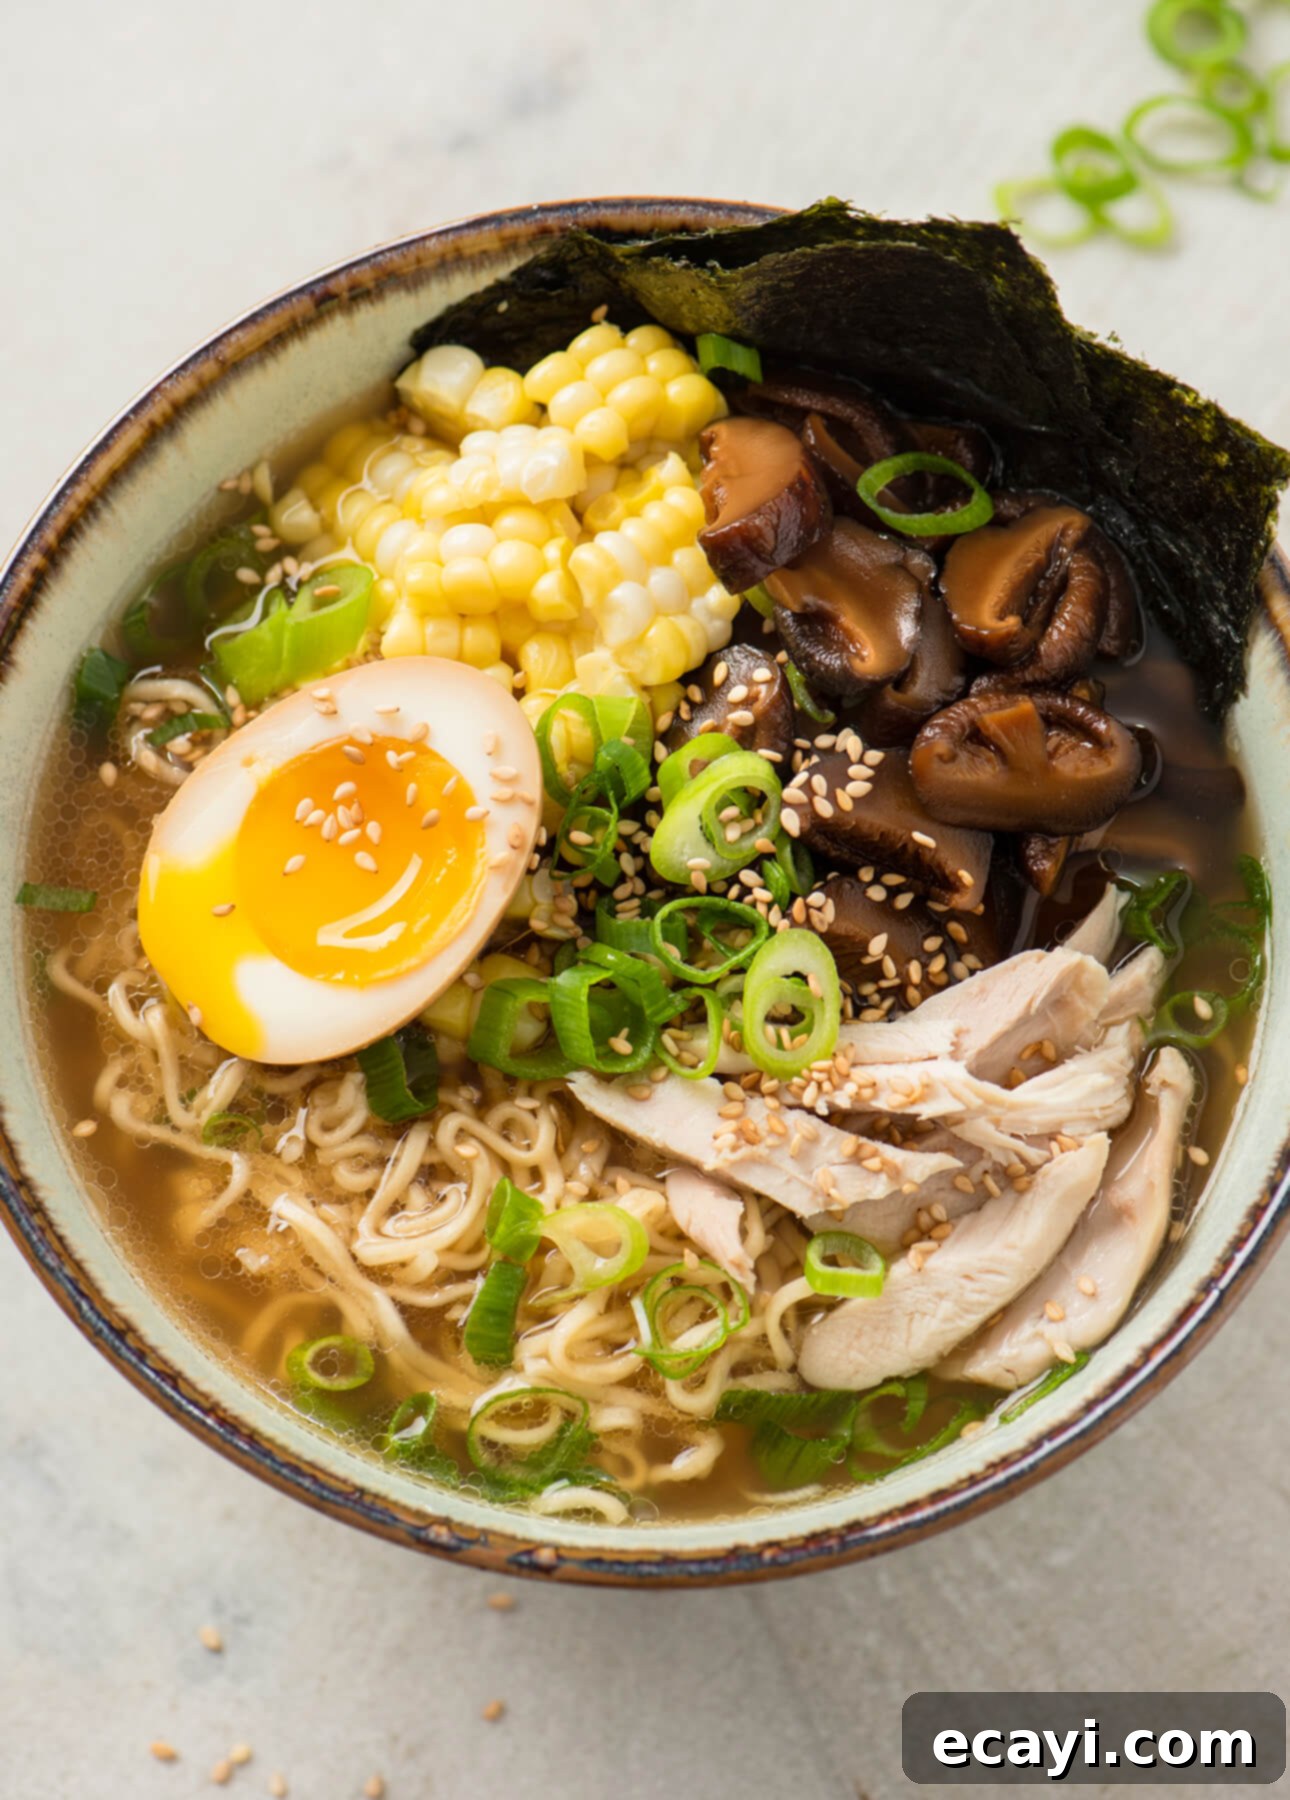
Mastering David Chang’s Momofuku Ramen at Home: An Ultimate Guide to Crafting Authentic Flavors
Want to recreate the legendary Momofuku ramen experience in your own kitchen? This comprehensive, step-by-step guide will empower you to elevate your homemade ramen game to celebrity chef levels, bringing the iconic flavors of David Chang’s masterpiece right to your dining table.
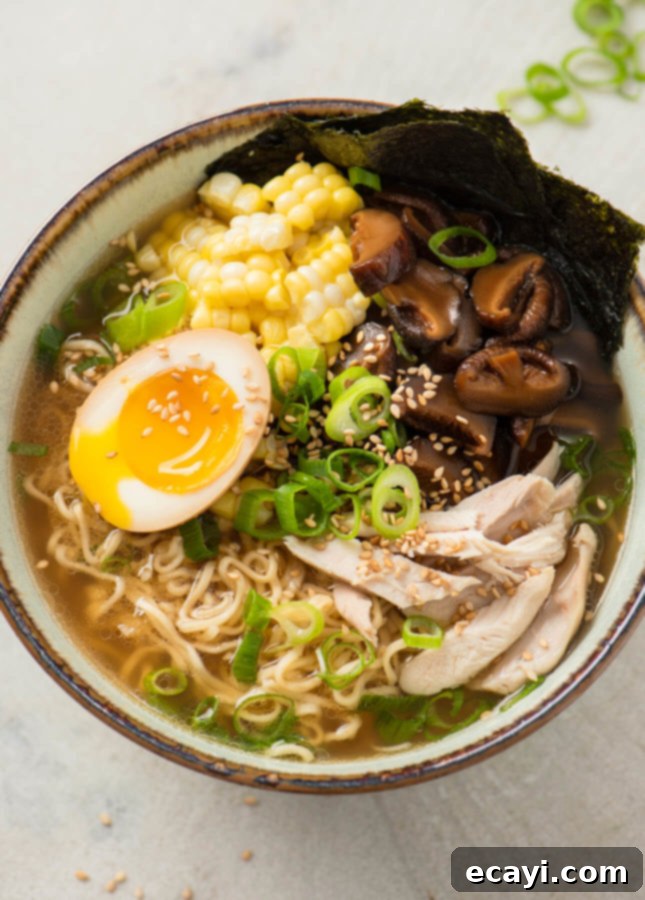
This post contains affiliate links. Full disclosure is at the bottom of the article.
Over a decade ago, my culinary world was forever changed by the discovery of ramen. Not the quick, convenient instant variety often found in dorm rooms, but the profound, complex, and intensely flavorful gourmet soup crafted from multiple meticulously prepared components. In my hometown, authentic ramen was a distant dream; no specialized restaurants existed to satisfy this burgeoning craving (the first would only open five years later!). Undeterred, I immersed myself in the world of ramen, poring over television shows, online tutorials, blogs, and cookbooks. The deeper I delved into the intricate craft of ramen making, the more my desire to taste it grew.
Soon, tasting and savoring ramen transformed into a dedicated obsession during my travels. Whenever I visited vibrant culinary capitals like New York, Paris, and eventually (the ultimate pilgrimage!) Tokyo, my itinerary would invariably prioritize seeking out the very best ramen establishments, even before considering any other type of restaurant. From one bowl to the next, I explored an astonishing spectrum of broths—rich, clear, spicy, creamy—alongside a fascinating array of noodle thicknesses and textures. The toppings were equally diverse, ranging from classic staples to avant-garde creations. Through this delicious journey, I gained a profound appreciation for the sheer amount of skill, effort, and passion poured into each comforting bowl of ramen.
Back home, inspired but lacking the extensive resources of a professional ramen shop, I often resorted to what I affectionately called “shortcut ramen.” This involved bathing dried ramen noodles in readily available store-bought chicken stock, topping them with whatever protein I had on hand—be it succulent rotisserie chicken, savory ground pork, or crispy fried tofu—and finishing with a vibrant medley of fresh vegetables for both color and flavor. While these bowls might not have been authentically Japanese, they were undeniably comforting and deeply satisfying. At that point, the idea of creating ramen at home that could even remotely rival the quality served in specialized restaurants seemed utterly impossible.
Then, the Momofuku cookbook entered my life. Back in 2009, David Chang was already a renowned chef, but he had yet to become the global culinary icon he is today. I acquired his debut cookbook with a burning desire to understand more about this witty, unconventional chef who appeared to defy all traditional culinary rules. Having heard countless tales of his groundbreaking New York City ramen establishment, Momofuku, and still awaiting my chance to visit in person, I believed that his namesake cookbook would offer a unique insight into what made his approach so extraordinary.
David Chang’s Momofuku cookbook is much more than a collection of recipes; it’s an incredibly entertaining read. One could easily flip through its pages, absorbing Chang’s captivating stories about his childhood and formative culinary experiences, without cooking a single dish, and still derive immense pleasure from the book. Despite its sleek, coffee-table book aesthetic, delving into the recipes reveals a surprising truth: Momofuku is an incredibly approachable cookbook. Chang’s distinctive casual tone guides you through each recipe and every intricate step as if he were right there in your kitchen, offering encouragement and candid advice. While many of the recipes are indeed time-consuming, their presentation makes them feel entirely achievable, promising gratifying results—a rarity among many celebrity chef cookbooks.
After contemplating the challenge for a considerable period and re-reading the Momofuku ramen recipe dozens of times, I finally decided to take the plunge. I committed to trying my hand at making Momofuku ramen from scratch. Although I still hadn’t had the opportunity to visit the New York City restaurant, I was determined to savor its iconic soup at home and, in the process, learn invaluable lessons about the art of ramen making.
Since that initial endeavor, I have made the Momofuku ramen broth on numerous occasions, gradually adapting and refining it to simplify the process for my home kitchen. My goal has been to use easily accessible ingredients and incorporate clever shortcuts to make this ambitious recipe achievable within a few hours of active cooking time. Yes, crafting Momofuku ramen is an undertaking, a genuine culinary project. However, the recipe yields a substantial batch of flavorful broth, ensuring that your efforts will be rewarded with many future delightful bowls of authentic ramen.
“Ramen = broth + noodles + meat + toppings and garnishes. It’s that simple and that complex, because variations are endless.” —David Chang, Momofuku cookbook.
What I admire most about David Chang’s culinary philosophy, especially concerning ramen, is his refreshing lack of elitism. He has never asserted that his ramen is strictly “authentic” in the traditional Japanese sense; rather, he simply crafts ramen that he genuinely loves to eat. This liberating approach is reflected in his Momofuku ramen recipe, which encourages improvisation and experimentation without any accompanying guilt. It’s about creating something delicious that resonates with your palate.
“Everyone says ramen is rigid; that it has to be one exact thing. It isn’t, and it doesn’t. Yes, this (recipe) is what we put into our ramen, but the most important thing is that you make it delicious, not that you make it exact: bean sprouts, chicken, tofu—there’s a world of stuff you can put in the broth. Make it taste good.” —David Chang, Momofuku cookbook.
What Makes a Classic Bowl of Japanese Ramen?
While the world of Japanese ramen offers an incredible diversity of regional styles and innovative variations, a classic bowl typically adheres to a fundamental structure. The foundational element is almost always a rich, savory broth, often made from simmered pork bones (tonkotsu), chicken, or a combination of dashi (seaweed and bonito flakes). The noodles are traditionally freshly made alkaline noodles, providing that signature chewy texture. Pork, particularly tender chashu (braised pork belly or shoulder), is the most common protein, though chicken or seafood are also used. Standard toppings frequently include sheets of nori (dried seaweed), crisp bamboo shoots (menma), perfectly soft-boiled eggs (ajitsuke tamago), and vibrant sliced green onions.
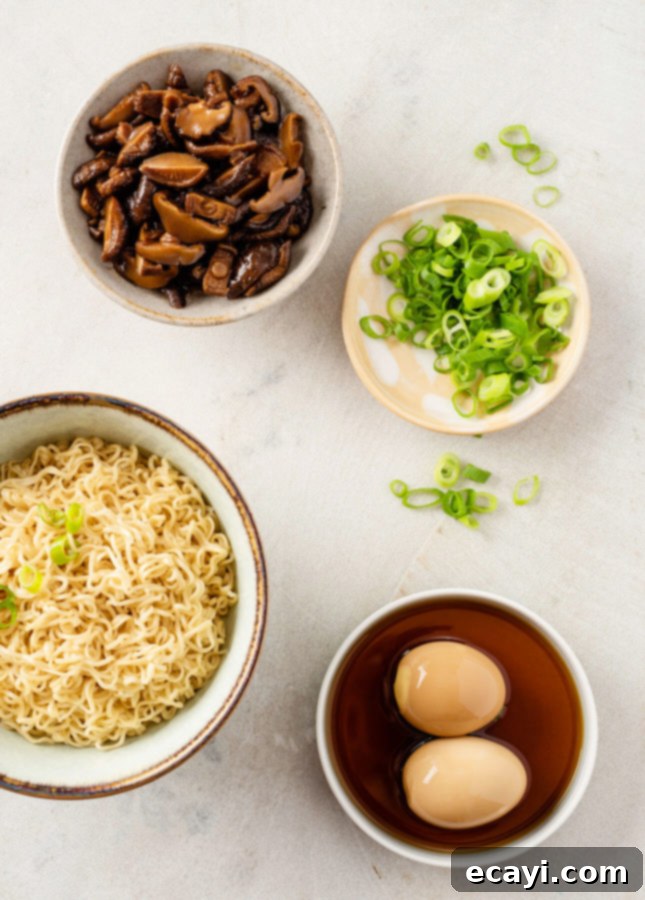
Your Guide to Assembling Easy Homemade Ramen Bowls
Even if you’re not ready to commit to the multi-hour project of making Momofuku ramen from scratch, you can still create incredibly satisfying ramen-inspired bowls at home. Here’s a versatile basic formula to guide your culinary creativity:
- Begin with a Flavorful Broth: The soul of any ramen bowl is its broth. Feel free to use high-quality store-bought chicken or vegetable broth as your base, or if you have extra time, a homemade stock. You’ll generally need about 2 cups (500 ml) of broth per serving.
- Boost and Enrich Your Broth: This is where you personalize the flavor profile. Deepen and enhance the taste of your base broth by seasoning it with ingredients such as Japanese soy sauce (shoyu), savory miso paste, fresh grated ginger, a dash of hot sauce for a kick, or even a splash of mirin for sweetness. Taste as you go to achieve your preferred balance.
- Select Your Noodles: The noodle choice significantly impacts the texture of your ramen. Options include fresh or dried egg noodles, hearty soba (buckwheat) noodles, thick and chewy udon noodles, or even just a humble block of dried instant ramen noodles (discarding the seasoning packet, of course). Cook them according to package directions, ensuring they remain al dente.
- Incorporate Fresh Vegetables: Add a vibrant splash of color, texture, and nutrition with your favorite vegetables. Popular choices include crisp bean sprouts, tender broccoli florets, wilted spinach, sweet corn kernels, sliced carrots, and earthy mushrooms. Blanch or lightly sauté them to retain their freshness.
- Crown with Protein: A hearty protein makes your ramen a complete meal. Options range from cooked shredded chicken (perhaps leftover from a rotisserie chicken), succulent shrimp, flaky fish, or a perfectly poached egg.
- Garnish for Ultimate Flavor and Crunch: The final garnishes add essential layers of flavor and visual appeal. Thinly sliced green onions are a must. Toasted sesame seeds offer a nutty crunch. Furikake, a Japanese seasoning blend, adds umami. Don’t hesitate to get creative with other additions like chili oil, a squeeze of lime, or a sprinkle of fresh herbs.
How to Make Momofuku Ramen at Home: The Chef-Level Experience
Let’s be clear: Momofuku ramen is far from your average, quick-fix instant ramen. This is a project that rewards patience with unparalleled depth of flavor. Here’s how you can replicate and elevate the homemade ramen experience to achieve David Chang’s celebrated standards:
- Craft David Chang’s Signature Pork Broth from Scratch: The broth is the heart and soul of Momofuku ramen. Our adapted recipe below guides you through creating a rich, meaty broth that is both bold and complex. It’s a cornerstone that cannot be skipped for an authentic Momofuku experience.
- Master the Art of Broth Seasoning: As Chang famously states in his book, “underseasoned broth is a crime.” Traditional Tokyo-style ramen broths are often seasoned with a concentrated sauce called “taré,” typically made with chicken drippings. While Chang provides a recipe for Momofuku’s taré, it’s another lengthy process that I’ve streamlined for home cooking. My shortcut involves a carefully balanced combination of Japanese soy sauce (shoyu), sweet mirin, and kosher salt (the precise ratio is detailed in the broth recipe below). This step requires you to truly engage your tastebuds. Chang advises aiming for a level where it’s “not quite too salty but almost,” a delicate balance that brings the broth to life.
- Prioritize Quality Noodles: The texture of your noodles is paramount. Some specialized ramen shops craft and sell their fresh, homemade noodles; it’s worth inquiring at your local Asian markets. Many Asian grocery stores also offer excellent handmade noodles, both fresh and frozen. For a truly authentic Momofuku replication, I recommend using classic lo mein noodles. These are widely available and were precisely what Momofuku served in their ramen bowls before they began making their own noodles from scratch.
- Include Shredded Meat: Both tender pork or succulent chicken work wonderfully. I particularly like to use the flavorful shredded chicken that naturally falls off the chicken legs after they’ve simmered to perfection in the broth, ensuring no flavor goes to waste.
- Prepare Perfect Soft-Boiled Ramen Eggs (Ajitsuke Tamago): These are an iconic and indispensable ramen topping. Ramen eggs are distinguished by their uniquely “jammy” yolk—neither completely runny nor fully firm. Their exterior also boasts an attractive beige to light brown hue, a result of being carefully peeled after soft-boiling and then marinated in a savory blend of soy sauce and mirin. Making these at home is surprisingly straightforward, and my detailed recipe is provided at the very end of this post.
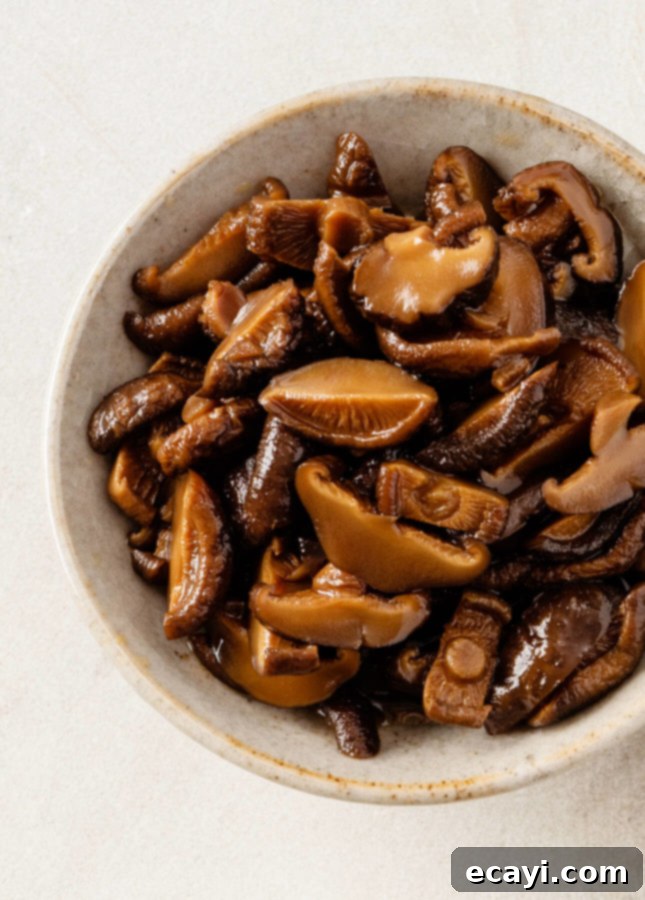
- Go the Extra Mile with Pickled Shiitakes: This exceptional topping is a true flavor bomb, bursting with umami and introducing a wonderfully unique dimension to your Momofuku ramen. There’s every reason to include this component, as it cleverly reuses the dried shiitake mushrooms that have already imparted their savory essence to the broth. It’s a zero-waste strategy that amplifies flavor significantly!
- Garnish with Classic Accents or Unleash Your Creativity: Traditional Momofuku ramen toppings often include small, crisp squares of nori, thinly sliced fish cakes (known as “naruto”—look for them in the freezer section of Japanese or well-stocked Asian markets), tender bamboo shoots, and finely sliced green onions. Feel free to stick to these timeless choices or experiment with other vibrant additions that appeal to your palate.
And there you have it: an unforgettable bowl of ramen, meticulously crafted from scratch in your own kitchen. While your homemade creation might not taste *exactly* like the Momofuku ramen served in David Chang’s renowned New York City establishments—after all, master chefs always reserve a few secret tricks—this homemade Momofuku ramen is an incredibly impressive and deeply satisfying bowl nonetheless. The broth is robust and intensely complex in flavor, almost masculine in its unapologetically meaty character. Indeed, who else but David Chang would dare to replace the classic seafood components often found in ramen broth with the rich, smoky depth of bacon?
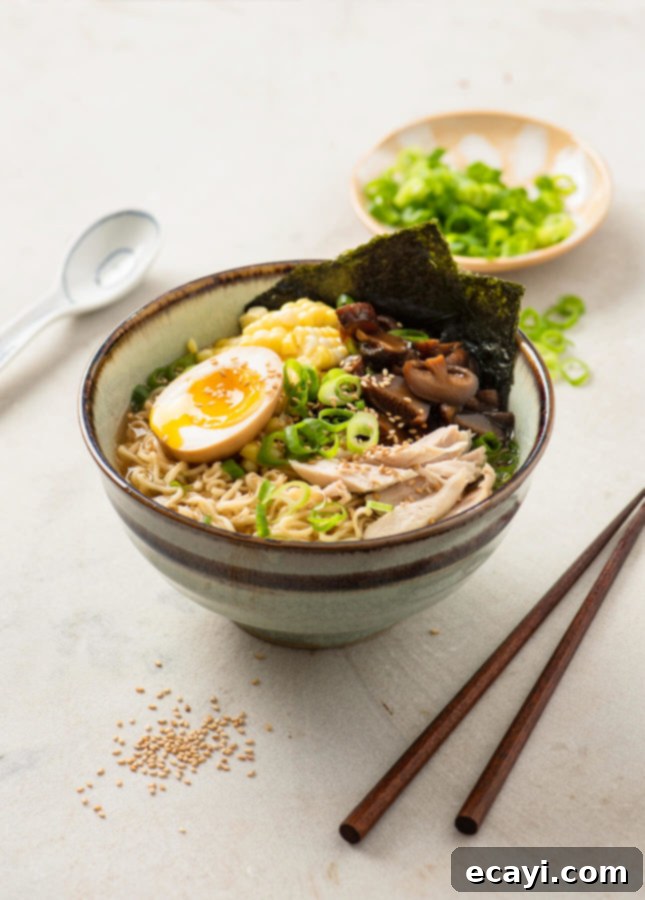
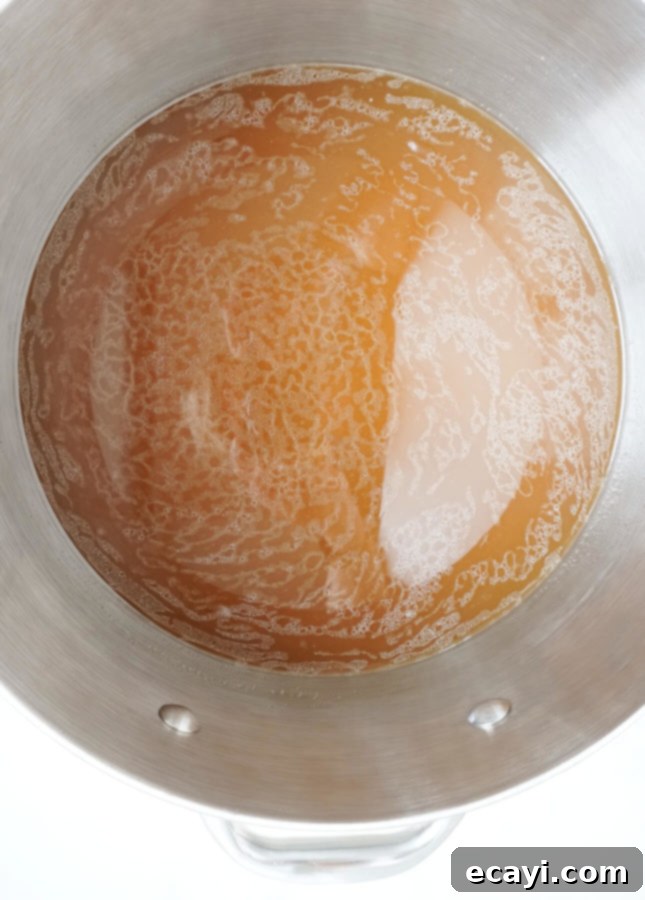
This homemade Momofuku ramen broth offers a truly luxurious experience on the palate. Its opulent richness coats your mouth, yet it achieves a perfect balance, never feeling overly heavy or cloying with fat, ensuring you can thoroughly enjoy every last drop. I find this broth to be remarkably well-balanced and exceptionally delightful to savor.
How Long Does It Take to Create Momofuku Ramen at Home?
From simmering the rich ramen broth to meticulously preparing each individual component, the entire process of making Momofuku ramen at home typically spans several hours. While it’s certainly possible to complete everything in a single, dedicated day, I highly recommend spreading this culinary project over two days. Allowing the broth to rest overnight provides ample time for its complex flavors to fully meld and deepen, resulting in an even more exquisite taste the following day. This staged approach is particularly beneficial given that the recipe yields a generous batch of broth. You can easily portion and freeze the extra broth, guaranteeing many future, effortless ramen feasts.
Once the labor-intensive broth is complete, the most crucial subsequent step in crafting homemade ramen is the meticulous prep work. Envision your kitchen as an assembly line: with your rich broth simmering hot, your noodles perfectly cooked, and all your chosen garnishes (proteins and fresh vegetables) neatly prepped and arranged, the final assembly transforms into a swift and joyous process, culminating in homemade ramen happiness.
What Essential Tools Are Needed for Homemade Momofuku Ramen?
While the process of creating this exceptional ramen broth is undeniably involved, it doesn’t necessitate any highly specialized or expensive kitchen equipment. The single, indispensable tool you will absolutely require is a large stockpot, ideally with a capacity of at least 6 quarts. The original Momofuku recipe is designed to produce a massive 5 quarts of broth! However, I’ve thoughtfully adapted this recipe to comfortably fit the size of stockpot most home cooks are likely to possess. My refined version yields approximately 3 quarts (12 cups) of ramen broth. It’s important to remember that the broth reduces down to this final volume during simmering, so you need ample space initially to accommodate the larger volume of water and all the ingredients as they cook.
If you happen to have an exceptionally large stockpot on hand (12 quarts or more), I heartily encourage you to consider doubling the recipe. This will allow you to produce an even greater quantity of this magnificent ramen broth. As David Chang sagely advises, ramen broth “freezes nicely (…). Making less seems like a waste of time when you’ve got a pot on the stove.” Maximizing your effort ensures you have delicious broth ready for future cravings.
Ready to Get Started Making Momofuku Ramen at Home?
All the essential recipes you need to embark on your Momofuku ramen journey at home are provided in detail below. The two core recipes are for the rich ramen broth itself, and the comprehensive instructions for assembling and serving your masterpiece. Given the extended preparation time required for the ramen broth, I highly recommend printing out that specific recipe. Having a physical copy will make it much easier to refer to each step as you progress through the cooking process.
Additionally, at the very end of this post, you will discover recipes for two optional, yet highly recommended, components: the Umami-Packed Pickled Shiitakes and the iconic Jammy Ramen Eggs. Incorporating these additional elements will truly complete your homemade Momofuku ramen experience, adding layers of authentic flavor and texture.

Pin Recipe
How to Make Momofuku Ramen Broth
Ingredients
For the ramen broth
- 12 cups water
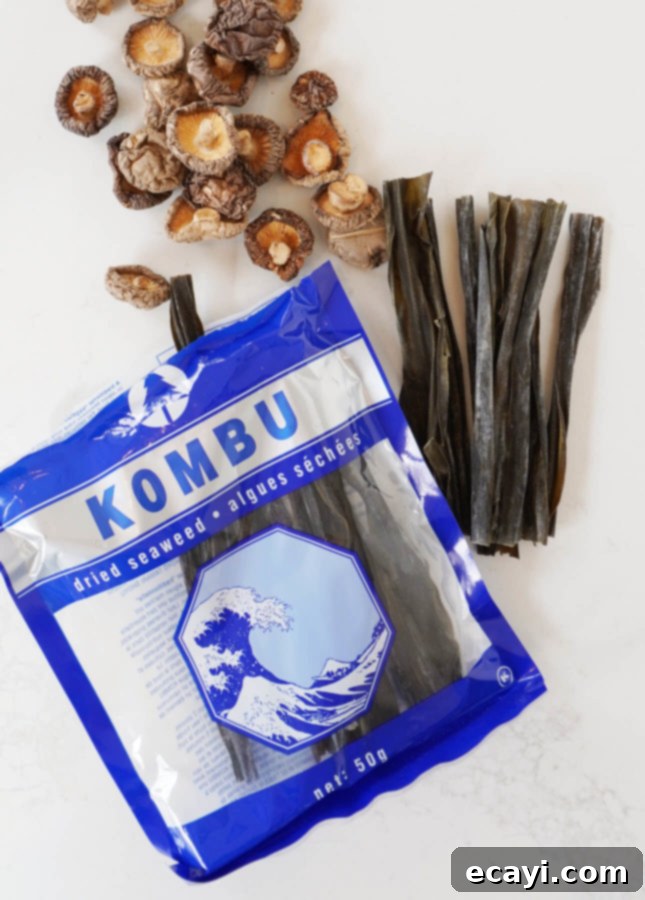
- 1 3 x 6-in (7.5 x 15 cm) piece of kombu (if the kombu you have is cut smaller, select enough pieces to approximately equal the recommended size)
- 1 cup dried shiitake caps (not sliced shiitakes)
- 2 lb bone-in chicken thighs and drumsticks
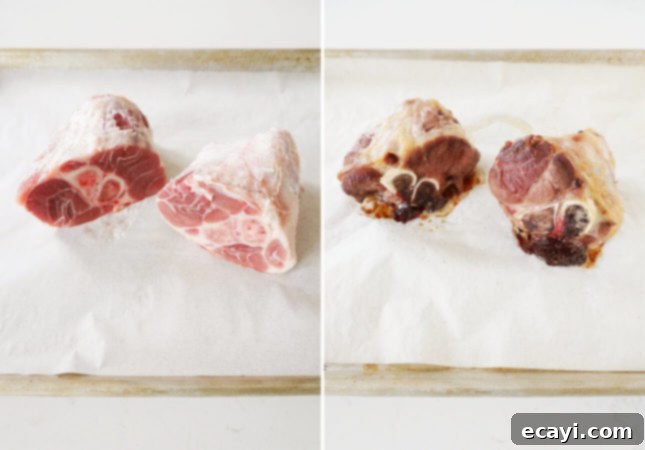
- 2 lb meaty pork bones (leg, shoulder, neck—whatever you can find at your local butcher shop)
- 8 oz smoked bacon
- 4 green onions, cut in 2-inch (5 cm) logs
- 1 small onion, cut in half
- 1 large carrot, peeled and chopped
Ramen seasoning
- 3 tbsp Japanese soy sauce (shoyu)
- 3 tbsp mirin (cooking rice wine)
- 1 tbsp kosher salt, or fine sea salt
Instructions
For the ramen broth:
-
Add the water to a large stockpot and set over high heat. Rinse the kombu under running water, then add it to the water. Bring the water to a simmer, then turn off the heat. Cover and let steep for 10 minutes.
-
Fish out the kombu from the pot. See recipe notes, below, to learn how you can reuse this kombu in a quick salad. (If you do not want to reuse the kombu, discard it.)
-
Rinse the dried shiitake under cold running water, then add them to the pot. Turn the heat back on to high heat, bring to a boil, then lower the heat. Simmer for 30 minutes.
-
Using a slotted spoon, remove the skiitakes from the pot. Transfer the shiitakes to a bowl and save them to make Pickled Shiitakes (get this recipe at the bottom of my main Momofuku Ramen post.)
-
Add the chicken thighs and/or drumsticks to the pot. Adjust the heat level to keep the broth at a gentle simmer. Using a spoon, skim and discard any froth or foam that rises to the surface of the broth while the chicken is simmering and replenish the water as necessary to keep the chicken covered throughout.
-
After about 1 hour, test the chicken: the meat should pull away from the bones easily. If it doesn’t, simmer until you reach that stage. Using a slotted spoon, remove the chicken from the pot and transfer to a plate. Let the chicken legs cool for a bit, then pull all the meat off and save it to serve over the ramen later.
-
While the chicken simmers, preheat the oven to 400°F (200°C). Line a baking sheet with parchment paper. Cut the skin off the pieces of pork bones you’re using, if there’s any, but leave the fat on. Set the pork bones on the baking sheet and roast for 30 minutes, or until the bones are golden brown.

-
Transfer the roasted pork bones to the broth. Add the bacon and adjust the heat level to keep the broth to a simmer. Using a spoon, skim and discard any froth or foam that rises to the surface of the broth and replenish with water to keep the broth at the same level throughout. After 45 minutes, fish out the bacon and discard it. Keep simmering the pork meat and bones for 1 hours, replenishing the water as needed. Add the green onions, onion, and carrot to the pot, and simmer for 1 hour more.
-
Remove and discard spent bones and vegetables. Pass the broth through a fine mesh strainer lined with cheesecloth. Pour the broth back in the pot.
-
In a small bowl, whisk together the ramen seasoning ingredients. If necessary, microwave the mixture for a few seconds to make sure the salt melts into the sauce.
Season the ramen broth:
-
Stir about half of the ramen seasoning into the broth. Taste and adjust to your taste. Remember David Chang’s advice: the ramen broth should be “not quite too salty but almost.” The flavor of your ramen broth depends on the type of bones and the saltiness of the bacon you used, so taste, trust your instinct, and adjust as needed.
-
STORAGE AND FREEZING INSTRUCTIONS: Store the ramen broth in airtight containers in portions (remember you’ll need 2 cups/500 ml per serving.) Refrigerate until cold. You can keep the ramen broth refrigerated for up to 4 days, or freeze it for up to 1 month (or more, if you have a chest freezer.)
-
A layer of fat will float to the top of the ramen broth and harden as it cools. Do not discard the fat. This fat is what makes this broth so delicious and flavorful. This fat will melt back into the broth as you reheat it before serving.
-
If you have limited storage capacity, you can save on space by simmering the broth further, until it is reduced by half. This means that you’ll store 1 cup (250 ml) broth per portion. Make sure to add a note on the container to remember to stir 1 cup (250 ml) water back into the broth (per portion) as you reheat it for service.
-
Recipe adapted from David Chang, Momofuku cookbook.
Notes
Did you make this?
Tell me how you liked it! Leave a comment or take a picture and tag it with @foodnouveau on Instagram.
Pin Recipe
How to Assemble and Serve Momofuku Ramen
Ingredients
PER SERVING:
- 2 cups ramen broth
- 6 oz fresh ramen noodles, or 3 oz (85 g) dried noodles of your choice
- ½ cup cooked meat (shredded chicken from the broth, shredded pork, or pork belly)
- ¼ to ½ cup seasonal vegetables, blanched (corn, bean sprouts, broccoli, spinach, carrots, etc.)
- 1 ramen egg sliced in half (get the recipe to make these at the bottom of my main Momofuku Ramen post)
- ¼ cup thinly sliced green onions (green and white parts)
- 2 3-in (7.5 cm) square pieces of nori (cut out from larger sheets)
Additional optional toppings
- Slices of fish cakes (“naruto”)
- Bamboo shoots
- Toasted sesame seeds
- Furikake
Instructions
Prepare all the Momofuku ramen components:
-
Bring the ramen broth to a simmer. Cook the noodles. Slice and blanch the vegetables. Slice the green onions. Get all the remaining components close to your workstation.
-
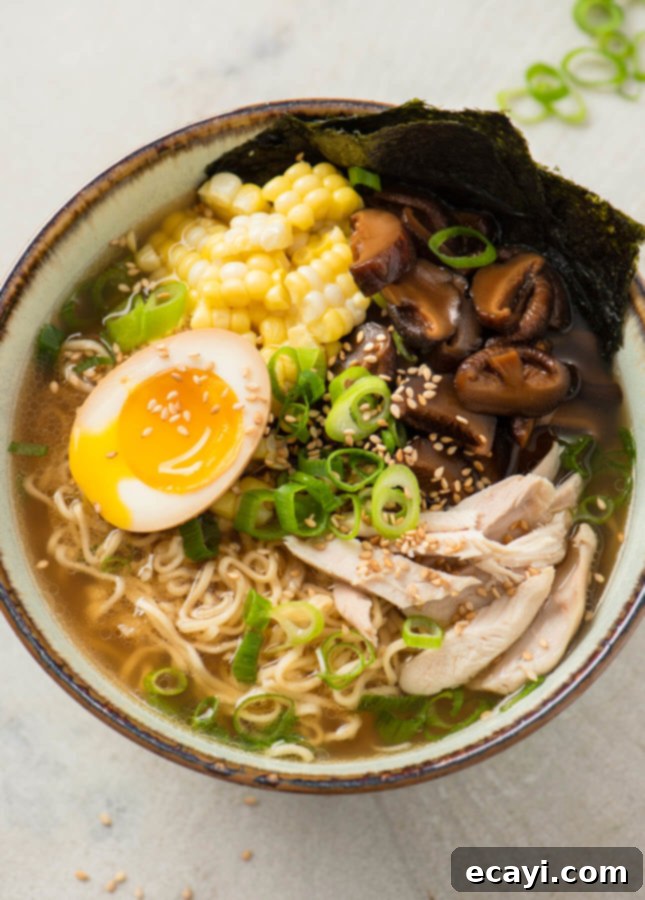
Lay the noodles in the bottom of the serving bowl. Arrange the meat and the vegetables over the noodles. Ladle the broth over. Top with the halved ramen egg and the green onions. Tuck the nori about one-third of the way into one side of the soup, so they lean against the side of the bowl and stand up above the rim. Finish with the remaining toppings of your choice. Serve very hot.
-
Recipe adapted from David Chang, Momofuku cookbook.
Did you make this?
Tell me how you liked it! Leave a comment or take a picture and tag it with @foodnouveau on Instagram.
Pin Recipe
Pickled Shiitakes
Ingredients
- 2 cups rehydrated shiitakes from the ramen broth, or 1 cup/40 g dried shiitake caps steeped in boiling water for 30 minutes, then drained
- 1 cup ramen broth, or chicken broth
- ½ cup granulated sugar
- ½ cup Japanese soy sauce
- ½ cup sherry vinegar, or rice vinegar
- 1 3-in (7.5 cm) knob of fresh ginger, peeled and sliced
Instructions
-
Cut the rehydrated shiitakes into 1/4-in-thick (0.6 cm) slices (discard the stems if there were any).
-
In a saucepan, combine the broth, sugar, soy sauce, vinegar, and ginger. Stir in the sliced shiitakes and bring to a simmer. Lower the heat and keep to a slow simmer for 30 minutes. Let the shiitakes cool in the pickling liquid.
-
Discard the ginger slices. Transfer the shiitakes to a jar and cover with the pickling liquid. The pickled shiitakes are ready to eat immediately. They will keep, refrigerated, for 1 month. Serve with ramen or enjoy as a snack.
-
Recipe adapted from David Chang, Momofuku cookbook.
Did you make this?
Tell me how you liked it! Leave a comment or take a picture and tag it with @foodnouveau on Instagram.

Pin Recipe
Easy Ramen Eggs
Ingredients
- 2 eggs
- ¼ cup water
- 2 tbsp Japanese soy sauce
- 2 tbsp mirin (rice cooking wine)
Instructions
-
Place the eggs in a small saucepan. Fill the saucepan with water up to 1-in (2.5 cm) above the eggs. Set over high heat and bring to a boil. Lower the heat and simmer for exactly 7 minutes.
-
While the eggs cook, fill a bowl with cold water and add ice to make it extra cold. When the eggs are done, immediately transfer them to the ice water bath and leave to cool for 10 minutes.
-
In a small, resealable plastic bag, combine the water, soy sauce, and mirin. Carefully peel the eggs and transfer them to the marinade. Close the bag, making sure to remove all the air from the bag before you seal it. Refrigerate the eggs overnight, making sure the eggs remain completely submerged in the marinade (you can place the bag in a small container to force it to stand up.) Use within 4 days.
Did you make this?
Tell me how you liked it! Leave a comment or take a picture and tag it with @foodnouveau on Instagram.
This site is a participant in the Amazon Associates Program, an affiliate advertising program designed to provide a means for the site to earn fees by linking to Amazon and affiliated sites.
If you click on an affiliate link, I may earn advertising or referral fees if you make a purchase through such links, at no extra cost to you. This helps me creating new content for the blog–so thank you! Learn more about advertising on this site by reading my Disclosure Policy.
