How to Make Authentic Sicilian Arancini: A Comprehensive Guide to Crispy Stuffed Risotto Balls
Embark on a culinary journey to Sicily and discover how to craft irresistible Arancini, the quintessential fried risotto balls, traditionally stuffed with rich meat sauce. This detailed guide, complete with step-by-step instructions and helpful images, will walk you through the process of creating these beloved Italian finger foods.

This post contains affiliate links. Full disclosure is at the bottom of the article.
My first encounter with arancini, a renowned Italian snack, occurred during one of my early trips to Italy. However, it was in Sicily, the dish’s birthplace, that I truly fell head over heels for them. Across the island, these delightful creations—gooey, cheesy, and perfectly crispy fried risotto balls—were ubiquitous, gracing breakfast tables, lunch counters, and late afternoon aperitivo spreads. Sicilian arancini truly are the quintessential finger food: creamy, flavorful rice, filled with a savory surprise and melting cheese, all encased in a neat, golden-fried package. They are an absolute showstopper for any gathering, pairing exquisitely with cocktails at your next dinner party or as a satisfying snack on their own.

What Exactly Are Arancini?
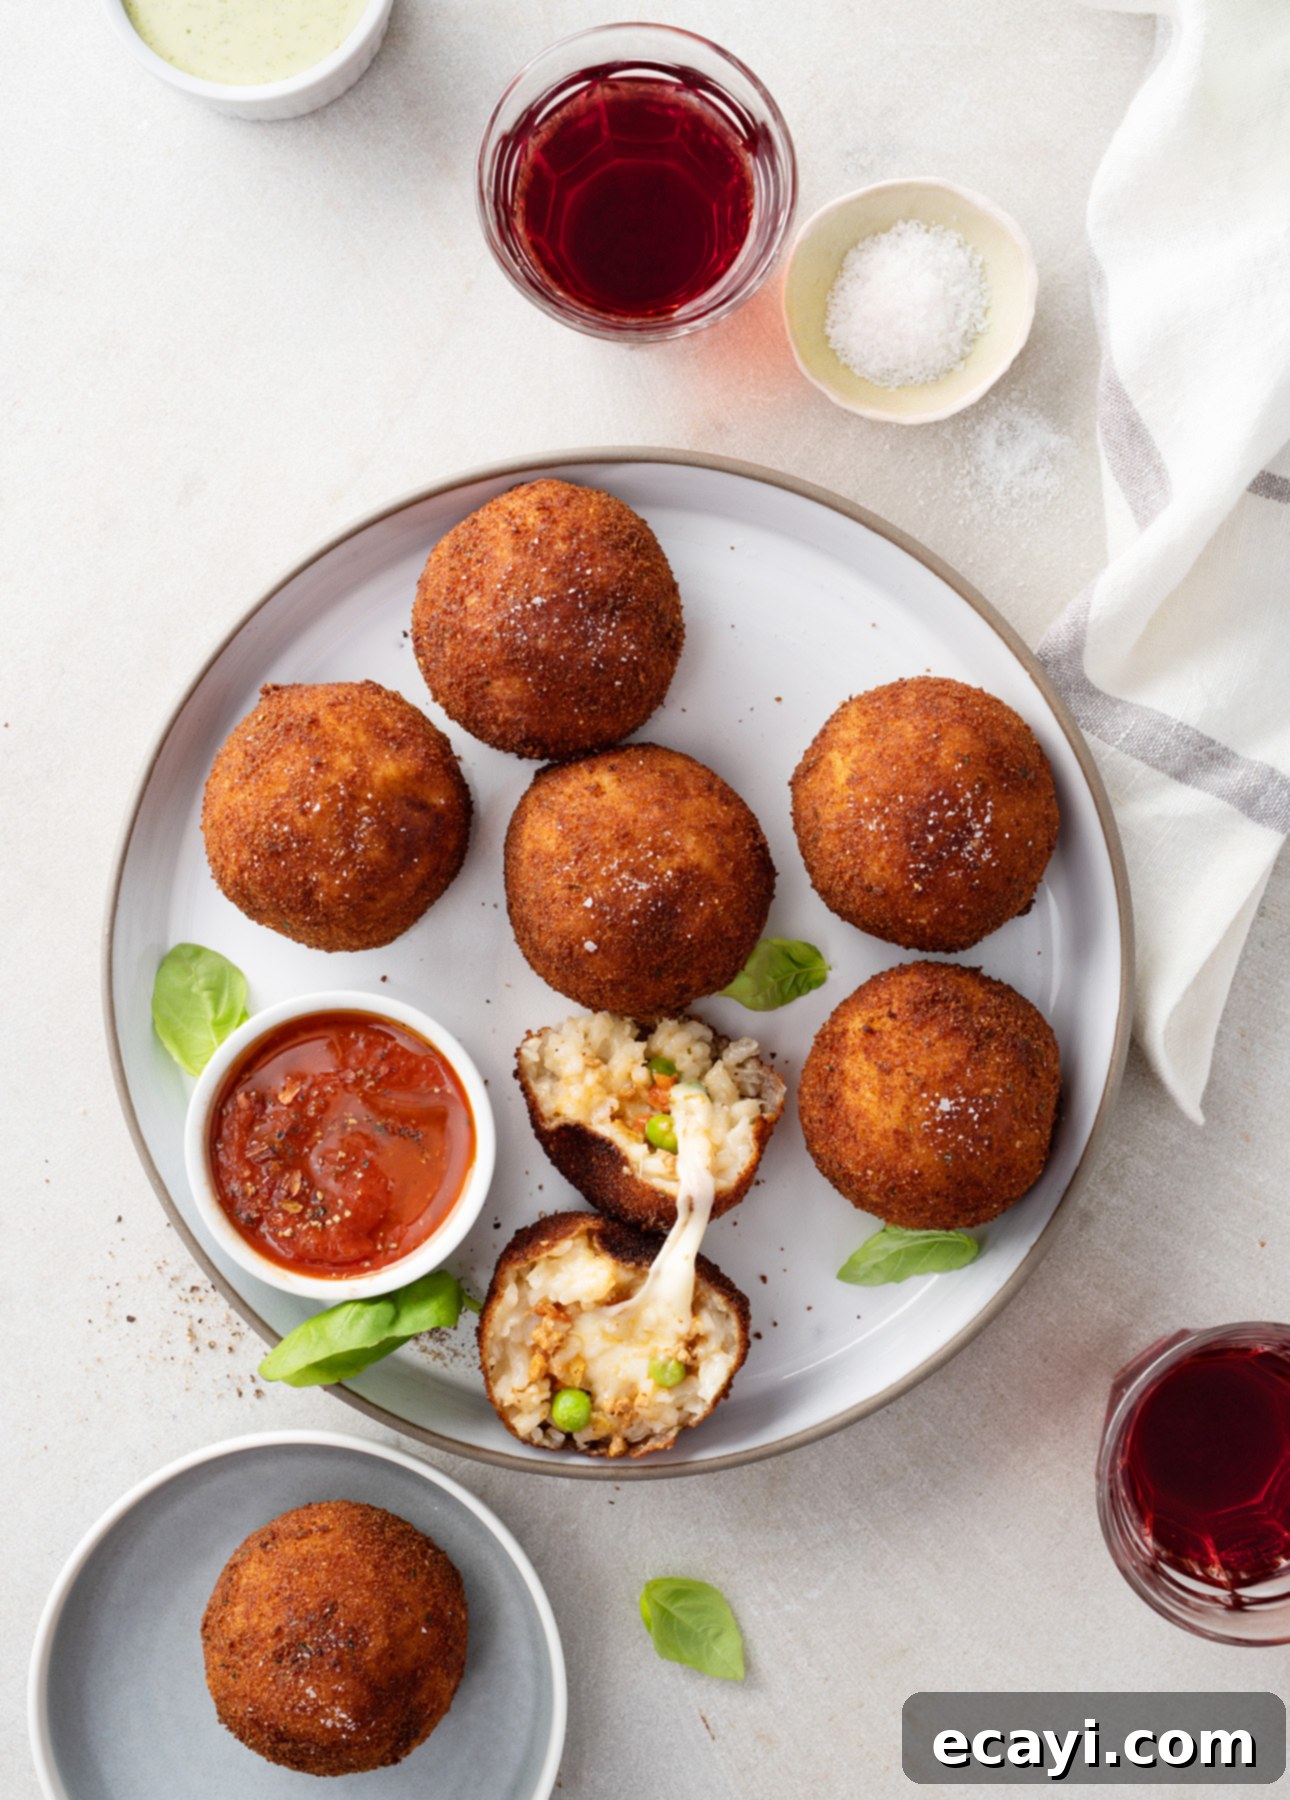
At their core, arancini are ingenious creations made from cooled, leftover risotto. The classic Sicilian version often features a generous stuffing of ragù – a rich, slow-cooked meat sauce – and a cube of mozzarella cheese. These meticulously formed risotto balls are then coated in a crispy layer of breadcrumbs and deep-fried until golden brown. This frying process not only creates an irresistible crunchy exterior but also perfectly reheats the risotto and melts the mozzarella into a luscious, gooey center. The true magic of arancini lies in this delightful textural contrast: the satisfying crunch of the shell giving way to a warm, creamy, and flavorful interior is utterly irresistible.
While the most traditional Sicilian arancini are filled with meat sauce (I particularly enjoy using a rich homemade Bolognese sauce for an extra layer of flavor!), the possibilities for stuffing are vast. You can simplify things by opting for just mozzarella or by deeply infusing the risotto itself with exquisite flavors. Some of the most memorable arancini I tasted in Sicily were made with pistachio-flavored risotto – an incredibly luxurious and unexpected bite! I also love to brighten the risotto with plenty of lemon zest; the sharp, aromatic citrus provides a wonderful counterpoint to the otherwise rich and comforting flavors and textures.
Perhaps the finest arancino I’ve ever savored in Italy, featuring a divine filling of pistachios and mortadella, enjoyed at Caffetteria Biancomangiare, nestled in the charming town of Ragusa, Sicily.

Unpacking the Name: What Does “Arancini” Mean?
The word arancini is a charming diminutive of arancia, which means “orange” in Italian. Therefore, “arancini” literally translates to “little oranges.” This playful name is a direct reference to the typical round shape and golden-brown color of the fried risotto balls, which strikingly resemble small oranges. This nomenclature not only highlights their visual appeal but also connects them deeply to the sun-drenched landscapes and bountiful citrus groves of Sicily.
The Cheeses of Arancini: What Varieties to Use?
The hallmark of a truly great arancino is its perfectly gooey, melted cheese center. For this, mozzarella cheese is the traditional and ideal choice. You can purchase fresh mozzarella and cut it into small cubes, which are perfect for stuffing into the center of your risotto balls. Alternatively, mini bocconcini (small mozzarella balls) are incredibly convenient, as they are already pre-portioned into tiny spheres that easily slip into the cold risotto, ensuring an even distribution of cheesy goodness.
Beyond the melting core, the risotto itself is richly flavored with another essential Italian cheese: Parmesan. For an authentic and superior flavor profile, I highly recommend using aged Parmigiano-Reggiano. Its sharp, nutty, and savory notes infuse the rice with a depth that forms the perfect foundation for the other flavors in the arancini.
A classic spread of delectable snacks—complete with inviting arancini—served for the aperitivo (happy hour) ritual in vibrant Catania, Sicily.

Mastering the Art of Shaping Arancini
Working with cold risotto is surprisingly pliable, making it ideal for shaping. While forming and preparing arancini for frying involves a few distinct steps, setting up an organized workspace will allow you to glide through the process with ease and efficiency, minimizing mess and maximizing enjoyment.
Quick Tips for Perfectly Shaped Sicilian Risotto Balls:
- Embrace Gloves or Plastic Wrap: Shaping the risotto can indeed be a sticky affair. To prevent your hands from becoming overly coated, consider wearing disposable gloves. An alternative, equally effective method is to place a portion of risotto on a square of plastic wrap and use the wrap itself to help gently mold and seal the arancini balls. This not only keeps your hands clean but also allows you to reuse the same square of plastic wrap for several arancini, reducing waste.
- Utilize an Ice Cream Scoop for Uniform Portions: For consistent results and an attractive presentation, an ice cream scoop is your best friend. It helps you quickly and accurately portion out equal amounts of risotto, ensuring that all your arancini balls are uniformly sized. This consistency is crucial, as it means every arancino will cook evenly and fry in approximately the same amount of time, preventing some from being undercooked or over-crisped.
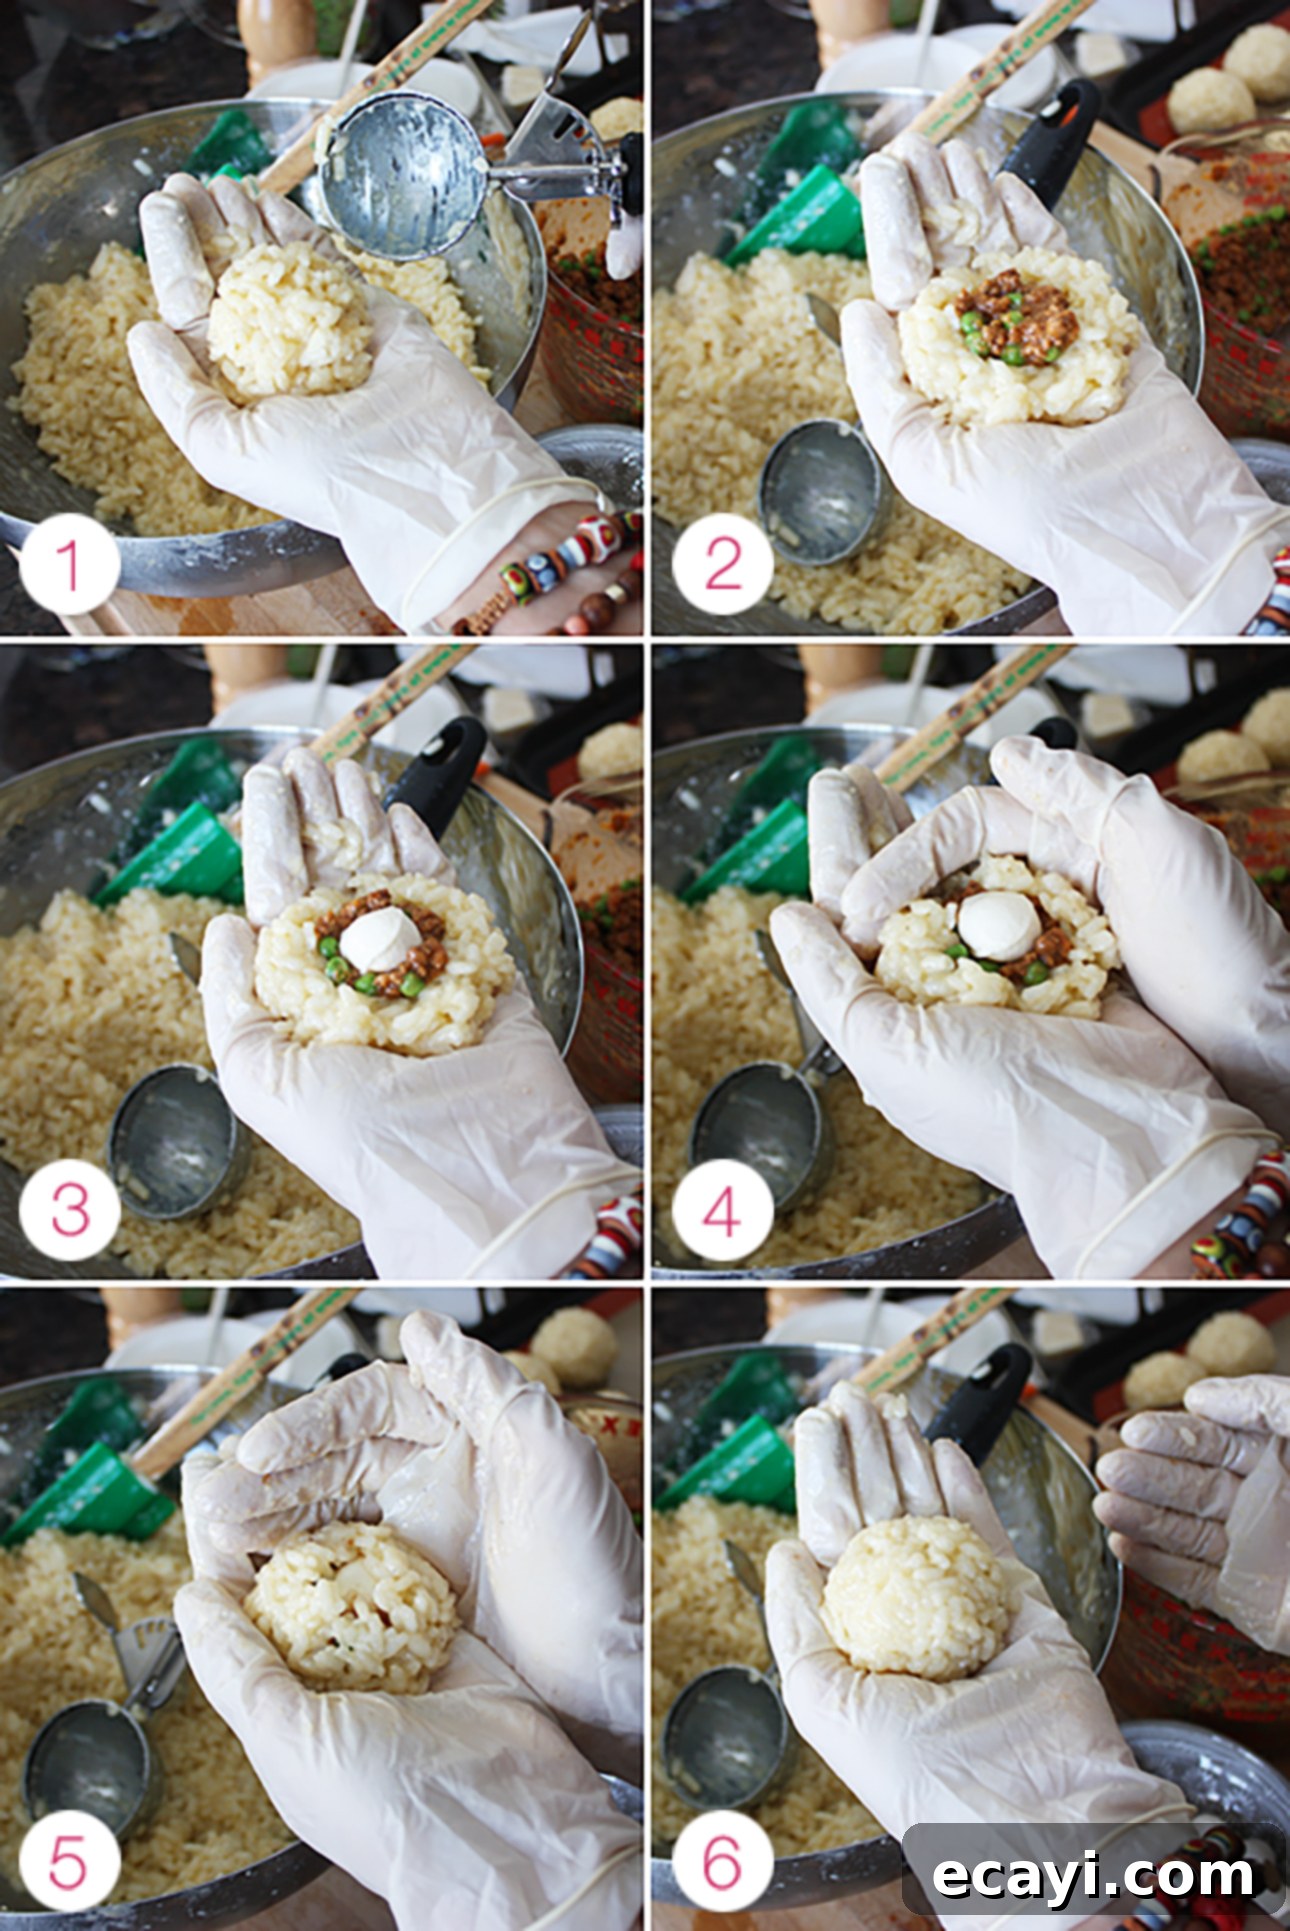
For the complete, detailed recipe, please refer to the section below. However, here’s a quick overview of the essential steps for shaping your delicious Sicilian risotto balls:
- Begin by taking a handful (approximately 1/4 cup or 60 ml) of the cooled risotto mixture. Gently shape it into a small, compact ball in the palm of your hand.
- Using your thumb or a spoon, create a distinct indentation in the very center of the rice ball. Into this well, carefully drop about 1 tablespoon (15 ml) of your chosen meat sauce, if you are using it as a filling.
- Nestle a piece of mozzarella cheese or a mini bocconcini ball directly over the meat sauce.
- Using both hands, gently manipulate and work the rice around the filling. Carefully close your hands over the rice ball, gradually sealing the meat sauce and cheese completely within the risotto, forming a perfectly round and enclosed sphere. Ensure there are no cracks for the filling to escape during frying.
Exploring Smaller Arancini: Bite-Sized Delights
Traditional Sicilian arancini are quite substantial, typically measuring about 2.5 inches (5 cm) in diameter – hence their comparison to small oranges! They are designed to be a satisfying snack or even a light meal.

However, there’s absolutely nothing wrong with making bite-sized arancini – in fact, they’re fantastic! This smaller format is particularly effective when you opt for a simpler filling or no stuffing at all. In this instance, your snack will resemble the Roman supplì, which are essentially smaller fried rice balls. Arancini and supplì are, after all, very close culinary cousins, both celebrated for their crispy exteriors and soft, flavorful interiors.
Bite-sized arancini are especially practical if you plan to serve them as part of an elegant array of cocktail finger foods or appetizers. To prepare these miniature marvels, I recommend making your risotto extra-cheesy, as you won’t be adding an additional chunk of cheese inside. Form the balls using about 1.5 tablespoons of risotto mixture. Remember to significantly adjust the frying time, as these smaller arancini will cook through much more quickly than their larger counterparts.
Frying Arancini Without a Deep Fryer: Safety First!
Absolutely, you can make perfectly fried Sicilian risotto balls even if you don’t own a dedicated deep fryer. I can personally attest to this, as I prepare arancini more often than I’d like to admit, all without a specialized appliance!
Frying arancini without a deep fryer requires heightened awareness and careful attention:
- Choose the Right Pot: Always use the largest, heaviest-bottomed pot you have available. This provides a stable base and ample room, reducing the risk of oil splashing.
- Mind the Oil Level: Ensure the cooking oil does not fill the pot higher than its lower third. For arancini, you typically only need about 3 inches (8 cm) of oil to achieve proper frying. This leaves plenty of headroom to prevent dangerous overflows when you add the food.
- Constant Supervision is Key: It is paramount that you ALWAYS remain glued to the stove whenever you have hot oil on it. Never leave hot oil unattended, even for a moment, as it can quickly become a fire hazard.
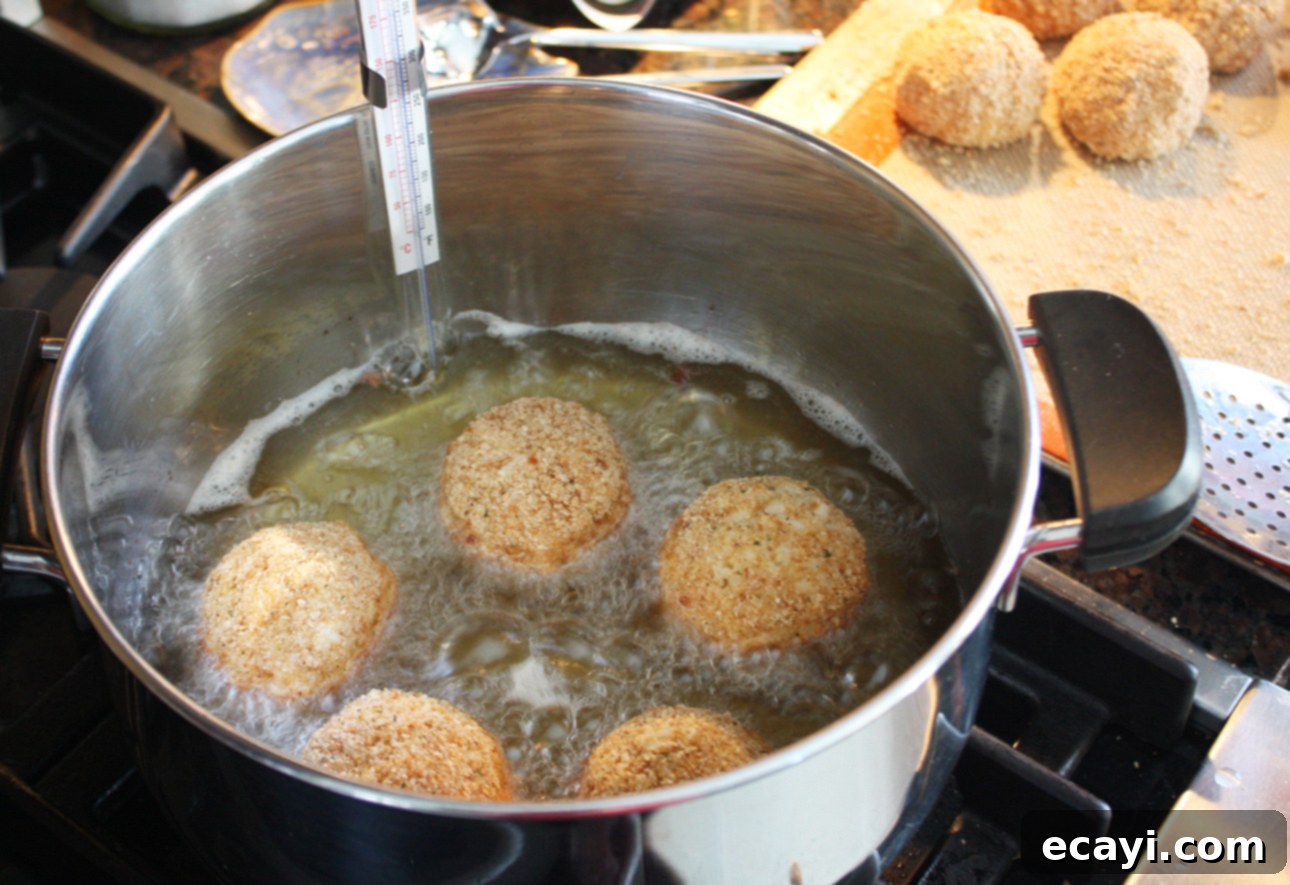
- Invest in a Thermometer: I strongly recommend clipping a deep-fry thermometer to the side of your pot. This inexpensive tool, often available for less than $10, is a small but vital investment. It allows you to accurately monitor and maintain the oil at the proper temperature, which is crucial for safety and for achieving consistently crispy, perfectly cooked arancini. Too-cold oil results in greasy arancini, while too-hot oil can burn the exterior before the interior is properly heated and the cheese melted.
Can You Bake Arancini Instead of Frying?
While deep-frying is the traditional method for arancini, resulting in their signature crispiness, you certainly can bake them as an alternative. If you choose to bake, I highly recommend forming bite-sized arancini rather than the traditional, larger size. Smaller arancini will bake more evenly and achieve a crispier texture in the oven compared to larger ones, which can sometimes remain a bit softer in the center without the direct heat of frying. While baked arancini won’t reach the same level of deep-fried crispness, they will still be wonderfully flavorful and a delicious option for a lighter take.
To bake arancini to perfection:
- Preheat your oven to a hot 425°F (220°C).
- Line a baking sheet with aluminum foil, which helps with cleanup and can aid in crisping the bottom.
- Generously grease the foil with cooking spray to prevent sticking and encourage browning.
- Form your arancini using about 1.5 tablespoons (22 ml) of risotto for each ball (if making bite-sized).
- Dredge them meticulously in flour, then egg, and finally breadcrumbs, exactly as indicated in the traditional frying recipe. This coating is crucial for texture.
- Arrange the coated arancini on the prepared baking sheet, ensuring they have enough space between them.
- Liberally spray the arancini balls all over with cooking spray. This helps create a golden, crispy crust in the oven.
- Bake for 20 to 25 minutes, or until the arancini are beautifully golden brown and heated through. For an extra boost of color and crispness, you can broil them for a minute or two at the very end of the cooking time, but watch them closely to prevent burning.
Planning Ahead: Can You Make Arancini in Advance?
Yes, absolutely! Sicilian risotto balls are an excellent make-ahead dish, perfect for entertaining or meal prep. You can prepare and fry the arancini according to the recipe instructions. Once fried, carefully transfer the hot balls to a cooling rack to allow them to cool completely to room temperature. Once cooled, store them in an airtight container and refrigerate for up to 3 days. This means you can enjoy fresh, crispy arancini with minimal effort right when you need them.
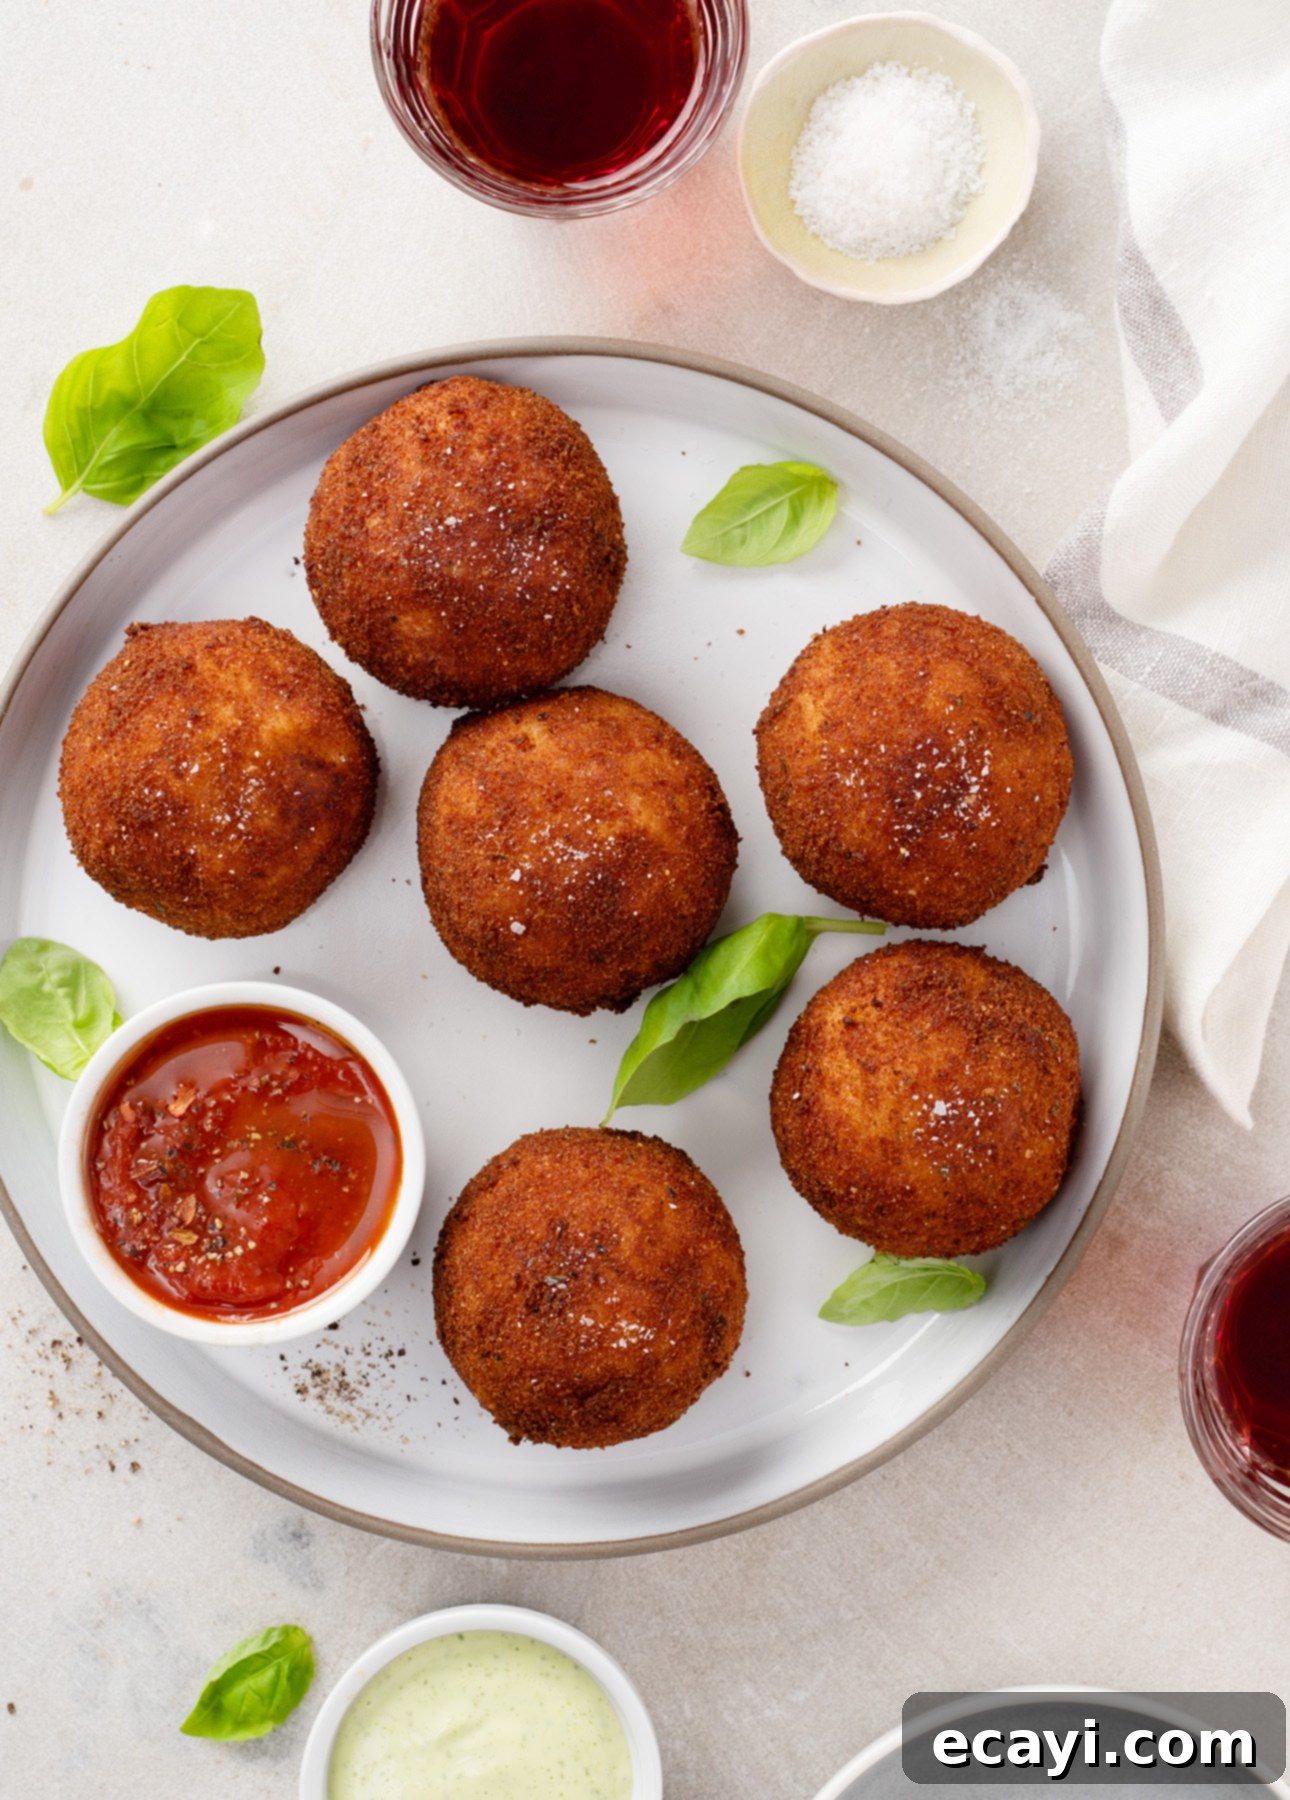
The Art of Reheating Arancini
Reheating refrigerated Sicilian risotto balls is a straightforward process, ensuring they regain their delicious warmth and a good portion of their original crispness.
Simply arrange the arancini on a baking sheet lined with parchment paper. Place them in a preheated 350°F (175°C) oven and bake for 10 to 15 minutes, or until they are thoroughly heated through and the exterior has crisped up nicely. Serve them immediately for the best experience.
Freezing Sicilian Risotto Balls: What You Need to Know
I generally do not recommend freezing arancini once they have been fried or baked. The freezing and thawing process can significantly alter the texture of both the risotto and the filling, often leading to a watery interior. This can cause the arancini to lose their carefully formed shape and, more importantly, prevent them from ever returning to their glorious, crispy texture once reheated.
However, you *can* prepare arancini up to a certain point for freezing, saving you time later. You can form the “naked” risotto balls, stopping just before the dredging process (i.e., before coating them in flour, egg, and breadcrumbs). To freeze these unfried arancini: set the formed balls on a baking sheet, spaced apart, and freeze them until they are completely solid. Once frozen solid, transfer them to an airtight container or freezer bag and store them in the freezer for up to 1 month.
When you’re ready to enjoy them, thaw the frozen arancini in the refrigerator overnight. Once thawed, proceed with dredging them in flour, egg, and breadcrumbs, and then fry them just before serving to achieve that perfect crispy exterior.

Pin Recipe
Arancini con Ragù (Sicilian Rice Balls Stuffed with Meat Sauce)
Ingredients
For the risotto
- 2 ¼ cups chicken stock, or a flavorful vegetable stock
- 1 tbsp extra-virgin olive oil
- 5 oz risotto rice (e.g., Arborio, Carnaroli, or Vialone Nano)
- 2 oz finely grated Parmigiano-Reggiano cheese (approximately 1 cup)
- 1 large egg
For the filling
- ½ cup leftover Bolognese sauce, or another thick, rich meat sauce of your preference
- ¼ cup frozen green peas, thawed
- 12 mozzarella cubes or mini bocconcini balls
To fry the arancini
- 1 cup all-purpose flour
- 2 large eggs, beaten
- 2 cups fine, dry breadcrumbs
- 2 cups vegetable oil (for deep-frying)
To serve
- Classic tomato sauce, or
- Creamy Aïoli (garlic mayonnaise)
Instructions
Make the risotto:
-
In a large, heavy-bottomed saucepan, bring the chicken or vegetable broth and olive oil to a gentle boil. Stir in the risotto rice, return the mixture to a boil, then immediately reduce the heat to maintain a gentle simmer. Cook the rice, uncovered, stirring occasionally, until it reaches an al dente consistency (tender yet still firm to the bite), which usually takes about 12 minutes. Once cooked, if there’s any significant amount of liquid remaining, carefully drain it using a colander (any residual liquid should be thick, resembling heavy cream). Gently stir the rice in the colander to ensure all excess liquid drains out. Spread the cooked rice evenly onto a baking tray to cool completely to room temperature. For optimal results, you can also refrigerate the rice for up to 24 hours at this stage.
-
Once the risotto rice is thoroughly cooled, transfer it to a large mixing bowl. Add the finely grated Parmigiano-Reggiano cheese and the egg, mixing well to ensure all ingredients are evenly incorporated. The egg acts as a binder, helping the arancini hold their shape.
Prepare the filling sauce:
-
Gently warm up your chosen Bolognese sauce or thick meat sauce. Stir in the thawed green peas until well combined. Set this mixture aside, allowing it to cool slightly before using.
Get your workstation ready for assembly:
-
Arrange the bowl of prepared risotto, the meat sauce with peas, and the mozzarella cubes (or bocconcini balls) in an assembly-line fashion directly in front of you. Keep a clean baking sheet nearby to place the formed arancini. A large ice cream scoop is highly recommended, as it conveniently measures out the ideal amount of rice (1/4 cup / 60 ml) for each arancino. If you prefer to keep your hands clean during this somewhat messy process, consider wearing disposable gloves.
How to expertly shape the arancini:
-
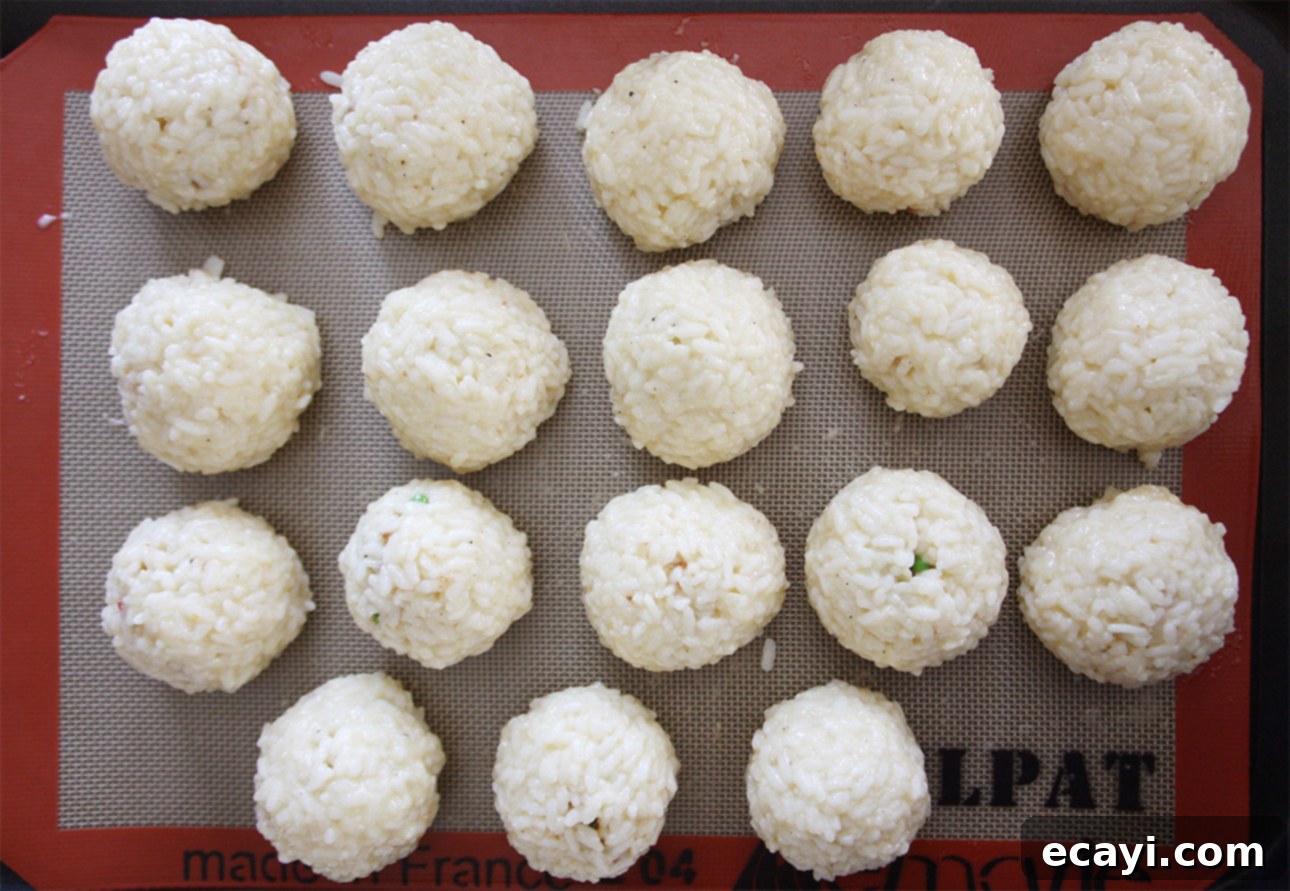
Scoop about 1/4 cup (60 ml) of the rice mixture and gently shape it into a small, uniform ball in the palm of your hand. Create a well or indentation in the center of the rice ball. Carefully spoon approximately 1 tablespoon (15 ml) of the meat sauce into this well. Place a bocconcini ball or a mozzarella cube directly on top of the sauce. Using both hands, carefully work the rice around the filling, slowly closing your hands over the rice ball to completely enclose the meat sauce and cheese. Aim for a perfectly round and sealed sphere. Repeat this process for all remaining risotto and meat sauce. Once all the arancini are formed, place them on a baking sheet and freeze for 20 minutes. This quick chill will help them firm up and maintain their perfect round shape during the frying process.
Dredge the arancini for a crispy coating:
-
Prepare your dredging station by setting three shallow bowls in a row on your working surface. Fill the first bowl with all-purpose flour, whisk the 2 eggs in the second bowl, and place the fine, dry breadcrumbs in the third bowl. Keep another clean baking sheet nearby to arrange the rice balls after they’ve been dredged.
-
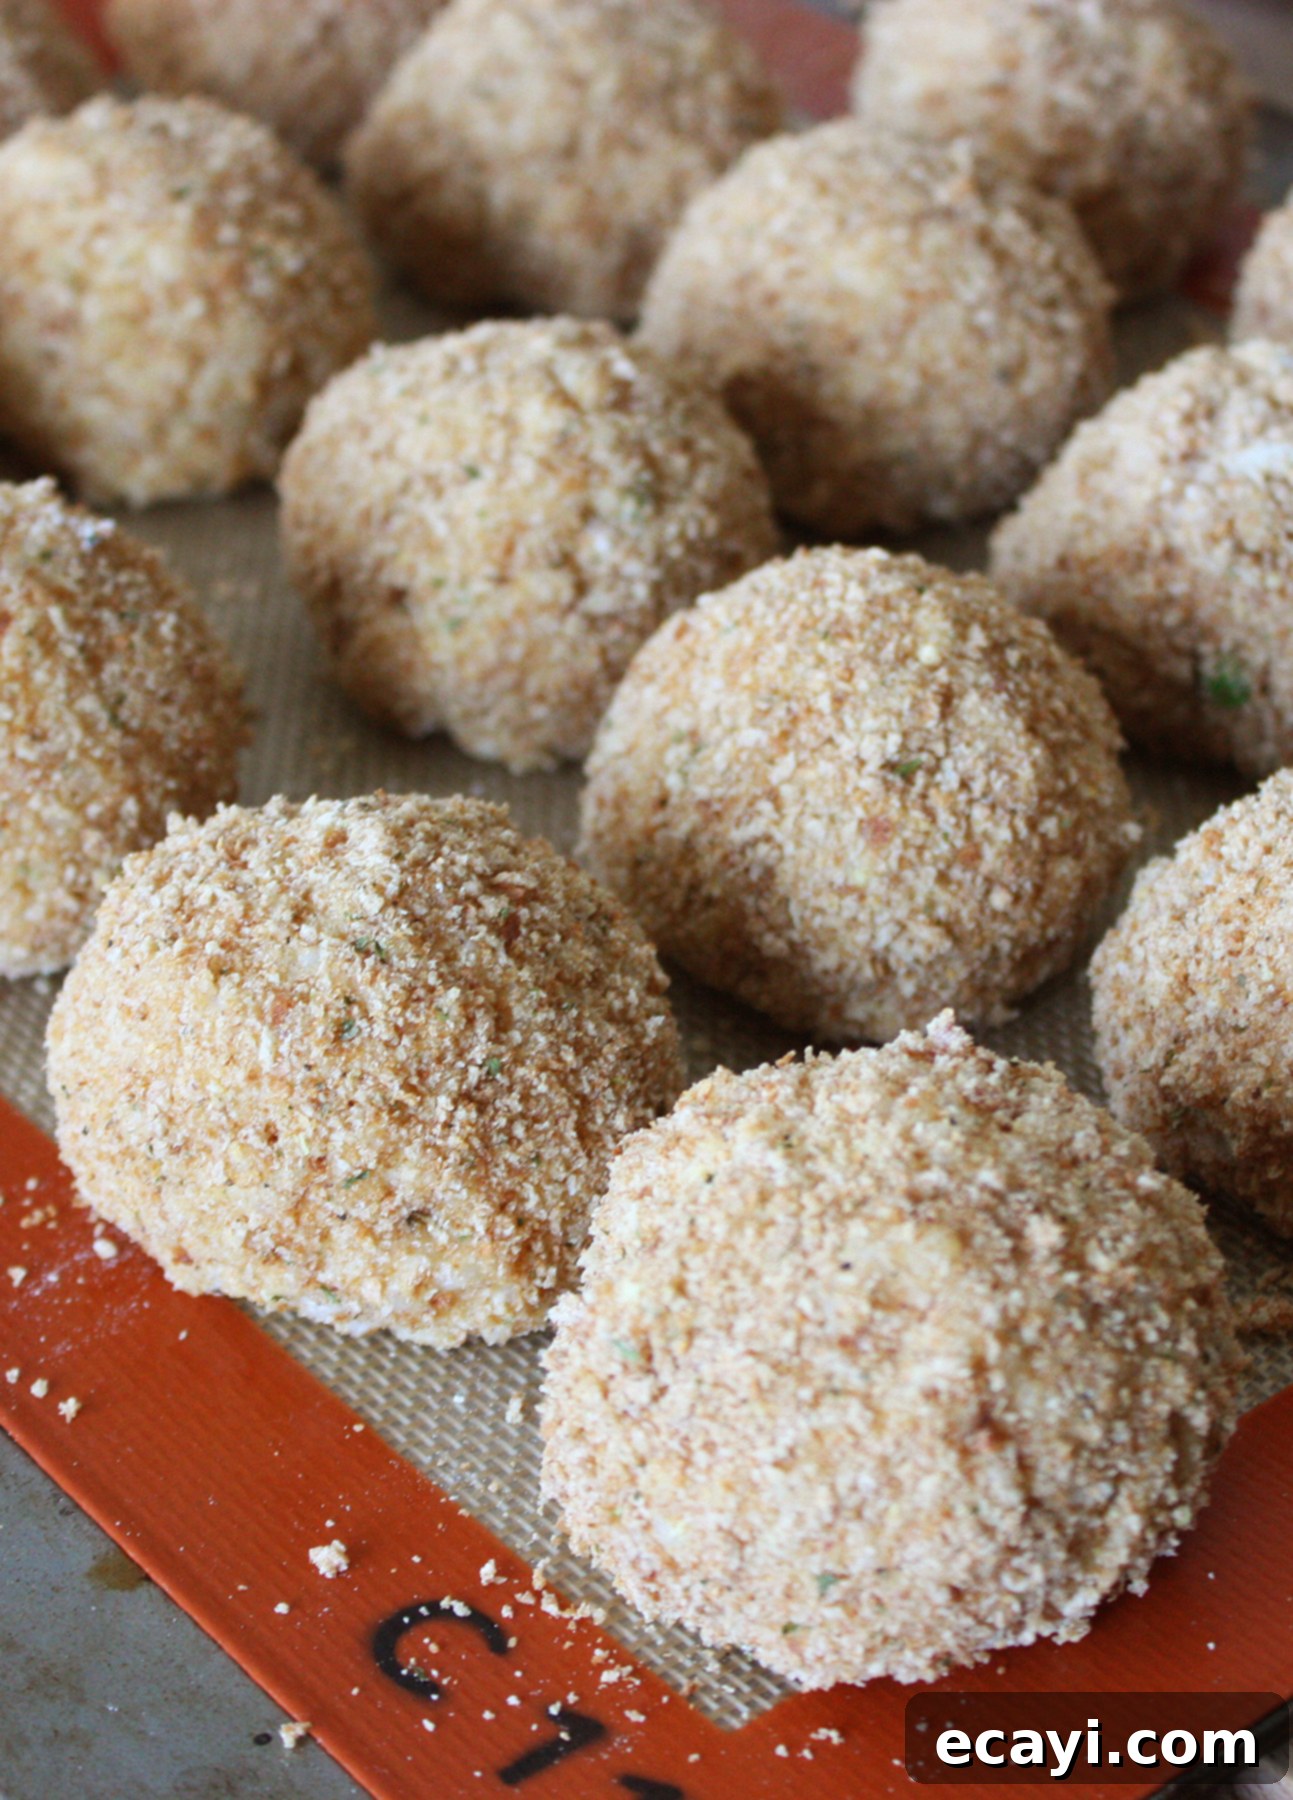
Take one arancino and roll it thoroughly in the flour, ensuring all sides are lightly coated. Gently tap off any excess flour. Next, transfer the flour-coated ball to the beaten egg, rolling it to coat evenly, and allow any excess egg to drip back into the bowl. Finally, roll the egg-coated ball in the breadcrumbs, gently pressing to ensure an even and complete coating. Transfer the fully dredged arancino to the clean baking sheet and repeat with all the remaining rice balls.
Fry the arancini until golden perfection:
-
If you intend to serve the arancini immediately after frying, preheat your oven to a low 200°F (95°C) or its lowest setting. This will allow you to keep the fried arancini warm while you finish frying the remaining batches. Line a baking sheet with a double thickness of paper towels; this will absorb excess oil from the fried arancini.
-
Pour the vegetable oil into a sturdy large stockpot or Dutch oven. Ensure the oil comes up approximately 2 inches (5 cm) from the bottom of the pot. Depending on the size of your pot, you may need to add more oil to reach this depth; adjust as necessary.
-
If working WITH a thermometer: Carefully insert a deep-fry thermometer into the oil, ensuring the tip is not touching the bottom of the pot. Heat the oil over medium heat until it reaches a steady 375°F (190°C). Once the desired temperature is achieved, keep a close eye on the thermometer and adjust the heat under the saucepan as needed to maintain a consistent temperature throughout the entire frying process.
-
If working WITHOUT a thermometer: To test the oil temperature, carefully drop a small crumb of bread or a tiny piece of risotto into the hot oil. It should immediately produce a lively but steady sizzle and gently bubble around the crumb. If nothing happens, the oil is not yet hot enough. If the oil around the crumb boils vigorously and sputters excessively, the oil is too hot and needs to cool slightly. Adjust your heat accordingly.
-
Once the oil reaches the correct temperature: Carefully slip 2 or 3 arancini into the hot oil at a time, being careful not to overcrowd the pot, which can lower the oil temperature. Fry the arancini, turning them as necessary with tongs or a slotted spoon, until they are beautifully golden brown and crisp on all sides, typically taking about 4 minutes. Using the slotted spoon, remove the fried arancini and transfer them to the paper towel-lined baking sheet to drain excess oil. If you wish, keep them warm in the preheated oven while you fry the remaining rice balls.
-
MAKE-AHEAD TIPS: To prepare arancini in advance, simply allow them to cool completely to room temperature on the paper towel-lined baking sheet after frying. Once cool, transfer them to an airtight container and store them in the refrigerator. To reheat, preheat your oven to 325°F (170°C). Arrange the refrigerated rice balls on a lightly greased baking sheet and warm for about 10 minutes in the oven, turning them halfway through to ensure even heating and crispness.
-
SERVING SUGGESTIONS: Arancini are wonderfully versatile and can be served either hot, fresh from the fryer, or at room temperature. These delightful Sicilian rice balls make an excellent snack or a sophisticated appetizer, especially when accompanied by a vibrant homemade tomato sauce or a creamy garlic mayo (Aïoli) for dipping. For a heartier meal, serve them as a main course alongside a crisp, refreshing salad.
Did you make this?
Tell me how you liked it! Leave a comment or take a picture and tag it with @foodnouveau on Instagram.
This site is a participant in the Amazon Associates Program, an affiliate advertising program designed to provide a means for the site to earn fees by linking to Amazon and affiliated sites.
If you click on an affiliate link, I may earn advertising or referral fees if you make a purchase through such links, at no extra cost to you. This helps me creating new content for the blog–so thank you! Learn more about advertising on this site by reading my Disclosure Policy.
