Indulge in the Dreamy No-Bake Biscoff Icebox Cake: Your Ultimate 5-Ingredient Dessert!
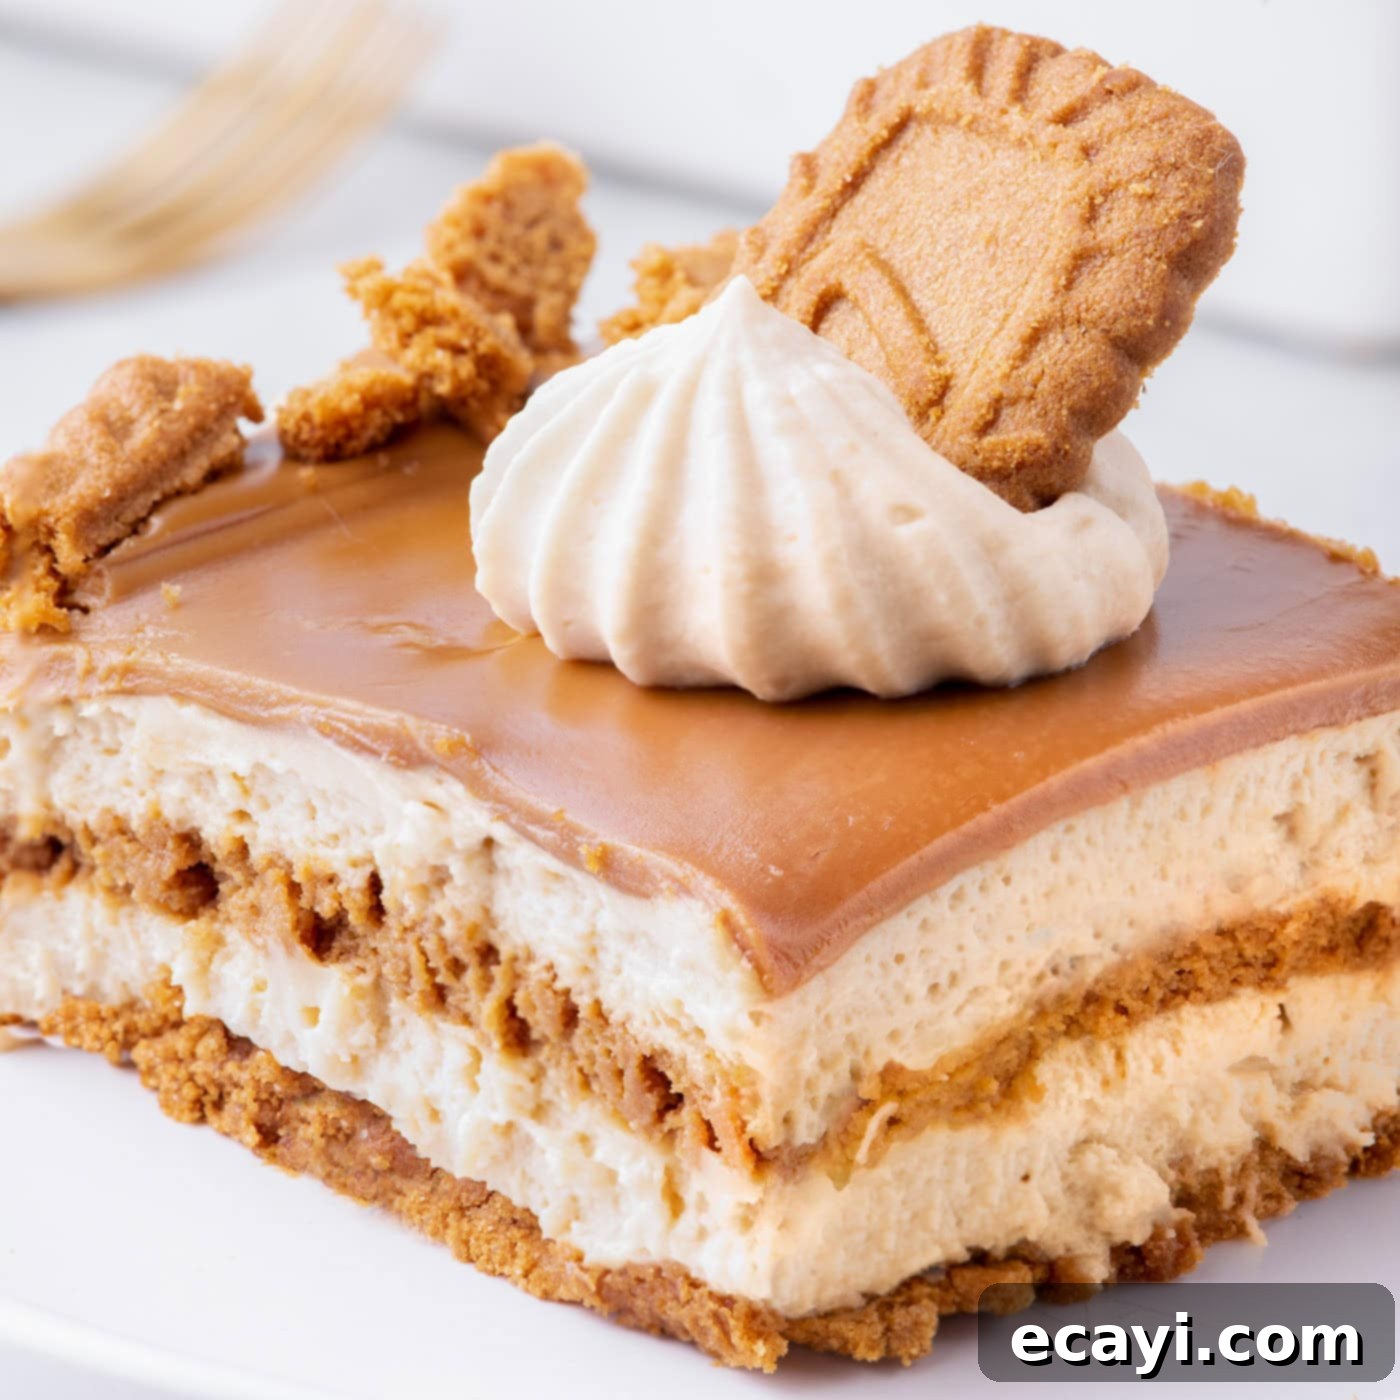
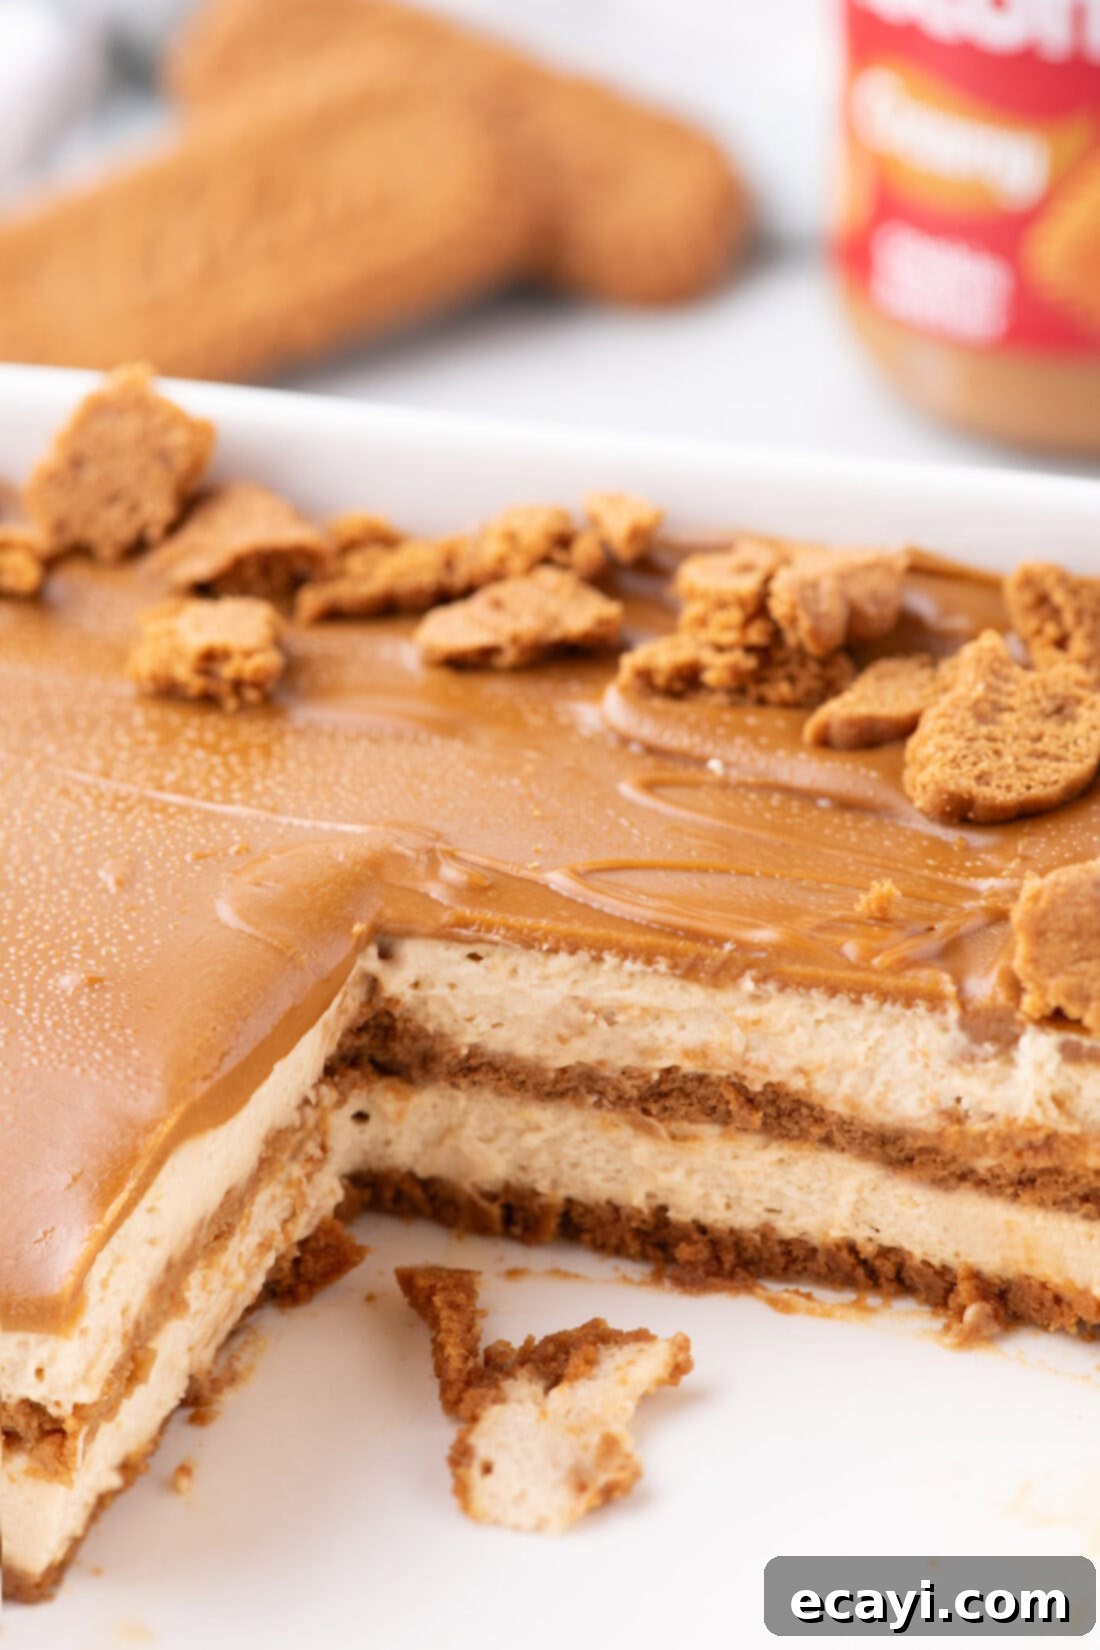
Prepare to be enchanted by the easiest, most delicious no-bake dessert you’ll ever create: our irresistible Biscoff Icebox Cake. This dreamy confection features luxurious layers of airy whipped cream, crisp Lotus Biscoff cookies, and a decadent cookie butter ganache, all coming together with just 5 simple ingredients. It’s the perfect treat for any occasion, offering a rich, spiced flavor that’s utterly unique and incredibly satisfying, without ever needing to turn on your oven.
Why This No-Bake Biscoff Icebox Cake Recipe is a Must-Try
The beauty of this Biscoff icebox cake lies in its effortless assembly and astonishing flavor profile. Forget complicated baking steps; the hardest part of this recipe is simply allowing it enough time to chill and firm up in your refrigerator. But trust us, the wait is absolutely worth it. This no-bake marvel combines rich, spiced Biscoff cookies with a creamy whipped filling, all crowned with a luscious cookie butter ganache. As the cake rests, those iconic, crunchy Biscoff cookies magically transform, soaking up the surrounding whipped cream to become wonderfully soft and tender, melting in your mouth like a cloud. It’s a symphony of textures and flavors that’s truly a dreamy combination.
Icebox cakes have long been celebrated for their delightful simplicity and minimal ingredient requirements, making them a go-to for easy entertaining and delicious family treats. Typically, these desserts involve layering a handful of ingredients, often a creamy mixture and a type of cookie or cracker, in a dish and allowing refrigeration to do all the “baking.” Whether it’s a luscious blend of whipped cream and cream cheese, like the one found in our popular Oreo icebox cake, or a vibrant mix of whipped cream, cream cheese, and pudding for a burst of flavor in our lemon icebox cake, the core concept remains the same. Just add your favorite biscuit, cookie, or graham cracker to create an incredibly easy dessert that’s perfect for feeding a crowd, especially during warmer months when you want to avoid turning on the oven. Our Biscoff version elevates this classic concept, offering a unique, caramelized spice flavor that is both comforting and exotic, making it an instant favorite.
Key Ingredients for Your Biscoff Icebox Cake
This simple Biscoff icebox cake relies on just a few high-quality ingredients to achieve its incredible flavor and texture. For all precise measurements, ingredient quantities, and detailed instructions, please refer to the printable recipe card at the very end of this comprehensive guide. Here’s a closer look at what you’ll need and some helpful tips for each component:
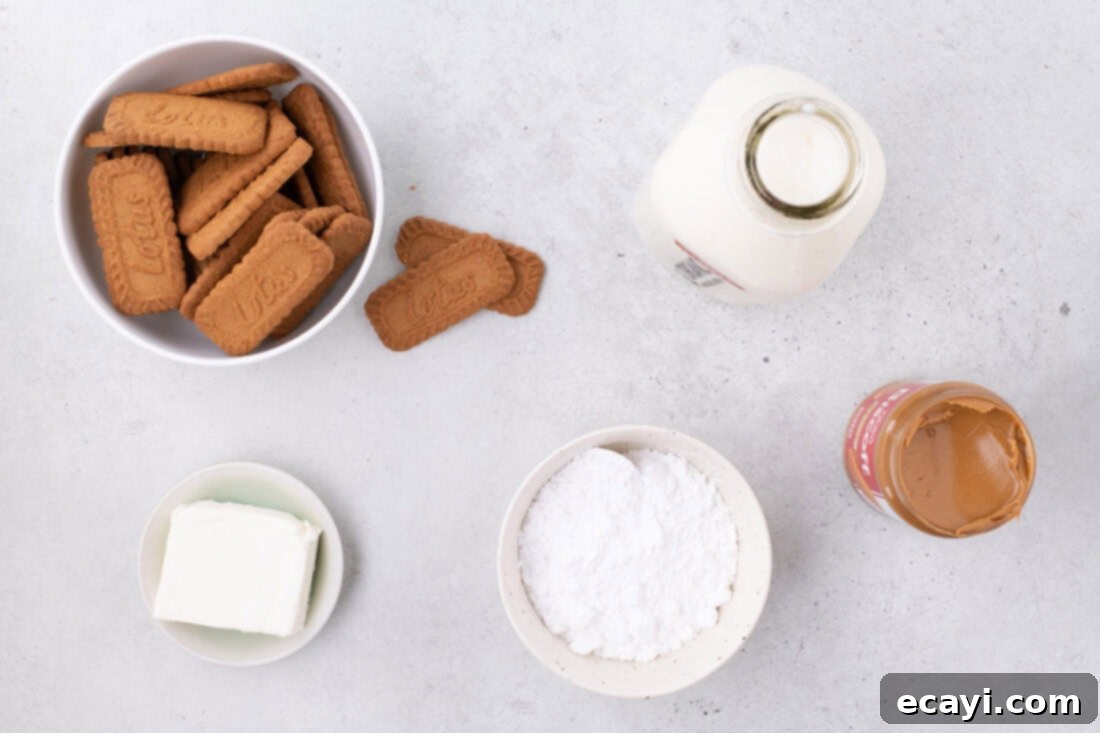
Ingredient Spotlight & Expert Substitution Advice
Understanding each ingredient’s role is key to mastering this delightful no-bake Biscoff dessert. Here’s how to ensure the best results:
BISCOFF COOKIES – For this recipe, it’s crucial to use the classic, crisp Lotus Biscoff cookies, often referred to as “speculoos” cookies. These iconic caramelized biscuits provide the signature flavor and texture that makes this icebox cake so special. Please make sure to purchase the original plain cookies and avoid the sandwich cream-filled varieties, as their softer texture and added filling will not absorb the cream mixture in the same way, potentially affecting the final consistency of your cake. If Biscoff cookies are unavailable, you could experiment with other crisp, plain tea biscuits, but be aware that the distinct spiced flavor will differ significantly. The magic truly comes from Biscoff!
CREAM CHEESE – Always opt for full-fat, brick-style cream cheese for this recipe. Using whipped cream cheese, cream cheese in a tub, or low-fat versions will alter the texture of your whipped cream mixture, making it less stable and creamy. It’s essential that your cream cheese is at room temperature before you begin mixing. This ensures it creams smoothly with the cookie butter and powdered sugar, preventing lumps and creating a uniformly silky mixture. To soften it, simply leave the brick on your kitchen counter for about 30-60 minutes. Do not attempt to microwave it to speed up the process, as this can partially melt the cream cheese, compromising its structure and the consistency of the final whipped cream filling. The ideal cream cheese block should feel slightly firm but yield easily when gently pressed, leaving a small indent.
HEAVY CREAM – Heavy whipping cream is the backbone of our light and airy filling. For successful whipping, your heavy cream must be thoroughly chilled. Cold cream whips up faster, holds its shape better, and achieves greater volume. Take your heavy cream out of the refrigerator only when you are completely ready to use it, and consider chilling your mixing bowl and whisk attachment in the freezer for 10-15 minutes beforehand. This extra step can make a significant difference in achieving perfect, stable whipped peaks.
BISCOFF COOKIE BUTTER (GANACHE) – The luscious top layer of this icebox cake is a simple yet impactful cookie butter ganache. All you need is a jar of smooth Biscoff cookie butter, readily available in most grocery stores near the peanut butter or spreads. While the Biscoff brand is recommended for its authentic flavor, any quality brand of smooth cookie butter will work perfectly if the Biscoff brand is difficult to find. This melted cookie butter creates a rich, glossy topping that adds another layer of intense Biscoff flavor and a beautiful finish to your dessert.
Crafting Your No-Bake Biscoff Icebox Cake: Step-by-Step Instructions
These detailed step-by-step photos and instructions are provided to help you visualize each stage of making this delectable Biscoff icebox cake. For a convenient printable version of this recipe, complete with precise measurements and comprehensive instructions, please Jump to Recipe at the bottom of this post.
- Begin by lightly greasing an 8×8-inch square baking pan. This small preparation step ensures easy removal of your beautiful icebox cake later.
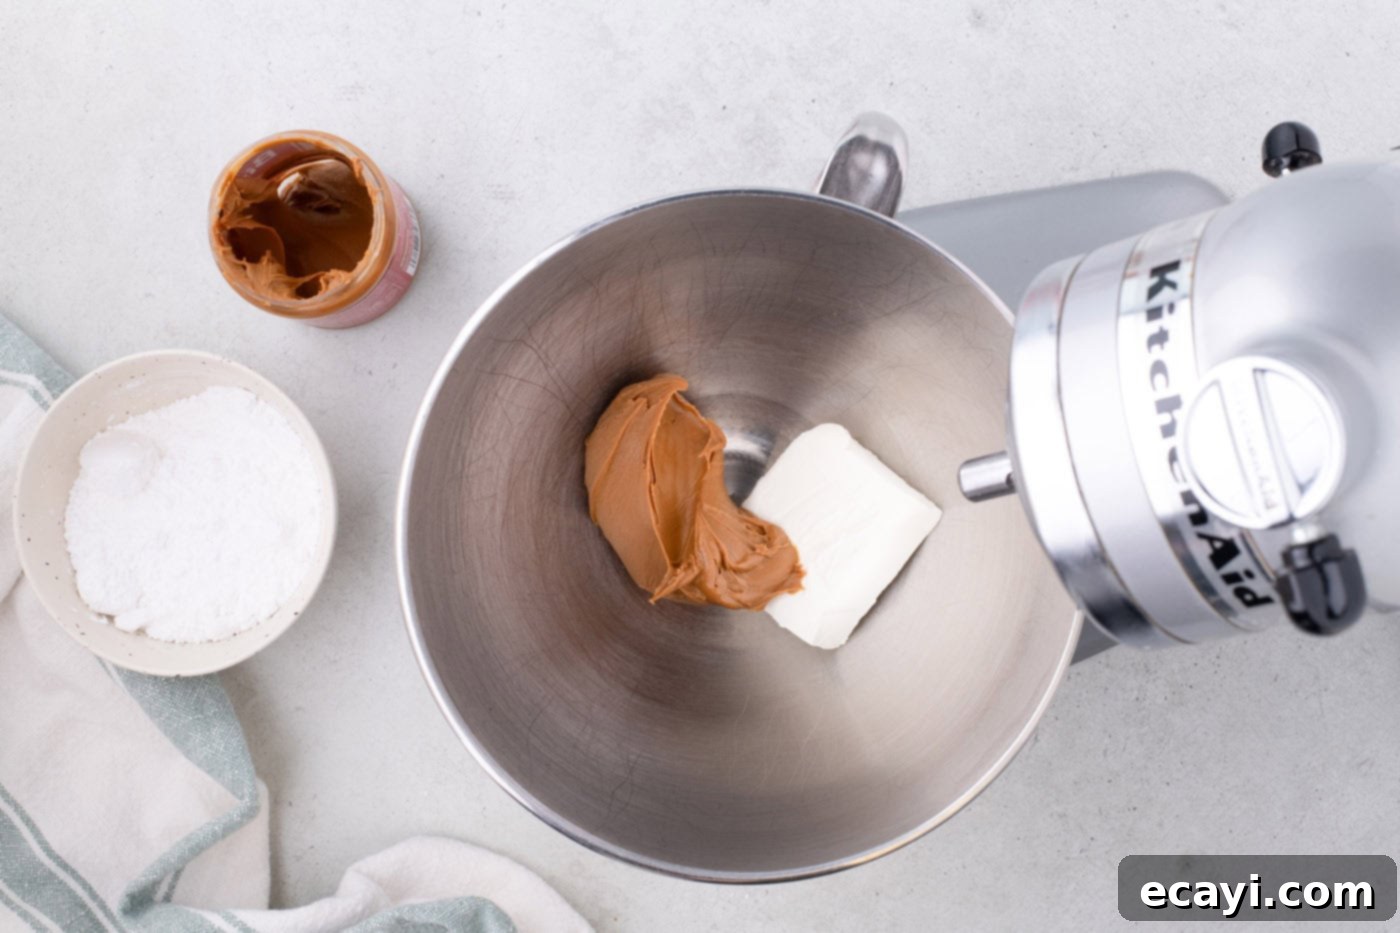
- In the bowl of a stand mixer fitted with the whisk attachment, combine your softened brick-style cream cheese and ¾ cup of Biscoff cookie butter. Mix these two ingredients on medium speed until the mixture is completely smooth and well-combined, with no lumps of cream cheese remaining. This forms the base of your creamy filling.

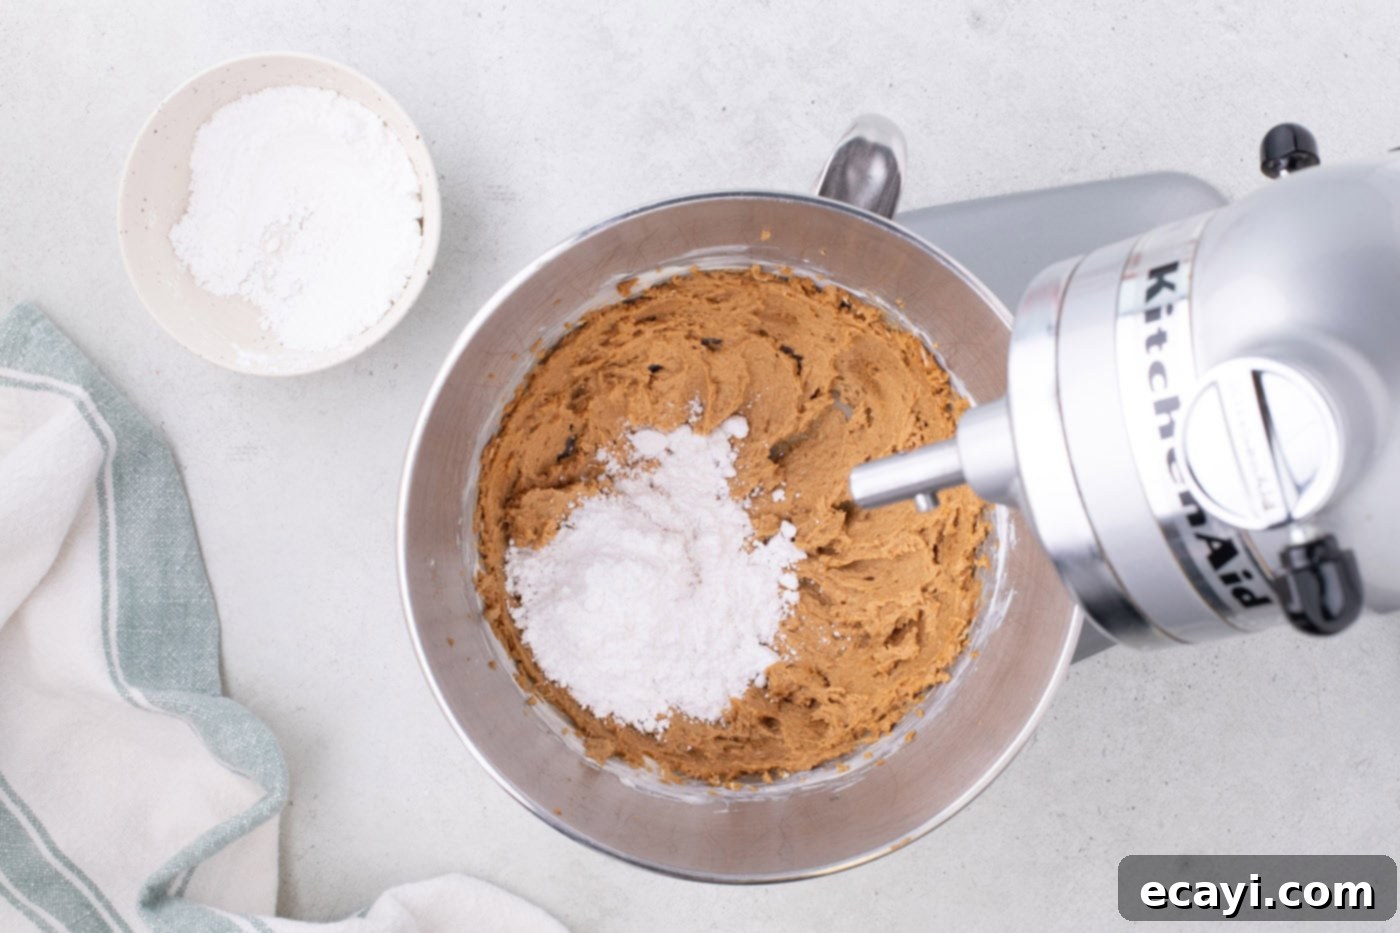
- Gradually add the powdered sugar to the cream cheese and cookie butter mixture, a little at a time, mixing on low speed. Continue to mix until the sugar is thoroughly incorporated and the mixture is smooth and light.

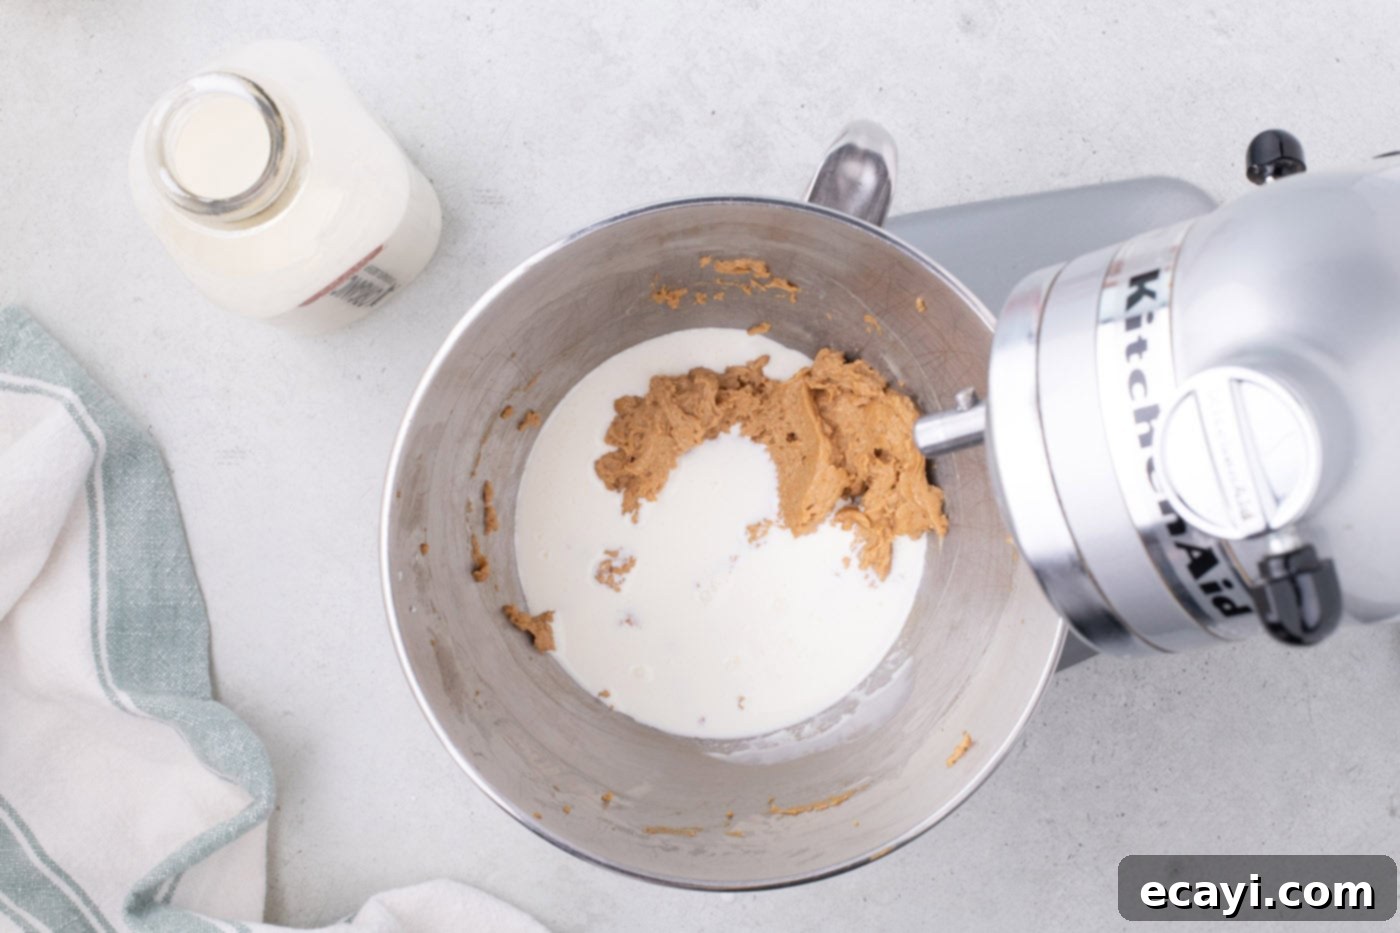
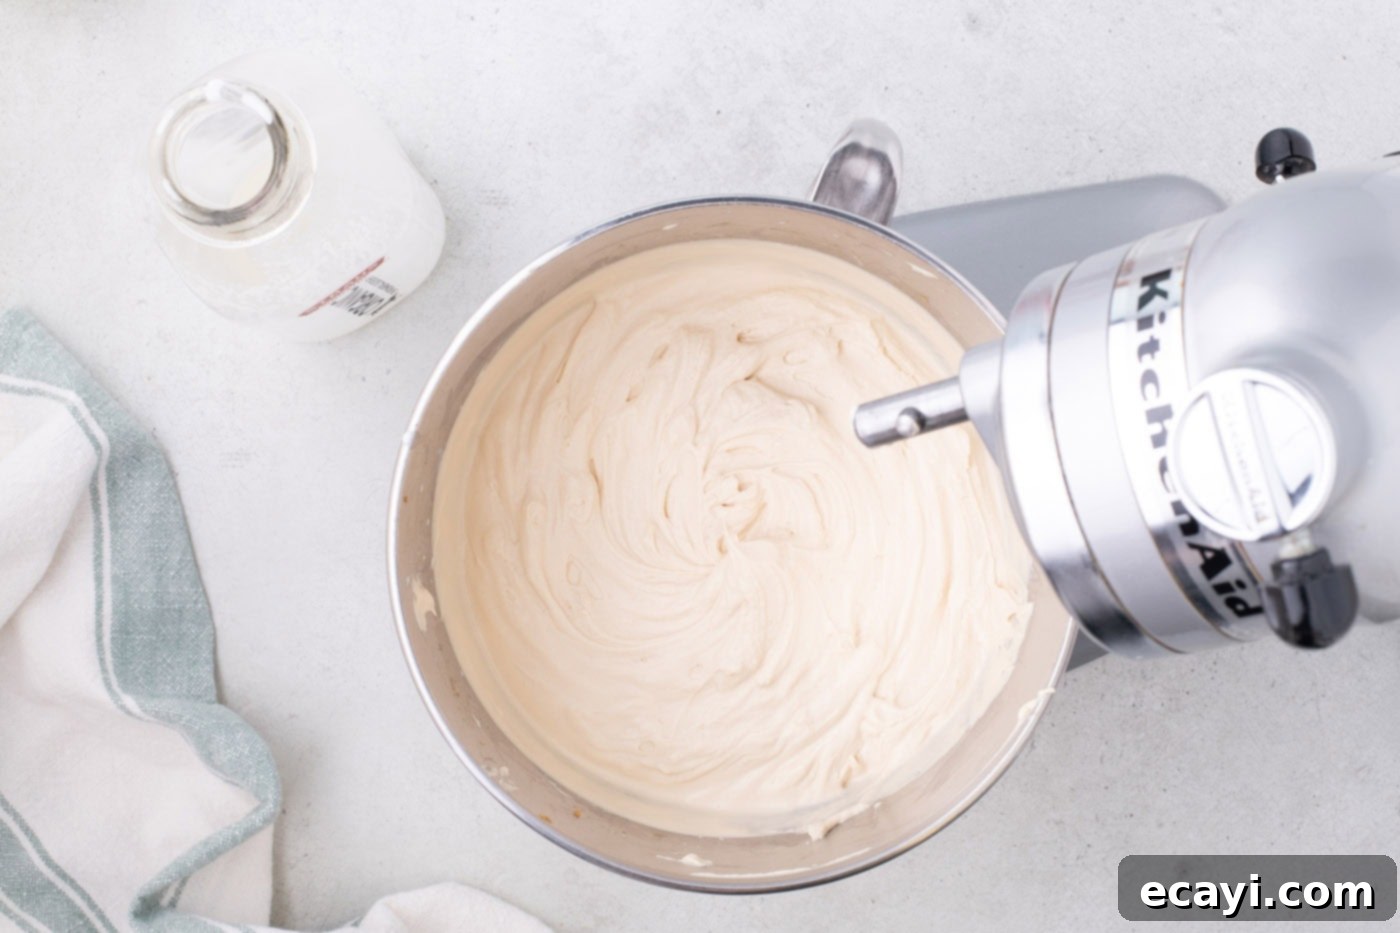
- Next, slowly incorporate the chilled heavy whipping cream into the Biscoff/cream cheese mixture. Start by adding ½ cup of the heavy cream and mix on low speed until it’s just combined. Then, add another ½ cup of heavy cream and continue mixing gently until smooth. Proceed to add the remaining heavy cream in 1-cup increments, mixing on low speed after each addition until smooth. Once all the cream is incorporated, increase the mixer speed to high and beat until the mixture thickens and soft peaks begin to form. Be careful not to overmix, as this can cause the mixture to separate. Set this luscious whipped cream mixture aside.
EXPERT TIP FOR WHIPPING CREAM – Achieving the perfect consistency for your whipped cream is key to this no-bake cake. The crucial factor is to avoid overmixing! Whipped cream can easily separate and turn grainy or even into butter if beaten for too long. Once it separates, it cannot be fully salvaged for this recipe. The secret to success is building volume slowly: start by mixing the ingredients on low speed until they are just smooth and combined. Only then should you increase the speed to high, and stop beating as soon as you observe the mixture forming soft, billowy peaks. The peaks should hold their shape but still be light and airy, not stiff. Your chilled bowl and whisk also greatly assist in this process.


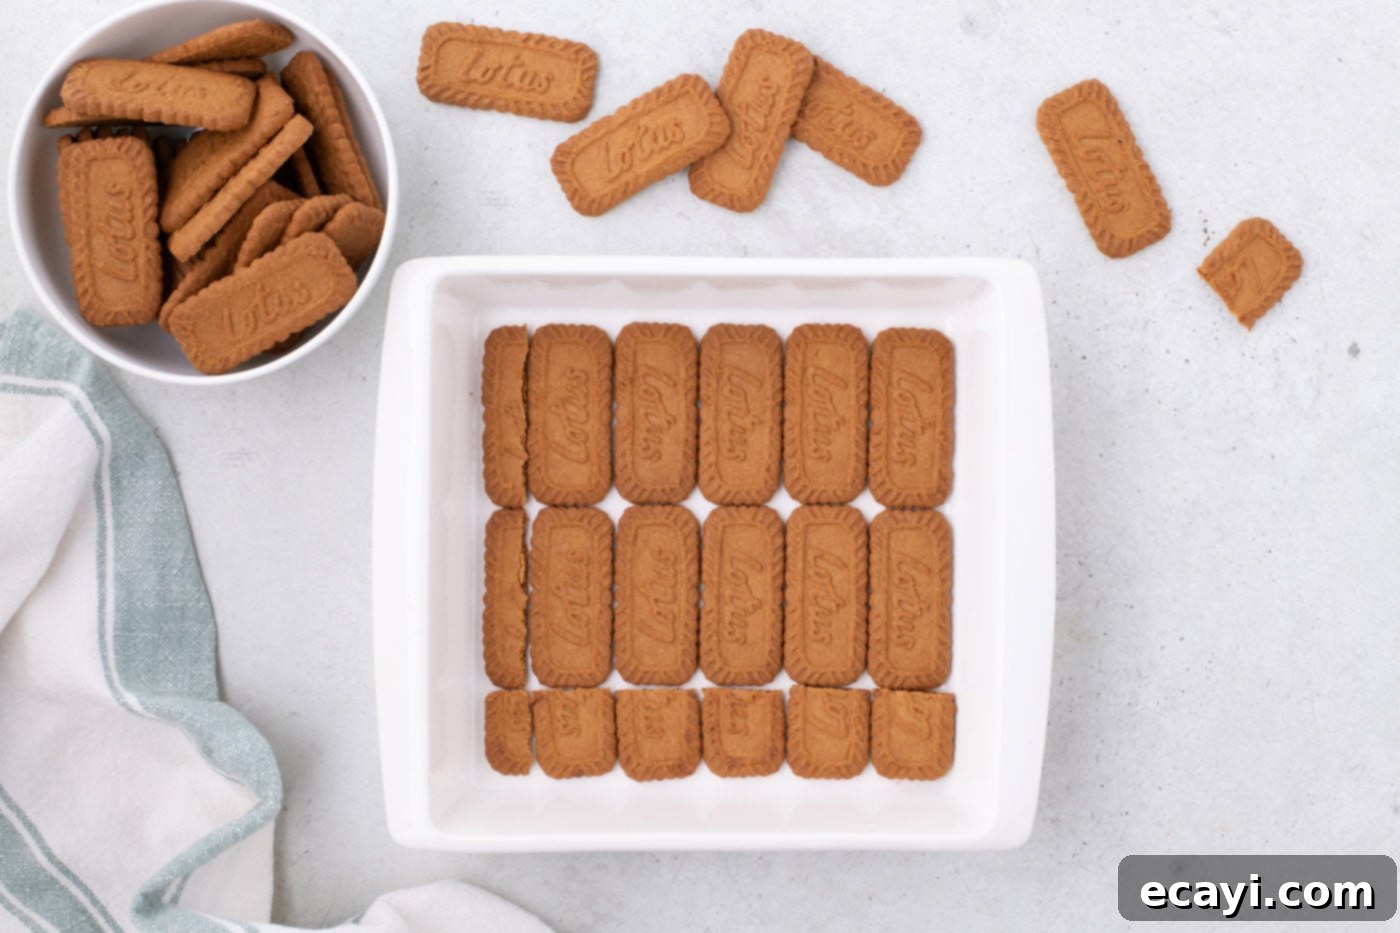
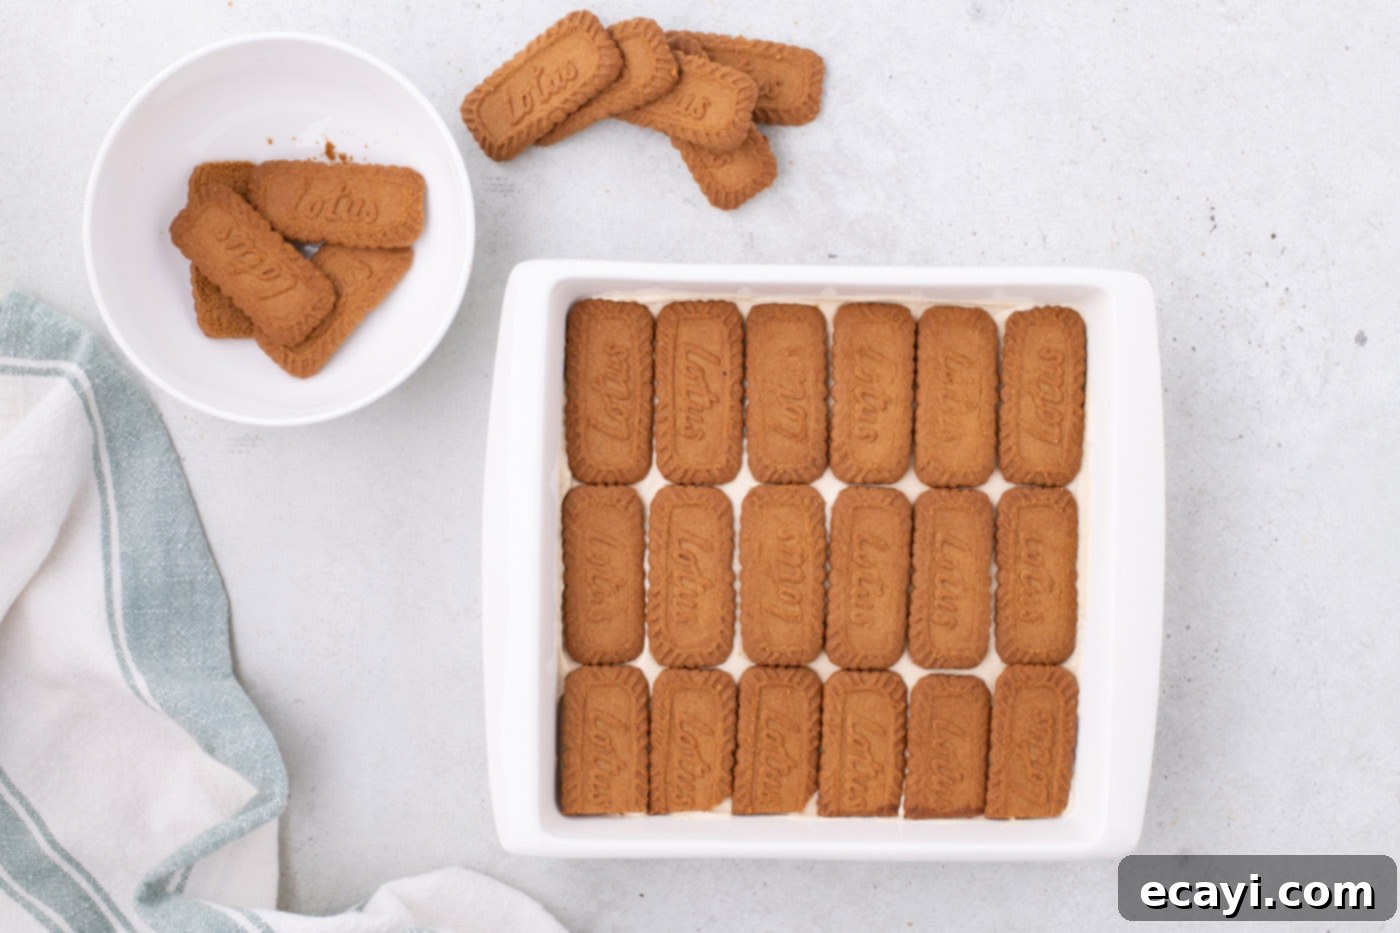
- Arrange a single layer of Biscoff cookies onto the bottom of your prepared 8×8-inch baking pan. Aim for a snug fit to create an even base. If the cookies don’t fit perfectly or leave large gaps, feel free to break some in half or cut them to fill in any empty spaces, ensuring the entire bottom is covered.

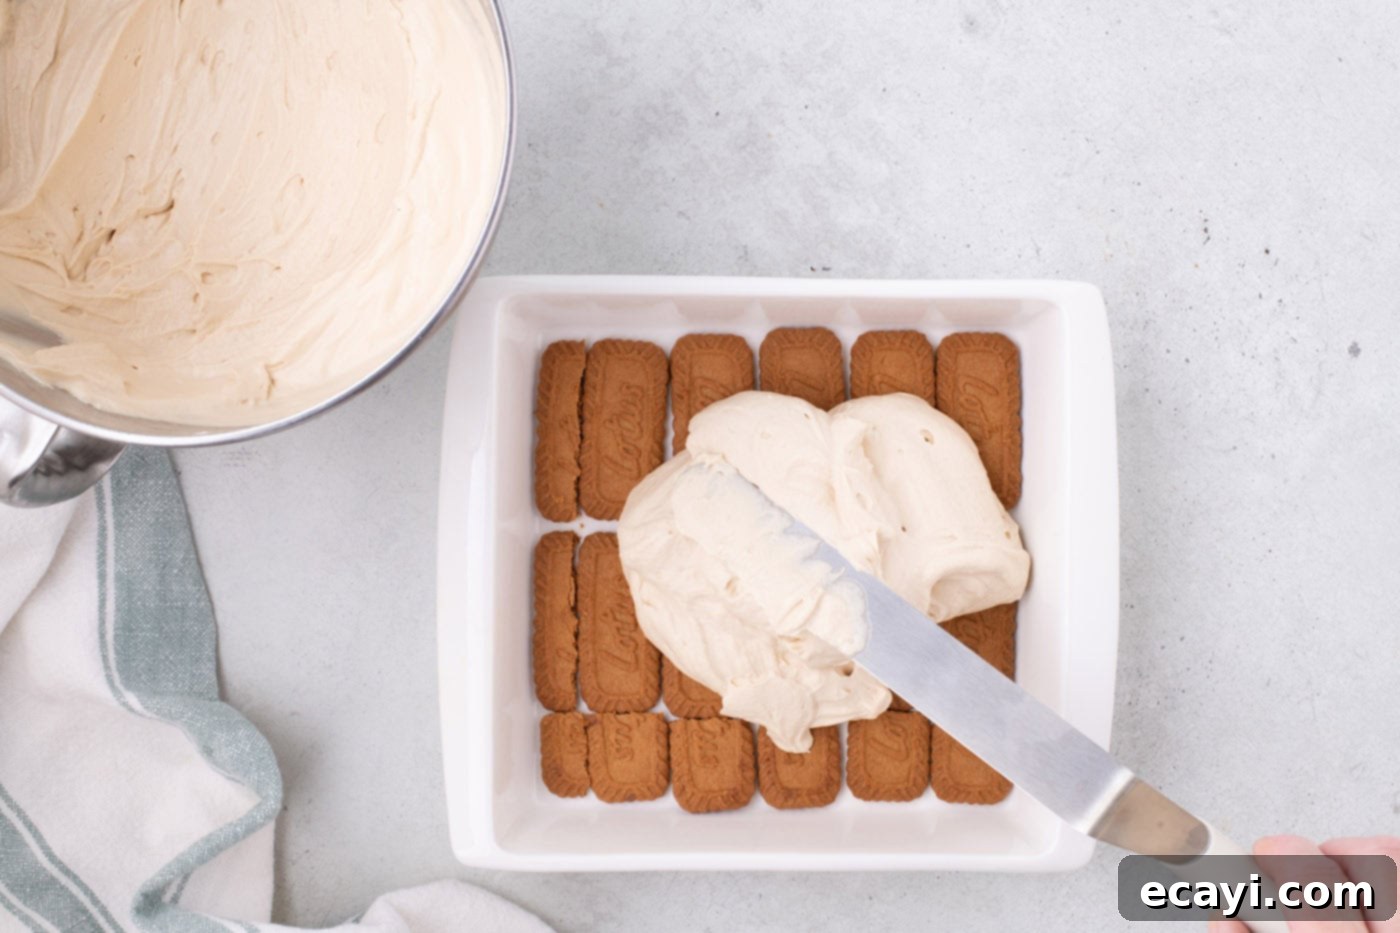
- Spoon approximately 2 ½ cups of your freshly made whipped cream mixture evenly over the layer of Biscoff cookies. Be gentle as you spread the cream to avoid disturbing the cookie layer too much. Use an offset spatula or the back of a spoon to smooth the top for an even layer.


- Create a second layer of Biscoff cookies directly on top of the whipped cream layer. Again, arrange them closely together, cutting cookies as needed to fill any gaps and ensure a complete and even layer. This creates a delightful cookie-cream-cookie pattern.

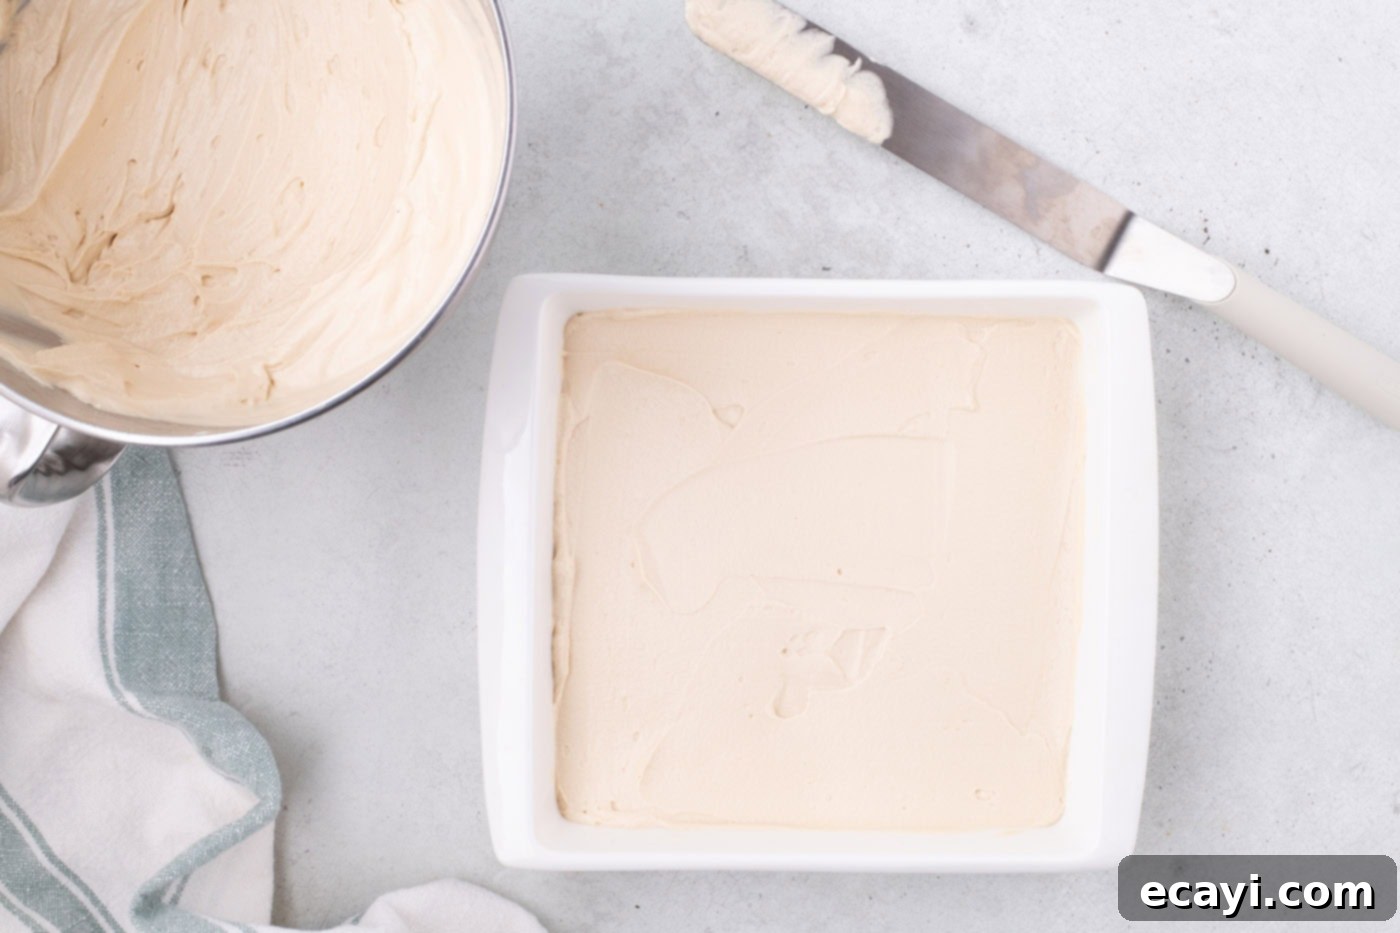
- Spoon the remaining 2 ½ cups of the whipped cream mixture over this second cookie layer. Carefully smooth it out with your offset spatula, making sure the cream reaches all corners of the pan and creates an even, appealing surface. Once smoothed, place the cake in the refrigerator to chill for at least 1 hour. This initial chill helps to set the cream and prepares the cookies for soaking.
Final Assembly and Chilling for Perfection
- While the cake is chilling, take about 10 additional Biscoff cookies and break them into smaller, irregular pieces. These will be used for garnish, adding a pleasant textural contrast and an extra touch of Biscoff flavor. Set these aside.
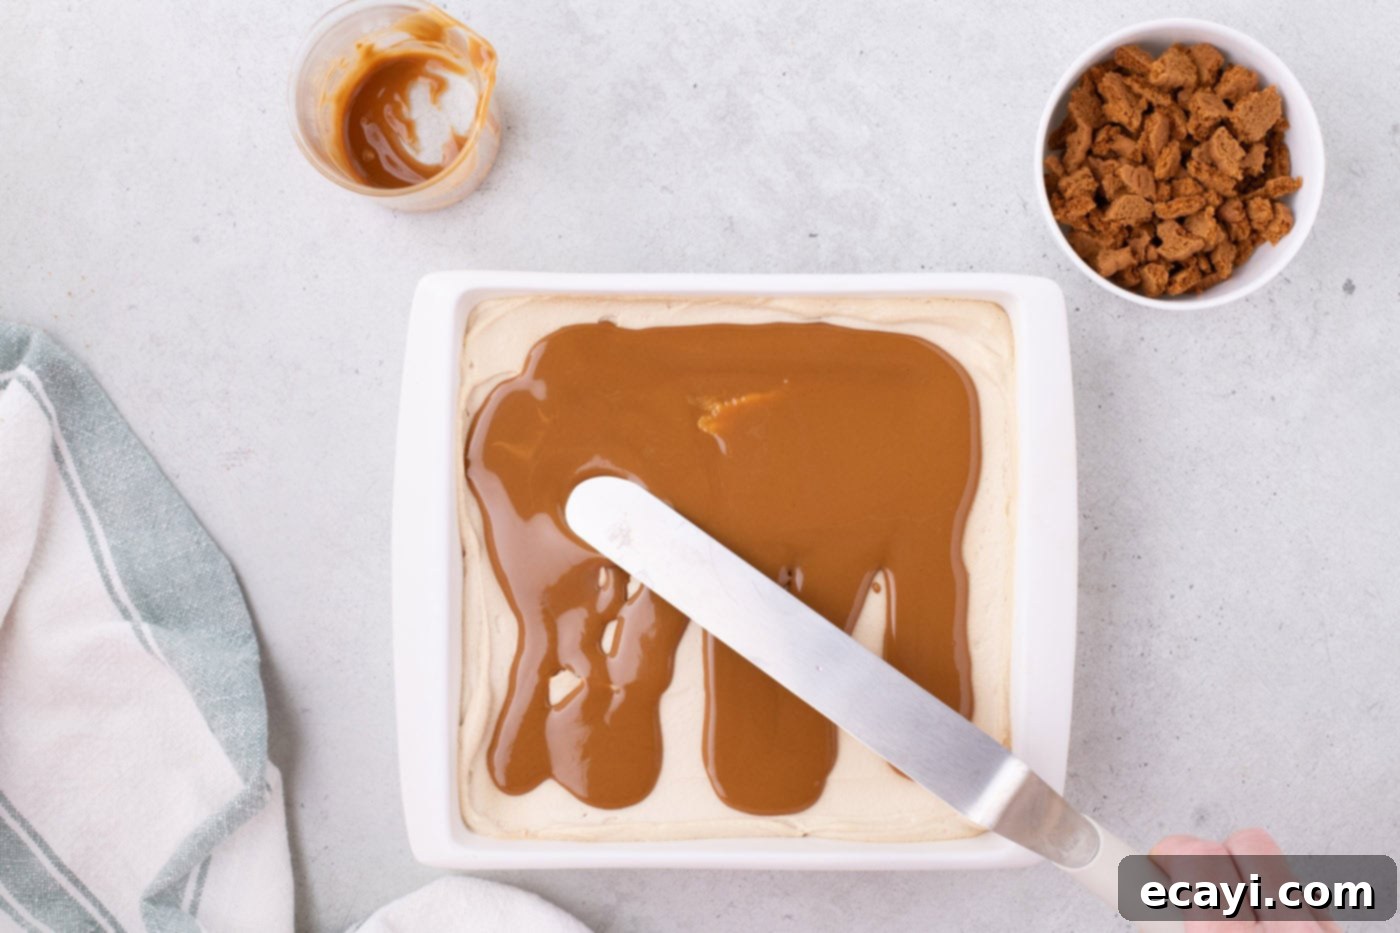
- To prepare the signature Biscoff ganache topping, measure 1 cup of Biscoff cookie butter into a microwave-safe container. Heat it in the microwave for approximately 30 seconds. The goal is to melt it just enough to make it pourable and easy to spread, not to overheat it. Once melted, carefully pour this warm, smooth cookie butter ganache over the partially chilled whipped cream layer. Use your offset spatula to gently spread it evenly across the entire surface of the cake, creating a beautiful, glossy finish.

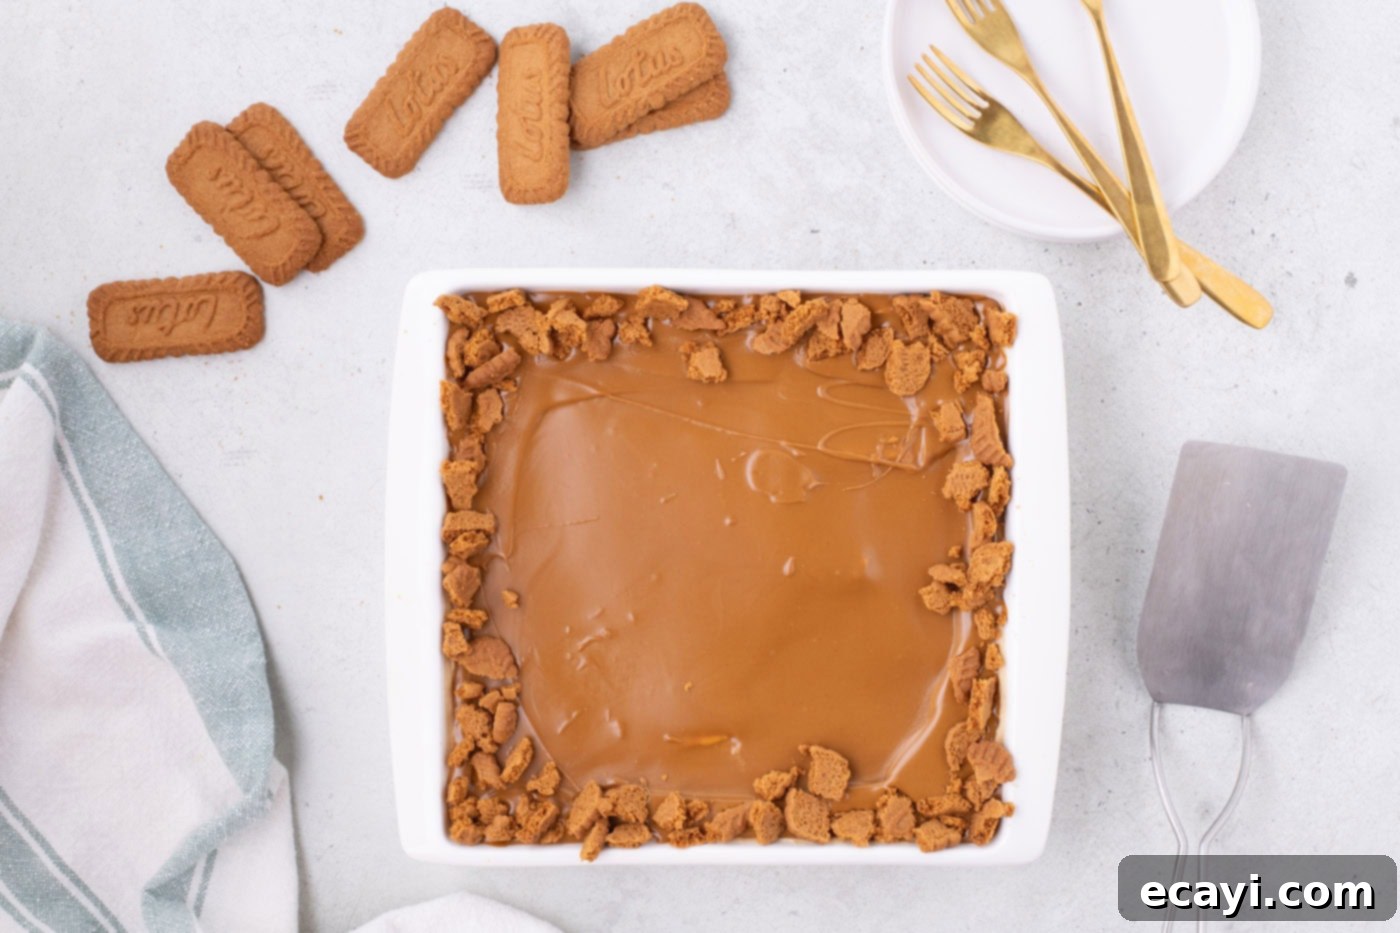
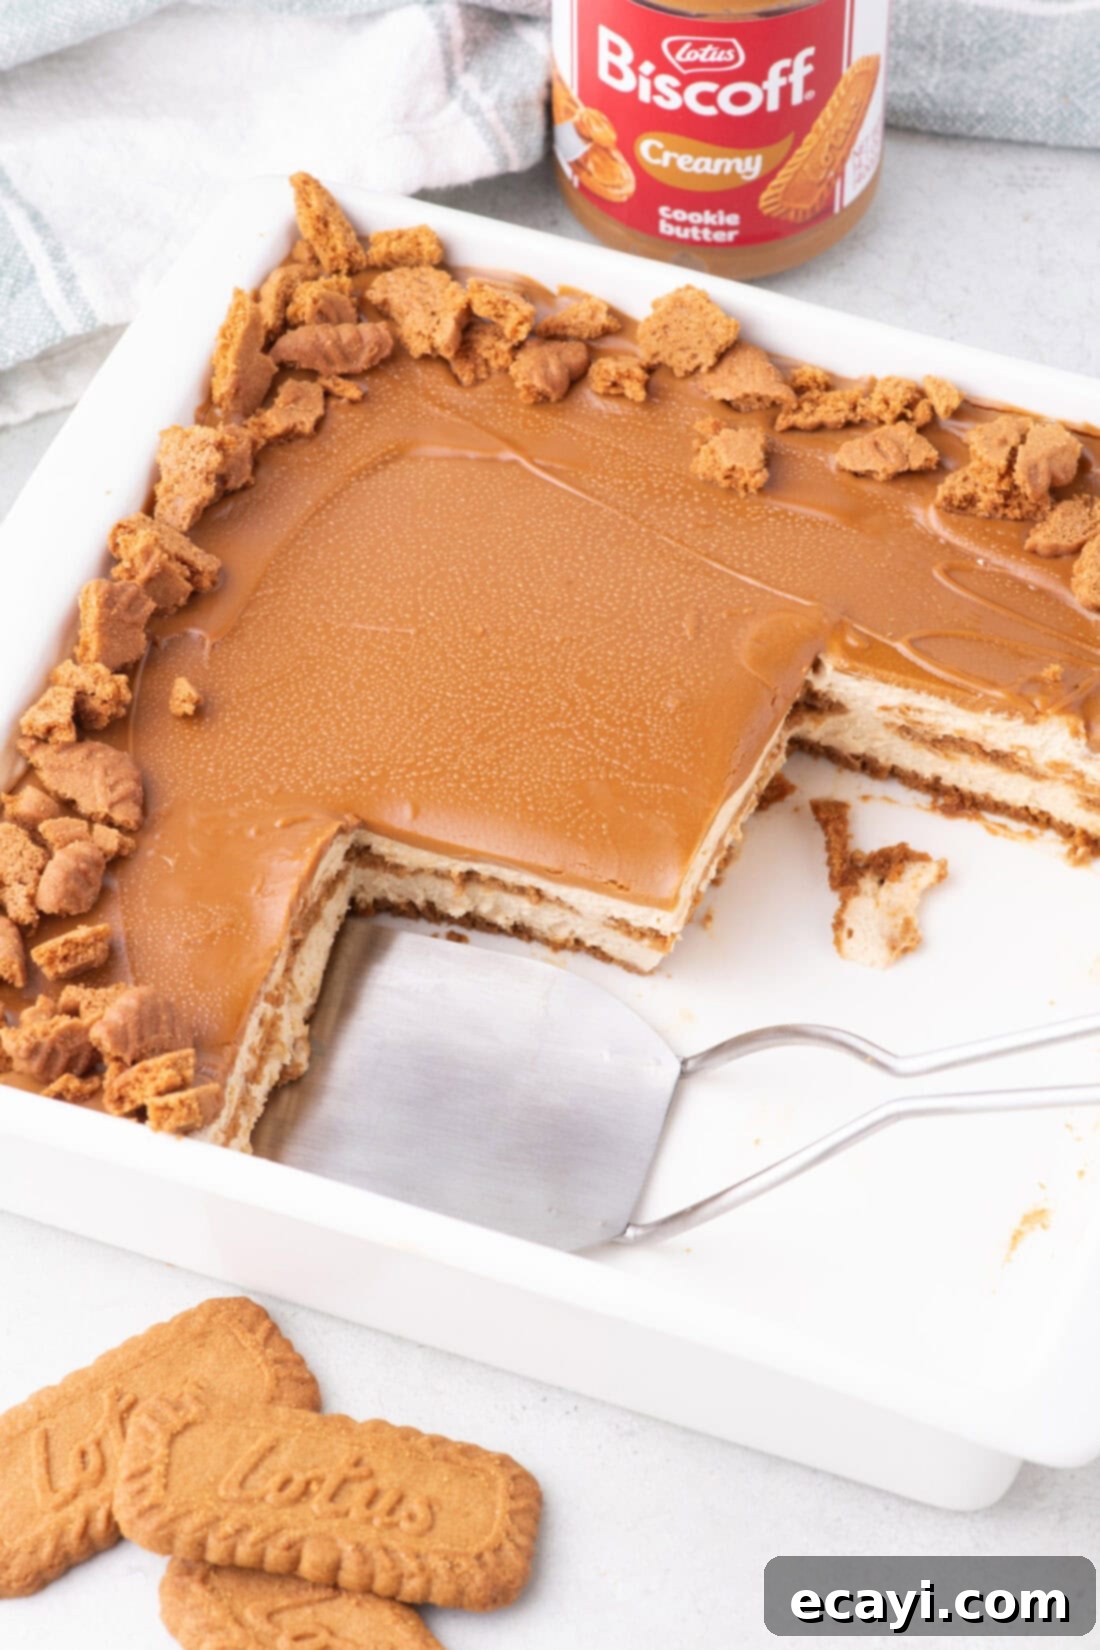
- Finally, sprinkle the reserved broken Biscoff cookie pieces along the sides of the ganache layer, creating an appealing square border. This not only adds visual interest but also enhances the cookie flavor in every bite. Once garnished, return the Biscoff icebox cake to the refrigerator for a minimum of 4 hours. For the absolute best texture and flavor, allowing it to chill overnight is highly recommended. This extended refrigeration time is crucial for the cookies to fully soften and for all the layers to meld together perfectly.

Frequently Asked Questions & Expert Tips for Your Biscoff Icebox Cake
To maintain its freshness and delightful texture, store your Biscoff icebox cake tightly wrapped with plastic wrap or covered with an airtight lid. It will keep beautifully in the refrigerator for up to 5 days. Ensure it’s well-sealed to prevent it from absorbing other refrigerator odors and to keep the cream fresh.
Absolutely, making this Biscoff icebox cake ahead of time is highly recommended! For the ultimate texture, where the cookies are perfectly softened and the flavors have fully melded, it’s best to prepare the cake a minimum of 4-5 hours in advance. Even better, you can easily assemble it the day before your event and store it in the refrigerator overnight. Allowing it ample time to rest and chill ensures those crisp Biscoff cookies transform into soft, cake-like layers, giving you truly delectable and easily sliceable dessert.
While some desserts can be frozen, we do not recommend freezing this Biscoff icebox cake. Freezing and then thawing will significantly change the delicate consistency of the whipped cream layers, making them watery and less appealing. For optimal enjoyment and texture, always store any leftovers in the refrigerator.
To achieve beautifully clean and precise slices of your Biscoff icebox cake, it’s essential to keep the cake as cold as possible. A well-chilled cake will be much firmer and easier to cut. Before each slice, dip a sharp knife into hot water, then wipe it completely dry. The warm, dry knife will glide through the layers effortlessly, giving you a clean cut every time. Repeat this process before making each subsequent slice for picture-perfect presentation.
While the distinct flavor of Biscoff is what makes this cake unique, if you absolutely can’t find them, you could substitute the cookies with graham crackers or another crisp, plain biscuit. For the cookie butter, look for other brands of speculoos spread, or in a pinch, you could try a caramel sauce or even a nut butter, though the flavor profile would change significantly. Always ensure you are using the plain, crunchy cookies and not the cream-filled variety.
Absolutely! This Biscoff icebox cake is delicious as is, but you can certainly customize it. Consider drizzling a little extra melted white chocolate or dark chocolate over the ganache, adding a sprinkle of sea salt to enhance the caramel notes, or even incorporating a layer of thinly sliced bananas for a fruity twist. A sprinkle of cinnamon or nutmeg in the whipped cream mixture could also complement the spiced cookie flavor.
Delightful Serving Suggestions for Your Biscoff Icebox Cake
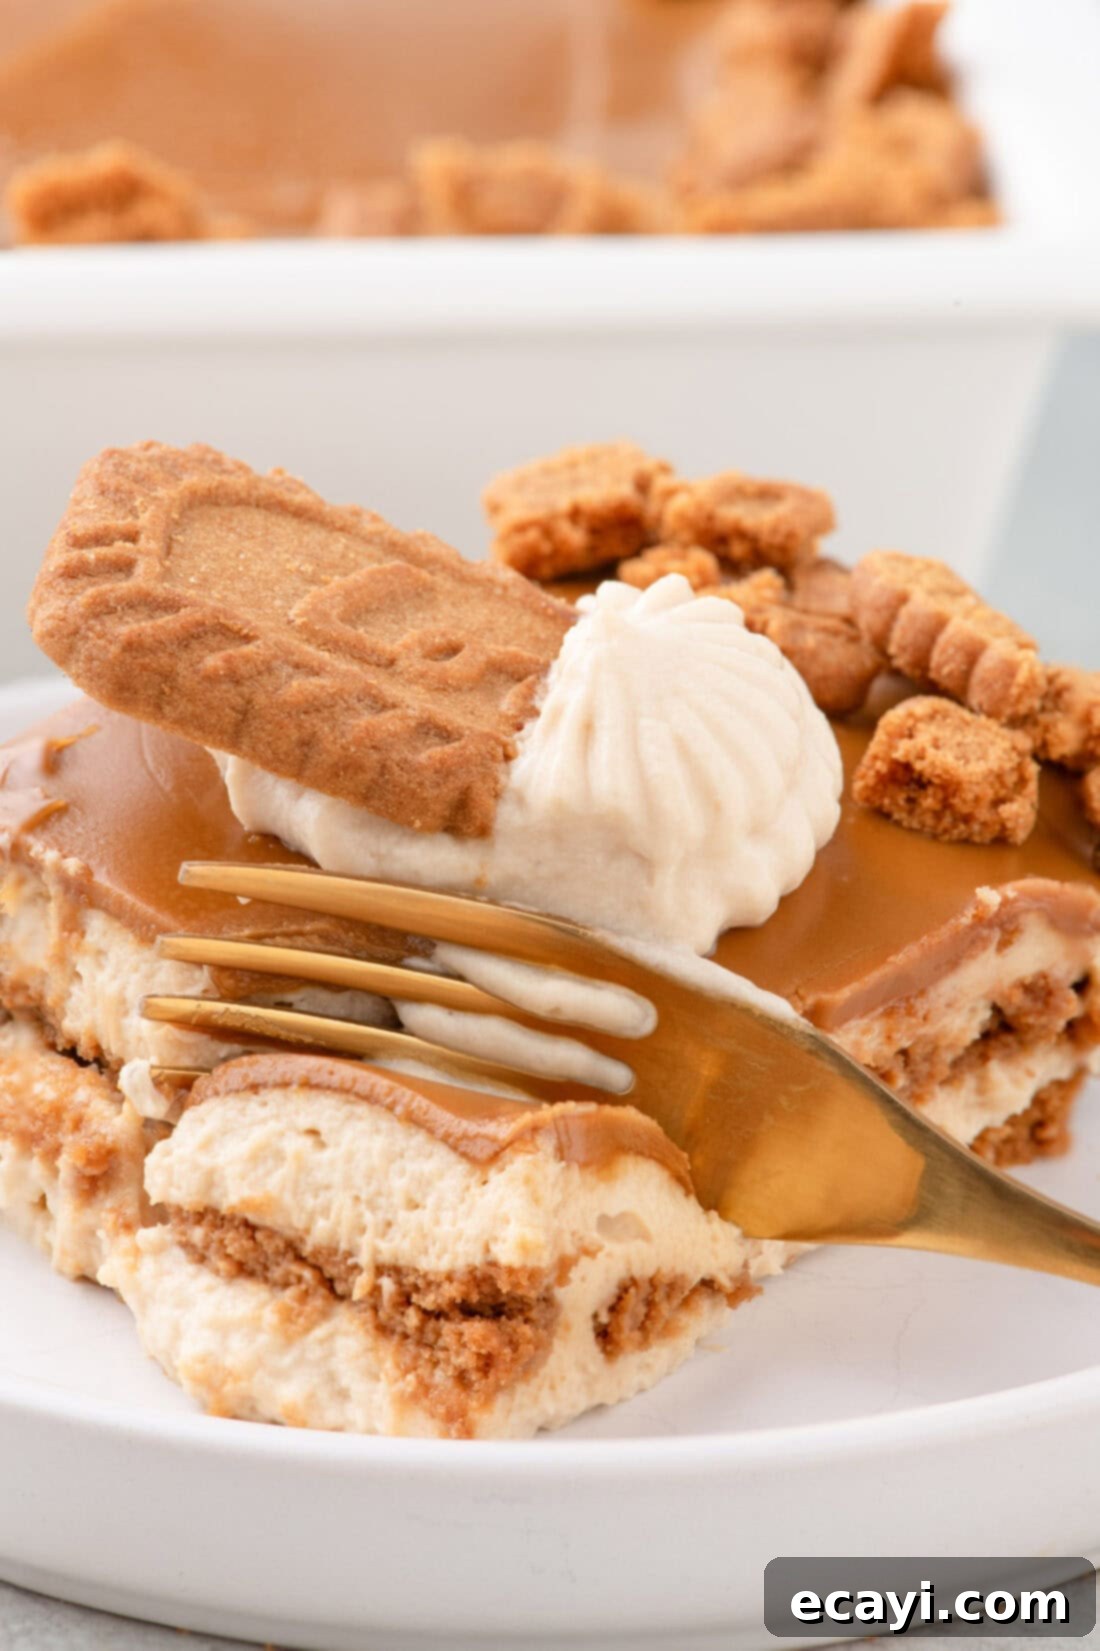
Once your Biscoff icebox cake has sufficiently chilled and firmed up, it’s ready to be savored! Serve individual slices as is, or elevate the presentation and taste with a few simple additions. An optional dollop of freshly whipped cream on top of each slice, perhaps garnished with half of a Lotus Biscoff cookie or a sprinkle of crushed extra cookies, adds an extra touch of elegance and flavor. A light dusting of cinnamon or cocoa powder can also enhance the visual appeal and aromatic experience. For the best consistency and a truly refreshing dessert, always ensure your Biscoff icebox cake remains well-chilled until serving. This sweet and spiced no-bake treat pairs wonderfully with a warm cup of coffee, a soothing tea, or a cold glass of milk. Enjoy every dreamy bite!
Explore More Easy No-Bake Icebox Cake Recipes
If you’ve fallen in love with the ease and deliciousness of this Biscoff icebox cake, you’ll be thrilled to discover our other fantastic no-bake creations. These recipes offer similar simplicity and require no oven, making them perfect for any season or celebration:
- Strawberry Icebox Cake
- Nutter Butter Icebox Cake
- Banana Cream Pie Icebox Cake
- Chocolate Chip Cookie Icebox Cake
I’m passionate about cooking and baking, and I love sharing my kitchen adventures with all of you! Remembering to check back daily for new recipes can be tricky, which is why I offer a convenient newsletter delivered right to your inbox every time a new recipe is posted. Simply subscribe today and start receiving your free daily recipes, ensuring you never miss a delicious idea!
Biscoff Icebox Cake
IMPORTANT – There are often Frequently Asked Questions and Expert Tips within the main blog post that you may find incredibly helpful. We encourage you to scroll back up and read them for additional insights and troubleshooting!
Print It
Pin It
Rate It
Save ItSaved!
Ingredients
- 4 ounces cream cheese brick style, at room temperature*
- 14.1 ounces Biscoff cookie butter divided (¾ cup for cream mixture, 1 cup for ganache)
- ½ cup powdered sugar
- 3 cups heavy whipping cream chilled
- 12 ounces Biscoff cookies divided (approx. 1 ½ packages, plus 10 cookies for garnish)
Equipment You’ll Need
-
8×8 baking pan
-
Stand mixer
-
Offset icing spatula
Before You Begin: Essential Tips for Success
- Always use the classic, plain Biscoff cookies for layering, not the cream-filled sandwich versions, as their texture is crucial for the cake.
- Ensure you use full-fat, brick-style cream cheese for the best texture and stability in your cream mixture. Avoid tubs or low-fat options.
- Allow your cream cheese to come to room temperature naturally on the counter for 30-60 minutes. Do not microwave it, as this can negatively affect the final texture of your filling. The cream cheese should be soft enough to indent easily with a touch.
- For optimal whipped cream results, consider chilling your stand mixer bowl and whisk attachment in the freezer for about 10-15 minutes before use. This helps the heavy cream whip up faster and more stable.
- Always keep your heavy whipping cream thoroughly chilled in the refrigerator until the precise moment you are ready to incorporate it into your mixture. This is vital for achieving thick, airy whipped cream.
Instructions
-
Lightly grease an 8×8-inch square baking pan to prepare.
-
In a stand mixer bowl with the whisk attachment, combine softened cream cheese and ¾ cup Biscoff cookie butter. Mix on medium speed until smooth and fully blended.
-
Gradually add powdered sugar to the mixture, blending on low speed until completely combined and smooth.
-
Add ½ cup of chilled heavy whipping cream to the Biscoff/cream cheese mixture and mix on low until combined. Add another ½ cup of heavy cream and continue mixing gently until smooth. Continue adding the remaining heavy cream in 1-cup increments, mixing on low speed until smooth after each. Increase speed to high and beat until the mixture thickens and forms soft peaks. Set aside.
TIP: Don’t overmix! The key is to build volume slowly on low speed. Once smooth, beat on high speed and stop as soon as soft peaks form to prevent separation.
-
Arrange a single layer of Biscoff cookies on the bottom of the prepared pan. Break or cut cookies as needed to fit snugly and cover the base.
-
Spoon 2 ½ cups of the whipped cream mixture evenly over the cookie layer. Gently smooth the top with an offset spatula, being careful not to shift the cookies.
-
Place a second layer of Biscoff cookies on top of the whipped cream, fitting them snugly and filling any gaps with cut cookie pieces.
-
Add the remaining 2 ½ cups of whipped cream to this second cookie layer, smoothing it out to cover all corners. Chill the cake in the refrigerator for 1 hour.
-
While chilling, break 10 additional Biscoff cookies into smaller pieces for garnish and set aside.
-
For the Biscoff ganache, place 1 cup of cookie butter in a microwave-safe bowl and heat for 30 seconds until melted and pourable. Pour the melted cookie butter over the chilled whipped cream layer, smoothing it evenly with an offset spatula.
-
Sprinkle the broken Biscoff cookie pieces along the edges of the ganache layer, creating a decorative border. Refrigerate the cake for a minimum of 4 hours, or ideally overnight, allowing it to fully set and the cookies to soften.
Expert Tips & FAQs Summary
- Clean Slices: For perfect cuts, keep the cake very cold. Dip a sharp knife into hot water, wipe dry, and slice before each cut to ensure smooth edges.
- Storage: Store tightly covered with plastic wrap or in an airtight container in the refrigerator for up to 5 days to maintain freshness.
- Make Ahead: This cake is ideal for making in advance! Prepare it 4-5 hours ahead, or even the day before, to allow the cookies to soften and flavors to fully develop for the best texture.
- Freezing: Freezing is not recommended as it will alter the delicate consistency of the whipped cream layers upon thawing. Stick to refrigeration for storage.
- Ingredient Quality: Using high-quality, full-fat cream cheese and thoroughly chilled heavy cream are crucial for a stable and delicious whipped mixture.
Nutrition Information
The recipes on this blog are tested with a conventional gas oven and gas stovetop. It’s important to note that some ovens, especially as they age, can cook and bake inconsistently. Using an inexpensive oven thermometer can assure you that your oven is truly heating to the proper temperature. If you use a toaster oven or countertop oven, please keep in mind that they may not distribute heat the same as a conventional full sized oven and you may need to adjust your cooking/baking times. In the case of recipes made with a pressure cooker, air fryer, slow cooker, or other appliance, a link to the appliances we use is listed within each respective recipe. For baking recipes where measurements are given by weight, please note that results may not be the same if cups are used instead, and we can’t guarantee success with that method.
