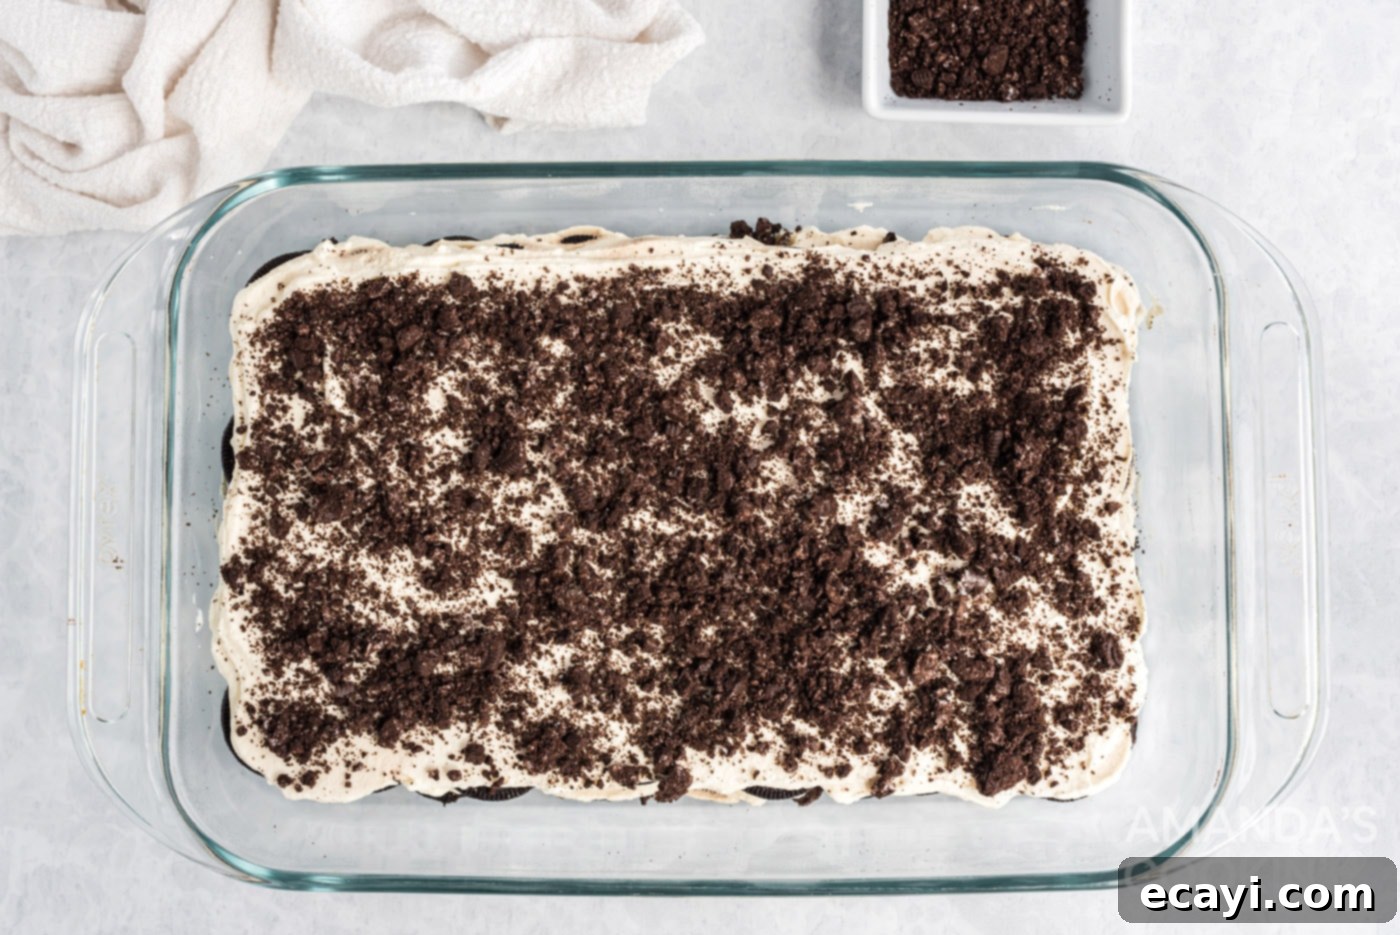
No-Bake Oreo Icebox Cake: The Easiest 4-Ingredient Summer Dessert
Beat the summer heat with this incredibly simple and refreshingly cool **Oreo icebox cake**! This delightful no-bake dessert is a true crowd-pleaser, perfect for potlucks, family gatherings, or a sweet treat any time you crave something effortless and delicious. Made with just four fundamental ingredients – luscious double-stuffed Oreo cookies and rich, homemade sweetened whipped cream – it transforms into a magical cake with minimal effort. Prepare to experience cookies and cream like never before, in a format that requires absolutely no oven time!
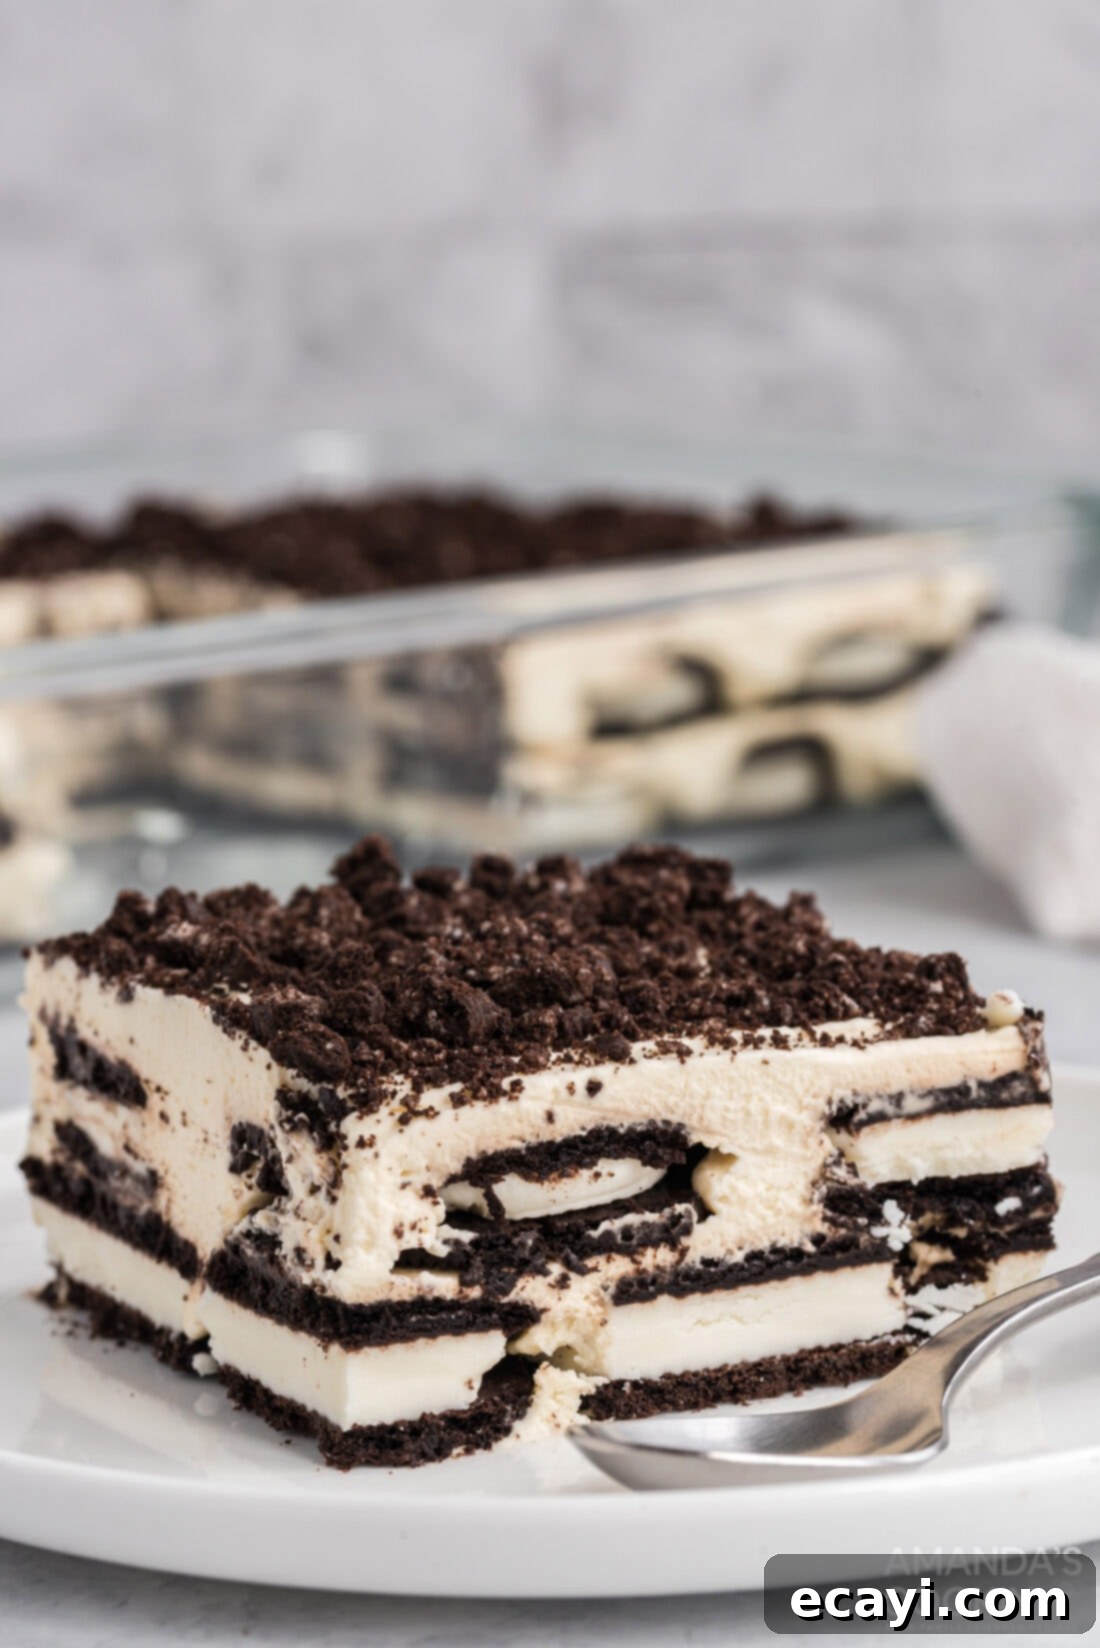
Why This No-Bake Oreo Icebox Cake is a Must-Try
If you have an undeniable love for the classic combination of cookies and cream, then this Oreo icebox cake is about to become your new favorite dessert. The brilliance of this recipe lies in its sheer simplicity and delicious outcome. It’s not just easy to make; it’s a truly effortless dessert that requires only a handful of ingredients and absolutely no baking!
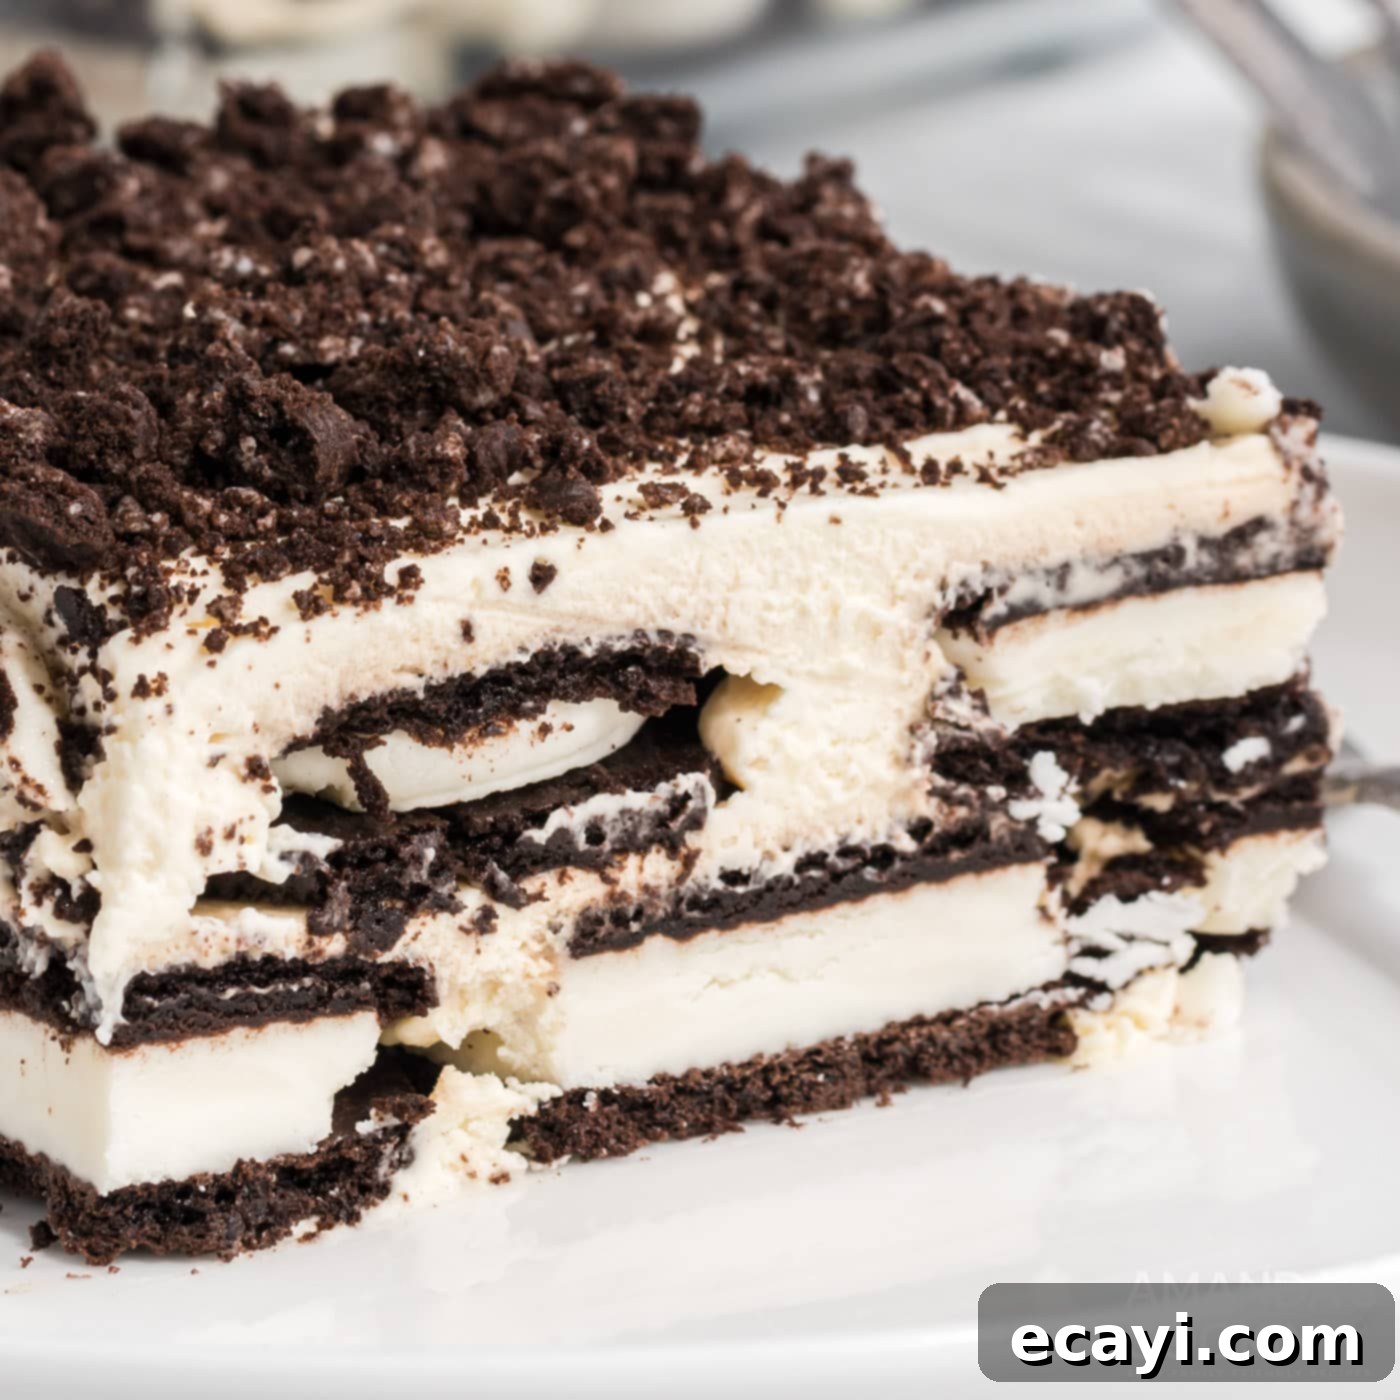
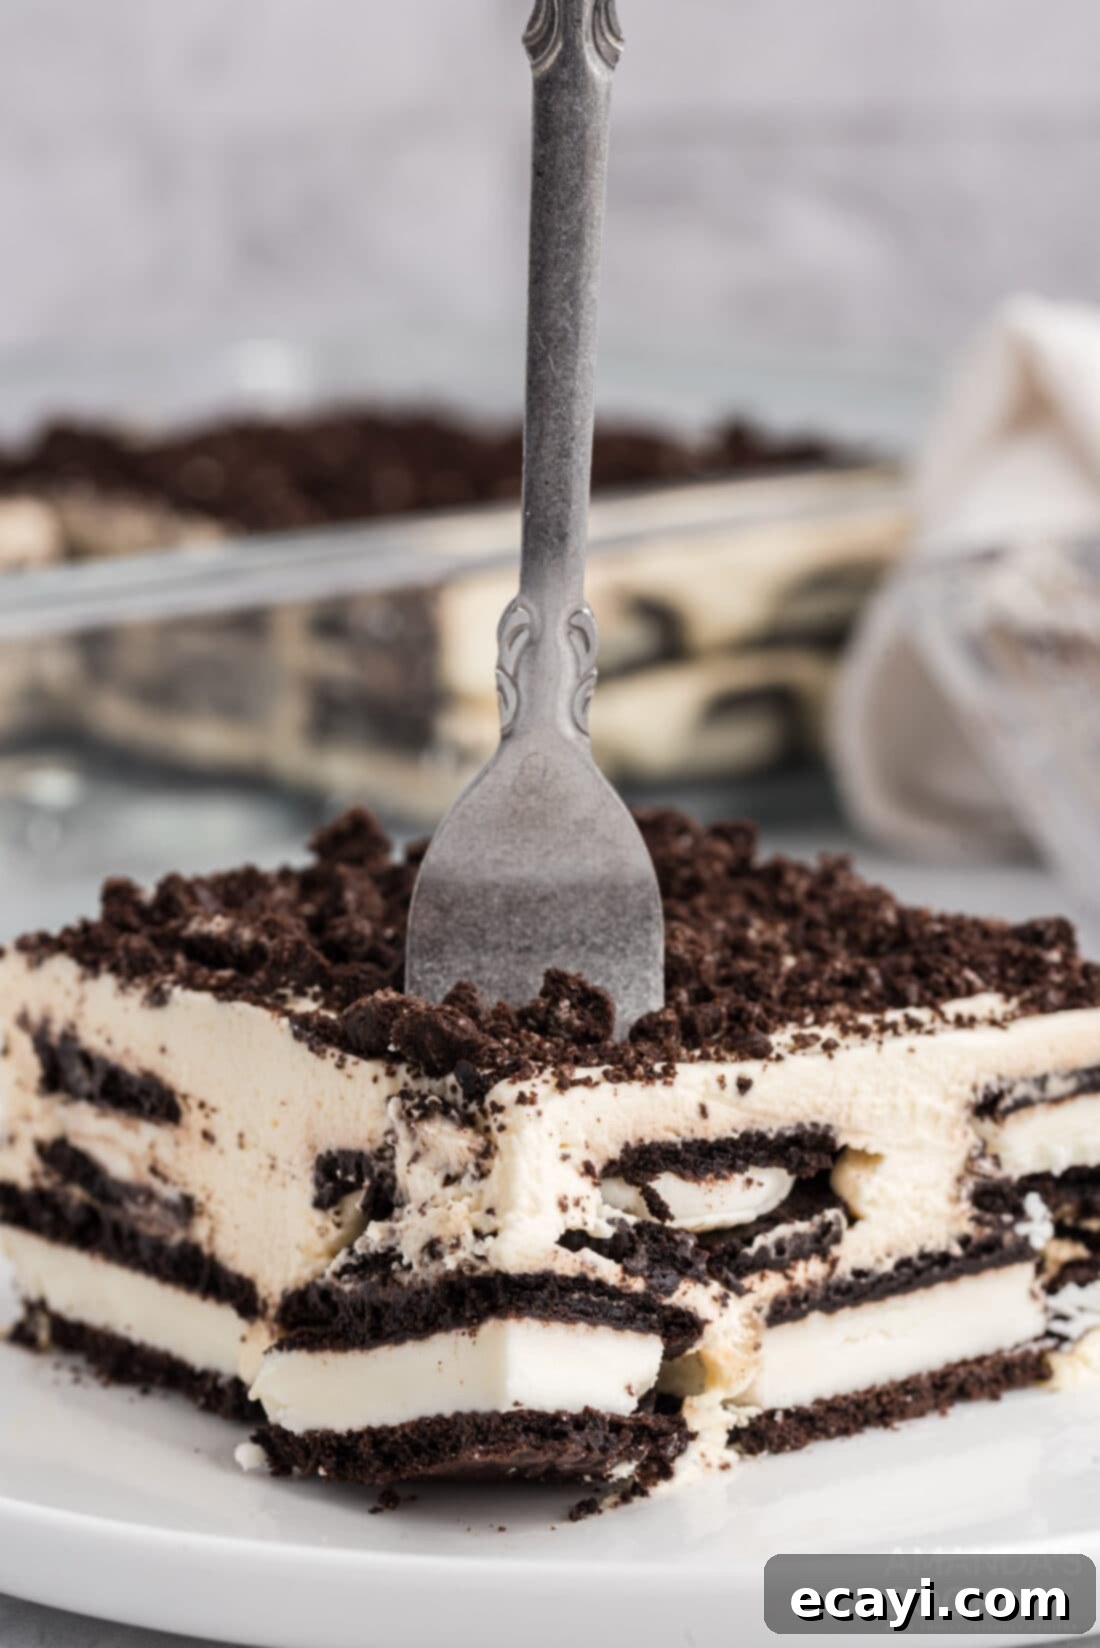
The magic happens through a straightforward layering process: crunchy Oreo cookies are meticulously stacked with generous dollops of freshly prepared homemade whipped cream, then left to chill in the refrigerator. This is where the “icebox” transformation occurs. As the cake rests, the Oreo cookies slowly absorb the moisture and richness from the luscious whipped cream. This softening process miraculously turns the crisp cookies into tender, moist, sponge-cake-like layers, creating a harmonious texture that’s soft yet satisfying. The result is a dessert that’s creamy, chocolatey, and delightfully light.
Beyond its simple preparation, this Oreo icebox cake is a fantastic choice for many reasons:
- **Effortless Elegance:** Despite its ease, it presents beautifully, making it ideal for entertaining.
- **Cooling Comfort:** As a no-bake treat, it’s perfect for warm weather when turning on the oven is the last thing you want to do.
- **Kid-Friendly:** Both making and eating this cake are fun activities for kids and adults alike.
- **Customizable:** While delicious on its own, it also serves as a fantastic base for various toppings and flavor twists.
Looking for a different, yet equally refreshing, take on icebox desserts? Be sure to explore our delightful lemon icebox cake or the vibrant strawberry icebox cake for more summer-inspired goodness!
Essential Ingredients for Your Oreo Icebox Cake
Crafting this simple yet spectacular dessert requires only a few key ingredients, each playing a vital role in achieving the perfect balance of flavor and texture. For precise measurements, detailed quantities, and comprehensive instructions, please refer to the printable recipe card available at the conclusion of this article.
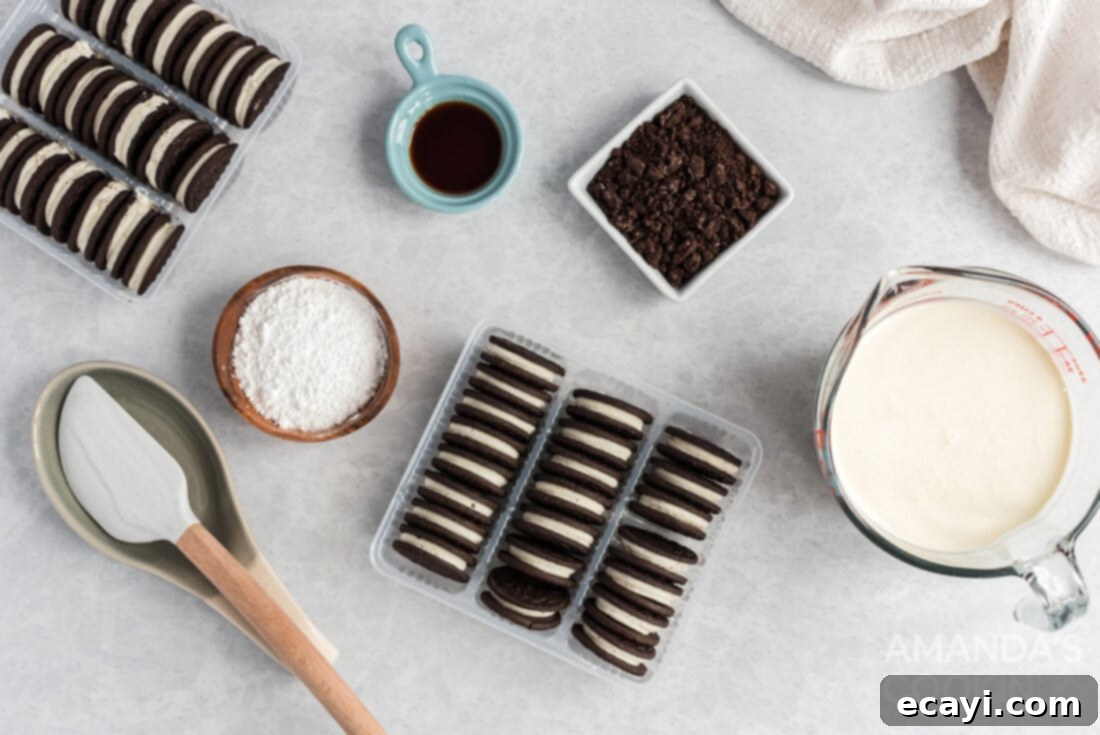
WHIPPED CREAM (Homemade is Best!) – While store-bought whipped topping (like Cool Whip) can be a convenient shortcut, we highly recommend using freshly made homemade whipped cream for this dessert. The superior flavor, rich texture, and customizable sweetness of homemade whipped cream truly elevate the icebox cake, making it incredibly light and airy. It truly takes minutes to (literally) whip up, especially with the help of a stand mixer or a hand mixer. It’s one of the reasons I adore my KitchenAid Mixer! If you don’t have an electric mixer, a good old-fashioned whisk and a bit of arm workout will also do the trick.
OREO COOKIES (Double Stuffed for Creaminess) – The star of the show! For the ultimate creamy experience and better structural integrity, we strongly suggest using double-stuffed Oreos. The extra cream filling in these cookies contributes to an even softer, more luscious cake texture as they absorb the whipped cream. While you can certainly make this recipe with regular Oreos, our tests have shown that the double-stuffed variety provides more substantial layers and a wonderfully rich mouthfeel that truly sets this icebox cake apart.
- **Heavy Whipping Cream:** Look for cream with at least 36% milk fat for the best whipping results. Ensure it’s very cold to achieve stiff peaks.
- **Powdered Sugar (Confectioners’ Sugar):** This fine sugar dissolves easily into the cream, resulting in a smooth, lump-free whipped topping. It also adds just the right amount of sweetness without being overly granular.
- **Vanilla Extract:** A touch of pure vanilla extract enhances the overall flavor profile of the whipped cream, adding a warm, aromatic note that complements the chocolatey Oreos beautifully.
Step-by-Step: How to Make Oreo Icebox Cake
These step-by-step photos and detailed instructions are provided to help you visualize the process of making this delicious recipe. For a convenient printable version of this recipe, complete with precise measurements and comprehensive instructions, you can Jump to Recipe at the bottom of this post.
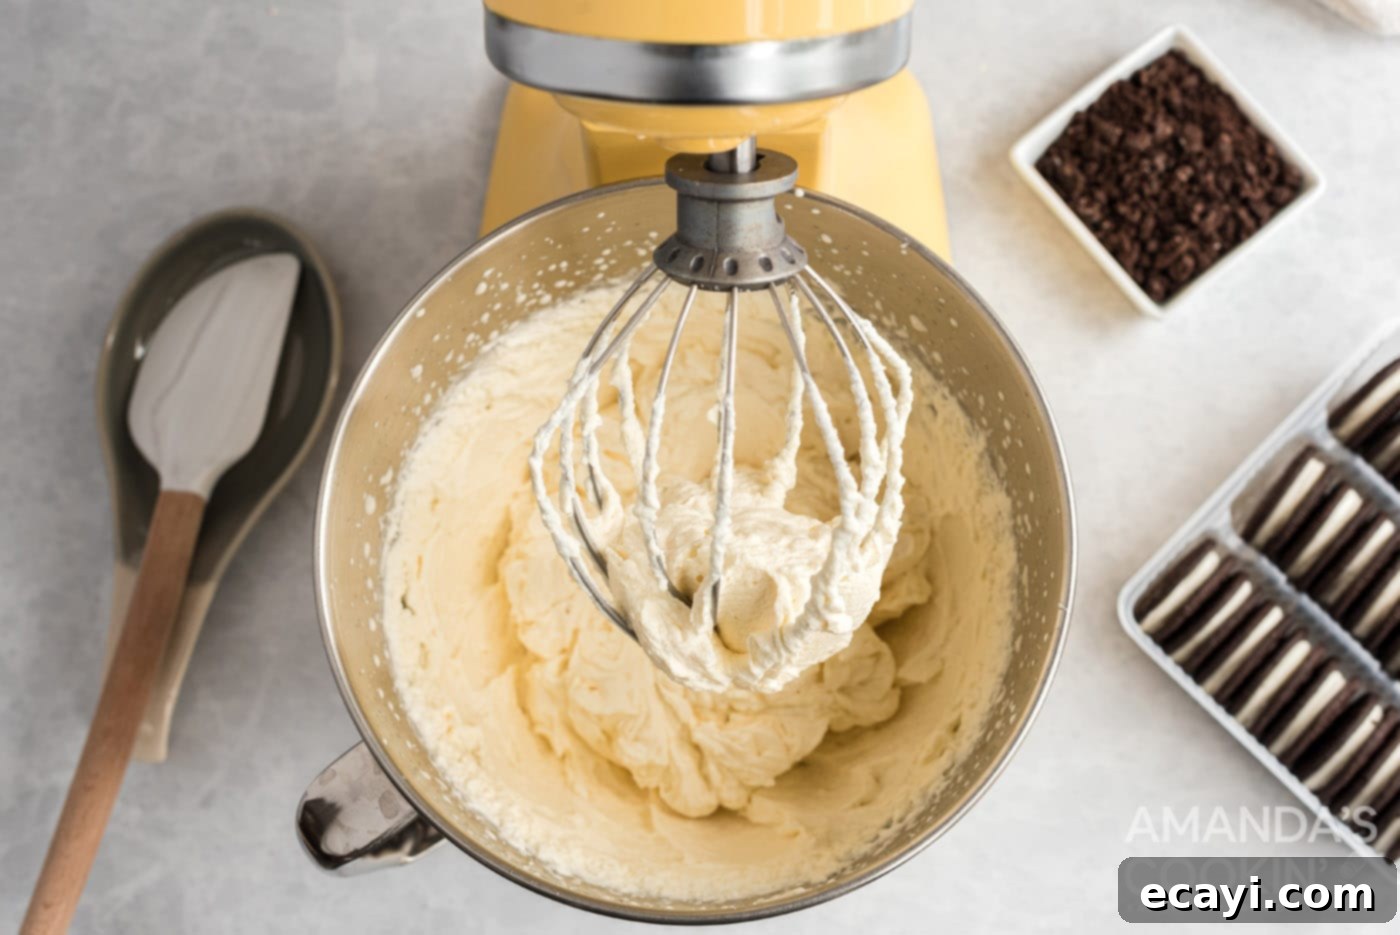
- **Prepare the Whipped Cream:** In a large, chilled mixing bowl, combine the very cold heavy whipping cream, powdered sugar, and vanilla extract. Using a stand mixer fitted with a whisk attachment or a hand mixer, beat the mixture on medium-high speed. Continue beating just until stiff peaks form, which typically takes about 7-9 minutes. Be vigilant and careful not to overmix, as overwhipped cream can quickly turn grainy or even into butter. You’ll know it’s ready when the cream holds its shape firmly when the whisk is lifted.

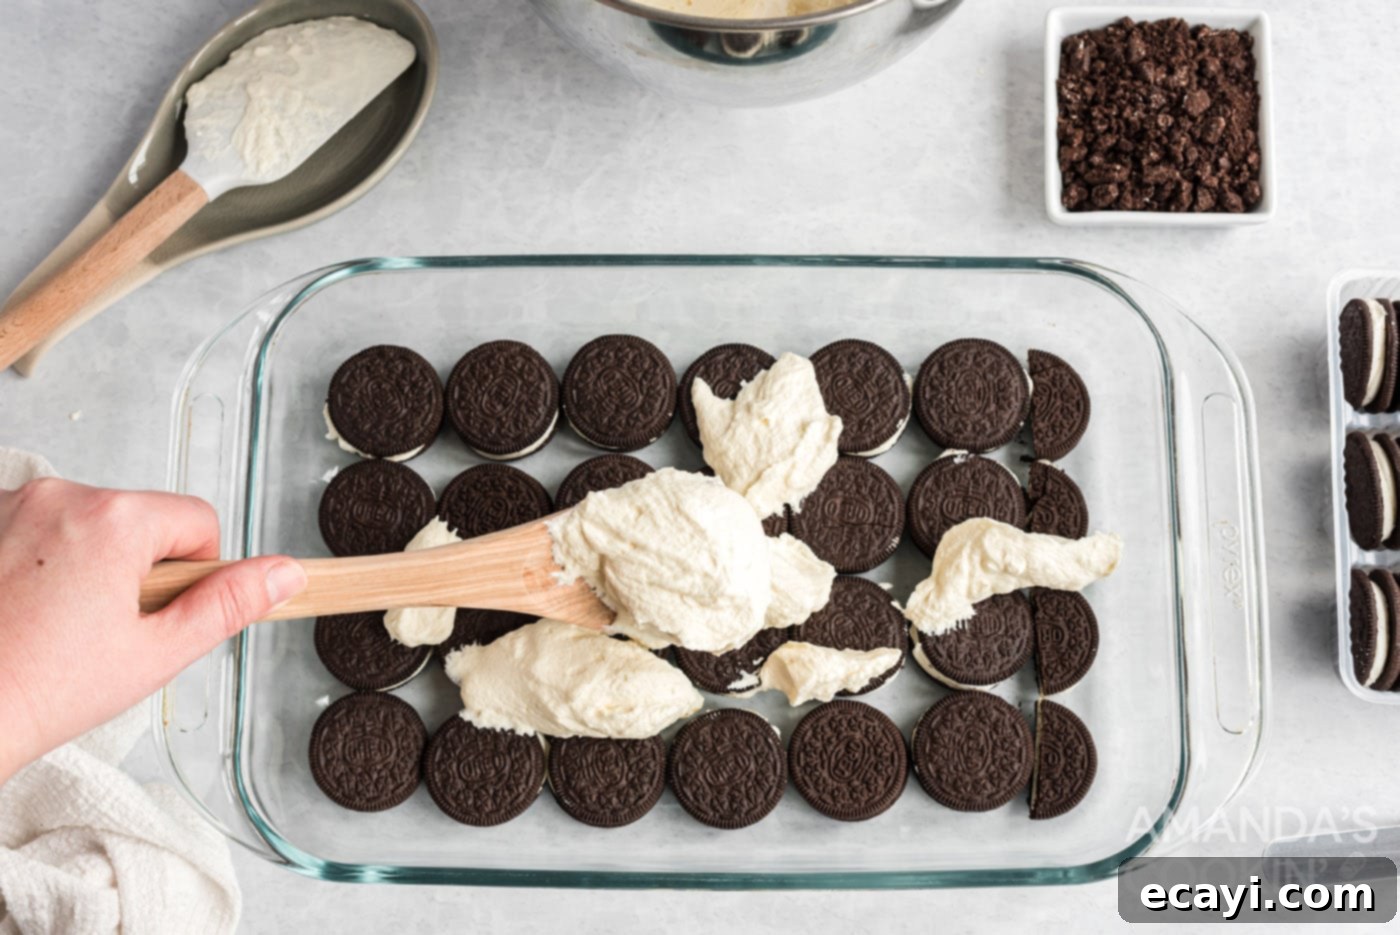
- **First Layer of Cookies:** Take a 13×9 pan or a 3-quart dish (a clear trifle bowl also works beautifully for presentation) and arrange a single, even layer of Oreo cookies at the bottom. Depending on the exact dimensions of your dish, you may need to break some cookies in half or into smaller pieces to fill any gaps at the ends or along the sides, ensuring a complete base layer.

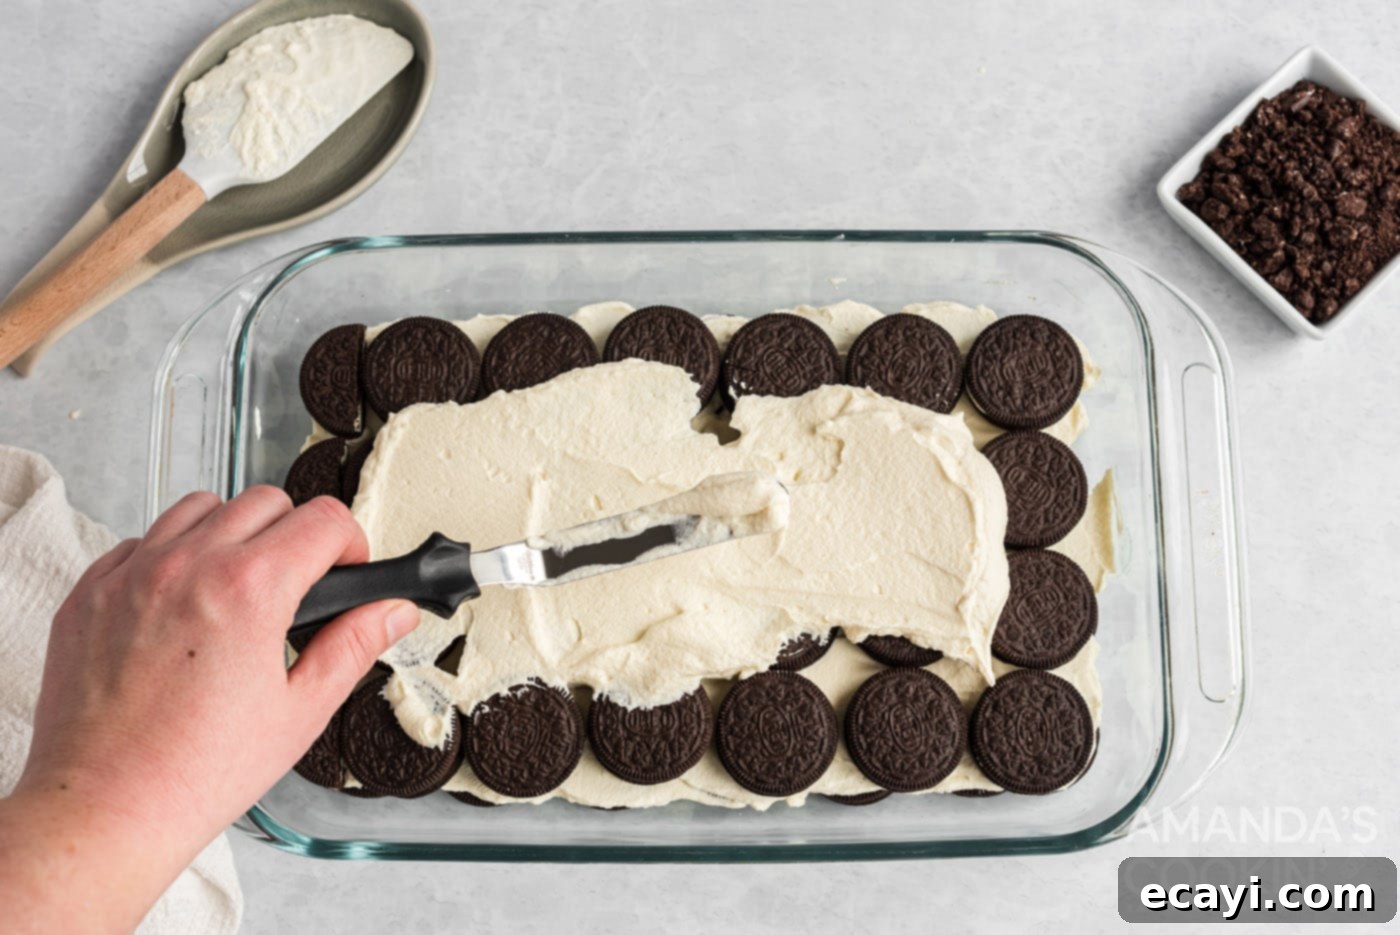
- **Add First Whipped Cream Layer:** Gently spoon approximately half of your freshly prepared whipped cream over the first layer of Oreo cookies. Carefully spread the whipped cream evenly from edge to edge, ensuring every cookie is well covered. This cream layer is crucial for softening the cookies during chilling.

- **Repeat Layers & Chill:** Create a second layer of Oreo cookies over the whipped cream, breaking cookies as needed to fit. Then, spread the remaining whipped cream evenly over the top, making sure to cover all the cookies completely. Once assembled, cover the dish tightly with plastic wrap or a lid. Refrigerate the icebox cake for a minimum of 6 hours, or ideally, overnight. This prolonged chilling period is essential for the cookies to fully soften and for the flavors to meld beautifully, creating that signature cake-like texture.
- **Serve with Toppings:** When ready to serve, remove the cake from the refrigerator. For an extra touch of classic Oreo flavor and a pleasant textural contrast, top with a sprinkle of crushed Oreo cookies. Other delightful topping options include chocolate chips, a drizzle of warm caramel sauce, a scattering of chopped nuts (like pecans or walnuts), or even fresh berries for a burst of color and tartness.
EXPERT TIP – For the cleanest and most precise slices, pop your icebox cake into the freezer for about 30 minutes before you plan to serve it. This slight firming will make cutting much easier and reduce crumbling.

Frequently Asked Questions About Oreo Icebox Cake
Yes, absolutely! While homemade whipped cream offers a richer, fresher flavor and a less sweet profile, you can certainly use a pre-made whipped topping like Cool Whip if you’re looking for an even quicker shortcut or prefer its specific taste. If substituting, you will need approximately 24 ounces of pre-made whipped topping to replace the homemade version. It’s worth noting that Cool Whip tends to be sweeter than homemade whipped cream, so bear this in mind as the overall sweetness of your dessert will increase.
The beauty of Oreo Icebox Cake is its versatility when it comes to toppings! If you’re feeling a bit fancy, you can elevate your dessert with drizzles of warm caramel or rich chocolate syrup, a sprinkle of mini chocolate chips, elegant shaved chocolate curls, or a crunch of any variety of chopped nuts (pecans, walnuts, or almonds work wonderfully). For a classic and simple touch that adds a satisfying crunch and visual appeal, I often opt to top it with extra crushed Oreos right before serving. Fresh berries like raspberries or strawberries also add a lovely color contrast and a hint of tartness.
Absolutely, and in fact, this dessert truly benefits from being made ahead of time! It’s actually best when given ample time to chill, allowing the flavors to deepen and the cookies to soften perfectly. Plan to refrigerate your icebox cake for at least 6 hours. For the absolute best results, where the cookies achieve that ideal tender, cake-like consistency, chilling it overnight is highly recommended. This allows the Oreo cookies to fully absorb the whipped cream, transforming them into soft and delicious layers. If you find yourself in a time crunch and need to serve it sooner, a helpful trick is to quickly dip each Oreo cookie in milk for just a second or two as you assemble your layers. This will accelerate the softening process significantly, cutting down the required chilling time.
While Double Stuffed Oreos are recommended for their extra cream and stability, you can certainly experiment! Regular Oreos work well, though they might result in a slightly less creamy cake. You could also try flavored Oreos (like mint, peanut butter, or golden Oreos) for a different twist. For a truly unique flavor, consider using other types of crisp cookies that absorb moisture well, such as graham crackers or chocolate wafer cookies, keeping in mind that the flavor profile will change significantly.
This delicious icebox cake can be stored, covered tightly with plastic wrap or in an airtight container, in the refrigerator for up to 3-4 days. However, for optimal taste and texture, it’s best enjoyed within the first 2-3 days. Beyond that, the cookies might become too soft, losing some of their delightful cake-like structure.
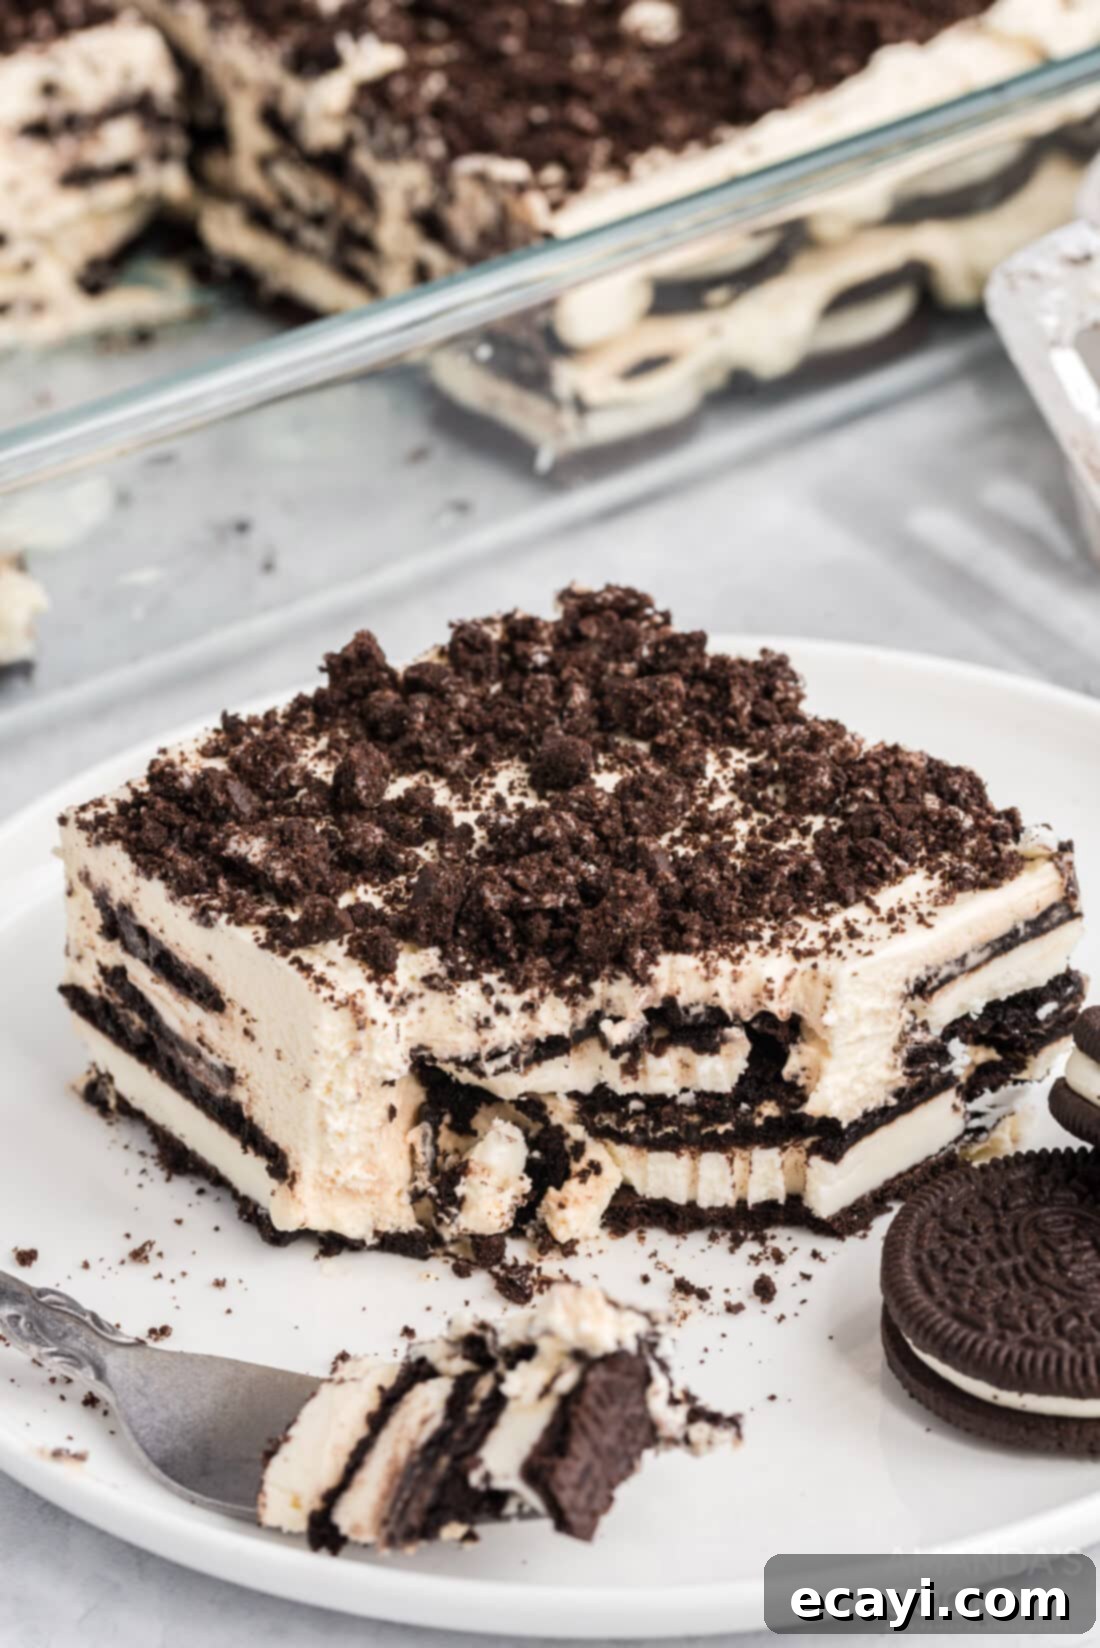
Indulge in a light, fluffy cloud of chocolatey cookies and luscious cream with this incredibly easy no-bake Oreo icebox cake! Whether it’s for a casual summer potluck, a celebratory get-together, or simply a sweet moment at home, this dessert promises to be a delightful experience for everyone. Its simplicity makes it approachable for even novice bakers, while its irresistible flavor ensures it’s a guaranteed crowd-pleaser every single time.
More Irresistible Dessert Recipes to Explore
If you loved this simple yet decadent Oreo Icebox Cake, you’re in for a treat! We have a treasure trove of other fantastic dessert recipes that are just as easy and delicious. Expand your baking (or no-baking!) repertoire with these delightful options:
- Fried Oreos: A carnival favorite brought to your kitchen.
- Lemon Blueberry Icebox Cake: A bright and fruity twist on the classic no-bake concept.
- No-Bake Oreo Cake: Another fantastic no-bake option for Oreo lovers.
- Chocolate Lasagna: Layers of rich chocolatey goodness without turning on the oven.
- Chocolate Icebox Cake: For those who can’t get enough chocolate.
- Oreo Cupcakes: A baked classic featuring everyone’s favorite cookie.
- Oreo Cheesecake: Creamy, dreamy, and packed with Oreo flavor.
I absolutely adore spending time in the kitchen, experimenting with new flavors and classic comforts, and then sharing my culinary adventures with all of you! Remembering to check back for new recipes daily can be a challenge, which is why I’ve made it super convenient. I offer a fantastic newsletter that brings a brand new recipe straight to your inbox every time one posts. Simply subscribe here and start receiving your free daily dose of delicious inspiration!
Oreo Icebox Cake
IMPORTANT – There are often Frequently Asked Questions within the blog post that you may find helpful. Simply scroll back up to read them!
Print It
Pin It
Rate It
Save ItSaved!
Ingredients
- 3 packages Double Stuffed Oreo cookies 15 oz each. You will typically use about 2 1/2 packages for the layers, reserving any remaining cookies for crushing as a topping.
- 3 cups heavy whipping cream
- 3 tablespoons powdered sugar
- 2 teaspoons vanilla extract
- Crushed cookies chocolate chips, caramel sauce, or chopped nuts for topping (optional)
Things You’ll Need
-
13×9 inch baking dish (or a 3-quart dish)
-
Stand mixer or hand mixer with whisk attachment
-
Large mixing bowl
Before You Begin: Expert Tips for Success
- **Whipped Topping Alternative:** If you choose to use store-bought whipped topping instead of making your own, a 24-ounce container of whipped topping can be substituted for the homemade whipped cream. Remember, this will make the dessert considerably sweeter.
- **Accelerated Cookie Softening:** For those moments when you need your icebox cake ready sooner, lightly dip each Oreo cookie in milk (just a quick dunk!) before placing it in the dish to form your layers. This accelerates the softening process, allowing you to enjoy the cake in less time.
- **Perfect Homemade Whipped Cream:** Achieving ideal whipped cream is key! For the best results, chill your metal mixing bowl and whisk attachment (or hand mixer beaters) in the freezer for about 15 minutes before you begin. Beat the heavy cream until it forms medium to medium-stiff peaks. You can tell it’s perfect when you lift the whisk and the tip of the cream stands upright without curling over. Be extremely careful not to over-whip past this point, or you’ll quickly end up with grainy whipped cream or even butter.
- **Assembly and Layering Guidance:** To assemble, start by arranging a single, even layer of Oreo cookies at the bottom of your chosen dish. Top this with approximately half of the prepared whipped cream, spreading it gently to cover the cookies fully. Repeat this process with another layer of cookies and the remaining whipped cream. The number of layers will depend on the depth of your dish. This recipe typically yields enough for 2-3 cookie layers with ample cream. While a 13×9 inch pan or any 3-quart dish works well, assembling it in a clear trifle bowl can create a stunning visual presentation, showcasing the beautiful layers.
- **Chill Time is Crucial:** Do not skimp on the chilling time! The extended refrigeration period is what allows the cookies to fully absorb the moisture from the cream, transforming them into a delightful cake-like texture. For the best flavor and consistency, an overnight chill is truly ideal.
Instructions
-
In a large, chilled mixing bowl, beat the cold heavy cream, powdered sugar, and vanilla extract until stiff peaks form. This typically takes about 7-9 minutes with an electric mixer. Ensure not to overmix to prevent butter formation.
-
In a 13×9 inch pan or a 3-quart dish, arrange a single layer of Oreo cookies, breaking them as necessary to fit snugly at the sides and ends of your baking dish. Evenly spread half of the prepared whipped cream over this cookie layer. Repeat this layering process once more, finishing with the remaining whipped cream on top.
-
Cover the dish tightly and refrigerate for at least 6 hours, or ideally overnight, to allow the cookies to soften completely and create that delicious cake-like texture. [Refer to the “Before You Begin” notes for tips on a quicker version if needed.]
-
To serve this delightful dessert, garnish with crushed Oreo cookies for extra crunch and visual appeal. Alternatively, you can top with chocolate chips, a drizzle of caramel sauce, chopped nuts, or fresh fruit for added flavor and flair.
Nutrition
The recipes on this blog are carefully tested using a conventional gas oven and a gas stovetop. Please be aware that oven performance, especially in older models, can vary significantly. Using an inexpensive oven thermometer is an excellent way to verify that your oven is consistently heating to the proper temperature. If you’re using a toaster oven or a countertop oven, keep in mind that these appliances may not distribute heat as uniformly as a full-sized conventional oven, and you might need to adjust your cooking and baking times accordingly. For recipes utilizing specialized appliances such as pressure cookers, air fryers, slow cookers, or similar devices, a direct link to the specific models we use is conveniently provided within each respective recipe. When it comes to baking recipes where ingredient measurements are given by weight, please understand that substituting cup measurements may lead to different results, and we cannot guarantee success with alternative measuring methods.
This post was originally published on May 1, 2018, and has since been extensively updated with enhanced photos, additional expert tips, and detailed instructions to provide the best possible experience for our readers.
