Patriotic Ice Cream Cone Cupcakes: The Ultimate Red, White & Blue 4th of July Dessert!
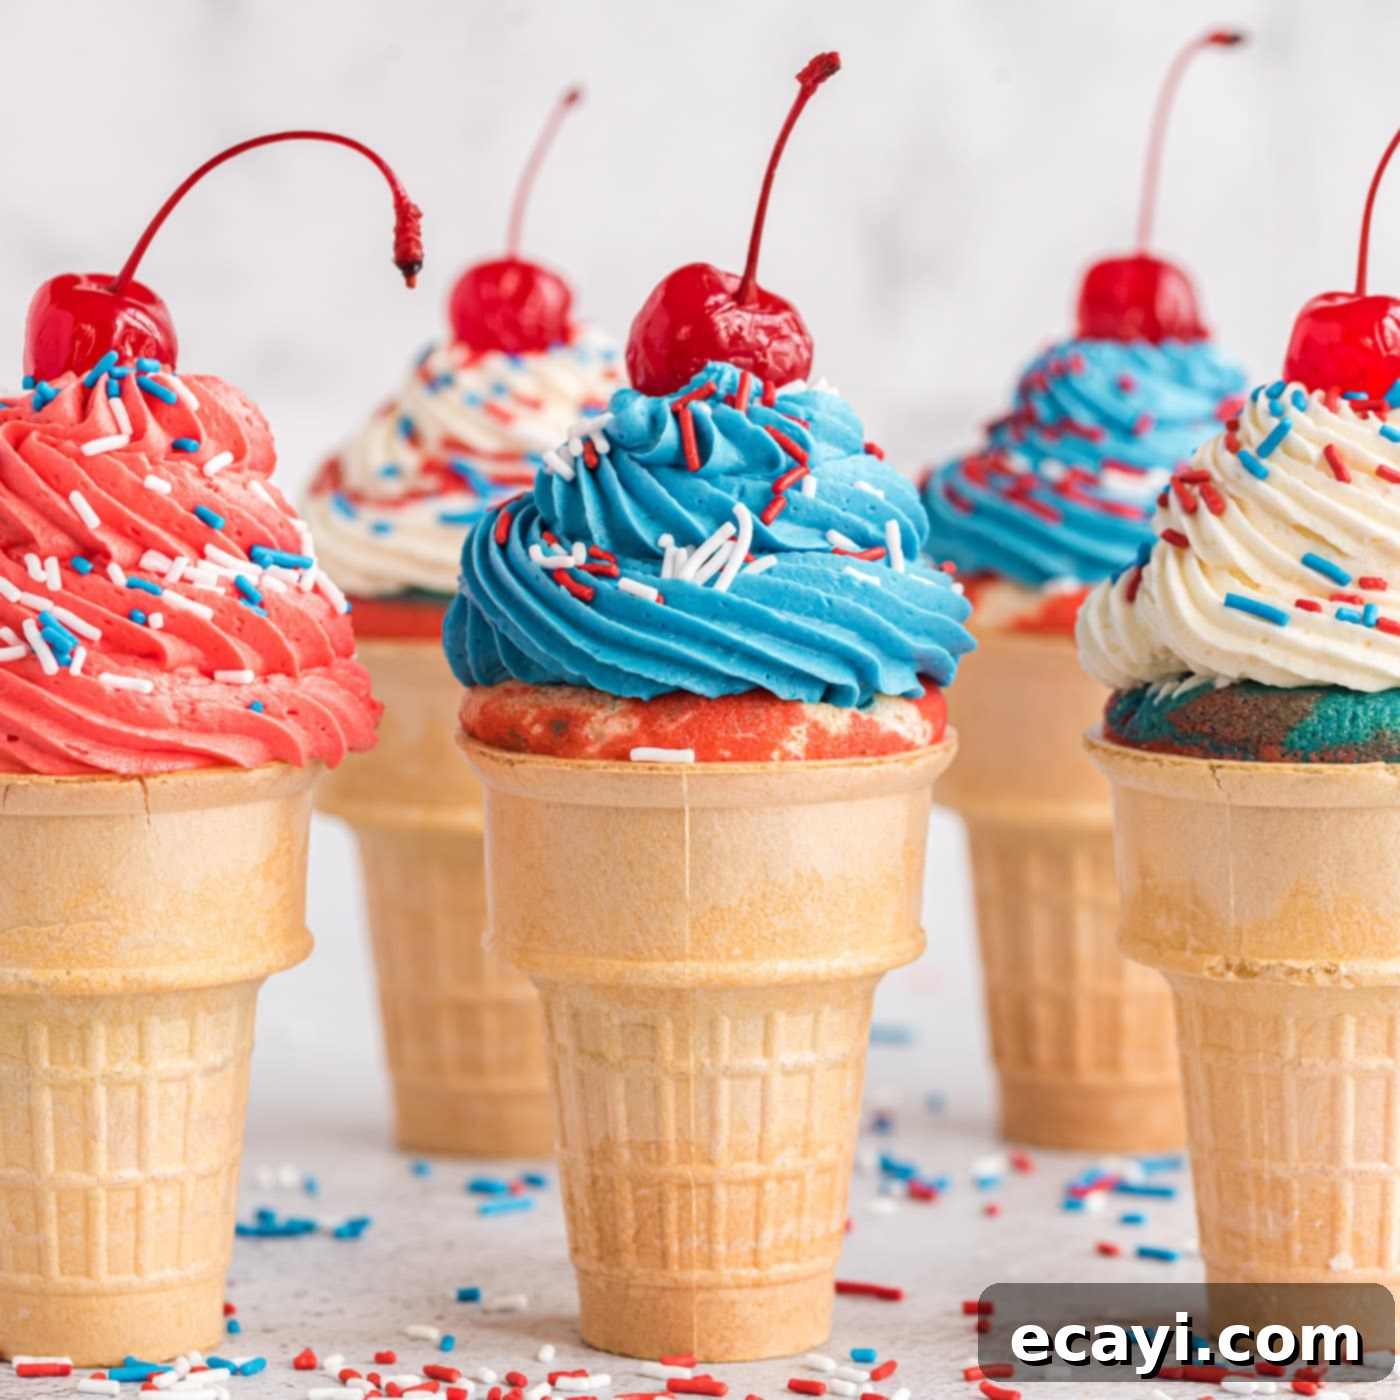
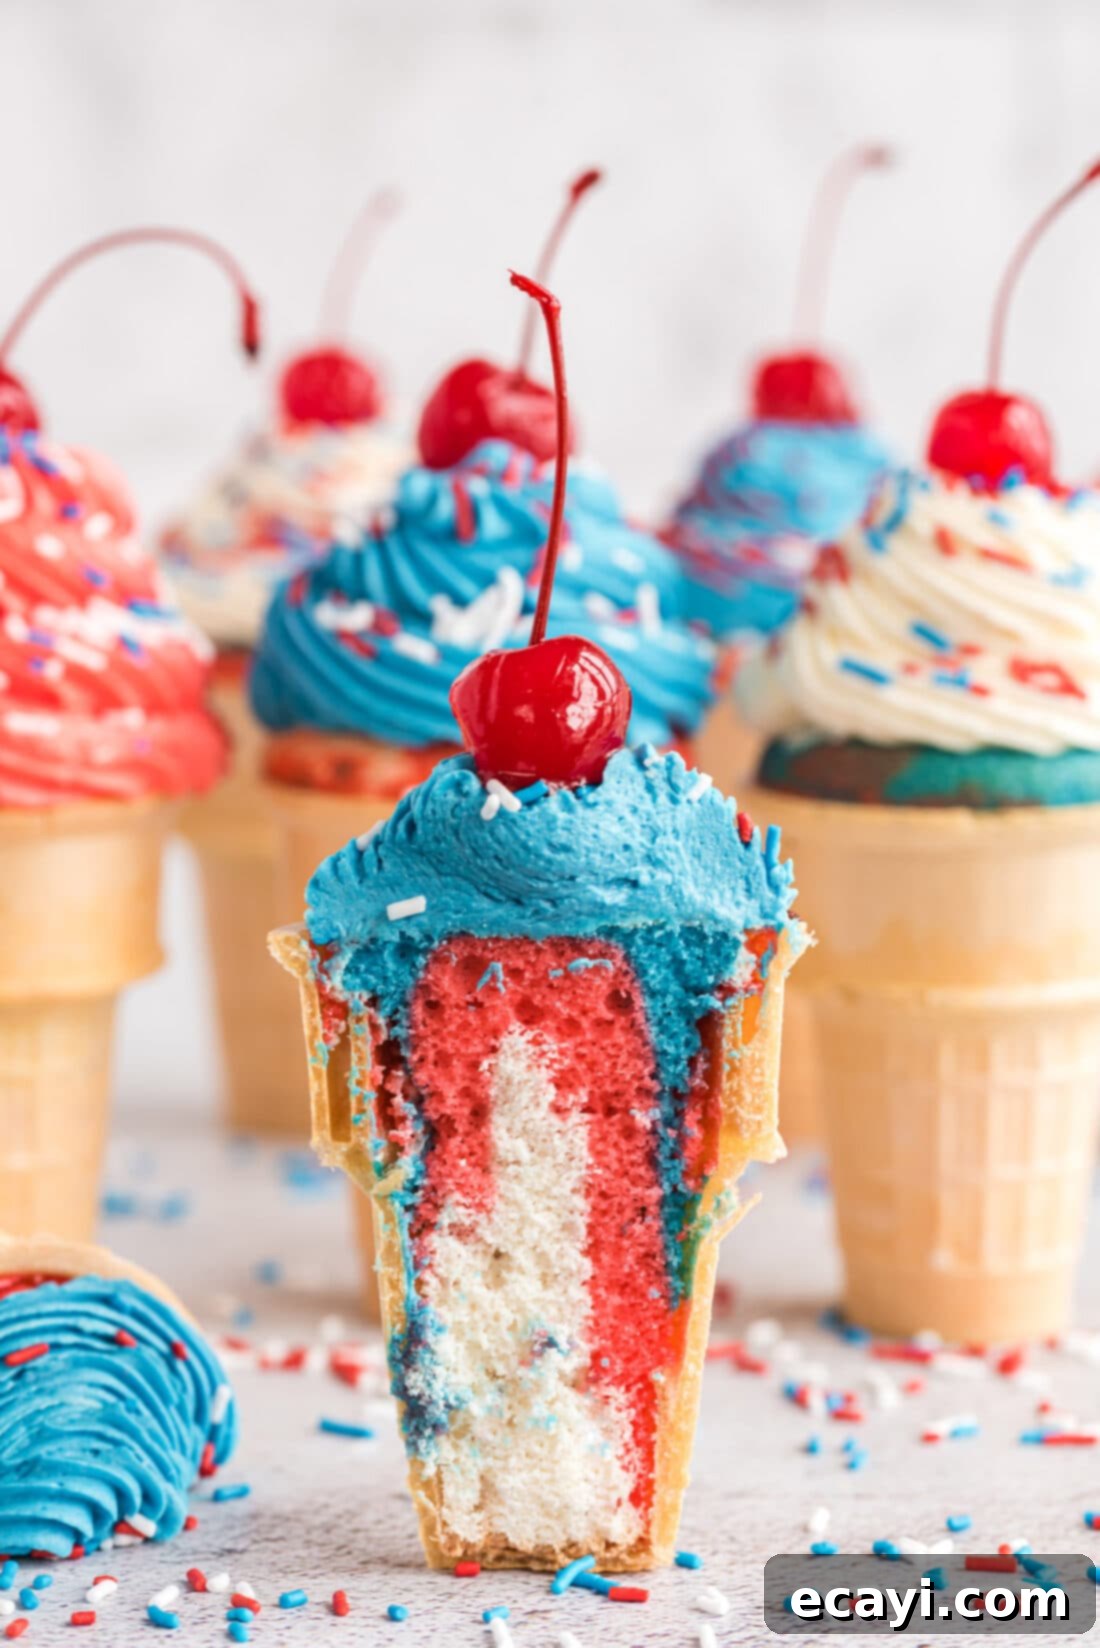
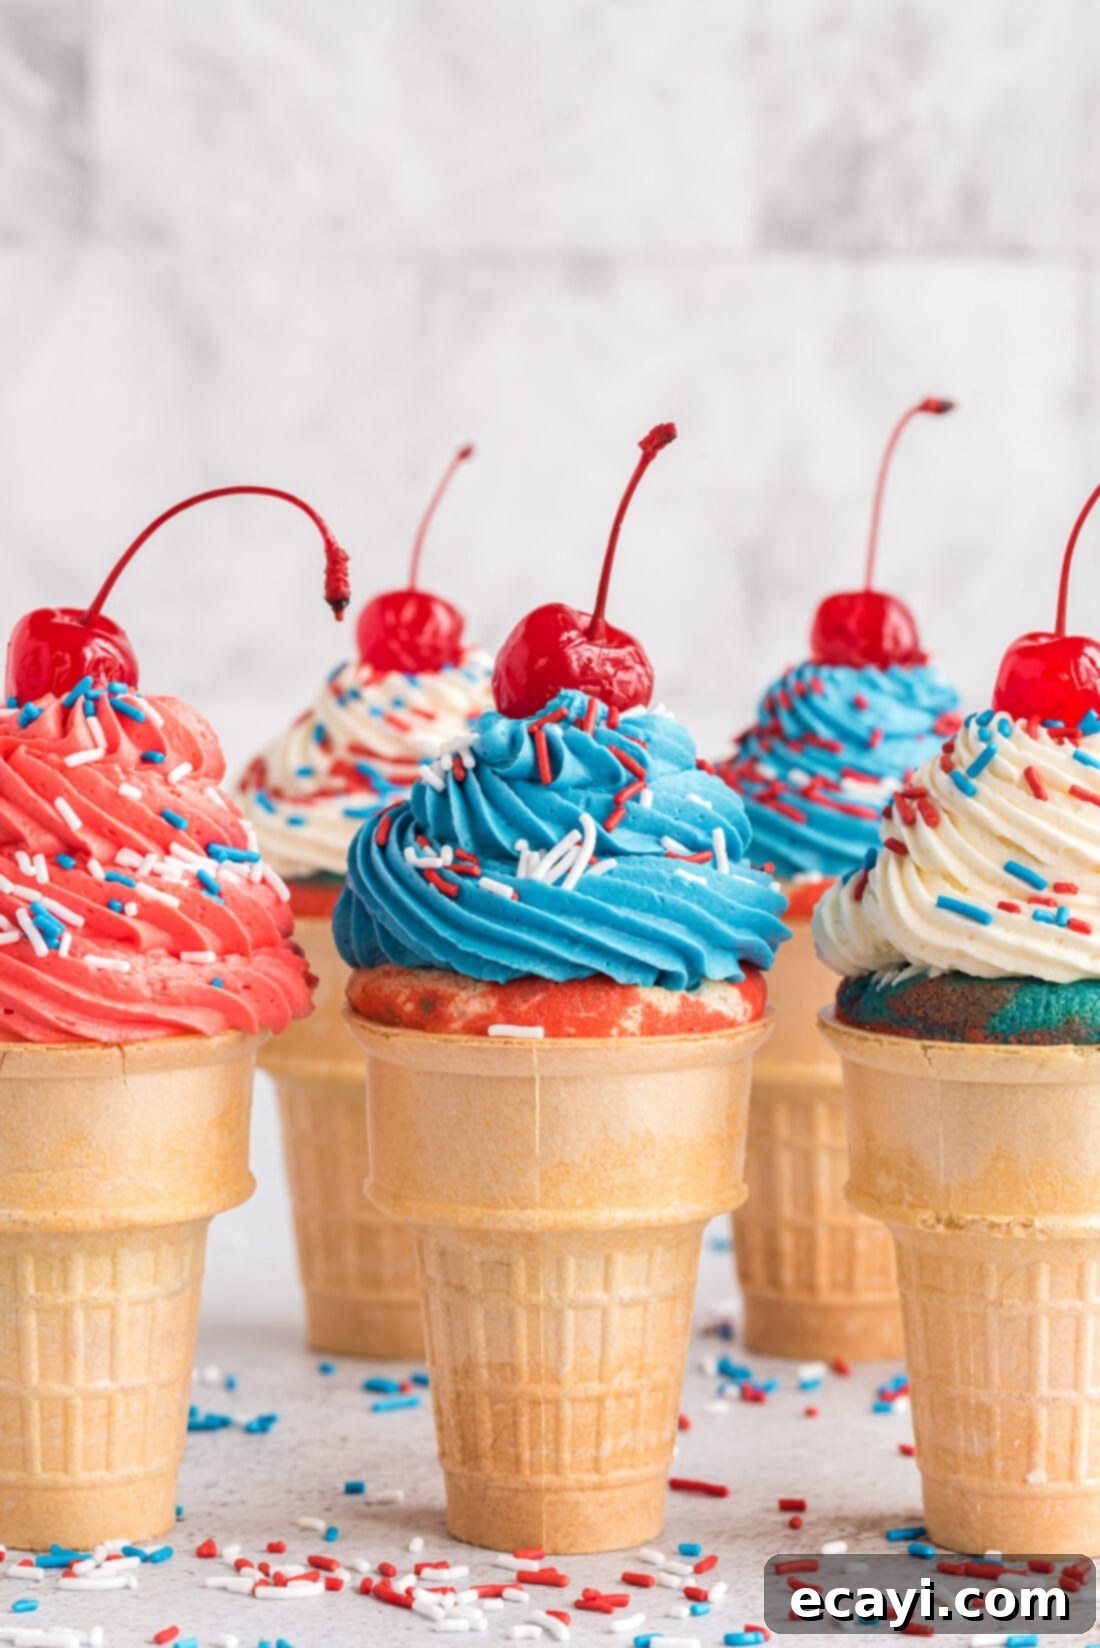
Prepare to amaze your guests with these absolutely adorable and incredibly delicious patriotic ice cream cone cupcakes! Imagine layers of vibrant red, pure white, and brilliant blue cake, perfectly baked right inside crisp ice cream cones. Each one is then elegantly crowned with a swirl of fluffy buttercream frosting, artfully piped to resemble a nostalgic scoop of soft-serve ice cream. Adorned with festive sprinkles and a bright maraschino cherry, these delightful treats are more than just a dessert; they are a true showstopping centerpiece, guaranteed to bring smiles and cheers to your 4th of July celebrations, Memorial Day picnics, or any event where a touch of American spirit is desired.
Why This Recipe Is a Must-Try!
These patriotic ice cream cone cupcakes are not just fun to look at; they’re incredibly satisfying to make and even more delightful to eat! The magic lies in their clever presentation: the pillowy, cloud-like buttercream frosting is piped with precision, transforming each cupcake into a sweet, soft-serve ice cream cone, complete with an optional cherry on top and a shower of festive sprinkles. It’s a nostalgic treat that combines the joy of ice cream with the comfort of cake, all in one easy-to-hold package.
While their intricate appearance might suggest a complicated baking process, rest assured, this recipe is surprisingly straightforward. We leverage the convenience of a boxed white cake mix, making the cake preparation quick and simple. With just a few drops of vibrant gel food coloring, you can easily transform the batter into the iconic red, white, and blue hues. The homemade buttercream frosting is simple to whip up, providing that perfect creamy contrast to the moist cake. Although the coloring process requires a little extra time for separating the batter into bowls, the overall ease and impressive outcome make these cupcakes accessible for bakers of all skill levels. They’re guaranteed to impress everyone who sees and tastes them, turning any gathering into an unforgettable celebration!
Gather Your Ingredients for Patriotic Perfection
To embark on this delightful baking adventure, you’ll need a few key components. All specific measurements, quantities, and detailed instructions can be found in the printable recipe card located at the conclusion of this comprehensive guide. We recommend gathering all your ingredients before you begin, ensuring a smooth and enjoyable baking experience. From the foundational cake mix to the vibrant food colorings and the creamy frosting elements, having everything ready will make the process seamless.
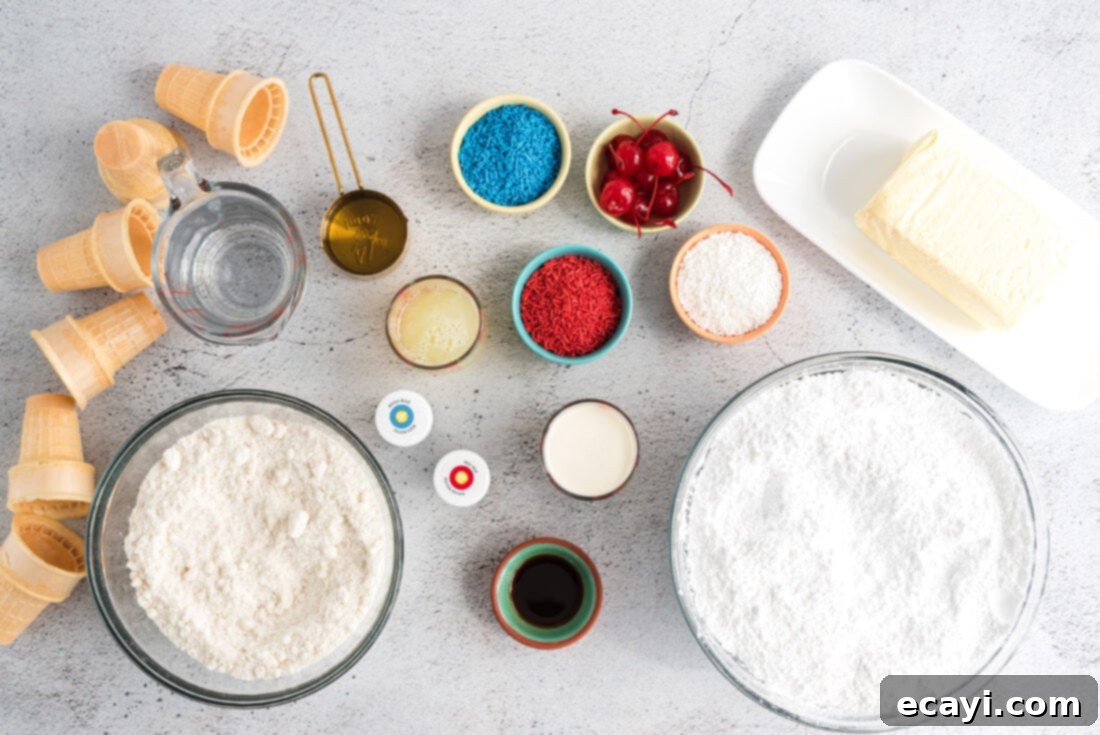
Ingredient Spotlight & Smart Substitutions
Understanding your ingredients is key to baking success. Here’s a closer look at the components of these patriotic treats and some helpful tips:
CAKE – To maximize efficiency and reduce prep time, a box of white cake mix is your best friend for this recipe. You’ll also need the additional ingredients typically listed on the back of your specific cake mix box, such as eggs, oil, and water. We highly recommend opting for a white cake mix over yellow or other flavors because it provides a neutral base that truly allows the red and blue food colorings to pop with maximum vibrancy. Moreover, using white cake ensures that your “white” layer in the patriotic theme is indeed a pure, clean white. If you prefer the satisfaction of baking from scratch, feel free to use your favorite classic white cake recipe. For an extra touch when using a boxed mix, consider substituting milk for water and adding an extra egg to enhance moisture and richness.
CONES – For this fun cupcake design, you’ll want to use cake cones, also known as ice cream cone cups. These cones have a flat bottom, making them ideal for standing upright in a cupcake pan and providing a stable base for your baked treats. While some brands, like Joy, offer colored cone cups (red, blue, and purple), regular, classic cake cones work absolutely wonderfully. Since the cake layers themselves will be bursting with color, the traditional cone serves as a perfect complement without overshadowing the festive interior. Avoid pointed sugar cones for baking, as they are less stable and prone to tipping or cracking during the baking process.
FOOD COLOR – The secret to achieving those brilliant, eye-catching red and blue layers is to use gel food coloring. Unlike liquid food coloring, which can dilute your batter and result in pastel or muted shades, gel food coloring is highly concentrated and delivers incredibly vibrant colors with just a tiny amount. This means your patriotic hues will truly stand out! Start with a small amount of gel on a toothpick and gradually add more until you reach your desired intensity, as a little goes a long way.
BUTTERCREAM FROSTING – While the recipe includes a simple and delicious homemade buttercream recipe, you can certainly opt for store-bought white frosting to save time. If using store-bought, make sure it’s a good quality brand that can be easily tinted with gel food coloring.
Crafting Your Patriotic Ice Cream Cone Cupcakes: A Step-by-Step Guide
These step-by-step photos and detailed instructions are provided to guide you visually through the recipe. For a convenient printable version, complete with precise measurements and comprehensive instructions, simply Jump to Recipe at the bottom of this post.
- Preheat your oven to 350°F (175°C). This ensures your oven is at the correct temperature for even baking from the start.
- In a large mixing bowl, prepare your dry white cake mix according to the specific instructions provided on the package. This usually involves adding eggs, oil, and water (or milk for a richer cake). Mix until just combined and smooth, being careful not to overmix.
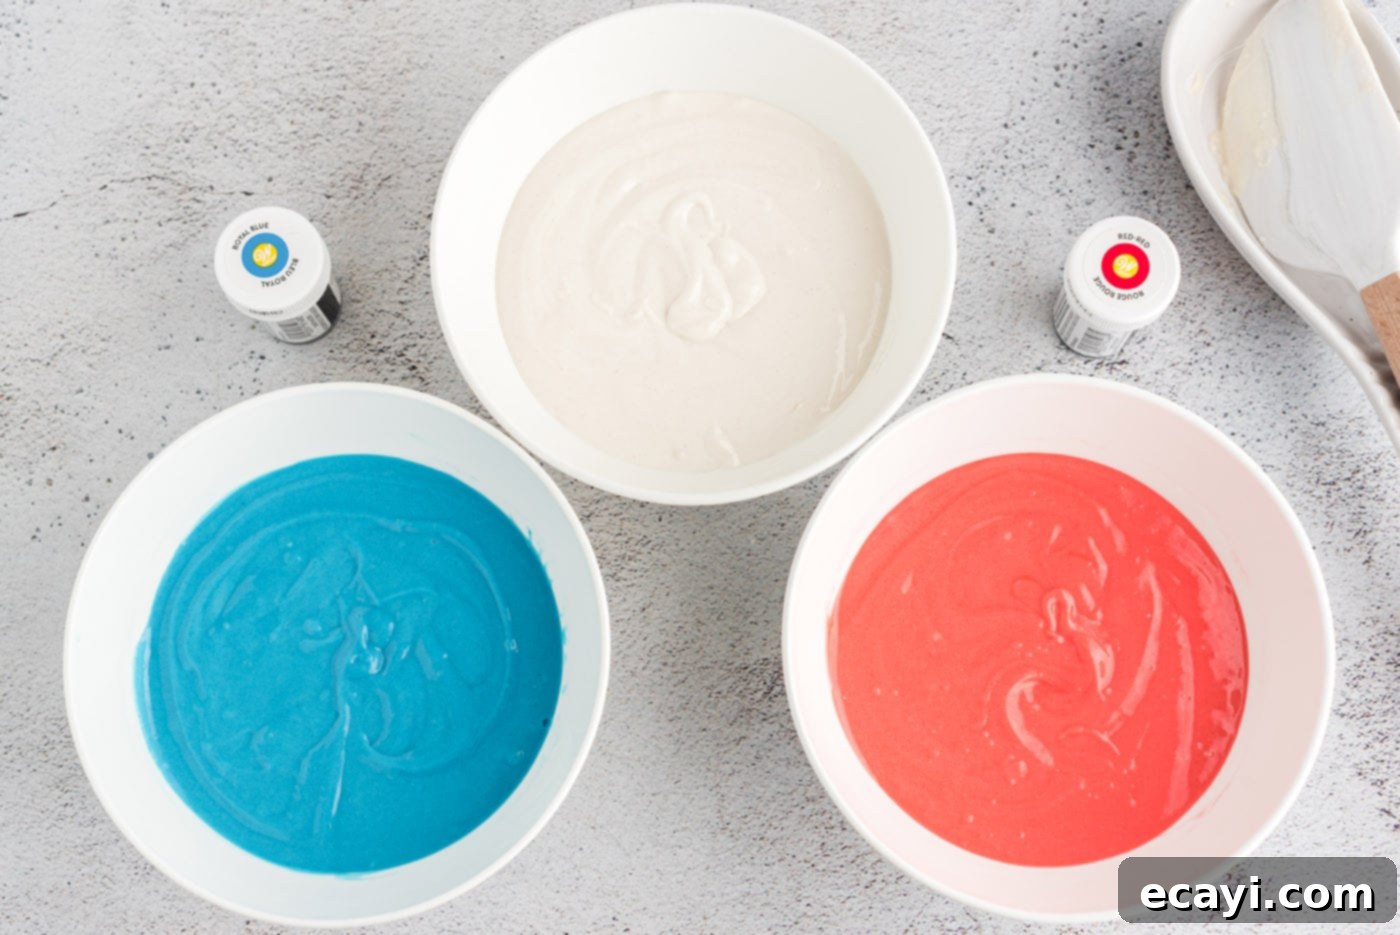
- Carefully separate the prepared cake batter into three equal portions, each in its own bowl. To one bowl, add a small amount of red gel food coloring. To another bowl, add a small amount of blue gel food coloring. Leave the third bowl of batter plain white. Gently stir each colored batter until the desired vibrant shade is achieved, remembering that gel coloring is potent, so start with a tiny amount and add more if needed.

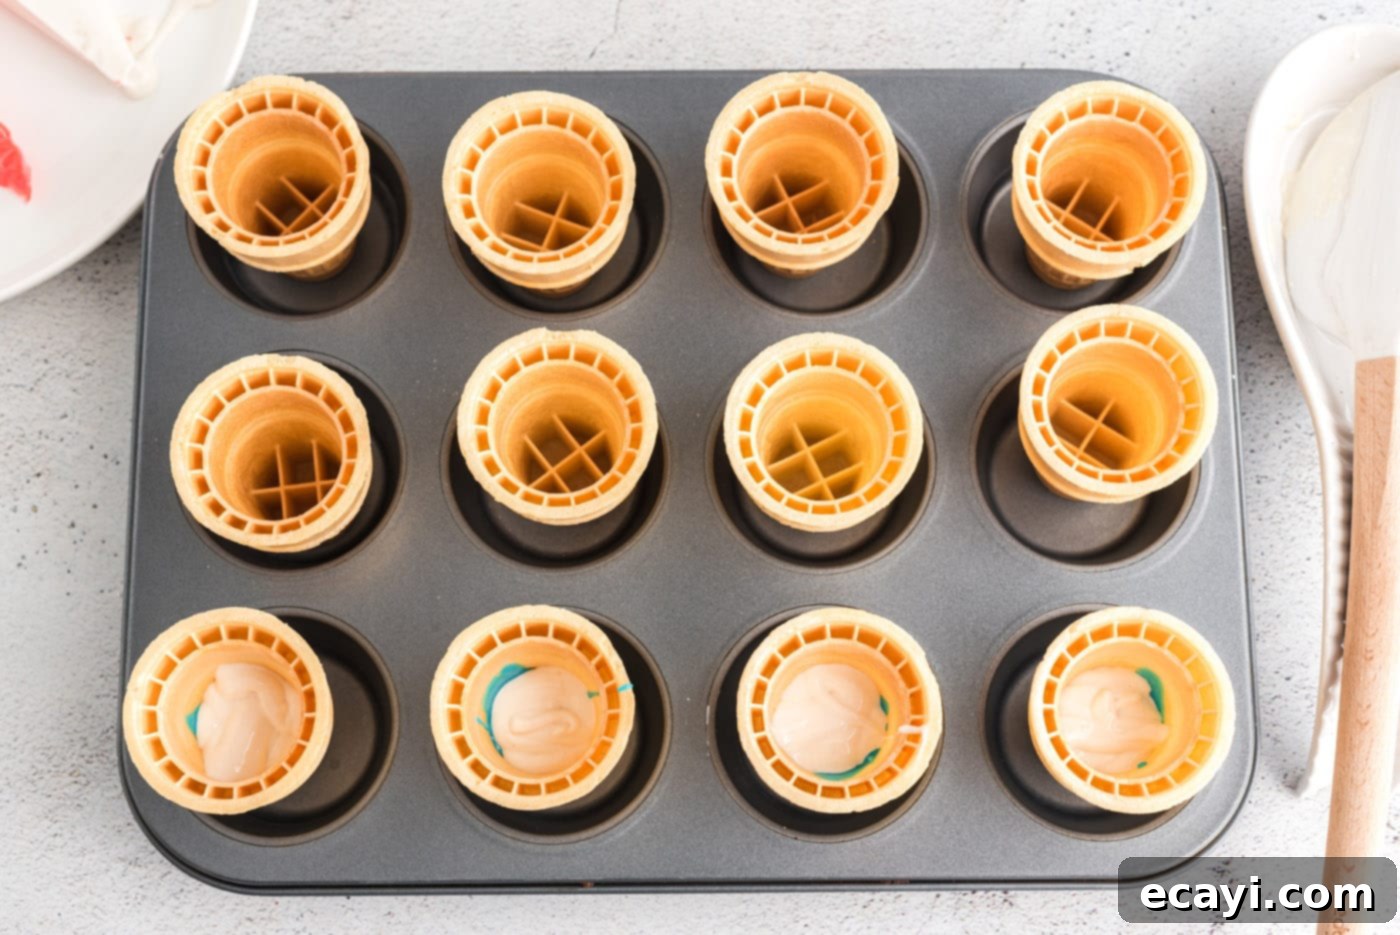
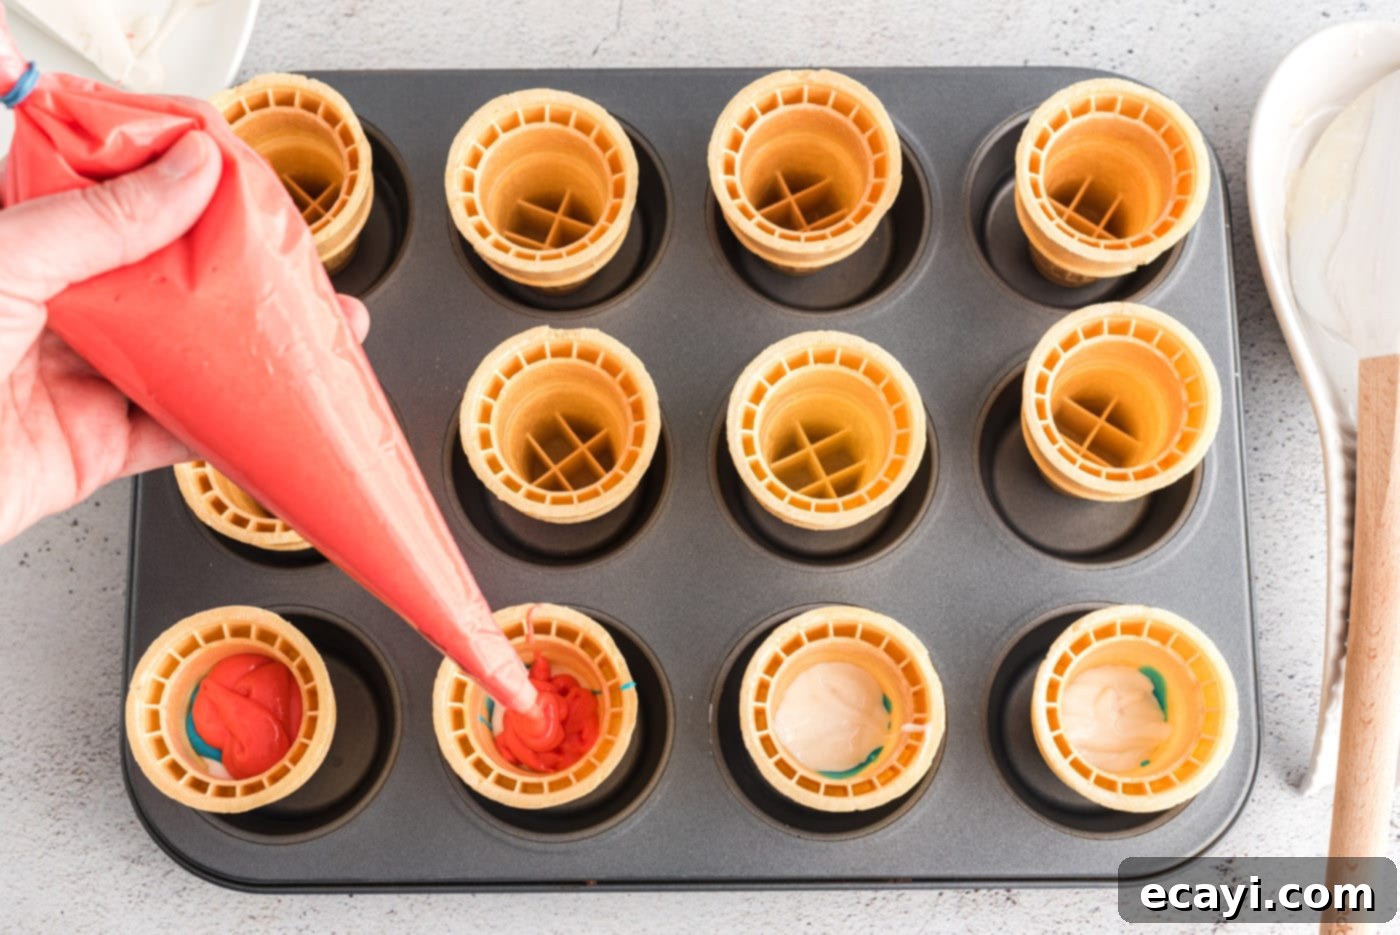
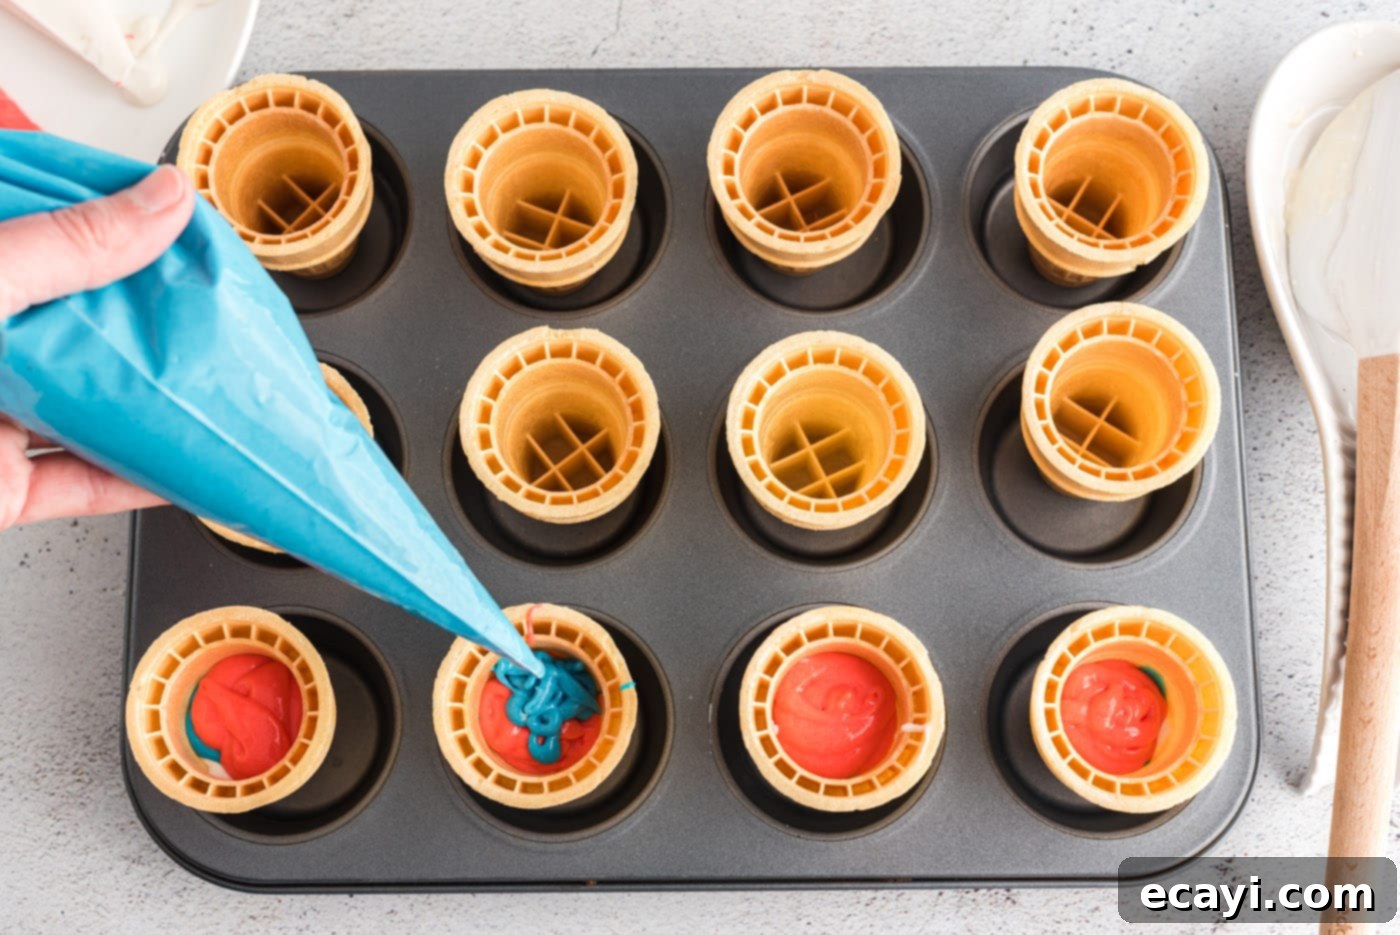
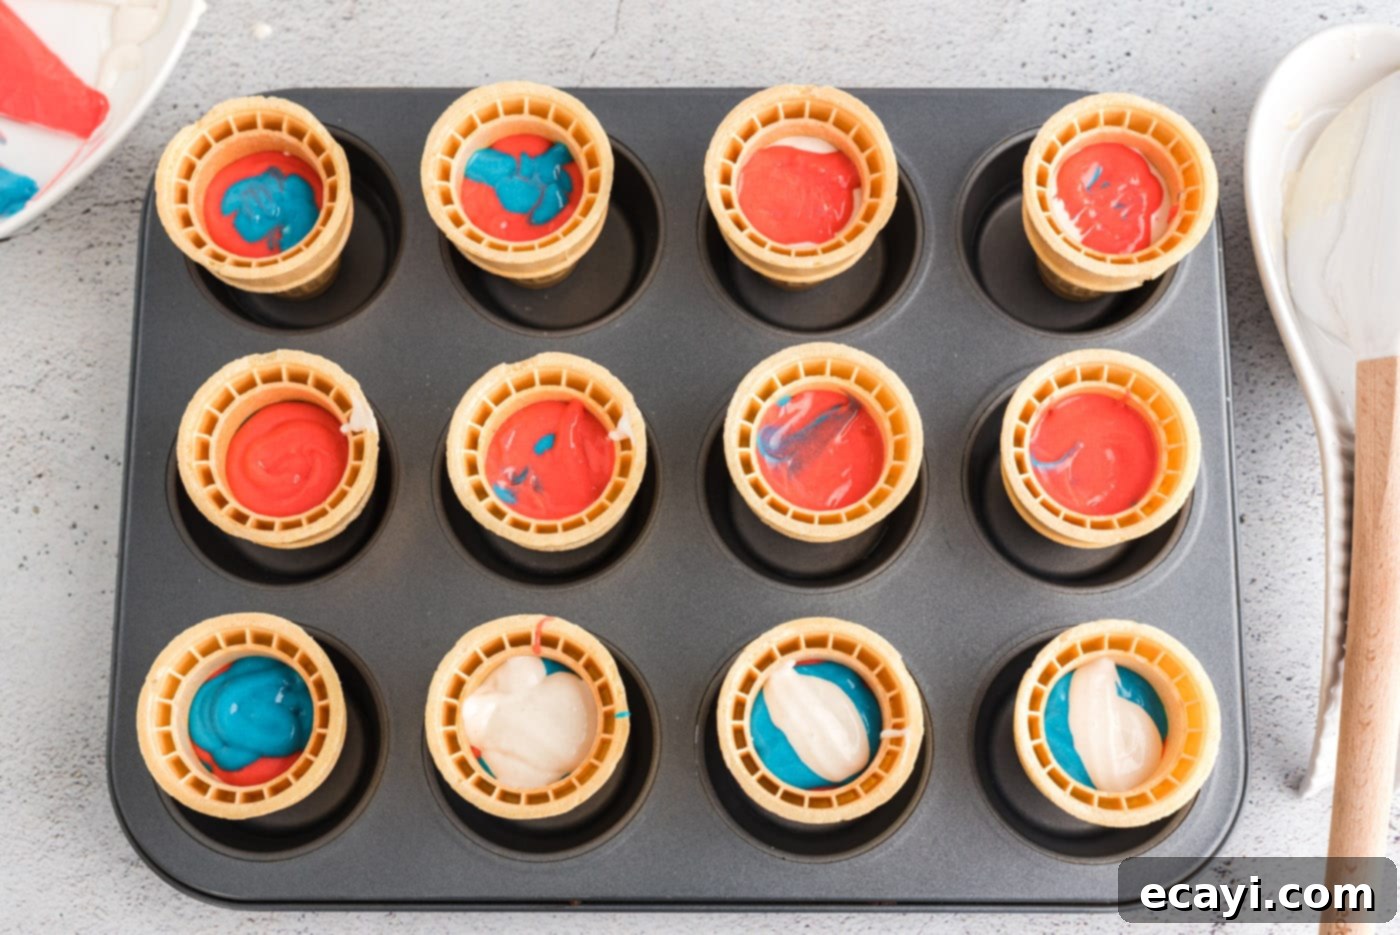
- Arrange your cake cones securely into a standard 12-cup cupcake pan. This helps them stay upright and prevents them from toppling over during baking. Now, for the fun part: layering the colors! The easiest and cleanest way to add the batter to the cones is by transferring each colored batter into separate piping bags (or sturdy ziptop bags with a corner snipped off). Alternating between the red, white, and blue batters, pipe small amounts of each color into the ice cream cones until they are about 3/4 full. This layering technique will create those beautiful striped patriotic layers once baked. Be careful not to overfill, as the cake will rise.


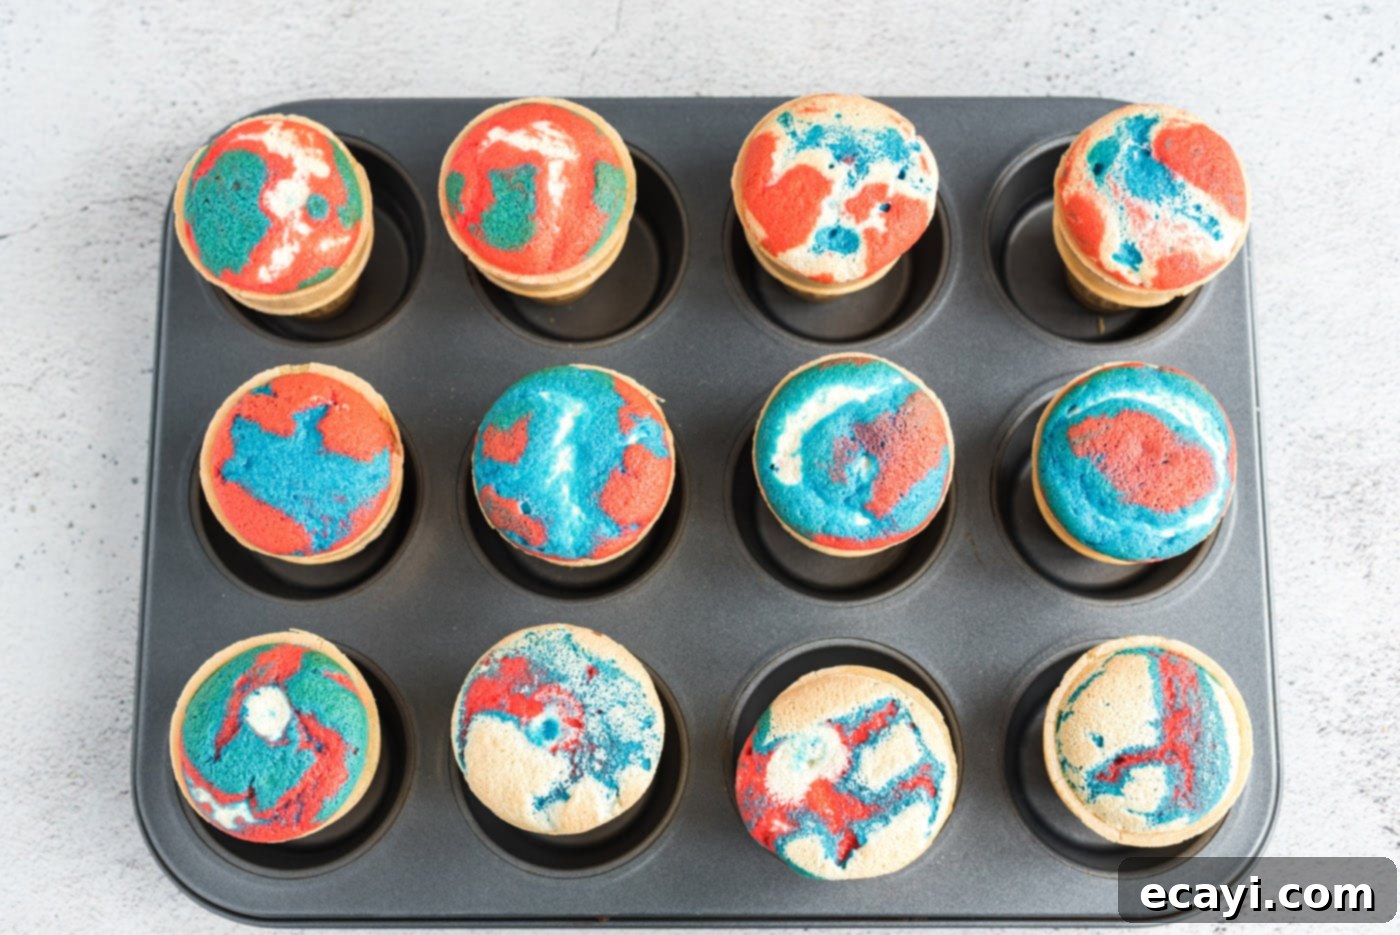
- Bake the cone cupcakes in your preheated oven for approximately 15 minutes, or until a wooden toothpick inserted into the center of a cake comes out clean. This indicates that the cake is fully cooked through. Keep an eye on them to prevent overbaking.

- Once baked, carefully remove the cones from the oven and allow them to cool down.
EXPERT TIP – To prevent the cake cones from becoming soggy, which can happen if steam gets trapped inside, carefully turn each cone upside down while still warm and poke a small hole on the bottom side of the cone. This allows excess steam to escape. Transfer the cones to a wire cooling rack and allow them to fully cool to room temperature before attempting to frost them. This is crucial for maintaining the crispness of the cone and preventing your frosting from melting.
- Now, let’s prepare the luscious buttercream frosting. In the bowl of a standing mixer (or using a hand mixer), beat the softened unsalted butter with the whisk attachment until it becomes wonderfully light and fluffy. This usually takes a few minutes and incorporates air, creating a truly irresistible texture.
- Gradually add the powdered sugar, one cup at a time, mixing slowly at first to prevent a cloud of sugar from escaping the bowl. Once incorporated, gradually increase the speed, ensuring all the powdered sugar is blended into the butter.
- Beat in the vanilla extract until it’s fully combined and fragrant.
- Begin adding the heavy cream. Start with 4 tablespoons, whisking on high speed. Stop and scrape down the sides of the bowl to ensure everything is evenly mixed. Continue adding 3-4 more tablespoons of heavy cream, beating until your desired light and fluffy consistency is achieved. This usually takes about 5 minutes of high-speed beating. The frosting should be easily pipeable but hold its shape.
- Divide the prepared buttercream frosting into three separate bowls, aiming for approximately 2 cups of frosting in each bowl.
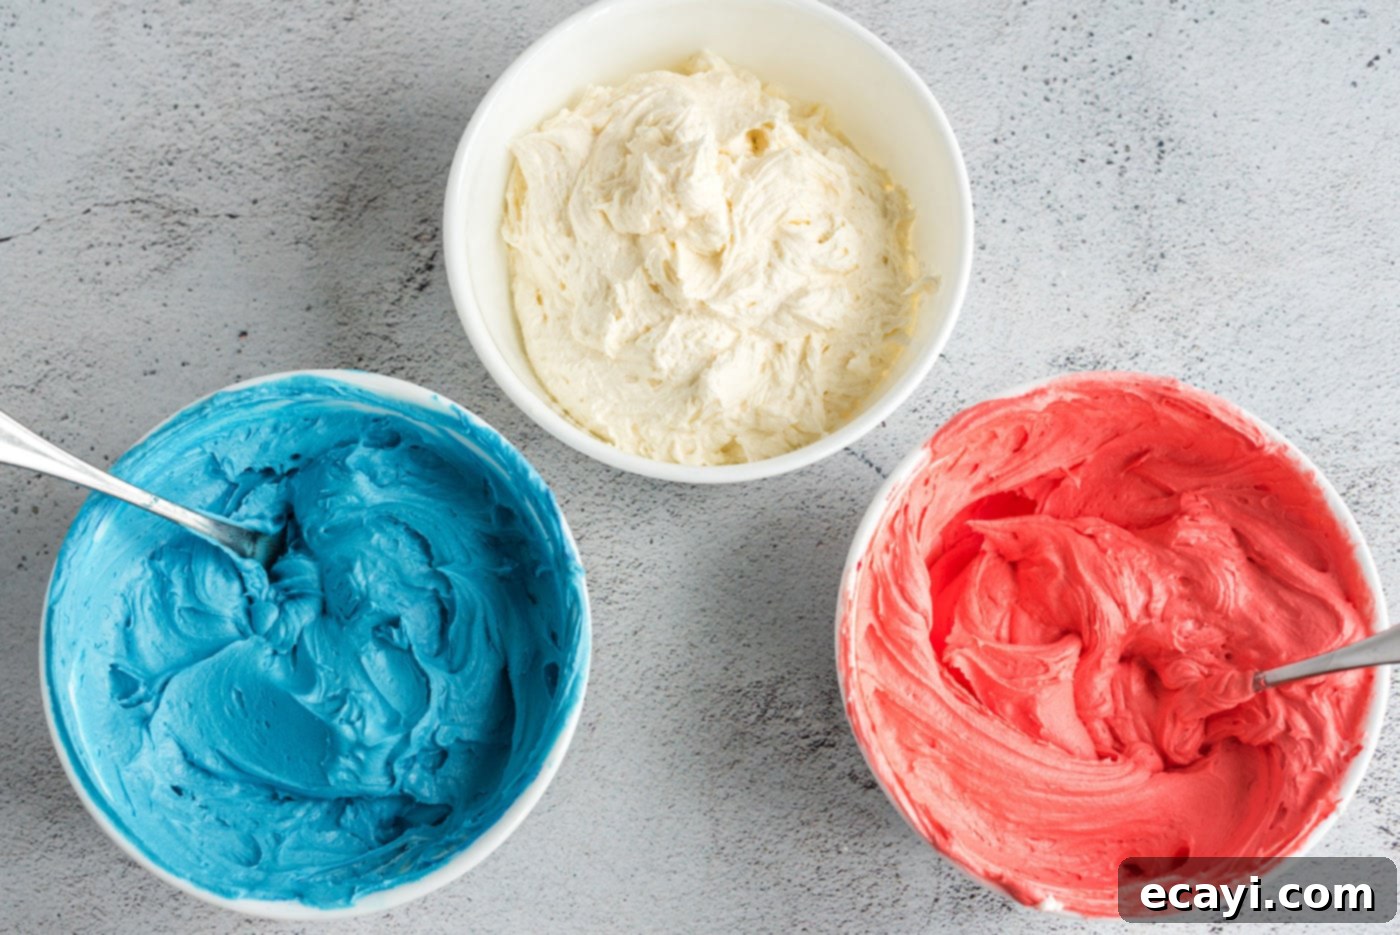
- Leave one bowl of frosting as is for your pristine white layer. To the second bowl, add a small amount of red gel food coloring and mix until you achieve a vibrant red. Similarly, add blue gel food coloring to the third bowl and mix thoroughly until it’s a brilliant blue. Remember, a little gel goes a long way!

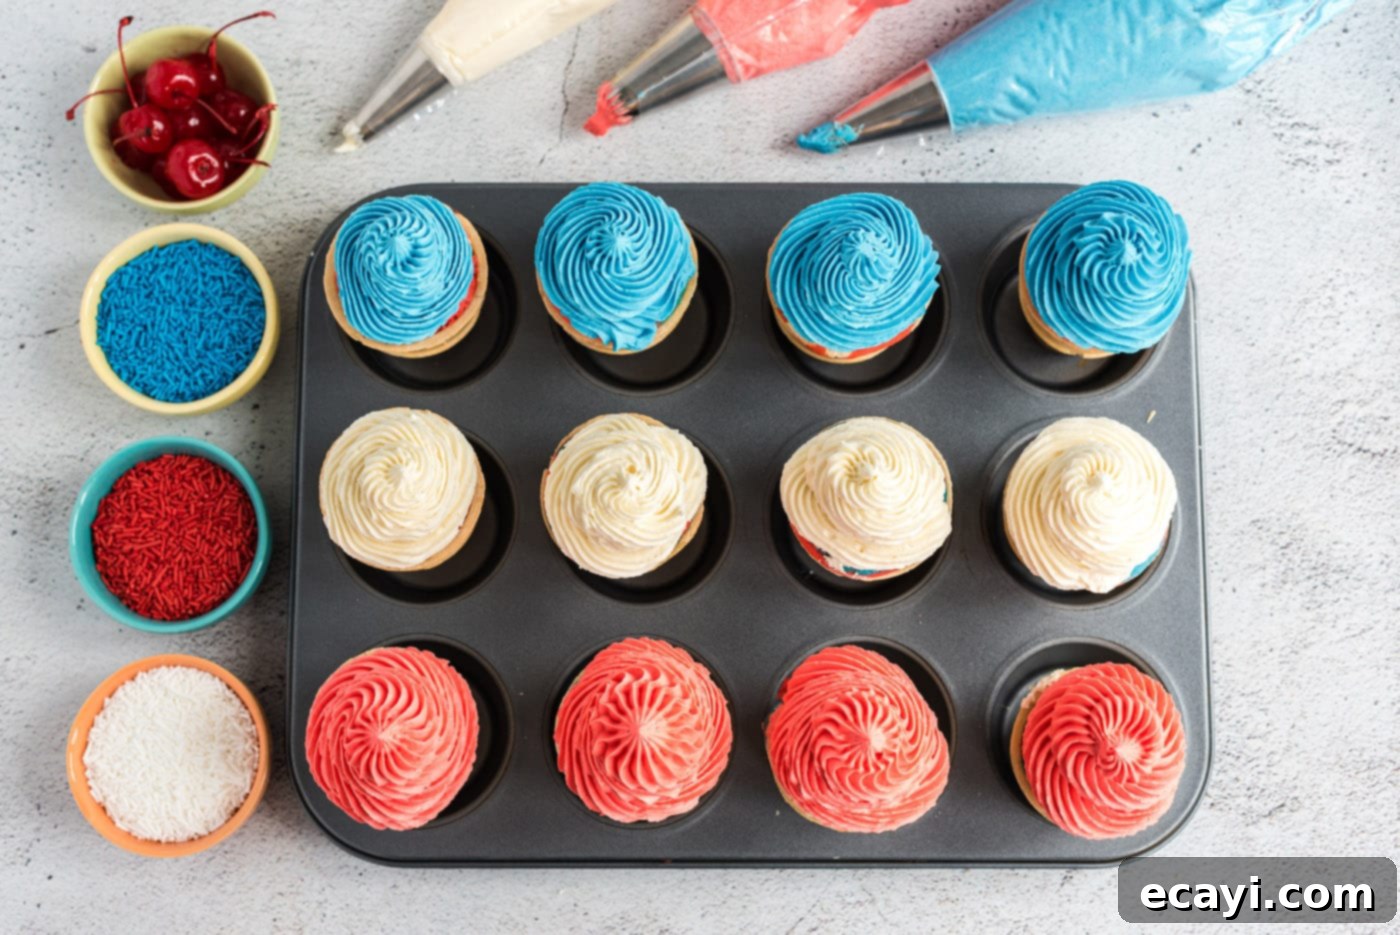
- Transfer each color of frosting into its own individual piping bag fitted with your preferred decorative tip (a star tip works wonderfully for a soft-serve look). Now, unleash your creativity! You can pipe all three colors onto a single cone for a stunning multi-colored swirl, or you can alternate between the cones, using a single color of frosting on each to create a varied display.

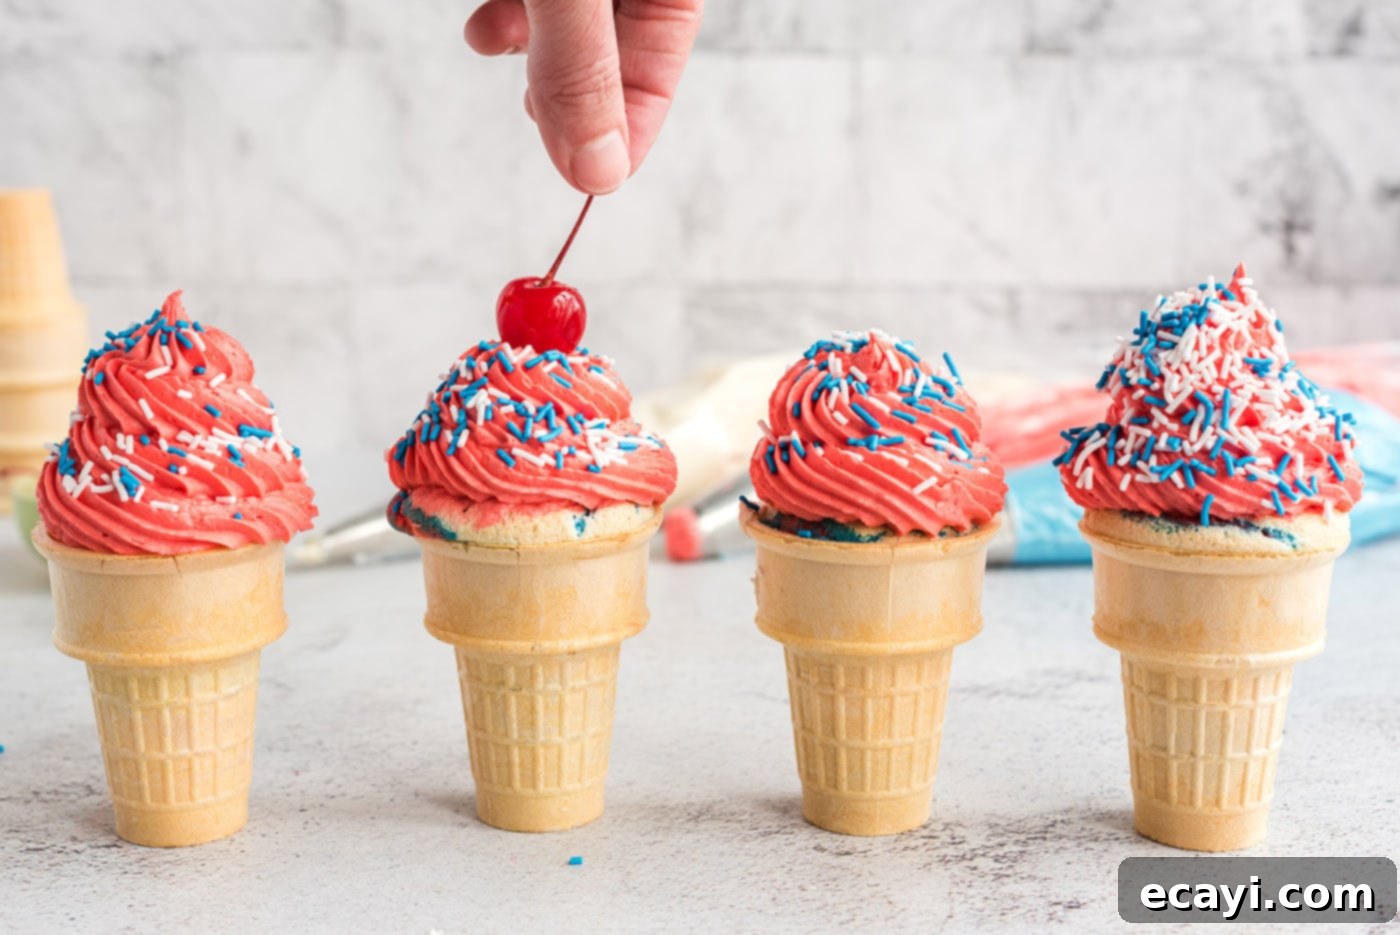
- To complete your masterpiece, generously garnish each cupcake with a sprinkle of red, white, and blue sprinkles. For the perfect finishing touch, top each cone with a festive maraschino cherry, ideally with the stem still on for that classic ice cream sundae appeal.

Frequently Asked Questions & Expert Tips for Success
Absolutely! If you don’t have enough cupcake pans or prefer to use a baking sheet, you certainly can. To ensure the cones remain stable and upright during baking, a clever trick is to cover your baking sheet completely from rim to rim with heavy-duty aluminum foil. Then, using a sharp knife, carefully cut small “X” patterns into the foil, creating snug holes where you can firmly nestle the batter-filled cones. This improvised rack provides a sturdy base, preventing the cones from tipping over as you transfer them in and out of the oven. Alternatively, for those who bake these frequently, you can also purchase a dedicated cupcake cone baking rack, which is designed specifically for this purpose.
You can certainly prepare the cupcake cones in advance, but for optimal freshness and cone crispness, we recommend making them no more than one day prior to your event. Ideally, baking them the night before or the morning of your celebration will yield the best results. Any longer than this timeframe, and you might find the cones beginning to absorb moisture from the cake, potentially becoming a bit soggy. Proper storage (as detailed below) is also crucial for maintaining their quality.
Transporting these charming but delicate cupcake cones can indeed be a bit challenging, but with the right approach, it’s manageable. The most secure method involves using specialized cupcake cone holders or carriers. These are designed to hold each cone individually and prevent movement. If you’re traveling a short distance, placing these holders inside a larger box can add extra protection. Alternatively, if you’ve baked them in a cupcake pan, you can simply place them back into the pan for transport, assuming you have enough pans to accommodate all your creations. For smaller quantities, placing them snugly in a sturdy box, perhaps with some crumpled parchment paper to fill gaps, can also work. Always carry them on a flat, stable surface, or have someone hold them carefully in their lap during transit.
Preventing soggy cones is a common concern and quite easy to address with a simple trick. After baking, once the cones are cool enough to handle, gently poke a small hole in the very bottom of each cone. This tiny aperture allows any trapped steam from the warm cake to escape, preventing it from condensing and making the cone soft. Furthermore, it’s essential to allow the cones to cool completely on a wire cooling rack or a specialized cupcake cone baking rack. Air circulation around all sides of the cone ensures that moisture dissipates thoroughly, maintaining that delightful crispness.
Proper storage is crucial for keeping your ice cream cone cupcakes at their best. Once fully cooled and frosted, the ideal way to store them is in a cupcake pan or a dedicated cupcake cone holder, uncovered, at room temperature. This might seem counterintuitive for frosted items, but storing them in the refrigerator, freezer, or covering them tightly with plastic wrap or aluminum foil can actually cause problems. The change in temperature and lack of air circulation will lead to condensation, making both the cones and the frosting “sweat” and become unpleasantly soggy. Therefore, always store them in a cool, dry place away from direct sunlight and humidity for the best texture and flavor.
While a white cake mix is highly recommended for achieving the most vibrant and true red, white, and blue colors, you can certainly experiment with other cake flavors if you prefer. However, be aware that yellow cake mixes, for instance, might alter the appearance of your “white” layer, making it look more cream or off-white, and could subtly affect the vibrancy of the red and blue hues. If you choose a flavored cake mix, try to select one with a lighter color to minimize impact on your patriotic theme. Always remember that lighter colored batters will yield the most striking results for this specific design.
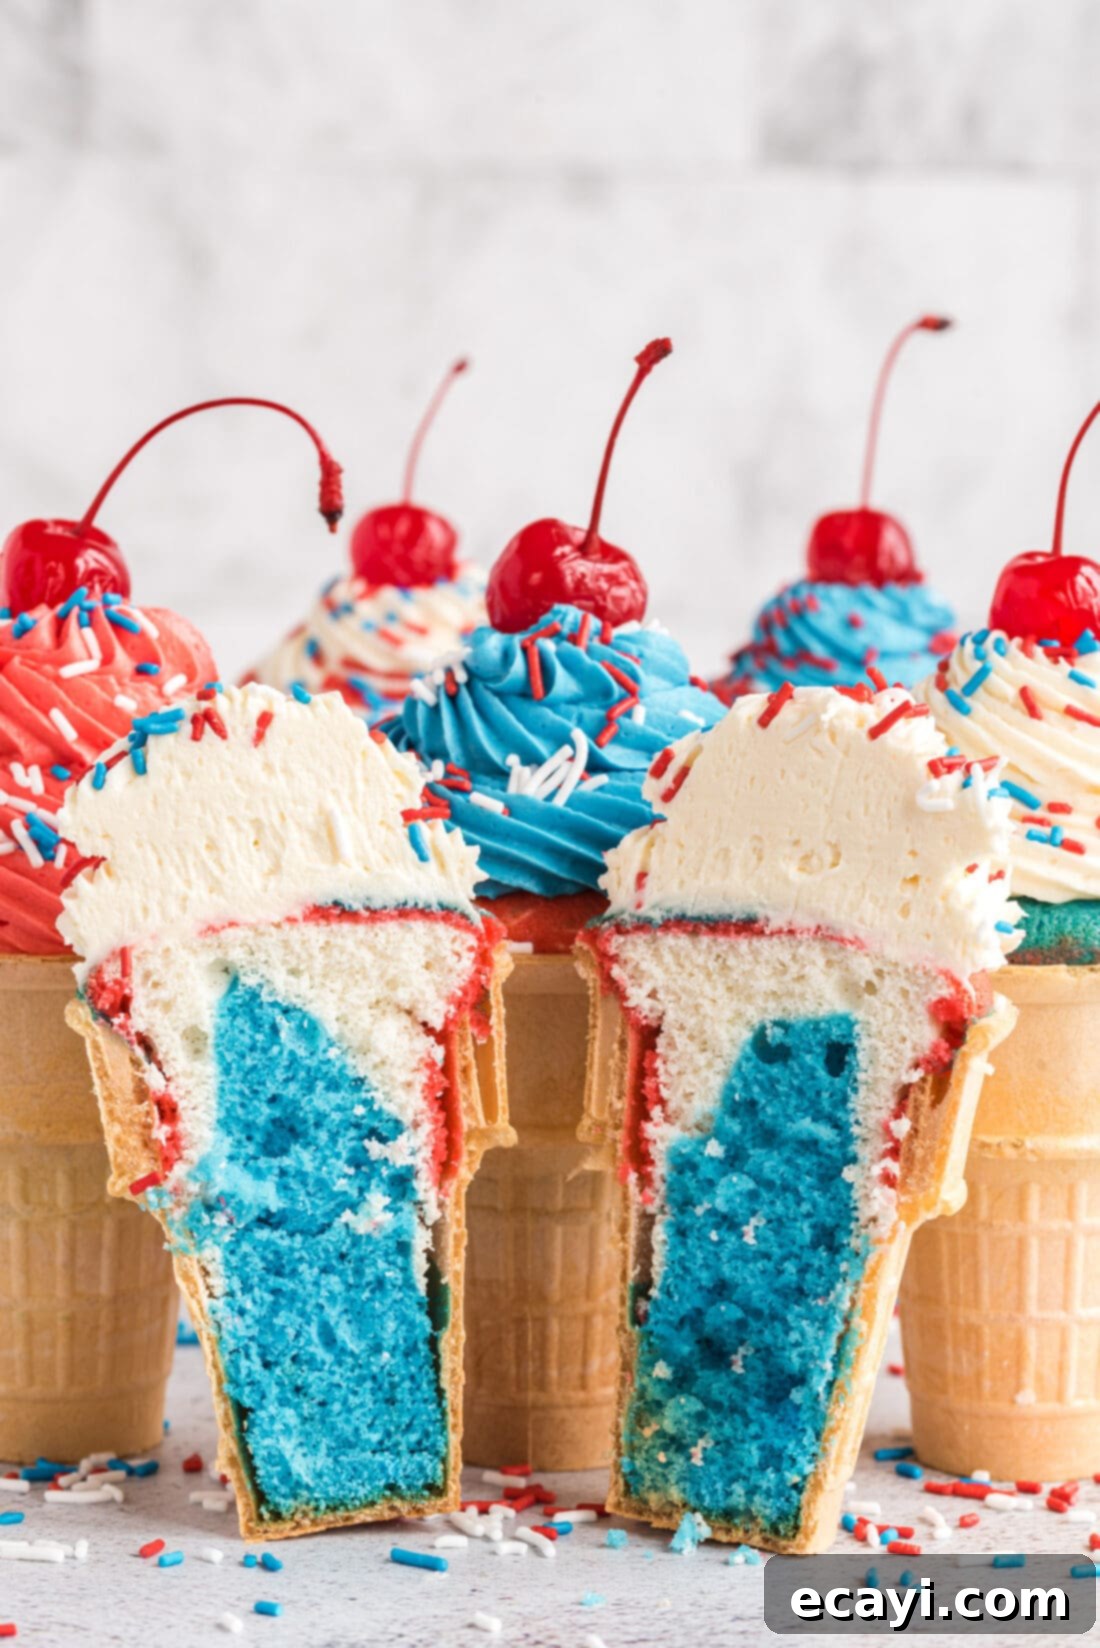
Creative Serving & Customization Suggestions
These versatile ice cream cone cupcakes offer endless possibilities for customization, allowing you to adapt them for various occasions, not just patriotic holidays. Here are a few creative ways to serve and personalize your delicious creations:
- Solid Color Presentation: Instead of layering the colors within a single cone, you can individually pour each colored batter (red, white, or blue) into its own separate cone. This creates striking solid-colored cake cones, which can then be frosted in contrasting colors for an even bolder visual impact.
- Contrasting Frosting Colors: If you opt for solid-colored cake cones, get creative with your frosting! For example, a red cake cone could be topped with a swirl of blue frosting and white sprinkles, while a blue cake cone might feature white frosting and red sprinkles. Mix and match to create a truly dynamic and appealing display.
- Swirled Frosting Technique: For an effortlessly elegant look, try adding all three different colored frostings (red, white, and blue) into a single piping bag. When piped, they will emerge in a beautiful, mesmerizing swirl, perfectly mimicking the look of soft-serve ice cream and enhancing the patriotic theme without extra effort.
- Beyond the 4th of July: This clever dessert concept isn’t limited to patriotic holidays! Use this as a fantastic base recipe for any celebration. Simply swap out the red and blue food coloring for colors that match a birthday party theme, school spirit colors, a favorite sports team, baby showers, or even Christmas and Halloween themes. The possibilities are truly limitless, making this a go-to recipe for any festive occasion.
More Festive Patriotic Recipes to Celebrate!
If you’re looking for more delicious and visually stunning recipes to complement your patriotic celebrations, check out these other fantastic ideas:
- Taco Salad Flag – A savory and creative flag display!
- Patriotic Candy Bark – Easy, colorful, and perfect for sharing.
- 4th of July Jello Shots – A grown-up treat for your festivities.
- American Flag Brownies – A classic dessert with a patriotic twist.
- Patriotic Charcuterie Board – An impressive spread for entertaining.
- Patriotic Mini Cheesecakes – Elegant individual desserts.
- Red White and Blue Poke Cake – A moist cake bursting with color.
- Patriotic Vodka Lemonade Slushie – A refreshing drink for adults.
I absolutely adore sharing my baking and cooking adventures with all of you! It can be a challenge to remember to check back every day for new recipes, which is why I offer a convenient newsletter. Each time a new recipe is posted, you’ll receive it directly in your inbox. Simply subscribe today and start enjoying your free daily recipes, keeping your culinary inspiration fresh and exciting!

Patriotic Ice Cream Cone Cupcakes
IMPORTANT – There are often Frequently Asked Questions within the blog post that you may find helpful. Simply scroll back up to read them!
Print It
Pin It
Rate It
Save ItSaved!
Ingredients
- 18 ice cream cake cones
- 15.25 ounce white cake mix PLUS ingredients listed on the back of the box
- blue and red gel food coloring
Buttercream Frosting
- 2 cups unsalted butter softened
- 2 teaspoons vanilla extract
- 8 cups powdered sugar
- 8 Tablespoons heavy whipping cream
Garnish
- maraschino cherries stem on
- red, white, and blue sprinkles
Things You’ll Need
-
Cupcake pan
-
Hand mixer or stand mixer
-
Mixing bowls
-
Piping bags
Before You Begin
- Always start with a SMALL amount of gel food coloring when tinting both the cake batter and the buttercream frosting. Gel food color is incredibly concentrated and goes a long way; you’ll typically need very little to achieve a bright, vibrant color.
- When layering the different colored cake batters into the cones, exercise a bit of restraint. If you add too many distinct layers or overwork the batter too much, the colors can blend together and become muddy, losing their crisp, patriotic definition.
- For optimal storage, once the ice cream cone cupcakes are fully cooled and frosted, place them in a cupcake pan or a dedicated cupcake cone holder. Store them uncovered at room temperature. It’s crucial to avoid placing them in the refrigerator, freezer, or covering them with plastic wrap or aluminum foil, as the trapped moisture will cause the cones and frosting to “sweat,” leading to an undesirable soggy texture. Ensure they are stored in a cool, dry environment.
- These cupcake cones can be prepared up to a day in advance. For the best flavor and cone crispness, it’s preferable to bake them the night before or the morning of your event. Storing them for any longer might result in the cones losing their crisp texture and becoming soggy.
- If you’re pressed for time or prefer a simpler approach, you can easily substitute the homemade buttercream frosting with a good quality, store-bought white frosting. Just be sure to use gel food coloring to tint it.
- You will most likely have some leftover buttercream frosting. Don’t let it go to waste! You can store it in air-tight containers in the refrigerator for 3-4 days, or freeze it for up to 2 months. Simply bring it to room temperature and re-whip before using.
Instructions
-
Preheat oven to 350F (175°C).
-
Prepare the dry white cake mix according to package instructions.
-
Separate the cake batter into 3 equal bowls. Add a small amount of red gel food coloring to one bowl, and a small amount of blue gel food coloring to another, leaving one of the bowls plain white. Stir gently until colors are vibrant.
-
Place cake cones into a cupcake pan. Alternating between colors, pour the batter into your ice cream cones filling until they are about 3/4 full. For best results and less mess, use piping bags or ziptop baggies with the corners snipped off to dispense the batter.
-
Bake for 15 minutes, or until a toothpick inserted into the center comes out clean. Remove the cones from the oven. Once the cones are partially cooled, gently turn them upside down and poke a small hole into the bottom side of each cone to allow steam to escape and prevent them from becoming soggy. Allow the cupcakes to fully cool to room temperature on a wire cooling rack or in the pan before frosting.
Making the Buttercream Frosting
-
In the bowl of a standing mixer with a whisk attachment (or using a hand mixer), beat the softened unsalted butter until it is light and fluffy.
-
Gradually add the powdered sugar, mixing slowly at first, then gradually increasing the speed to ensure the powdered sugar is fully incorporated and stays within the mixing bowl.
-
Beat in the vanilla extract until well combined and fragrant.
-
Add 4 tablespoons of the heavy cream and whisk on high speed. Scrape down the sides of the bowl. Add an additional 3-4 tablespoons of heavy cream, beating until the desired light, fluffy, and easily pipeable consistency is achieved (approximately 5 minutes of high-speed beating).
-
Divide the finished buttercream frosting into three separate bowls, aiming for approximately 2 cups in each bowl.
-
Leave one bowl as white frosting. Add a small amount of red gel food coloring to the second bowl and mix thoroughly to combine. Then, add blue gel food coloring to the third bowl and mix until a vibrant blue is achieved.
-
Transfer each colored frosting to its own individual piping bag, fitted with your desired decorative tip (e.g., a star tip). You can pipe all three colors onto one cone for a swirled effect or alternate between cones using a single color for each.
-
For the final flourish, garnish generously with red, white, and blue sprinkles, and top each patriotic masterpiece with a vibrant maraschino cherry.
Nutrition
The recipes on this blog are meticulously tested with a conventional gas oven and gas stovetop to ensure accuracy. It’s important to acknowledge that some ovens, particularly older models, can heat and bake inconsistently. To achieve the best results, using an inexpensive oven thermometer can help verify that your oven is consistently reaching and maintaining the proper temperature. If you utilize a toaster oven or a countertop oven, please bear in mind that their heat distribution may differ from a full-sized conventional oven, potentially requiring adjustments to your cooking and baking times. For recipes prepared with specialized appliances like pressure cookers, air fryers, slow cookers, or others, a direct link to the specific appliances we use is typically provided within each respective recipe. When it comes to baking recipes where measurements are given by weight, please note that substituting volume (cups) for weight may lead to varied results, and we cannot guarantee the same level of success with that method.
