Easy & Festive Red, White, and Blue Poke Cake: Your Go-To Patriotic Dessert Recipe
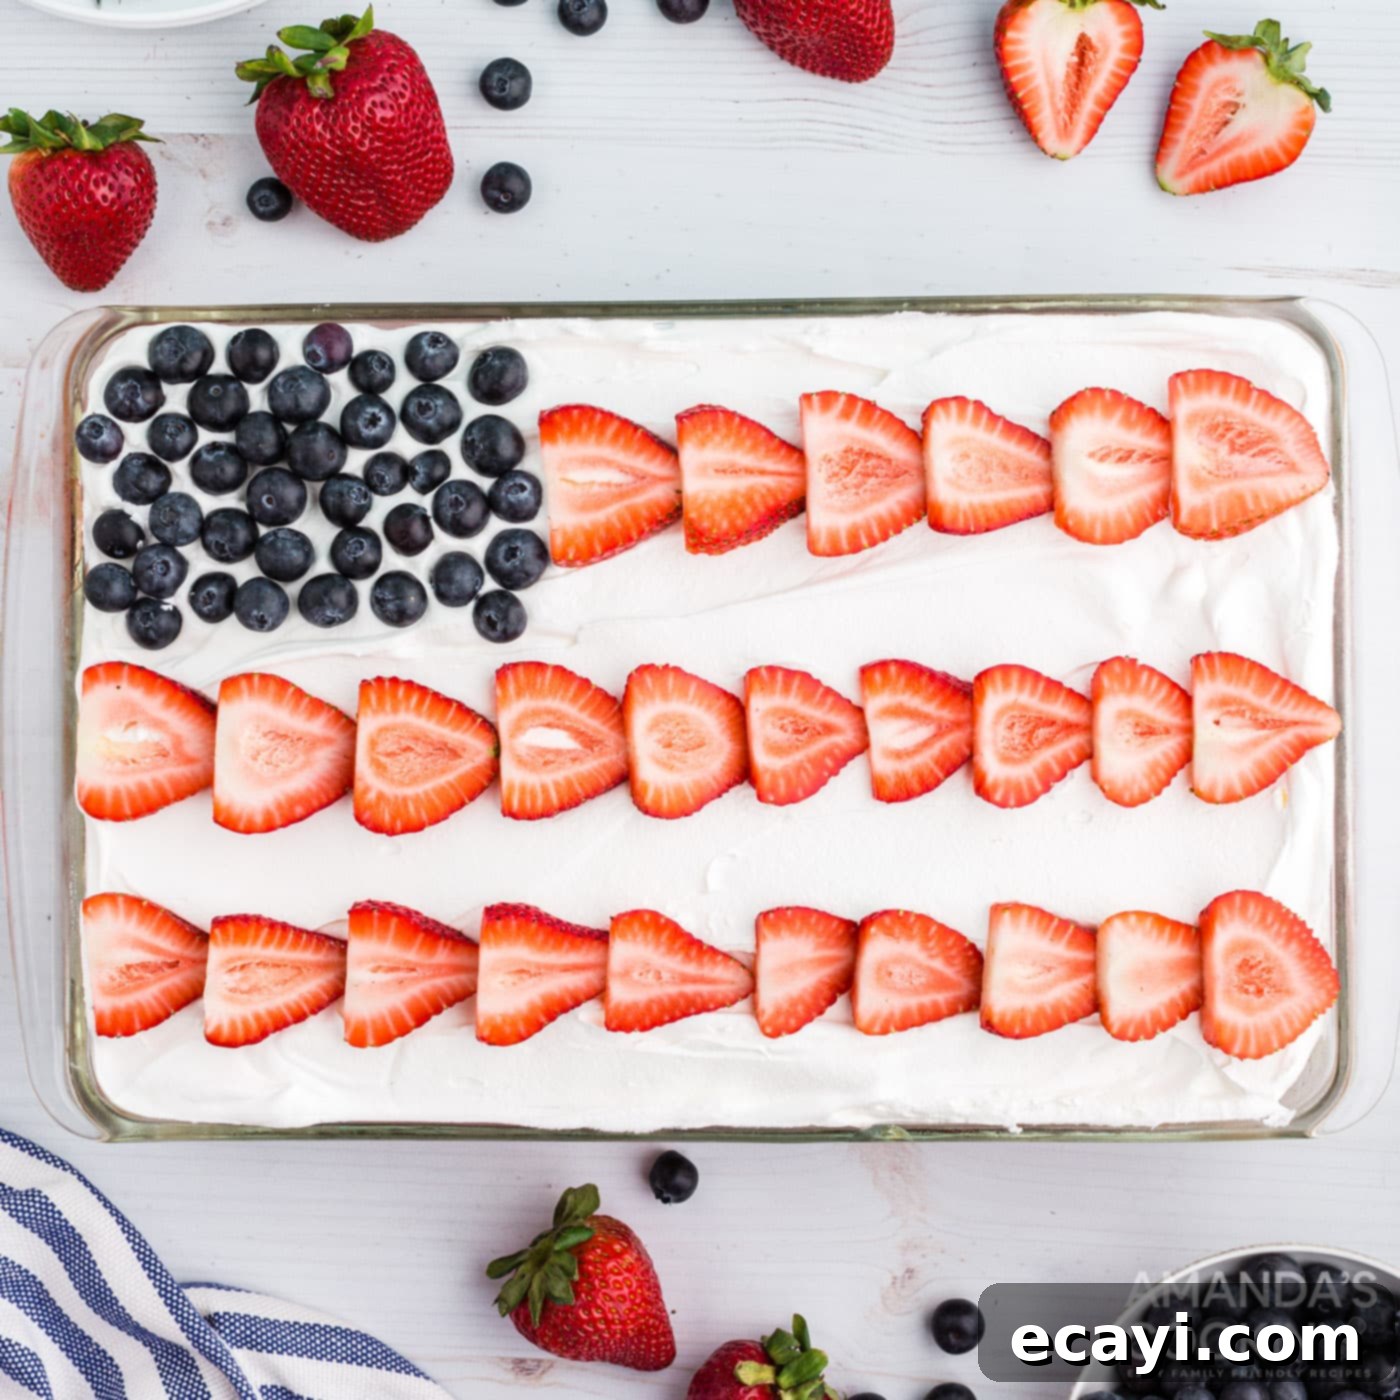
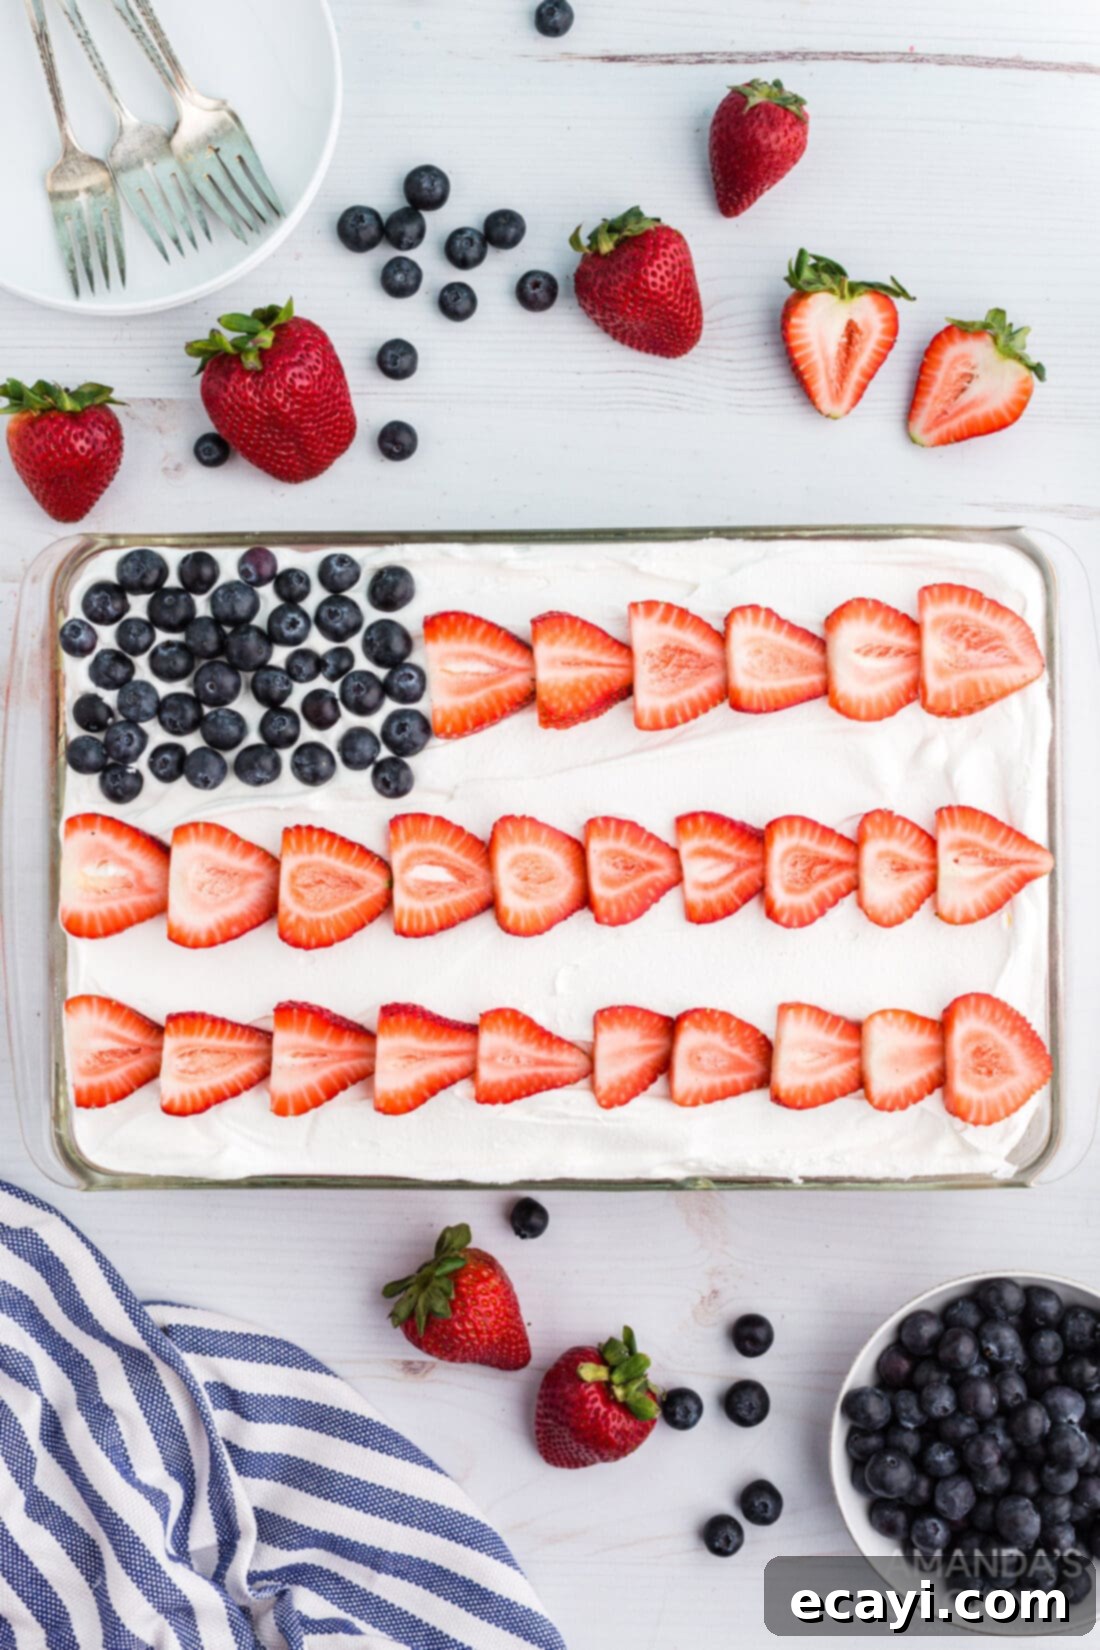
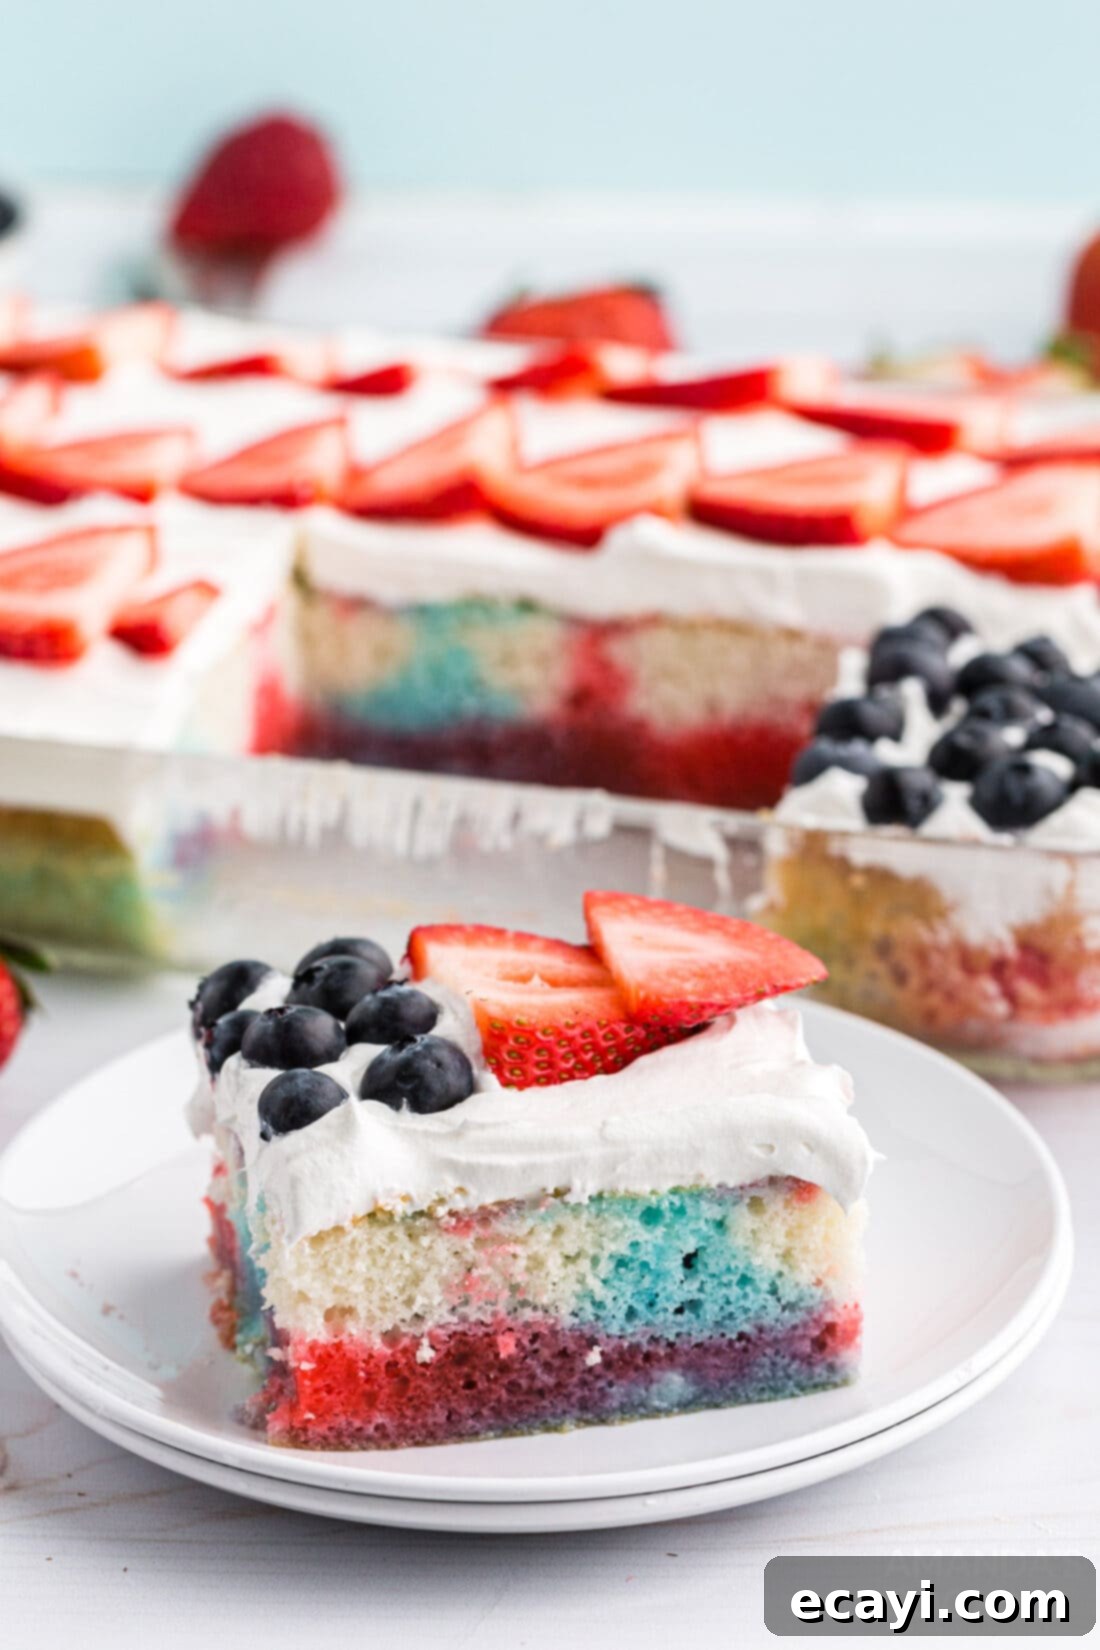
Celebrate national holidays and summer gatherings with this incredibly easy and visually stunning Red, White, and Blue Poke Cake. This festive dessert begins with a simple white cake mix, expertly infused with vibrant blue and red gelatin, then crowned with a fluffy layer of Cool Whip, and finally adorned with fresh, juicy summer berries arranged to resemble the American flag. It’s a guaranteed crowd-pleaser that combines simplicity with a dazzling patriotic presentation, perfect for Memorial Day, the Fourth of July, or any occasion that calls for a touch of national pride.
Why This Patriotic Poke Cake Recipe is a Must-Try
There’s a special joy in bringing a homemade dessert to a holiday potluck or family get-together, and this Red, White, and Blue Poke Cake perfectly fits the bill. Its vibrant colors and delightful flavors make it an ideal centerpiece for any patriotic celebration, be it Memorial Day, the Fourth of July, or Veterans Day. What truly sets this recipe apart is its incredible simplicity combined with an undeniably impressive outcome. You don’t need to be a baking expert to create a show-stopping dessert that will earn rave reviews.
The magic of poke cakes lies in their humble yet effective ingredients: a boxed cake mix for convenience, colorful Jell-O for a moist and flavorful infusion, and a creamy whipped topping for a light, airy finish. This combination not only ensures ease of preparation but also results in a cake that is exceptionally moist, tender, and bursting with fruity flavor. The gelatin seeps into the holes poked in the baked cake, creating pockets of delightful color and moisture that elevate a standard cake mix into something extraordinary. This method guarantees a super moist cake every time, making it much more exciting than a traditional frosted cake.
We’re no strangers to the charm of poke cakes; they’re a consistent favorite in our kitchen due to their versatility and foolproof nature. If you love this concept, you might also enjoy our Watermelon Poke Cupcakes for a fun summer twist, the comforting flavors of our Banana Pudding Poke Cake, or the classic indulgence of our Boston Cream Poke Cake. This Red, White, and Blue version, however, holds a special place for its patriotic appeal and ability to brighten any festive table. Its visual impact is simply unmatched for holiday gatherings, transforming a simple dessert into a celebratory statement.
Essential Ingredients for Your Patriotic Poke Cake
Crafting this festive dessert requires just a few readily available ingredients, most of which you likely already have in your pantry. For precise measurements, detailed quantities, and comprehensive instructions, remember to refer to the printable recipe card located at the end of this post.
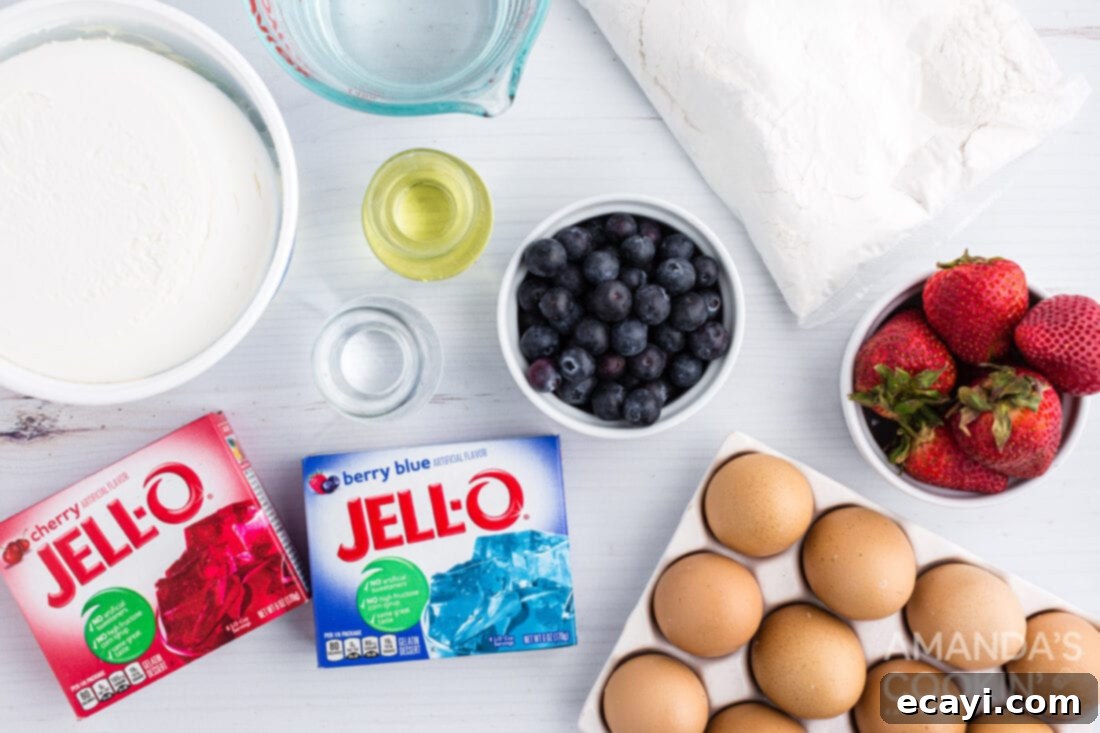
JELL-O: To achieve the iconic red and blue hues, we opted for berry blue and cherry gelatin. These flavors provide a vibrant contrast and a delightful fruity taste that complements the white cake. However, don’t hesitate to experiment with other red options like strawberry or raspberry, similar to our popular raspberry poke cake. A crucial point to remember is that you will be using UNPREPARED Jell-O powder for this recipe. The specific quantities of boiling water and ice water needed for the gelatin mixture are clearly outlined in the recipe card, so you don’t need to follow the instructions on the Jell-O box for making standard Jell-O. We’ve found that using approximately 1.5 ounces of each Jell-O flavor provides optimal color and moisture without saturating the cake excessively. If too much liquid Jell-O is used, it can pool at the bottom of the cake, making it soggy. Any leftover prepared Jell-O can be transformed into delicious Jell-O cups or other fun, festive treats!
CAKE: The foundation of this patriotic dessert is a classic white cake mix. Choosing a white cake is key because its light color beautifully allows the red and blue Jell-O colors to shine through, creating a striking visual contrast. For an authentic “red, WHITE, and blue” effect, a top tip is to use only egg whites when preparing your cake batter, if your cake mix calls for whole eggs. Egg yolks tend to impart a yellowish tint to the cake, which would detract from the pure white background needed for the flag design. Alternatively, some cake mixes specifically state “white cake” and only require egg whites, making the process even simpler. While a boxed mix ensures convenience and consistent results, you can certainly use your favorite homemade white cake recipe if you prefer.
TOPPING: For the frosting layer, we highly recommend Cool Whip due to its exceptional readiness, light texture, and remarkable stability. It holds its shape beautifully, making it perfect for decorating and ensuring your patriotic design stays intact throughout your event. Cool Whip is also less prone to melting than traditional whipped cream, especially when served outdoors. If you prefer a homemade touch, you are absolutely welcome to prepare your own whipped topping from heavy cream. Simply whip cold heavy cream with a touch of powdered sugar and vanilla until stiff peaks form. To create the iconic American flag design on top, we primarily use fresh strawberries and blueberries. Strawberries provide the vibrant red stripes, while blueberries form the “star” field. For variety, or if you simply prefer them, fresh blackberries and raspberries can also be incorporated to achieve a similar festive look.
Step-by-Step Guide: How to Make Red, White and Blue Poke Cake
These step-by-step photos and detailed instructions are designed to help you visualize each stage of making this delightful poke cake. For a convenient printable version of this recipe, complete with precise measurements and comprehensive instructions, simply Jump to Recipe at the bottom of the page.
- Prepare Your Oven: Begin by preheating your oven to 350°F (175°C) or the specific temperature indicated on your chosen cake mix package instructions. This ensures your oven is at the correct temperature for even baking.
- Mix the Cake Batter: In a large mixing bowl, combine the white cake mix with the eggs, vegetable oil, and water according to the exact instructions and quantities provided on your cake mix package. Beat until the batter is smooth and well combined, being careful not to overmix, which can result in a tough cake.
- Bake the Cake: Lightly grease a 9×13 inch glass baking dish. Pour the prepared cake batter evenly into the greased dish. Bake for approximately 30 minutes, or until a wooden skewer or toothpick inserted into the center comes out clean. Baking times may vary slightly, so keep an eye on your cake.
- Initial Cooling: Once baked, remove the cake from the oven and allow it to cool in the baking dish for 5-10 minutes. This short cooling period helps the cake firm up slightly before you begin the poking process.
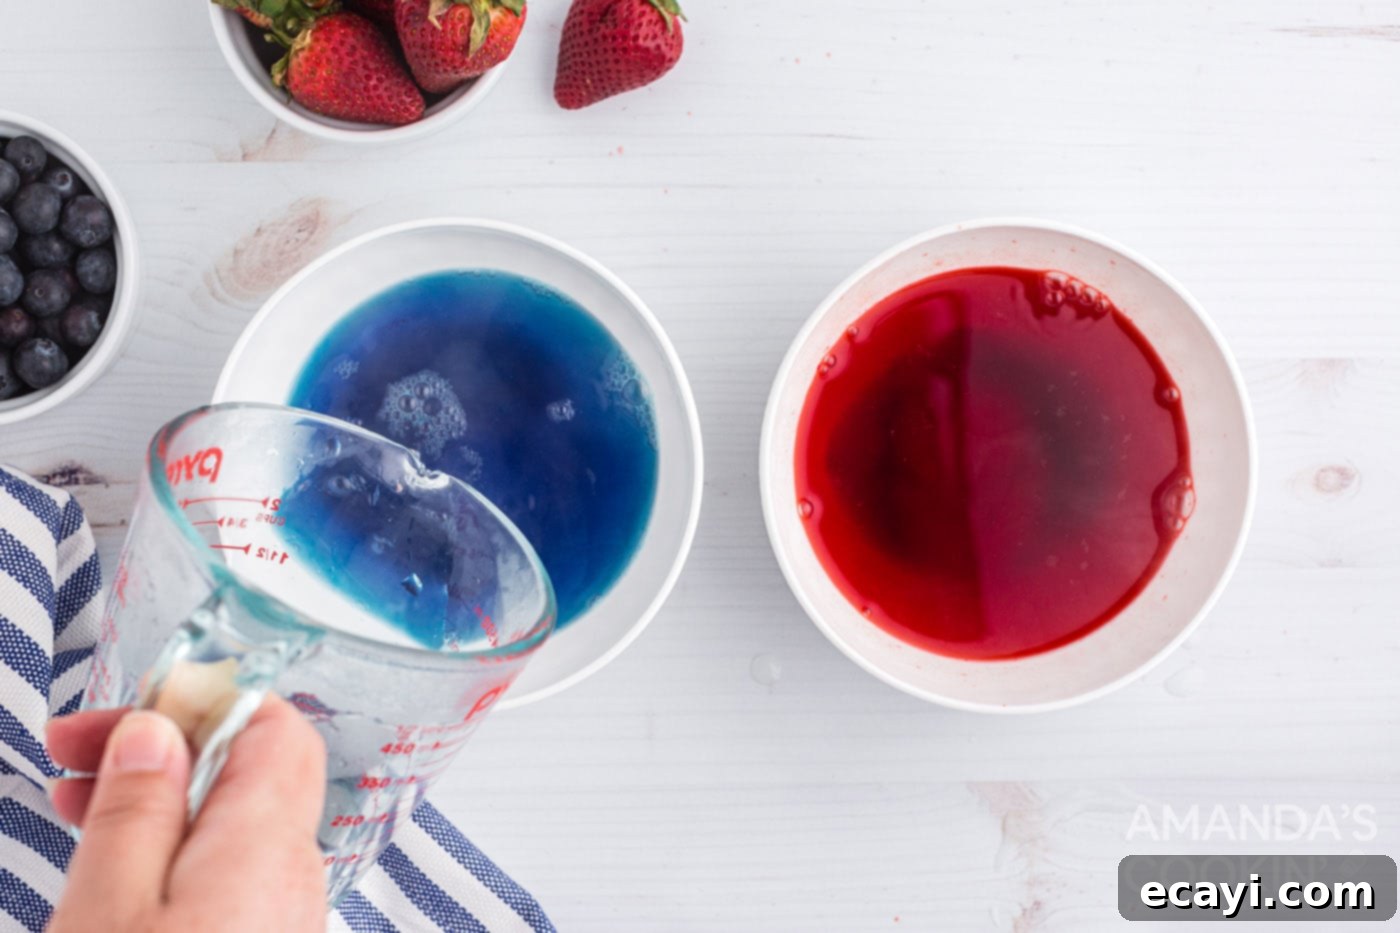
- Prepare the Jell-O Mixtures: While the cake is cooling, prepare your gelatin. For each color of Jell-O (red and blue), dissolve one 3 oz package of unprepared Jell-O powder in 1 cup of boiling water. Stir vigorously until the gelatin powder is completely dissolved. Then, stir in 1 cup of ice water to cool the mixture down rapidly. Repeat this process for both the red and blue Jell-O. Ensure the ice water melts completely.

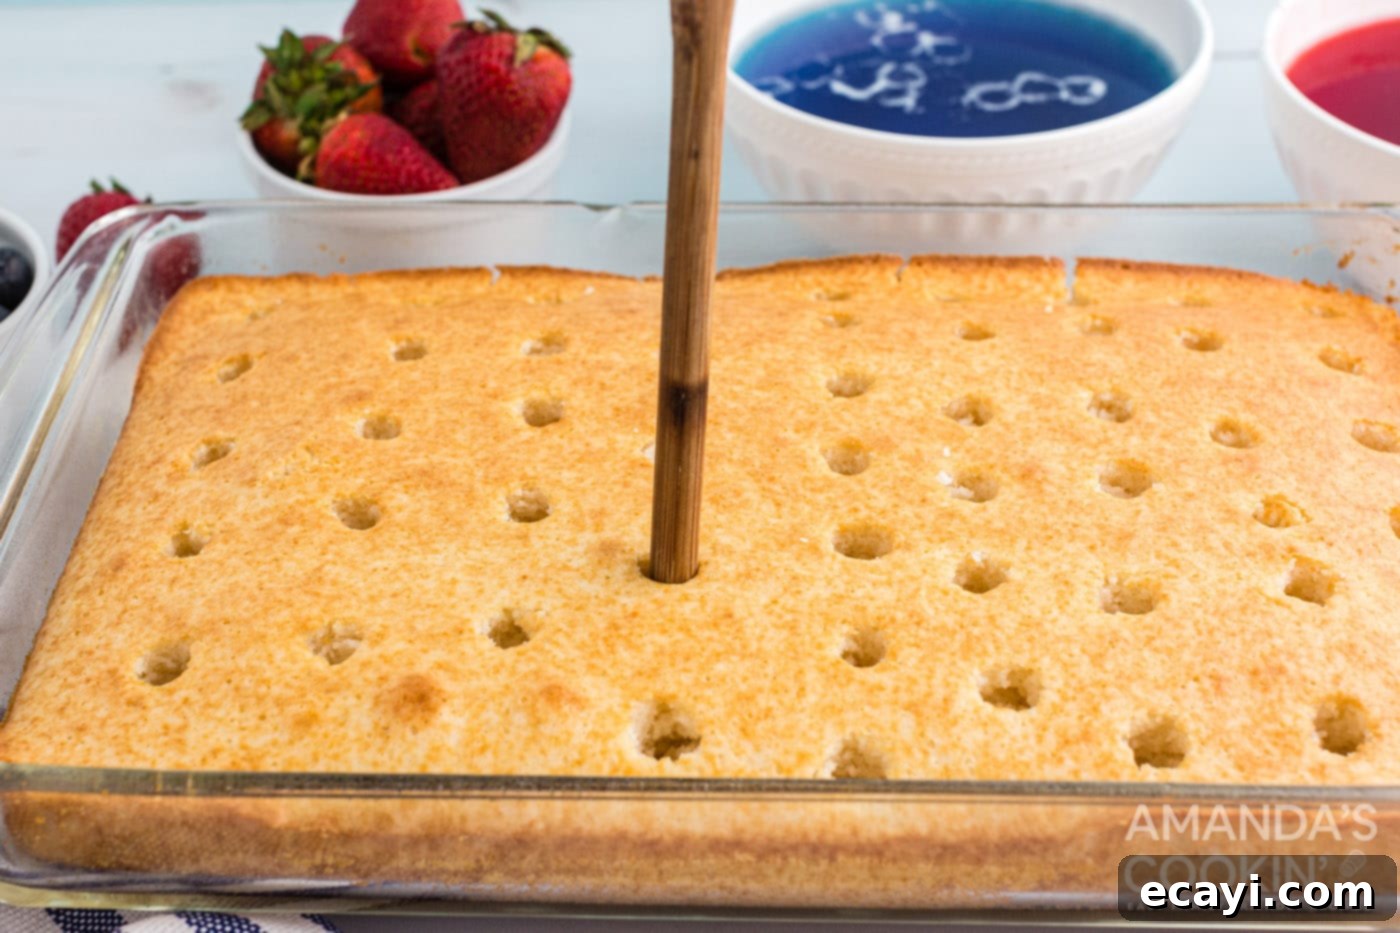
- Poke the Cake: After the initial cooling period, use the handle of a wooden spoon, a chopstick, or even the blunt end of a clean dowel to poke holes all over the surface of the cake. Aim for holes that are about ¾ of the way through the cake’s depth and spaced roughly ½ to 1 inch apart. Ensure the holes are deep enough to allow the Jell-O to penetrate but not so deep they go through to the bottom of the pan.

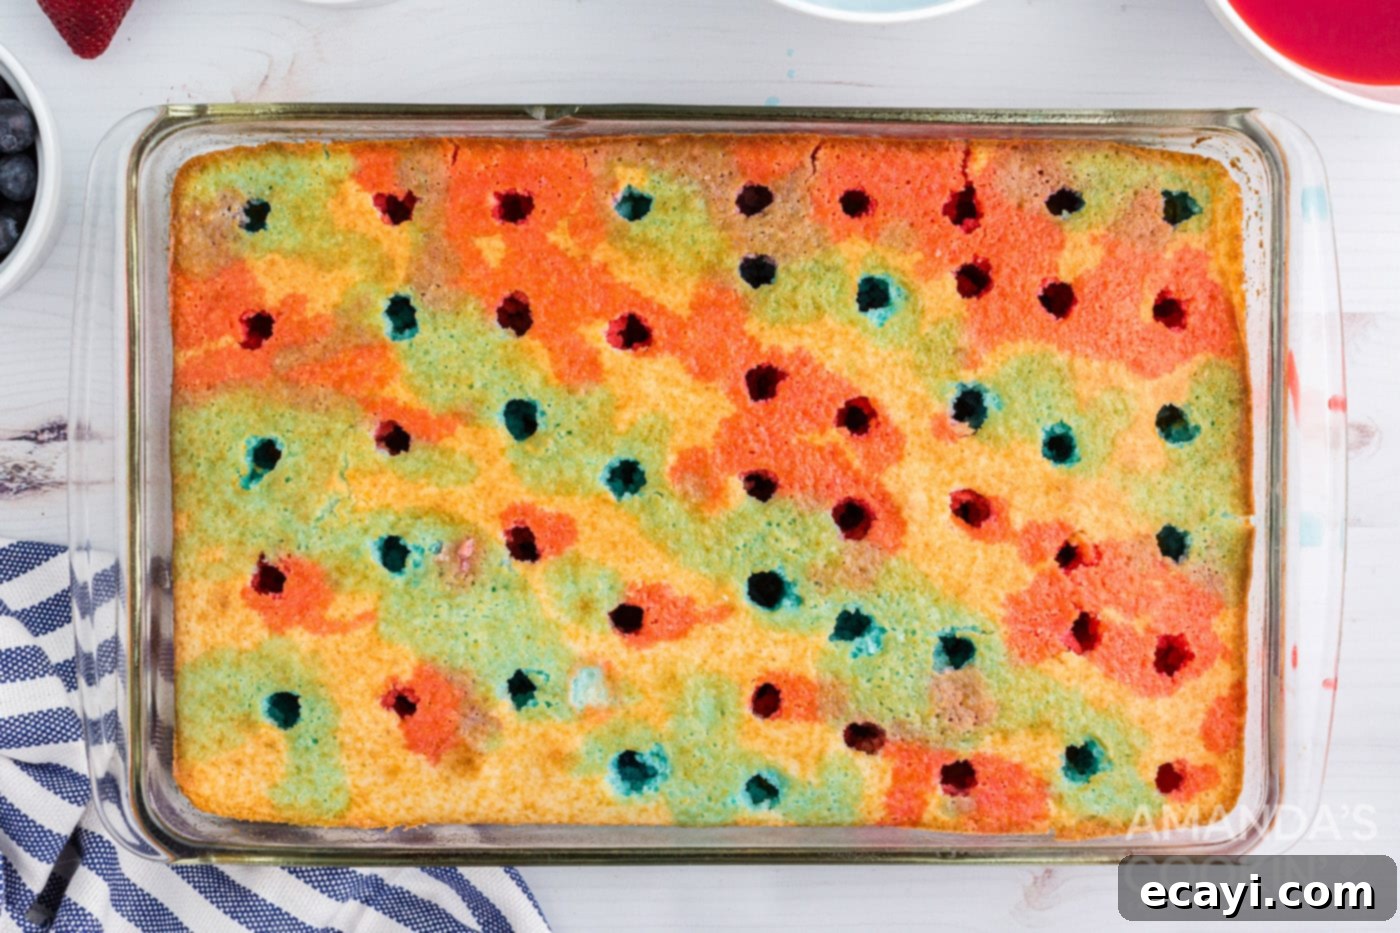
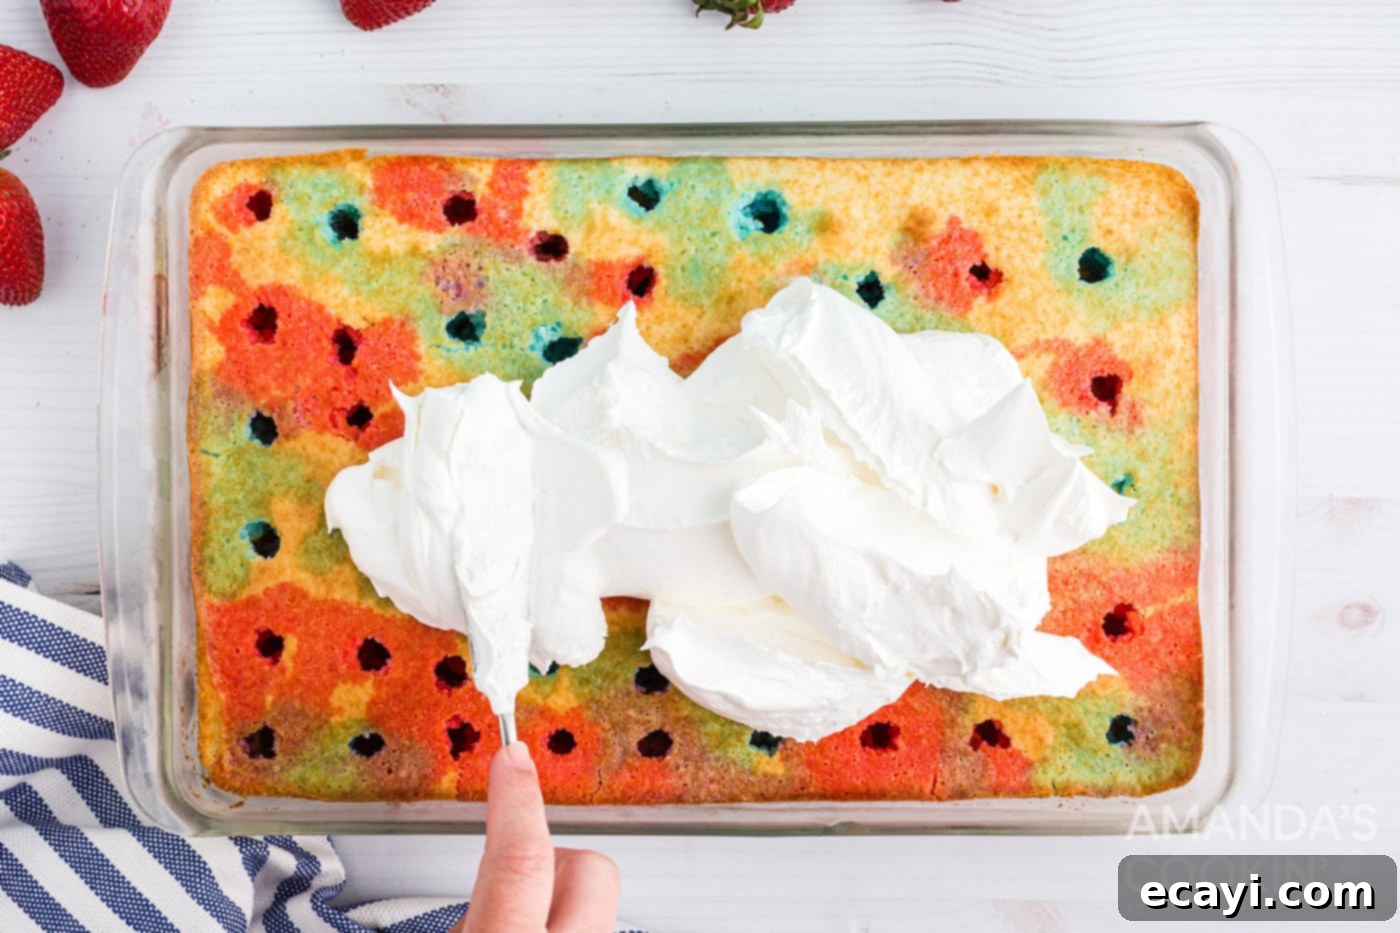
- Infuse with Jell-O: Carefully pour the prepared blue and red Jell-O liquids over the poked cake. To create the striped effect, alternate rows of blue and red Jell-O, drizzling the liquid heavily over the holes. The cake will absorb the liquid, filling the poked channels with color and flavor. You may not need to use all of the prepared Jell-O; avoid over-saturating the cake to prevent puddling at the bottom. Allow the Jell-O to absorb for about 15-20 minutes at room temperature.

- Chill the Cake: Place the cake in the refrigerator for at least 30 minutes to an hour after adding the Jell-O. This step is crucial to allow the gelatin to set within the cake, creating those beautiful, distinct color channels.
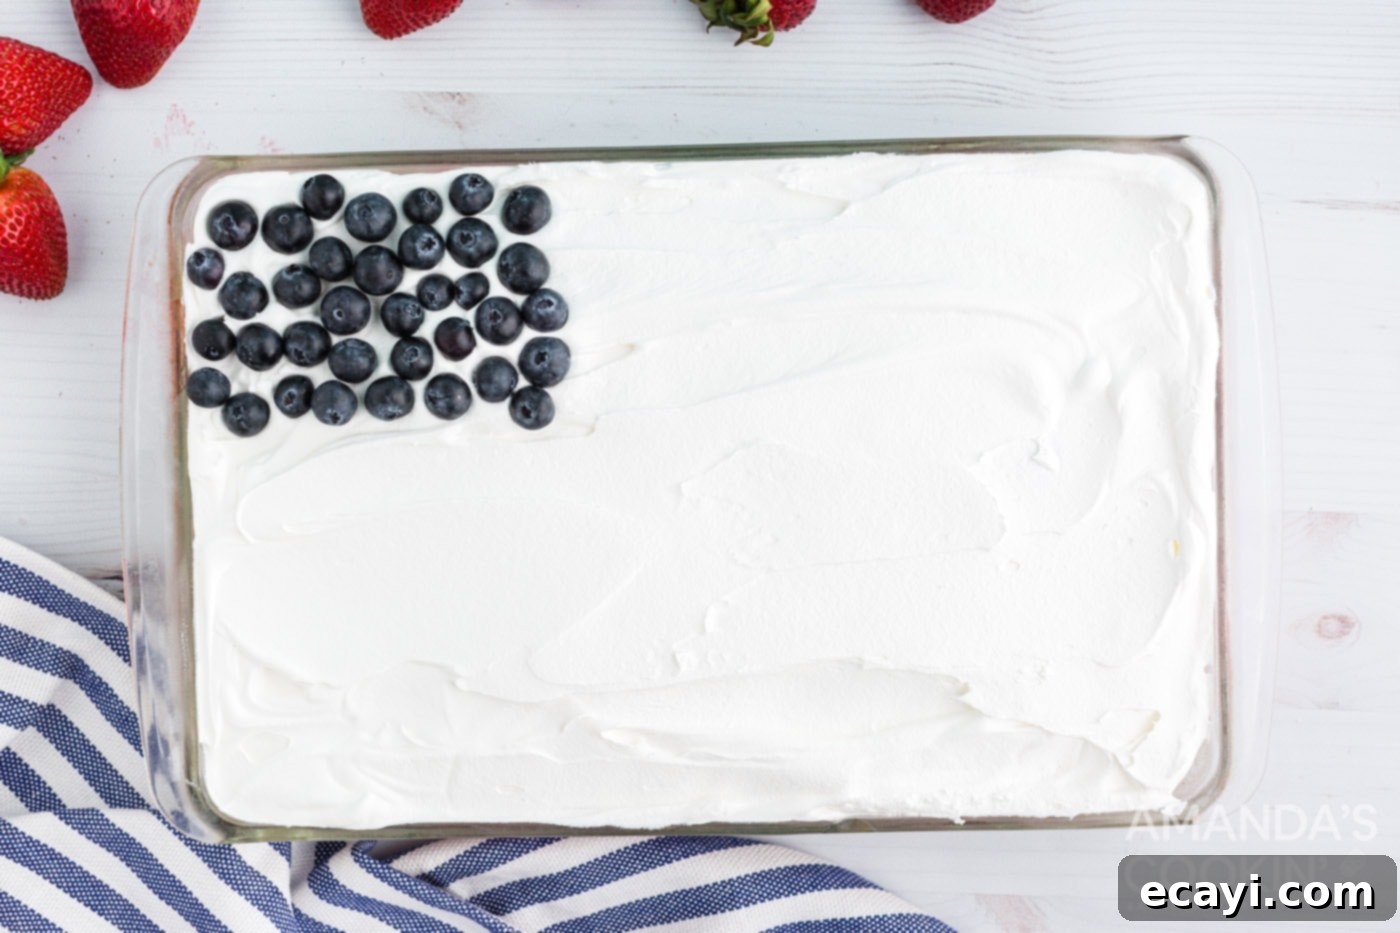
- Apply Whipped Topping: Once the cake has cooled completely and the Jell-O is set, gently spread the thawed Cool Whip (or your homemade whipped topping) evenly over the entire surface of the cake. Use an offset spatula or the back of a spoon to create a smooth, appealing layer.

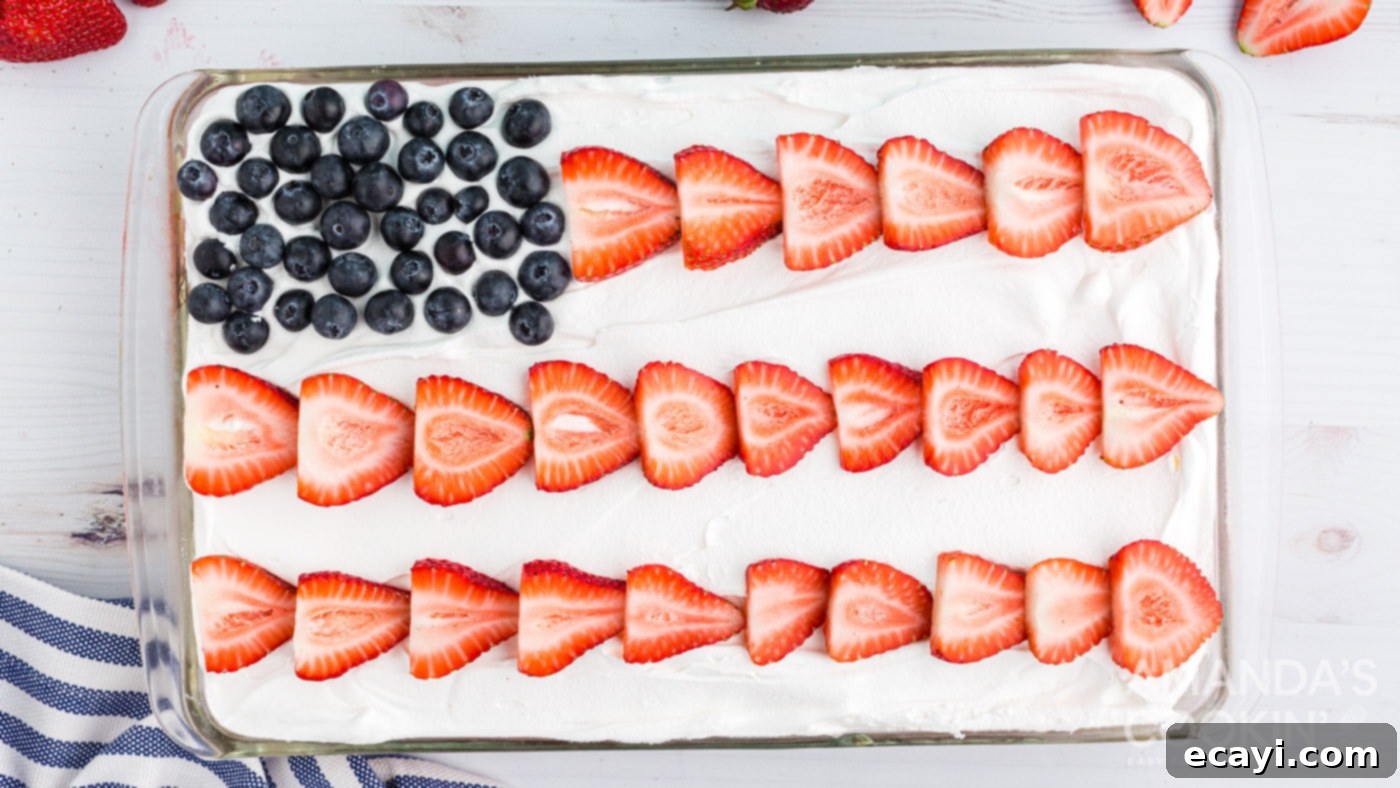
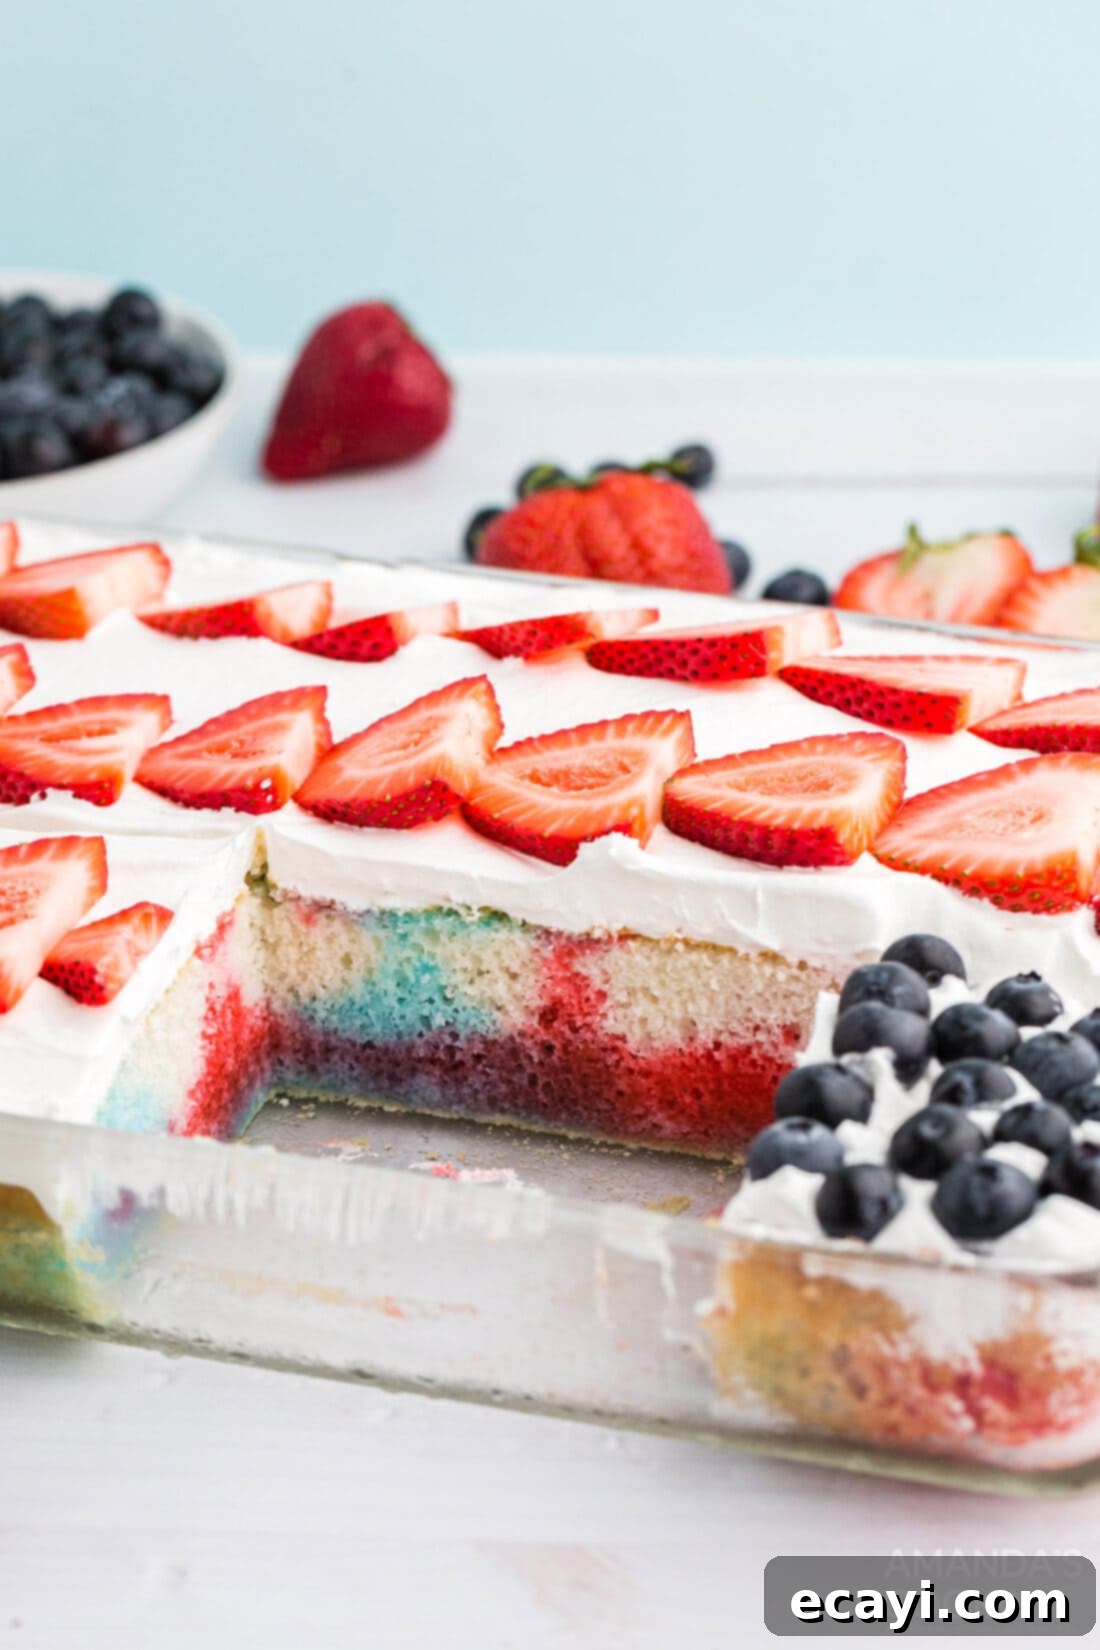
- Decorate the Flag: Now for the patriotic masterpiece! Carefully place fresh blueberries neatly into one top left corner of the cake, forming a rectangular “union” for the flag. Next, slice fresh strawberries into uniform ⅛ inch thick slices. Arrange these strawberry slices in horizontal rows across the remainder of the cake (excluding the blueberry corner), overlapping each slice slightly to create continuous red stripes.


- Final Chill and Serve: Refrigerate the decorated cake for at least 2 hours before serving. This final chilling period allows all the layers to set perfectly, the flavors to meld, and the cake to firm up for easy slicing. Slice into 20-24 pieces and serve this spectacular patriotic dessert to your appreciative guests!
Frequently Asked Questions & Expert Tips for Your Poke Cake
Absolutely! This patriotic poke cake is an excellent make-ahead dessert, perfect for reducing stress on the day of your event. You can prepare and assemble the entire cake up to 1 day in advance. The Jell-O helps keep the cake wonderfully moist, and the Cool Whip holds up well in the refrigerator. Just be sure to cover it tightly to maintain freshness and prevent any refrigerator odors from affecting the flavor. For optimal freshness and presentation, we recommend adding the fresh berry flag decoration no more than a few hours before serving, as very delicate berries can sometimes soften or release a bit of liquid over time.
To keep your poke cake fresh and delicious, tightly cover the baking dish with plastic wrap or aluminum foil and store it in the refrigerator. It will remain delicious for up to 3 days. It’s important to note that the fresh strawberries on top of the cake, due to their high water content, may begin to soften and release some liquid after a couple of days. While this doesn’t affect the taste, the appearance might be slightly less crisp. For the best visual appeal, enjoy the cake within 1-2 days of decorating with berries.
You certainly can, and we encourage it if you prefer! While a boxed cake mix and Cool Whip offer unbeatable convenience, making components from scratch can add a wonderful homemade touch. We have a fantastic classic white cake recipe that would be a perfect base if you’d prefer to bake from scratch instead of using a cake mix. For a homemade whipped topping, simply whip 1-2 cups of cold heavy whipping cream with 2-4 tablespoons of powdered sugar and 1 teaspoon of vanilla extract until stiff peaks form. This fresh whipped cream offers a rich, decadent flavor that complements the fruity gelatin beautifully. Just be aware that homemade whipped cream is slightly less stable than Cool Whip and might soften more quickly in warm environments.
Expert Tips for Success:
- For the Purest White Cake: As mentioned, using only egg whites for your cake mix (if it calls for whole eggs) will ensure the cake remains a brilliant white, allowing the Jell-O colors to truly pop.
- Perfect Jell-O Absorption: Don’t overdo the Jell-O liquid. While you want it moist, too much can lead to a soggy bottom layer. Stick to the recommended 1.5 oz of each Jell-O powder per 2 cups of liquid (1 boiling, 1 ice) and only drizzle enough to fill the holes. You’ll likely have some prepared Jell-O left over – a great excuse for Jell-O shots or cups!
- Uniform Strawberry Stripes: For the best-looking flag, select strawberries that are relatively similar in size. After washing and hulling, slice them into even ⅛-inch to ¼-inch thick pieces. Use the center slices primarily, as they tend to be the most uniform in shape, making your stripes look neat and consistent when overlapped.
- Chilling is Key: Don’t rush the chilling process! Allowing ample time for the Jell-O to set within the cake and for the entire dessert to firm up is essential for clean slices and a stable presentation.
- Keep it Cool: If serving outdoors on a warm day, try to keep the cake refrigerated until just before serving. The Cool Whip and gelatin will hold up best when kept cool.
Delightful Serving Suggestions
This Red, White, and Blue Poke Cake is not just a dessert; it’s a celebration in itself! It’s perfectly suited as a sweet grand finale at any casual gathering, from summer potlucks and lively BBQs to festive backyard parties. Its vibrant colors and refreshing flavors make it a natural complement to a wide range of main courses and side dishes typically enjoyed during holiday festivities.
Consider pairing this spectacular cake with light and flavorful main dishes to balance the sweetness. Some excellent choices include juicy grilled shrimp, tender marinated grilled chicken skewers, or classic BBQ pulled pork sandwiches. For sides, freshly grilled corn on the cob, a crisp green salad, or a creamy potato salad would create a well-rounded meal. This cake also shines alongside other patriotic-themed treats for an ultimate dessert spread.
More Festive Patriotic Recipes to Explore
If you love celebrating with themed food, we have a bounty of other patriotic recipes that will make your holiday spread unforgettable. From refreshing drinks to charming desserts and savory snacks, these ideas are perfect for Memorial Day, Fourth of July, or any event that calls for a touch of red, white, and blue:
- Patriotic Punch: A colorful and refreshing beverage to quench your thirst.
- Patriotic Mini Cheesecakes: Individual servings of creamy cheesecake topped with berries.
- American Flag Kabobs: Healthy and fun fruit skewers arranged like the flag.
- Taco Salad Flag: A savory and creative take on a flag presentation.
- Mini Shortcake Cups: Individual shortcakes layered with berries and cream.
- American Flag Brownies: Rich brownies decorated with patriotic flair.
- Patriotic Charcuterie Board: An impressive spread of themed cheeses, meats, and fruits.
- American Flag Cupcakes: Easy-to-serve cupcakes adorned with a mini flag design.
- 4th of July Jello Shots: A fun, adult-friendly treat for your celebration.
- Patriotic Ice Cream Cone Cupcake: A whimsical dessert combining two favorites.
- Mixed Berry Icebox Cake: A no-bake, layered delight with summer berries.
- Patriotic Vodka Lemonade Slushie: Another refreshing adult beverage for hot days.
I love to bake and cook and share my kitchen experience with all of you! Remembering to come back each day can be tough, that’s why I offer a convenient newsletter every time a new recipe posts. Simply subscribe and start receiving your free daily recipes!
Red White and Blue Poke Cake
IMPORTANT – There are often Frequently Asked Questions and Expert Tips within the blog post that you may find helpful. Simply scroll back up to read them!
Print It
Pin It
Rate It
Save ItSaved!
Ingredients
- 16.25 oz white cake mix along with the ingredients called for on the back of the box, normally vegetable oil, 2-3 eggs, and water
- 3 oz cherry jello unprepared
- 3 oz berry blue jello unprepared
- 2 cups boiling water divided
- 2 cups ice water divided
- 8 oz Cool Whip or whipped topping
- 10 strawberries sliced
- 1 cup blueberries
Equipment You’ll Need
-
13×9 baking dish
Before You Begin
- For a truly red, WHITE, and blue cake with vibrant contrast, be sure to use only egg whites when mixing up the cake mix if your specific brand calls for whole eggs. Egg yolks will lend a yellow tint to the cake, diminishing the pure white background.
- You only need a precise amount of the Jell-O liquid to infuse the cake effectively. We recommend using about 1.5 oz of each Jell-O flavor (mixed as directed in the recipe card). If you add too much liquid Jell-O, it can start to puddle at the bottom of the cake, making it soggy. Don’t worry about any leftover prepared Jell-O – it’s perfect for making festive Jell-O cups or other fun treats!
- When preparing your strawberries for the flag design, first cut off the green stems and then slice them into even pieces, ideally about ⅛” to ¼” thick. To ensure uniform “stripes,” use primarily the center slices of the strawberries, as they will be the most consistent in size and shape when slightly overlapped on the cake. Aim to choose strawberries that are generally similar in overall size to help create beautiful, even rows.
Instructions
-
Preheat oven to 350°F (175°C) or as directed on cake mix package instructions.
-
Beat together cake mix, eggs, oil, and water following the instructions and quantities indicated on cake mix package.
-
Pour cake batter into a greased 9×13 glass baking dish and bake according to instructions (approximately 30 minutes), until a toothpick inserted comes out clean.
-
Allow the cake to cool in the pan for 5-10 minutes while you prepare the gelatin mixtures.
-
For each of the colors of Jell-O, mix 3 oz of unprepared Jell-O powder with 1 cup of boiling water and stir until completely dissolved. Then, add 1 cup of ice water and stir until combined and ice is melted.
-
Use the handle of a wooden spoon or a chopstick to poke holes all over the cooled cake, approximately ½-1 inch apart and ¾ deep.
-
Alternate rows of blue and red Jell-O liquid, drizzling it carefully and heavily over the holes in the cake; you will not need to use all of the prepared Jell-O. Allow it to absorb for 15-20 minutes.
-
Once the cake has cooled completely and the Jell-O is set (about 30-60 minutes in the refrigerator), gently top with the thawed Cool Whip, spreading it evenly.
-
Place blueberries neatly into one top left corner of the cake to form the blue field of the flag. Slice strawberries into ⅛” slices and arrange them in rows across the rest of the cake (excluding the blueberry corner), overlapping each slice slightly to create red stripes.
-
Refrigerate the finished cake for a minimum of 2 hours before serving to allow everything to set. Slice into 20-24 pieces and serve your beautiful patriotic dessert.
Nutrition Information
The recipes on this blog are tested with a conventional gas oven and gas stovetop. It’s important to note that some ovens, especially as they age, can cook and bake inconsistently. Using an inexpensive oven thermometer can assure you that your oven is truly heating to the proper temperature. If you use a toaster oven or countertop oven, please keep in mind that they may not distribute heat the same as a conventional full sized oven and you may need to adjust your cooking/baking times. In the case of recipes made with a pressure cooker, air fryer, slow cooker, or other appliance, a link to the appliances we use is listed within each respective recipe. For baking recipes where measurements are given by weight, please note that results may not be the same if cups are used instead, and we can’t guarantee success with that method.
