Effortless & Festive Candy Cane Danish: Your Go-To Christmas Breakfast Recipe
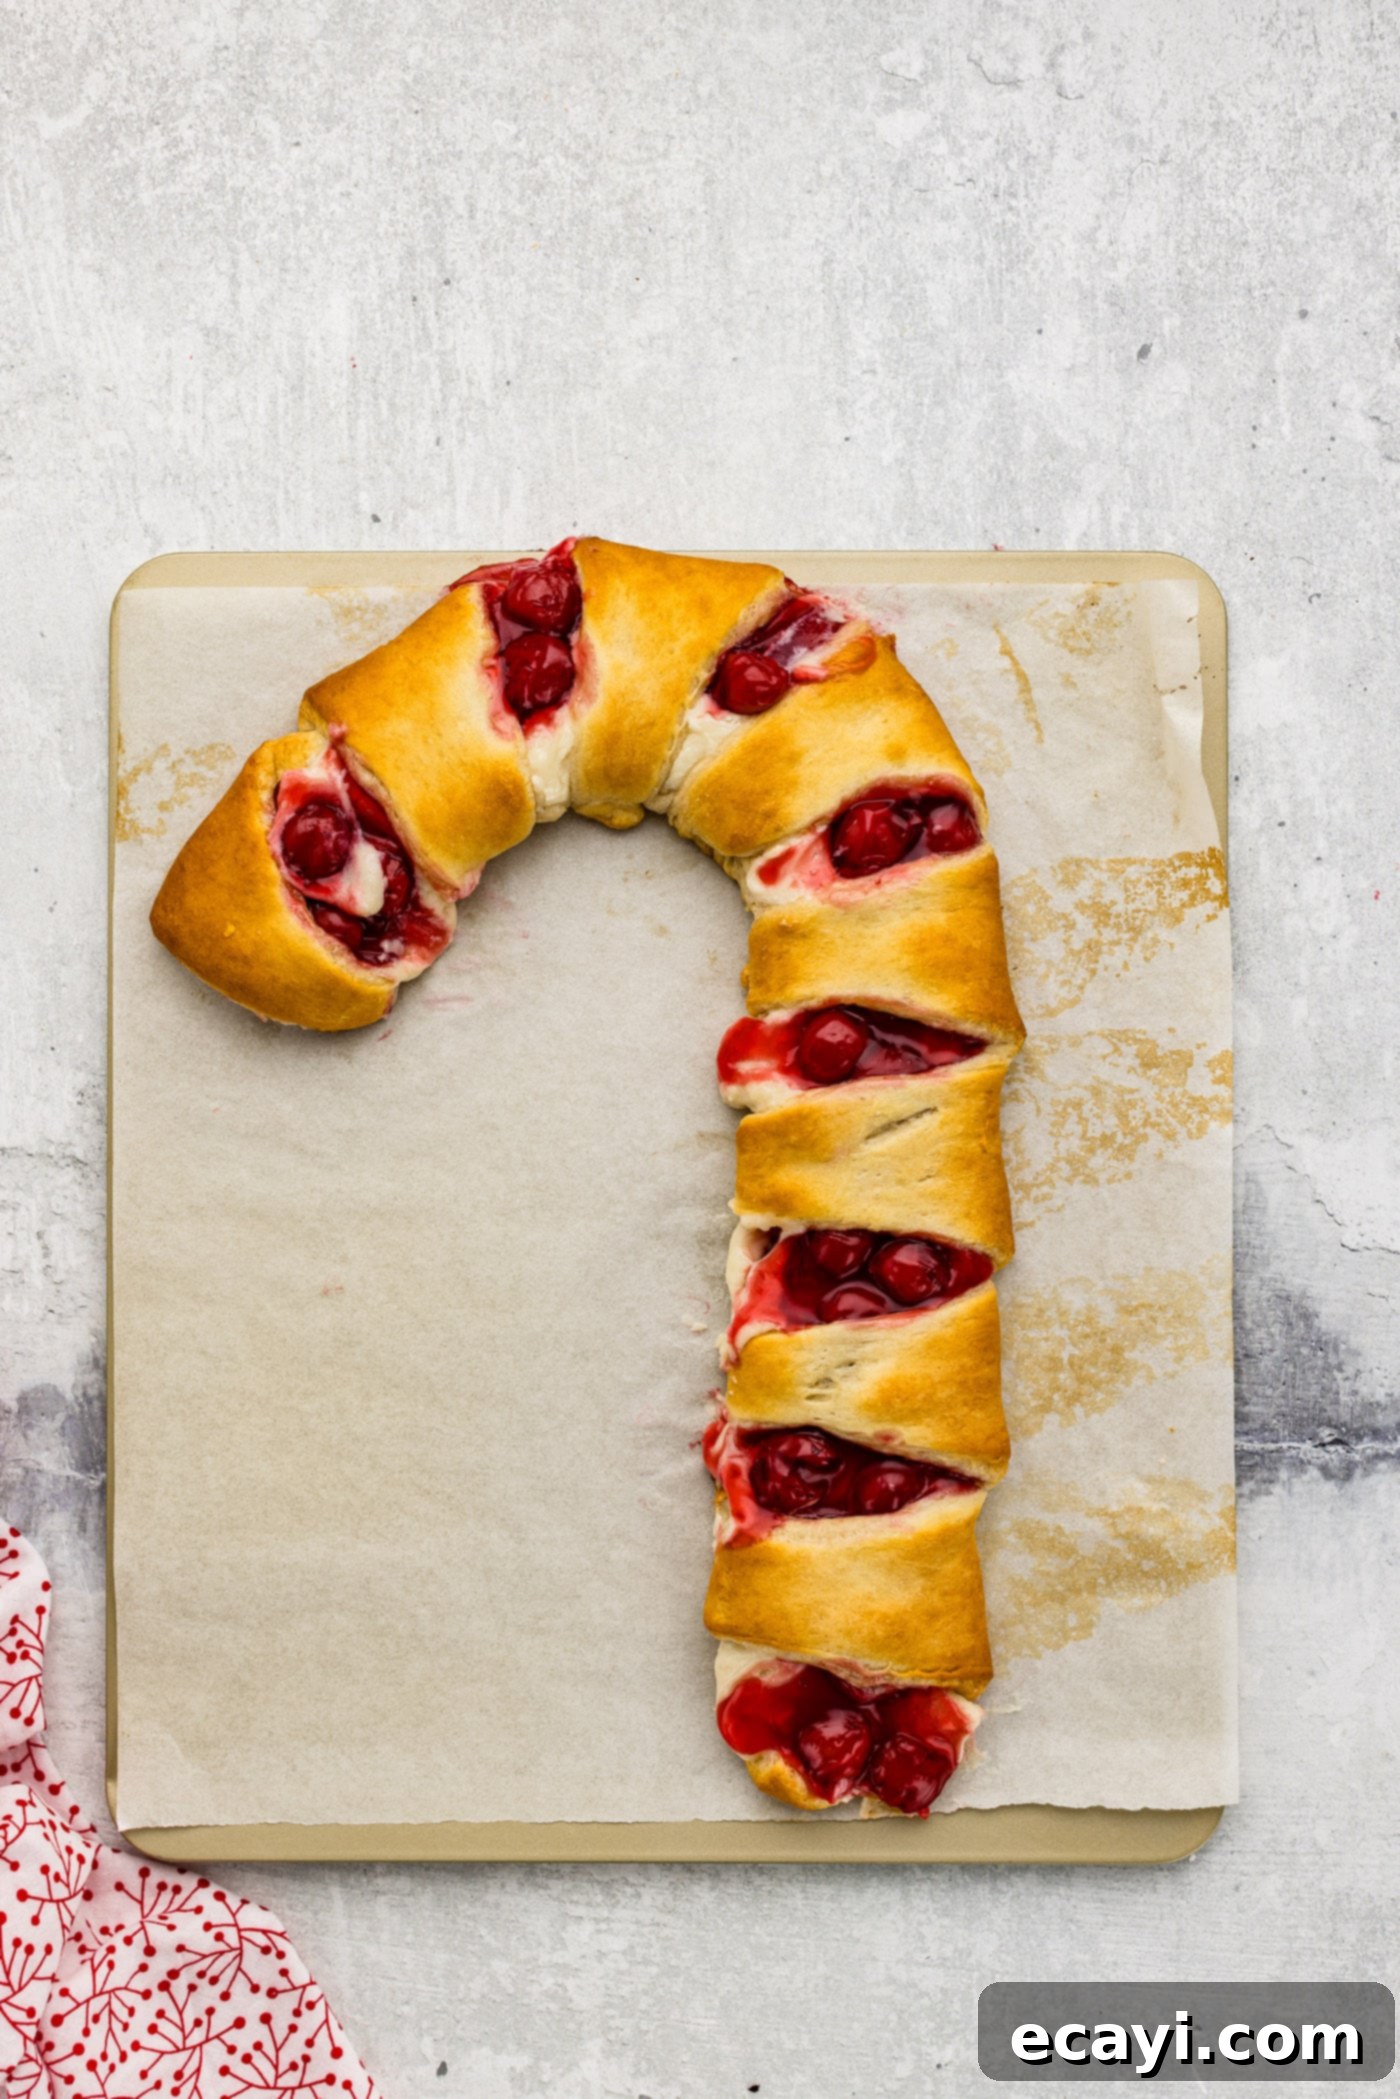
Transform your holiday mornings with this incredibly easy and delightfully festive Candy Cane Danish! Crafted from convenient crescent rolls and a luscious fruit pie filling, then elegantly crowned with a simple icing glaze, this pastry is an absolute must-have for a memorable Christmas breakfast or any special winter gathering. Its charming candy cane shape and vibrant colors are sure to bring smiles to everyone around the table, making your holiday celebrations even sweeter.

Why This Candy Cane Danish Recipe is Your Holiday Morning Secret Weapon
Bringing a touch of whimsy and irresistible flavor to your Christmas morning breakfast has never been easier than with this delightful Candy Cane Danish. Imagine the joy on faces as they see this beautiful, themed pastry, shaped just like a classic candy cane. Beyond its festive appearance, this recipe is a true marvel of convenience and taste, making it an ideal choice for one of the busiest and most cherished mornings of the year.
At its heart, this isn’t just a pretty pastry; it’s essentially a deliciously simple cherry cream cheese danish, cleverly baked into an iconic holiday shape. The secret to its incredible ease lies in two fantastic shortcuts: readily available refrigerated crescent rolls and your favorite canned (or homemade!) pie filling. This means you can say goodbye to time-consuming kneading, messy dough proofing, and complex baking techniques. With minimal effort, you achieve bakery-quality results right in your own kitchen, freeing up valuable time to spend with family and friends.
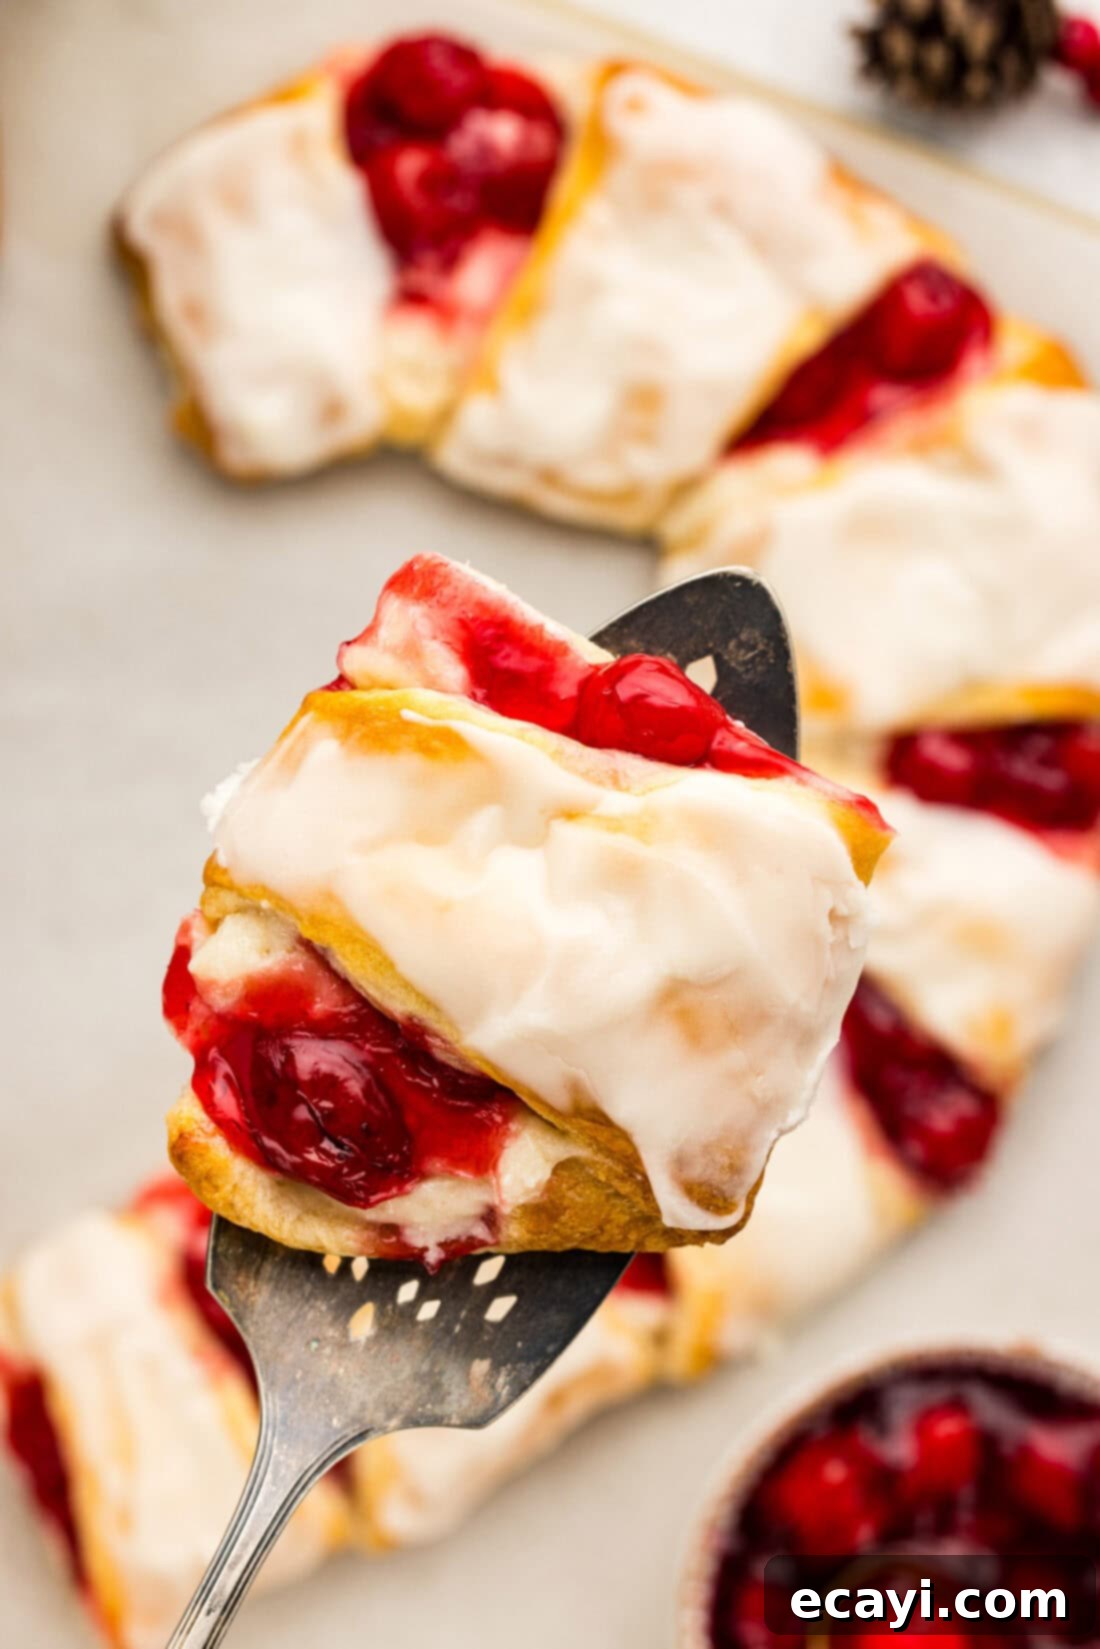
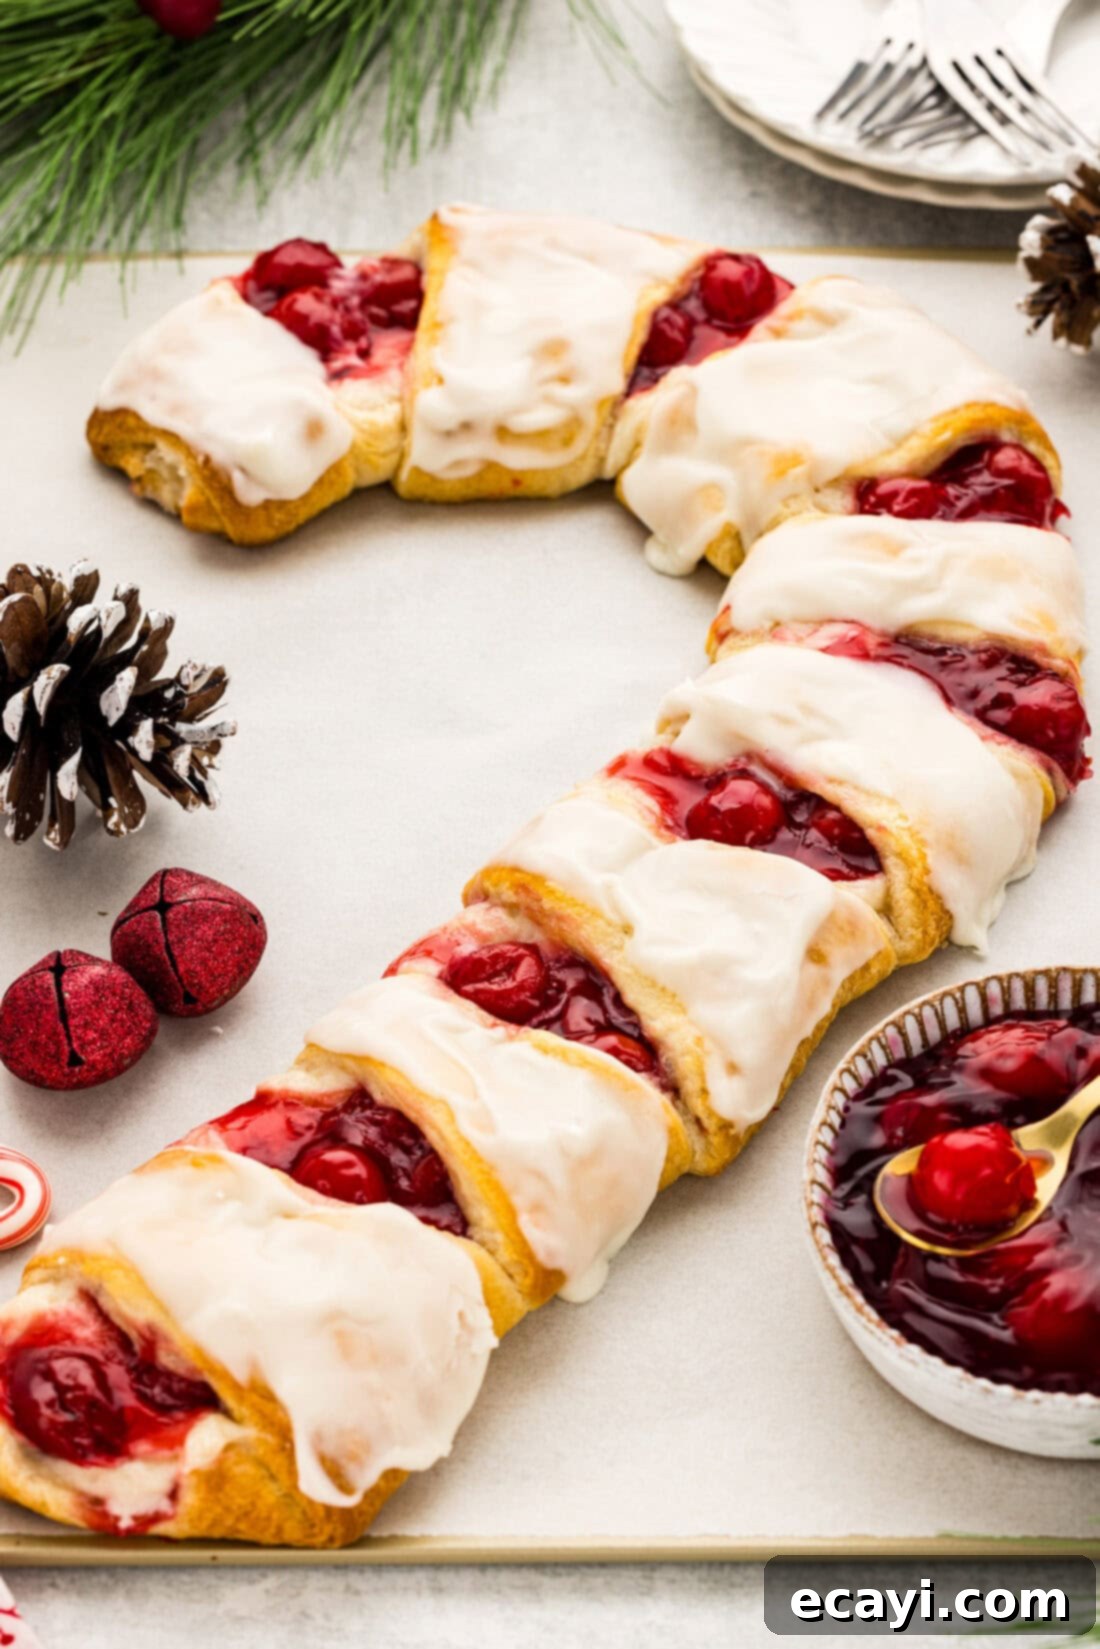
The combination of fluffy, flaky crescent dough, a rich, tangy cream cheese filling, and vibrant fruit pie filling creates a harmonious blend of textures and tastes. The simple yet elegant icing glaze, generously drizzled over the baked pastry, not only adds a touch of sweetness but also visually ties together the characteristic red and white stripes of the candy cane, making it a feast for both the eyes and the palate. It’s a spectacular presentation that requires surprisingly little fuss, allowing you more precious time to enjoy the holiday festivities with your loved ones. This recipe works because it delivers maximum holiday cheer with minimum stress, ensuring a memorable and delicious start to your Christmas day or any festive occasion.
Key Ingredients for Your Festive Candy Cane Danish
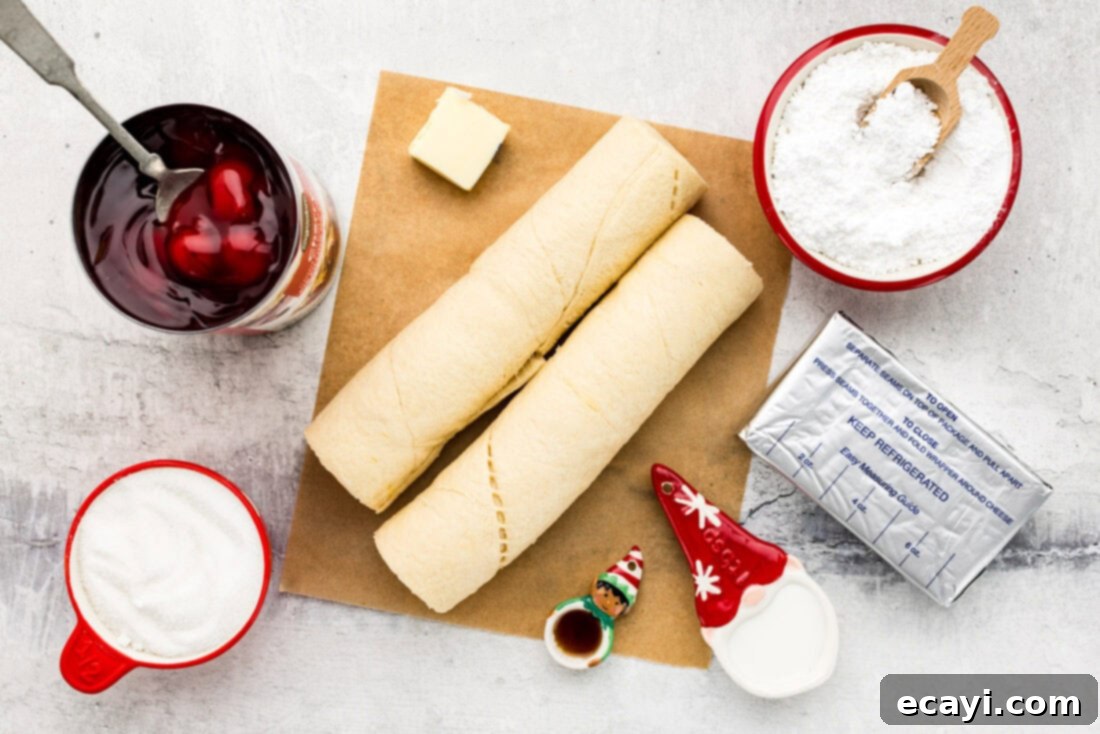
Crafting this festive Candy Cane Danish requires a few simple, readily available ingredients that come together to create a truly magical holiday treat. You’ll find a complete list of all measurements and detailed instructions in the printable recipe card located at the very end of this post. For now, let’s dive into the core components that make this danish so special and so incredibly easy to prepare.
Ingredient Spotlight & Creative Substitution Ideas
Understanding each ingredient and its role is key to baking success. Here’s a closer look at what you’ll need and how you can get creative with substitutions to tailor this Candy Cane Danish to your taste and pantry.
DOUGH – The foundation of our quick and easy danish is pre-packaged crescent roll dough. For this recipe, you will need two standard 8-ounce tubes of crescent rolls. These convenient rolls are a fantastic shortcut, eliminating the need for making dough from scratch, which saves considerable time and effort, especially during the busy holiday season. They bake up light, flaky, and golden brown, providing the perfect tender and buttery pastry base for your sweet filling. Ensure they are chilled until ready to use for best handling.
PIE FILLING – While classic cherry pie filling is traditionally used for its vibrant red hue that perfectly complements the candy cane theme, you have plenty of room for variation. You can opt for a high-quality store-bought cherry pie filling for maximum convenience, or if you’re feeling ambitious and have some on hand, homemade cherry pie filling will undoubtedly elevate the flavor to a new level. We’ve also had great success experimenting with other fruit fillings in the past, such as vibrant raspberry and sweet strawberry pie filling. Both of these alternatives were equally delicious and maintained the festive red appearance, making them excellent choices if you want to switch things up or simply use what you already have in your pantry. Just ensure the filling isn’t too runny.
CREAM CHEESE FILLING – This creamy, sweet center is what makes the danish truly indulgent and gives it that authentic danish flavor. The basic mixture involves an 8-ounce brick of cream cheese (ensure it’s full-fat for the best texture and flavor), granulated sugar, and vanilla extract. For an added layer of flavor that beautifully complements the cherry filling, consider using a blend of vanilla and almond extracts. The subtle nuttiness of almond extract harmonizes exceptionally well with stone fruits like cherries, creating a more complex and sophisticated taste profile. Feel free to adjust the flavoring to your preference; a touch of lemon zest could also brighten the filling, adding a wonderful citrusy counterpoint to the sweetness.
GLAZE – The simple icing glaze is essential for both flavor and visual appeal, giving the danish its characteristic glossy finish. It typically consists of powdered sugar, softened butter, milk, and vanilla extract. The softened butter helps create a smoother, richer glaze, while milk (or cream for a richer texture) allows you to achieve the perfect drizzling consistency. Vanilla extract enhances the overall sweetness and aroma of the glaze. It’s crucial to ensure your butter is properly softened to room temperature for easier mixing, which will prevent any unsightly lumps in your final glaze. You can adjust the amount of milk to reach your desired consistency – thinner for a light drizzle, thicker for a more opaque coating.
Step-by-Step Guide: How to Make Your Candy Cane Danish
These step-by-step photos and instructions are here to help you visualize how to make this recipe with ease. For the complete printable version of this recipe, including exact measurements and detailed instructions, please Jump to Recipe at the bottom of this post.
- Prepare Your Workspace: Begin by preheating your oven to 375°F (190°C). This ensures the oven is at the correct temperature when your danishes are ready to bake. Next, line two standard cookie sheets with parchment paper. This crucial step prevents sticking, ensures even baking, and makes cleanup an absolute breeze, guaranteeing your beautiful danishes can be easily removed and transferred. Set these prepared sheets aside.
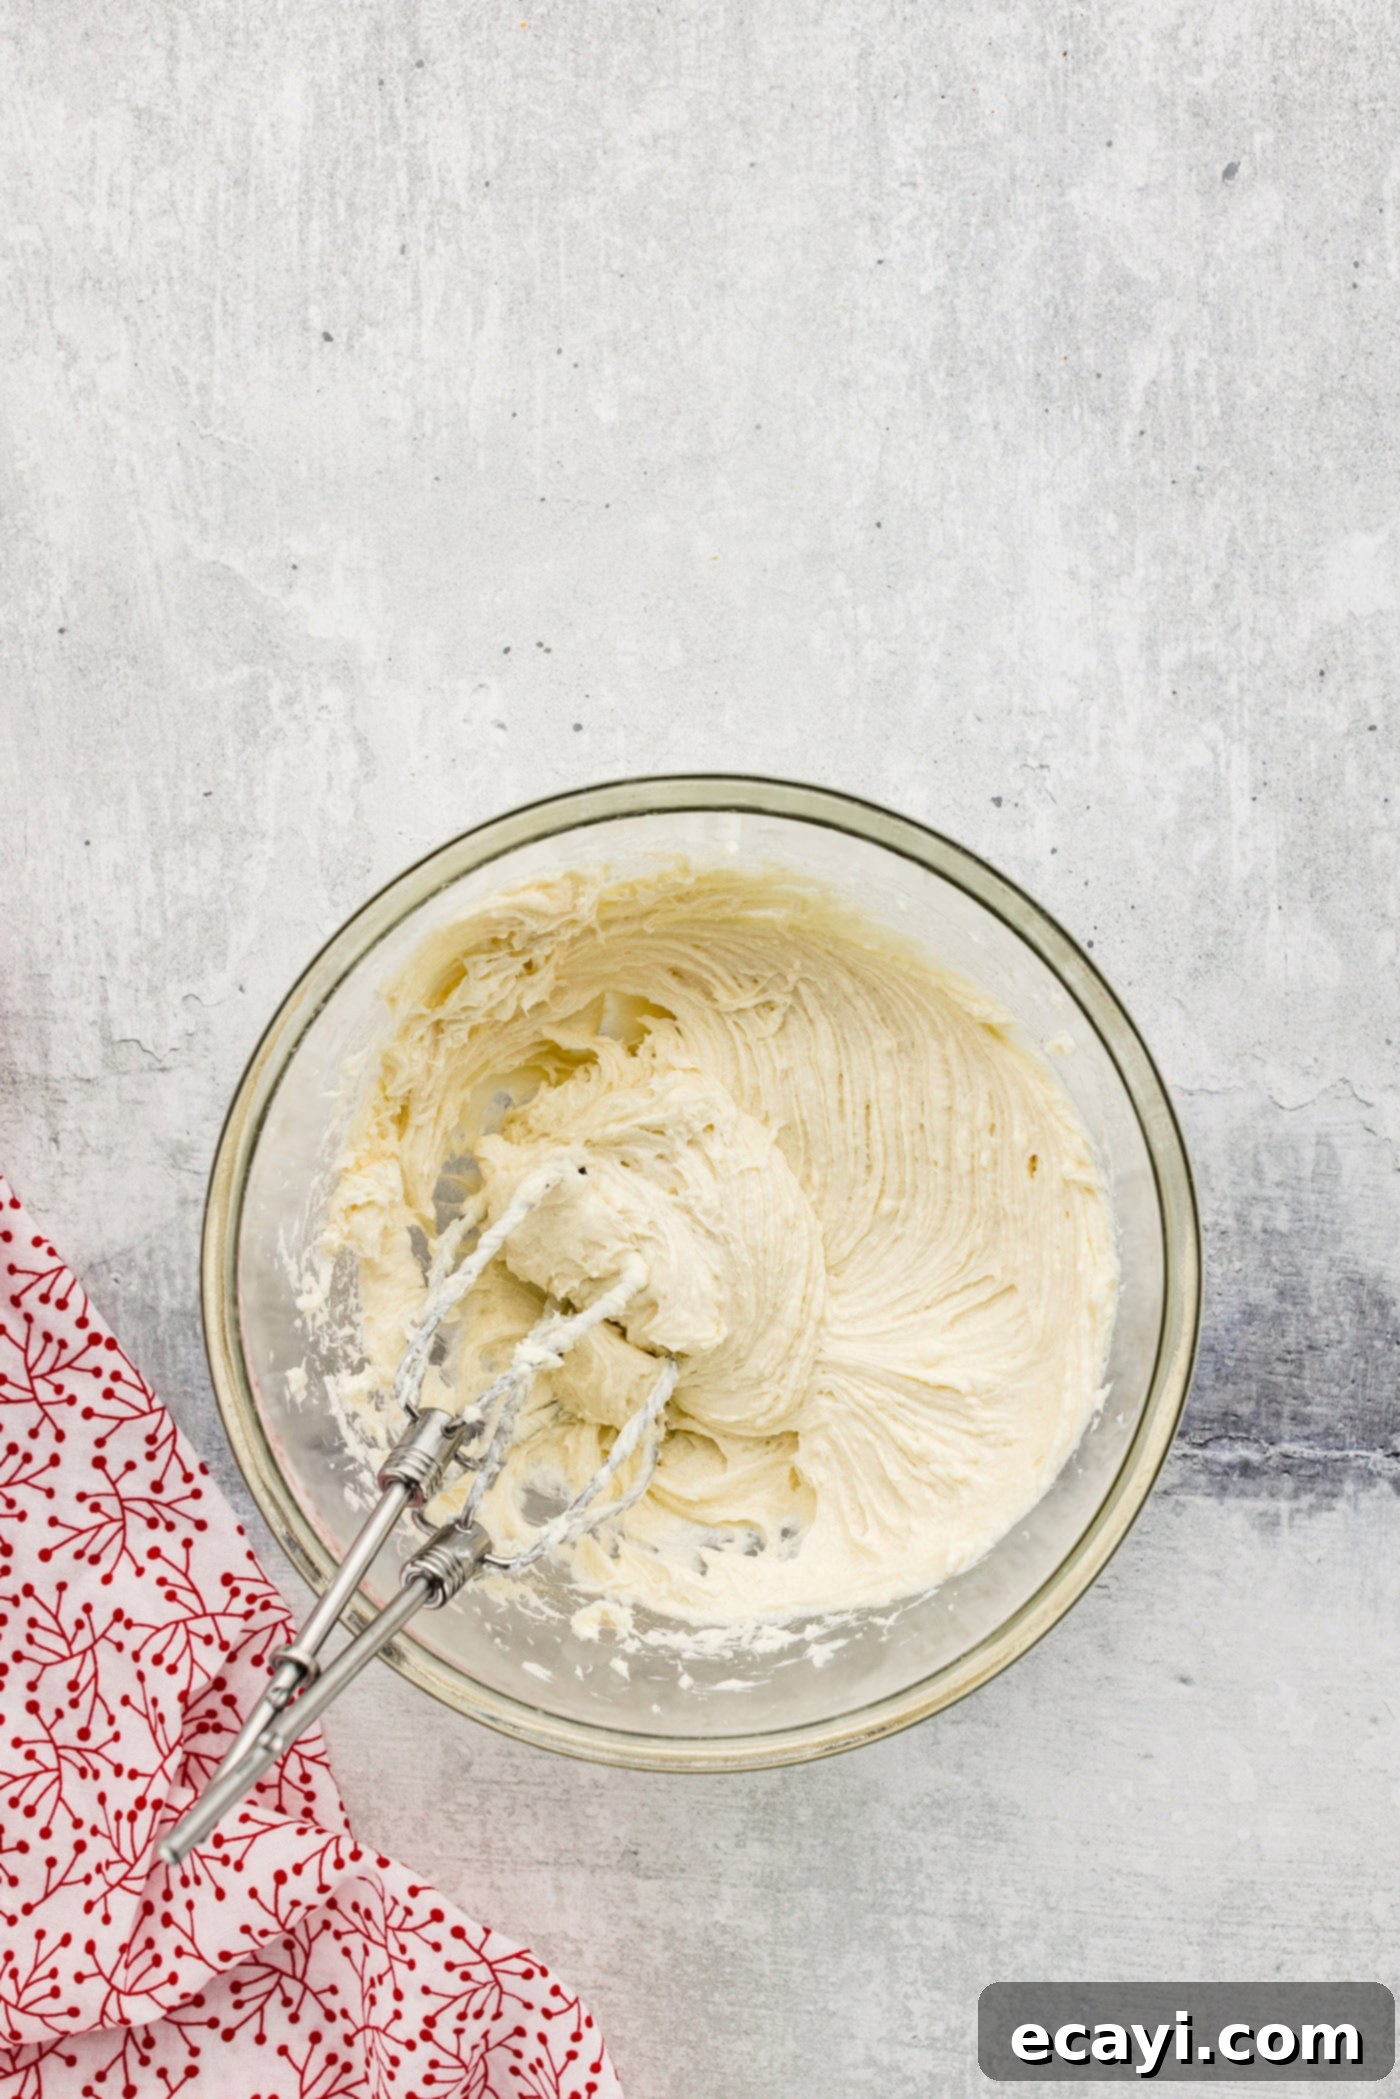
- Whip Up the Cream Cheese Filling: In a medium-sized mixing bowl, combine the softened cream cheese (ensure it’s at room temperature for optimal smoothness), granulated sugar, and your choice of vanilla extract (or the delightful vanilla and almond extract blend, which adds a wonderful depth of flavor). Using a hand mixer or stand mixer, beat these ingredients together until the mixture is light, airy, and perfectly smooth, with no lumps of cream cheese remaining. This ensures an even distribution of flavor and a luxurious texture in your danish.

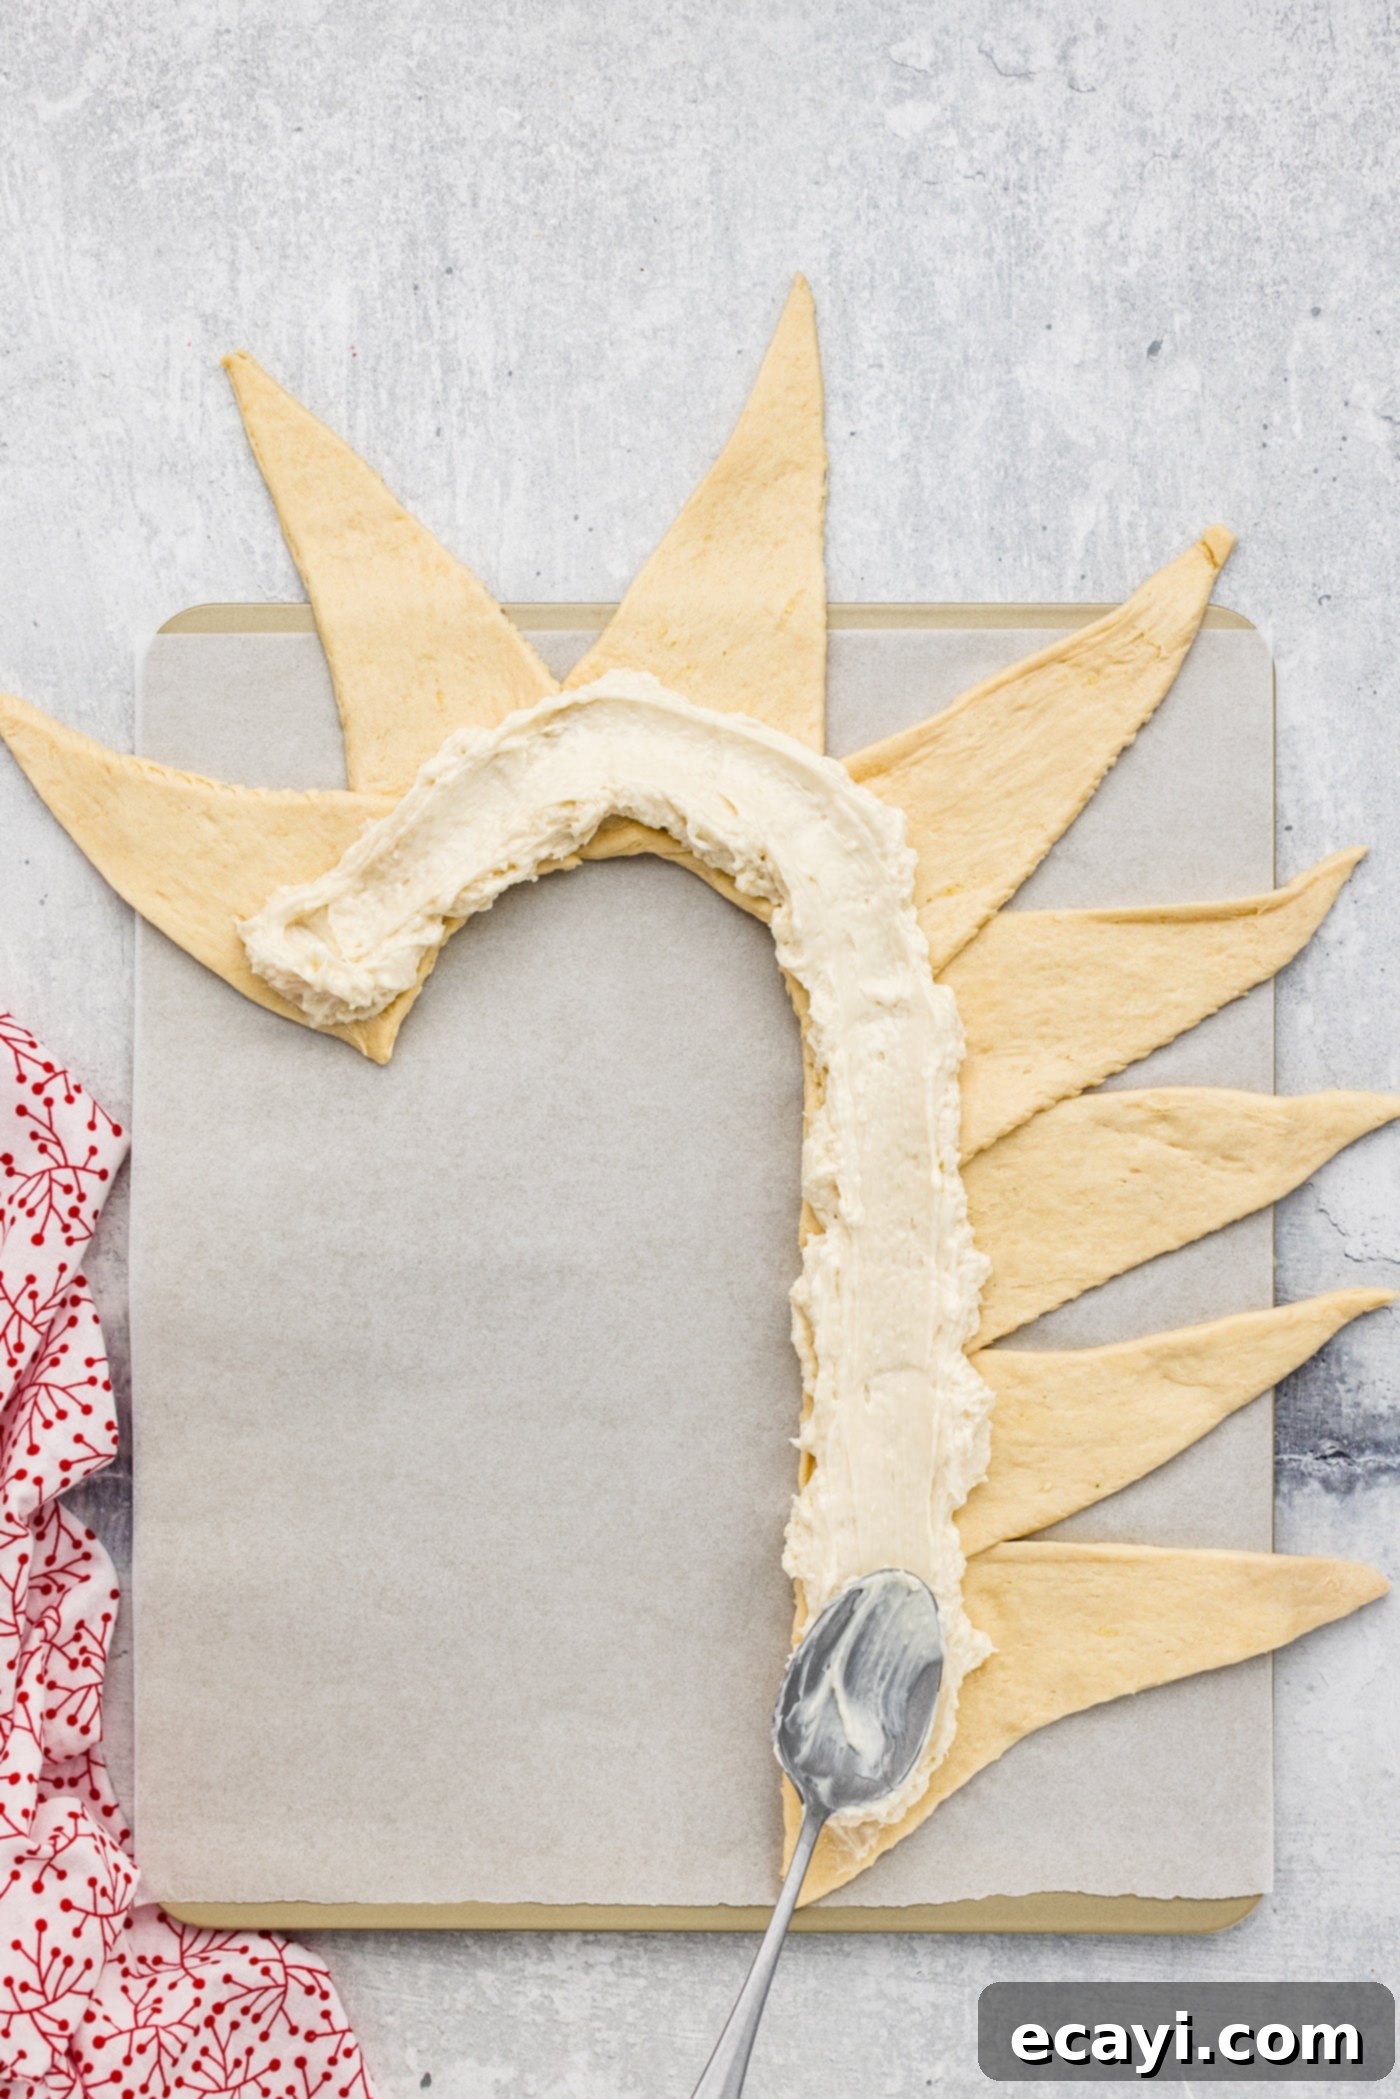
- Form the Candy Cane Shape: Carefully unroll one tube of cold crescent roll dough. On one of your prepared cookie sheets, arrange four crescent triangles in a straight line along their wide ends, slightly overlapping the corners by about half an inch to create a continuous dough base. Then, using the fifth crescent triangle, begin to gently curve the top end of your arranged dough, forming the distinctive hook shape of a candy cane. Take your time to make a nice, even curve. Repeat this precise process for the second candy cane on your other prepared baking sheet.

- Layer the Cream Cheese Filling: Take half of your impeccably smooth cream cheese mixture and evenly spread it along the wide end of the crescent roll triangles on your first candy cane shape. Ensure you leave a small border (about half an inch) around the edges, especially along the pointed tips of the triangles, which will be folded over to create the danish stripes. This border will help keep the filling neatly enclosed.

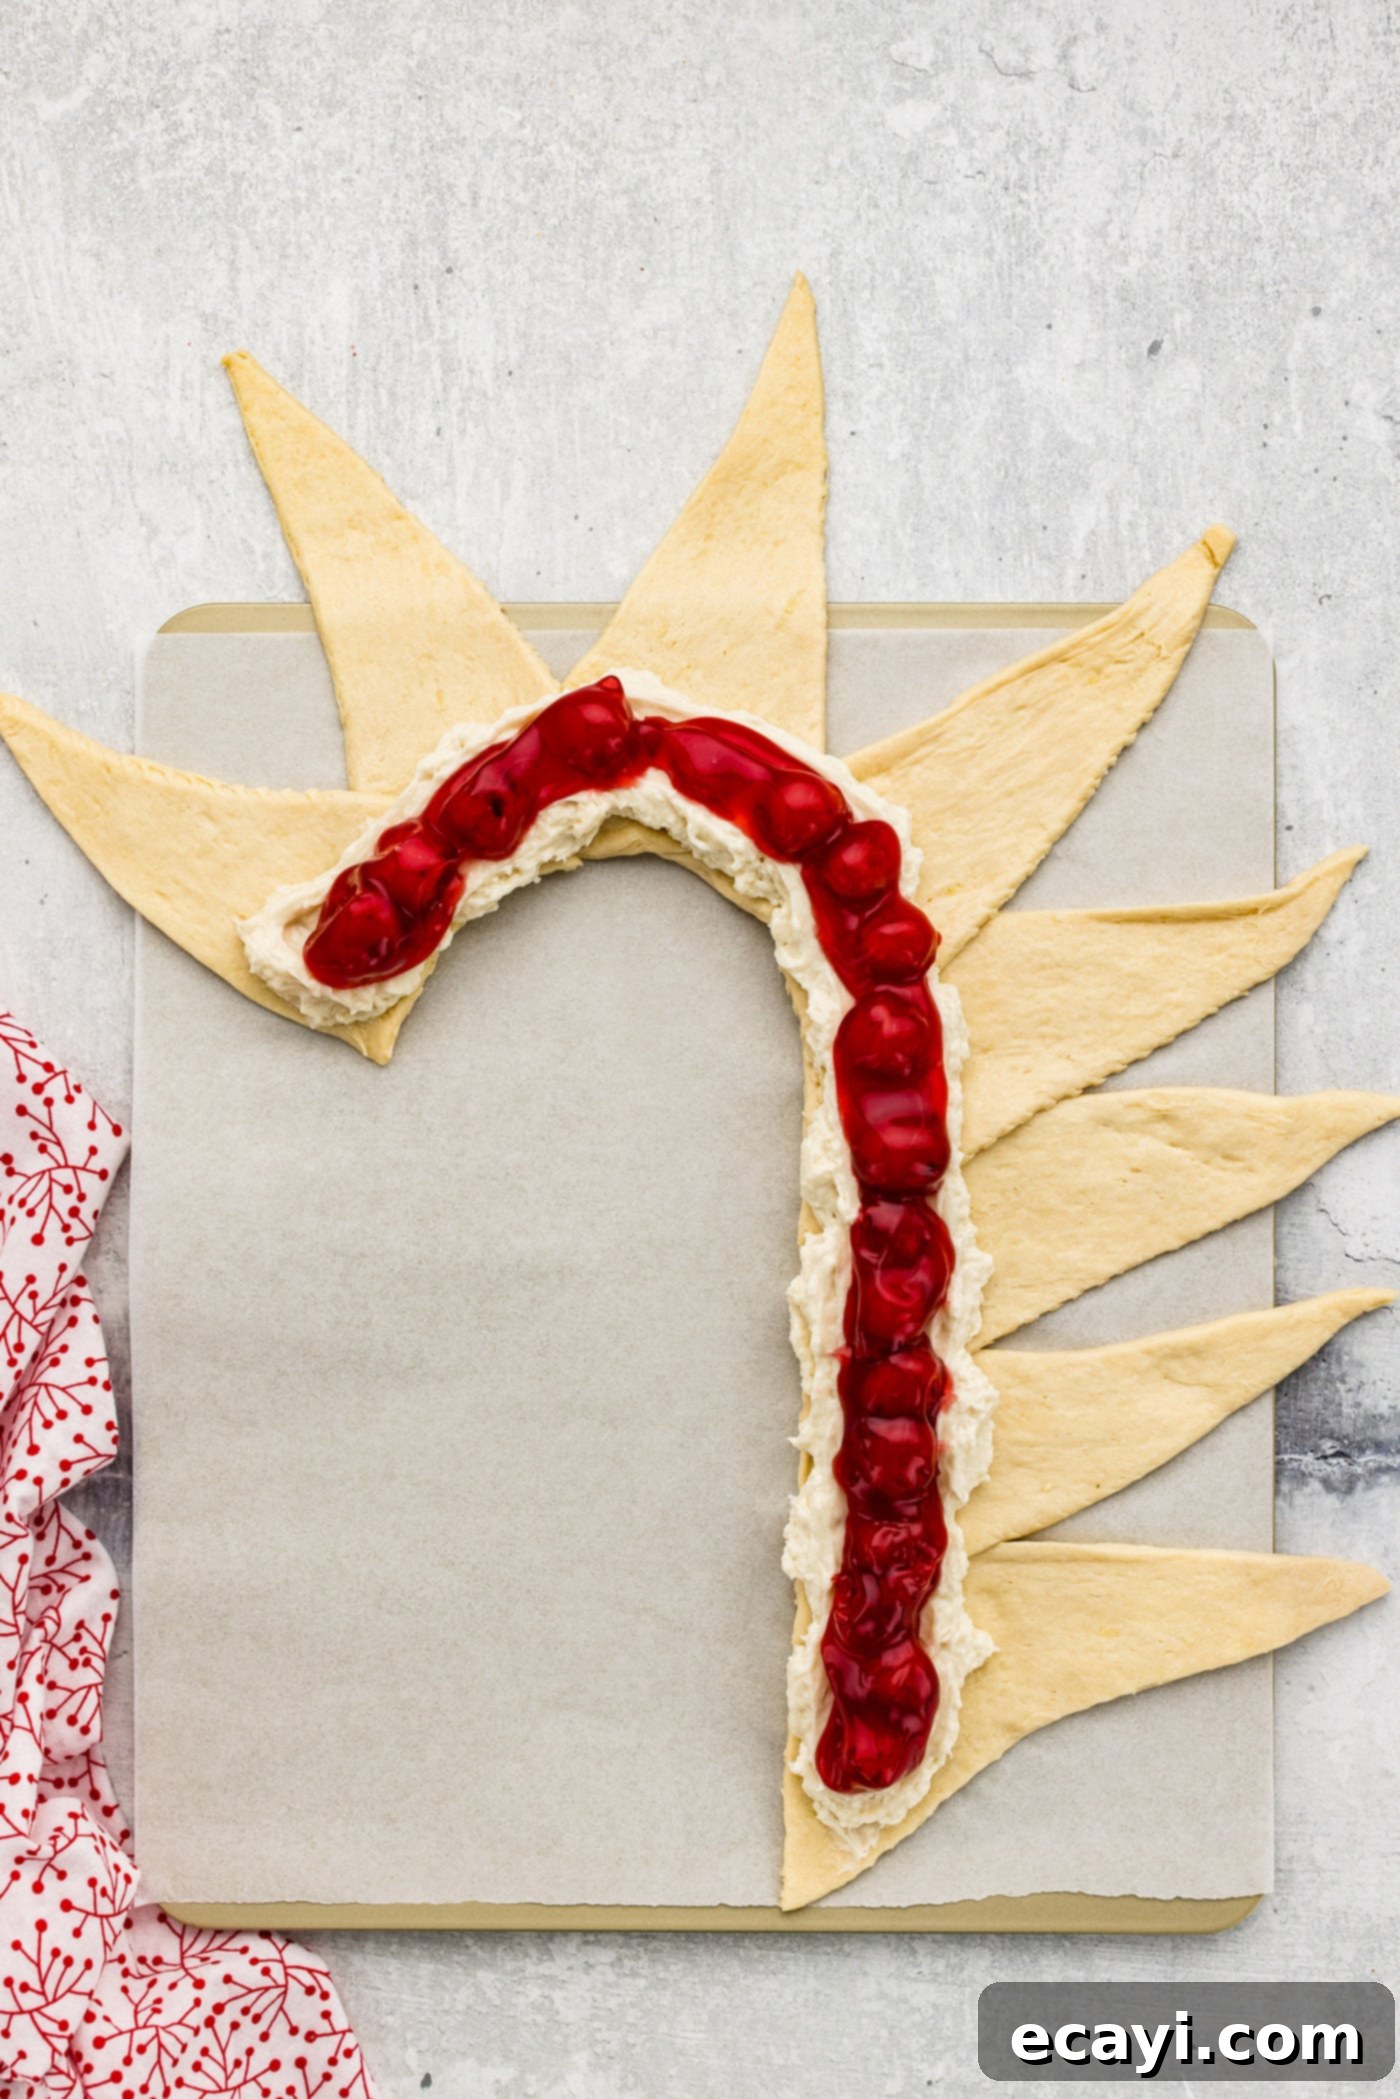
- Add the Fruit Pie Filling: Next, carefully spoon half of your cherry (or other chosen fruit) pie filling directly on top of the cream cheese layer. Gently spread it to cover the cream cheese evenly, creating a vibrant, fruity stratum that will be the “red” of your candy cane. Again, avoid spreading it too close to the edges where the dough will be folded, to prevent leakage during baking.

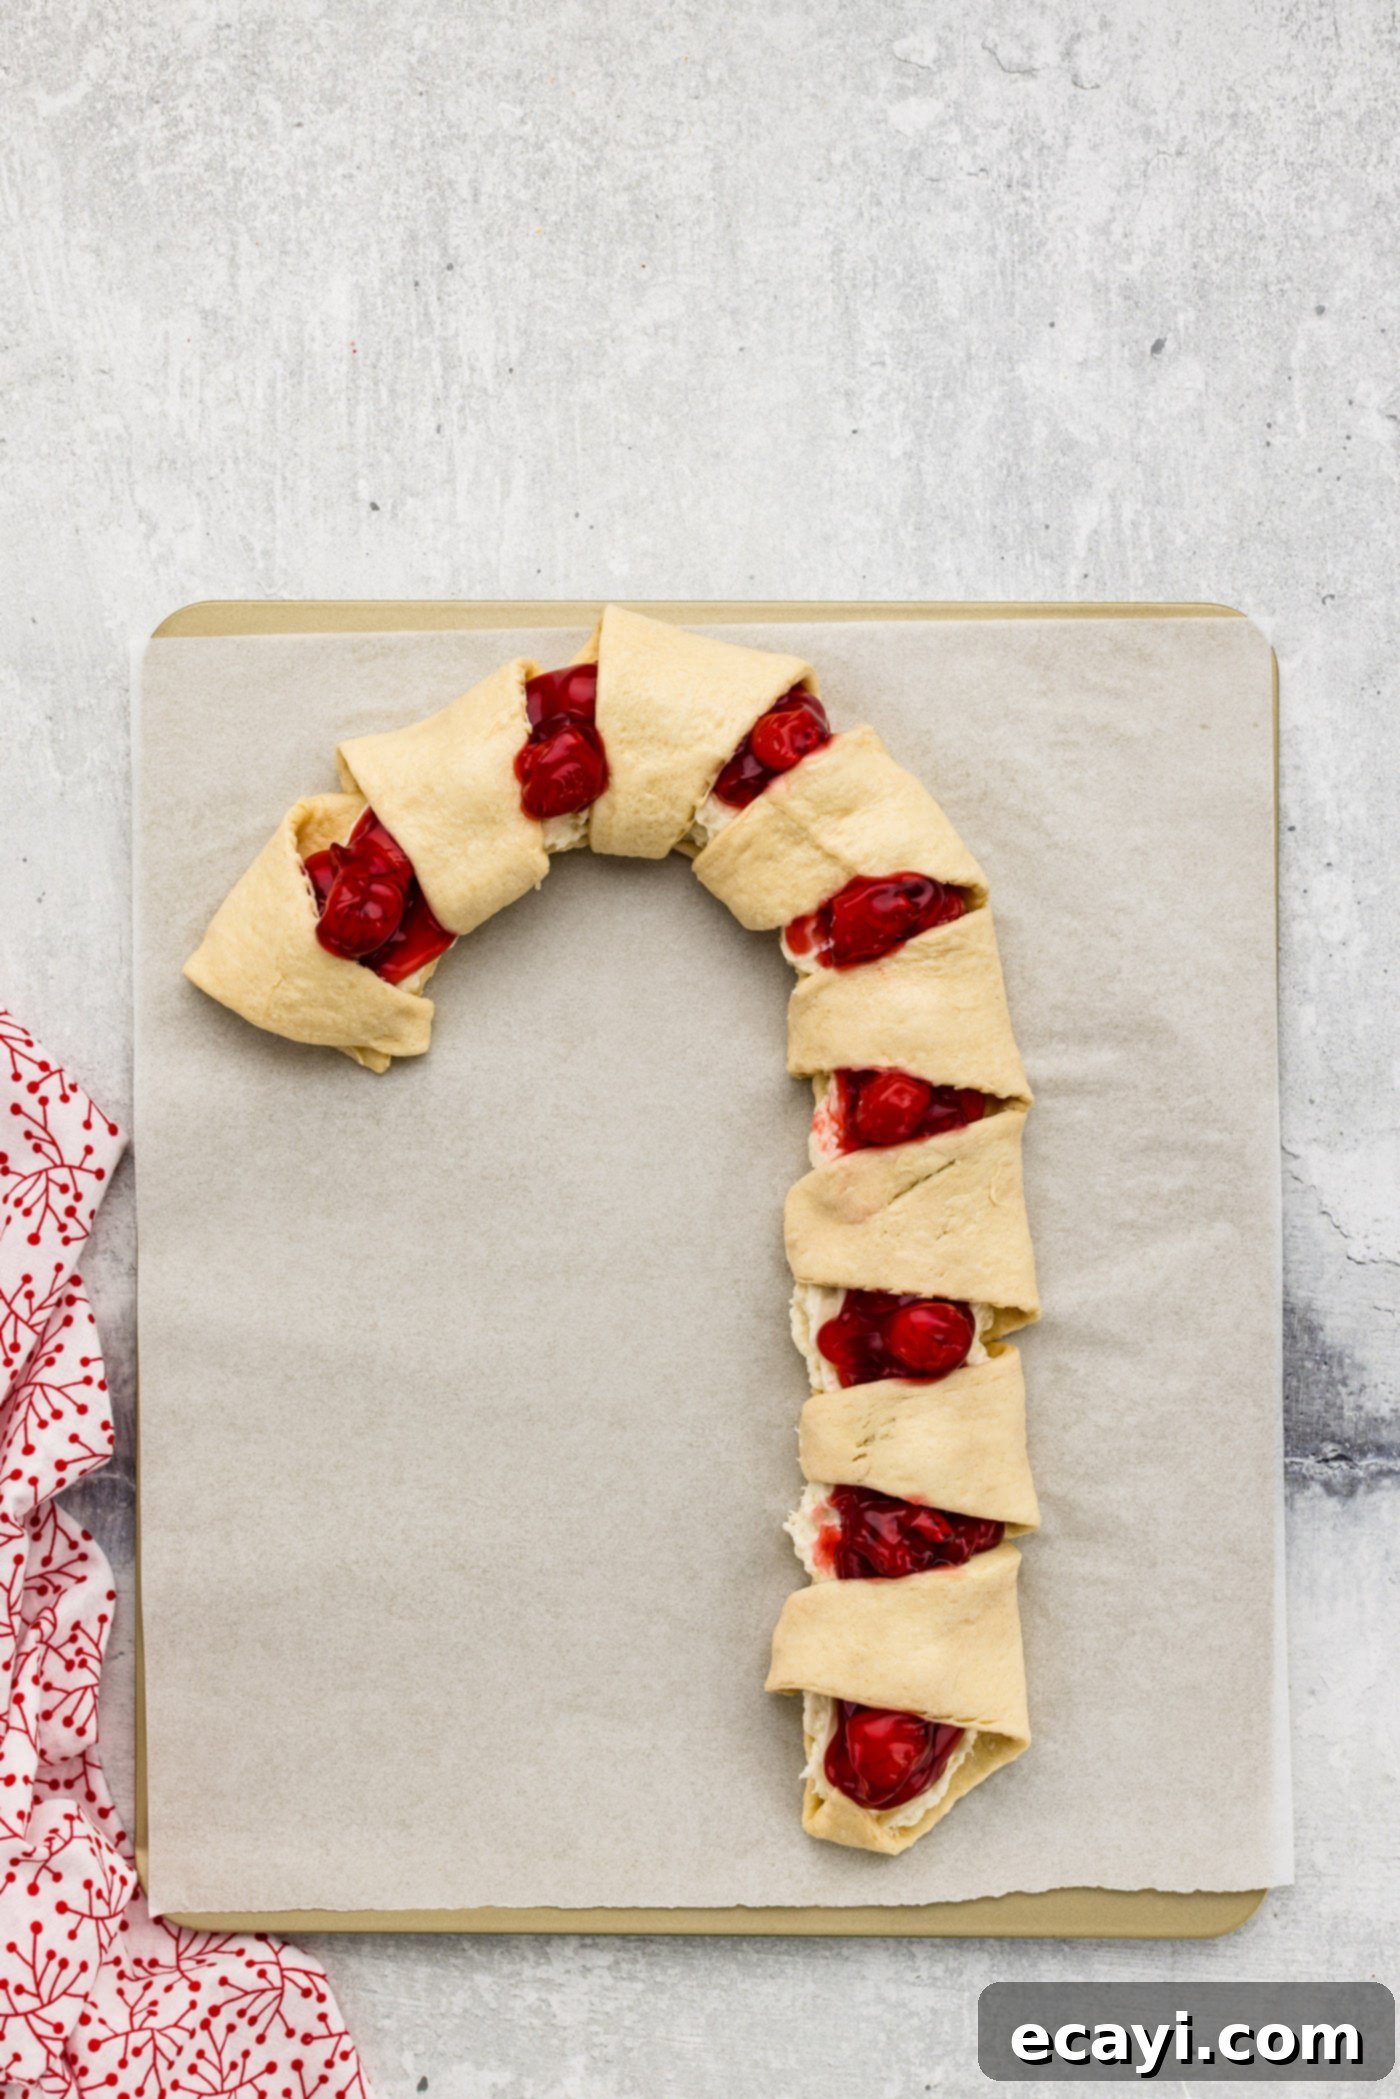
- Create the Stripes & Finish Assembly: Now, it’s time to create the iconic candy cane stripes. Carefully fold over the pointed tips of the crescent triangles, overlapping them to completely enclose the filling and form distinct diagonal stripes across the pastry. Begin this folding process from the curved top of the cane and work your way down the straight section. Gently tuck the ends along the length of the pastry to secure them firmly. Repeat this entire assembly process with the remaining tube of crescent rolls, cream cheese filling, and cherry pie filling to create your second spectacular candy cane danish.

- Bake to Golden Perfection: Carefully transfer your cookie sheets with the assembled danishes into the preheated oven. Bake for approximately 15-20 minutes, or until the crescent dough turns a beautiful, inviting golden brown and the filling appears bubbly and set. Keep a close eye on them towards the end of the baking time to prevent over-browning, as oven temperatures can vary.

- Prepare & Apply the Glaze: While your pastries are still warm (but not scalding hot) from the oven, quickly prepare the simple icing glaze. In a small bowl, whisk together the powdered sugar, softened butter, milk, and vanilla extract until the mixture is completely smooth and has a nice, drizzly consistency. The residual warmth of the danish will help the glaze melt slightly and spread beautifully. Carefully drizzle the glaze over the baked danish, focusing on the crescent stripes to enhance the visual effect and add that final touch of sweetness. Serve warm and enjoy your festive creation!
Frequently Asked Questions & Expert Baking Tips
To ensure your Candy Cane Danish turns out perfectly every time, here are some common questions and invaluable tips from our kitchen experts:
Absolutely! One of the greatest advantages of this recipe, especially during the busy holiday season, is its make-ahead potential. You can fully assemble the candy cane danish the night before you plan to bake it. Once assembled, simply cover it tightly with plastic wrap and store it in the refrigerator. We highly recommend assembling it directly on a parchment-lined baking sheet before chilling. This prevents any disturbance to its delicate shape when transferring it in the morning. When you’re ready to bake, simply place it directly into your preheated oven as directed in the recipe. This allows you to wake up to a nearly ready, festive breakfast without the morning rush, making your holiday celebrations smoother and more enjoyable!
While this recipe is designed to yield two magnificent candy cane pastries, we understand that sometimes you might only need one. Though we haven’t personally tested halving this specific recipe for a single danish in our kitchen, many of our adventurous readers have reported successful results! If you decide to make only one, you’ll need one 8-ounce tube of crescent rolls, half the cream cheese filling ingredients, and about half a can of pie filling. Just be aware that baking times might need slight adjustment, so keep a close eye on your single danish to ensure it bakes to a perfect golden brown without drying out or becoming overcooked. It might cook a little faster.
To keep any leftover Candy Cane Danish fresh and delicious, proper storage is key. Allow the danish to cool completely after baking and glazing. Then, store it in an airtight container or wrap it tightly with plastic wrap to prevent it from drying out or absorbing refrigerator odors. Place it in the refrigerator, where it will remain good for up to 2 days. Beyond this timeframe, the pastry may start to become soggy, particularly due to the moisture from the fruit filling and the glaze, and the crescent rolls can lose their desirable flakiness. For best taste and texture, we highly recommend enjoying it within the first day or two after baking. You can gently warm individual slices in the microwave or a low oven before serving.
Essential Tips for a Perfect Candy Cane Danish Every Time
- Baking Sheet Size is Important: This recipe is designed to produce two impressive, generously sized candy cane pastries. Be mindful that you’ll need enough space for both to bake properly without crowding, as this can affect even browning. If you wish to make just one, you would indeed need an exceptionally large baking sheet or bake them in separate batches! For optimal results and ease of handling, we highly recommend using two standard baking sheets, each generously lined with parchment paper. Parchment paper is your best friend here; it not only prevents the pastry from sticking but also makes transferring the delicate danish much simpler and ensures a super easy cleanup.
- Effortless Transfer and Presentation: To further aid in lifting and serving your beautiful danish without breakage, consider using a silicone baking mat or, as mentioned, high-quality parchment paper. These create a non-stick surface that allows the danish to slide off smoothly. For an even smoother experience, a rimless insulated baking sheet can be incredibly helpful, allowing you to gently slide the baked danish off the pan rather than risking damage by trying to lift it.
- Mastering the Folding Technique: After meticulously forming the crescent cane shape and generously adding your delicious cream cheese and fruit filling, pay close attention to the folding process. This is crucial for both containing the filling and achieving the iconic striped look. Start from the very top (the curved hook) of the candy cane and carefully fold the pointed tips of the crescent triangles over the filling, overlapping them. Work your way down the length of the pastry, gently tucking the ends to secure the filling and create those signature diagonal stripes. This technique ensures a neat and appealing final product that holds its shape beautifully.
- Glaze While Warm for a Smooth Finish: The timing for applying the glaze is crucial for achieving that smooth, even, and slightly melted finish. Make sure to frost your danish while it is still quite warm, but not piping hot directly out of the oven. The residual heat from the pastry will slightly melt the icing, allowing it to naturally level out and create a beautiful, glossy sheen. If the danish is too cool, the glaze might be thicker and harder to spread evenly, resulting in a less polished look.
- Leftover Pie Filling? No Problem!: It’s quite common to have a little bit of pie filling left over after making two danishes. Don’t let this delicious excess go to waste! This leftover filling is perfect for crafting other delightful treats. Consider using it for small cherry hand pies, adorable cherry pie cookies, or even as a quick, flavorful topping for vanilla ice cream, plain yogurt, oatmeal, or pancakes.
- Clean Up for a Polished Presentation: After baking and especially after glazing, if any of the delicious filling or glaze has seeped out onto the parchment paper, use a small icing spatula or a rubber spatula to carefully clean around the edges of the danish. This simple step ensures a clean presentation and professional-looking finish for your holiday masterpiece, making it even more impressive on your breakfast table.
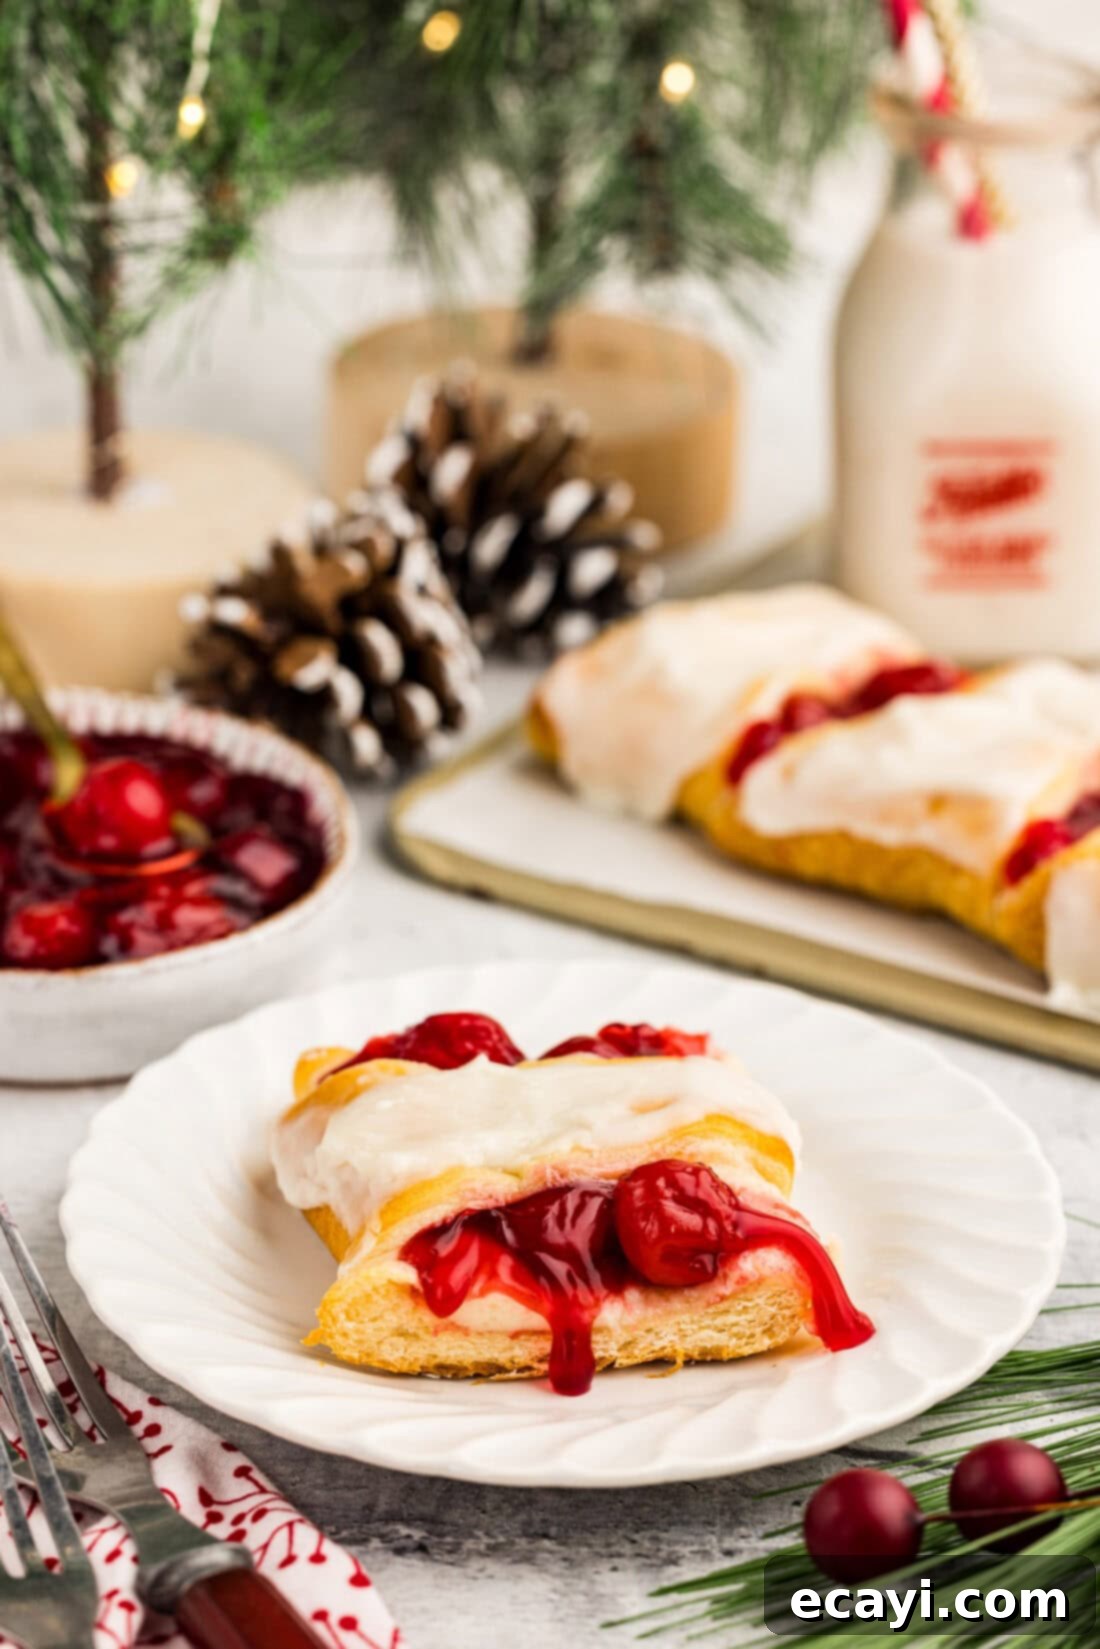
Delightful Serving Suggestions for Your Candy Cane Danish
There’s nothing quite like the aroma of freshly baked danish filling your home on Christmas morning! Your beautiful Candy Cane Danish is best served warm, allowing the flavors to truly shine and the pastry to retain its soft, flaky texture. Pair it with a steaming cup of freshly brewed coffee, a comforting mug of hot cocoa, or a refreshing glass of cold milk for a complete and satisfying holiday breakfast. It’s equally delicious enjoyed at room temperature, making it a versatile treat for brunch, a festive dessert, or even an afternoon coffee break.
This charming pastry isn’t just a delicious meal; it’s an experience. The festive shape and vibrant colors make it a showstopper on any holiday table, instantly setting a cheerful mood. We have a strong feeling that once you experience the joy and ease of making this Christmas breakfast, it will quickly become a cherished tradition in your household, just as it has in ours. For an extra touch of holiday cheer, consider adding a sprinkle of festive red and green sprinkles over the glaze before it sets, or offer a dollop of freshly whipped cream or a scoop of vanilla ice cream on the side for an even more decadent treat!
More Festive Christmas Recipes to Enjoy
Looking for more holiday inspiration? Explore these other delightful Christmas-themed recipes perfect for entertaining or simply enjoying with your family during the most wonderful time of the year:
- Antipasto Wreath: A savory and stunning appetizer that’s as beautiful as it is delicious, perfect for holiday gatherings.
- Crockpot Hot Chocolate: Keep everyone warm and cozy with this rich and creamy, hands-off hot chocolate recipe, ideal for a crowd.
- Christmas Tree Cheese Platter: An elegant and easy way to serve an assortment of cheeses, fruits, and crackers, shaped festively.
- Christmas Tree Pull Apart Bread: A fun and interactive sweet bread, often filled with cinnamon and sugar, perfect for sharing.
I absolutely adore sharing my passion for baking and cooking with all of you! To make sure you never miss out on new culinary adventures and delicious recipes, I offer a convenient newsletter delivered straight to your inbox every time a new recipe posts. Simply subscribe today and start receiving your free daily recipes to inspire your kitchen creativity and make every meal special!

Festive Cherry Cream Cheese Candy Cane Danish
IMPORTANT – Don’t miss the detailed Frequently Asked Questions and Expert Tips sections within the blog post! They offer invaluable advice for perfecting this recipe. Simply scroll back up to read them!
Print It
Rate It
Save ItSaved!
Ingredients
- 8 ounces cream cheese brick style, softened at room temp for easy mixing
- ½ cup granulated sugar
- 1 teaspoon vanilla extract OR 1/2 teaspoon vanilla and almond extract, each for enhanced flavor
- 16 ounces crescent rolls two 8-oz tubes (refrigerated)
- 21 ounces cherry pie filling canned, or homemade, can also use raspberry or strawberry
For the Sweet Glaze
- 1 cup powdered sugar
- 1 Tablespoon butter softened at room temp
- 1 Tablespoon milk
- ¼ teaspoon vanilla extract
Helpful Kitchen Tools
-
Silicone baking mat (optional, but highly recommended for easy cleanup)
-
Rubber spatula (for spreading and cleaning up)
-
Mixing bowls (various sizes for ingredients and fillings)
-
Cookie sheets (at least two, for baking both danishes)
-
Parchment paper (for lining baking sheets)
-
Hand mixer or stand mixer (for the cream cheese filling)
Before You Begin: Important Notes & Considerations
- Flavoring the Cream Cheese: The cream cheese filling is deliciously versatile! While vanilla extract offers a classic taste, incorporating a blend of vanilla and almond extracts can truly elevate the flavor profile. The subtle nuttiness of almond extract beautifully complements the fruitiness of cherries (or raspberries/strawberries). Feel free to experiment with other extracts like lemon for a brighter note, or even a hint of rum extract for a more festive touch.
- Baking Surface for Easy Release: For guaranteed non-stick baking and effortless removal of your delicate candy cane danishes, always line your cookie sheets. A Silpat (silicone baking mat) or parchment paper are ideal choices. Using these not only prevents sticking but also ensures even baking and makes cleanup incredibly simple. If possible, a rimless insulated baking sheet can be advantageous as it allows you to gently slide the baked danish off the pan, minimizing the risk of it breaking apart.
- Utilizing Leftover Pie Filling: It’s quite common to have a small amount of pie filling remaining after you’ve created your two danishes. Don’t discard it! This leftover filling is a fantastic bonus ingredient for other treats. Consider using it for quick mini hand pies, delightful cherry pie cookies, or even as a simple topping for oatmeal, pancakes, or ice cream.
- Achieving a Clean Finish: After your danishes have baked and you’ve applied the glaze, take a moment to perfect their presentation. If any of the delicious fruit filling or sweet glaze has accidentally spilled or spread beyond the intended area onto the parchment paper during baking, use a small icing spatula or the edge of a rubber spatula to carefully clean up around the base of the danish. This minor detail makes a significant difference in the overall neatness and professional appearance of your holiday pastry.
- Softened Cream Cheese and Butter: Ensure both your cream cheese and butter for the glaze are properly softened to room temperature. This is key for a smooth, lump-free cream cheese filling and a silky, easily mixable glaze. If your cream cheese isn’t soft enough, you risk a lumpy filling and difficult spreading.
- Freezing for Later Enjoyment: If you’re planning ahead or have leftovers you wish to save, the baked danish freezes wonderfully. Allow it to cool completely, then wrap it tightly first in plastic wrap, then in aluminum foil to prevent freezer burn. It can be frozen for up to 1-2 months. To serve, thaw overnight in the refrigerator and gently reheat in a low oven (around 250°F / 120°C) until warmed through, or microwave individual slices briefly.
Instructions for Your Holiday Danish
-
Preheat Oven & Prep Pans: Preheat your oven to 375°F (190°C). Line two large cookie sheets with parchment paper to prevent sticking and ensure easy cleanup. Set them aside.
-
Prepare Cream Cheese Filling: In a medium mixing bowl, combine the softened brick-style cream cheese, granulated sugar, and vanilla extract (or the vanilla and almond extract blend). Beat with a hand mixer or stand mixer until the mixture is light, fluffy, and completely smooth.
-
Shape the Danish Base: On one of the prepared cookie sheets, carefully unroll one tube of cold crescent rolls. Arrange four crescent triangles in a straight line along their wide ends, slightly overlapping the corners to form a continuous strip. With the fifth crescent, begin to gently curve the top portion, shaping it into the distinctive hook of a candy cane.
-
Add Fillings: Spread half of the cream cheese mixture evenly along the wide end of the crescent roll triangles, leaving a small border (about half an inch) around the edges. Then, top this with half of your chosen cherry pie filling, spreading it gently over the cream cheese layer, again avoiding the very edges.
-
Form the Stripes & Repeat: Carefully fold over the pointed tips of the crescent triangles, starting from the top (curved end) of the cane. Overlap them to create enclosed stripes, gently tucking the ends along the pastry’s length to secure the filling. Repeat the entire shaping and filling process with the remaining tube of crescent rolls, cream cheese, and cherry pie filling on your second prepared cookie sheet.
-
Bake Until Golden: Transfer the cookie sheets to your preheated oven. Bake for 15-20 minutes, or until the pastry is puffed and a beautiful golden brown.
To Make the Icing Glaze
-
Mix Glaze & Frost: While the pastries are still warm from the oven, prepare your glaze. In a small bowl, combine the powdered sugar, softened butter, milk, and vanilla extract. Whisk thoroughly until the mixture is smooth and has a drizzly consistency. Drizzle this glaze over the warm danishes, taking care to frost only the crescent stripes for the signature candy cane look. Serve warm and enjoy!
Expert Tips & FAQs for Success
- Make Ahead Option: For an effortless Christmas morning, assemble the danish (without baking) the night before. Cover tightly with plastic wrap and refrigerate on the parchment-lined baking sheet. Bake as directed in the morning.
- Softened Ingredients are Key: Ensure your cream cheese and butter are at room temperature. This will prevent lumps in your filling and ensure a smooth, easy-to-mix glaze.
- Don’t Waste Leftover Filling: If you have any pie filling left, repurpose it for other holiday treats like small hand pies or cherry pie cookies, or use it as a topping for yogurt or ice cream.
- Clean Edges for Best Presentation: After baking and glazing, use a small icing or rubber spatula to clean up any filling or glaze that might have oozed out. This provides a polished, professional look.
- Serving Temperature: While delicious warm, this danish is also wonderful served at room temperature.
- Freezing Instructions: If you wish to freeze the baked danish, ensure it is completely cooled, then wrap it tightly in plastic wrap and then foil. It can be frozen for up to 1-2 months. Thaw in the refrigerator overnight and gently reheat in a low oven (around 250°F / 120°C) until warmed through.
Nutrition Information (per slice)
The recipes on this blog are tested with a conventional gas oven and gas stovetop. It’s important to note that some ovens, especially as they age, can cook and bake inconsistently. Using an inexpensive oven thermometer can assure you that your oven is truly heating to the proper temperature. If you use a toaster oven or countertop oven, please keep in mind that they may not distribute heat the same as a conventional full sized oven and you may need to adjust your cooking/baking times. In the case of recipes made with a pressure cooker, air fryer, slow cooker, or other appliance, a link to the appliances we use is listed within each respective recipe. For baking recipes where measurements are given by weight, please note that results may not be the same if cups are used instead, and we can’t guarantee success with that method.
This post was originally published here on Nov 28, 2016 and has since been updated with new photos, expert tips, and enhanced details to bring you the best possible holiday baking experience. Recipe contributed by Rebekah from KitchenGidget.

