Easy & Delicious Chicken Philly Cheesesteak: A Lighter, Flavorful Twist on a Classic
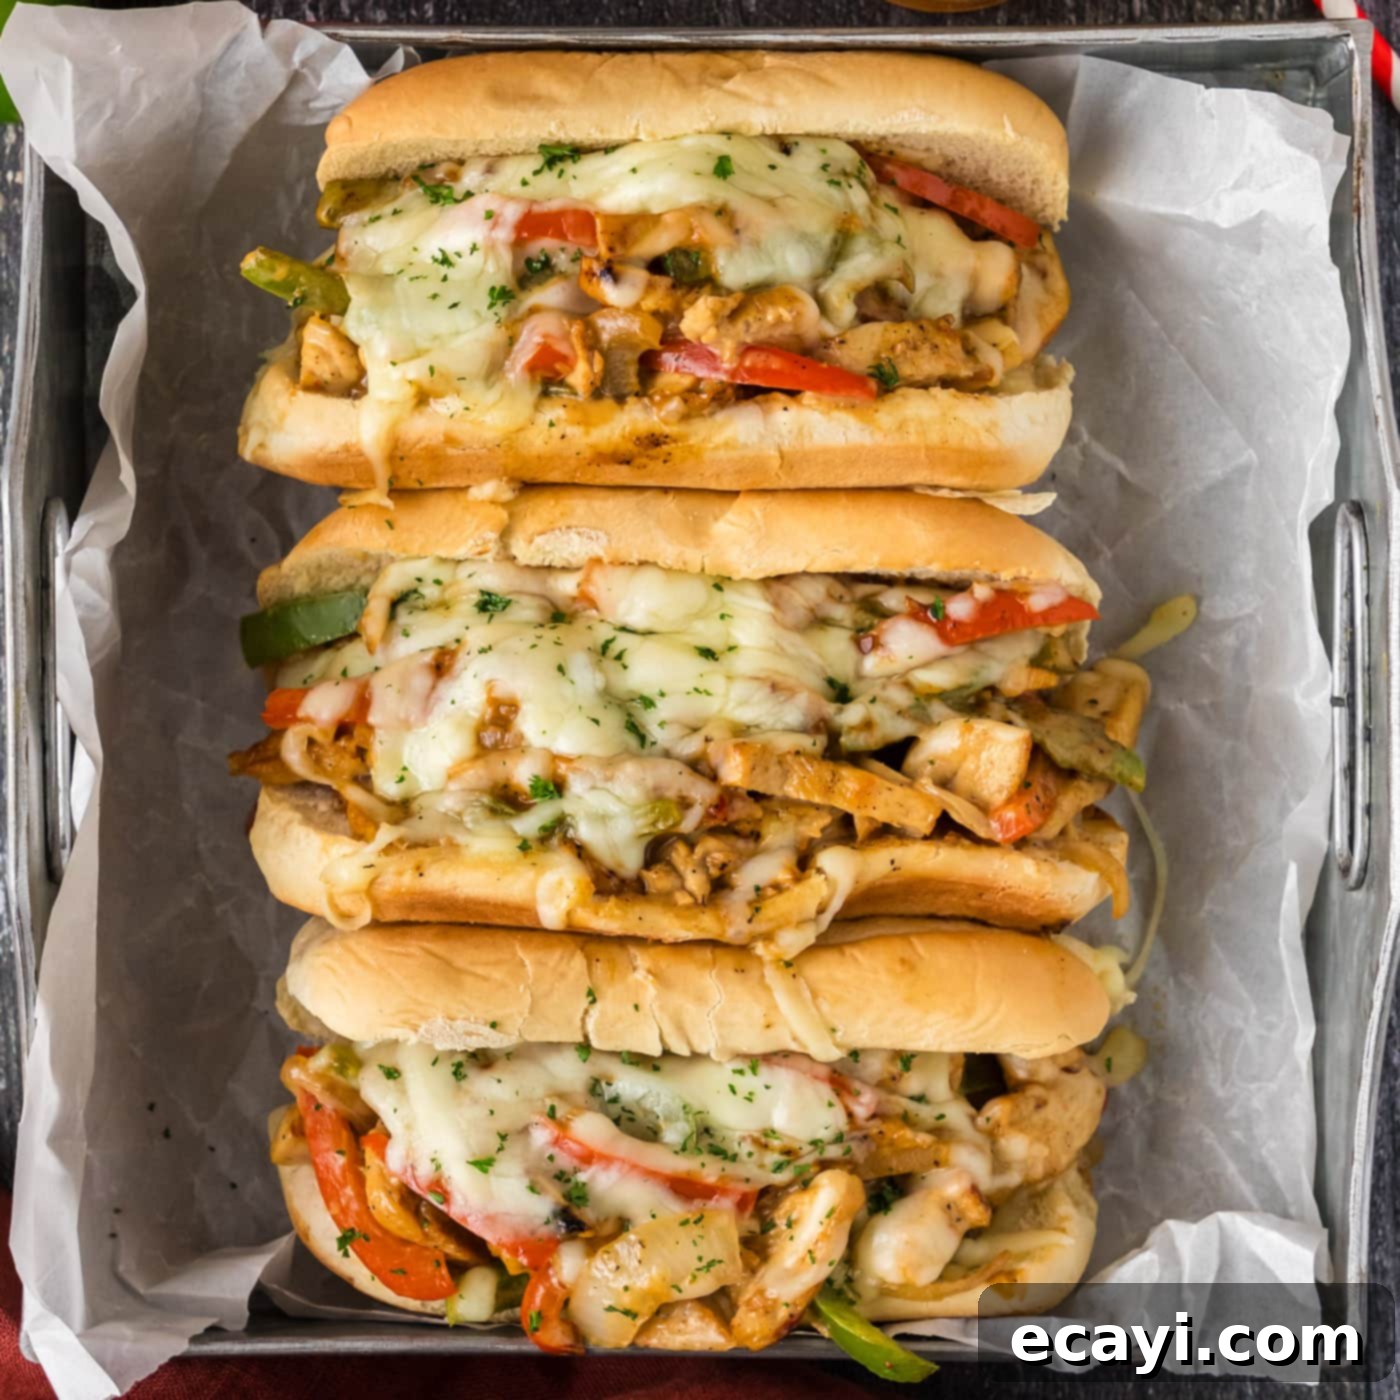
Discover how to create the ultimate Chicken Philly Cheesesteak, a delightful and lighter interpretation of the beloved East Coast classic. This recipe combines tender, seasoned chicken with a medley of sautéed bell peppers and onions, all smothered in rich, melty cheese and nestled in a soft, hearty hoagie bun. Perfect for a weeknight dinner or a crowd-pleasing gathering, this chicken cheesesteak offers all the irresistible flavors and satisfying textures of the traditional version but with the added versatility and lean protein of chicken. Get ready to sink your teeth into a sandwich that’s packed with flavor in every single bite!
Why This Chicken Philly Cheesesteak Recipe Works
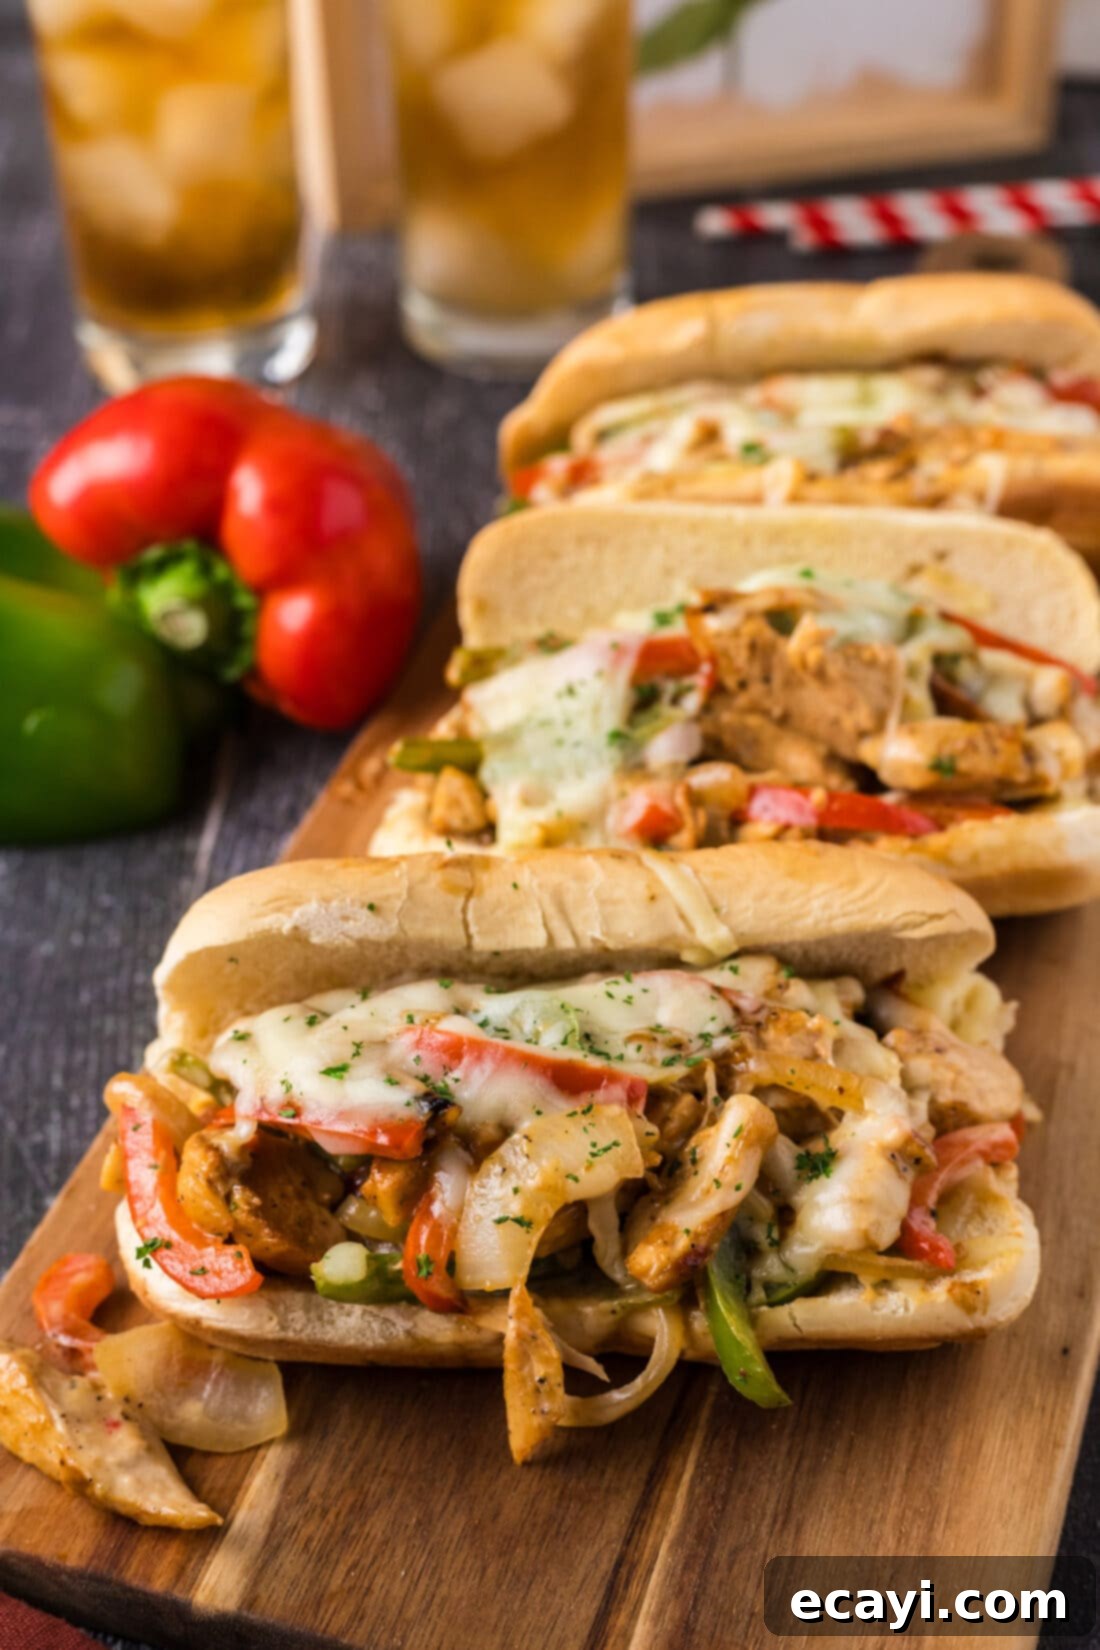
This chicken Philly cheesesteak recipe is more than just a substitute for the traditional beef version; it’s a culinary experience designed for maximum flavor and ease. We’re taking the iconic elements of a Philly cheesesteak – the thinly sliced vegetables, the savory meat, and the incredible melted cheese – and reinventing them with succulent chicken. The result is a sandwich that’s not only lighter but also incredibly versatile and just as satisfying. Imagine hearty hoagie buns overflowing with perfectly seasoned chicken, vibrant bell peppers, and sweet onions, all brought together with a creamy, cheesy coating. Each bite delivers a harmonious blend of textures, from the crunch of the vegetables to the tenderness of the chicken and the gooeyness of the cheese, making it an irresistible choice for any sandwich lover. This recipe streamlines the cooking process, ensuring a delicious meal on the table without extensive effort, proving that a lighter twist can be just as decadent.
Essential Ingredients for Your Chicken Philly Cheesesteak
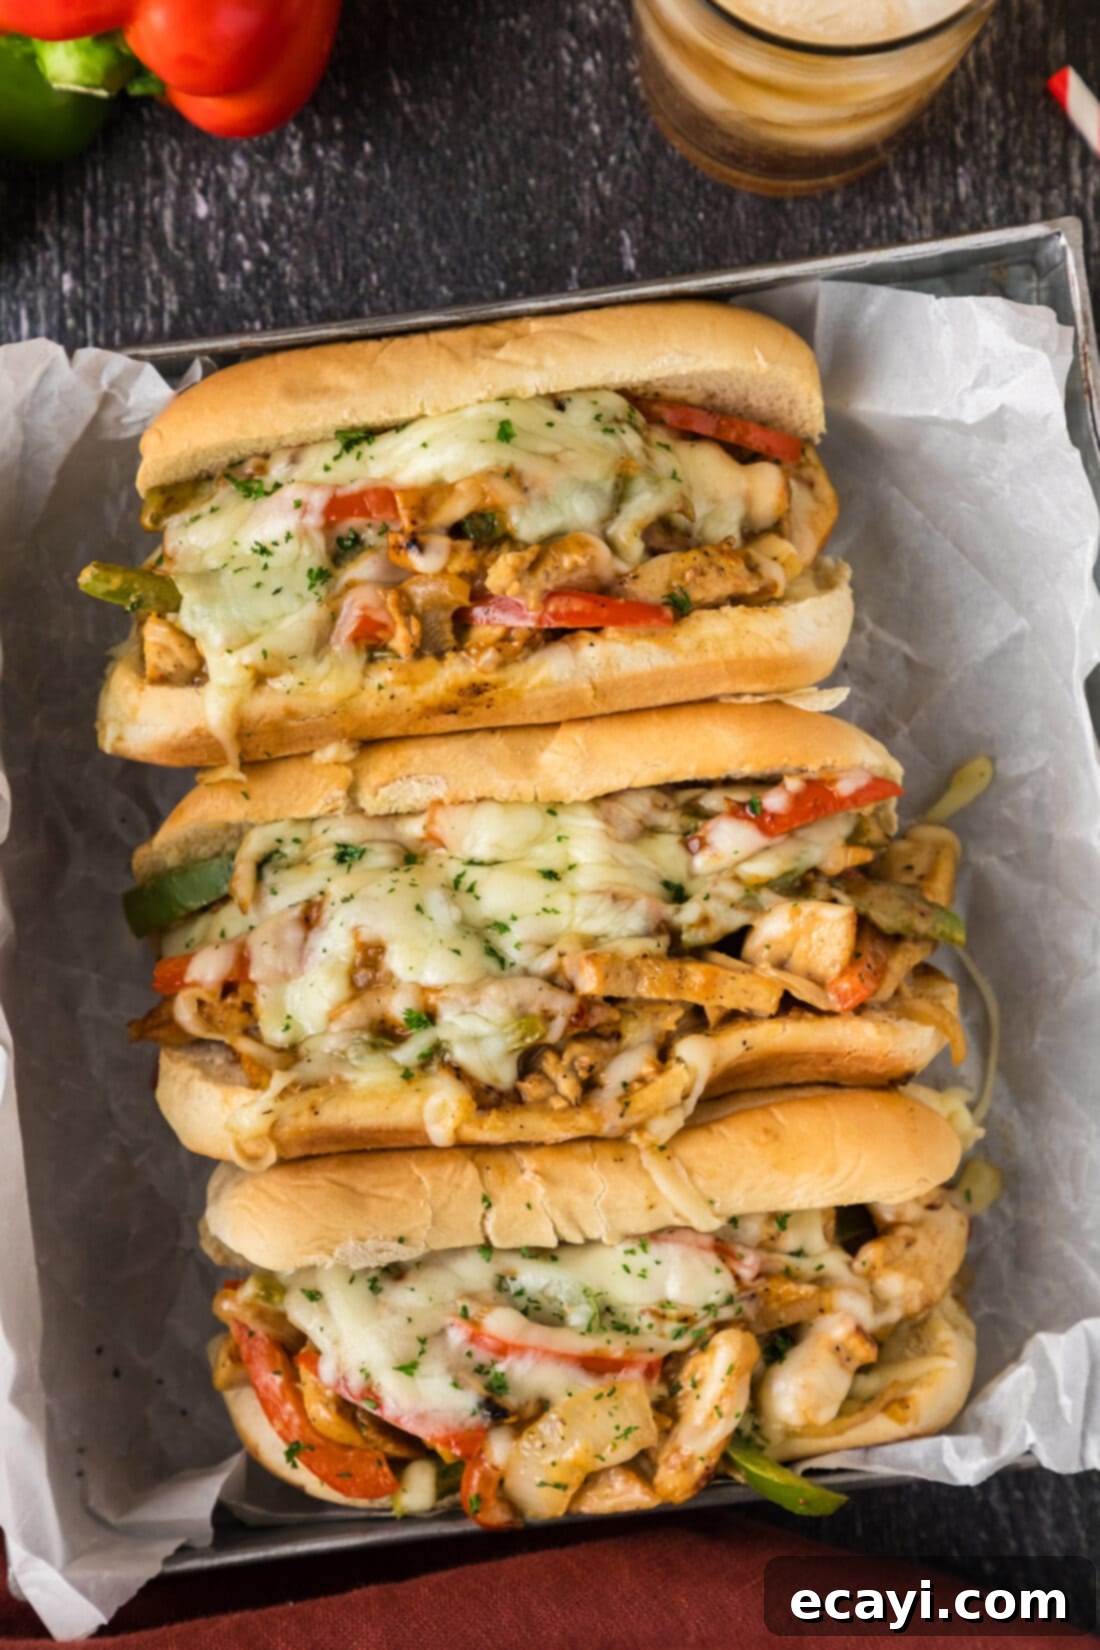
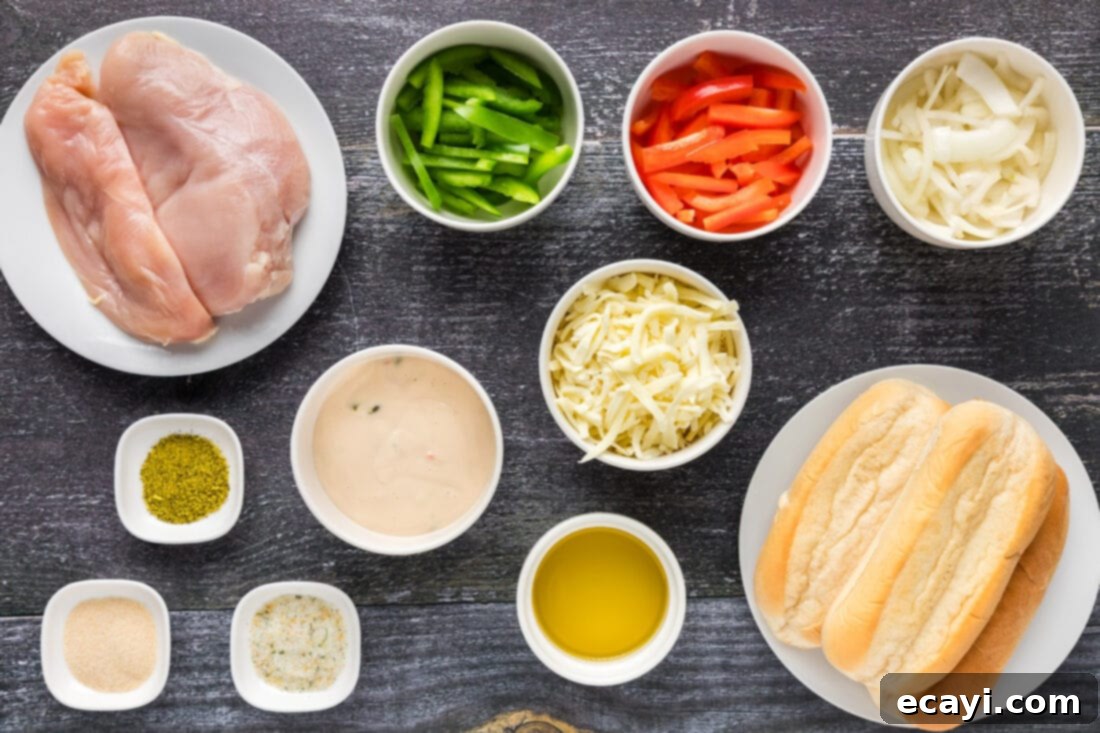
Crafting the perfect chicken Philly cheesesteak begins with high-quality ingredients. While the full list with precise measurements and detailed instructions can be found in the printable recipe card at the end of this post, here’s a snapshot of the key components you’ll need to bring this incredible sandwich to life. From fresh produce to premium chicken and gooey cheese, each element plays a crucial role in building the layered flavors and satisfying textures that make this recipe a standout. Ensure you have these items on hand to make your cooking experience smooth and enjoyable:
Ingredient Spotlight & Smart Substitution Ideas
Understanding each ingredient and its role is key to mastering this chicken Philly cheesesteak. Here, we delve deeper into the core components, offering insights and flexible substitution suggestions to help you tailor the recipe to your preferences or what you have available.
CHEESE – The “cheesesteak” part of the name is crucial, and while the classic beef version often adheres to specific cheese choices, this chicken variant offers more freedom. Since a chicken Philly cheesesteak sandwich doesn’t follow the traditional “rules” as strictly, the type of cheese you choose is entirely up to your taste. We highly recommend a combination of mozzarella cheese for its fantastic stretch and mild flavor, along with Queso Blanco for an extra layer of creamy, mouthwatering richness. However, feel free to experiment! Provolone cheese is a classic choice for any cheesesteak, providing a sharp, tangy bite that complements the chicken and vegetables beautifully. Other excellent options include mild Swiss cheese, creamy American cheese, or even the iconic Cheez Whiz for that authentic, extra-gooey Philly experience. The goal is a cheese that melts well and integrates seamlessly with the other fillings, creating that signature decadent bite.
CHICKEN – Boneless, skinless chicken breasts are our go-to for this recipe due to their lean protein and ease of preparation. We’ve opted to cut our chicken into tender, bite-sized chunks, which integrate wonderfully with the sautéed peppers and onions, ensuring every forkful (or bite) has a balanced mix of ingredients. However, if you prefer a more traditional “shaved meat” texture, similar to the beef version, you can certainly slice the chicken breasts very thinly against the grain before cooking. For those who enjoy a richer, more succulent flavor, chicken thighs are an excellent alternative. Their higher fat content ensures a moist and flavorful result, even if slightly less “lean.” Whichever cut you choose, ensure it’s cooked to an internal temperature of 165°F for safety and optimal tenderness.
BUN – The foundation of any great cheesesteak is its bread, and a high-quality hoagie roll is paramount. We favor hoagie rolls because they are delightfully soft, possess a satisfying chew, and are robust enough to confidently hold the generous heaps of flavorful toppings without falling apart. Their structure is essential for containing the juicy fillings and melted cheese. For those residing in or visiting the East Coast, or if you’re simply lucky enough to find them, genuine Amoroso rolls are considered the gold standard for cheesesteaks. Their unique texture and flavor truly elevate the sandwich experience. If Amoroso rolls aren’t available, look for other Italian-style rolls or submarine rolls that are fresh, soft on the inside, and have a lightly crisp crust, ensuring they can stand up to the warm, moist filling.
VEGETABLES – Bell peppers and onions are the undisputed stars of the vegetable show in a Philly cheesesteak. We typically use a combination of green bell peppers for their slightly bitter, classic flavor, and red bell peppers for a touch of sweetness and vibrant color. You can also incorporate yellow or orange bell peppers for a full spectrum of flavor and visual appeal. When sautéing, aim for a tender-crisp texture – you want them softened but still with a slight bite to provide textural contrast to the chicken and cheese. Freshly sliced yellow onions or Vidalia onions will lend a sweet, pungent flavor that mellows beautifully as it cooks. Ensure your vegetables are thinly sliced to integrate smoothly into the sandwich.
SEASONING & OIL – A simple yet effective seasoning blend of lemon pepper, garlic salt, and onion powder ensures the chicken is flavorful before even meeting the pan. Olive oil is used for sautéing the chicken and vegetables, adding a subtle richness. Feel free to adjust the seasoning to your palate, perhaps adding a pinch of smoked paprika for depth or a dash of cayenne for a subtle kick. The quality of your oil also impacts the flavor, so a good extra virgin olive oil is always a great choice.
Step-by-Step Guide: How to Make Chicken Philly Cheesesteak
These step-by-step photos and detailed instructions are here to guide you through the process of making this delicious recipe visually. For the full printable version, complete with precise measurements and all instructions, simply Jump to Recipe at the bottom of this page.
- Preheat your oven to 250°F (120°C). This low temperature is perfect for toasting the hoagie buns and melting the cheese at the end, giving your sandwiches a warm, gooey finish.
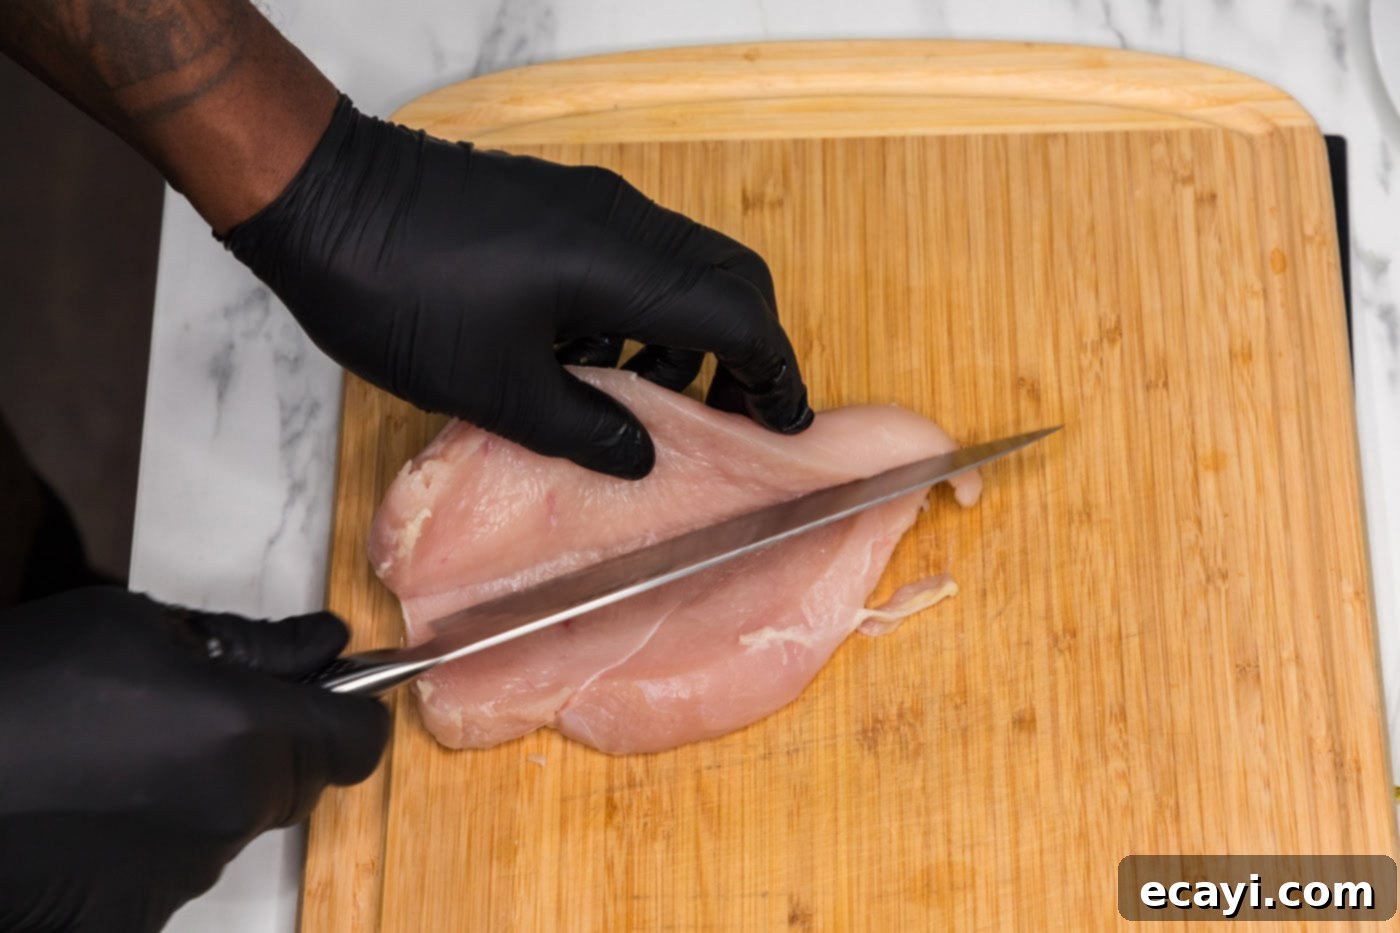
- If you are working with thick chicken breasts, it’s important to ensure even cooking. Carefully butterfly each one by slicing horizontally through the thickest part almost all the way to the other side, then opening it like a book. Alternatively, you can gently pound them with a meat mallet to achieve an even thickness of about ½ to ¾ inch. This critical step ensures that the chicken cooks uniformly and quickly, preventing some parts from being overcooked while others are still raw, leading to perfectly tender results.

- In a small mixing bowl, combine half of the olive oil with the lemon pepper, garlic salt, and onion powder. Mix well until a cohesive seasoning paste forms. Generously spread this aromatic mixture all over both sides of the prepared chicken breasts, ensuring every surface is coated for maximum flavor penetration.
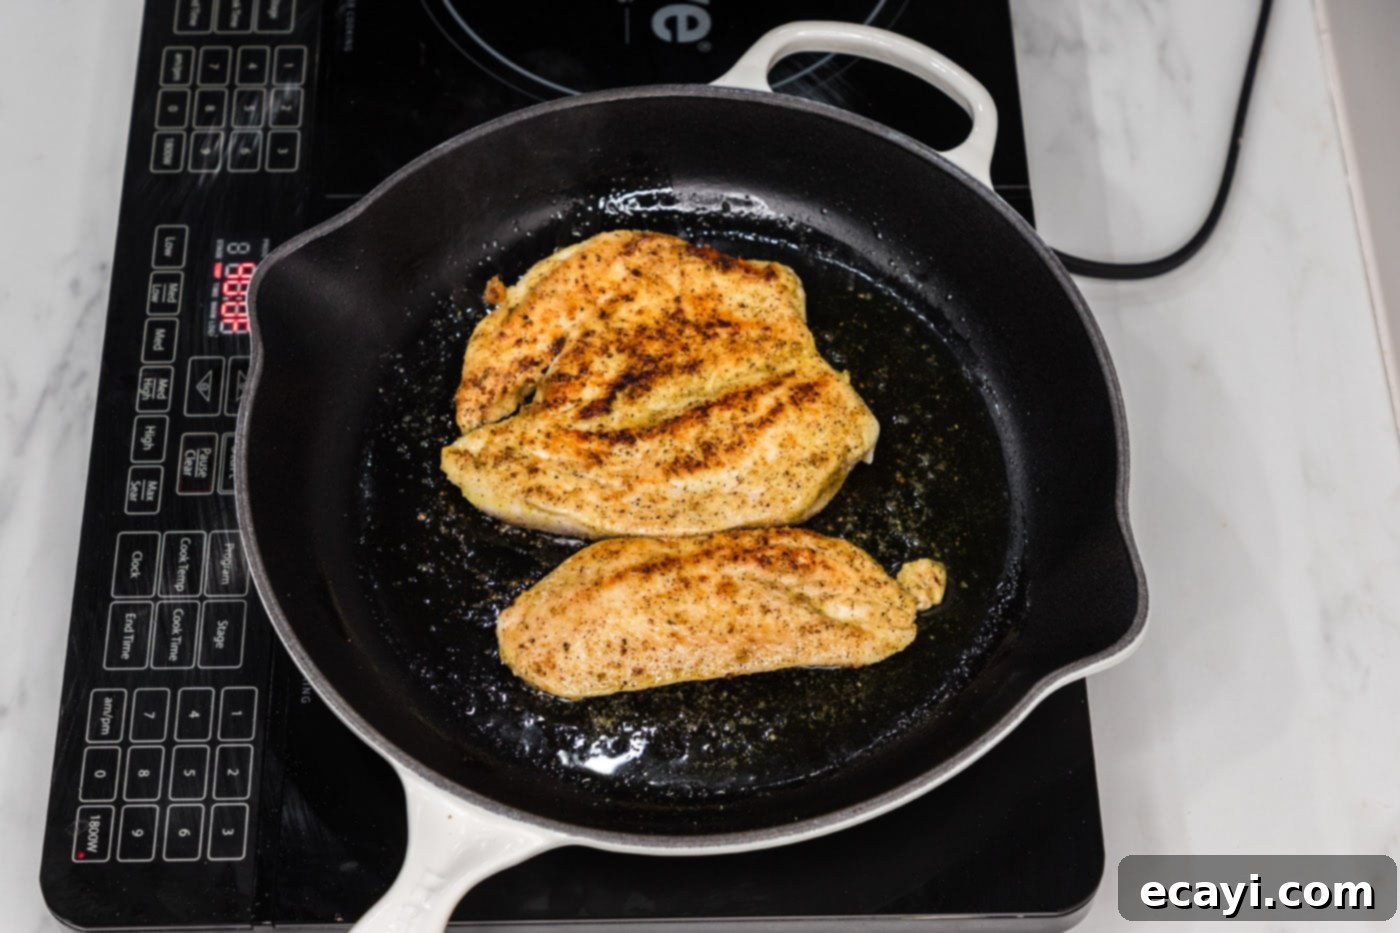
- Heat the remaining olive oil in a large skillet or cast-iron pan over medium-high heat. Wait until the oil is shimmering slightly, indicating it’s hot enough to sear. Carefully add the seasoned chicken to the hot skillet and cook for 4-5 minutes per side. You’re looking for a beautiful golden-brown crust to develop, and the chicken should reach an internal temperature of 165°F (74°C). Use a meat thermometer to confirm doneness.

- Once cooked, remove the chicken from the pan and transfer it to a cutting board or plate. Allow it to rest for a few minutes; this helps the juices redistribute, keeping the chicken tender and moist. Crucially, do not clean out the skillet! The browned bits and residual oil are packed with flavor, forming a crucial base for your vegetables.
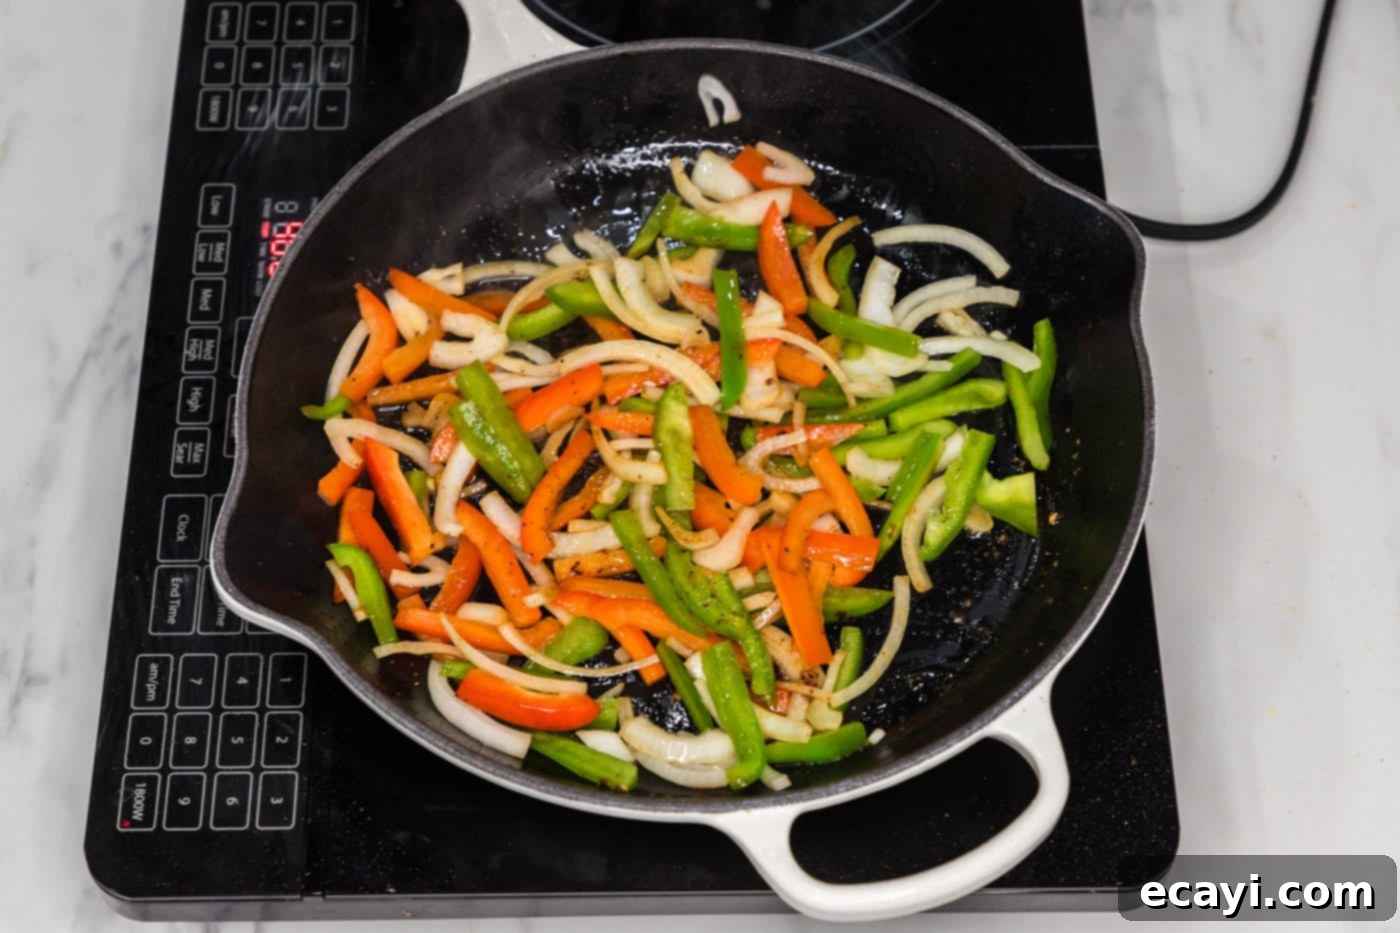
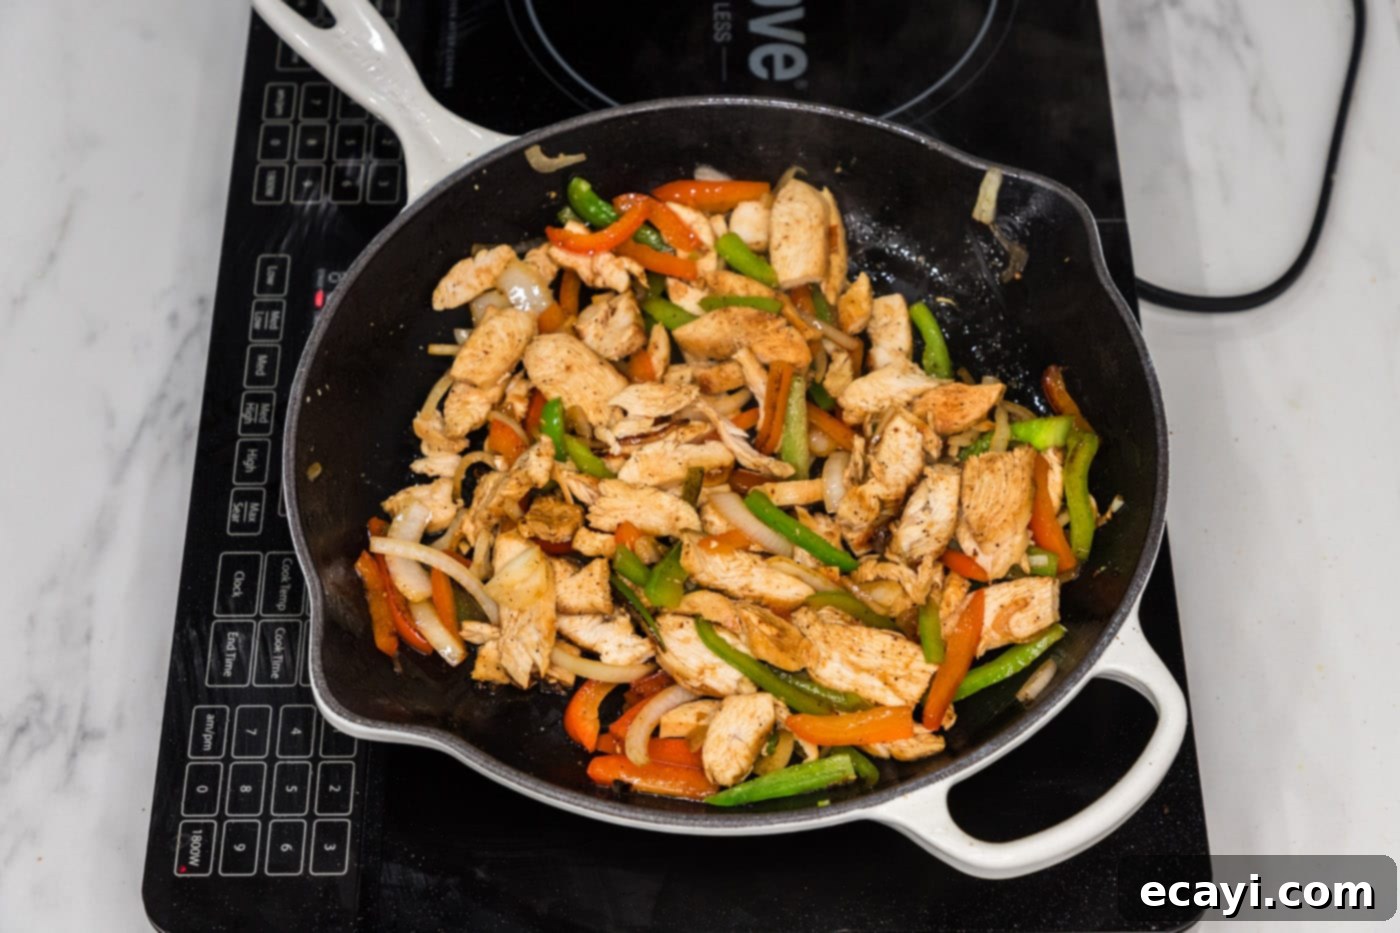
- Add your thinly sliced bell peppers (green and red) and onions directly to the same skillet. Cook over medium-high heat, stirring occasionally, until the vegetables soften and become tender, which typically takes about 3-5 minutes. They should still retain a slight crispness for texture.

- While the vegetables are cooking, take the rested chicken and chop it into bite-sized chunks or thin slices, depending on your preference. Once the vegetables are tender, add the chopped chicken back into the skillet. Toss everything together thoroughly to combine, allowing the chicken to warm through and mingle with the savory vegetable juices.

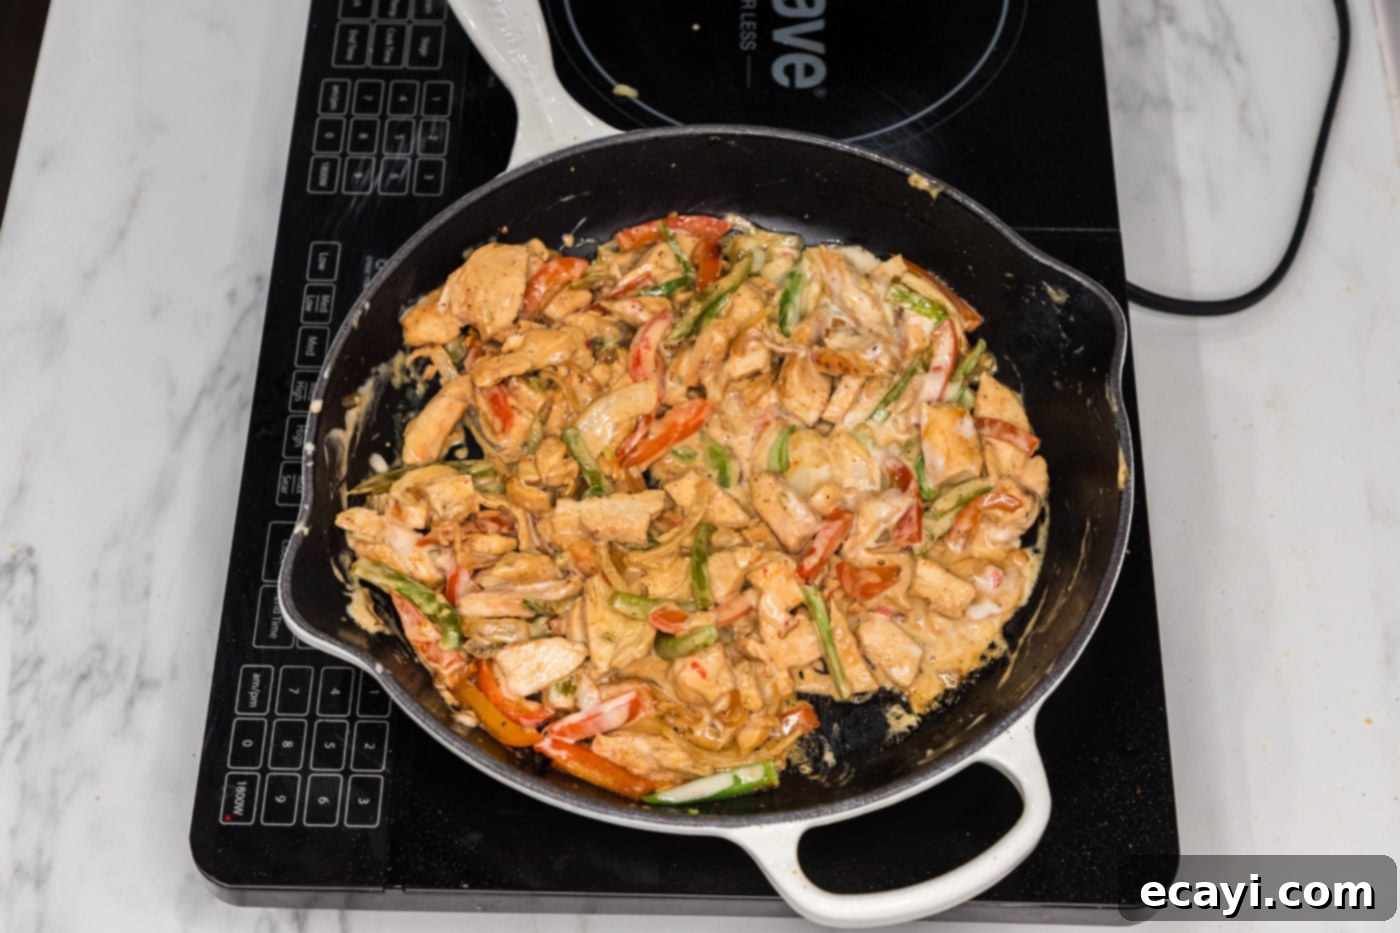
- Now for the magic touch! Add the Queso Blanco dip to the chicken and vegetable mixture. Stir everything together until the queso is fully melted and coats all the ingredients, creating a creamy, cohesive filling. Continue heating just until everything is warm and bubbly. Once coated, turn off the skillet to prevent overcooking.

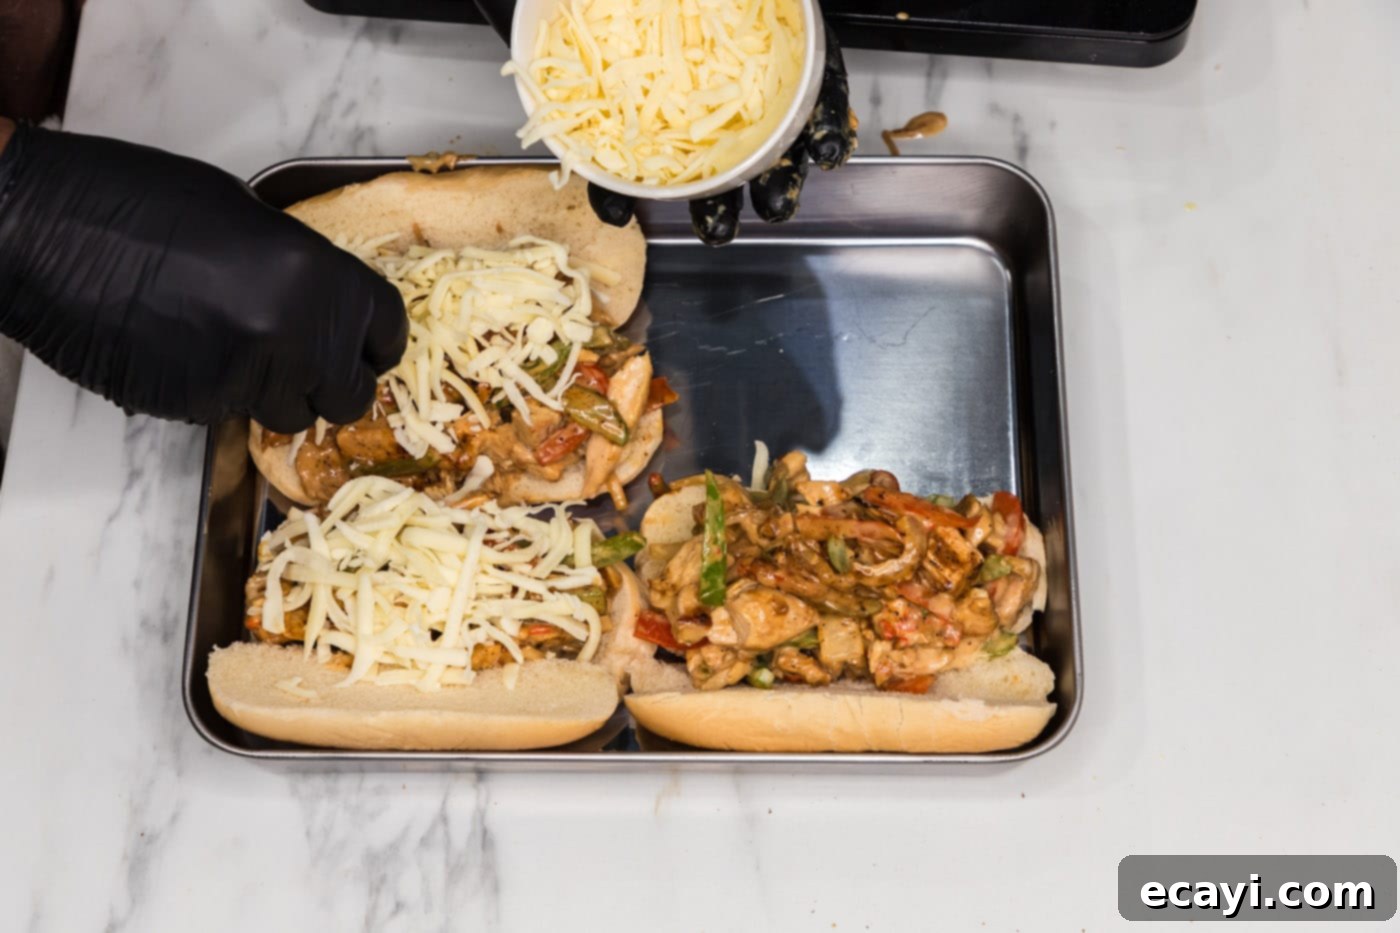
- Arrange your hoagie buns in a baking pan, splitting them open without cutting all the way through, so they lie flat. Evenly divide the flavorful chicken and vegetable mixture among all the sandwich buns, piling it high. Finish each sandwich by generously sprinkling shredded mozzarella cheese over the top of the filling.
- Place the baking pan into your preheated 250°F (120°C) oven. Toast the sandwiches for about 5 minutes, or until the mozzarella cheese is perfectly melted, bubbly, and slightly golden. This final step brings all the flavors together and gives you that irresistible gooey cheese pull. Carefully remove from the oven and serve immediately!
Frequently Asked Questions & Expert Tips for Chicken Philly Cheesesteak
Get answers to common questions and discover pro tips to make your chicken Philly cheesesteak experience even better, from prep to leftovers!
Proper storage is key to enjoying your delicious chicken Philly cheesesteak leftovers. The best method is to store the chicken and vegetable mixture separately from the hoagie buns. Transfer the cooled chicken mixture to an airtight container and keep it in the refrigerator for up to 4 days. Storing the components separately prevents the bread from becoming soggy. When you’re ready to enjoy, you can reheat the mixture and toast fresh buns for the best experience.
To reheat your chicken Philly cheesesteak mixture, gently warm it over medium-low heat on the stovetop until heated through, stirring occasionally. Alternatively, you can microwave it in 30-second intervals, stirring in between, until it’s hot. Once the filling is warm, spoon it onto a fresh or lightly toasted hoagie bun. Top with additional cheese if desired, then toast the assembled sandwich in a toaster oven, air fryer, or conventional oven at 350°F (175°C) for 3-5 minutes, or until the cheese is melted and bubbly and the bun is nicely warm and slightly crisp.
The beauty of a chicken Philly cheesesteak is its adaptability! To truly make it your own, consider adding a variety of toppings and flavor boosters. For a spicy kick, try fresh or pickled jalapeños or a dash of your favorite hot sauce. Sautéed mushrooms are another fantastic addition, offering an earthy depth. Banana peppers provide a tangy crunch, while a hint of garlic butter brushed on the bread roll before toasting adds an extra layer of savory richness. Don’t be afraid to experiment with different types of cheese, a sprinkle of fresh herbs like parsley or chives, or even a drizzle of a creamy garlic aioli. The sky’s the limit when it comes to customizing your perfect chicken Philly sandwich!
While a chicken cheesesteak is often perceived as a “healthier” alternative, it’s important to consider all components. Chicken itself is typically leaner and provides a bit more protein per serving compared to beef, which can be beneficial for those looking to reduce red meat intake. If your definition of healthier is primarily focused on a leaner protein source, then yes, it can be a good choice! However, the overall healthiness of the meal depends heavily on the additional ingredients, such as the generous amounts of cheese, the type of hoagie roll, and any extra sauces or toppings. To truly lighten up this dish, you can opt to enjoy the chicken and vegetable mixture in a bowl, without the hoagie roll, reducing the carb and calorie count. You could also use whole wheat buns, reduce the amount of cheese, or add even more vegetables for extra fiber and nutrients. It’s all about balance and conscious choices.
If you prefer thinly sliced chicken rather than chunks, a great tip is to partially freeze your boneless, skinless chicken breasts for about 20-30 minutes before slicing. This firms up the meat, making it much easier to cut very thin, uniform slices against the grain. A sharp knife is also essential for this task. Alternatively, you can ask your butcher to thinly slice the chicken for you, which saves a lot of prep time.
Serving Suggestions for Your Chicken Philly Cheesesteak
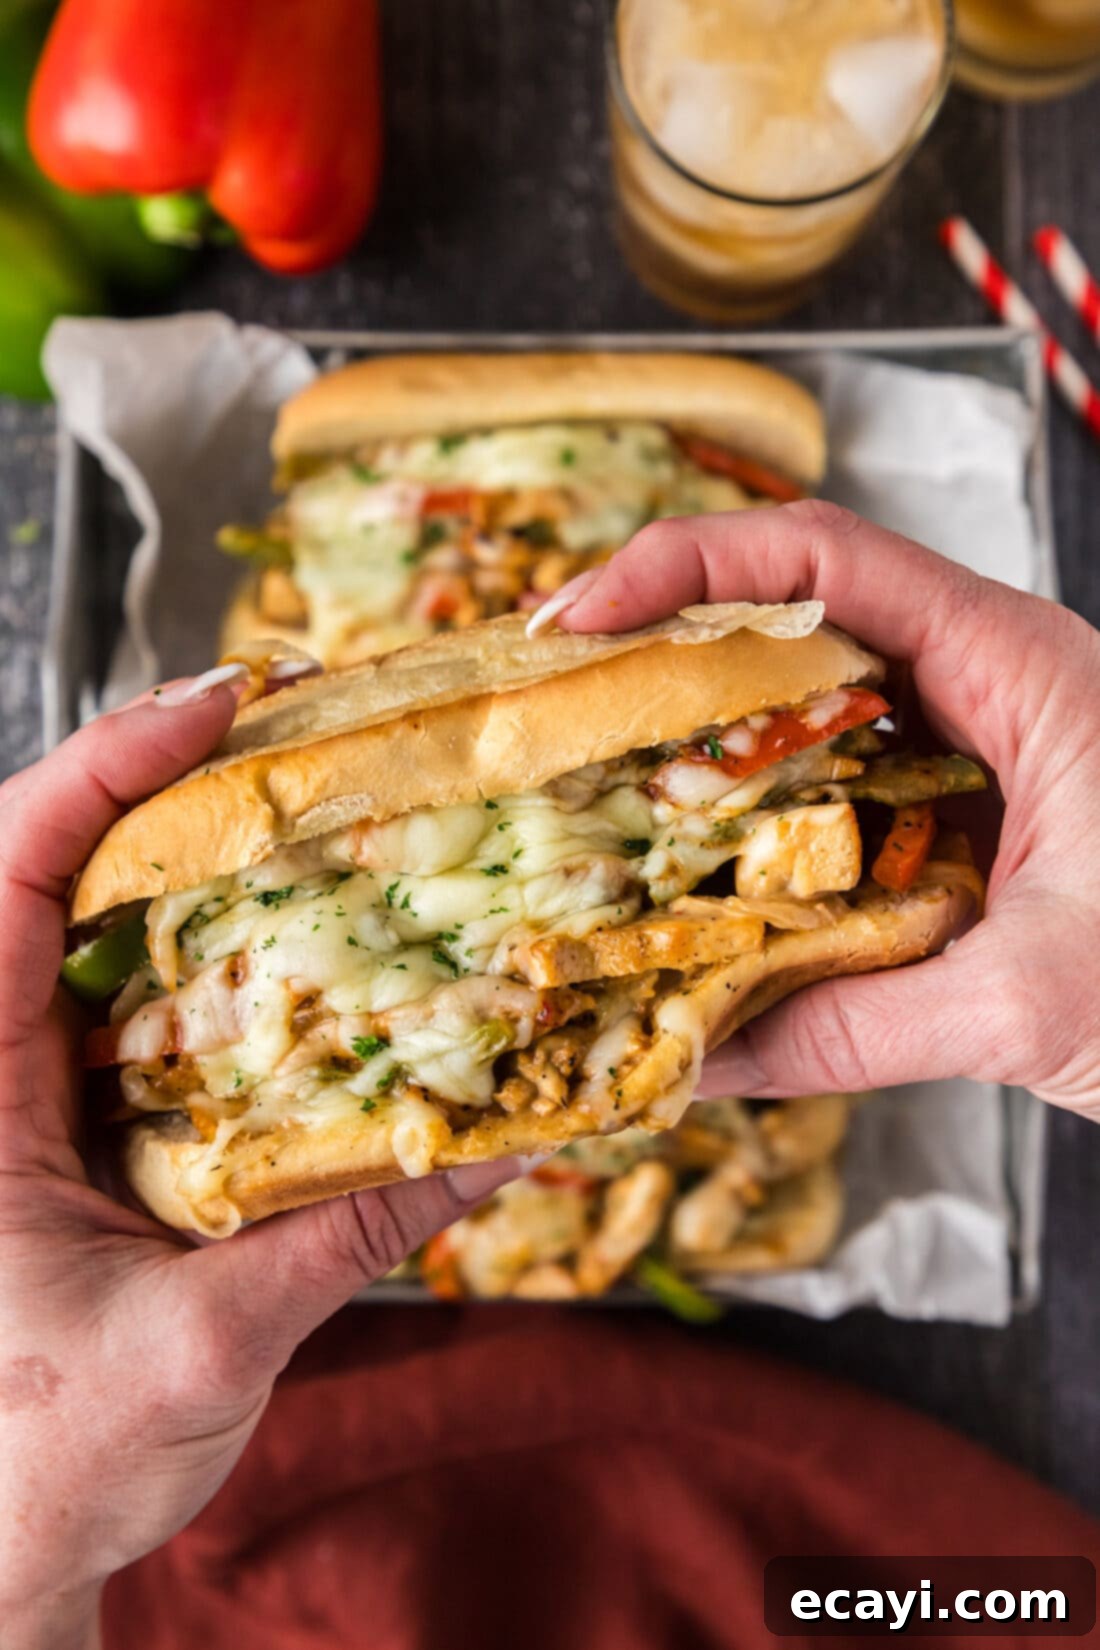
A hearty chicken Philly cheesesteak is a meal in itself, but pairing it with the right side dishes can elevate your dining experience. Classic companions are always a hit: crispy french fries, sweet potato fries, or a generous bag of your favorite potato chips provide that satisfying crunch. For a refreshing contrast, serve with a dill pickle spear or a light coleslaw. If you’re craving something a bit more substantial, homemade onion rings are an excellent choice. Don’t forget, you can also easily customize the way you enjoy this dish!
For those looking to keep things lighter or reduce carbohydrates, consider deconstructing your chicken cheesesteak. Serve the flavorful chicken and vegetable mixture in a bowl as-is, creating a delicious and satisfying meal without the added carbs and calories from the hoagie roll. This “cheesesteak bowl” is a fantastic option for a lighter lunch or dinner. Another versatile idea is to place the mixture into a large tortilla to create a savory chicken cheesesteak wrap or even in lettuce cups for an ultra-light option. However you choose to serve it, this chicken Philly cheesesteak is guaranteed to be a crowd-pleaser!
More Delicious Sandwich and Cheesy Recipes to Try
If you loved this chicken Philly cheesesteak, you’re in for a treat! Our kitchen is filled with more incredible sandwich creations and cheesy delights that are perfect for any occasion. From other twists on classic favorites to brand new culinary adventures, these recipes are designed to bring joy to your taste buds. Explore these related dishes and find your next family favorite:
- Flavorful Shrimp Roll
- The Original Philly Cheesesteak
- Irresistible Philly Cheesesteak Dip
- Hearty Philly Chicken Cheesesteak Casserole
- Philly Cheesesteak Cheesy Bread
I absolutely adore sharing my passion for baking and cooking, and bringing my kitchen experiments and successes to all of you! Keeping up with new recipes can be tricky, which is why I offer a convenient newsletter delivered straight to your inbox every time a fresh recipe is posted. Simply subscribe today and start receiving your free daily recipes, making it easier than ever to discover new favorites and expand your culinary repertoire!
Chicken Philly Cheesesteak
IMPORTANT – There are often Frequently Asked Questions within the blog post that you may find helpful. Simply scroll back up to read them!
Print It
Pin It
Rate It
Save It
Saved!
Prevent your screen from going dark
Course:
Dinner
Cuisine:
American
3
servings
40 minutes
670
Amanda Davis
Ingredients
-
1
pound
boneless skinless chicken breasts
weighed after trimming -
2
Tablespoons
olive oil
divided -
1
teaspoon
lemon pepper -
2
teaspoons
garlic salt -
2
teaspoons
onion powder -
1
small
green bell pepper
about 1/2 cup sliced -
1
small
red bell pepper
about 1/2 cup sliced -
½
cup
sliced onion -
½
cup
queso blanco dip -
3
hoagie buns -
1
cup
shredded mozzarella cheese
Things You’ll Need
-
Large heavy bottomed skillet -
Baking sheet
or baking dish
Before You Begin
- For the cheese, feel free to personalize your sandwich! While mozzarella and Queso Blanco create an extra mouthwatering experience, you can easily substitute with provolone cheese, Swiss, American cheese, or even classic Cheez Whiz for a different flavor profile and melt.
- Regarding the chicken, we’ve opted for bite-sized chunks to ensure a balanced mix of ingredients in every bite. However, for a more traditional texture akin to a beef cheesesteak, you can slice the chicken breasts very thinly instead. Don’t hesitate to use chicken thighs if you prefer their richer flavor and juicier texture!
- The bun is crucial! If you happen to be in an area where Amoroso rolls are available, they are an absolutely excellent and authentic choice that will elevate your sandwich. Otherwise, sturdy, soft hoagie rolls work perfectly.
- If you’re looking for a lighter meal or reducing carbs, simply deconstruct your chicken cheesesteak! Enjoy the delicious chicken mixture in a bowl without the hoagie roll, making it a fantastic low-carb option.
- Consider partially freezing chicken breasts for 20-30 minutes before slicing to achieve very thin, uniform pieces if you opt for the sliced chicken method. This makes the chicken firmer and easier to handle.
Instructions
-
Preheat oven to 250 F.
-
If you have thick chicken breasts, butterfly each one, or gently pound with a meat mallet, to get them to an even thickness. This ensures that they cook quicker, and they are finished cooking at the same time.
-
In a small bowl, mix together half of the olive oil, the lemon pepper, garlic salt, and onion powder. Spread mixture all over the chicken, both sides.
-
Heat remaining olive oil in skillet over medium-high heat until shimmering. Add seasoned chicken and cook for 4-5 minutes per side, until nicely browned and chicken has reached an internal temperature of 165 F.
-
Remove chicken from pan and set aside to rest. Do not clean out the skillet.
-
Add bell peppers and onion to the skillet and cook, turning occasionally, until tender, about 3-5 minutes.
-
Meanwhile chop chicken into bite sized chunks. Add chicken chunks to the skillet with the vegetables. Toss to combine.
-
Add Queso dip and stir to coat, heating through. Turn off skillet.
-
Place hoagie buns in a baking pan and open them up. Divide the chicken mixture evenly among all the sandwich buns. Top each sandwich with mozzarella cheese.
-
Place baking pan into preheated oven and toast sandwiches for 5 minutes.
Expert Tips & FAQs
- For best results, store the chicken Philly cheesesteak mixture separately from the bun in an air-tight container in the refrigerator for up to 4 days. This keeps the buns fresh and prevents them from becoming soggy.
- To reheat, warm the chicken mixture over medium-low heat on the stovetop or in the microwave in 30-second intervals until it’s thoroughly heated. Then, add the warm mixture along with your desired cheese on top of a fresh or lightly toasted bun. Finish by toasting in a toaster oven, air fryer, or conventional oven until the cheese is perfectly melted and bubbly.
- Experiment with different bell pepper colors (yellow, orange) for a vibrant and slightly sweeter flavor profile.
- For extra zest, try adding a squeeze of fresh lemon juice over the cooked chicken and vegetables just before adding the queso.
- If you like a kick, sprinkle in some red pepper flakes when sautéing the vegetables or add sliced pickled jalapeños to the finished sandwich.
Nutrition
Serving:
1
sandwich
|
Calories:
670
cal
|
Carbohydrates:
44
g
|
Protein:
54
g
|
Fat:
31
g
|
Saturated Fat:
13
g
|
Polyunsaturated Fat:
3
g
|
Monounsaturated Fat:
9
g
|
Trans Fat:
0.02
g
|
Cholesterol:
147
mg
|
Sodium:
1376
mg
|
Potassium:
831
mg
|
Fiber:
3
g
|
Sugar:
8
g
|
Vitamin A:
1166
IU
|
Vitamin C:
56
mg
|
Calcium:
317
mg
|
Iron:
4
mg
Tried this Recipe? Pin it for Later!
Follow on Pinterest @AmandasCookin or tag #AmandasCookin!
The recipes on this blog are tested with a conventional gas oven and gas stovetop. It’s important to note that some ovens, especially as they age, can cook and bake inconsistently. Using an inexpensive oven thermometer can assure you that your oven is truly heating to the proper temperature. If you use a toaster oven or countertop oven, please keep in mind that they may not distribute heat the same as a conventional full sized oven and you may need to adjust your cooking/baking times. In the case of recipes made with a pressure cooker, air fryer, slow cooker, or other appliance, a link to the appliances we use is listed within each respective recipe. For baking recipes where measurements are given by weight, please note that results may not be the same if cups are used instead, and we can’t guarantee success with that method.
