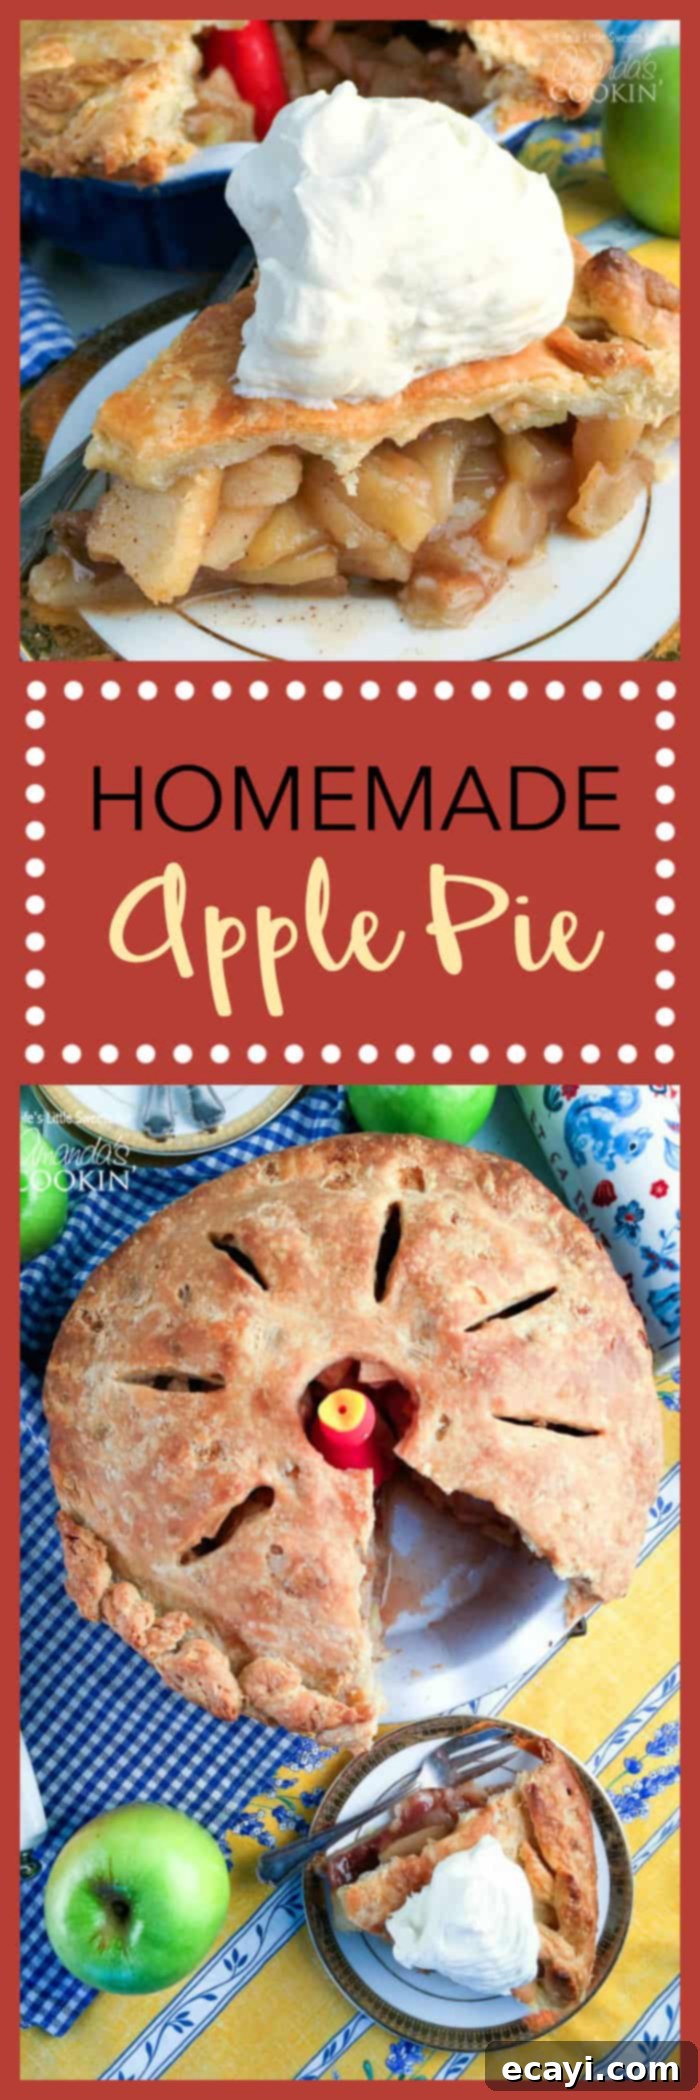
Classic Homemade Apple Pie Recipe: Flaky Crust & Irresistible Filling
Prepare to delight your senses with this classic homemade apple pie, a true labor of love that promises an extraordinary culinary experience. Boasting an incredibly flavorful filling nestled within a buttery, crisp, and perfectly golden crust, this recipe delivers on every dream you’ve ever had about the perfect apple pie. It’s more than just a dessert; it’s a centerpiece, a conversation starter, and a comforting classic that will undoubtedly steal the show at your next holiday gathering. Get ready for the fanfare and accolades this epic homemade pie will bring!
The Irresistible Allure of Homemade Apple Pie
There’s nothing quite like the incredible aroma that fills your home when a freshly baked apple pie emerges from the oven. This particular pie recipe is designed to create a truly amazing scent, a symphony of warm and inviting notes. The harmonious combination of sweet honey, crisp apples, aromatic cinnamon, rich vanilla, and subtle coconut sugar contributes to a complex and utterly perfect apple fragrance. You’ll adore the sweet, spicy, and comforting smell that comes wafting from your kitchen, announcing that a truly special dessert is on its way. This is the kind of baking experience that creates lasting memories.
Planning for the holidays? While this homemade apple pie is a definite crowd-pleaser, be sure to explore our other festive recipes like the traditional English Trifle or our luscious Homemade Pecan Pie for a truly spectacular holiday season spread!
Crafting the perfect homemade apple pie is a rewarding journey, and one that I’ve refined over many years of practice. While good pie baking certainly takes dedication, never allow the idea of making a pie from scratch to intimidate you. I’ve prepared this apple pie recipe, along with numerous other pie creations, so many times that each step has become second nature. It’s a process I’ve come to love, and with a little patience and attention to detail, you can achieve remarkable results too.
If this marks your first foray into pie making, I highly recommend reading through the entire recipe directions multiple times before you begin. Allocate ample time for the process, and remember that you always have the option to break down the steps over two days – prepare the apple pie filling or the pie crust (or both!) the day before. This approach significantly reduces stress and makes the baking experience much more enjoyable. Why not enlist a friend or family member as a helper? Baking is often more fun with company! Once the individual components of the pie are meticulously prepared, assembling them is straightforward, and then it’s simply a matter of baking your masterpiece to golden perfection.
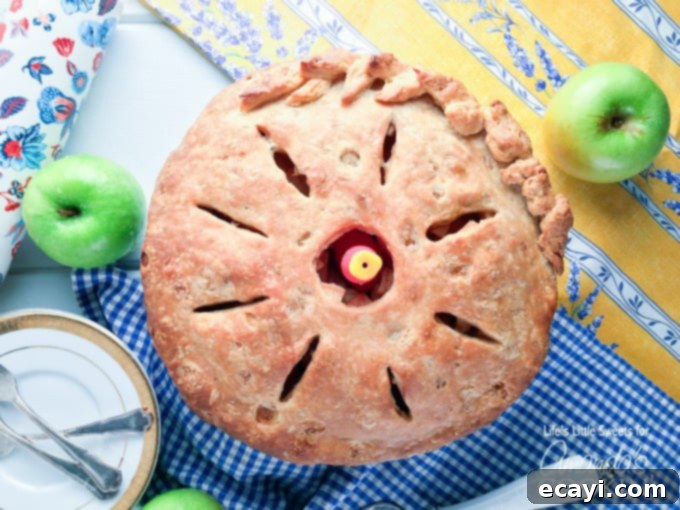
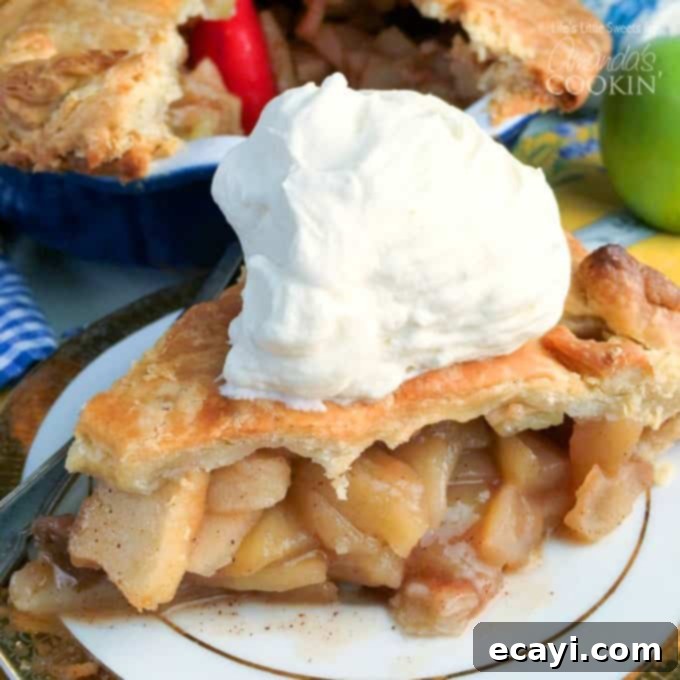
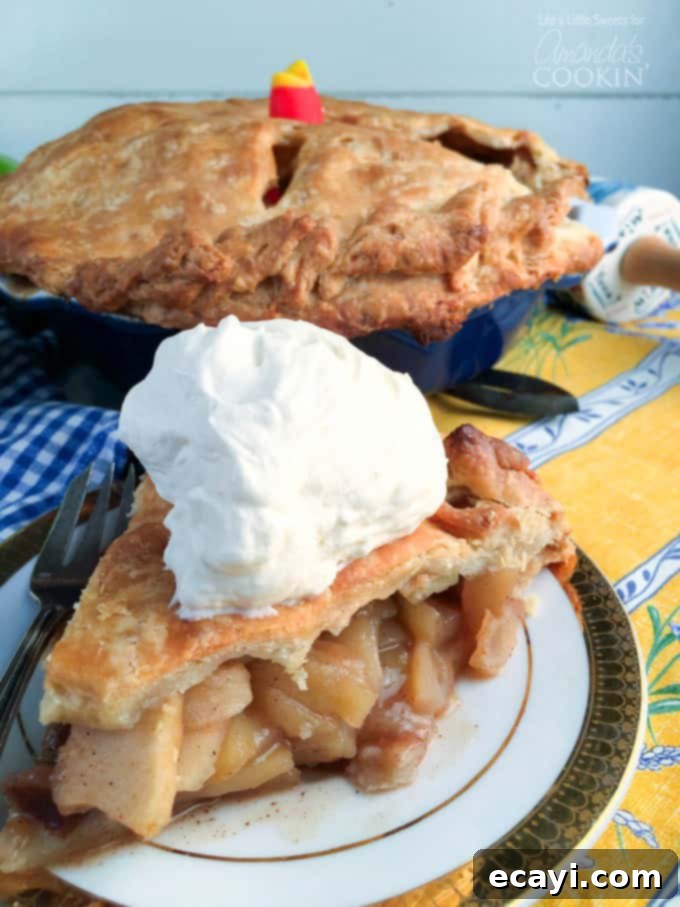
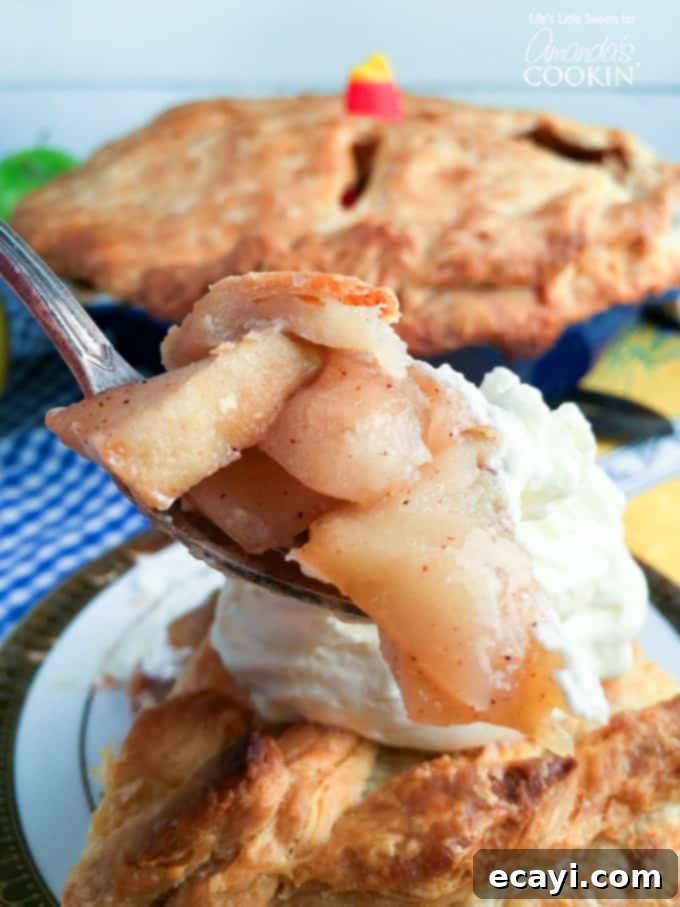
This particular apple pie recipe is the culmination of several years of dedicated practice, experimentation, and refinement. It draws inspiration from my popular Mile High Pear Pie recipe, borrowing key techniques that ensure a consistently flaky crust and a perfectly balanced filling. For an ultimate dessert experience, I suggest serving this warm apple pie with a generous scoop of creamy vanilla ice cream. Alternatively, or in addition, a dollop of my homemade Vanilla Whipped Cream adds a cloud-like finish that perfectly complements the rich apple filling.
Please note: This post may contain affiliate links. This means that if you make a purchase through one of these links, I may earn a small commission, at no extra cost to you. These commissions help support this blog and allow me to continue sharing delicious recipes.
Essential Ingredients for a Perfect Apple Pie
Achieving the perfect balance of flavor and texture in your apple pie starts with selecting the right ingredients. Here’s a detailed look at what you’ll need for both the luscious filling and the delectable double crust.
For the Filling:
- 3 pounds peeled and sliced (¼ inch thick) Granny Smith Apples or other variety good for baking: Granny Smith apples are highly recommended due to their tartness, which provides a lovely counterpoint to the sweetness of the sugars, and their firm texture, which holds up beautifully during baking without turning mushy. Other excellent baking apple varieties include Honeycrisp, Braeburn, or a mix of two.
- ½ cup white granulated sugar (can substitute coconut sugar): Provides foundational sweetness. Coconut sugar offers a slightly richer, caramel-like flavor and is a great alternative for those looking to reduce refined sugar.
- ¼ cup brown sugar: Adds depth of flavor with its molasses notes, contributing to a richer, more complex taste profile in the filling.
- ¼ cup honey: Enhances the natural sweetness of the apples and adds a unique floral aroma and sticky texture to the filling.
- 2-3 tablespoons flour: Acts as a thickening agent, ensuring the apple filling sets properly and isn’t too runny, creating that perfect consistency when sliced.
- 1 tablespoon apple cider vinegar (can substitute fresh squeezed lemon juice): A touch of acidity brightens the flavors, preventing the pie from tasting overly sweet and enhancing the apple’s natural tartness.
- 1 teaspoon cinnamon: The quintessential spice for apple pie, offering warmth and a classic aromatic profile that perfectly complements the apples.
- 1 teaspoon vanilla extract: A splash of vanilla rounds out the flavors, adding a subtle creamy note that elevates the entire filling.
- ¼ teaspoon sea salt or kosher salt: A pinch of salt is crucial for balancing sweetness and enhancing all the other flavors, making them pop.
For the Double Crust:
- 2-1/3 cups all-purpose unbleached flour, plus extra for rolling out dough: Unbleached flour provides a tender crumb and is ideal for achieving a light and flaky pastry.
- 1 cup butter *solid, chilled (can substitute equal amount of coconut oil), plus more for greasing the pie plate: Cold, solid butter is absolutely essential for a flaky crust. As the butter melts during baking, it creates pockets of steam, separating the layers of dough. Coconut oil can be used for a vegan option, yielding a slightly different but still delicious texture.
- 1 tablespoon granulated white sugar (can substitute coconut sugar): A small amount of sugar in the crust enhances flavor and contributes to browning.
- 1 tablespoon apple cider vinegar (can substitute fresh squeezed lemon juice): The acidity in the vinegar helps tenderize the dough and prevents gluten from developing too much, leading to a more tender crust.
- ¼ teaspoon sea salt or kosher salt: Salt is vital for flavor in the crust, just as it is in the filling.
- 3/4 cup ice water, plus more, if needed: Ice-cold water helps keep the butter solid, which is key to a flaky crust. The exact amount may vary based on your environment’s humidity, so add gradually.
Helpful Kitchen Tools for Making the Best Homemade Pie
Having the right tools can make all the difference in your pie-making journey, making the process smoother and more enjoyable. Here’s a list of essential kitchen items that will aid you in creating a show-stopping apple pie:
- 9″ x 2″ inch deep pie dish: A deep dish provides ample space for a generous filling, ensuring a tall, impressive pie.
- Small, medium, and large mixing bowls: Necessary for preparing different components of the pie, from mixing the filling to combining dry and wet crust ingredients.
- Sharp knife and pie serving utensil: A good knife is crucial for slicing apples and trimming dough, while a pie server makes for elegant presentation.
- Vegetable peeler: For efficiently peeling your apples.
- Cutting board: Provides a stable surface for slicing apples and rolling out dough.
- Measuring spoons and measuring cups: Accuracy in measurements is key for successful baking.
- Apple slicer (optional but recommended): A handy tool for quickly and uniformly coring and slicing apples.
- Dough scraper: Invaluable for dividing dough and cleaning your work surface, preventing overhandling.
- Pie weights or dried beans: Used for blind baking the bottom crust to prevent it from puffing up and ensuring an even, crisp base.
- Parchment paper: Excellent for lining baking sheets, rolling out dough, and covering the crust during blind baking.
- Aluminum foil: Useful for tenting the pie to prevent over-browning of the crust during the final stages of baking.
- Pastry blender: The best tool for cutting cold butter into flour, achieving that perfectly crumbly texture for a flaky crust.
- Rolling pin: Essential for evenly rolling out your pie dough to the desired thickness.
- Pie bird (optional): This charming ceramic device helps vent steam from the pie filling, preventing it from bubbling over and potentially keeping the crust crisper.
- Pastry mat or large cutting board: Provides a non-stick, designated surface for rolling out dough, often with helpful measurement guides.
- Favorite cookie cutters for making decorative cutouts from the pie dough: For adding beautiful, personalized touches to your pie’s top crust.
Top Tips for Pie Making Success: Achieve That Perfect Flaky Crust and Flavorful Filling
Baking a truly exceptional apple pie involves a few key techniques and considerations. Follow these tried-and-true tips to ensure your homemade pie turns out perfect every time, with a deliciously flaky crust and a wonderfully set, flavorful filling.
- Keep Your Butter Cold: This is arguably the most crucial tip for a flaky crust. Always cut butter into small cubes and place it in the freezer to chill thoroughly before incorporating it into your dough. Keeping the butter solid and cold ensures that it melts slowly in the oven, creating pockets of steam that expand and separate the layers of dough, resulting in that coveted flaky texture.
- Chill Your Rolling Pin: For an extra edge in maintaining cold dough, consider using a rolling pin made of ceramic or marble. These materials naturally stay cooler than wood or silicone. For best results, chill your ceramic or marble rolling pin in the refrigerator for 5-10 minutes before you start rolling out your dough.
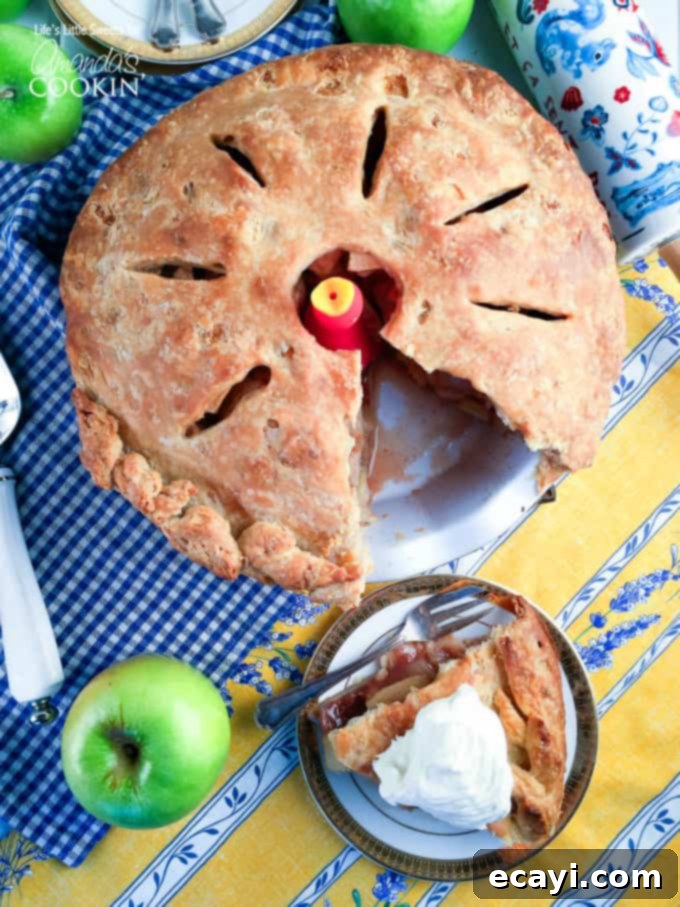
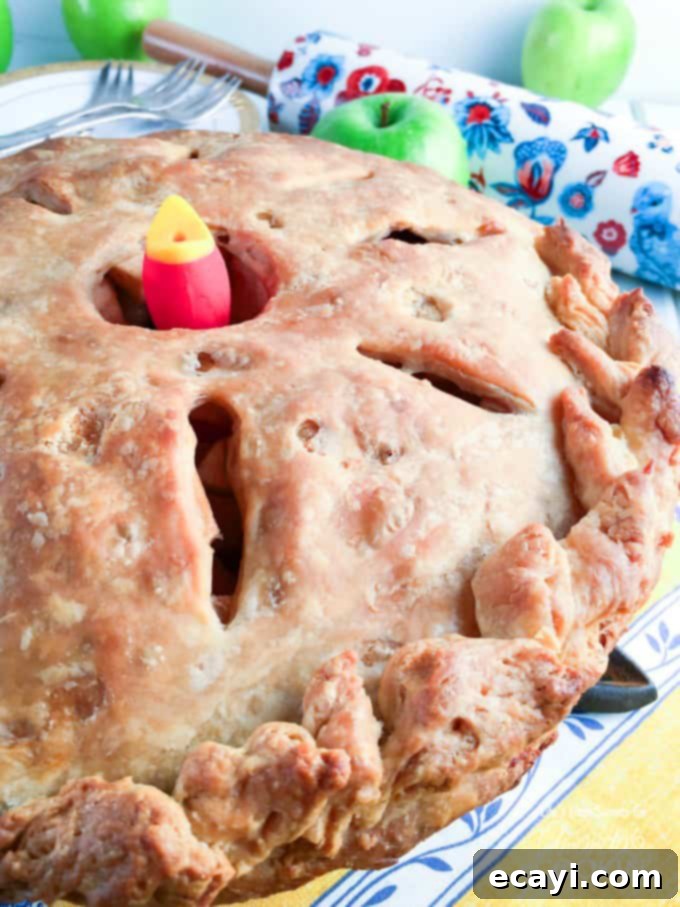
- Employ a Pie Bird (Optional but Recommended): A pie bird, or pie funnel, is a clever kitchen gadget designed to vent steam from the pie filling as it bakes. This helps prevent the filling from bubbling over the sides of the pie dish and can contribute to a crisper top crust by allowing moisture to escape efficiently. While it doesn’t completely eliminate potential overflow, it significantly aids in the baking process.
- Bake on a Baking Sheet: To save yourself from messy oven cleanups, always bake your pie on a baking sheet. Even with a pie bird, some filling might bubble over, and a baking sheet will catch any drips. Furthermore, it makes transferring the hot pie in and out of the oven much safer and easier.
- Blind Bake the Bottom Crust: To prevent a soggy bottom crust, which is a common pie pitfall, I highly recommend blind baking your bottom dough first. This involves partially baking the crust before adding the filling. Use pie weights (or dried beans) to line the crust and keep the dough from bubbling up and shrinking during this initial bake. This step creates a sturdy, crisp base that stands up to the moist apple filling.
- Thickening with Cornstarch (If Needed): If you are particularly concerned about your pie filling being too wet, especially if you’re using very juicy apples or a lot of moisture-rich ingredients, you can add a tablespoon or two of cornstarch to the apple filling mixture along with the flour. Cornstarch is a very effective thickener and will help achieve a firmer set.
- Cool Completely Before Slicing: Patience is key! Make sure to allow the pie to cool completely, often for several hours, before attempting to slice it. If the pie is cut while still hot, the delicious, juicy filling will be liquid and flow out, resulting in a messy and less appealing presentation. Cooling allows the filling to properly set and firm up, ensuring clean, beautiful slices.
- Mastering Ice Water for Dough: When preparing the dough, ensure your water is ice-cold. Chill approximately 3/4 to 1 cup of water, and generally, you’ll use almost 3/4 cup. The exact amount can vary significantly depending on the humidity of your environment and the type of flour. Start with 1/4 cup and add gradually, just enough for the dough to come together. Keep extra ice water on hand in case the dough starts to dry out between handling or chilling sessions.
- Embrace Butter Lumps: For a truly flaky crust, you want to see nice, big, gorgeous butter lumps (about pea-sized) throughout your pastry dough. Avoid overworking the dough, as this develops gluten and makes the crust tough rather than tender. The dough should not be overly sticky, nor should it be falling apart; it should just barely come together.
- Chilling Top Crust for Easy Handling: For the top crust, especially if you’re planning decorative cutouts, lay parchment paper over a large cutting board or pastry mat. Roll out the dough into a large circle, about 1/4 inch thick. Cover it completely with plastic wrap and chill for at least 30 minutes in the refrigerator before handling it further. Remember, chilling the dough between each handling step is more time-consuming but absolutely worth the effort for achieving that perfect, structurally sound, and flaky crust.
- Consider Crust Thickness: You have flexibility with the thickness of your pie crust. Rolling it out to 1/4 inch thick provides a sturdy crust that holds up well for slicing and offers a satisfying bite. This thickness also leaves enough dough for some simple decorative cutouts. Alternatively, if you wish to create a lot of intricate cutouts for the top of your pie, you can roll the dough thinner, to about 1/8 inch. Any trimmings can then be repurposed for additional decorations.
- Flexible Order of Preparation: While this recipe is written to prepare the pie filling first and then the double crust, you can certainly reverse the order. This flexibility can be particularly useful if you’re spreading the pie-making process over a couple of days. I personally prefer to marinate the apples for a while so they have ample time to absorb the delicious flavors of all the spices and sugars. If I’m making the double crust immediately after the filling, I simply leave the covered filling on the counter. If preparing in advance, cover and refrigerate the pie filling.
- Granny Smith Apples are Best: I strongly recommend using Granny Smith apples for your apple pie. Their firm texture ensures they don’t become mushy during the long baking time, and their natural tartness provides an essential balance to the sweetness of the filling, resulting in a more complex and enjoyable flavor profile.
- Pre-made vs. Homemade Dough: You can certainly save time by purchasing a pre-made, double pie crust. However, the unparalleled flavor and texture of homemade pie dough are incredibly delicious and, in my opinion, well worth the extra effort if you have the time and willingness. The flaky, buttery layers of a scratch-made crust truly elevate the entire pie.
- The Optional Egg Wash: An egg wash (a whisked egg with a splash of water or milk) is often brushed over the top crust before baking to give it a golden sheen and help decorative elements adhere. However, it is entirely optional with this recipe. The photos you see for this homemade apple pie recipe do not feature an egg wash. I chose a minimalist approach, opting for the crust to shine on its own merit, relying on its natural beautiful browning. If you do use an egg wash, keep a close eye on your pie in the oven as it can accelerate browning.
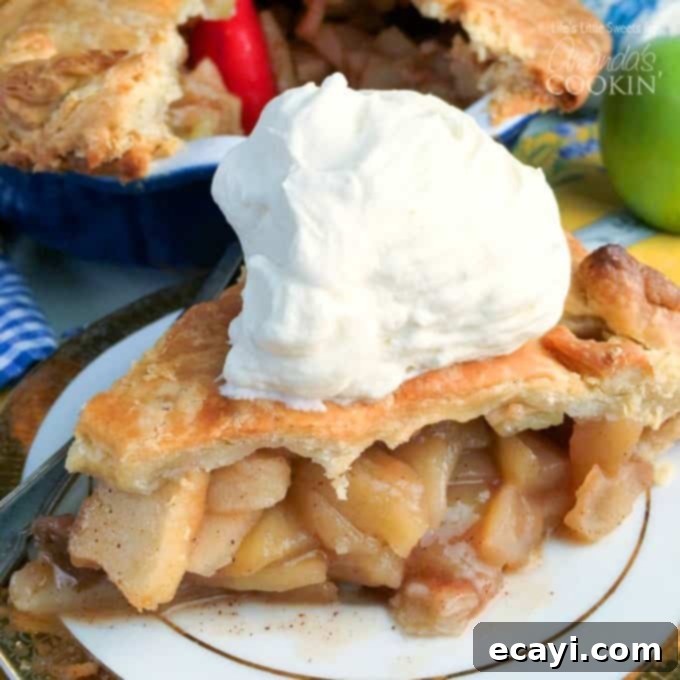
I genuinely hope you enjoy this homemade apple pie as much as our family does. It has truly become a cherished family favorite, bringing warmth and joy to every occasion.
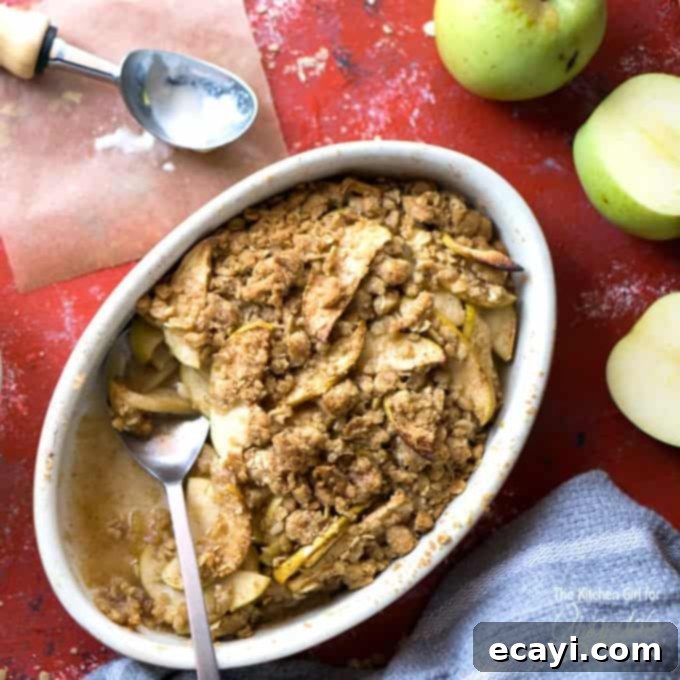
Did you go apple picking this year and now have an abundance of fresh apples? This recipe is a fantastic way to utilize them! If you’re looking for another comforting apple dessert, try our Baked Apple Crisp! This Baked Apple Crisp is destined to become your new go-to crisp recipe, beloved by the entire family for its simple charm and delicious flavor. Don’t forget to add a scoop of vanilla ice cream to top it all off for an extra treat! Feeling a bit more adventurous and looking for a baking challenge? Explore the amazing Christopsomos – a Greek apple pastry that is truly unique and oh-so delicious!
Before you go, make sure to bookmark or pin my strawberry pie recipe; it’s another seasonal delight you won’t want to miss! And for a charming, bite-sized dessert perfect for parties or individual servings, check out these delightful mini apple pies!
Explore More Delicious Pie Recipes
If you have fallen in love with the art of pie making, or simply enjoy a wide variety of sweet treats, delve into our collection of other incredible pie recipes. There’s a perfect pie for every taste and occasion!
- Classic Blueberry Pie: A vibrant, fruity pie bursting with juicy blueberries, perfect for summer.
- Homemade French Silk Pie: Indulge in a rich, creamy chocolate filling set in a flaky crust, a truly decadent dessert.
- Velvety Banana Cream Pie: Layers of fresh bananas, smooth vanilla cream, and whipped topping in a delicious crust.
- Our Signature Homemade Apple Pie: The very recipe you’re exploring, a testament to traditional baking excellence.
- No-Bake Peanut Butter Pie: A quick and easy dessert featuring a luscious, fluffy peanut butter filling.
- Perfect Pumpkin Pie Recipe: The quintessential holiday pie, creamy and perfectly spiced.
- Southern Buttermilk Pie: A delightfully tangy and sweet custard pie, simple yet satisfying.
- Dreamy Coconut Cream Pie: A tropical escape with a rich, creamy coconut filling and fluffy whipped cream.
Classic Apple Pie Recipe
IMPORTANT – Be sure to read the comprehensive “Tips for Pie Making Success” and other helpful sections within the blog post for detailed guidance and FAQs!
Print It
Pin It
Rate It
Save ItSaved!
Ingredients
FOR THE FLAVORFUL FILLING:
- 3 pounds peeled and sliced ¼ inch thick Granny Smith Apples (or other firm baking apple variety)
- ½ cup white granulated sugar (coconut sugar can be substituted for a deeper flavor)
- ¼ cup brown sugar
- ¼ cup honey
- 2-3 tablespoons all-purpose flour
- 1 tablespoon apple cider vinegar (or fresh squeezed lemon juice)
- 1 teaspoon ground cinnamon
- 1 teaspoon vanilla extract
- ¼ teaspoon sea salt or kosher salt
FOR THE BUTTERY DOUBLE CRUST:
- 2-1/3 cups all-purpose unbleached flour (plus extra for rolling out dough)
- 1 cup butter *solid, chilled (can substitute equal amount of cold coconut oil for a vegan option), plus more for greasing the pie plate
- 1 tablespoon granulated white sugar (or coconut sugar)
- 1 tablespoon apple cider vinegar (or fresh squeezed lemon juice)
- ¼ teaspoon sea salt or kosher salt
- ¾ cup ice water (plus more, if needed, for consistency)
Instructions for the Perfect Pie
PREPARING THE APPLE PIE FILLING
-
In a large mixing bowl, gently combine all the prepared apple pie filling ingredients. Ensure the apples are evenly coated with the sugars, spices, and thickener. Cover the bowl and set it aside to allow the apples to marinate and absorb the wonderful flavors.
-
If you are preparing the filling the day before baking, make sure to cover it tightly and refrigerate it. This helps the flavors meld even further.
-
For best results when mixing, sprinkle the dry and liquid ingredients evenly over the sliced apples before mixing thoroughly. This ensures a consistent flavor distribution throughout your pie.
CREATING THE BUTTERY DOUBLE PIE CRUST
-
Before you begin, ensure all your crust ingredients (especially butter and water) are very cold to achieve that desired flaky texture. *Please refer to the “Tips for Pie Making Success” section in the blog post above for more detailed explanations on these critical steps. Lightly grease your 9-inch pie dish and set it aside.
-
In a large mixing bowl, combine 2-1/3 cups of flour, 1 tablespoon of sugar, 1 tablespoon of apple cider vinegar (or fresh lemon juice), 1/4 teaspoon of salt, and the 1 cup of chilled, sliced butter. Using a pastry blender (or your fingertips), work the mixture until it resembles coarse crumbs with noticeable chunks of butter, approximately 1/2-inch in size. Avoid overmixing.
-
Starting with 1/4 cup of ice water, gradually add it to the mixture. Using a large fork, then your fingertips, gently work the dough until it just comes together to form a ball. If the dough seems too dry and won’t hold its shape, add more ice water, a tablespoon at a time, until it reaches the right consistency. Keep extra ice water handy in case the dough dries out during subsequent handling.
-
Wrap the dough ball tightly in plastic wrap to prevent it from drying out, then refrigerate for at least 30 minutes before proceeding with rolling it out. This chilling step is vital for a tender, flaky crust.
-
After chilling, divide the dough ball evenly in half using a dough scraper. Wrap one half in plastic wrap and return it to the refrigerator; this will be your top crust. Roll out the other half (for the bottom crust) into a 1/4-inch thick circle large enough to fit into your greased pie dish, leaving about a 1/2-inch overhang to account for shrinkage. Cover the dough in the pie dish with a square of parchment paper, fill with pie weights, and return to the refrigerator to chill for another 30 minutes.
-
While the bottom crust chills, retrieve the other half of the dough (for the top crust). Cover a large cutting board or pastry mat with parchment paper and lightly flour the surface. Roll out this dough half into a 1/4-inch thick circle. If the dough becomes sticky, lightly dust with more flour to ease handling. Cover the rolled-out dough circle completely with plastic wrap to prevent drying, and chill for another 30 minutes.
BLIND BAKING THE BOTTOM CRUST
-
Once all pie filling ingredients are prepared and the top dough is chilling for its final stint, preheat your oven to 425 degrees F (220 degrees C).
-
If you have pie weights, pricking the bottom crust with a fork is not strictly necessary as the weights prevent bubbling. If you don’t have pie weights, you must prick the bottom crust liberally. Ensure the bottom crust is covered with parchment paper (aluminum foil can also be used as a substitute), then pour your pie weights evenly over the parchment. Bake for 12-15 minutes, or until the bottom crust achieves a light golden-brown color.
FINAL ASSEMBLY AND BAKING THE PIE:
-
After the bottom crust has been blind baked, carefully remove the parchment paper and pie weights. Place your pie bird (if using) directly in the center of the bottom crust. Using a large spoon, neatly spoon in the marinated apple pie filling around the pie bird. Pour any accumulated excess pie filling juice evenly over the apple slices. You can gently press down on the apple slices to eliminate any large air pockets.
-
Once the top crust pie dough has chilled for its 30 minutes, remove it from the refrigerator. Cut a small circle in the center, just large enough for the pie bird to poke through. Alternatively, if not using a pie bird, you can cut several decorative slits across the top crust after it’s placed over the apple pie filling. Carefully transfer the top crust over the apple pie filling. Crimp and trim the edges of both crusts together to seal the pie.
-
If you have any dough trimmings left over, get creative! You can use your favorite cookie cutters to make decorative shapes (like leaves or lattice strips) to adorn the top of your pie.
-
An egg wash (a whisked egg with a tiny bit of water or milk) is optional. Applying it to the top crust will give your pie a beautiful golden-brown, shiny finish. However, be aware that an egg wash can make the pie brown faster as it bakes, so monitor it closely in the oven. This recipe’s photos do not feature an egg wash, showcasing the crust’s natural beauty.
-
Bake the pie for 1 hour. It’s crucial to check on it after about 30-45 minutes to ensure the top crust isn’t getting overly browned. If it is, create a “tent” with aluminum foil, making a small circle cutout for the pie bird or vents, and carefully place it over the pie to reduce further browning (I usually do this around the 45-minute mark). Continue baking for the remaining time until the crust is deeply golden and the filling is bubbly.
-
Allow the baked pie to cool completely on a wire rack. This critical step ensures that the pie filling properly sets and thickens before you cut into it, preventing a runny, messy slice. Patience will be rewarded with perfectly held slices of delicious apple pie.
The recipes on this blog are meticulously tested with a conventional gas oven and gas stovetop to ensure reliability. It’s important to acknowledge that some ovens, particularly older models, may cook and bake inconsistently. We recommend using an inexpensive oven thermometer to verify that your oven is consistently reaching and maintaining the proper temperature. If you use a toaster oven or countertop oven, please be mindful that they might not distribute heat in the same way as a conventional full-sized oven, and you may need to adjust your cooking and baking times accordingly. For baking recipes where measurements are provided by weight, please note that substituting with cup measurements may yield different results, and we cannot guarantee success with alternative measurement methods.
