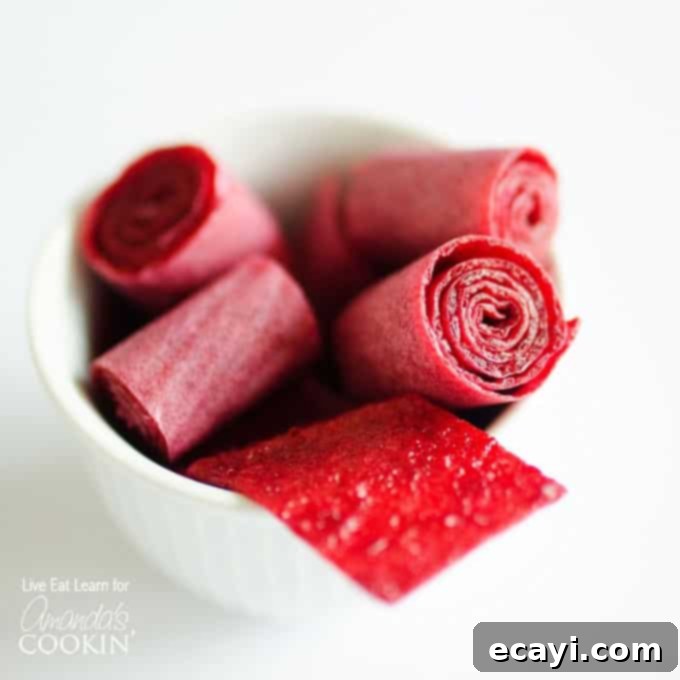
Easy Homemade Plum Fruit Roll-Ups: A Healthy, 3-Ingredient Snack for the Whole Family
Discover how simple it is to create delicious and healthy homemade fruit roll-ups right in your own kitchen! Forget the artificial colors and added sugars of store-bought versions; these fruit leather treats require just three core ingredients – fresh plums, a touch of honey, and a splash of lemon juice – plus a hint of cinnamon for flavor. With only a blender and an oven, you can whip up a batch of these vibrant, chewy fruit snacks that are sure to be a hit with both kids and adults. They’re not only a fun and satisfying treat but also a perfect on-the-go snack that you can feel good about serving.
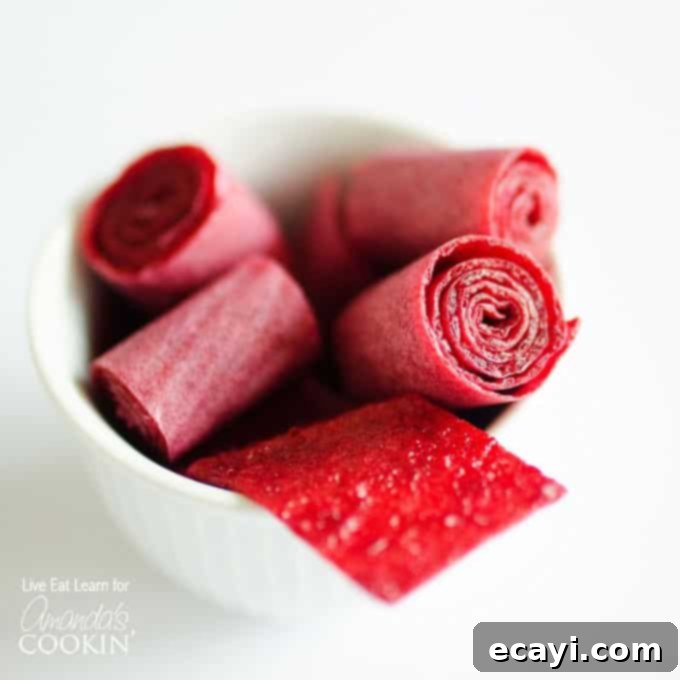
Why Make Homemade Fruit Leather? The Benefits of DIY Fruit Roll-Ups
Making your own fruit roll-ups, also known as fruit leather, offers numerous advantages over their commercially produced counterparts. First and foremost, you gain complete control over the ingredients. This means no high-fructose corn syrup, artificial dyes, or preservatives often found in packaged snacks. You can choose fresh, ripe fruit, ensuring maximum flavor and nutritional value. For this recipe, we’re focusing on the natural sweetness and slight tartness of plums, enhanced by a touch of honey and cinnamon, making for a truly wholesome treat.
Beyond health benefits, homemade fruit roll-ups are incredibly versatile. You can experiment with various fruits, customize the sweetness level, and even add different spices to suit your family’s preferences. They are also budget-friendly, especially when you use seasonal fruits, turning excess produce into a long-lasting, delightful snack. Plus, the process itself can be a fun activity to share with children, teaching them about where their food comes from and the joy of creating something delicious from scratch. These compact, healthy, and flavorful fruit leather snacks are ideal for lunchboxes, road trips, or simply enjoying at home.
The Simple Steps to Delicious Fruit Leather: An Overview
Don’t be intimidated by the idea of making fruit roll-ups from scratch. The process is straightforward and requires minimal hands-on time, although the oven dehydration step does take several hours. Here’s a quick glimpse into how these delightful plum fruit roll-ups come to life:
- Start by gently cooking your chosen fruit to soften it and release its natural juices.
- Blend the cooked fruit with a few additional ingredients until it forms a perfectly smooth puree.
- Carefully spread this vibrant fruit puree onto a baking sheet prepared with parchment paper.
- Slowly dehydrate the fruit in a low-temperature oven for an extended period, allowing it to transform into pliable fruit leather.
- Once cooled, cut the fruit leather into convenient strips.
- Roll them up and enjoy your homemade, healthy snack!
While the dehydration time might seem a bit long, remember that it’s mostly passive. With only about 15-20 minutes of active preparation, you’ll have a batch of incredible homemade fruit roll-ups ready to savor before you know it. The low and slow cooking process is essential for achieving that perfect chewy texture without burning the fruit.
This post contains affiliate links. This means that if you make a purchase through these links, I may earn a small commission, at no extra cost to you. Your support helps keep this blog running!
Key Ingredients for Plum Fruit Roll-Ups
Our featured recipe for these easy homemade fruit roll-ups highlights the delightful flavor of plums. Here’s a closer look at the minimal ingredients you’ll need to create this fantastic snack, and why each plays a crucial role:
- 4 cups chopped plums: Fresh, ripe plums are the star here. They offer a naturally sweet and slightly tart flavor that dehydrates beautifully into a chewy leather. When preparing plums, make sure to pit them, but you can confidently leave the skins on. The skins add color, fiber, and extra nutrients, and they’ll blend seamlessly into the puree, contributing to the final texture without being noticeable. Any variety of plum will work, so pick what looks best at your local market.
- 2 tablespoons honey: Honey serves as a natural sweetener, complementing the plums’ inherent flavor. The amount can be adjusted based on the sweetness of your plums and your personal preference. For a vegan alternative, maple syrup can be substituted. Honey also aids in achieving the perfect pliable texture for the fruit leather.
- 1 tablespoon lemon juice: A touch of lemon juice is essential for two reasons. Firstly, it brightens the flavor of the plums, adding a subtle tang that balances the sweetness. Secondly, and perhaps more importantly, lemon juice acts as a natural preservative and helps prevent the fruit leather from oxidizing and turning a dull brown color during the long dehydration process, ensuring your roll-ups maintain their beautiful, vibrant hue.
- ½ teaspoon cinnamon: Cinnamon is an optional but highly recommended addition. It imparts a warm, aromatic spice note that beautifully enhances the natural sweetness of the plums, adding depth and complexity to the flavor profile. If you’re not a fan of cinnamon, or prefer a pure fruit flavor, feel free to omit it or experiment with other spices like a pinch of nutmeg or ginger.
These simple ingredients combine to create a remarkably flavorful and wholesome fruit snack that’s far superior to anything you’d buy pre-packaged.
Helpful Kitchen Tools for Making Fruit Leather
While the recipe itself is simple, having the right tools can make the process even smoother and more enjoyable. You don’t need highly specialized equipment, but these items will certainly come in handy:
- Baking sheet: A sturdy baking sheet is fundamental for this recipe, as it provides the surface for dehydrating your fruit puree. Look for a commercial-grade, heavy-duty sheet that won’t warp in the oven and provides even heat distribution. A standard half-sheet pan (approximately 18×13 inches) is usually ideal for a batch of this size, allowing the fruit leather to spread thinly enough for proper drying.
- Blender or food processor: To achieve that perfectly smooth, lump-free fruit puree, a good quality blender or food processor is indispensable. A high-speed blender will typically yield the smoothest results, but a robust food processor will also work well, especially for fruits with tougher skins like plums. Ensure your chosen appliance can handle blending cooked fruit into a fine consistency.
- Parchment paper: This is absolutely crucial for preventing the fruit leather from sticking to your baking sheet. Line your pan completely with parchment paper, ensuring it extends up the sides slightly to make removal easier. Alternatively, a high-quality silicone baking mat (like Silpat) can be used, offering a reusable, non-stick surface. Do not use wax paper, as it is not oven-safe at the temperatures required for dehydration.
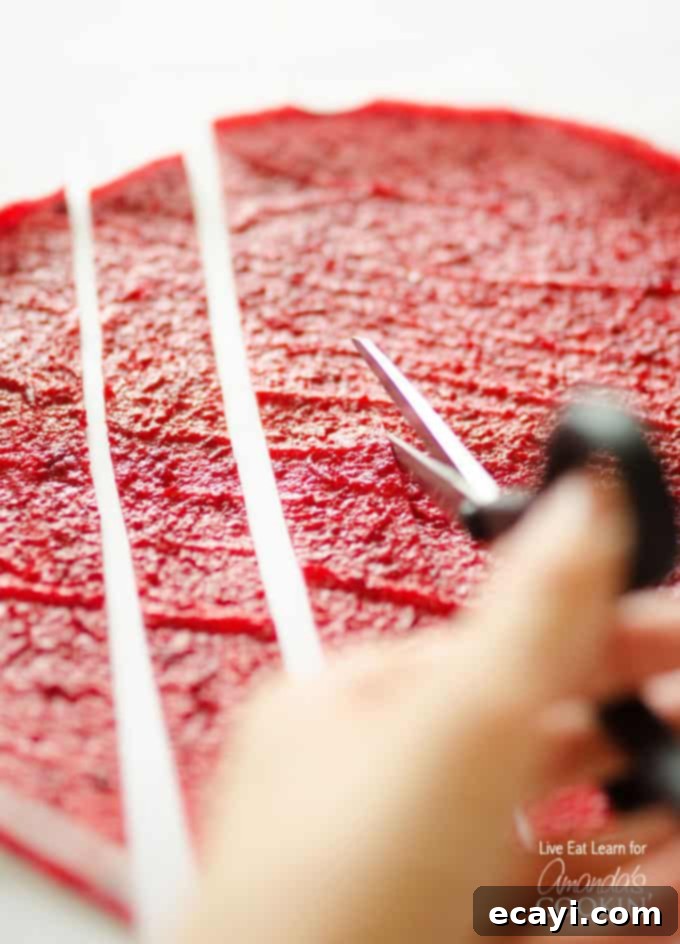
- Kitchen shears: Once your fruit leather is perfectly dehydrated and cooled, kitchen shears are the best tool for cutting it into neat, uniform strips. They offer more control than a knife, especially when cutting through the slightly chewy texture of the leather, with the parchment paper still attached.
Having these tools ready will streamline your fruit leather-making process and contribute to a successful, delicious outcome.
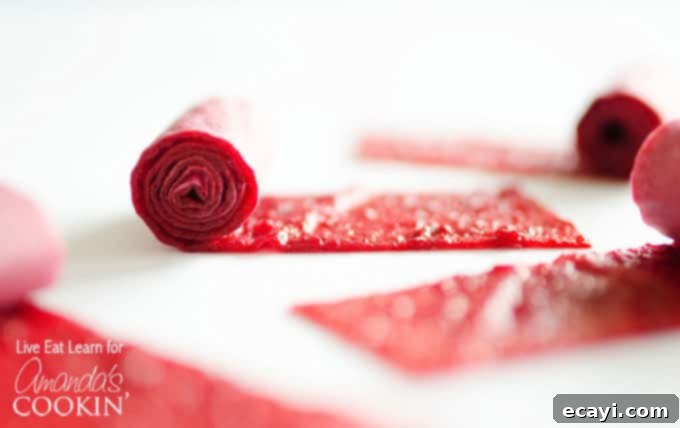
Crafting Perfect Plum Fruit Roll-Ups: A Detailed Guide
Embarking on your fruit leather journey is an incredibly rewarding experience. This detailed guide will walk you through each step, ensuring your homemade plum fruit roll-ups turn out perfectly chewy, flavorful, and vibrant. While the process requires a bit of patience during dehydration, the hands-on time is minimal, making it an ideal project for a lazy weekend afternoon.
Preparation: Baking the Plums to Perfection
Unlike berries, which often release their juices readily, plums benefit from a preliminary baking step. This crucial stage helps to soften the fruit flesh and encourages the natural sugars and juices to flow freely, which is essential for creating a smooth puree and optimal dehydration. You’ll start by:
- Washing and Chopping: Thoroughly wash your plums. Remove the pits, but there’s no need to peel the skins. The skins contribute to the beautiful color and add extra nutrients and fiber, and they will completely break down during blending. Chop the pitted plums into roughly equal pieces to ensure even cooking.
- Initial Bake: Spread the chopped plums in a single layer on a baking sheet. Bake them in a preheated oven at 350°F (175°C) for approximately 20 minutes. The plums should become noticeably softer and release some of their liquids. This step is key to developing the fruit’s flavor and texture before blending.
Blending for Smoothness and Flavor
Once your plums are baked and slightly cooled, it’s time to transform them into a luscious puree. This is where the magic truly happens, as the simple additions enhance the plums’ natural goodness:
- Puree the Ingredients: Carefully transfer the cooked plums to your blender or food processor. Add the honey, lemon juice, and cinnamon. The lemon juice is vital for two reasons: it brightens the flavor and helps preserve the vibrant color of the plums during drying, preventing browning. Honey adds a touch of natural sweetness and helps with the pliable texture of the fruit leather. Cinnamon, though optional, adds a wonderful warmth that complements the plums beautifully.
- Achieve a Silky Smooth Texture: Process the mixture until it is completely smooth and free of any lumps. You want a consistent, even puree without any discernible pieces of plum skin or flesh. Scrape down the sides of the blender or food processor as needed to ensure everything is thoroughly incorporated.
- Taste and Adjust: Take a small taste of your plum puree. This is your chance to adjust the sweetness. If your plums were particularly tart, or if you prefer a sweeter fruit roll-up, you can add a little more honey, one teaspoon at a time, and blend again until it reaches your desired flavor profile.
Spreading and Dehydrating: The Art of Fruit Leather
The next steps are about preparing the puree for its long, slow transformation into fruit leather. Patience is a virtue here, as low and slow heat is the secret to success:
- Prepare Your Baking Sheet: Line a large baking sheet (or two smaller ones, if necessary) with parchment paper. Ensure the parchment paper lies flat and extends slightly up the sides of the pan. This will make it much easier to peel the fruit leather off once it’s dried. Do not use wax paper, as it will stick.
- Evenly Spread the Puree: Pour the smooth plum puree onto the lined baking sheet. Using an offset spatula or the back of a spoon, spread the puree into an even layer, aiming for a thickness of about 1/8 to 1/4 inch. Consistency is key; if some areas are thicker than others, they will take longer to dry, leading to uneven results.
- The Dehydration Process: Place the baking sheet in your oven, preheated to its lowest possible temperature, typically between 140°F and 170°F (60°C to 77°C). The goal is to slowly remove moisture without cooking the fruit. Leave the oven door slightly ajar (you can use a wooden spoon to prop it open) to allow moisture to escape and prevent the fruit from baking instead of dehydrating.
- Monitor and Test for Doneness: Dehydrate for 6 to 8 hours, or potentially longer, depending on your oven and the thickness of your fruit puree. The fruit leather is ready when it is no longer sticky to the touch in the middle, and it has a firm, pliable, and slightly tacky texture. It should feel like thin, leathery fruit, but not brittle or crispy. If it’s still sticky, continue dehydrating in 30-minute increments, checking frequently.
Finishing Touches: Cutting, Rolling, and Storing
Once your fruit leather is perfectly dehydrated, the final steps are quick and satisfying:
- Cool Completely: Remove the baking sheet from the oven and allow the fruit leather to cool completely at room temperature. This helps it firm up and makes it easier to handle.
- Cut into Strips: With the parchment paper still attached, use clean kitchen shears to cut the fruit leather into desired strips or shapes. You can make them wide or narrow, short or long, depending on your preference.
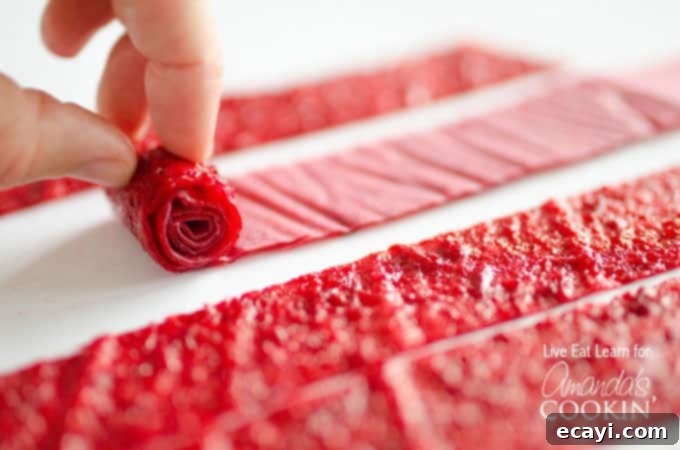
- Roll Them Up: Gently roll each strip of fruit leather, ensuring the parchment paper remains on the outside. This prevents the sticky fruit leather from adhering to itself and makes it easy to unroll when you’re ready to enjoy it. If you wish, you can trim any rough edges before rolling for a neater appearance.
- Proper Storage: Store your homemade fruit roll-ups in an airtight container in the refrigerator for 1 to 2 weeks. For longer storage, you can keep them in the freezer for up to 3-6 months. Just be sure they are tightly sealed to prevent freezer burn.
And there you have it – delicious, healthy, and easy homemade plum fruit roll-ups ready to enjoy! They’re a perfect example of how simple ingredients can create an amazing snack.
Tips for Success and Creative Variations
Making fruit leather is quite forgiving, but a few tips can ensure your success, and exploring variations can keep things exciting!
Tips for Perfect Fruit Roll-Ups Every Time:
- Use Ripe Fruit: The riper the fruit, the sweeter and more flavorful your fruit leather will be, potentially reducing the need for added sweeteners.
- Even Thickness: Spread the puree as evenly as possible. Inconsistent thickness leads to uneven drying, with thin spots becoming brittle and thick spots remaining sticky.
- Low and Slow Heat: Resist the urge to increase the oven temperature to speed up drying. High heat will cook the fruit rather than dehydrate it, resulting in a crispy, burnt product instead of pliable leather.
- Keep Oven Door Ajar: This is crucial for allowing moisture to escape. If the moisture is trapped, the fruit will steam or bake rather than dry.
- Test for Doneness: The “no longer sticky in the middle” test is key. It should be firm but flexible, like a piece of thick rubber. It should peel easily from the parchment paper once fully cooled.
- Parchment Paper vs. Silicone Mat: While parchment paper works wonderfully, a silicone baking mat (like Silpat) is an excellent reusable alternative that ensures no sticking.
Creative Fruit Leather Variations:
While plums make for a fantastic fruit roll-up, the possibilities are endless! Don’t hesitate to experiment with different fruits and flavor combinations:
- Berry Bliss: Strawberries, raspberries, blueberries, or a mixed berry blend are fantastic choices. They often don’t need pre-baking, just wash and blend.
- Apple Cinnamon: Cooked apples blended with a generous amount of cinnamon and a touch of nutmeg create a classic, comforting flavor.
- Tropical Twist: Mango, pineapple, or a combination of both can bring a taste of the tropics to your snack drawer. A squeeze of lime juice instead of lemon can enhance these flavors.
- Peach Perfection: Sweet peaches (peeled if desired for a smoother texture, though skins can be left on) make wonderfully soft and fragrant fruit leather.
- Cherry Almond: Pitted cherries blended with a tiny drop of almond extract offer a sophisticated flavor profile.
- Add-ins: Consider adding a teaspoon of vanilla extract to almost any fruit for added depth. A pinch of ginger or cardamom can also elevate certain fruit flavors.
- Sweetener Alternatives: While honey works great, you can use maple syrup, agave nectar, or even stevia for different dietary preferences. Always adjust to taste.
Experimentation is part of the fun in making homemade fruit roll-ups. With a basic understanding of the process, you can adapt this recipe to suit almost any fruit you have on hand, creating a diverse array of healthy and delicious snacks.
OTHER SNACK RECIPES YOU MAY ENJOY:
Looking for more delightful and easy snack ideas? Here are some other fantastic recipes from our kitchen that you might love, perfect for any occasion, from healthy energy boosts to savory treats:
- Cherry Cheesecake Energy Bites – These bite-sized wonders are perfect for a healthy and lightly sweet on-the-go snack! Packed with flavor and wholesome ingredients, they provide a quick burst of energy.
- Whipped Brie Stuffed Strawberries – They might look indulgent, but these treats are surprisingly easy to make and definitely worth trying! A sophisticated snack that balances sweet and savory.
- Baked Potato Pizzas – So easy and super fun to make, these mini potato pizzas are great for after-school snacks, appetizers for the big game, or even a light meal!
- Taco Chex Mix – If you love the irresistible crunch of Chex Mix and the bold flavors of tacos, there’s really no further explanation needed! This savory mix is a crowd-pleaser and highly addictive.
Ready to get started? Find the full printable recipe card below:
SCROLL DOWN FOR THE PRINTABLE VERSION
Easy Plum Fruit Roll-Ups
IMPORTANT – There are often Frequently Asked Questions within the blog post that you may find helpful. Simply scroll back up to read them!
Print It
Pin It
Rate It
Save ItSaved!
Ingredients
- 4 cups chopped plums (pit plums, then chop, leaving skins on for color and nutrients)
- 2 tablespoons honey (adjust to taste for sweetness)
- 1 tablespoon lemon juice (helps preserve color and brightens flavor)
- ½ teaspoon cinnamon (optional, for added warmth)
Instructions
-
Prepare Plums: Place the chopped (and pitted, skins on) plums on a baking sheet. Bake at 350 degrees F (175°C) for 20 minutes, or until the plums are tender and slightly softened. This helps release their natural juices and makes blending easier.
-
Blend Puree: Transfer the cooked plums, honey, lemon juice, and cinnamon to a food processor or high-speed blender. Puree until the mixture is completely smooth with no chunks remaining. Taste the puree and add more honey if you desire a sweeter flavor.
-
Spread Evenly: Line a large baking sheet with parchment paper, ensuring it lies flat. Pour the fruit puree onto the parchment paper and spread it into an even layer, approximately 1/8 to 1/4 inch thick. Consistency in thickness is key for even drying.
-
Dehydrate: Place the baking sheet in your oven set to the lowest possible temperature, typically between 140°F and 170°F (60°C to 77°C). Prop the oven door slightly ajar with a wooden spoon to allow moisture to escape. Dehydrate for 6 to 8 hours, or until the fruit leather is no longer sticky in the center and is firm yet pliable.
-
Cool and Cut: Remove the fruit leather from the oven and let it cool completely on the baking sheet. Once cooled, use clean kitchen shears to cut the fruit leather (still attached to the parchment paper) into desired strips or shapes.
-
Roll and Store: Roll each strip so that the parchment paper is on the outside. This prevents sticking. You can trim any rough edges for a neater look if desired. Store the rolled fruit leather in an airtight container in the refrigerator for 1 to 2 weeks. For longer storage, freeze for up to 3-6 months.
-
Enjoy Your Healthy Snack! These homemade fruit roll-ups are now ready to be enjoyed as a wholesome, delicious snack anytime.
The recipes on this blog are tested with a conventional gas oven and gas stovetop. It’s important to note that some ovens, especially as they age, can cook and bake inconsistently. Using an inexpensive oven thermometer can assure you that your oven is truly heating to the proper temperature. If you use a toaster oven or countertop oven, please keep in mind that they may not distribute heat the same as a conventional full sized oven and you may need to adjust your cooking/baking times. In the case of recipes made with a pressure cooker, air fryer, slow cooker, or other appliance, a link to the appliances we use is listed within each respective recipe. For baking recipes where measurements are given by weight, please note that results may not be the same if cups are used instead, and we can’t guarantee success with that method.
