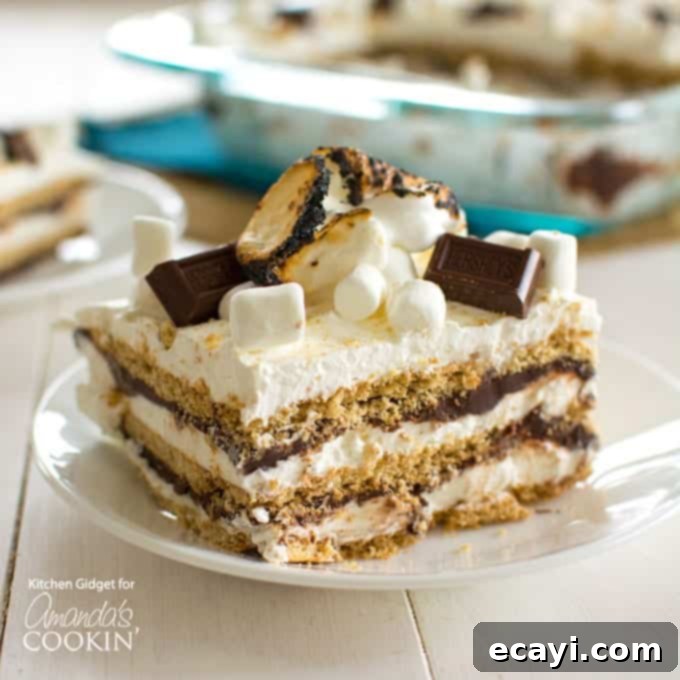
Ultimate No-Bake S’mores Icebox Cake Recipe: Easy & Delicious Crowd-Pleaser
Craving the classic taste of campfire s’mores but without the hassle of a bonfire? Our S’mores Icebox Cake is the perfect solution! This incredibly easy, no-bake dessert brings all the beloved flavors indoors. Imagine luscious layers of crisp graham crackers, airy marshmallow whipped cream, and rich chocolate ganache, creating a dessert so delightful, everyone will be begging for “s’more”! Perfect for feeding a crowd, this recipe is guaranteed to be a hit at any gathering, from summer BBQs to cozy indoor celebrations.
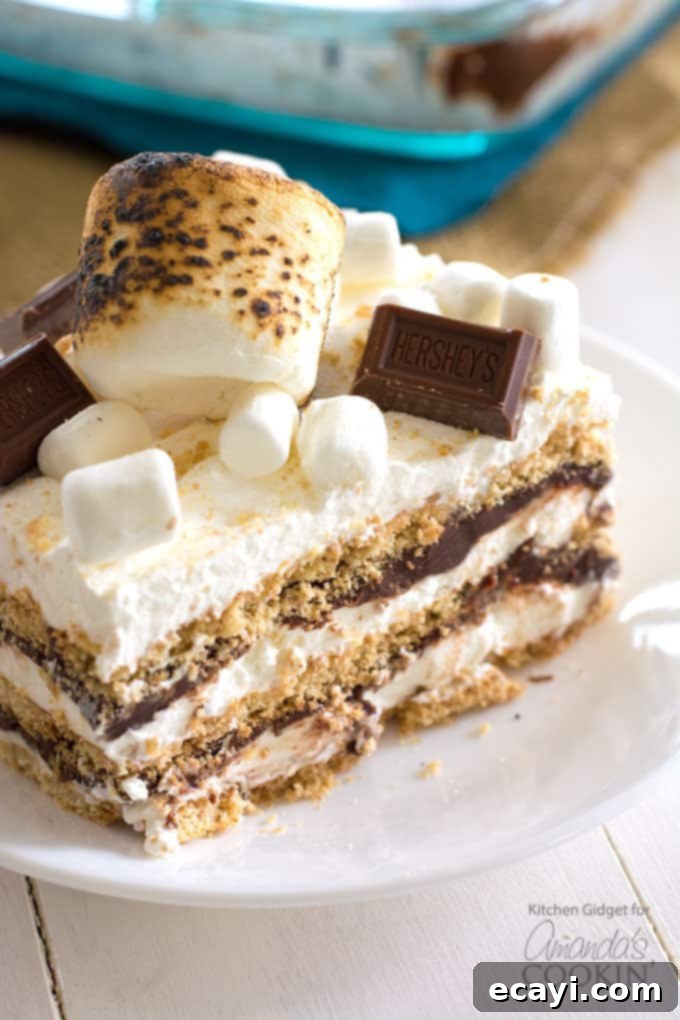
Just like our popular S’mores Cupcakes, this S’mores Icebox Cake recipe is a true showstopper. It’s a simple, one-pan, no-bake dessert that promises pure delight with minimal effort. Whether you’re a seasoned baker or a kitchen novice, you’ll find this recipe straightforward and incredibly rewarding. The best part? No oven means a cool kitchen, making it an ideal treat for warmer months or when you simply want to avoid heating up your home.
Why You’ll Love This Easy S’mores Icebox Cake
We all have those special foods we’re utterly passionate about – the ones that make us a little giddy, our undeniable guilty pleasures. For me, it’s everything s’mores. The magical combination of crunchy, honey-kissed graham crackers, decadent milk chocolate, and gooey, toasted marshmallows is simply irresistible. While campfire s’mores hold a special place in our hearts, they aren’t always feasible. That’s precisely why I crafted this no-bake S’mores Icebox Cake – to satisfy those intense s’mores cravings anytime, anywhere, with maximum convenience and flavor.
This dessert offers several compelling reasons to fall in love:
- Effortless Preparation: This is a true no-bake wonder. Forget about turning on the oven, dealing with complicated techniques, or extensive clean-up. This recipe is all about simple layering and chilling, perfect for busy schedules or those who prefer minimal fuss in the kitchen.
- Perfect for Any Occasion: From casual family gatherings, backyard barbecues, and summer picnics to more festive celebrations, this cake scales beautifully. It’s substantial enough to feed a crowd (serving up to 20 slices!), yet easy enough for an impromptu dessert.
- Make-Ahead Marvel: One of the greatest advantages of an icebox cake is its make-ahead potential. You can assemble this dessert the day before your event, allowing ample time for it to chill and for the flavors to meld beautifully. This frees up your time on the day of your event, letting you focus on other preparations or simply enjoying your guests.
- Crowd-Pleasing Flavors: The classic s’mores combination is a universally beloved flavor profile. The harmony of sweet chocolate, creamy marshmallow, and subtly spiced graham crackers ensures every slice will be devoured with delight. It’s nostalgic, comforting, and always a hit!
- Cool & Refreshing: Especially welcome during the warmer months, a chilled dessert like this S’mores Icebox Cake provides a refreshing counterpoint to the heat. It’s a delightful alternative to heavier baked goods, offering a light yet satisfying end to any meal.
The Magic of an Icebox Cake: A No-Bake Dessert Phenomenon
Icebox cakes are truly a marvel in the dessert world, offering an ingenious way to create a “cake” without any baking. Their brilliance lies in their simplicity: all the ingredients are layered together and then chilled in the refrigerator – or “icebox,” as our forebears affectionately called that ingenious invention. This extended chilling process is what makes the magic happen; it allows the liquid components from the cream and ganache to gradually soak into the crisp cookies or crackers, transforming them into a wonderfully tender, cake-like texture without any heat whatsoever. This makes icebox cakes a perfect choice for numerous reasons:
- Summer Saviors: When the weather is warm and turning on your oven feels like a terrible idea, an icebox cake keeps your kitchen cool and your energy bills low. They are the quintessential summer dessert.
- Ultimate Make-Ahead Desserts: Unlike many baked goods that are best served fresh, icebox cakes actually *require* chilling, often overnight, to achieve their optimal texture and flavor. This means they are ideal for meal prep and entertaining, as you can assemble them hours, or even a full day, in advance, freeing up your time on the day of your event.
- Versatile & Adaptable: The basic concept of an icebox cake – layers of crisp elements softened by creamy fillings – is incredibly versatile. You can adapt it with various cookies, creams, fruits, and chocolates to create endless flavor combinations.
- Year-Round Comfort: Don’t limit icebox cakes to summer! Imagine a cold, snowy day where you’re dreaming of warmer times. A slice of this S’mores Icebox Cake can instantly transport you to a summer campfire, even if it’s just in your imagination. Pair it with something comforting like a hearty Spaghetti Salad or a warm bowl of BLT Lentil Soup, and you’ll forget all about the chill outside!
Crafting Your S’mores Icebox Cake: Layers of Pure Bliss
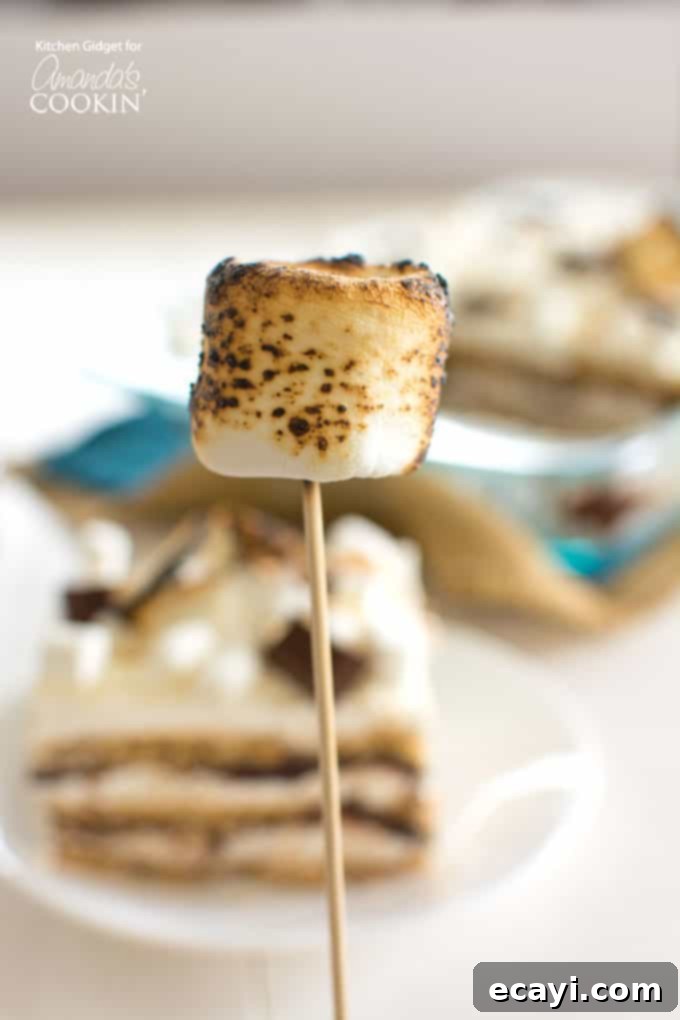
My unique take on S’mores Icebox Cake features distinct layers designed to deliver that authentic campfire flavor. We start with sturdy graham crackers, move to a fluffy and sweet marshmallow whipped cream, and then introduce a rich, velvety milk chocolate ganache. To capture that essential “toasted marshmallow” s’mores flavor – which is crucial for authenticity – I add a final touch of broiled marshmallows on top just before serving. This small but significant step adds both visual appeal and an irresistible smoky sweetness that truly completes the s’mores experience. I might have had a little too much fun toasting them, but that’s what s’mores are all about – playful indulgence and delicious memories!
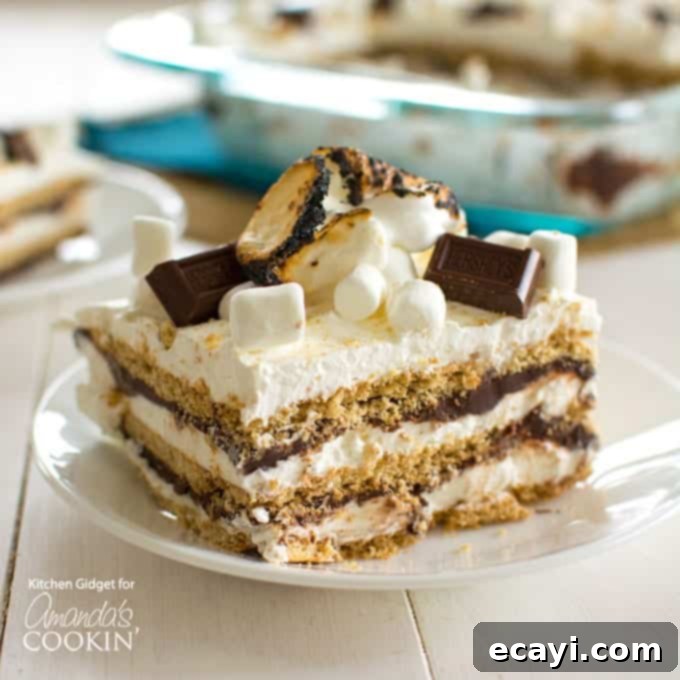
Assembling the Layers: A Detailed Guide to Your S’mores Masterpiece
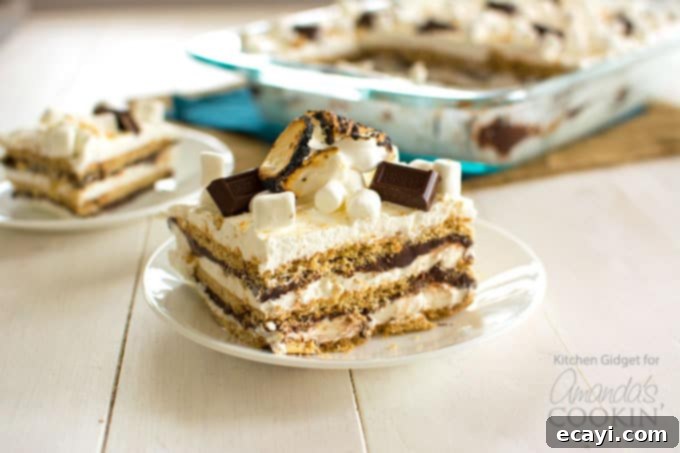
Creating this s’mores masterpiece is surprisingly simple, almost like building a delicious dessert lasagna. Each layer is carefully placed to contribute to the ultimate flavor and texture experience.
- The Foundation: Marshmallow Whipped Cream. Begin by spreading a thin, even layer of your prepared marshmallow whipped cream mixture at the bottom of a 13×9 inch baking pan. This initial layer serves a crucial purpose: it acts as an anchor for your first layer of graham crackers, preventing them from sliding around and ensuring a stable, beautiful base for your cake. For convenience, you can use store-bought whipped topping (like Cool Whip) which yields a consistent, airy cream. However, for a richer, fresher, and more gourmet taste, we often prefer homemade whipped cream folded with marshmallow fluff. Both options are delicious, so choose what suits your preference and time!
- The Graham Cracker Layer. Next, carefully arrange a single layer of graham crackers directly on top of the marshmallow cream. These crackers are the “cake” component of our icebox cake. As the dessert chills in the refrigerator, these crispy crackers will gradually absorb moisture from the surrounding cream and ganache. This process is transformative, as they will soften into a tender, delightful, cake-like texture. Don’t worry if the crackers don’t fit perfectly; simply break or cut them to fit snugly into any gaps, ensuring full coverage across the bottom of the pan.
- The Decadent Chocolate Ganache. On top of the graham cracker layer, pour a generous and even sheet of your rich, fudgy chocolate ganache. This isn’t just any chocolate sauce; ganache is a luxurious, silky smooth mixture of melted chocolate and warm heavy cream. It’s the same exquisite base used to create gourmet truffles and elegant pastry glazes. Its intense chocolate flavor and smooth texture are incredibly appealing, so much so that you might find it hard not to sneak a spoonful or two on its own before it even makes it into the cake!
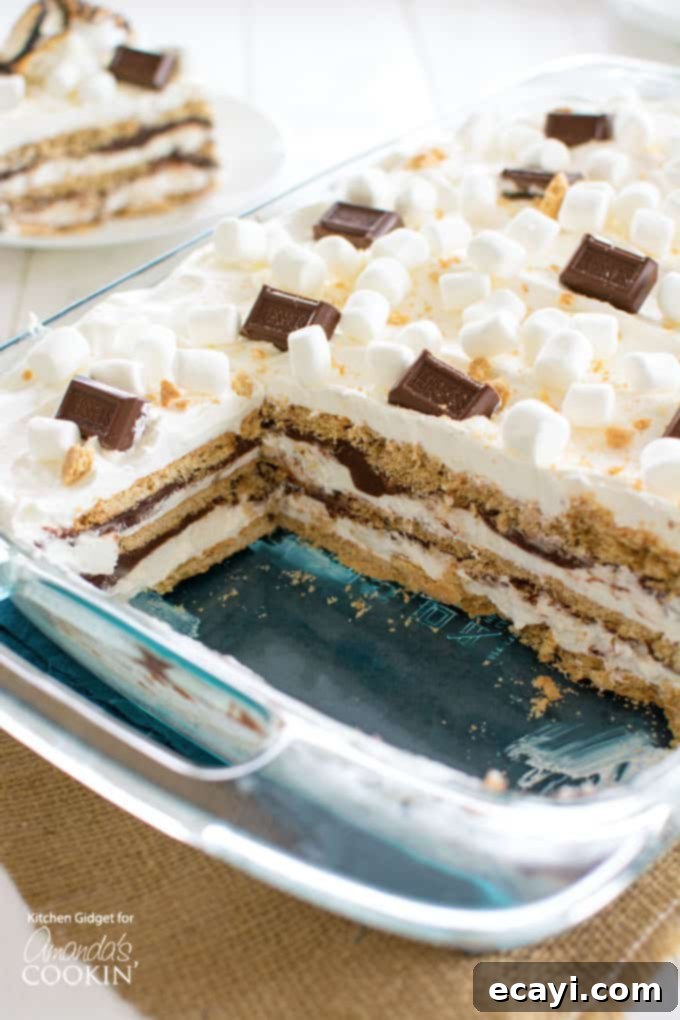
Repeat these delightful layers – another layer of graham crackers, followed by more marshmallow whipped cream, and then the remaining chocolate ganache. Continue layering until your pan is full, typically around three to four repetitions, depending on the depth of your pan and how thickly you spread each layer. Once all layers are neatly assembled, cover the pan tightly with plastic wrap and refrigerate your S’mores Icebox Cake for at least 4 hours, or ideally, overnight. This extended chilling time is absolutely vital. It allows the graham crackers to fully soften, achieving that perfect cake-like consistency, and gives all the flavors ample time to meld beautifully, resulting in a cohesive, sliceable, and utterly delicious dessert.
The Finishing Touch: Toasted Marshmallows and Elegant Garnish
Before presenting your stunning S’mores Icebox Cake, elevate its appeal and flavor with some thoughtful garnishes. Crushed graham crackers add a wonderful textual contrast and visual cue to the dessert’s base, while extra chocolate chunks enhance the rich cocoa flavor. But the undisputed star of the show, bringing that authentic campfire feel, is undoubtedly the toasted marshmallows. Achieving that perfect golden-brown, slightly charred exterior is easier than you might think, even without a campfire:
- Kitchen Torch: For precision and control, a small kitchen torch (often used for crème brûlée) is your best friend. Arrange a few mini marshmallows on top of your chilled cake, then hold the torch a few inches away and move it constantly to achieve even toasting. This method gives you excellent control over the level of char.
- Oven Broiler: If you don’t have a kitchen torch, your oven’s broiler can do the trick. Place your marshmallows on a parchment-lined baking sheet (or directly on the cake if using an oven-safe pan) and broil them for a very short duration – usually between 30-60 seconds. It’s critical to watch them *very* carefully, as marshmallows can go from perfectly toasted to burnt in an instant. Keep the oven door slightly ajar to monitor closely.
- Stovetop Burner (Gas Range): For those with a gas range, you can carefully toast individual marshmallows over a low flame using tongs or a skewer. This method mimics the campfire experience, producing a wonderfully smoky flavor. Again, constant vigilance is key to prevent burning.
These beautifully toasted marshmallows not only look fantastic, adding an artisanal touch, but also impart that signature campfire aroma and a delicate smoky sweetness, making your S’mores Icebox Cake truly unforgettable and completing the full s’mores sensory experience.
Essential Ingredients for Your S’mores Icebox Cake:
Gathering your ingredients is the first exciting step to creating this delightful dessert. Here’s a detailed look at what you’ll need:
- 3 packs of graham crackers (equivalent to one full 14.4 oz box): These form the structural base and tender layers of your cake. They soften beautifully when chilled, transforming into a tender, cake-like consistency.
- 16 oz whipped topping, thawed (e.g., Cool Whip): This forms the base of your light and airy marshmallow cream. For a homemade alternative, you can whip 2 cups of cold heavy cream with 1/2 cup powdered sugar and 1 teaspoon of vanilla extract until stiff peaks form.
- 1 jar (7 oz) marshmallow fluff: This is a key ingredient for achieving that signature, stretchy, and sweet marshmallowy texture and flavor within your whipped cream mixture. It gives the cream its distinct s’mores character.
- 2 cups mini marshmallows: These delightful small marshmallows will be gently folded into the whipped cream mixture, adding extra pockets of gooey sweetness and texture throughout the cake layers.
- 2 1/2 cups chocolate chips: These are the foundation for your rich and velvety chocolate ganache. Milk chocolate chips are recommended for that classic, sweet s’mores taste, but you can experiment with semi-sweet or even dark chocolate chips for a less sweet, more intense cocoa flavor.
- 2 cups heavy cream: Used to create the luxurious, pourable chocolate ganache that beautifully binds all the layers together with its smooth, decadent texture.
- Extra marshmallows, graham crackers, and chocolate chunks: These are for your final garnish, adding an inviting visual appeal and reinforcing the s’mores theme on top of the finished cake.
Helpful Kitchen Tools for a Smooth Preparation:
While this S’mores Icebox Cake recipe is inherently simple, having the right kitchen tools can make the preparation process even smoother, more efficient, and ultimately more enjoyable. Here are some recommendations:
- 13×9 inch baking pan: I highly recommend using a glass pan for this particular dessert. The transparency of glass allows your guests to admire all the beautiful, distinct layers of graham crackers, marshmallow cream, and chocolate ganache before they even take a bite, making for an even more enticing and impressive presentation!
- Offset spatula: While a regular butter knife can work in a pinch for spreading, an offset (or icing) spatula makes spreading the cream and ganache layers much easier and smoother. Its angled blade helps you achieve an even distribution across each layer, which is crucial for perfect, consistent slices.
- Mixing bowls: You’ll need at least two good-sized mixing bowls – one large bowl for thoroughly combining your whipped topping, marshmallow fluff, and mini marshmallows, and another smaller bowl for preparing the rich chocolate ganache.
- Small saucepan: Essential for gently warming the heavy cream to the perfect simmering point, which is necessary for melting the chocolate chips into a silky smooth ganache.
- Whisk or Electric Mixer: If you’re opting for homemade whipped cream, an electric hand mixer or stand mixer with a whisk attachment will make light work of whipping the heavy cream to fluffy perfection. Even for store-bought whipped topping, a whisk can help incorporate the marshmallow fluff smoothly.
- Kitchen Torch (optional but recommended): For that perfect, smoky, golden-brown toasted marshmallow garnish that truly completes the s’mores experience. If you don’t have one, the oven broiler or a gas stovetop burner are good alternatives (see “Finishing Touch” section for details).
Tips for the Best S’mores Icebox Cake Every Time
To ensure your S’mores Icebox Cake turns out perfectly moist, flavorful, and easy to slice, keep these valuable tips in mind:
- Chill Overnight for Optimal Results: While a minimum of 4 hours of chilling is acceptable, an overnight chill (preferably 10-12 hours) truly allows this cake to shine. The extended time in the refrigerator gives the graham crackers ample opportunity to fully soften and absorb the creamy goodness, transforming them into that desirable cake-like texture. It also allows the flavors to deepen and meld together beautifully, resulting in a more cohesive and delicious dessert.
- Strive for Even Layers: When spreading each layer of marshmallow cream and chocolate ganache, use your offset spatula to ensure they are as even as possible. Consistent layers not only make for a visually appealing cake but also ensure that every single bite has a balanced ratio of all the delicious components. This is key for a harmonious flavor experience.
- Customize Your Chocolate Experience: Don’t be afraid to experiment with different types of chocolate chips in your ganache. While milk chocolate provides that classic, sweet s’mores profile, using semi-sweet chocolate will offer a slightly less sweet, richer cocoa flavor. For true chocolate aficionados, dark chocolate can provide an intense, sophisticated twist.
- Patience with the Ganache: When preparing the ganache, resist the urge to stir the chocolate and hot cream immediately. Allow the warm cream to sit over the chocolate chips for at least 3-5 minutes before you begin stirring. This gives the chocolate time to fully melt from the residual heat, ensuring a perfectly smooth, lump-free ganache that’s a dream to spread.
- Garnish Just Before Serving: To maintain the freshest texture and appearance of your toppings, add your toasted marshmallows, graham cracker crumbs, and chocolate chunks right before you plan to serve the cake. This ensures the marshmallows are delightfully gooey and the crumbs remain crisp.
- Proper Storage: Any leftover S’mores Icebox Cake should be stored tightly covered with plastic wrap or in an airtight container in the refrigerator. It will remain delicious for up to 3-4 days. While the crackers may continue to soften further over time, the flavors will remain fantastic.
- Consider a Springform Pan: If you want a truly showstopping presentation with clean sides, consider assembling this cake in a springform pan. Line the bottom with parchment paper and the sides with acetate strips for easy removal and a professional finish.
Embrace the S’mores Experience with This Irresistible No-Bake Cake!
We are confident you’ll absolutely adore this S’mores Icebox Cake! Seriously, who wouldn’t? This ultra-enticing, easy-to-make dessert will have every s’mores lover rejoicing with its nostalgic flavors and delightful textures. It’s the perfect treat to share with family and friends, bringing smiles and satisfying sweet cravings. Whether you’re entertaining a large group or simply indulging your family, this cake delivers maximum impact with minimal effort. If you find yourself captivated by all things s’mores and are eager for more delightful variations, you might also want to explore some of our other fantastic s’mores-inspired creations:
- These refreshing Frozen S’mores
- A gooey and communal S’mores Dip
- The sophisticated and adult-friendly S’mores Martini
- Our delightful and portable S’mores Cupcakes
- And for a cookie twist, these wonderfully crunchy Crumb-Coated S’more Cookies!
More Easy No-Bake Dessert Ideas:
If you love the simplicity and deliciousness of this one-pan, no-bake icebox cake, you’ll be thrilled to discover more of our stress-free dessert recipes. These are perfect for entertaining, summer days, or anytime you need a fantastic treat without turning on the oven, offering a wide range of flavors and textures:
- Mint Chocolate Lasagna
- Funfetti Icebox Cake
- Pineapple Dream Dessert
- Lemon Cheesecake Pudding Dessert
- Lemon Blueberry Trifle
- Chocolate Lasagna
- Mixed Berry Icebox Cake
S’mores Icebox Cake
IMPORTANT – There are often Frequently Asked Questions within the blog post that you may find helpful. Simply scroll back up to read them!
Print It
Pin It
Rate It
Save ItSaved!
Ingredients
- 2 ½ cups chocolate chips
- 2 cups heavy whipping cream
- 16 oz whipped topping thawed
- 7 ounce marshmallow fluff
- 2 cups mini marshmallows
- 14.4 ounces graham crackers 1 box: 3 sleeves
- Extra marshmallows, graham crackers and chocolate chunks, for garnish
Instructions
Make the Ganache
-
Place the chocolate chips in a bowl.
-
In a small saucepan warm the heavy cream until it comes to a simmer.
-
Pour the cream over the chocolate and let sit for a few minutes, then stir until melted and smooth.
-
Place in refrigerator while preparing remaining ingredients.
For the Cake:
-
In a large bowl, combine the whipped topping, marshmallow fluff and marshmallows.
-
Spread a thin layer on the bottom of a 13×9 pan. This is just to anchor the cracker layer.
-
Top with a layer of graham crackers. Fill in any gaps with crackers cut to size.
-
Top with 1/3 of the marshmallow mixture and spread in an even layer.
-
Next, add half the chocolate ganache.
-
Repeat layer of graham crackers, 1/3 marshmallow mixture and remaining ganache.
-
Top with final layer of graham crackers and final 1/3 of marshmallow mixture.
-
Cover and refrigerate for at least 4 hours or overnight.
-
Garnish with graham cracker crumbs, chocolate chunks and marshmallows, if desired.
Nutrition
The recipes on this blog are tested with a conventional gas oven and gas stovetop. It’s important to note that some ovens, especially as they age, can cook and bake inconsistently. Using an inexpensive oven thermometer can assure you that your oven is truly heating to the proper temperature. If you use a toaster oven or countertop oven, please keep in mind that they may not distribute heat the same as a conventional full sized oven and you may need to adjust your cooking/baking times. In the case of recipes made with a pressure cooker, air fryer, slow cooker, or other appliance, a link to the appliances we use is listed within each respective recipe. For baking recipes where measurements are given by weight, please note that results may not be the same if cups are used instead, and we can’t guarantee success with that method.
