Easy Mexican Pinwheels: Creamy Chicken, Taco Flavor, and Vibrant Bell Peppers for Any Occasion
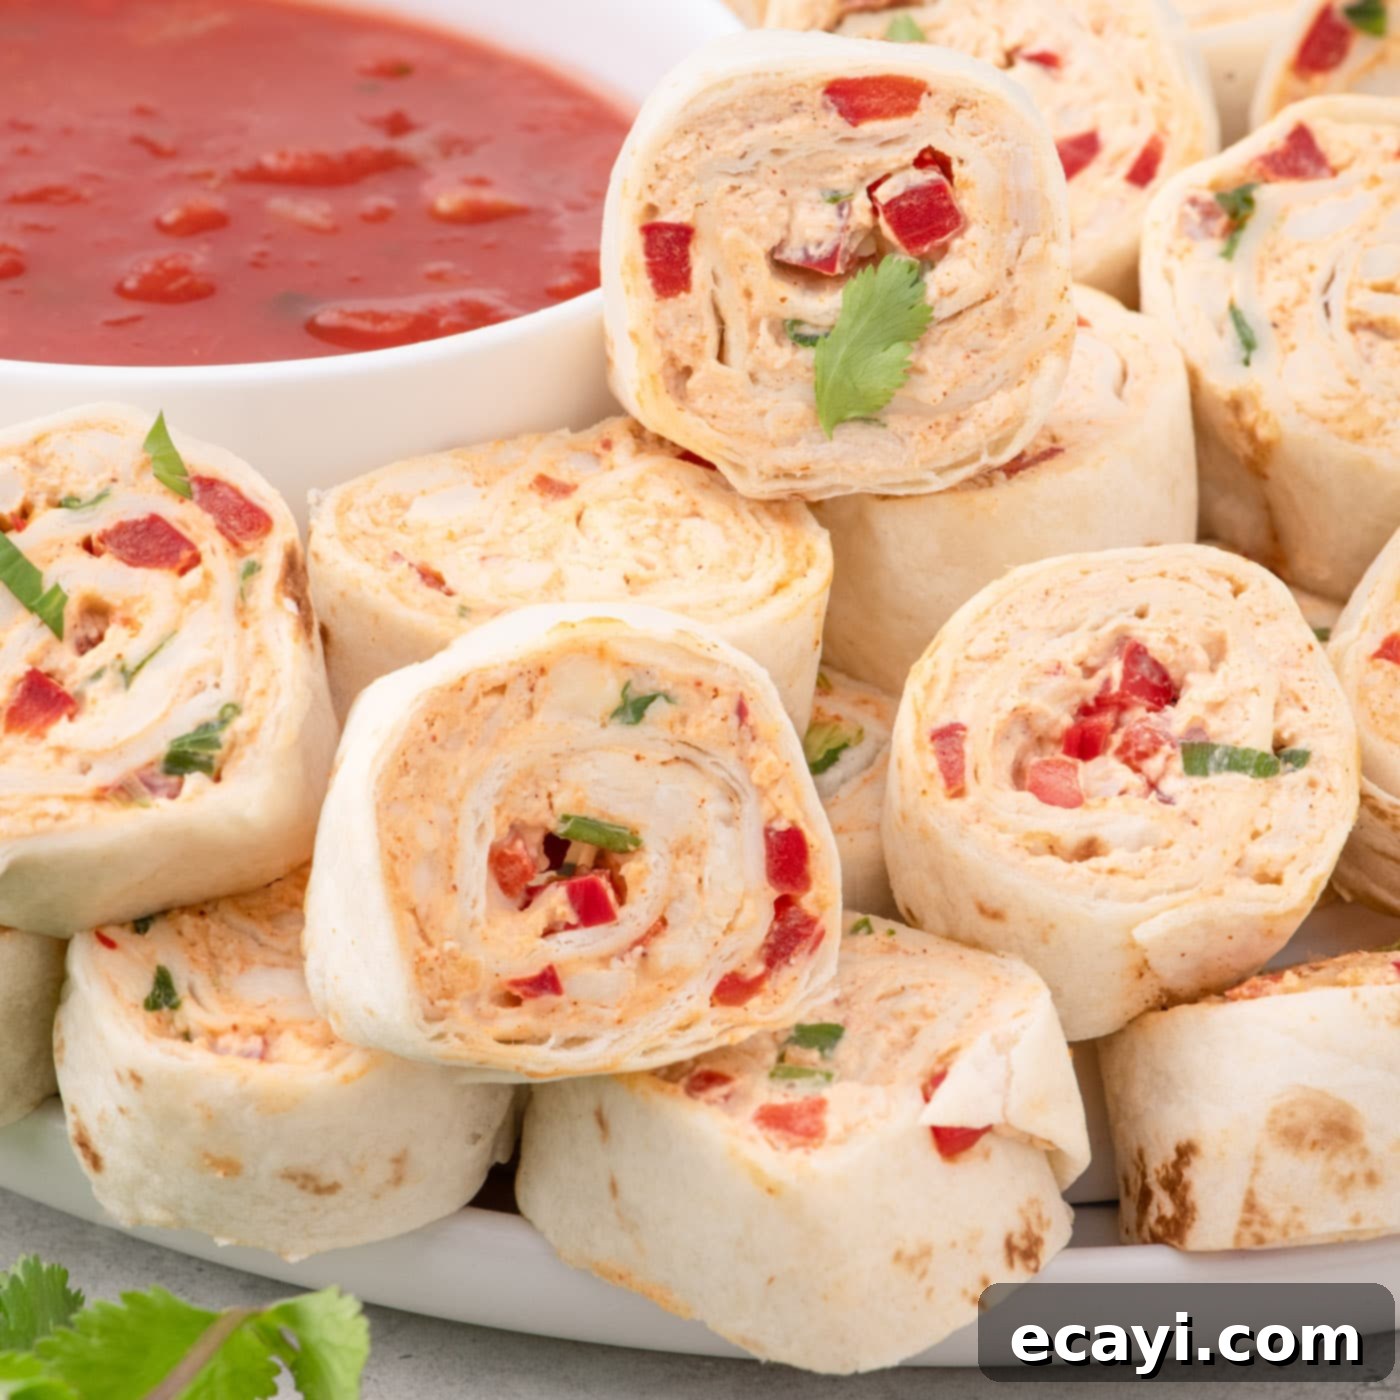
Get ready to impress your guests with these irresistible Mexican Pinwheels! Packed with a rich, creamy blend of softened cream cheese, savory shredded chicken, and zesty taco seasoning, these bite-sized delights offer a delightful crunch from vibrant bell peppers in every single mouthful. They’re the perfect appetizer for parties, game days, or a casual gathering with friends and family, promising a burst of flavor that will keep everyone coming back for more.
Why This Mexican Pinwheel Recipe Works
Pinwheel sandwiches have long been a beloved classic for their simplicity and versatility, but these Mexican-inspired pinwheels take that popularity to a whole new level. By incorporating flavorful shredded chicken, a punchy taco seasoning blend, and crisp, colorful bell peppers, you create an appetizer that’s not just easy but utterly addictive. The combination of textures—creamy, crunchy, and soft tortilla—makes for an exciting culinary experience that’s a fantastic departure from your everyday deli meat pinwheels.
This recipe is a true winner for several reasons. Firstly, it’s incredibly simple to prepare, making it ideal for busy hosts or anyone looking for a no-fuss appetizer. Most of the prep can even be done in advance, saving you precious time on the day of your event. Secondly, the flavors are universally appealing; who doesn’t love the comforting taste of Mexican cuisine? The cool, creamy filling beautifully balances the warmth of the taco seasoning, creating a harmonious and refreshing bite. Thirdly, these pinwheels are designed for sharing. The recipe yields a generous amount, ensuring there’s plenty to go around, though be warned: they tend to disappear remarkably fast! Whether you’re hosting a large party or just need a satisfying snack, these Mexican Pinwheels are a surefire hit.
Ingredients You Will Need
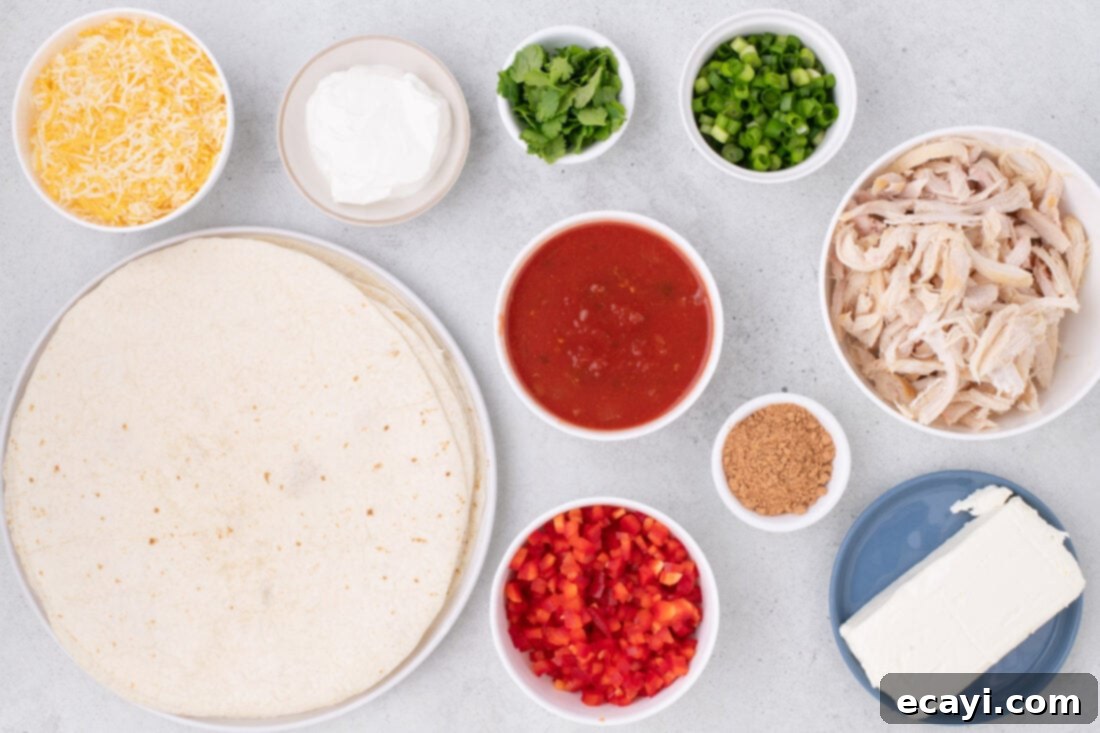
Crafting these delicious Mexican Pinwheels requires a handful of simple, readily available ingredients. You’ll find a complete list of measurements, ingredients, and detailed instructions in the printable recipe card located at the very end of this post. For now, let’s dive into some key components and helpful tips for selecting and preparing them.
Ingredient Info and Substitution Suggestions
Cream Cheese & Sour Cream: These two dairy products form the creamy, rich base of our pinwheel filling. For the best texture and flavor, we highly recommend using full-fat brick-style cream cheese, softened to room temperature. This makes it much easier to beat into a smooth consistency, avoiding lumps. Similarly, full-fat sour cream contributes to the luxurious creaminess and a slight tang that complements the taco seasoning beautifully. If you’re looking for a slightly lighter option, you could try using light cream cheese or Greek yogurt in place of sour cream, though the texture may be slightly different.
Taco Seasoning: The secret to that irresistible Mexican flair! You can use your favorite store-bought taco seasoning blend for convenience, or easily make your own from scratch. A homemade blend allows you to control the spice level and salt content, typically consisting of chili powder, cumin, paprika, garlic powder, onion powder, and a pinch of cayenne. Adjust the amount to your taste; some prefer a milder flavor, while others crave a more robust kick.
CHICKEN: Shredded chicken breast is the star protein here. For ultimate ease, don’t hesitate to grab a pre-made rotisserie chicken from your local grocery store. It’s a fantastic shortcut that saves you cooking time and effort, and the chicken is usually perfectly seasoned and tender. Alternatively, you can boil or bake two chicken breasts until cooked through, then shred them using two forks or a stand mixer. Ensure the chicken is cooled before mixing it into the cream cheese base.
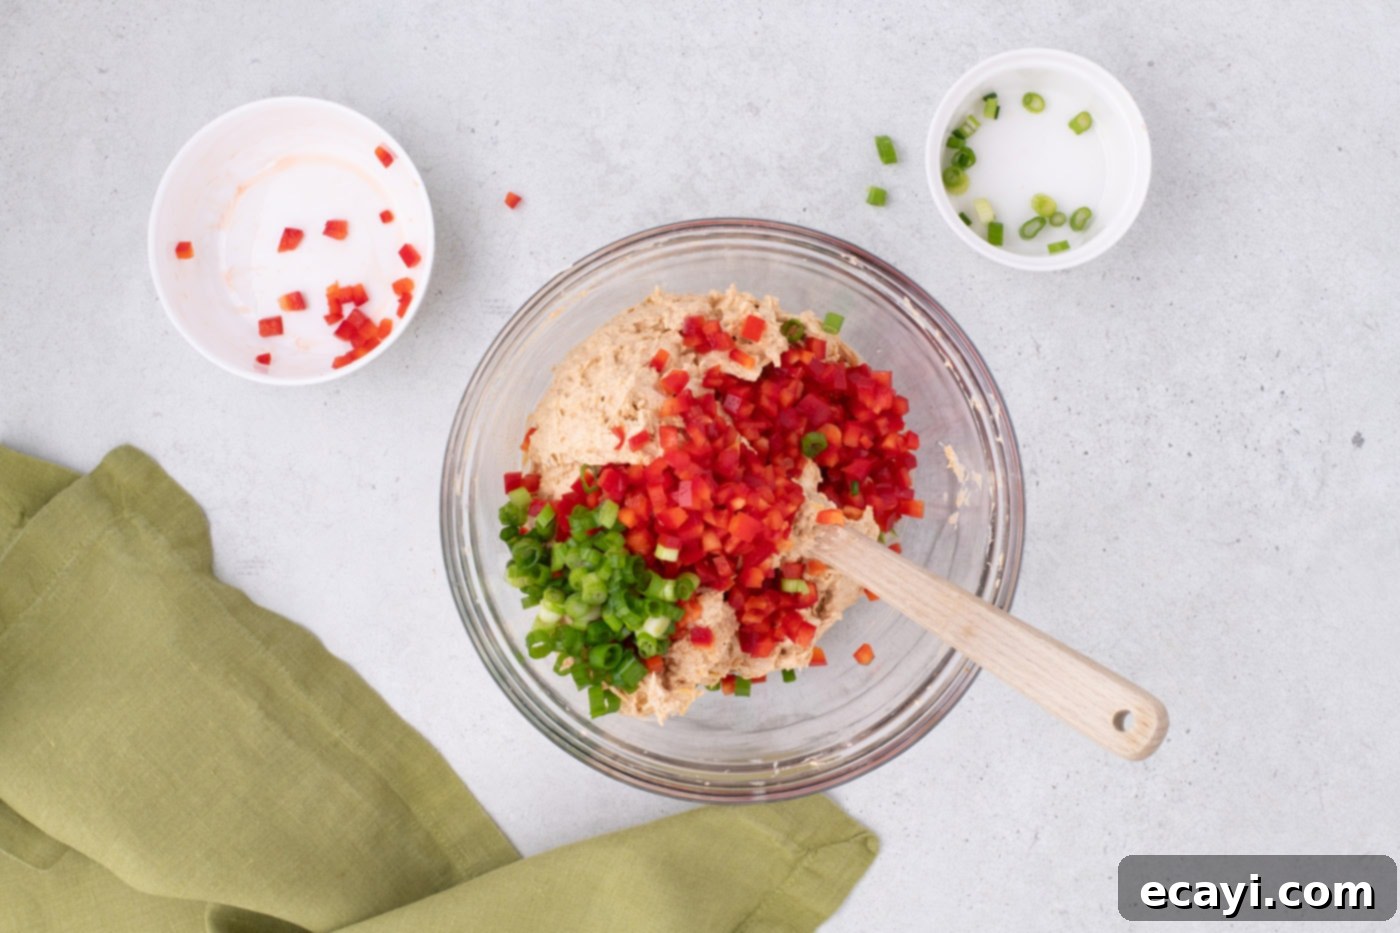
VEGGIES (Bell Peppers & Green Onions): The red bell pepper not only adds a beautiful pop of color but also a crisp, refreshing texture and a subtle sweetness that cuts through the richness of the cream cheese. Green onions provide a mild oniony bite. When incorporating these finely diced vegetables into the cream cheese mixture, it’s crucial to be gentle. Avoid over-stirring or mashing them vigorously, as you want to preserve their crispness and vibrant shape. A soft silicone spatula is your best friend here, as it’s far gentler on the ingredients than a traditional wooden spoon. Feel free to experiment with other finely diced vegetables like yellow or orange bell peppers for even more color, or a small amount of finely diced jalapeño for a little heat.
Mexican Style Shredded Cheese: A blend of Monterey Jack, Cheddar, Asadero, and Queso Blanco cheeses is perfect for adding a melty, savory dimension. These blends are readily available in most supermarkets. You can also use a single type of cheese like Monterey Jack or sharp cheddar if you prefer. For best results, use freshly shredded cheese if possible, as pre-shredded varieties often contain anti-caking agents that can slightly alter the texture.
TORTILLAS: The foundation of our pinwheels! 10-inch “burrito-style” flour tortillas are your absolute best option for this recipe. Their larger size provides ample surface area for the filling, and their pliability allows them to be rolled tightly without cracking. Corn tortillas, while delicious in other applications, are generally too brittle and will break apart when rolled with this filling. If 10-inch tortillas aren’t available, 7-inch “fajita-size” tortillas will also work, but you’ll need more than 8 of them to use up all the delicious filling. Don’t be afraid to get creative with flavored tortillas, such as jalapeño cheddar wraps for an extra kick or sun-dried tomato wraps for a different savory note.
Cilantro: Fresh chopped cilantro is an optional but highly recommended garnish. Its bright, herbaceous flavor adds a fresh finish and a beautiful touch of green to the finished pinwheels. If you’re not a fan of cilantro, a sprinkle of finely chopped parsley or additional green onions can be used instead.
How to Make Mexican Pinwheels
These step-by-step photos and detailed instructions are here to guide you visually through the process of making these delicious Mexican Pinwheels. For a quick reference to the printable version of this recipe, complete with precise measurements and condensed instructions, simply Jump to Recipe at the bottom of this page.
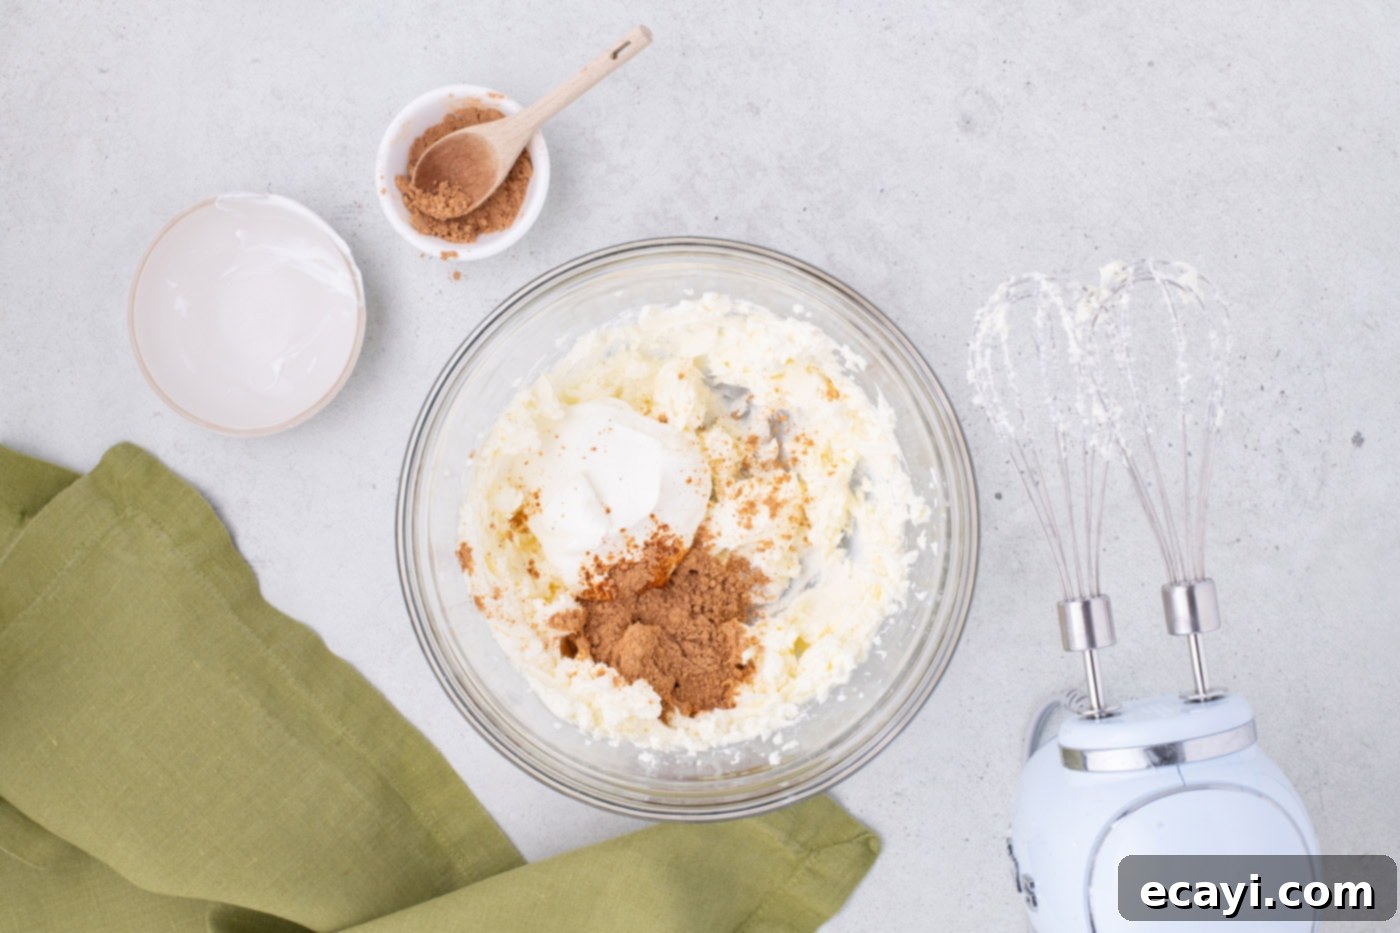
- Prepare the Cream Cheese Base: In a large mixing bowl, combine the softened brick-style cream cheese, full-fat sour cream, and taco seasoning. Using a handheld mixer, beat these ingredients together until the mixture is completely smooth, creamy, and well combined. Ensure there are no lumps of cream cheese remaining. This step is crucial for an even distribution of flavor and a smooth filling consistency.


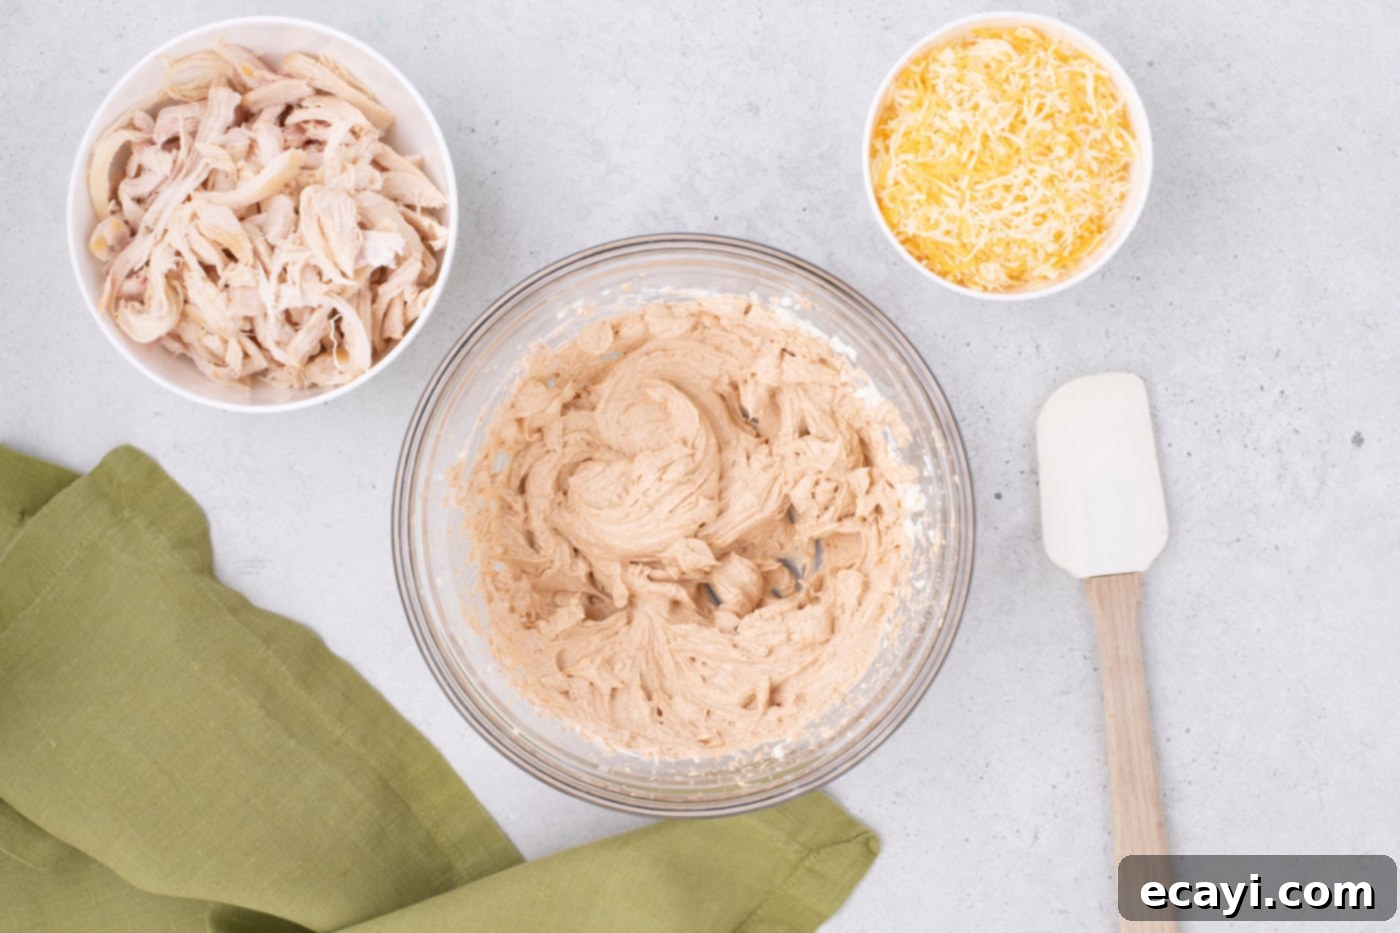
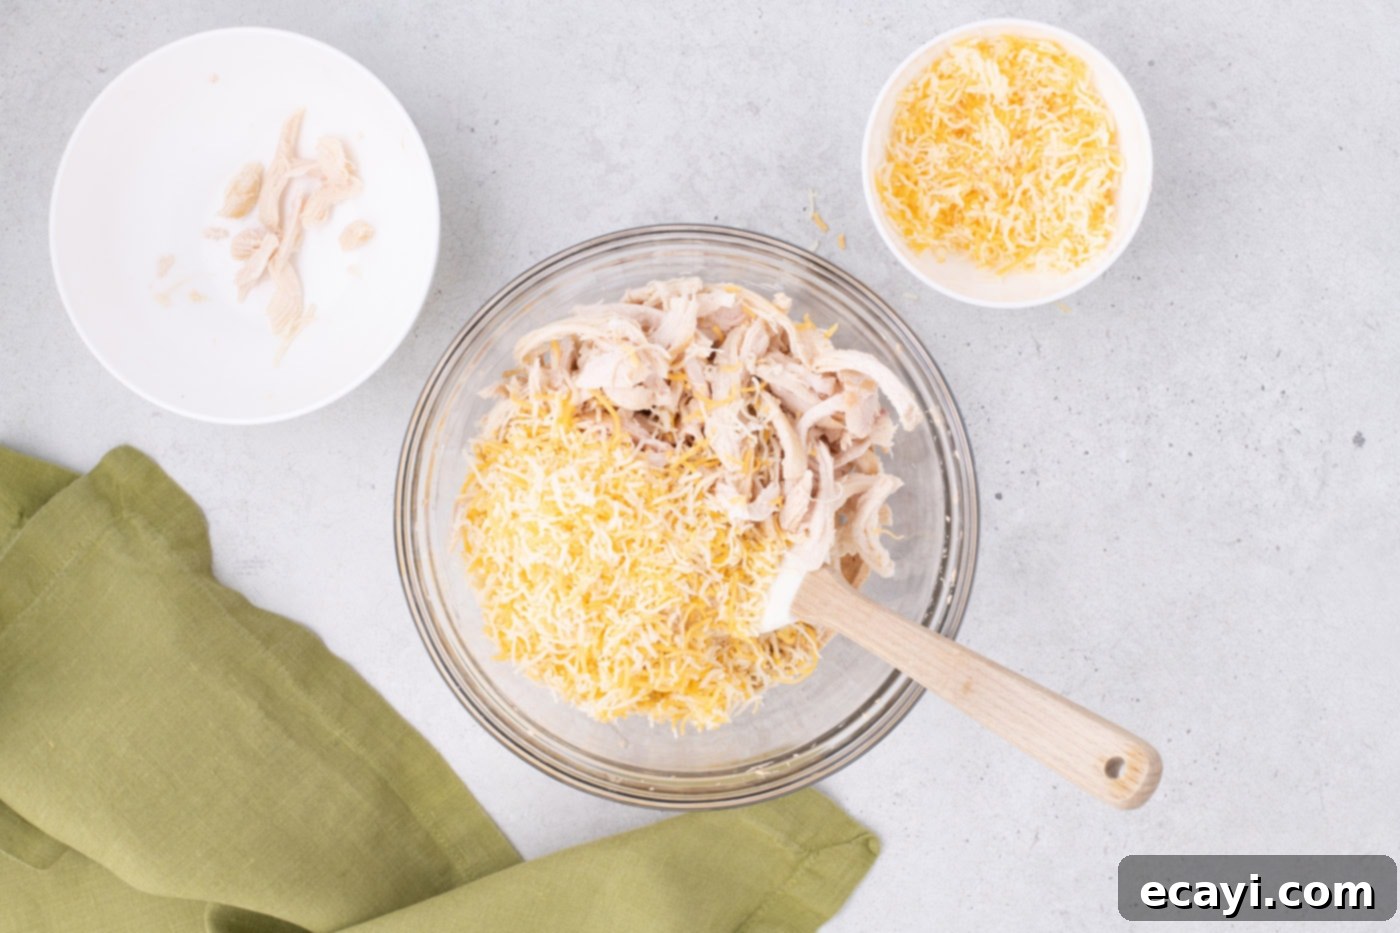
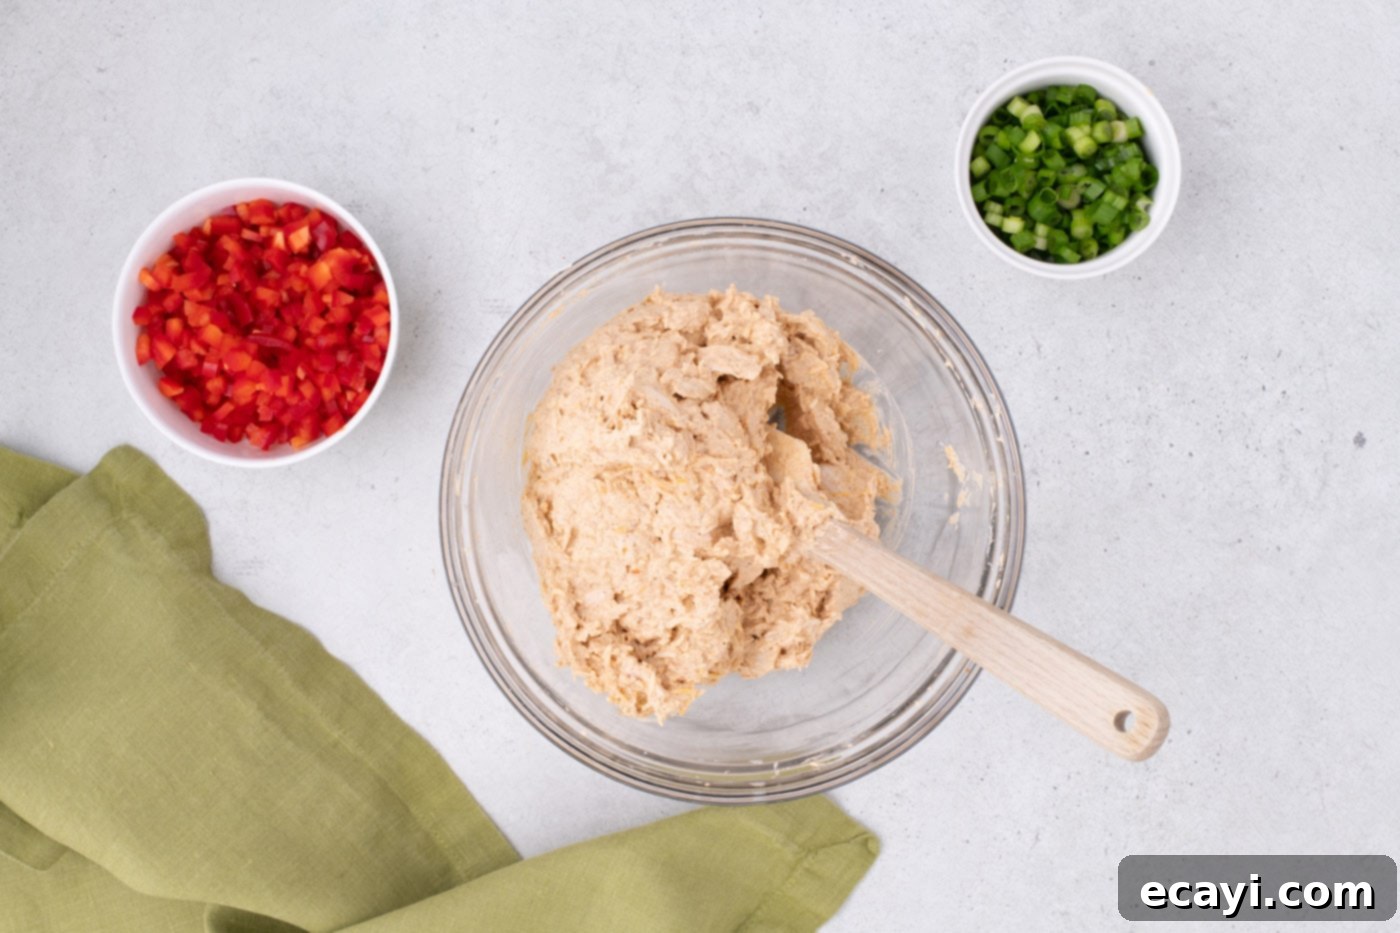
- Add Chicken and Cheese: Gently fold the shredded chicken and Mexican-style shredded cheese into the cream cheese mixture. Use a soft spatula to ensure everything is evenly incorporated without overworking the mixture.


- Incorporate the Veggies: Carefully fold in all but ¼ cup of the finely diced red bell pepper and all but 1 tablespoon of the sliced green onion. These reserved portions will be used later for a vibrant garnish, adding extra freshness and visual appeal to the sliced pinwheels. Remember to fold gently to maintain the crisp texture of the vegetables.

- Chill the Filling: Once everything is mixed, cover the bowl and place the filling in the refrigerator for at least 2 hours. This chilling period is crucial for two reasons: it allows the flavors to meld and intensify, and it helps the mixture firm up, making it much easier to spread and roll into tight pinwheels. Don’t skip this step for the best results!
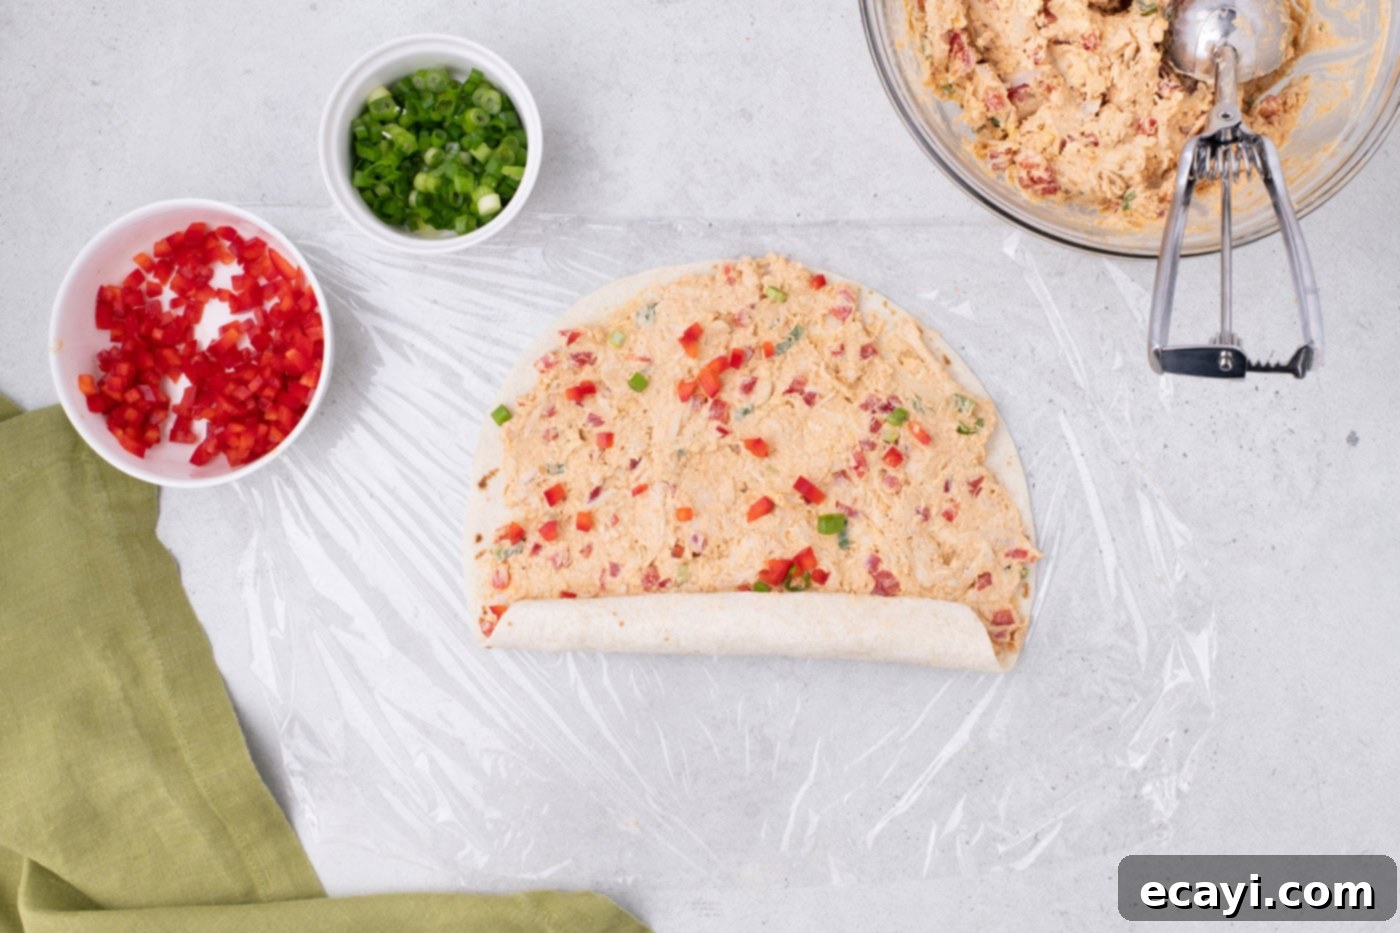
- Prepare Tortillas: Lay a large piece of plastic wrap on your clean work surface. The plastic wrap should be slightly larger than your tortilla, as it will assist in tightly rolling the pinwheel later. Place one 10-inch flour tortilla on top of the plastic wrap.
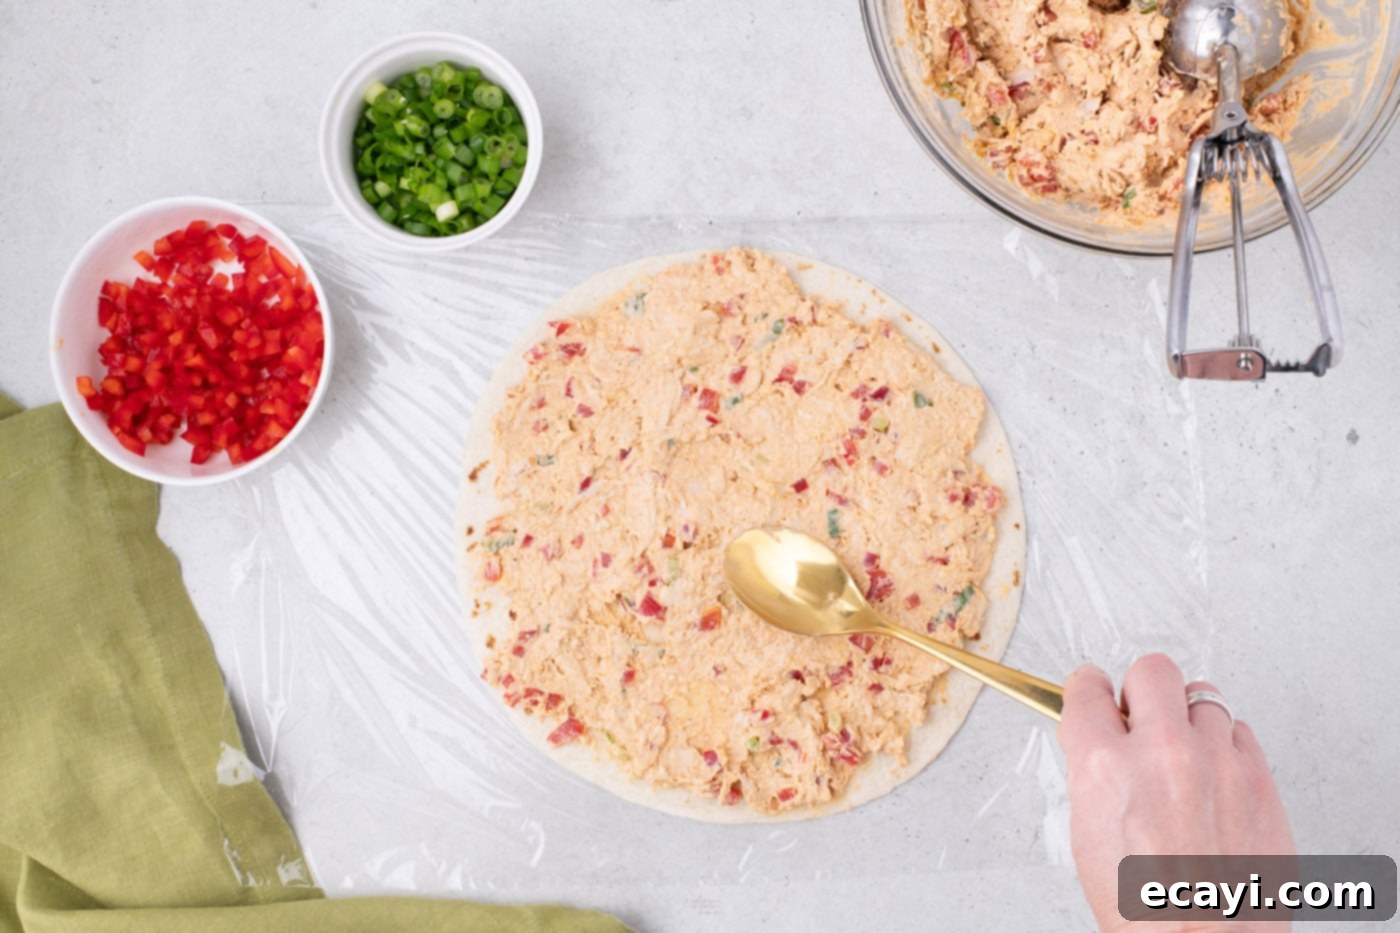
- Spread the Filling: Dollop just over 1/2 cup of the chilled filling onto the tortilla. For consistency, a 3-tablespoon cookie dough scoop works perfectly, requiring about 3 scoops per tortilla.
- Evenly Distribute: Using the back of a spoon or an offset spatula, carefully and evenly spread the filling across the entire surface of the tortilla, leaving about a half-inch border free around the edges. This ensures the filling doesn’t squeeze out when rolled.

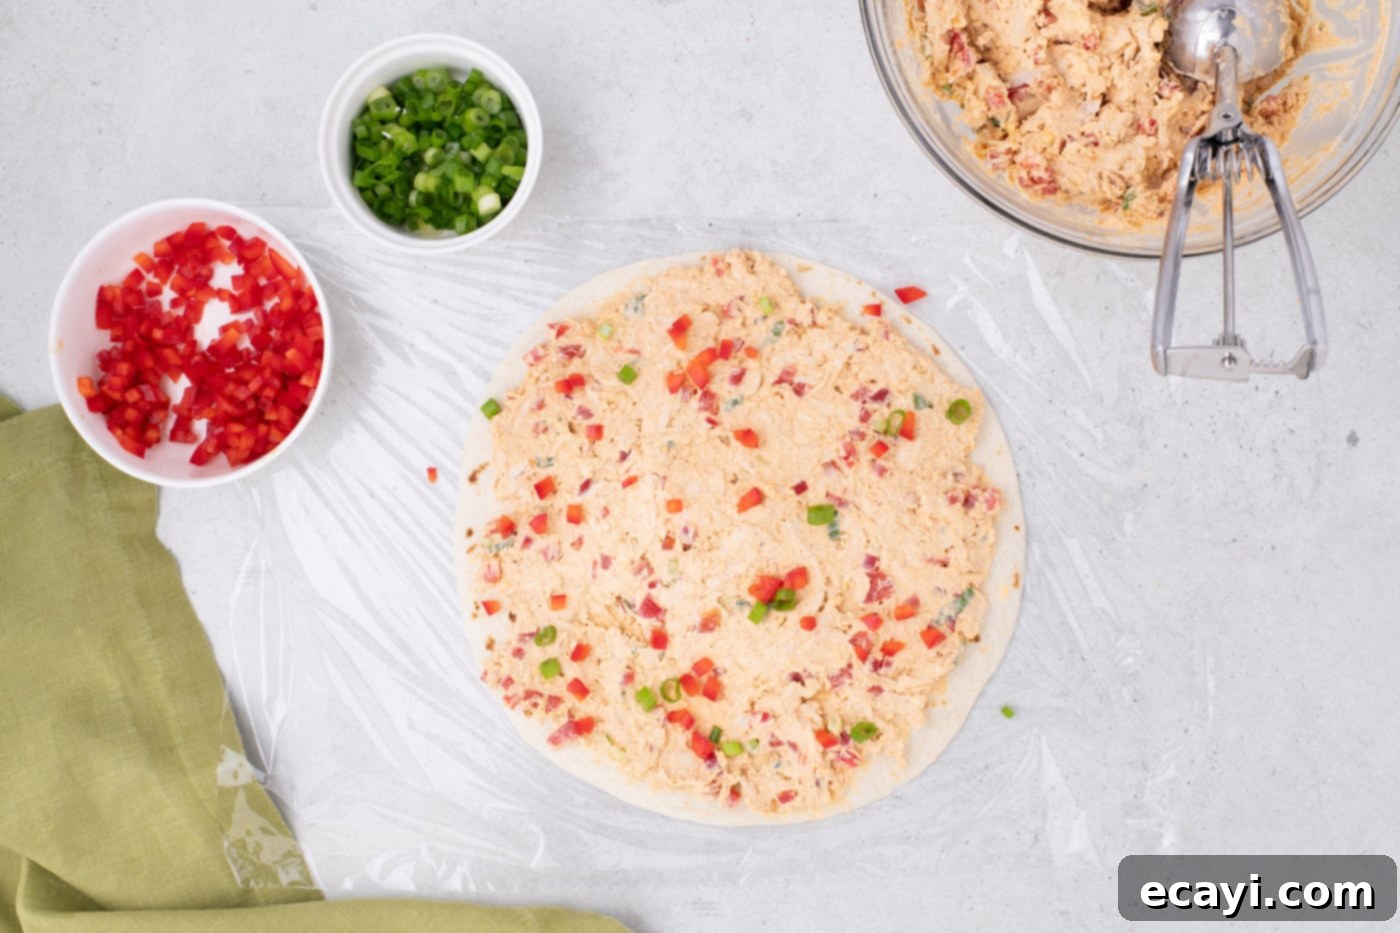
- Add Garnish for Visual Appeal: Sprinkle a heaping 1 teaspoon of the remaining diced red pepper and a tiny pinch of the reserved green onion over the spread filling. This extra layer of fresh vegetables will add an enticing pop of color and texture when your pinwheels are sliced, making them even more visually appealing.

- Roll Tightly: Starting from the edge closest to you, use the plastic wrap as a guide to help you roll the tortilla very tightly into a compact 2-inch log. The tighter you roll, the better your pinwheels will hold their shape when sliced. Repeat this process with the remaining tortillas and filling.

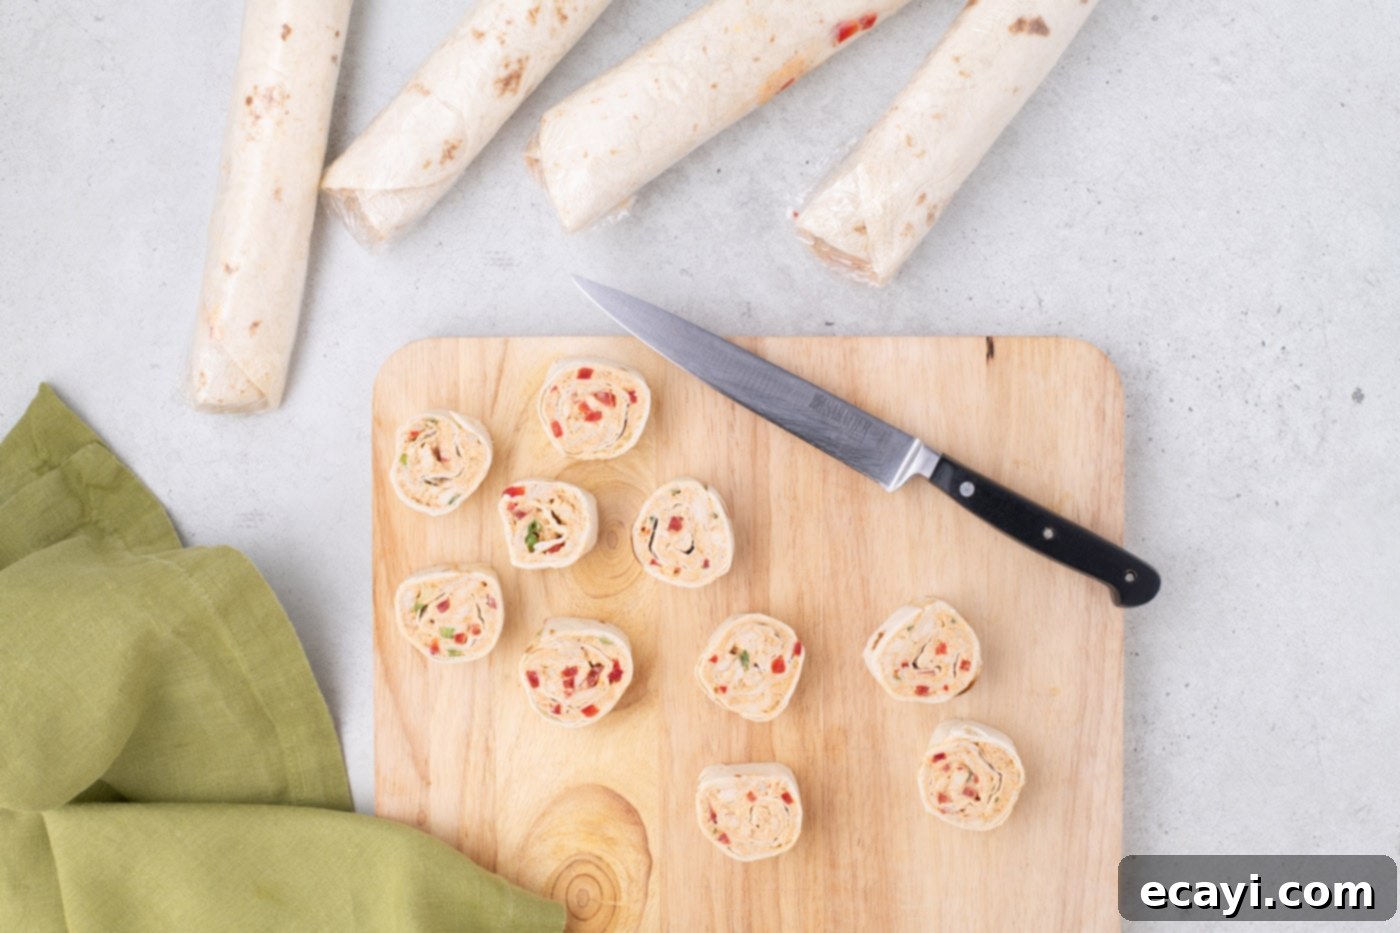
- Firm Up the Rolls: Once all tortillas are rolled, place the wrapped logs back into the refrigerator for another 20 minutes. This second chill time is essential for the rolls to firm up completely, making them much easier to slice cleanly without squishing the filling.
- Slice and Serve: When you’re ready to serve, unwrap each chilled roll. Using a sharp chef’s knife, carefully cut each log into 1 1/2-inch thick slices, creating perfect pinwheels. For the cleanest cuts, wipe your knife clean with a damp cloth between each slice to prevent sticking and maintain sharp edges.

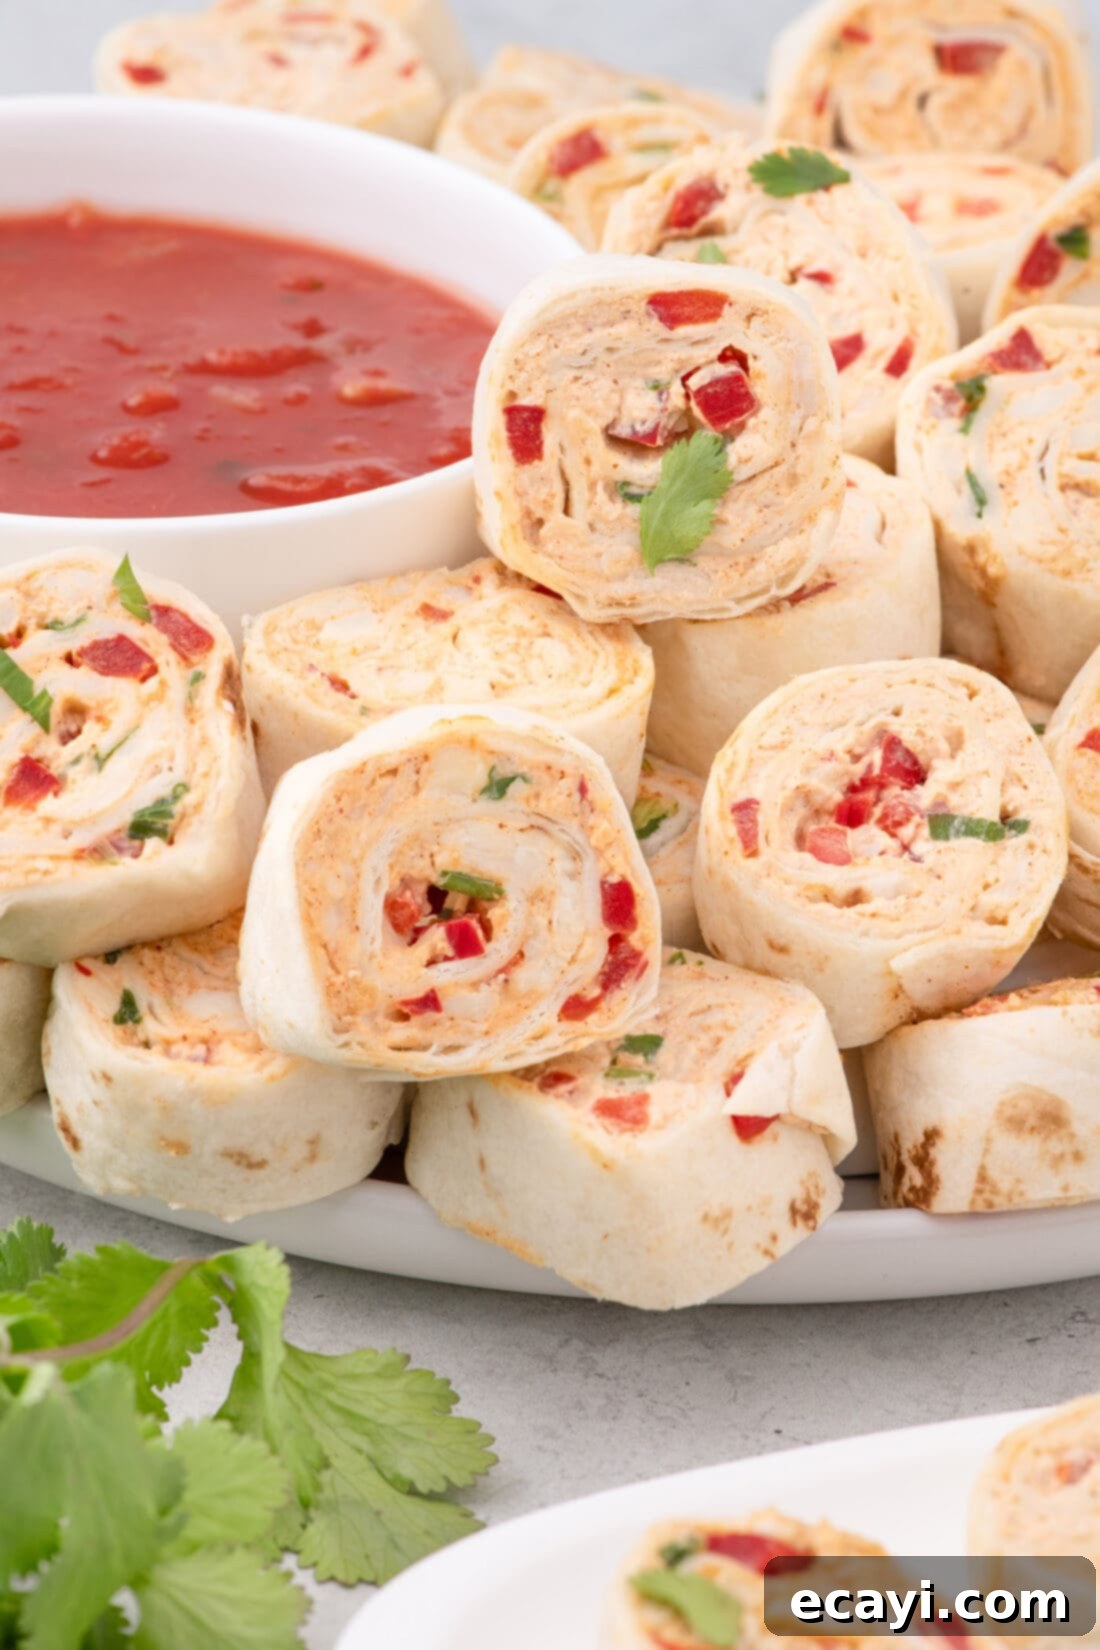
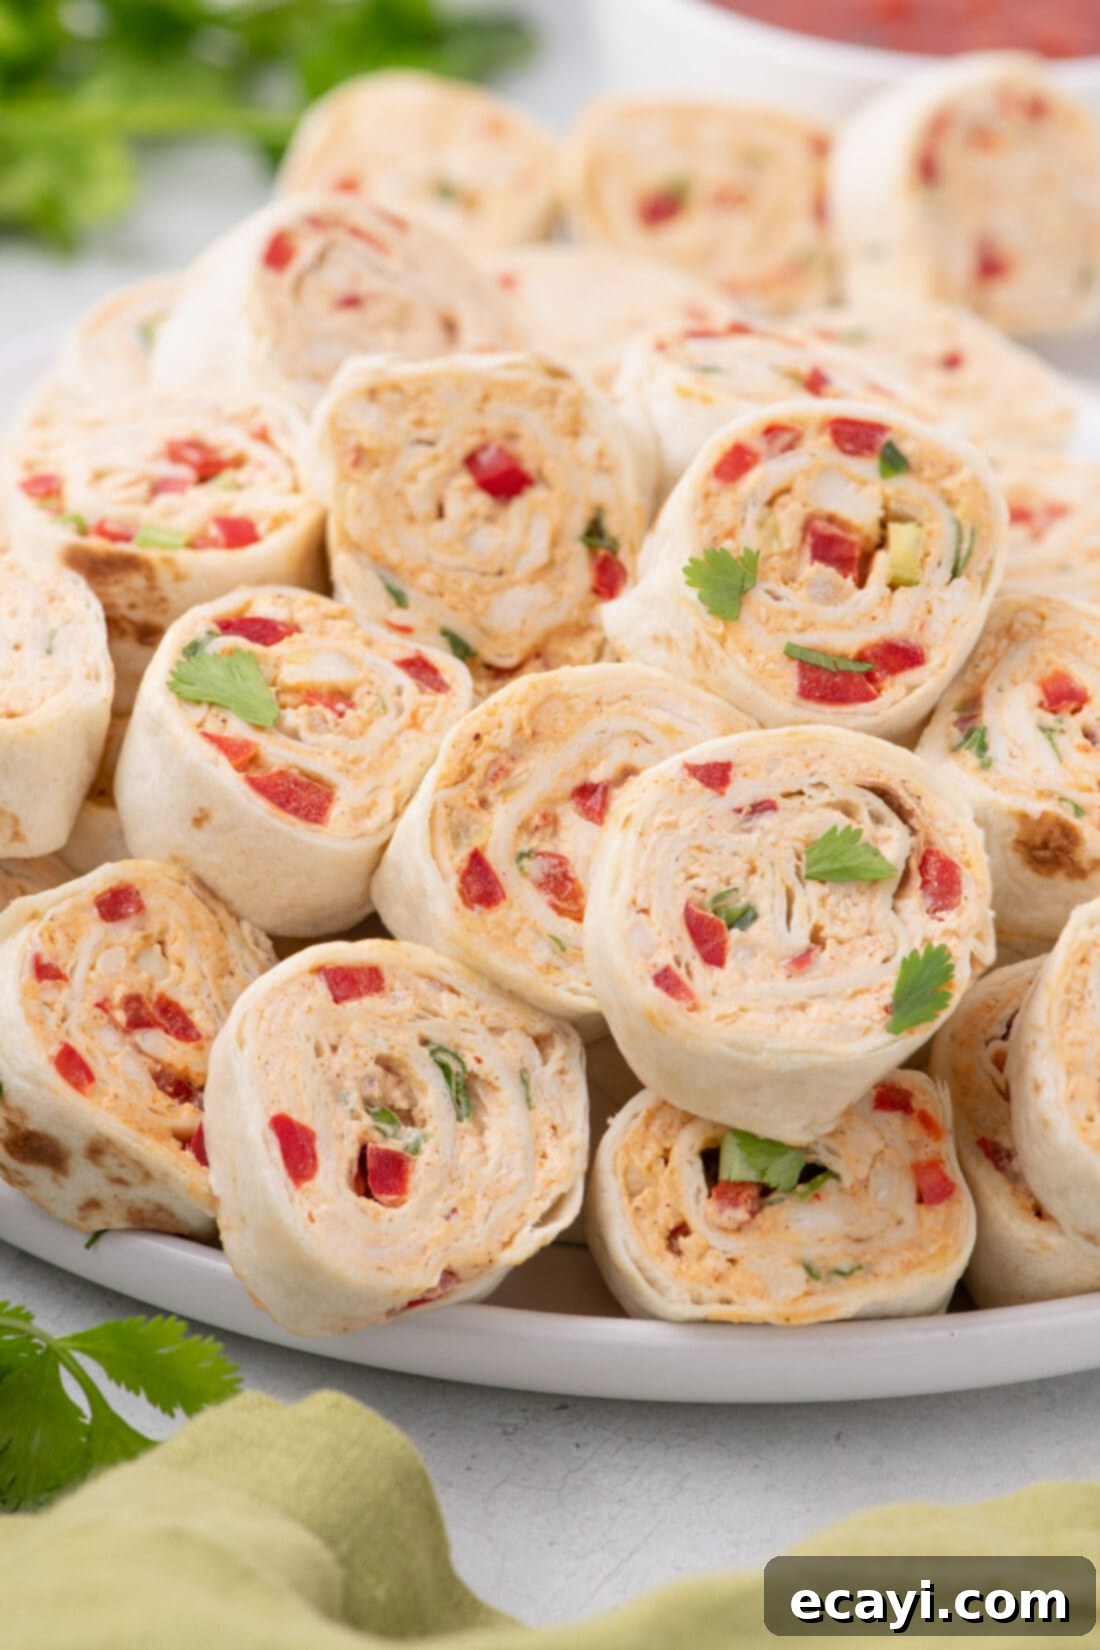
- Final Garnish: Arrange the sliced pinwheels beautifully on a serving tray. For a final flourish, sprinkle with the remaining chopped cilantro.
Frequently Asked Questions & Expert Tips
Mexican Pinwheels are undoubtedly best when enjoyed the day they are assembled, as adding the filling to the tortilla too far in advance can lead to the tortillas becoming slightly soggy. However, you can certainly prepare the creamy, flavorful filling mixture a day or two beforehand. Simply mix all the ingredients for the filling as directed, cover it tightly, and refrigerate. On the day you plan to serve, spread the chilled filling onto the tortillas, roll, chill briefly, and slice. This method ensures maximum freshness and crispness for your pinwheels while still saving you significant prep time.
Any leftover Mexican Pinwheels can be stored in an airtight container in the refrigerator for up to 2 days. While they will still be delicious, it’s worth noting that the tortillas may continue to soften and absorb moisture from the filling over time, potentially becoming a bit soggy. For the best texture, try to consume them within 24 hours of assembly.
These pinwheels are wonderfully versatile and open to customization! To enhance the Mexican flavor profile, consider tossing in some fire-roasted corn (drained well) for a smoky sweetness, or finely dicing a jalapeño or poblano pepper for a touch of heat and earthy flavor. Other delicious additions could include a spoonful of drained black beans, a dash of hot sauce in the cream cheese mixture, or a sprinkle of finely chopped black olives. The key is to add ingredients that are finely diced and don’t introduce too much moisture. Remember to be careful not to go overboard with additions to maintain a good ratio of creamy filling to fresh veggies and other ingredients, ensuring the pinwheels roll easily and hold their shape.
Making a vegetarian version of these Mexican Pinwheels is incredibly simple and equally delicious! Just omit the shredded chicken entirely. To compensate for the chicken’s bulk and to add more visual appeal and texture, we recommend adding an additional yellow or orange bell pepper, finely diced, to the filling mixture. This provides a lovely color contrast and an extra crunch. Additionally, when removing the chicken, you will need to increase the quantity of Mexican-style shredded cheese to 2 cups to ensure the filling retains its desired consistency and richness.
Unfortunately, freezing assembled Mexican Pinwheels is not recommended. The cream cheese and sour cream mixture can change texture when frozen and thawed, often becoming grainy or watery. Additionally, the tortillas and fresh vegetables will become mushy. It’s best to enjoy these fresh.
Achieving clean, perfectly formed pinwheel slices is all about proper chilling and a sharp knife. First, ensure the rolled logs are thoroughly chilled for the recommended time (at least 20 minutes) so the filling is firm. Second, use a very sharp chef’s knife. For each slice, make a confident, single cut rather than sawing back and forth. Wiping the knife blade clean with a damp paper towel between each slice will prevent the filling from sticking to the knife and ensure each pinwheel looks picture-perfect.
Serving Suggestions
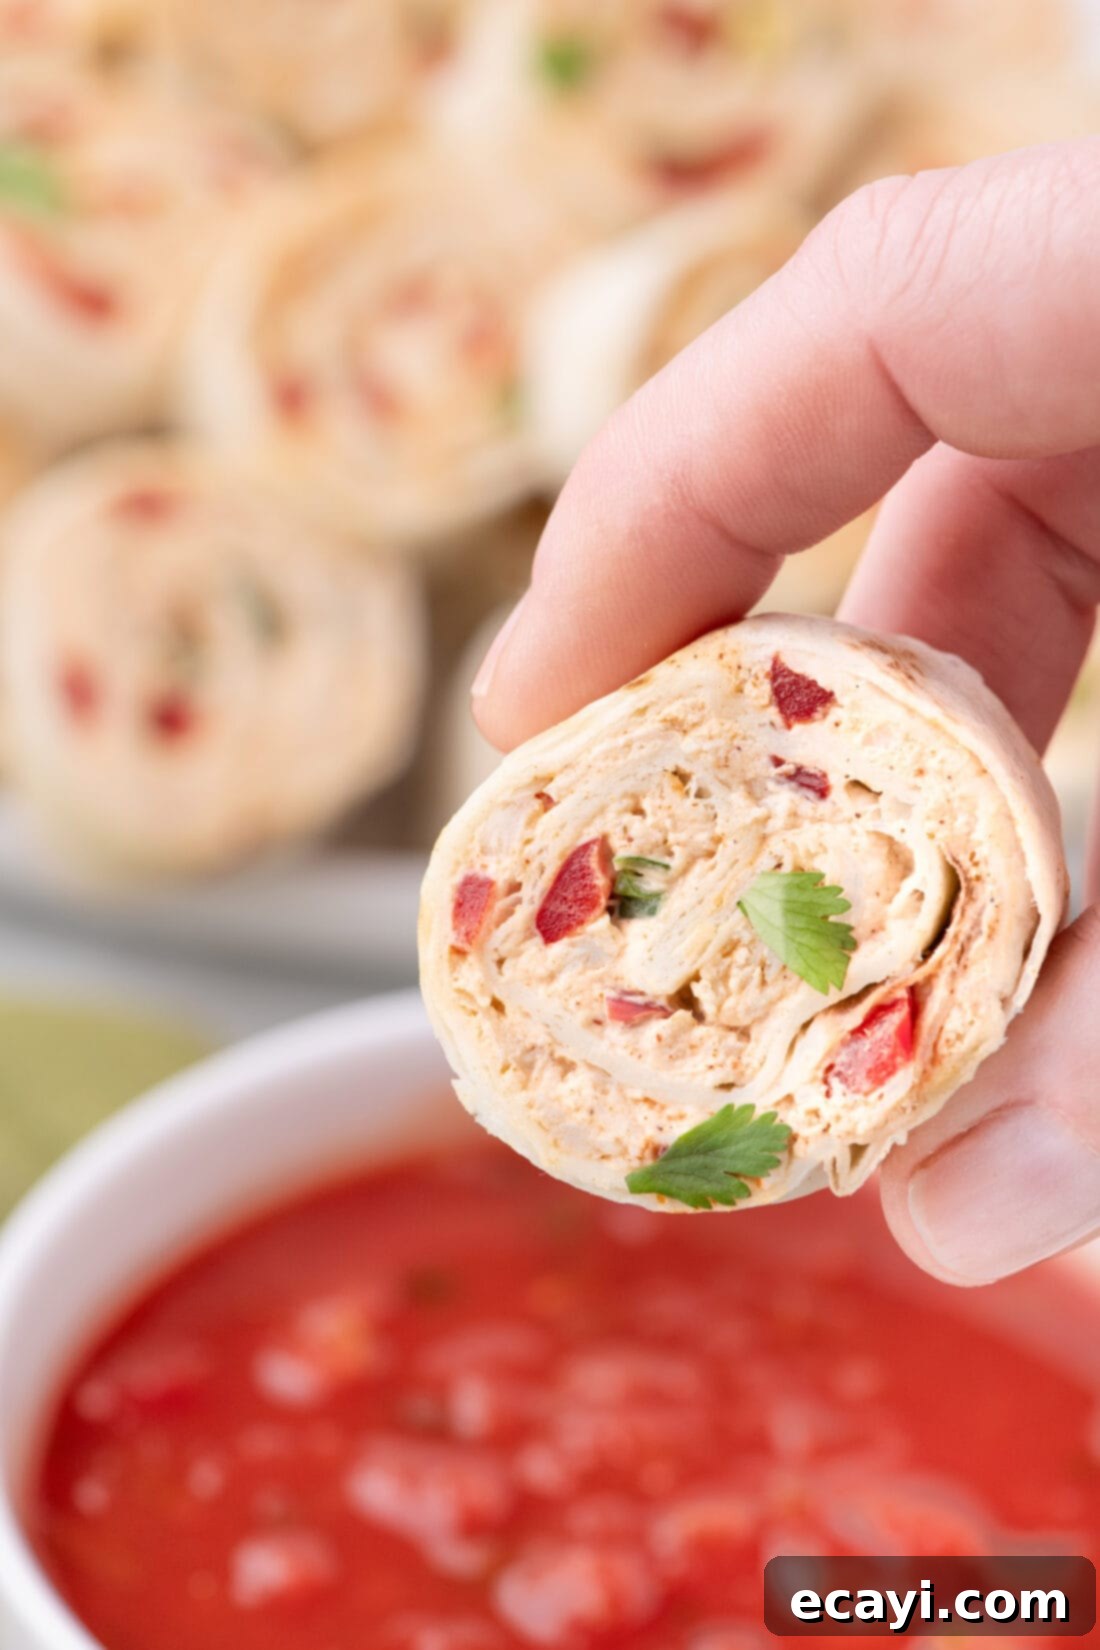
Mexican Pinwheels are incredibly versatile and can be served in a variety of ways to complement any gathering. Arrange them beautifully on a large platter for an eye-catching display. While they are perfectly delicious and flavorful on their own, offering a few optional dips can elevate the experience. Classic choices like a fresh salsa or a vibrant, homemade guacamole are always crowd-pleasers. For those who enjoy a little extra tang, a bowl of extra sour cream or even a creamy avocado ranch dressing makes a wonderful accompaniment. Ensure the pinwheels remain chilled until just before serving to maintain their firm texture and refreshing taste. They pair wonderfully with other Mexican-themed appetizers like mini quesadillas, loaded nachos, or even as a light lunch alongside a fresh green salad.
More Pinwheel Recipes You’ll Love
If you’ve fallen in love with the convenience and deliciousness of pinwheel recipes, you’re in luck! This versatile appetizer style lends itself to countless flavor combinations. Here are a few more fantastic pinwheel recipes to inspire your next gathering:
- Easy Pizza Pinwheels: All the classic flavors of pizza, rolled up into a bite-sized snack.
- Classic Pinwheel Sandwiches: A timeless favorite, perfect for picnics and lunchboxes.
- Dill Pickle Pinwheels: A tangy, savory treat for pickle lovers!
I love to bake and cook and share my kitchen experience with all of you! Remembering to come back each day can be tough, that’s why I offer a convenient newsletter every time a new recipe posts. Simply subscribe and start receiving your free daily recipes!

Mexican Pinwheels
IMPORTANT – There are often Frequently Asked Questions within the blog post that you may find helpful. Simply scroll back up to read them!
Print It
Pin It
Rate It
Save ItSaved!
Ingredients
- 8 ounces cream cheese brick style, softened
- ½ cup full fat sour cream
- 2 Tablespoons taco seasoning
- 2 cups shredded chicken breast about 2 breasts
- 1 ¾ cups finely diced red bell pepper about 1 large bell pepper, divided
- 1 cup Mexican style shredded cheese
- ⅓ cup sliced green onions divided
- 8 flour tortillas 10 inch size/burrito style
- 1 Tablespoon chopped cilantro optional for garnish
Things You’ll Need
-
Large mixing bowl
-
Hand mixer
-
Plastic wrap
Before You Begin
- This recipe is designed to yield approximately 48-60 pinwheels, depending on how thickly you slice them. If you’re hosting a smaller gathering or just want a batch for yourself, feel free to halve all the ingredients.
- For added convenience, consider using a pre-cooked rotisserie chicken from the grocery store. It saves a lot of time and ensures your chicken is tender and flavorful without extra effort.
- If you enjoy a bit more heat in your Mexican-inspired dishes, you can easily add a kick to the cream cheese mixture. Simply stir in about 1/8 teaspoon of dried chili pepper flakes along with the taco seasoning. Taste and adjust to your preferred spice level.
- When folding in the finely diced red bell pepper and green onions, remember to be gentle. Over-stirring can crush these delicate vegetables, leading to a less appealing texture and appearance. A soft silicone spatula is ideal for this task, as it helps to carefully incorporate the ingredients while preserving their crispness.
- The choice of tortilla is key for successful pinwheels. 10-inch burrito-style flour tortillas are highly recommended because their size and flexibility allow for easy rolling and prevent cracking. Avoid corn tortillas, as they tend to be too brittle for this application and will break apart. If 10-inch tortillas are unavailable, 7-inch “fajita-size” tortillas can be used, but you will likely need more than 8 of them to use up all the filling. Experiment with flavored tortillas like jalapeño cheddar or sun-dried tomato wraps to add another layer of unique flavor!
Instructions
-
Using a handheld mixer, beat together the cream cheese, sour cream, and taco seasoning in a large mixing bowl until well combined.
-
Fold in the shredded chicken and Mexican cheese.
-
Fold in all but ¼ cup of the red bell pepper and all but 1 tablespoon of the green onion (these will be used later).
-
Place the filling in the refrigerator for 2 hours to allow the flavors to intensify.
-
Lay a tortilla on top of a large piece of plastic wrap (the plastic wrap needs to be slightly bigger than the tortilla).
-
Dollop just over 1/2 cup of the filling onto the tortilla (I scooped 3 scoops of the filling using a 3-tablespoon cookie dough scoop).
-
Using the back of a spoon, evenly spread the filling over the tortilla, stopping just shy of the edges.
-
Sprinkle a heaping 1 teaspoon of the remaining diced red pepper and a pinch of green onion over the filling, (this adds extra color and texture to your pinwheels when they are sliced).
-
Using the plastic wrap as your guide and starting at the end nearest you, tightly roll the tortilla to create a 2-inch roll. Repeat this process with the remaining tortillas.
-
Place the rolls in the refrigerator for 20 minutes to firm them up.
-
When ready to serve, cut 1 1/2-inch slices (pinwheels) using a sharp chef’s knife, wiping the knife clean between each slice.
-
Place the pinwheels on a serving tray and garnish with the chopped cilantro.
Expert Tips & FAQs
- This recipe will yield anywhere from 48-60 pinwheels, depending on how thick you slice them. Feel free to halve the recipe for less.
- Make Ahead – Mexican Pinwheels are best eaten the day you make them as adding the filling to the tortilla too early will cause the pinwheel to become soggy. However, you can mix all the ingredients for the filling and refrigerate it for a day or two beforehand. On the day you plan to serve the pinwheels, add the filling to the tortilla and proceed with the rest of the directions.
- Storing – Leftovers can be stored in an air-tight container kept in the refrigerator for up to 2 days. Do note that the pinwheels may get soggy as they sit in the refrigerator.
- Vegetarian – You can make a vegetarian version by omitting the chicken and adding an additional yellow or orange bell pepper for color contrast. If omitting the chicken, you will need to increase the quantity of shredded cheese to 2 cups.
- Serve Mexican pinwheels on a platter with optional dips on the side such as salsa and guacamole.
Nutrition
The recipes on this blog are tested with a conventional gas oven and gas stovetop. It’s important to note that some ovens, especially as they age, can cook and bake inconsistently. Using an inexpensive oven thermometer can assure you that your oven is truly heating to the proper temperature. If you use a toaster oven or countertop oven, please keep in mind that they may not distribute heat the same as a conventional full sized oven and you may need to adjust your cooking/baking times. In the case of recipes made with a pressure cooker, air fryer, slow cooker, or other appliance, a link to the appliances we use is listed within each respective recipe. For baking recipes where measurements are given by weight, please note that results may not be the same if cups are used instead, and we can’t guarantee success with that method.
