Effortlessly Spooky: Easy 4-Ingredient Mummy Cookies for a Fun Halloween
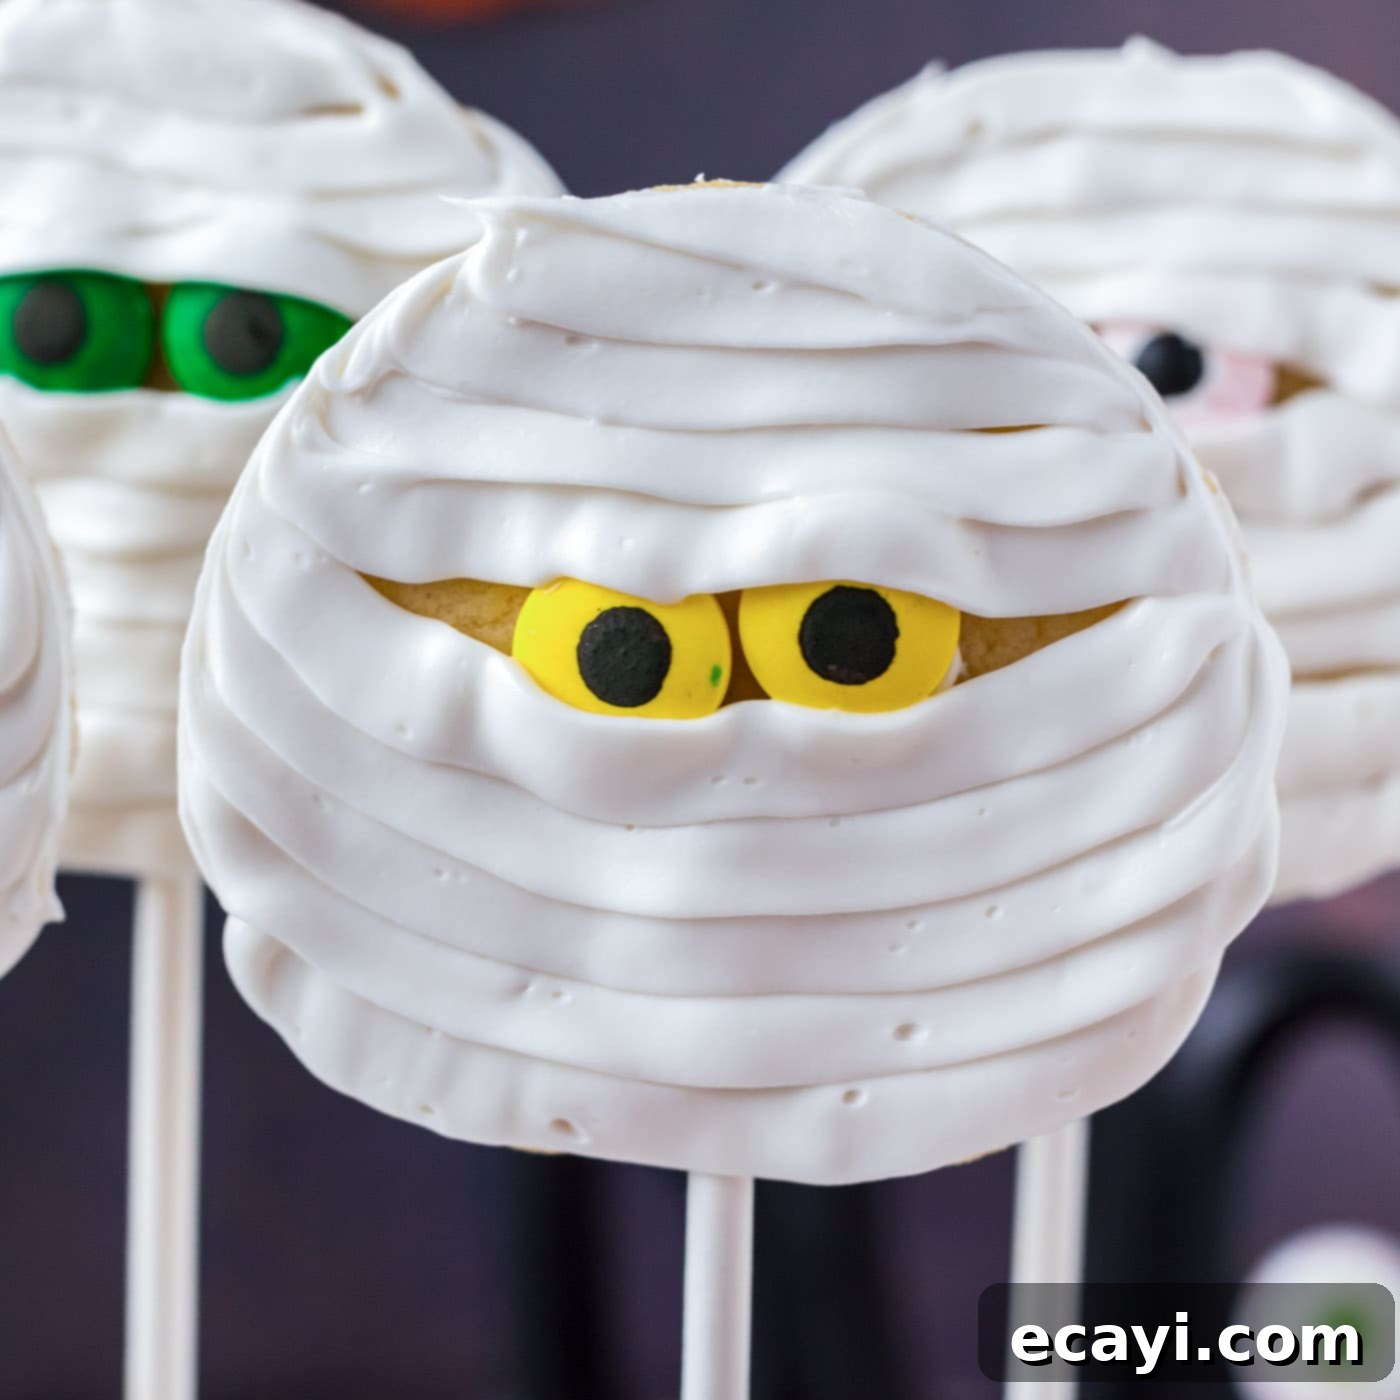
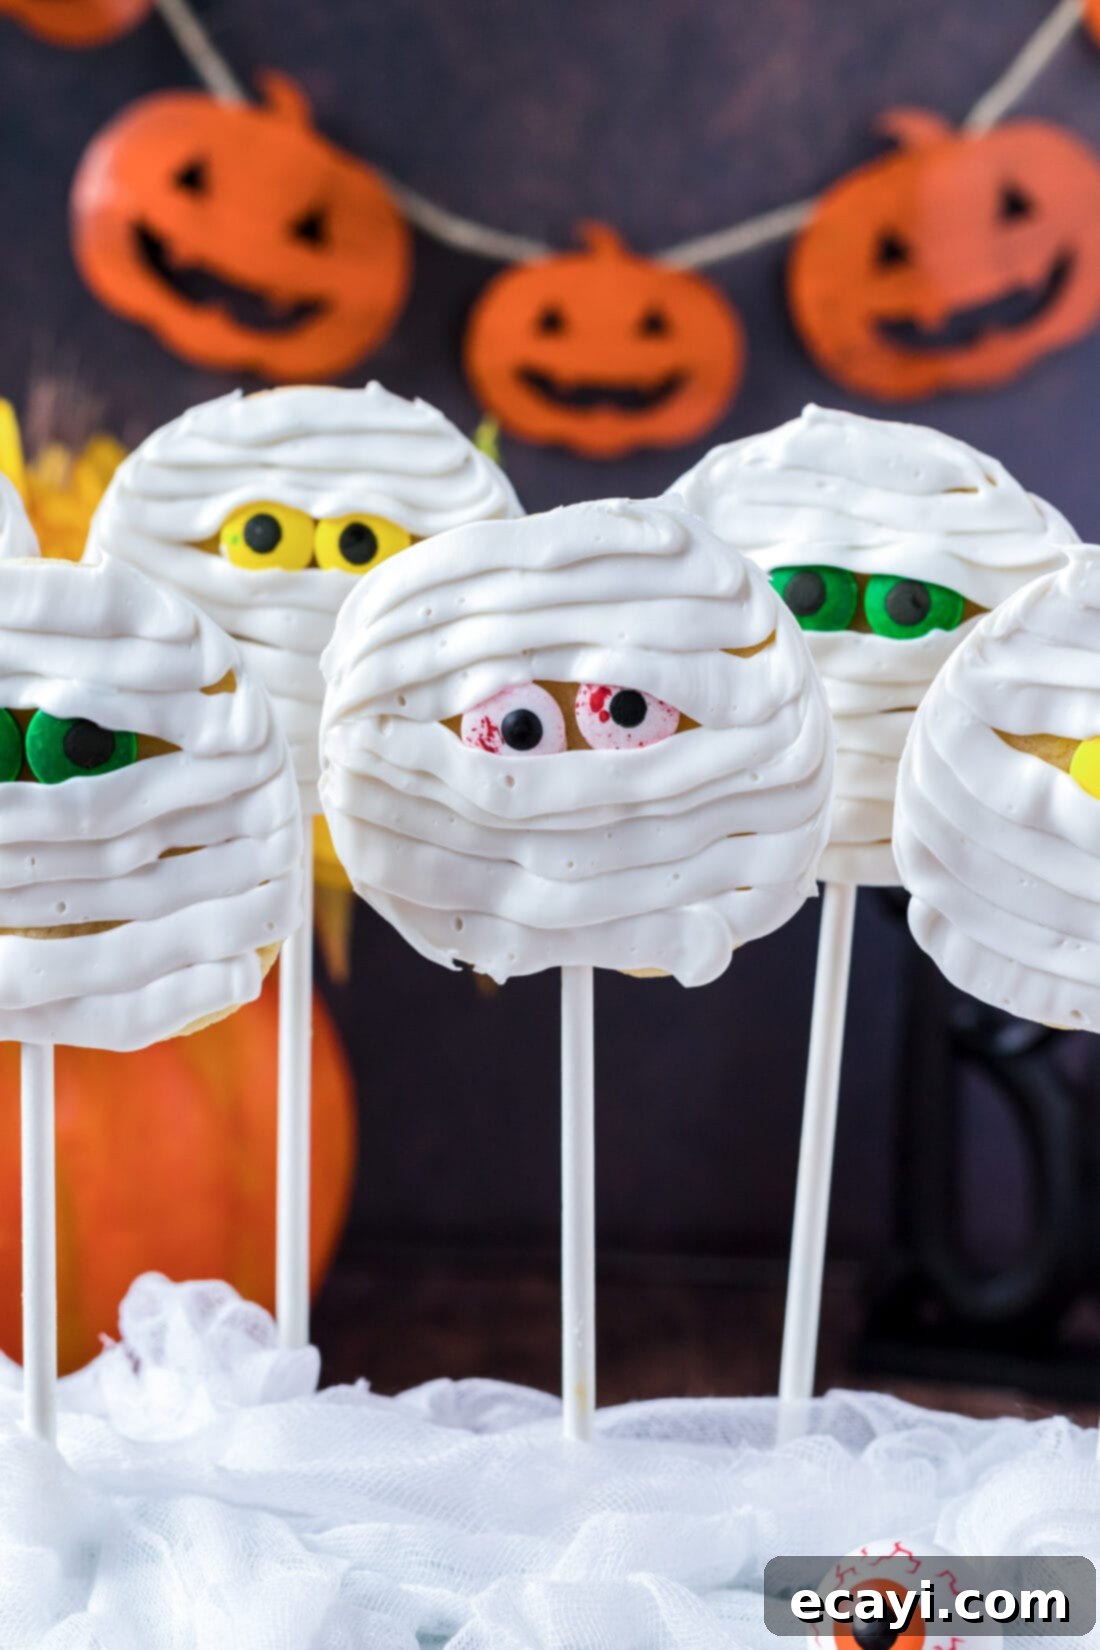
Get ready for a ghoulishly good time in the kitchen! These incredibly simple and wonderfully spooky mummy cookies are the ultimate Halloween party dessert. Requiring just four basic ingredients, they come together quickly to create an adorable, festive treat that’s perfect for both kids and adults. Whether you’re hosting a big Halloween bash or just looking for a fun activity to do with the family, these mummy cookies are sure to bring smiles and a touch of friendly fright to your celebration.
Why This Recipe Is a Halloween Must-Have
These mummy cookies are designed for maximum impact with minimum effort, making them a true lifesaver during the busy Halloween season. The recipe cleverly leverages convenience ingredients like refrigerated sugar cookie dough and canned frosting, allowing you to whip up a batch in a flash. This means less time baking from scratch and more time enjoying the spooky festivities! We’ve also included instructions for serving them as delightful “Halloween cookie pops” on lollipop sticks, which adds an extra layer of fun, especially for little goblins and ghouls. However, they are just as charming and delicious served on a platter without sticks, offering flexibility for any party presentation.
Our mummy cookies have been a hit at various Halloween gatherings, from pumpkin painting parties to school events. Their versatility makes them an excellent addition to almost any Halloween-themed party or celebration. Imagine them displayed on a festive tiered tray, or individually wrapped in cellophane baggies as unique party favors for your guests. These sweet treats can even follow a savory, themed main course, like a playful mummy meatloaf, to create a truly immersive Halloween dining experience. Their ease and charm ensure they’ll become a beloved tradition in your Halloween repertoire.
Key Ingredients You Will Need
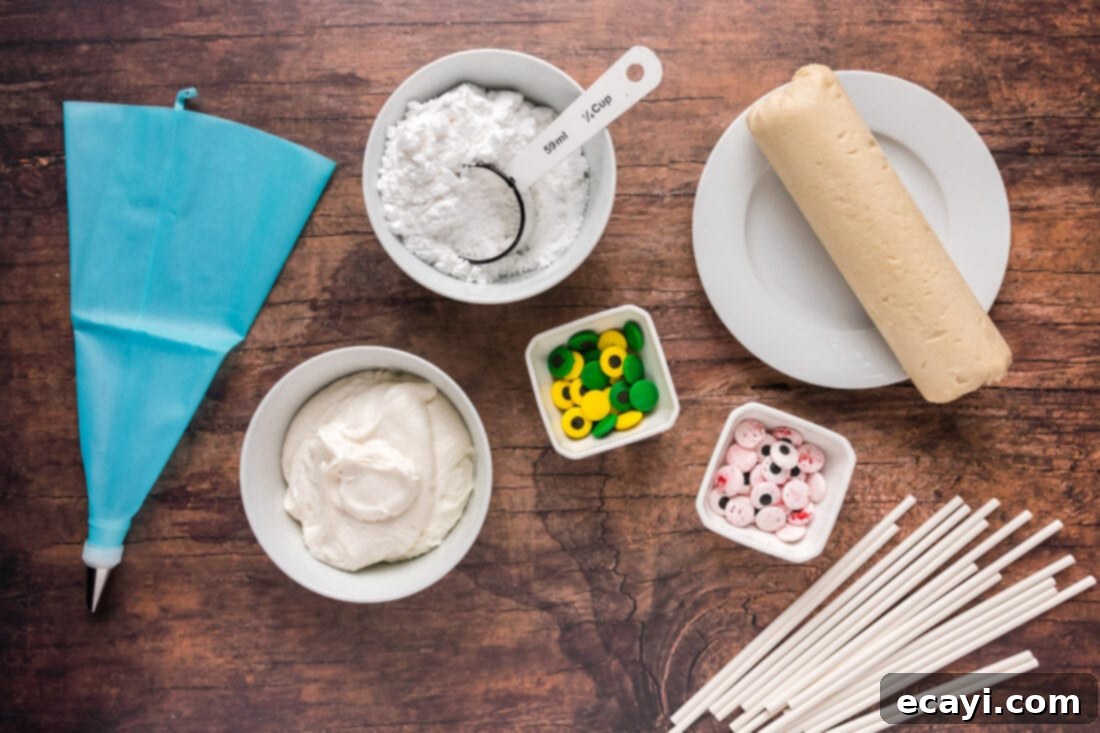
Crafting these adorable mummy cookies only requires a handful of readily available ingredients. Simplicity is at the heart of this recipe, ensuring anyone can create these festive treats without a trip to a specialty store. You can find all specific measurements and detailed instructions in the printable recipe card at the very end of this post.
Ingredient Spotlight & Smart Substitutions
Let’s dive a little deeper into the ingredients and how you can customize this recipe to your liking or what you have on hand.
COOKIES – The foundation of these delightful treats is the cookie base. Using refrigerated sugar cookie dough is the secret weapon for making these cookies incredibly quick and fuss-free. It eliminates the need for measuring, mixing, and chilling, letting you jump straight to baking. However, if you prefer the satisfaction and taste of homemade, our classic sugar cookie recipe works beautifully as an alternative. Just be sure to allow ample time for preparing the dough from scratch, including chilling time, before moving on to the decorating steps.
FROSTING – For that signature mummy bandaging, we opt for canned white frosting. This pre-made option drastically cuts down on prep time, mirroring the convenience of the refrigerated cookie dough. While white is ideal for the traditional mummy look, feel free to experiment with other light colors like pale green or grey if you’re aiming for a different spooky creature or a more whimsical vibe. The key is to enhance its piping consistency. We recommend mixing in about 1/2 cup of powdered sugar to thicken the frosting. This ensures it holds its shape better when piped, creating crisp, defined “bandages” rather than runny smudges. If you’re a fan of homemade touches, our rich and creamy buttercream frosting recipe can also be used; just make sure it’s stiff enough for piping.
CANDY EYEBALLS – No mummy is complete without its expressive, spooky eyes! We love using a variety of bloodshot candy eyeballs and also vibrant green and yellow candy eyeballs for extra character. These can typically be found seasonally at craft stores like Michaels, party supply stores such as Party City, or large retailers like Walmart around the Halloween festivities. If specific candy eyeballs are hard to find, don’t worry! You can easily substitute them with classic M&M’s (using the white or lighter colors for eyes), regular plain candy eyeballs, or even mini chocolate chips for a simpler, but equally charming, eye effect. The choice is yours to make your mummies as unique as your Halloween spirit!
Crafting Your Spooky Mummy Cookies: A Step-by-Step Guide
These step-by-step photos and instructions are designed to help you visualize each part of the process. For a convenient printable version of this recipe, complete with precise measurements and comprehensive instructions, simply Jump to Recipe at the bottom of this post.
- Prepare Your Oven: Begin by preheating your oven precisely according to the instructions provided on your chosen cookie dough package. While our recipe specified 350°F, always defer to the package recommendations for optimal results with your specific dough.
- Line Your Baking Sheet: Take an insulated baking sheet and line it thoroughly with parchment paper. This crucial step not only prevents sticking but also ensures an even bake, easy cookie removal, and makes cleanup a breeze.
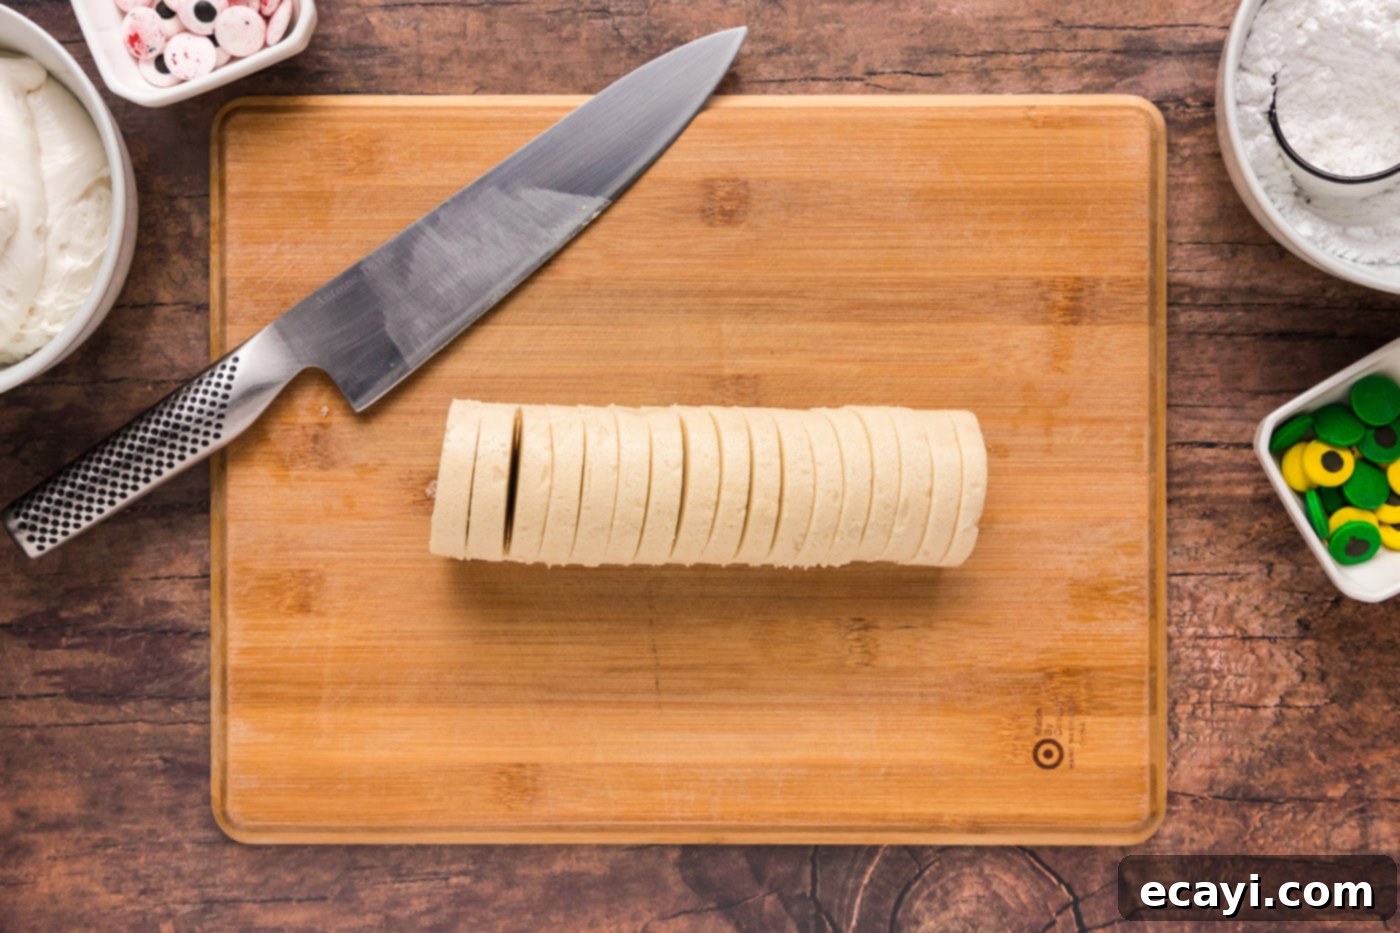
- Slice the Cookie Dough: Carefully take your refrigerated cookie dough log and cut it into 16 uniform slices, each approximately 1/2-inch thick. Consistency in thickness is key here for even baking and uniform cookie sizes.

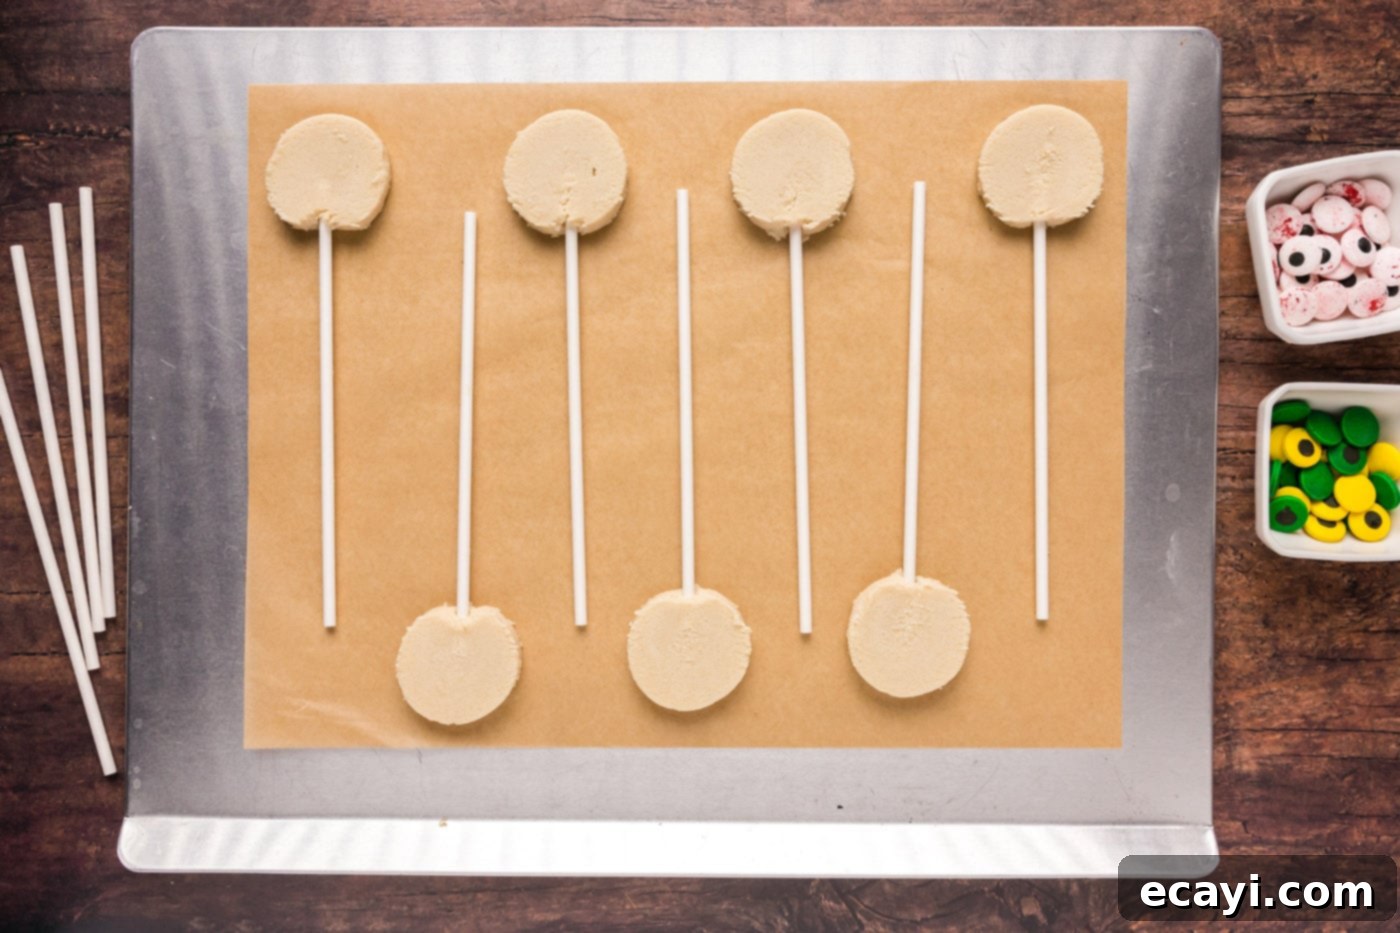
- Insert Lollipop Sticks: For an extra fun “cookie pop” presentation, gently insert a lollipop stick into the base of each cookie slice. Arrange the prepared cookie slices on your lined baking sheet, ensuring there’s adequate space between each one. The dough will expand as it bakes, so sufficient spacing prevents them from merging together.

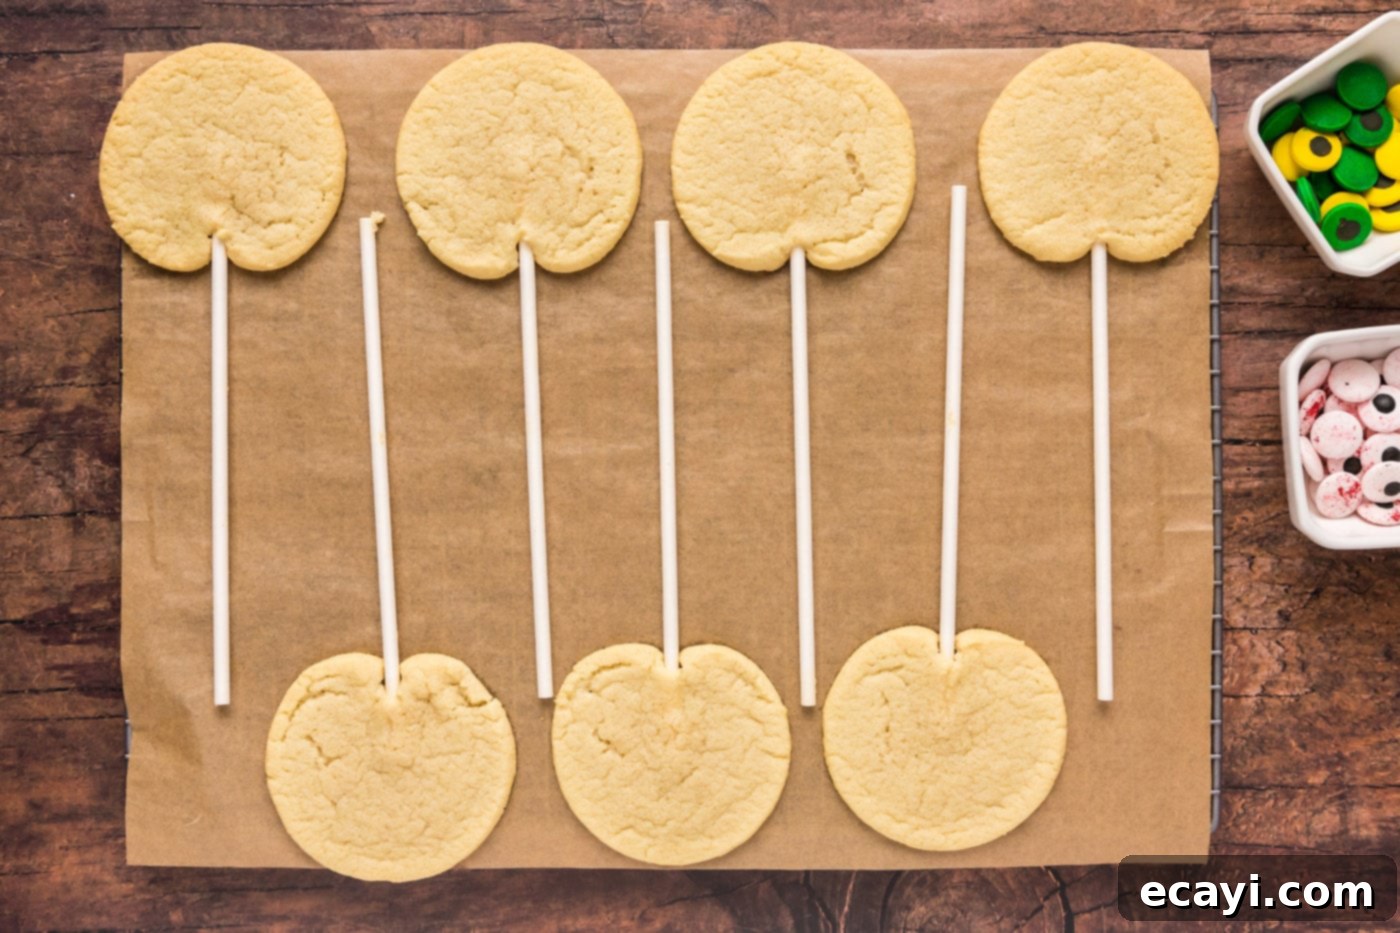
- Bake to Perfection: Place the baking sheet into your preheated oven and bake according to the instructions on your cookie dough package. Our dough required 11-14 minutes, and we found 12 minutes to be the perfect baking time, resulting in cookies that were golden at the edges but still soft in the center.
- Cooling is Crucial: Once baked, remove the pan from the oven and immediately place it onto a wire cooling rack. If any lollipop sticks feel loose, gently push them a little further into the warm cookie while they are still soft. Allow the cookies to cool on the pan on the rack for a minimum of 5 minutes. After this initial cooling period, carefully slide the parchment paper, along with the cookies, off the baking sheet and directly onto the wire rack to cool completely. This gradual cooling prevents breakage and helps the sticks set securely.
EXPERT TIP – Patience is key during this stage! Resist the urge to handle or remove the cookie pops from the parchment paper before they have completely cooled. Warm cookies are fragile and prone to breaking or crumbling, especially with the added leverage of the lollipop stick. Allow them to firm up entirely for the best results.

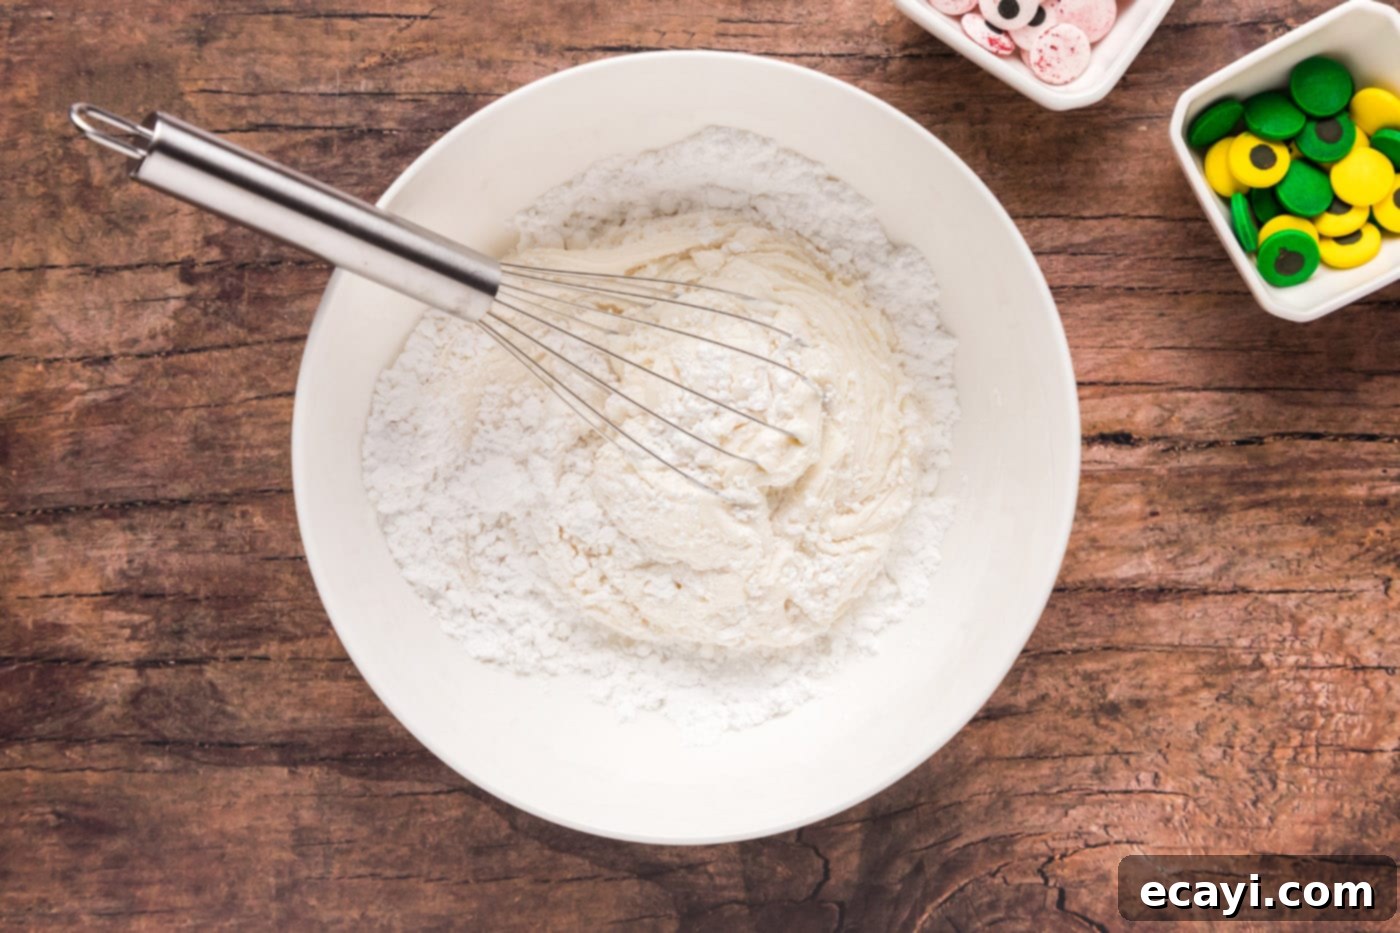
- Prepare the Frosting: In a generously sized mixing bowl, combine the entire can of white frosting with 1/2 cup of powdered sugar. Whisk these two ingredients together thoroughly until they are completely combined and the mixture is smooth and lump-free. The powdered sugar helps to thicken the canned frosting, making it much easier to pipe and ensuring your mummy bandages hold their shape. Transfer this thickened frosting into a piping bag fitted with a flat piping tip. A flat tip is ideal for creating the distinct, strip-like appearance of mummy bandages.

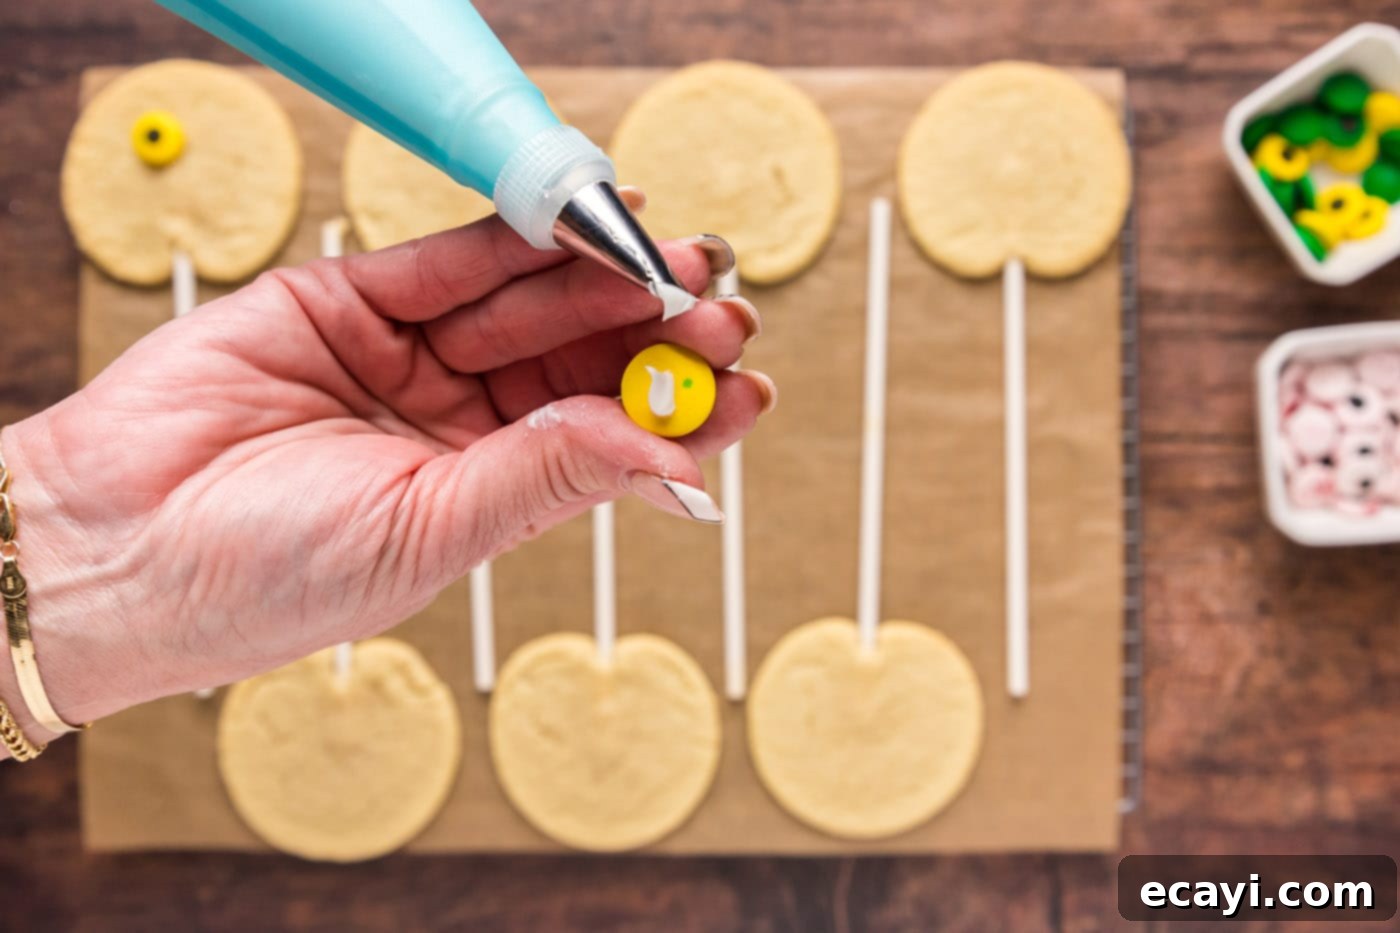
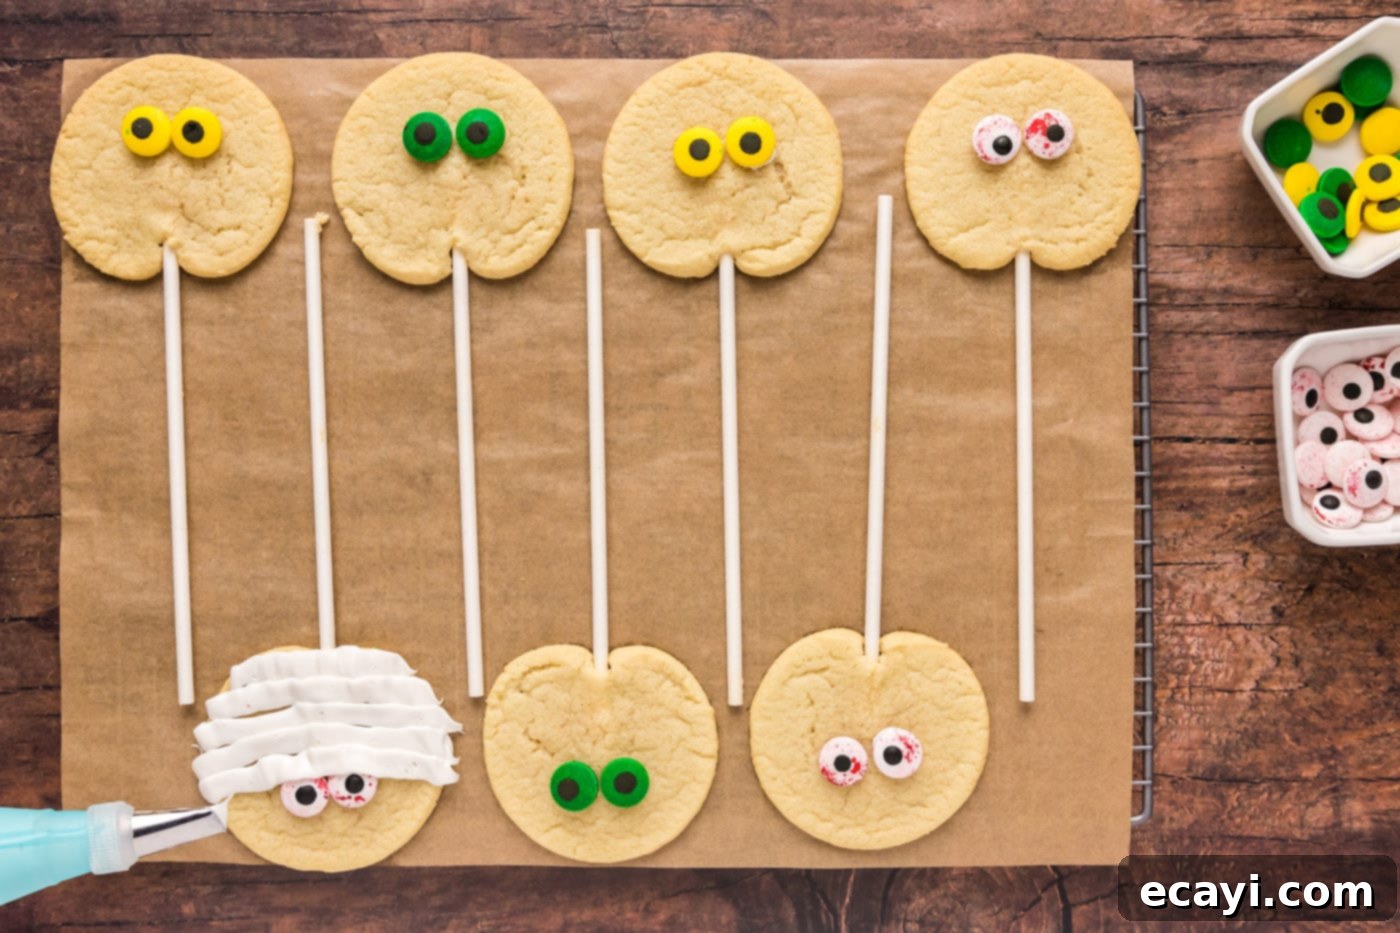
- Add the Eyes: Once your cookies are fully cooled, it’s time to bring your mummies to life! Place a small dot of frosting on the back of a candy eyeball. Gently press this frosted eyeball onto the top third of a cooled cookie. Repeat this process for a second eye, placing it alongside the first. This placement creates the perfect foundation for the bandaged mummy look.

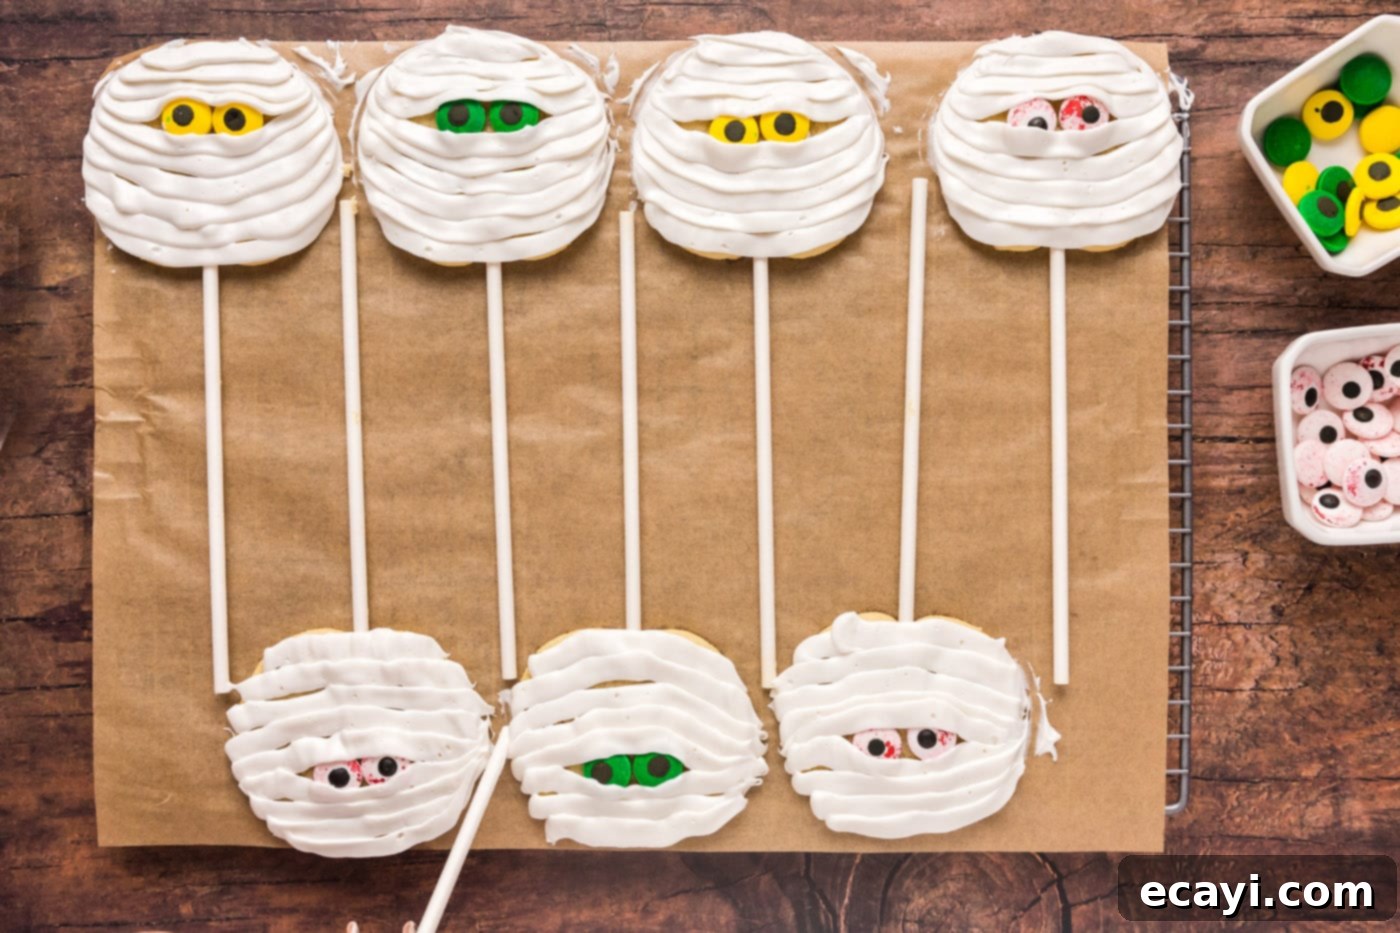
- Pipe the Bandages: With your piping bag ready, begin piping horizontal strips of white frosting across the face of each cookie. Start from the top, just above the eyes, and work your way down. Overlap each row slightly to create the textured, wrapped appearance of bandages. Make sure to overlap the candy eyes just enough so they appear to be peeking out from beneath the frosting, adding to the spooky charm. This technique is what truly transforms a simple cookie into a recognizable mummy.

- Clean Up Edges: For a neater, more professional finish, use an extra lollipop stick, a toothpick, or a small skewer to carefully clean up any excess frosting that may have spread beyond the edges of the cookies. This sharpens the appearance and makes your mummies look even more perfect.
- Allow Frosting to Set: After decorating, arrange your mummy cookies on a flat surface or a wire rack and allow the frosting to dry and set. This step is crucial before handling or packaging them. While the frosting will start to firm up in as little as 15 minutes, it’s always best to prepare these cookies earlier in the day if you plan to serve them for an afternoon or evening Halloween party. This gives the frosting ample time to fully set, preventing smudges and ensuring they look their best when presented.
EXPERT TIP – The drying time can vary based on humidity and frosting consistency. For best results, place them in a cool, dry place. If you’re in a hurry, a few minutes in the refrigerator can speed up the setting process, but be cautious of condensation when bringing them back to room temperature.

Frequently Asked Questions & Expert Tips
To maintain their freshness and delicate decoration, store your finished mummy cookies in an airtight container at room temperature. They will remain delicious for 3-4 days. Avoid stacking them directly on top of each other, especially if the frosting is not completely firm, to prevent smudging.
Absolutely! Mummy cookies are excellent for making in advance. You can comfortably prepare them the morning of, or even the night before, your event. This allows the frosting plenty of time to set and alleviates last-minute party prep stress.
While the baked cookies can be frozen undecorated, freezing them once decorated with the canned frosting is not recommended. The texture of the frosting can change upon thawing, potentially becoming watery or separating, which would ruin the mummy bandage effect. For best results, bake and freeze the plain cookies, then thaw and decorate them closer to your event.
Yes, this recipe is fantastic for involving children! The simplicity of using pre-made dough and canned frosting means kids can easily participate in slicing the dough (with adult supervision), adding the candy eyeballs, and especially piping the “bandages.” It’s a fun, low-stress activity that encourages creativity and gets them excited for Halloween.
That’s perfectly fine! The lollipop sticks are an optional fun addition for a “cookie pop” presentation. If you prefer to serve them on a tray or platter, simply omit the sticks during step 4. The cookies will bake just as well and look equally adorable without them.
Creative Ways to Serve Your Mummy Cookies
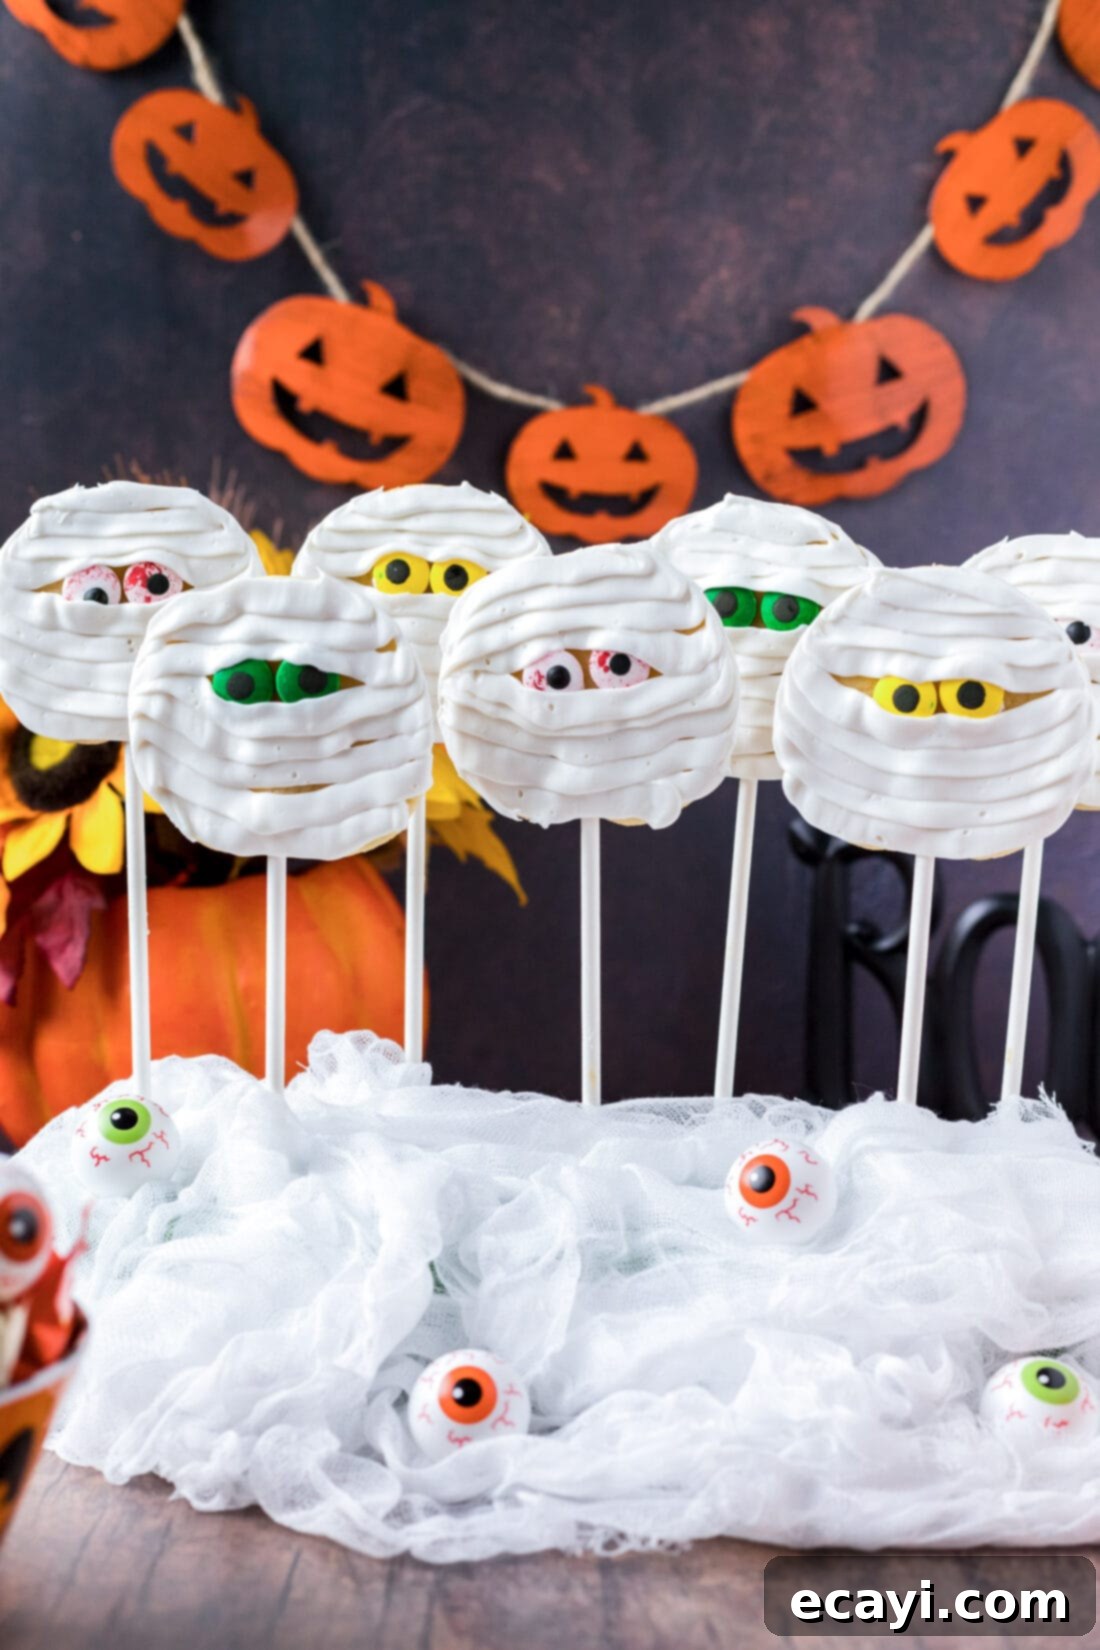
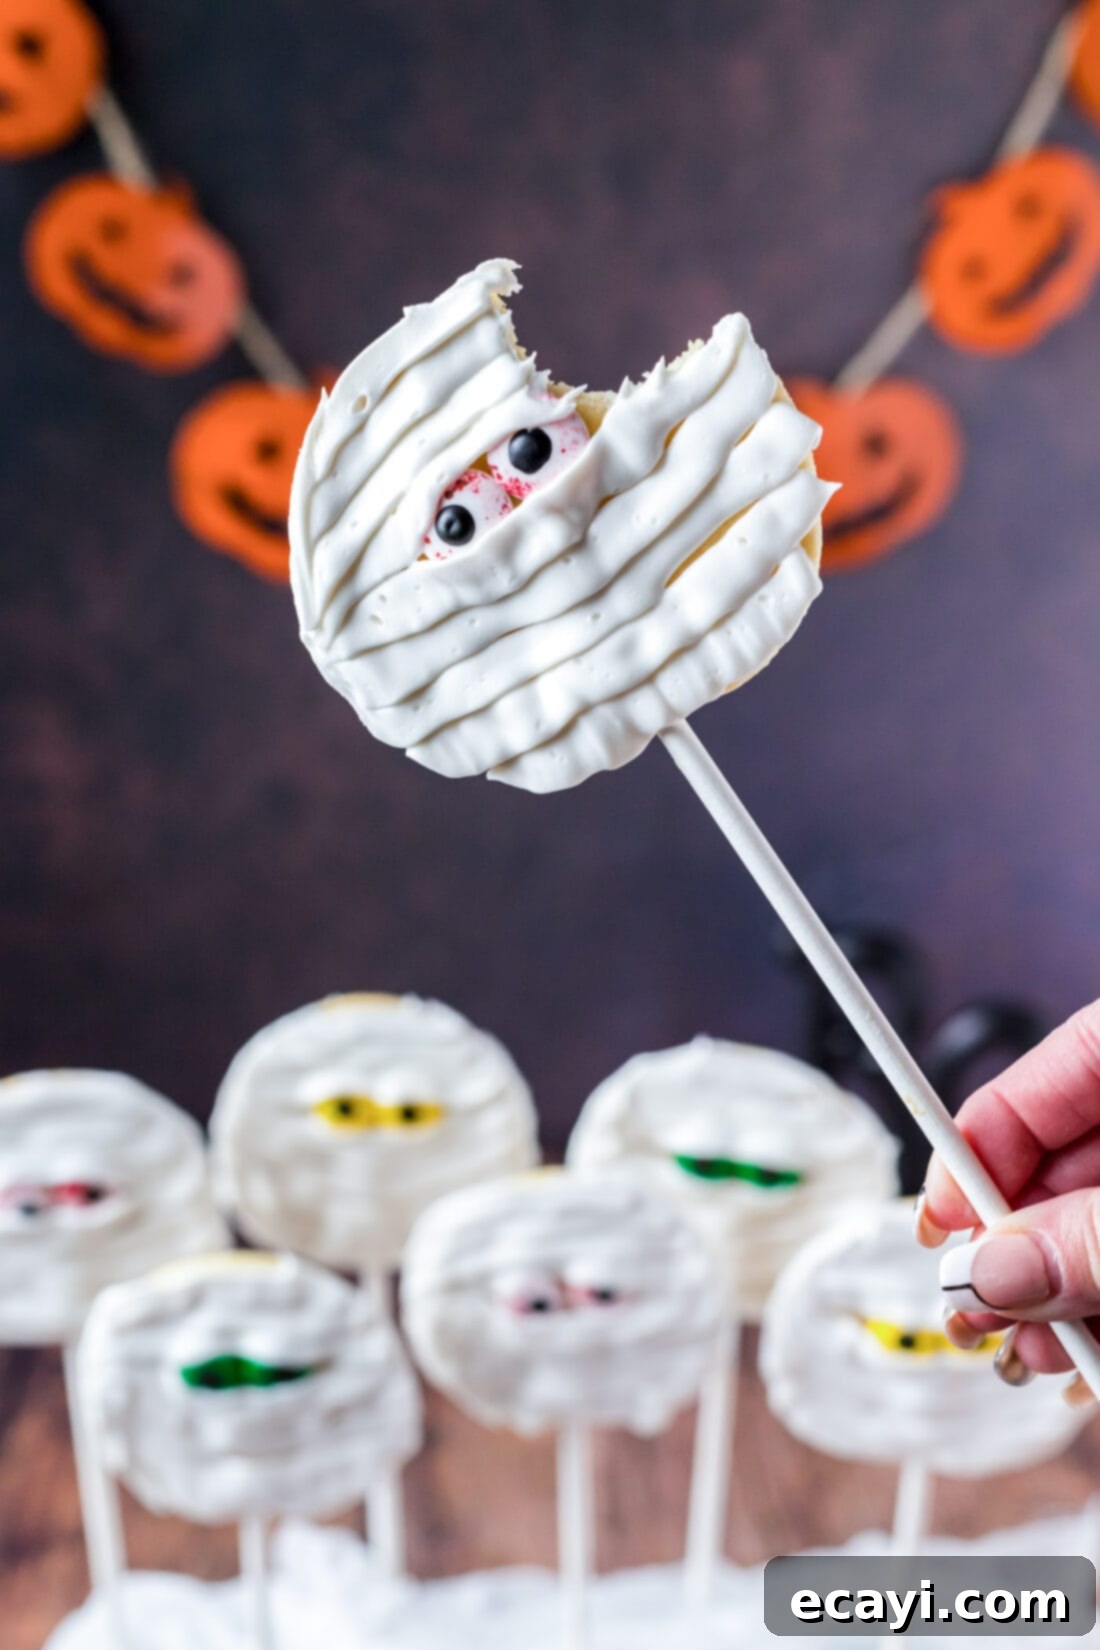
The presentation of these mummy cookies can be just as fun as making and eating them! To create a truly eye-catching display, consider arranging your cookie pops upright in floral foam. You can wrap the foam with artificial spiderwebs or festive Halloween fabric to create a spooky centerpiece. The upright presentation of cookie pops makes them easy for guests to grab and enjoy. For a more traditional approach, if you chose to omit the lollipop sticks, these cookies look fantastic laid out on a large decorative platter, perhaps with some autumn leaves or small pumpkin decorations around them.
Another wonderful idea is to use these mummy cookies as charming party favors. Individually wrap each cookie in a clear cellophane baggie tied with a festive ribbon. A quick note of caution if you choose this route: because the frosting does not harden completely like royal icing, it’s essential to be very careful when packaging. Select favor bags that are generously sized, ensuring there’s enough space around the cookie so the frosting doesn’t press directly against the plastic. This extra room will help prevent smudging and keep your mummy cookies looking perfect until they are ready to be enjoyed by your guests.
More Spooktacular Halloween Recipes
Looking to expand your Halloween menu? Here are some other festive and fun recipes that pair perfectly with your mummy cookies or make great standalone treats for your next spooky gathering:
- Halloween Dirt Cups: A classic kid-friendly dessert, these dirt cups feature layers of chocolate pudding, crushed cookies, and gummy worms, perfect for a creepy graveyard effect.
- Spiderweb Taco Dip: This savory appetizer is a crowd-pleaser, topped with sour cream piped into a spooky spiderweb design, great for savory snacking.
- Witch Finger Cookies: Unsettlingly realistic and deliciously buttery, these almond-flavored cookies are a must-have for any witch’s coven.
- Halloween Eyeball Salsa: A gruesome but tasty dip made with fresh ingredients and “eyeball” mozzarella, serving as a vibrant and eerie appetizer.
- Jalapeno Popper Mummies: Spicy and savory, these wrapped poppers make a fantastic savory snack or appetizer, mirroring the mummy theme in a delicious way.
- Cheese and Pretzel Broomsticks: Simple, cute, and healthy-ish, these make a wonderful snack or party favor for younger guests.
I genuinely love sharing my passion for baking and cooking, along with all my kitchen experiences, with you! Keeping up with new recipes can be tricky, which is why I offer a convenient newsletter delivered right to your inbox every time a new recipe is posted. Simply subscribe today and start receiving your free daily dose of delicious inspiration!

Mummy Cookies
IMPORTANT – Don’t forget to check the Frequently Asked Questions and Expert Tips section within the blog post for additional helpful information! Simply scroll back up to read them.
Print It
Pin It
Rate It
Save ItSaved!
Ingredients
- 16 ounce refrigerated sugar cookie dough
- 32 candy eyeballs
- 16 ounces canned white frosting
- ½ cup powdered sugar
Things You’ll Need
-
16 Lollipop sticks 6 inches
-
Piping bag with coupler
-
Flat piping tip
-
Insulated baking sheets
-
Wire cooling racks
Before You Begin
- You should have just enough frosting to decorate 16 cookies, assuming a moderate application of “bandages.” However, the exact amount needed can vary based on how many strips you pipe and their thickness. To avoid running short, it’s always a good idea to have an extra can of frosting on hand, just in case!
- Remember, we add 1/2 cup of powdered sugar to the canned frosting specifically to thicken it. This step is crucial for achieving a pipeable consistency that creates neat, defined mummy bandages rather than a runny mess.
Instructions
-
Preheat your oven according to the specific baking instructions provided on your chosen refrigerated cookie dough package (our package recommended 350°F).
-
Line a baking sheet with parchment paper to prevent sticking and ensure easy cleanup after baking.
-
Carefully cut the refrigerated cookie dough log into 16 individual slices, aiming for an approximate thickness of 1/2-inch each to ensure even baking.
-
Gently insert a lollipop stick into the base of each cookie slice. Arrange the cookies on your prepared baking sheet, leaving sufficient space between them to allow for expansion during baking.
-
Bake the cookies following the time guidelines on your cookie dough package. For our dough, 11-14 minutes was suggested, and we found 12 minutes yielded perfect results.
-
Once baked, remove the pan from the oven and place it on a wire rack. If any lollipop sticks feel loose, gently push them further into the still-warm cookie. Allow the cookies to cool on the pan for 5 minutes. Afterward, carefully slide the parchment paper, with the cookies still on it, onto the wire rack to cool completely.
-
TIP: It is crucial not to attempt to remove or handle the cookie pops before they have fully cooled; otherwise, the cookies are likely to break off the sticks or crumble.
-
In a large bowl, whisk together the canned white frosting and 1/2 cup of powdered sugar until the mixture is completely smooth and thoroughly combined. Transfer this thickened frosting into a piping bag fitted with a flat piping tip.
-
Apply a small dot of frosting to the back of a candy eyeball and gently press it onto the top third of a cooled cookie. Repeat this process for a second eye, placing it next to the first to create your mummy’s gaze.
-
Using your piping bag, pipe horizontal strips of white frosting across the face of each cookie, creating a bandaged appearance. Slightly overlap each row and ensure the frosting partially covers the eyes, making them look as though they’re peeking through the wraps.
-
For a neat finish, use an extra lollipop stick or a skewer to carefully clean up any excess frosting around the outer edges of your decorated cookies.
-
TIP: The frosting requires time to dry and set before the cookies can be handled or packaged. While they may begin to firm up in as little as 15 minutes, it is highly recommended to prepare these cookies early in the day for an afternoon or evening Halloween party to allow for optimal setting.
Nutrition Information
The recipes featured on this blog are developed and tested using a conventional gas oven and a gas stovetop. Please be aware that oven performance can vary, especially with older appliances, leading to inconsistent cooking and baking. We highly recommend using an inexpensive oven thermometer to ensure your oven maintains the correct temperature. If you are using a toaster oven or countertop oven, please note that their heat distribution might differ from a full-sized conventional oven, potentially requiring adjustments to cooking and baking times. For baking recipes where ingredients are measured by weight, using volumetric measurements (cups) instead may lead to different results, and we cannot guarantee success with this alternative method. For recipes utilizing pressure cookers, air fryers, slow cookers, or other specialized appliances, a link to the specific models we use is typically provided within each respective recipe.
This comprehensive guide to making spooky and sweet mummy cookies was originally published here on September 29, 2022, and has been updated and expanded for clarity and enhanced instructions.
