Irresistible Red, White, and Blue Oreo Truffles: Your Ultimate Easy Patriotic Dessert Recipe
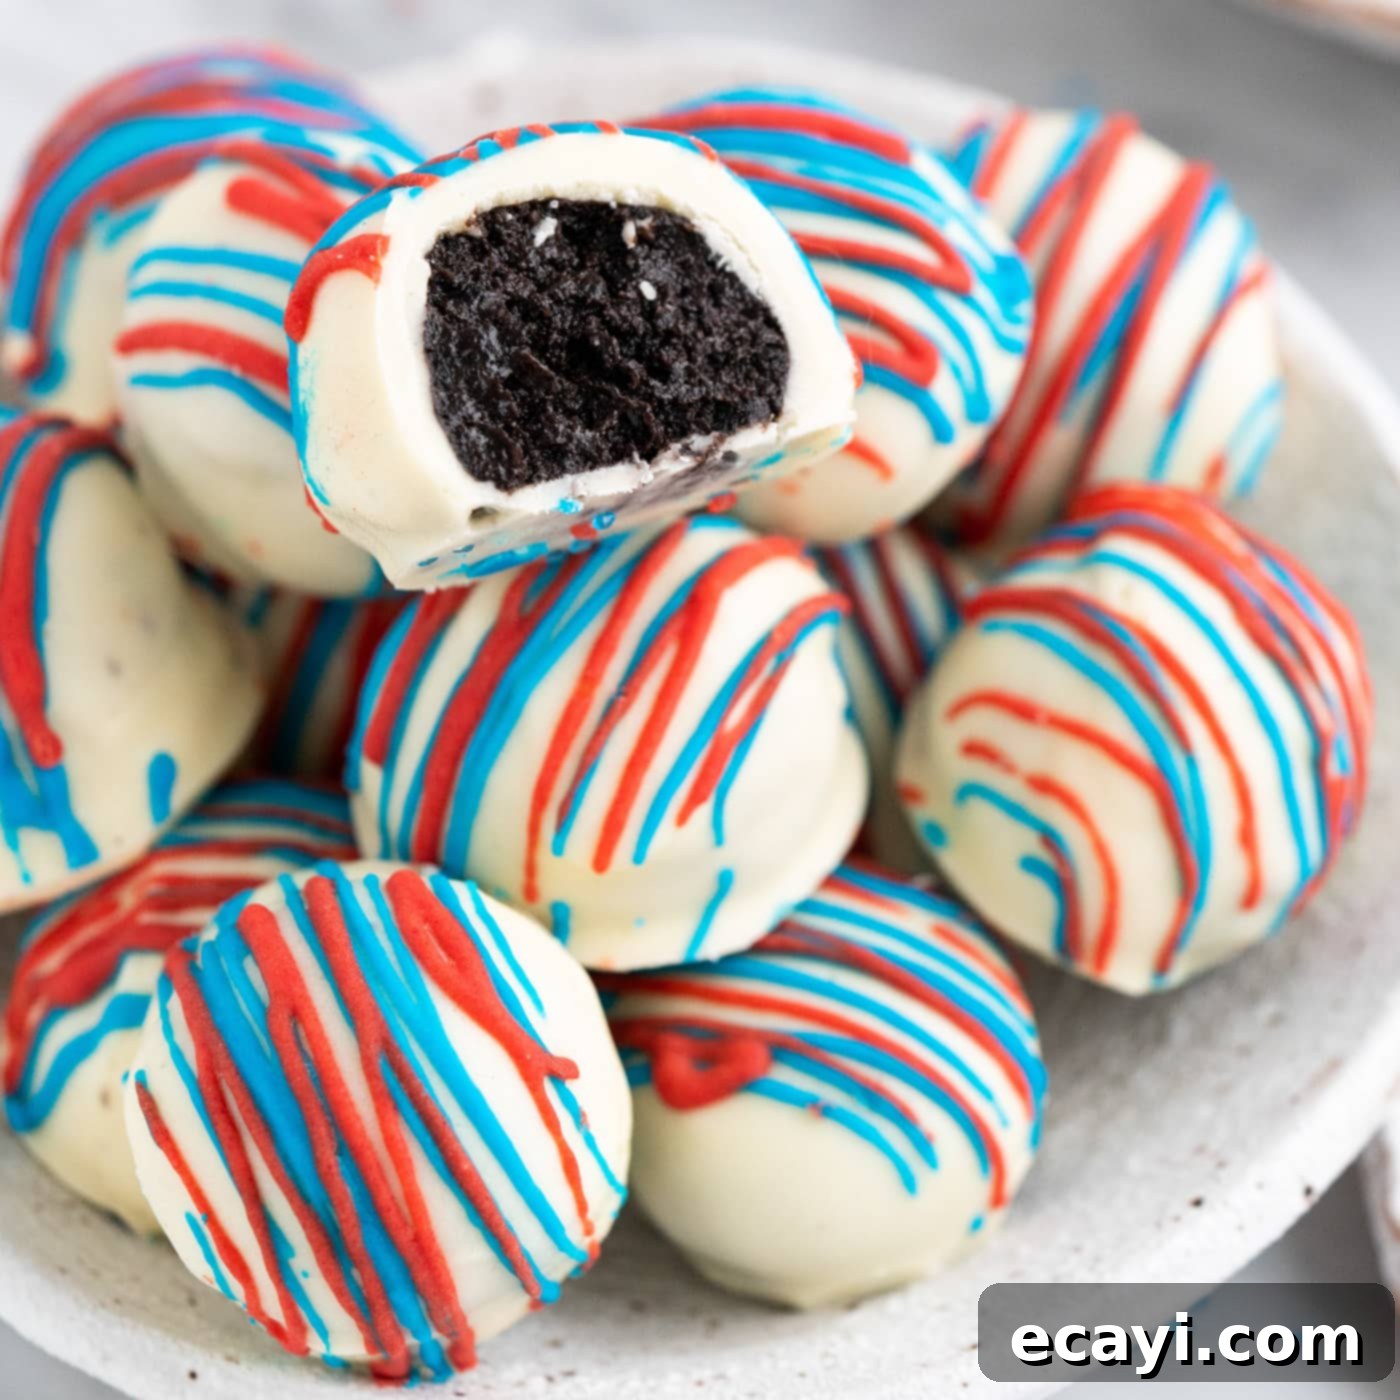
Prepare to delight your taste buds with these incredible Red, White, and Blue Oreo Truffles! Crafted from a simple blend of crushed Oreos and smooth cream cheese, enrobed in a luscious white chocolate coating, and then adorned with festive sprinkles and a vibrant chocolate drizzle, these no-bake treats are as effortless to make as they are delicious. They are the perfect customizable dessert to showcase your patriotic spirit at any celebration, from the Fourth of July to Memorial Day and beyond.
Why This Easy Oreo Truffle Recipe Works So Well
Whether you affectionately call them Oreo balls or Oreo truffles, these delightful, bite-sized confections are incredibly versatile and perfect for almost any themed holiday or party. Their inherent simplicity combined with endless decoration possibilities makes them a go-to dessert. These particular red, white, and blue Oreo truffles are specifically designed to shine at patriotic celebrations like the Fourth of July, Memorial Day, Veterans Day, or Patriots Day. Their festive colors and appealing design mean they can be dressed up in countless ways to match your event’s aesthetic.
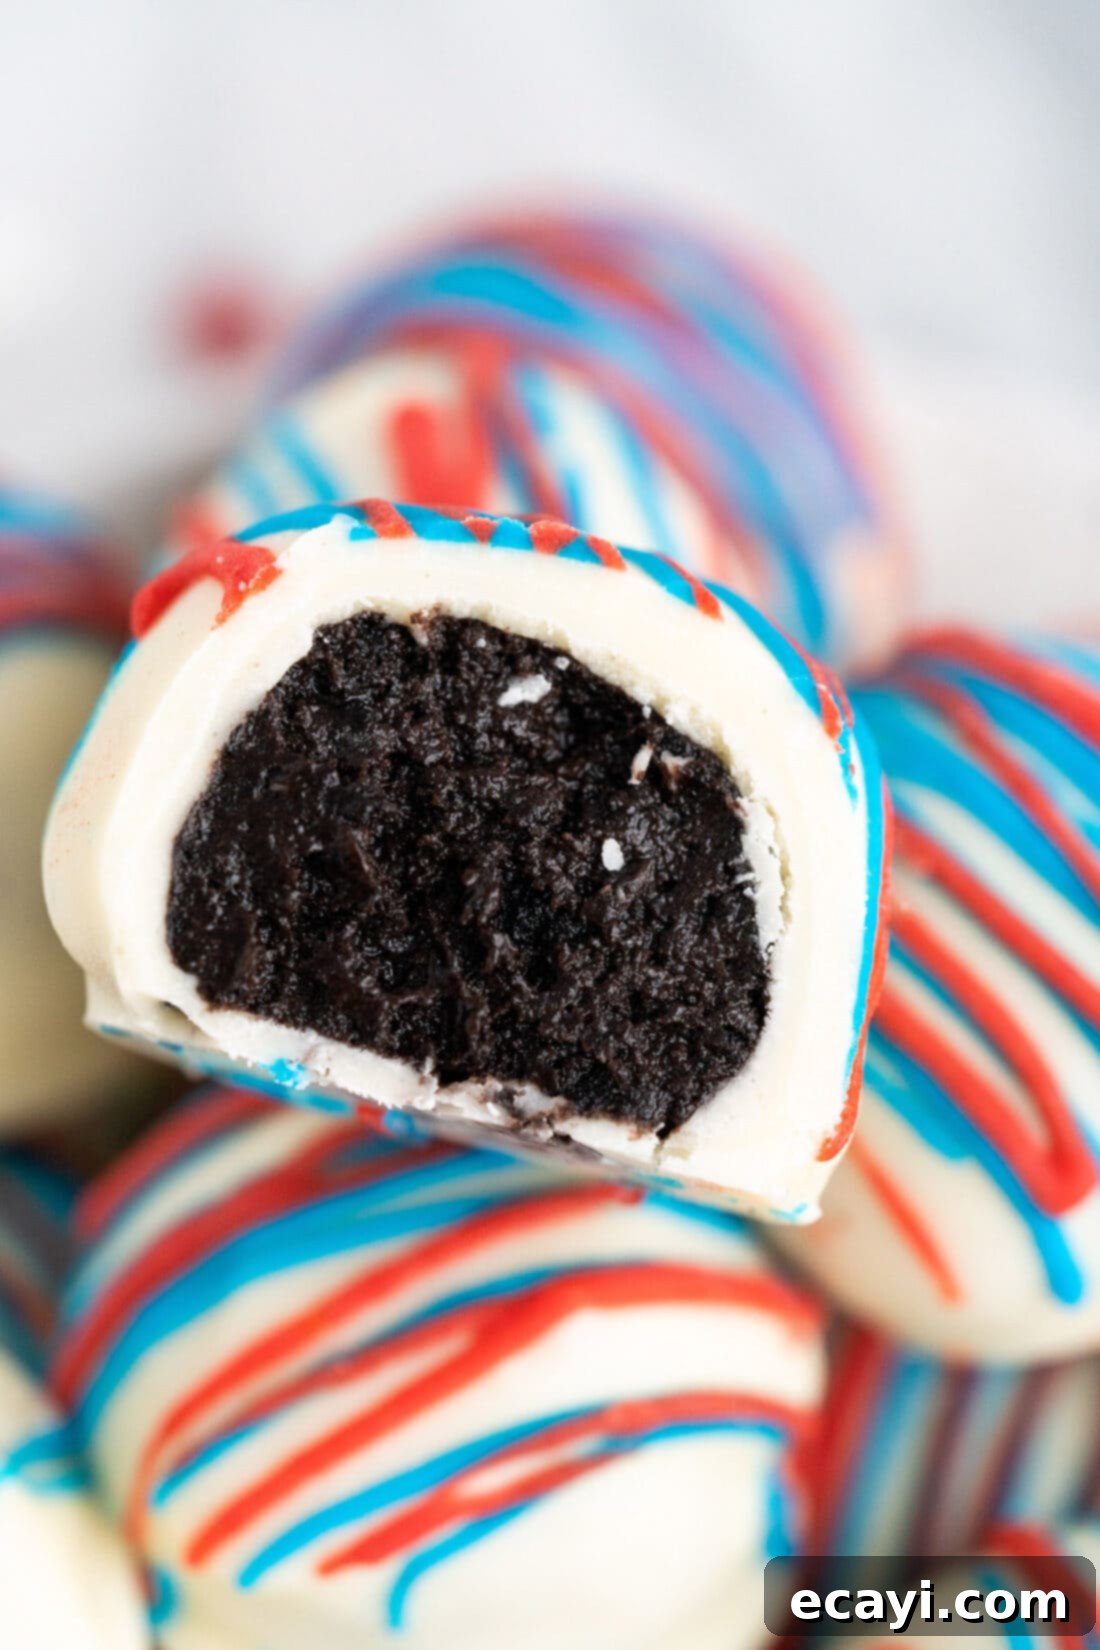
Oreo truffles share a similar concept with cake balls, but they achieve their decadent texture and rich flavor with entirely different, and arguably simpler, ingredients. The process is wonderfully straightforward: simply crush whole Oreo cookies in a food processor until they form fine crumbs, then mix them with softened cream cheese to create a rich, dense, and utterly irresistible filling. Once the mixture is perfectly combined, you’ll roll it into neat little balls, chill them to firm up, then dip each one into melted white chocolate. The final step is where the magic truly happens – decorating them with an array of red, white, and blue sprinkles and colorful chocolate drizzles transforms them into a celebratory masterpiece.
This recipe truly works because it leverages the beloved flavor of Oreos, combining it with the creamy tang of cream cheese for a perfectly balanced bite. The no-bake aspect saves time and effort, making it accessible even for novice bakers. Plus, the chilling steps ensure a firm truffle that holds its shape beautifully and provides a satisfying contrast to the crisp chocolate coating. It’s a crowd-pleaser that looks impressive but requires minimal fuss.
Key Ingredients You Will Need for Patriotic Oreo Truffles
Creating these delightful Red, White, and Blue Oreo Truffles requires just a handful of readily available ingredients. For the full recipe with precise measurements and detailed instructions, you can refer to the printable recipe card further down this post. However, here’s an overview of what you’ll need to gather to get started on these patriotic treats:
- 36 whole Oreo cookies: It’s important to use regular Oreos, not the “double stuff” variety, for the best consistency.
- 8 ounces full-fat cream cheese: Ensure it’s at room temperature and cut into cubes for easy blending.
- 16 ounces vanilla almond bark or white candy melting wafers: This will be your primary coating for the truffles.
- 4 ounces additional vanilla almond bark or white candy melting wafers: For the colorful red and blue drizzles.
- Red gel food coloring: For tinting part of your drizzle chocolate.
- Blue gel food coloring: For tinting the remaining drizzle chocolate.
- Red, white, and blue sprinkles: An assortment of festive sprinkles for decoration.
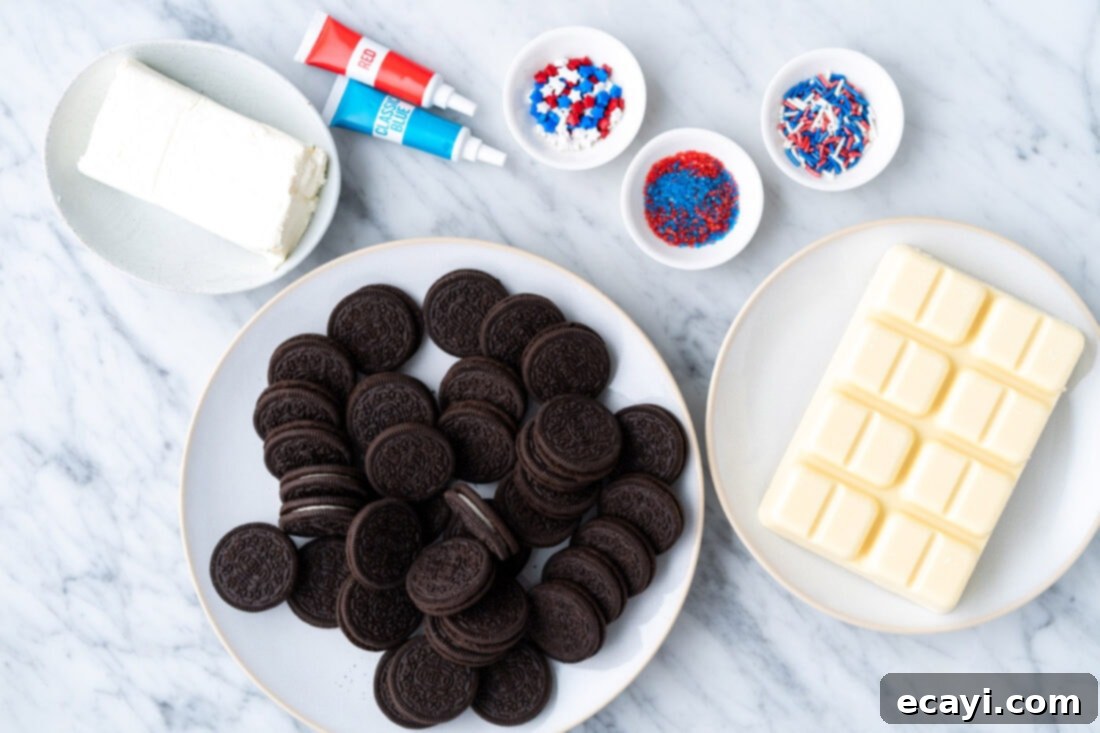
Ingredient Insights and Expert Substitution Suggestions
Understanding your ingredients is key to achieving perfect Oreo truffles every time. Here’s a deeper dive into each component and some helpful substitution tips:
OREOS – This recipe calls for 36 whole Oreo cookies. It’s crucial to use the classic, regular Oreos, not the Double Stuf or Thins versions, as their filling-to-cookie ratio can significantly alter the texture of your truffle mixture. There’s no need to separate the cookie from its creamy center; simply add the whole cookies to your food processor. The filling plays a vital role in providing moisture and contributing to the truffles’ signature rich flavor and smooth consistency. If you’re looking to experiment with different flavor profiles, you could try other Oreo varieties, but be mindful that the overall texture and sweetness might vary. For a less patriotic look but equally delicious treat, Golden Oreos could offer a vanilla twist.
CREAM CHEESE – Full-fat cream cheese is highly recommended for these truffles. Its higher fat content results in a richer, creamier, and more stable truffle filling. It’s essential for the cream cheese to be at room temperature when you add it to the crushed Oreos. This ensures it blends smoothly and thoroughly with the cookie crumbs, preventing lumps and creating a uniformly soft and pliable mixture that’s easy to roll into balls. If your cream cheese is too cold, it will be difficult to incorporate, and your mixture might end up crumbly.
CHOCOLATE COATING – For the coating, we’ve chosen vanilla almond bark, but white candy melting wafers or a quality bar of white baking chocolate are excellent alternatives. These options melt smoothly and set quickly, giving your truffles a beautiful, professional finish. I strongly advise against using standard white chocolate chips for dipping truffles. Chocolate chips often contain stabilizers that prevent them from melting as smoothly as compounds designed for dipping, making them prone to seizing (hardening and becoming grainy) when heated or when in contact with moisture, especially when adding liquid food coloring. If you want to achieve vibrant red and blue coatings, instead of using food coloring to dye white almond bark or melting wafers, consider purchasing pre-colored red and blue candy melts (also known as candy wafers). These are specifically designed to melt smoothly and retain their color without issues. If you do opt to color white chocolate or almond bark, use gel-based food coloring, as liquid food coloring can cause the chocolate to seize.
SPRINKLES – The decoration is where you can truly let your creativity shine! For a patriotic theme, there’s a fantastic array of sprinkles available. Consider patriotic star sprinkles for a classic look, nonpareils for a fine, colorful texture, or Jimmies for a more substantial sprinkle. Coarse red or blue sugar sprinkles also work wonderfully, adding both color and a slight textural crunch. Don’t be afraid to mix and match different types to create a dynamic and eye-catching display on your truffles!
How to Make Delicious Red, White, and Blue Oreo Truffles
These step-by-step photos and detailed instructions are provided to help you visualize the process of making this recipe. For a convenient printable version, complete with all measurements and instructions, please Jump to Recipe at the bottom of this post.
- Prepare Your Workspace: Begin by lining a large baking tray with parchment paper. This will prevent your truffles from sticking and make cleanup much easier.
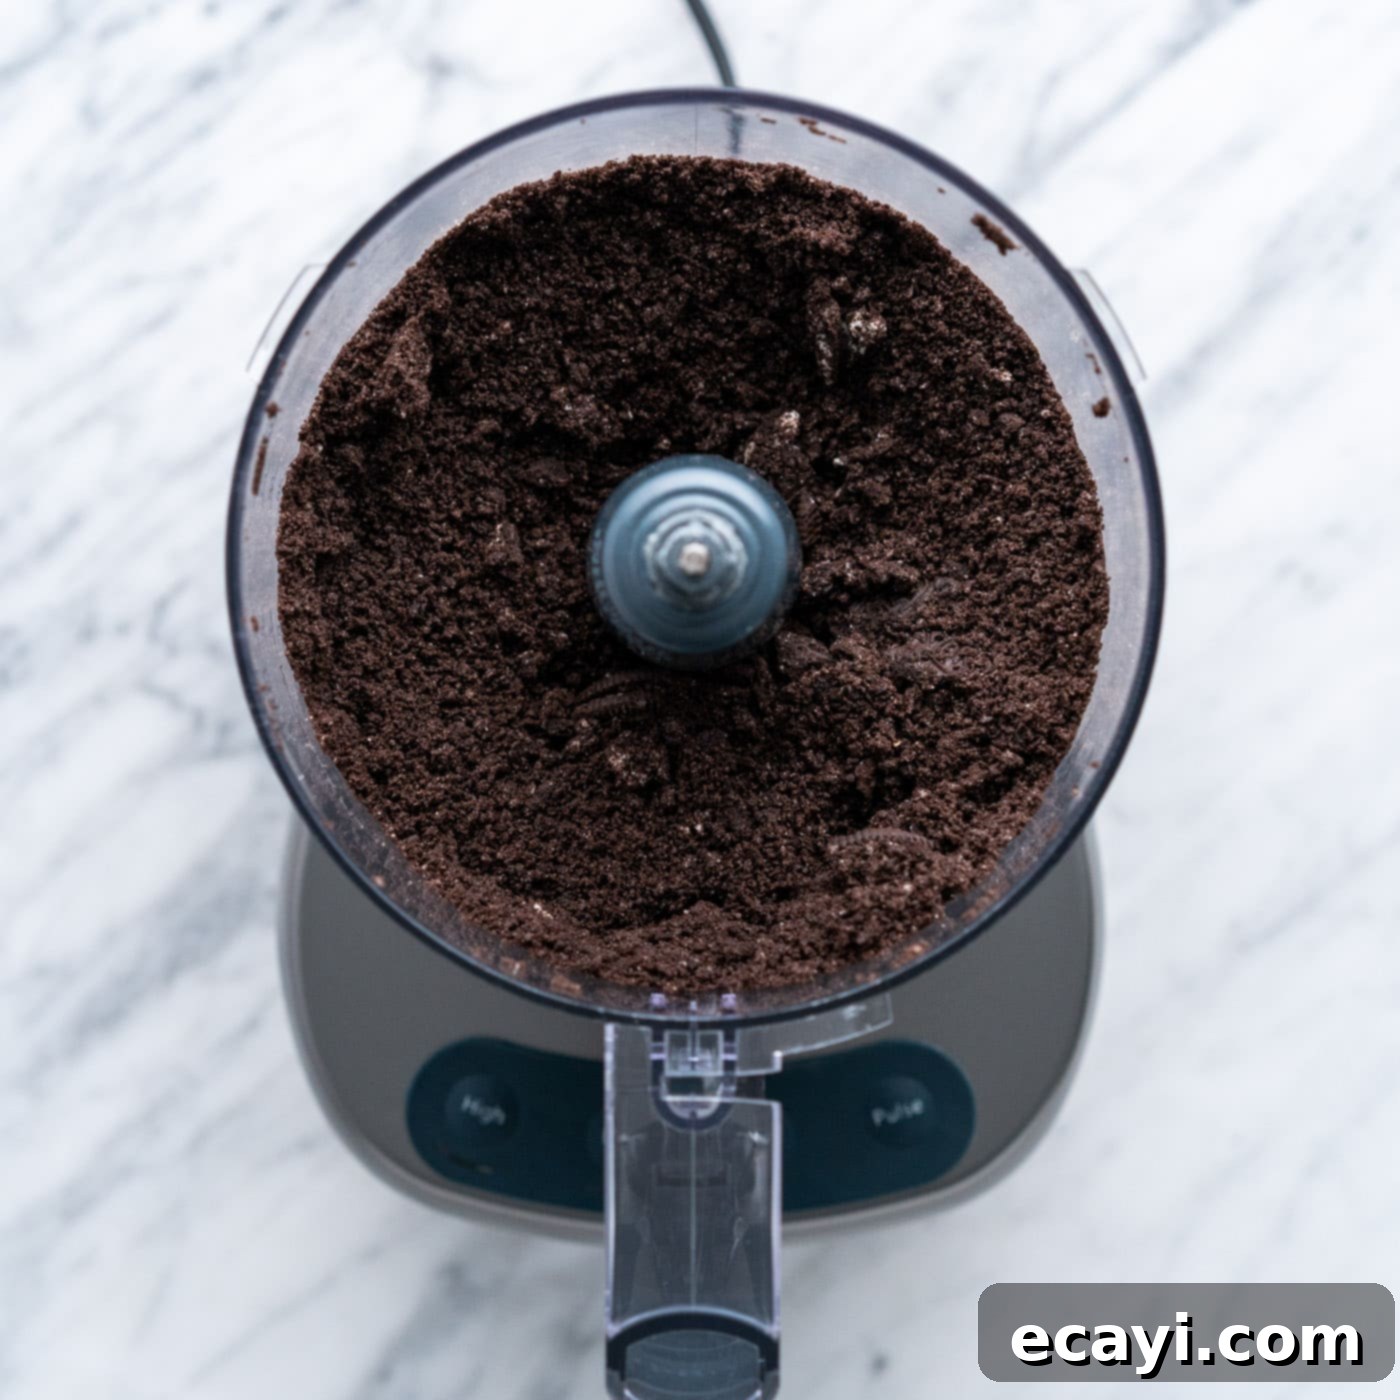
- Crush the Oreos: Add the entire package of Oreo cookies, including their creamy filling, to a food processor. Pulse a few times to break them down, then process continuously until they transform into fine, even crumbs. The consistency should resemble wet sand, with no large cookie pieces remaining. This fine texture is essential for a smooth truffle filling.

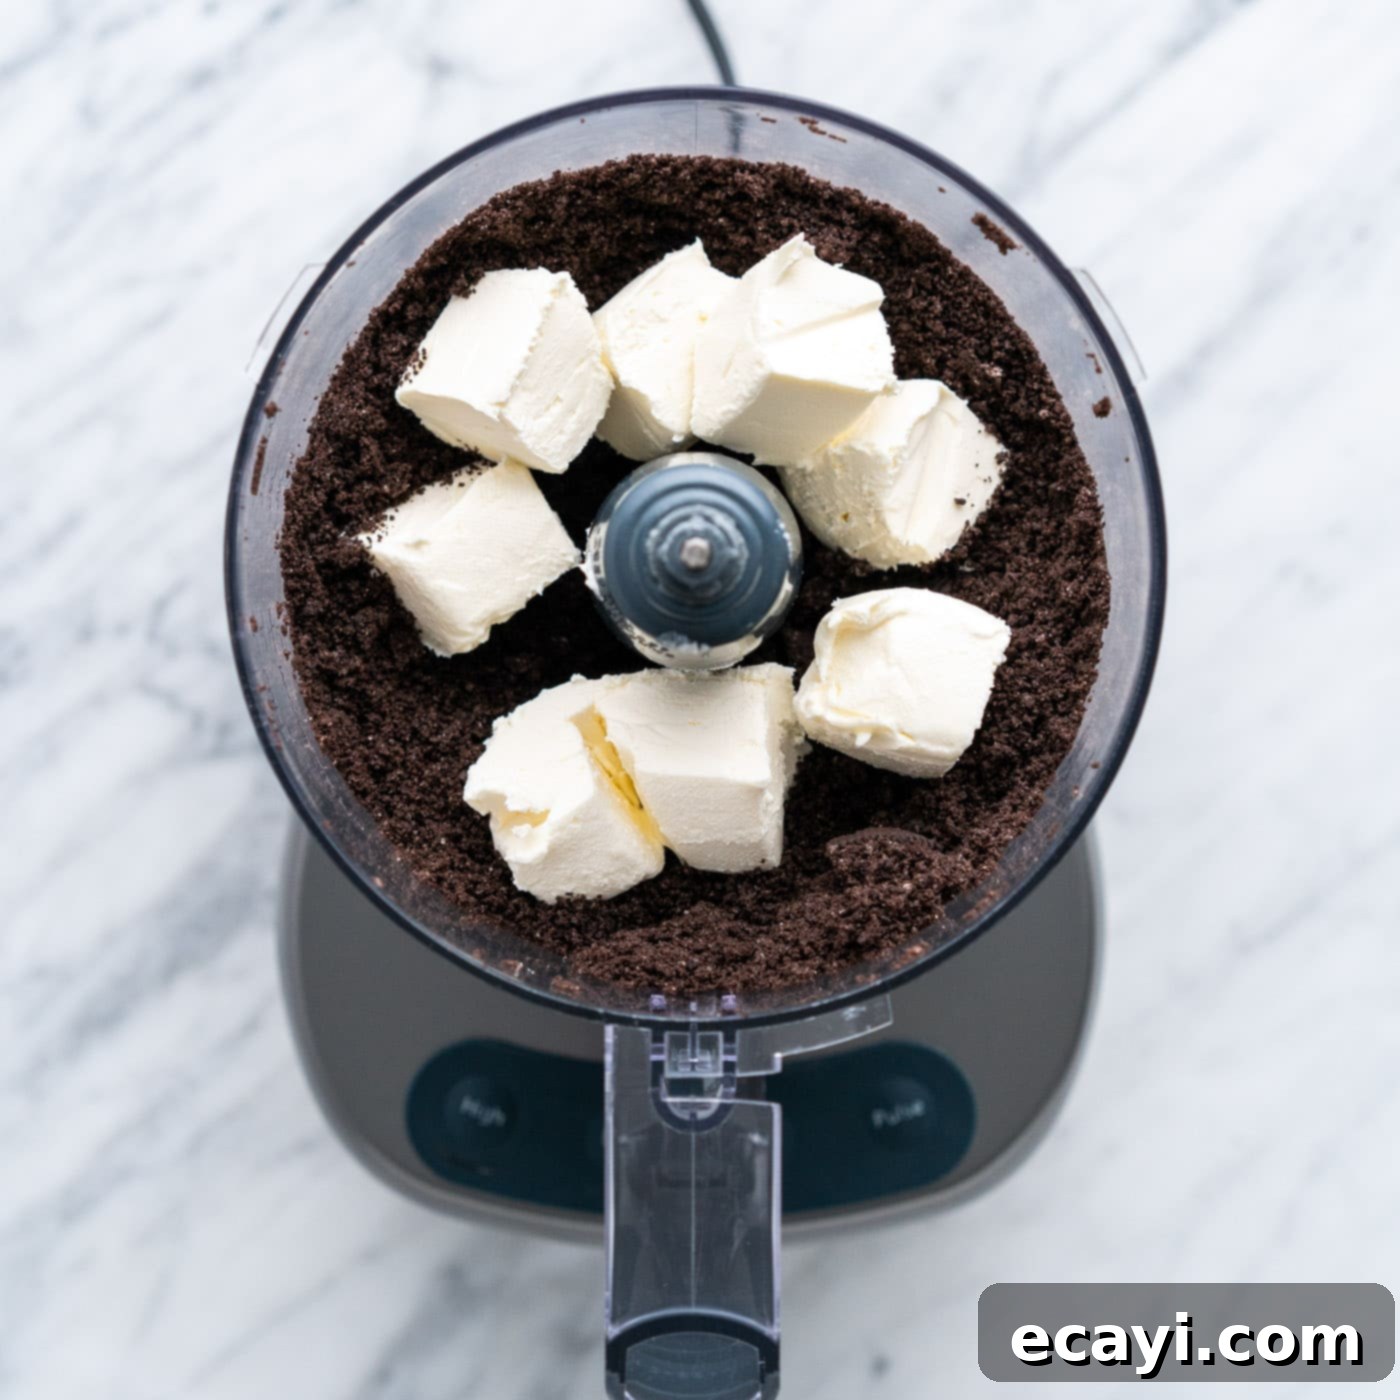
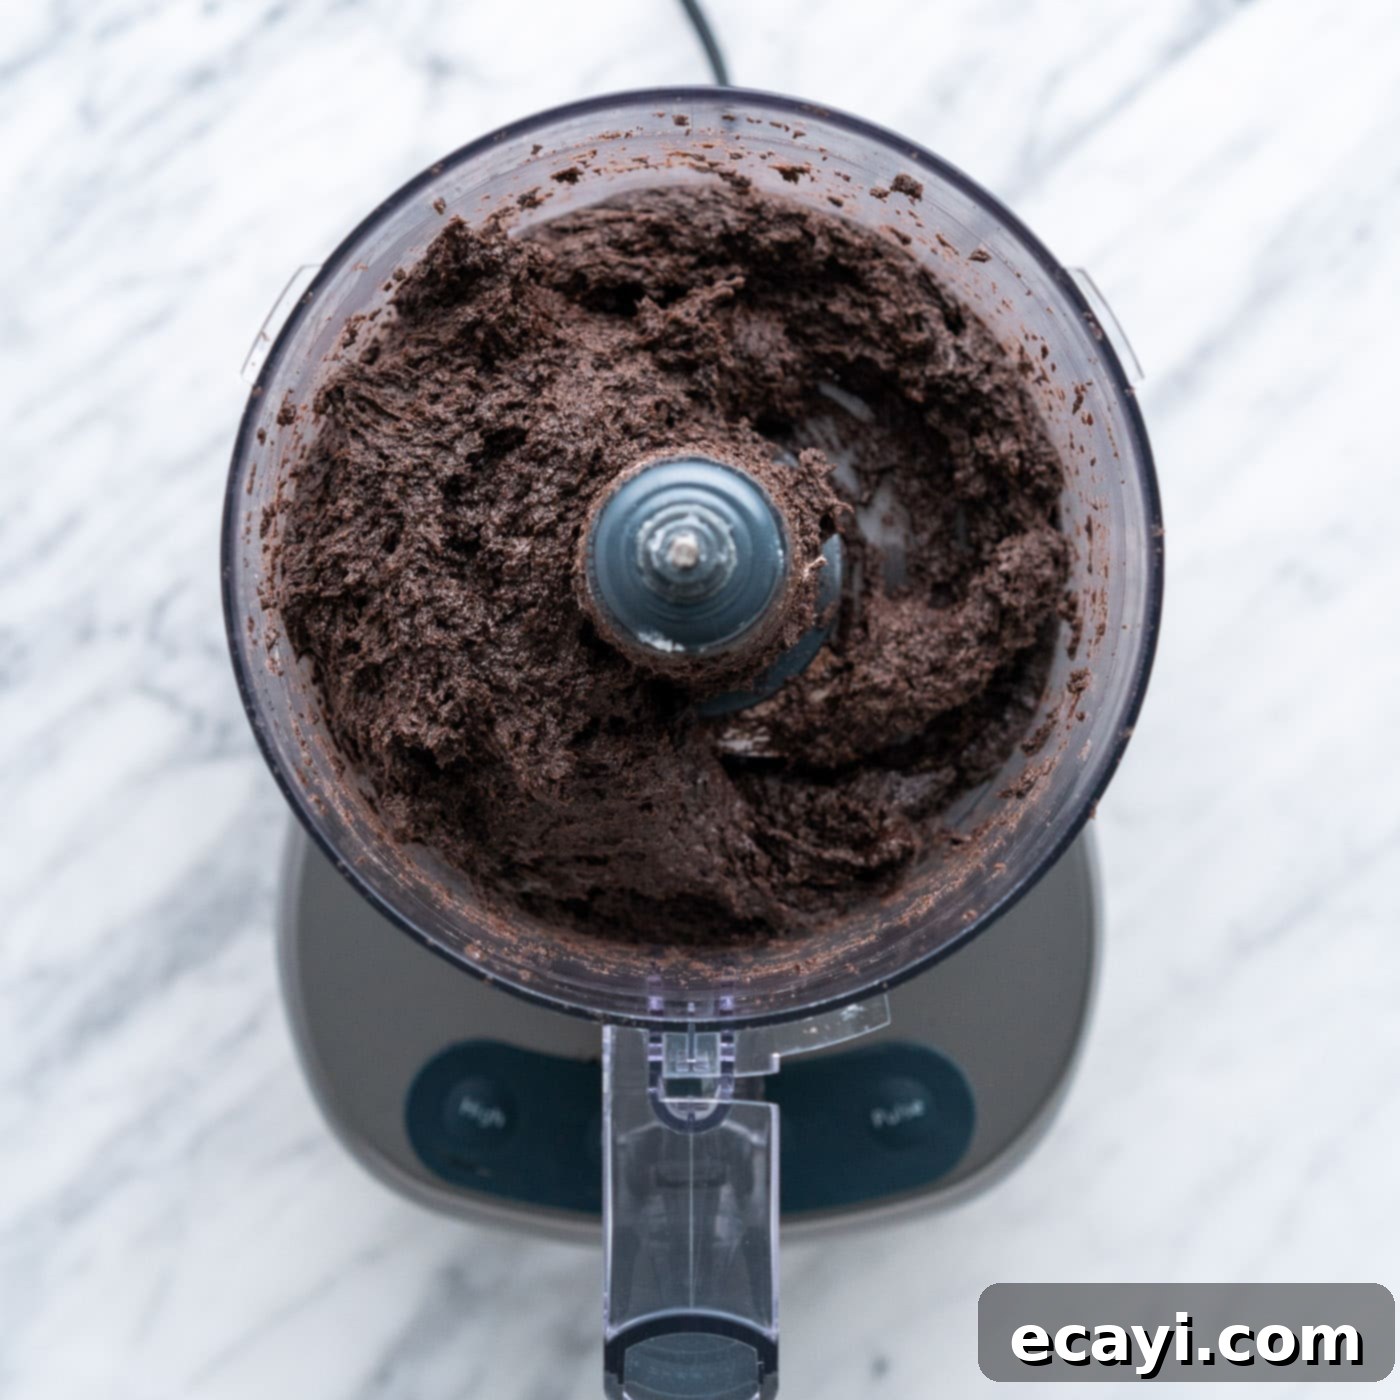
- Combine with Cream Cheese: Add the cubed, room-temperature cream cheese to the food processor with the Oreo crumbs. Process the mixture until it is thoroughly combined and smooth. It should form a dough-like consistency that pulls away from the sides of the bowl. Stop periodically to scrape down the sides of the food processor bowl with a spatula to ensure everything is evenly mixed. The result should be a rich, dark, and slightly sticky truffle batter.


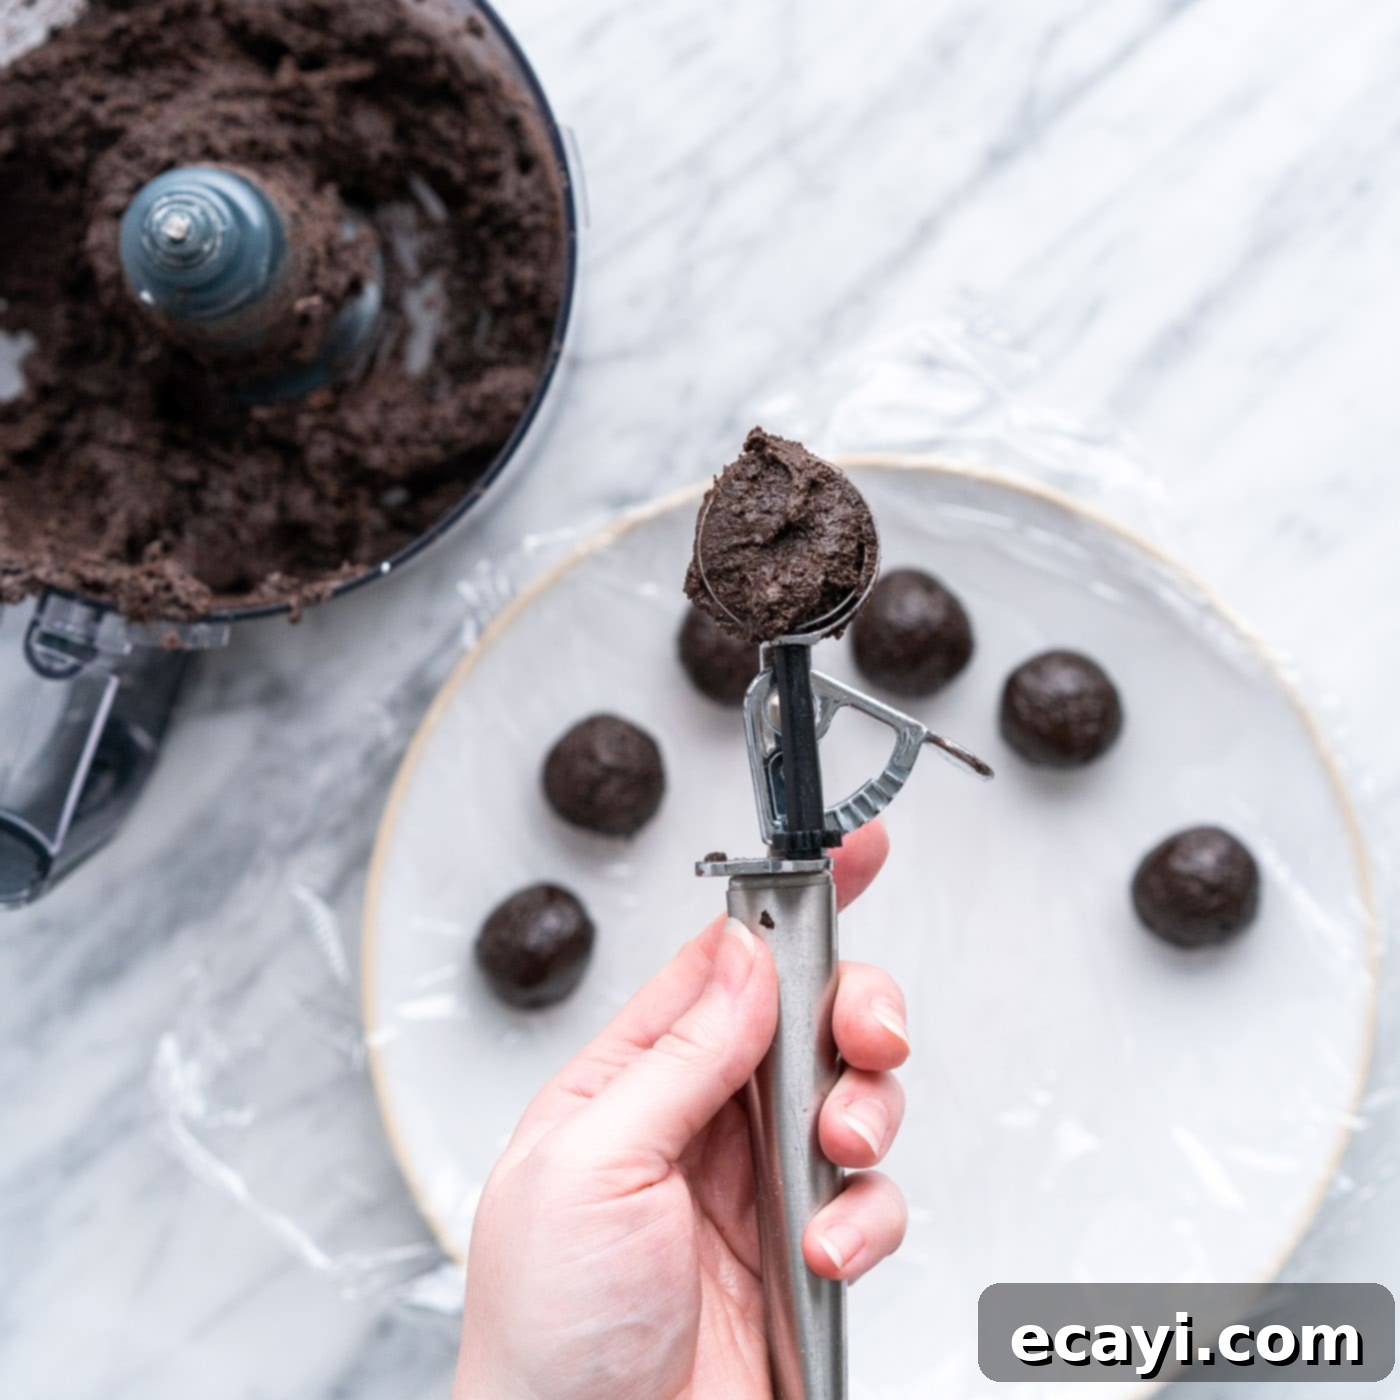
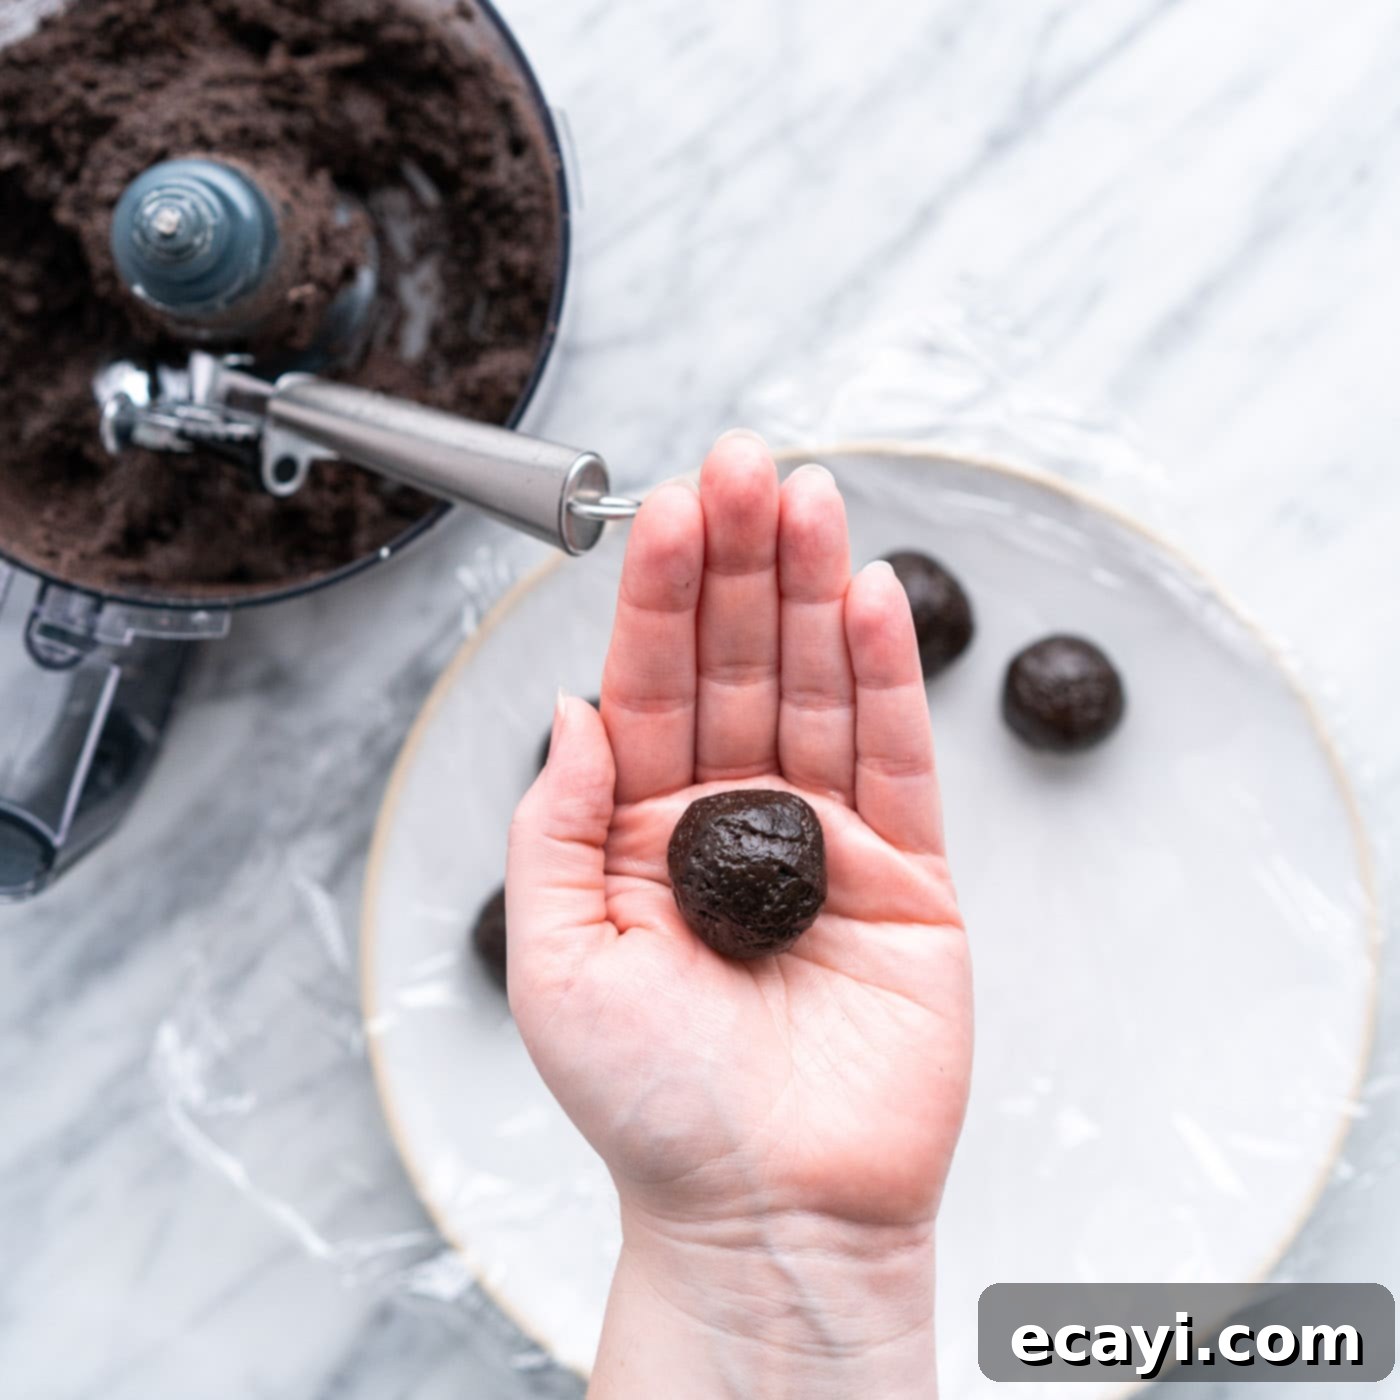
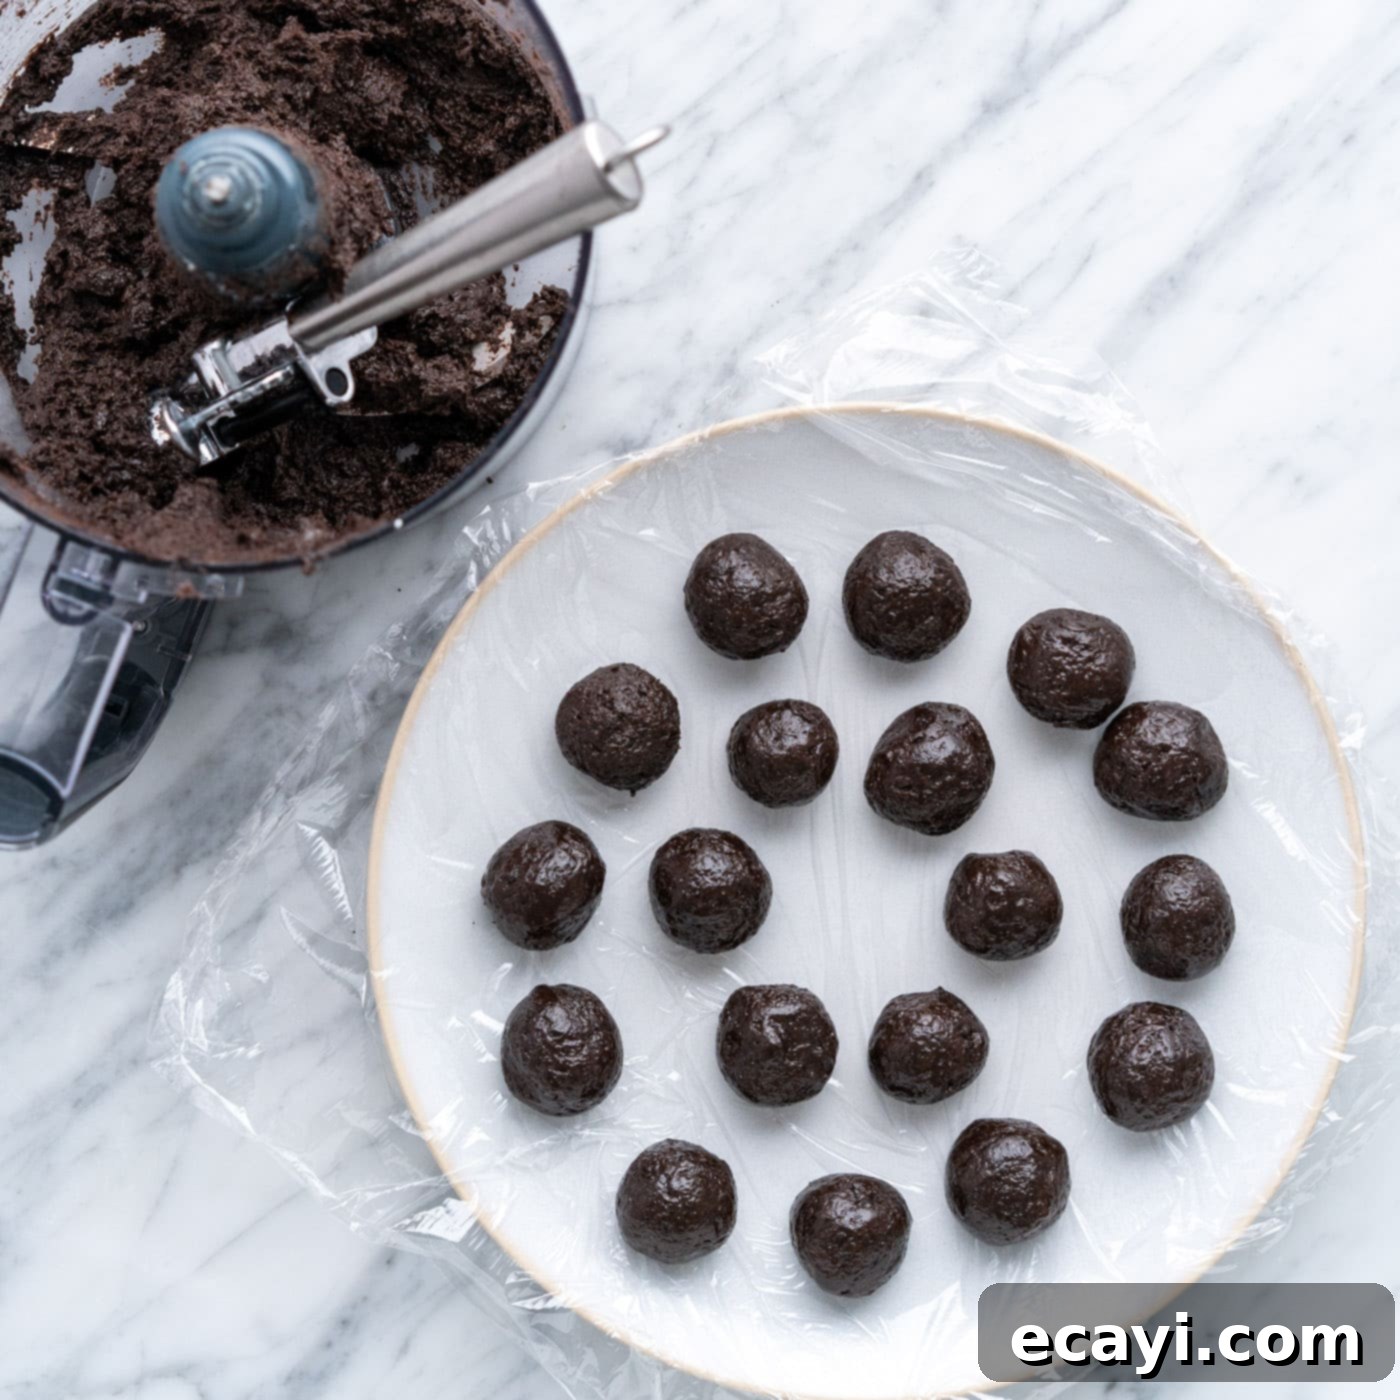
- Shape and Chill the Truffles: Using a 1-tablespoon scoop, measure out portions of the Oreo-cream cheese mixture. Roll each portion into a smooth, compact ball between your palms. Uniform sizing helps them chill and coat evenly. Arrange these balls neatly on your prepared baking tray. Once all truffles are shaped, transfer the tray to the freezer for a minimum of 30 minutes, or to the refrigerator for at least 2 hours. Chilling is essential as it firms up the truffles, preventing them from softening too much when dipped into warm chocolate.


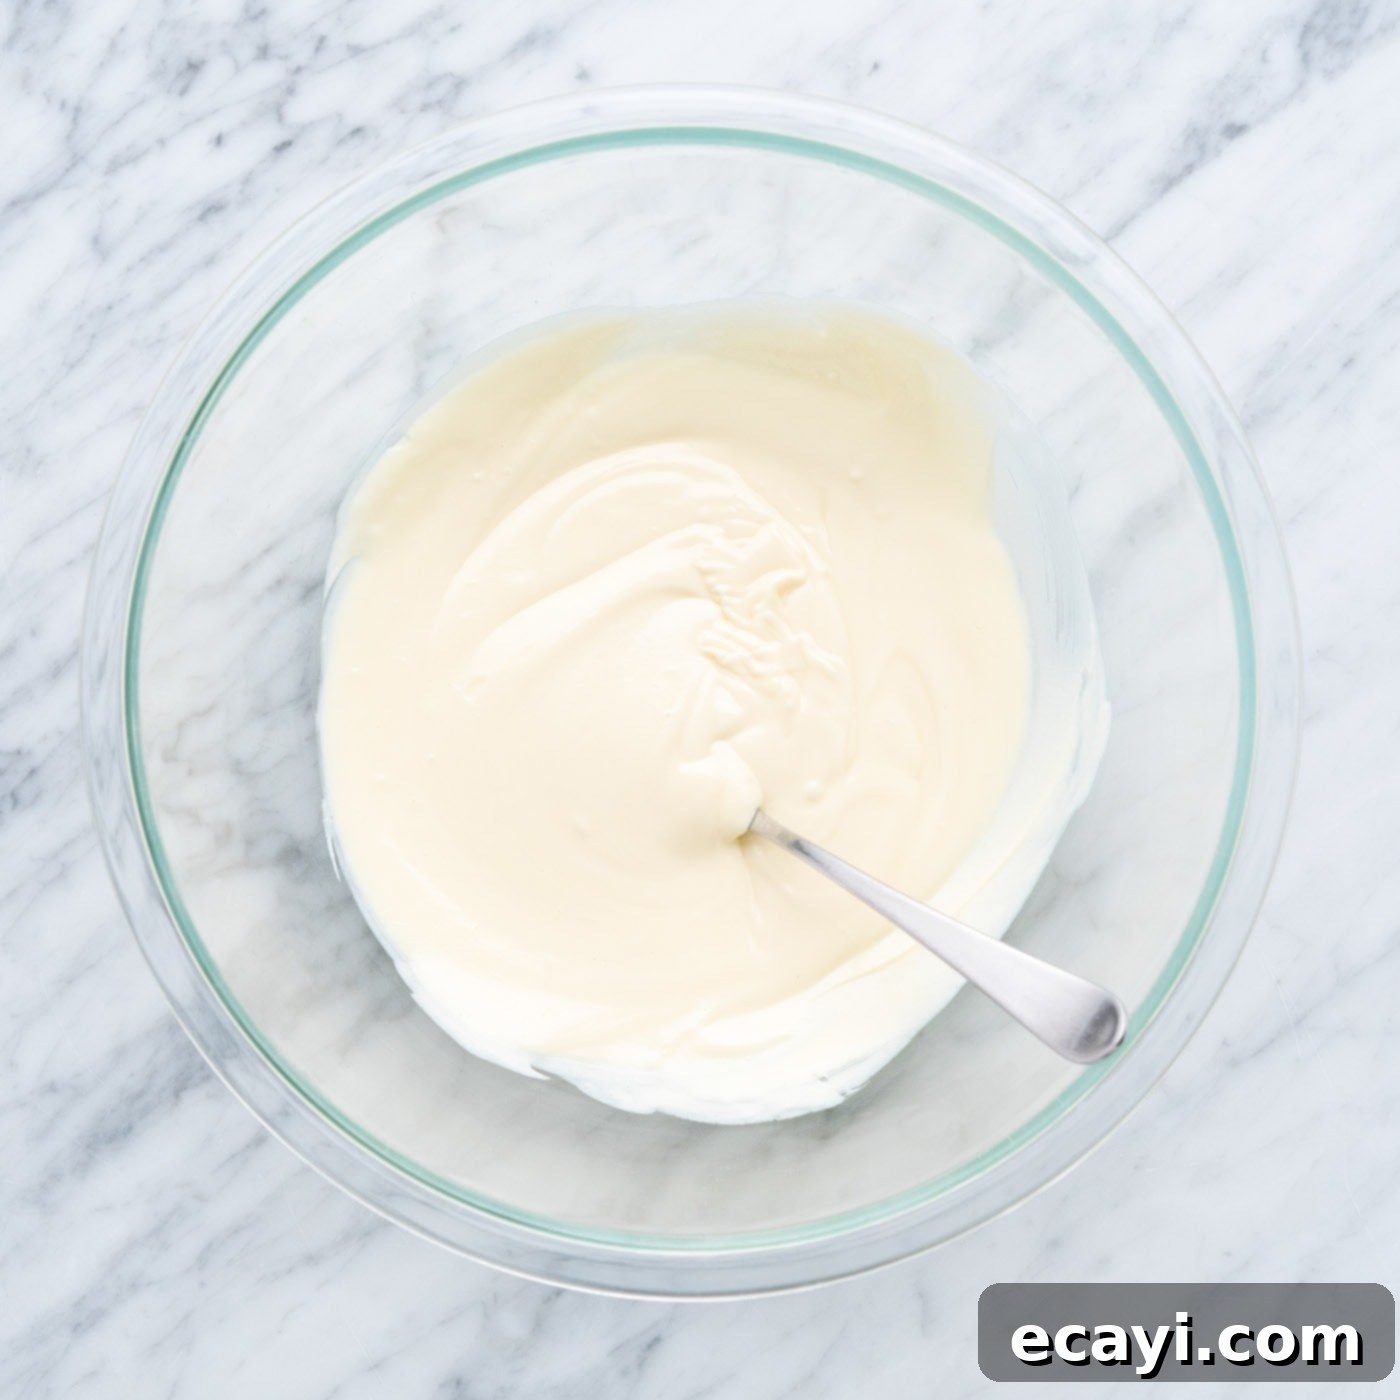
- Melt the Coating: Once your truffles are adequately chilled, it’s time to prepare the chocolate coating. Melt the vanilla almond bark or melting wafers according to the package directions. This is typically done in a microwave in short intervals, stirring frequently, or over a double boiler. Ensure the candy coating is fully melted and smooth, but critically, it should not be too hot. Overheated chocolate will cause your chilled truffles to soften rapidly upon contact, making them difficult to coat evenly and risking a messy finish.

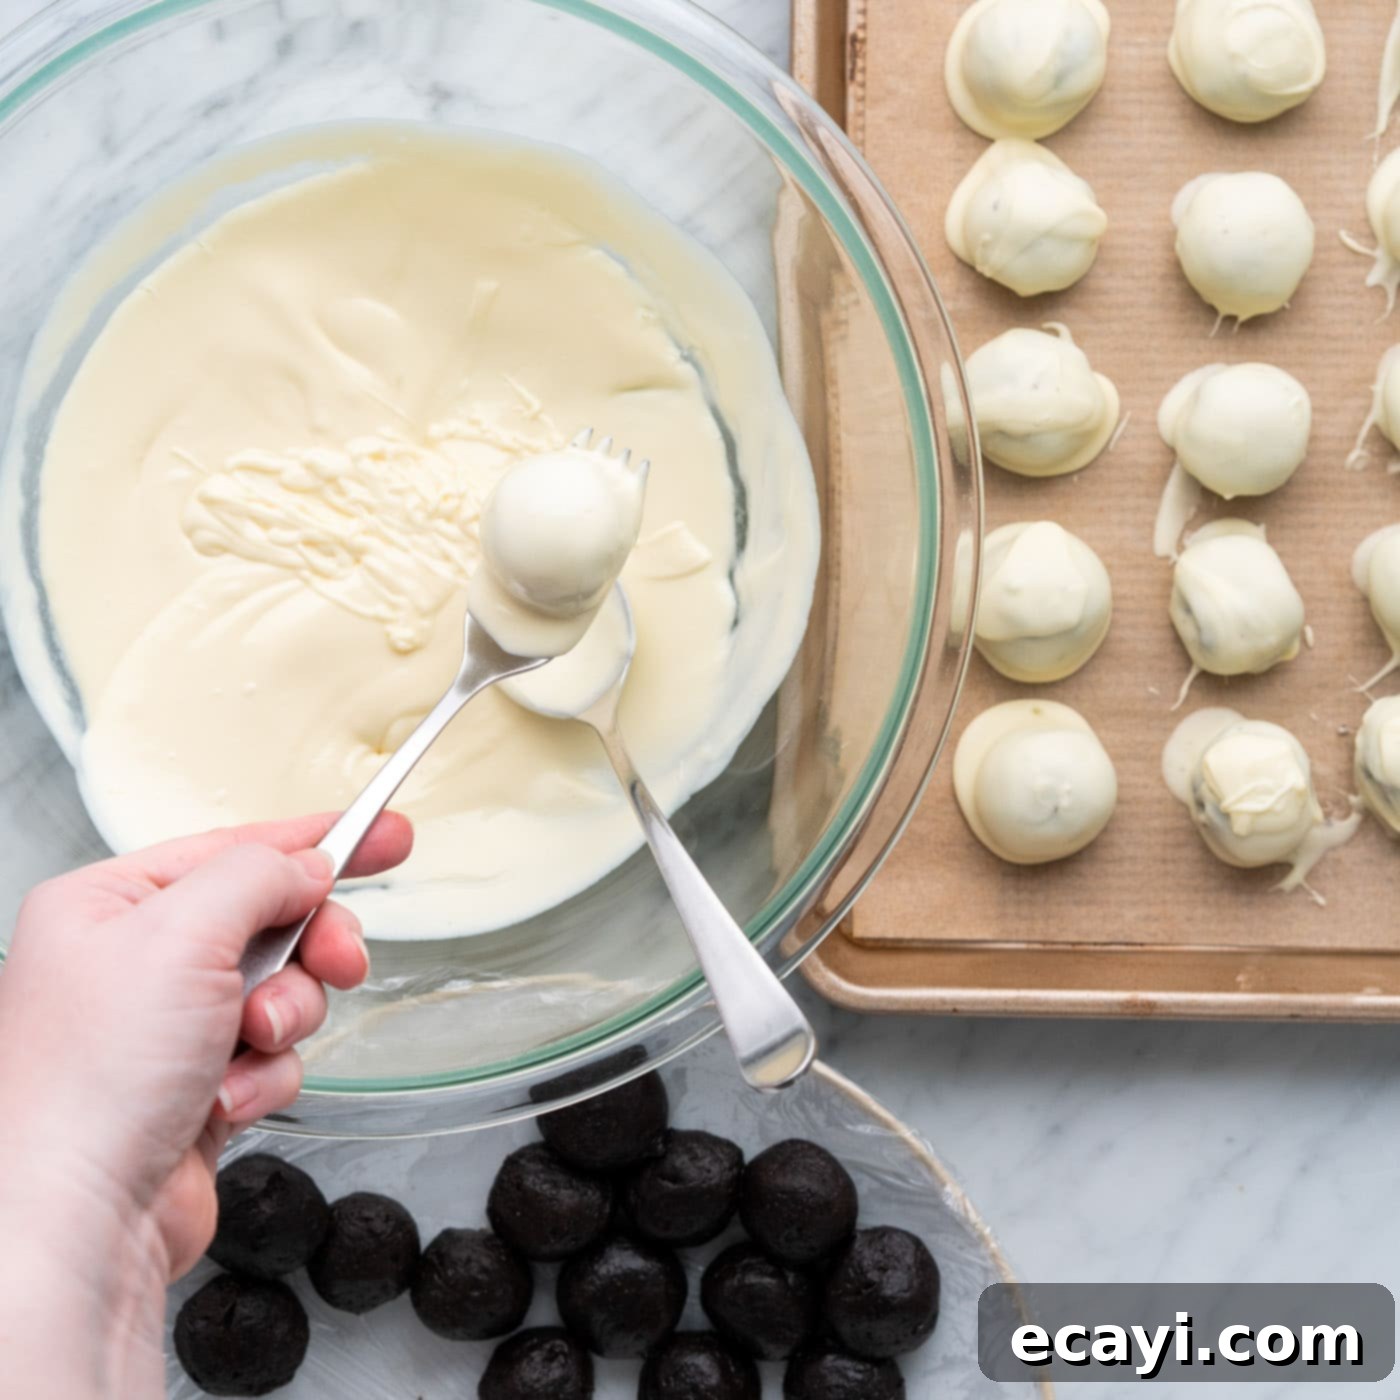
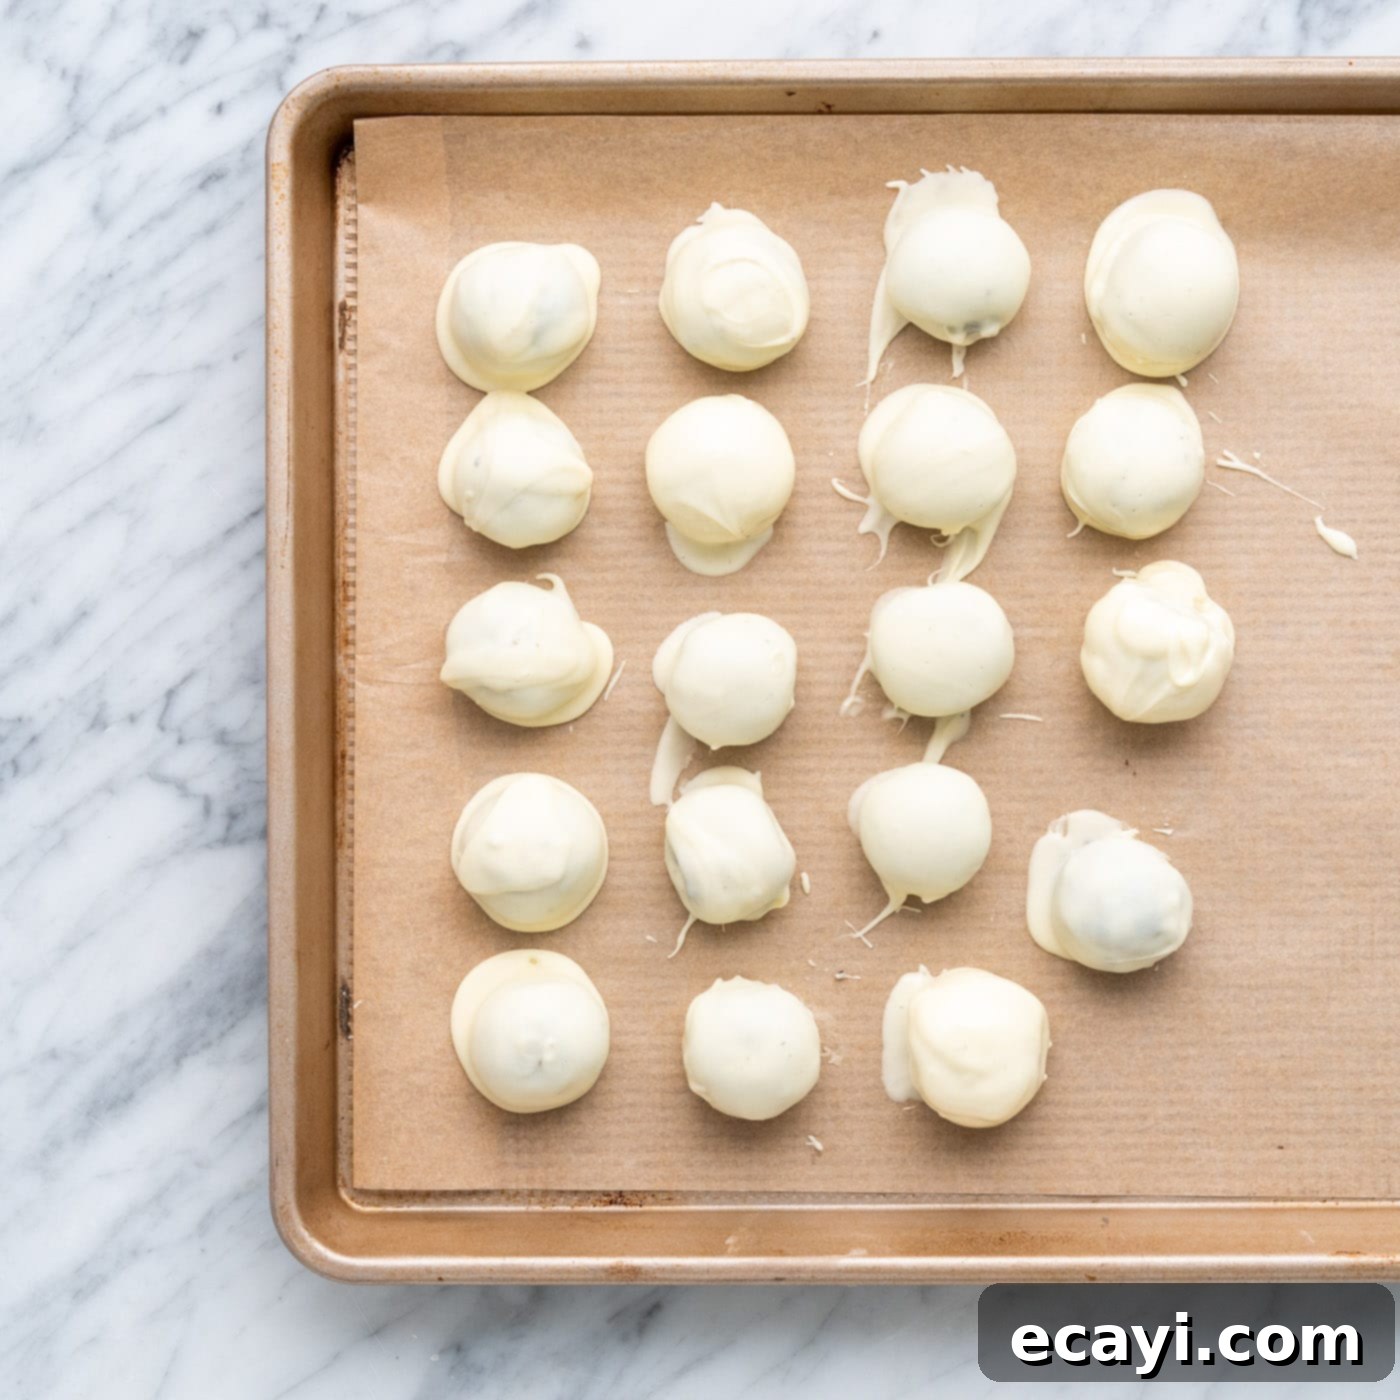
- Dip the Truffles: Carefully dip each chilled truffle into the melted candy coating. A fork or a specialized candy dipping tool works best for this. Allow any excess chocolate to drip off by gently tapping the fork against the side of the bowl. Then, carefully place the coated truffle back onto your parchment-lined baking tray to set. Repeat with all truffles, working efficiently as the coating can begin to set quickly.


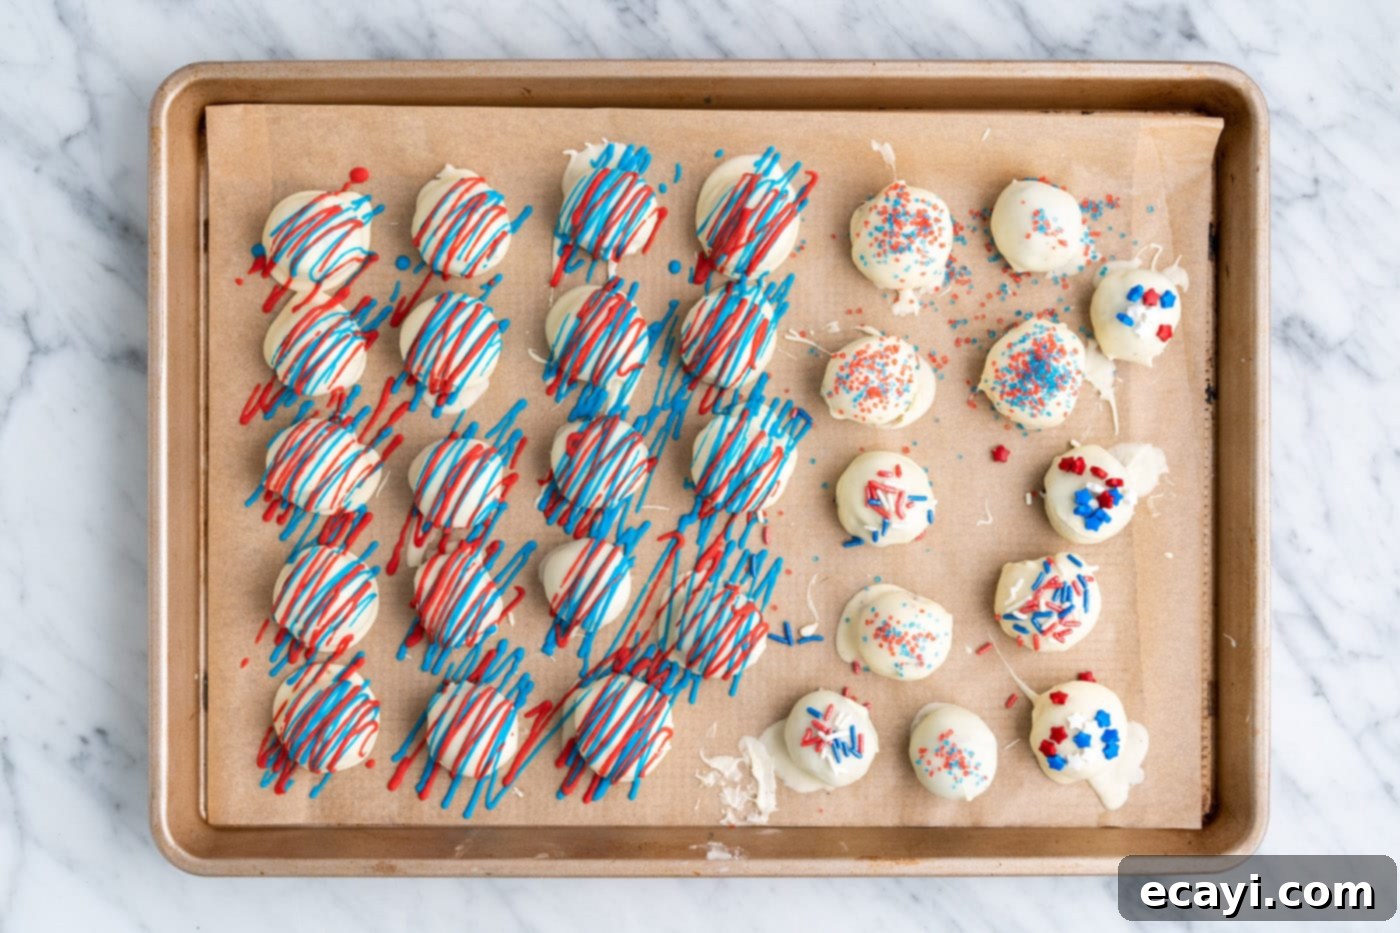
- Decorate with Sprinkles (Immediately!): If you plan to adorn your truffles with sprinkles, you must do this immediately after dipping each truffle, while the candy coating is still wet. The coating sets surprisingly fast, and once it hardens, the sprinkles will no longer adhere. Have your chosen patriotic sprinkles ready for a quick and festive finish!
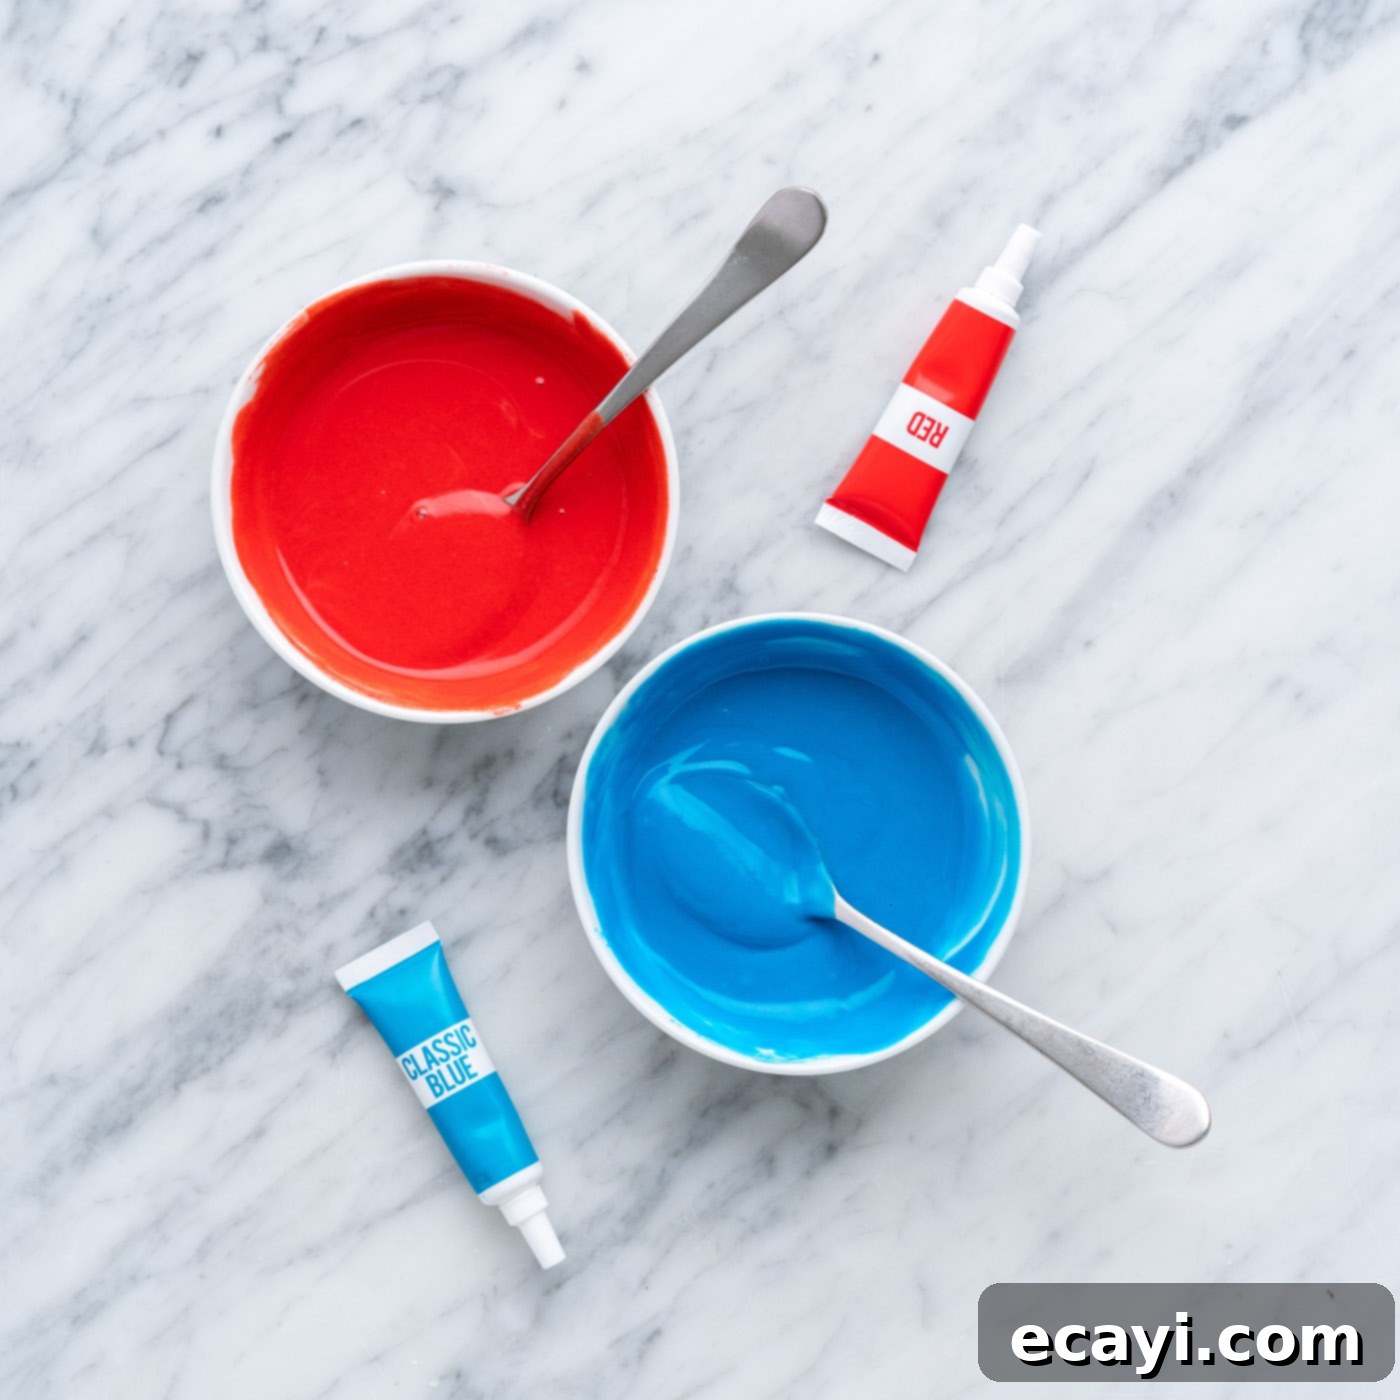
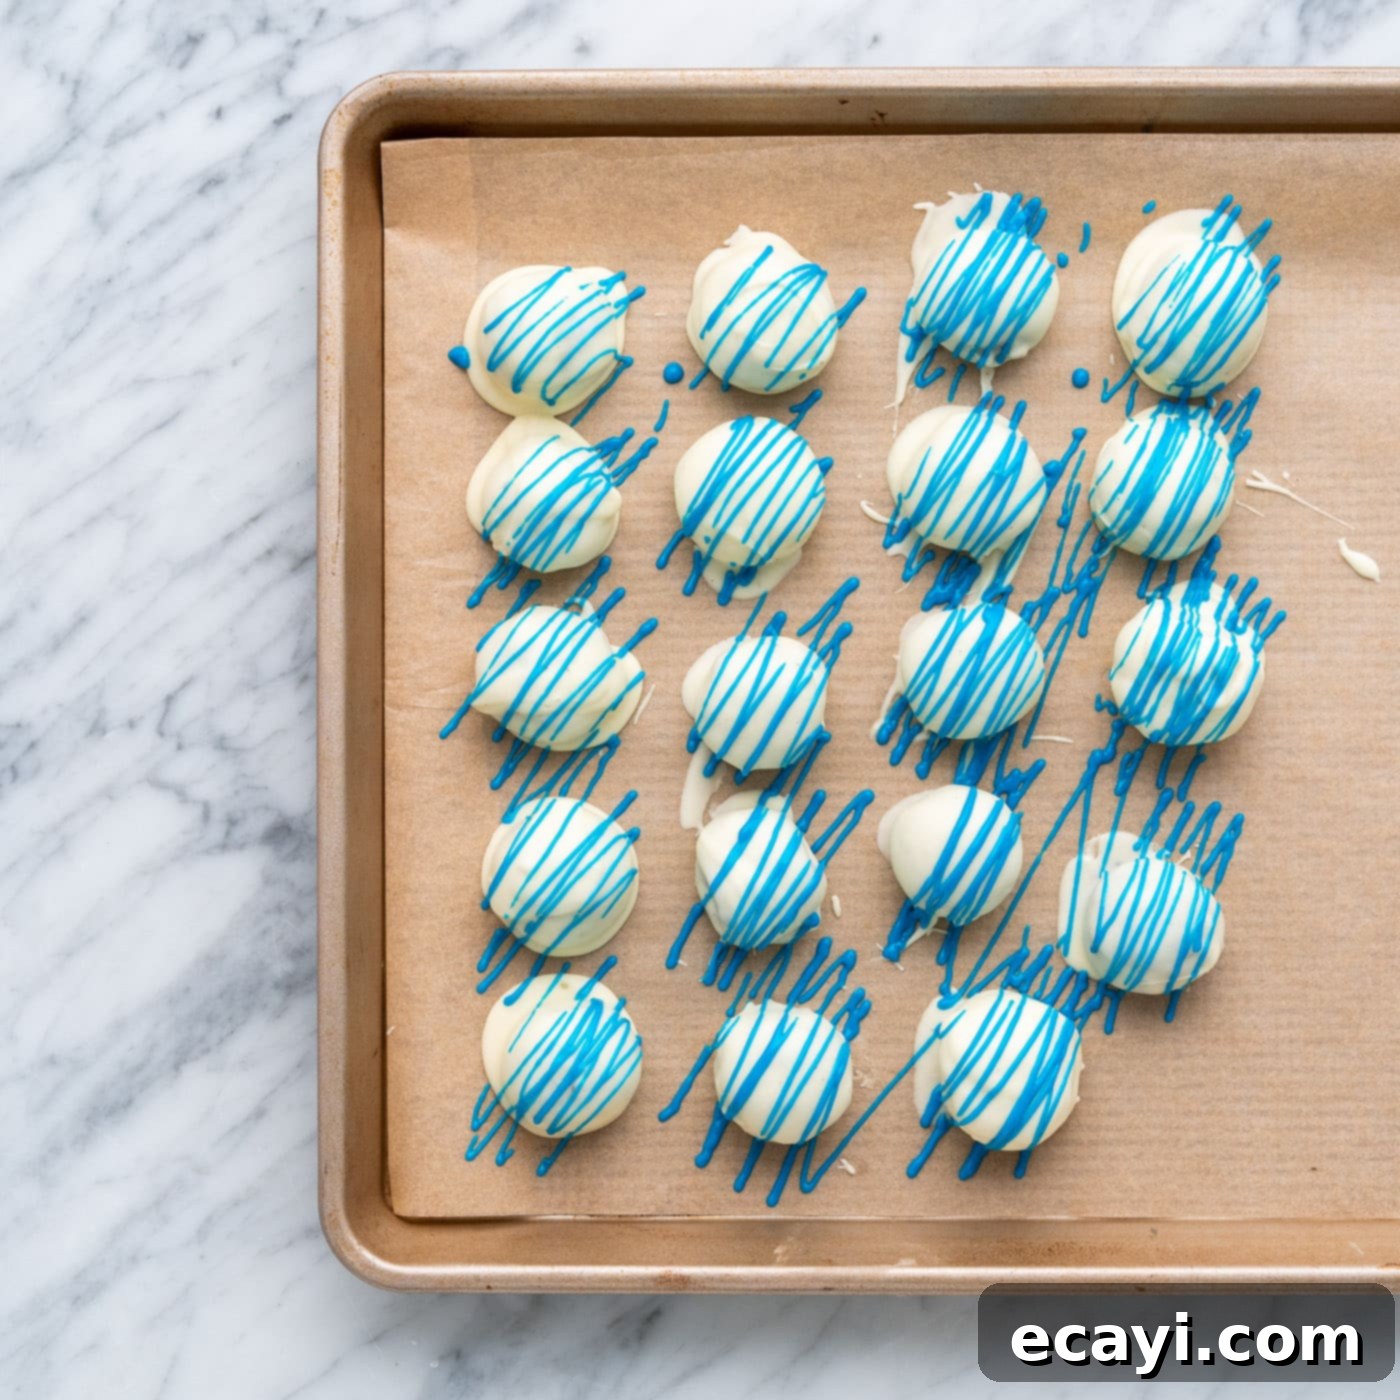
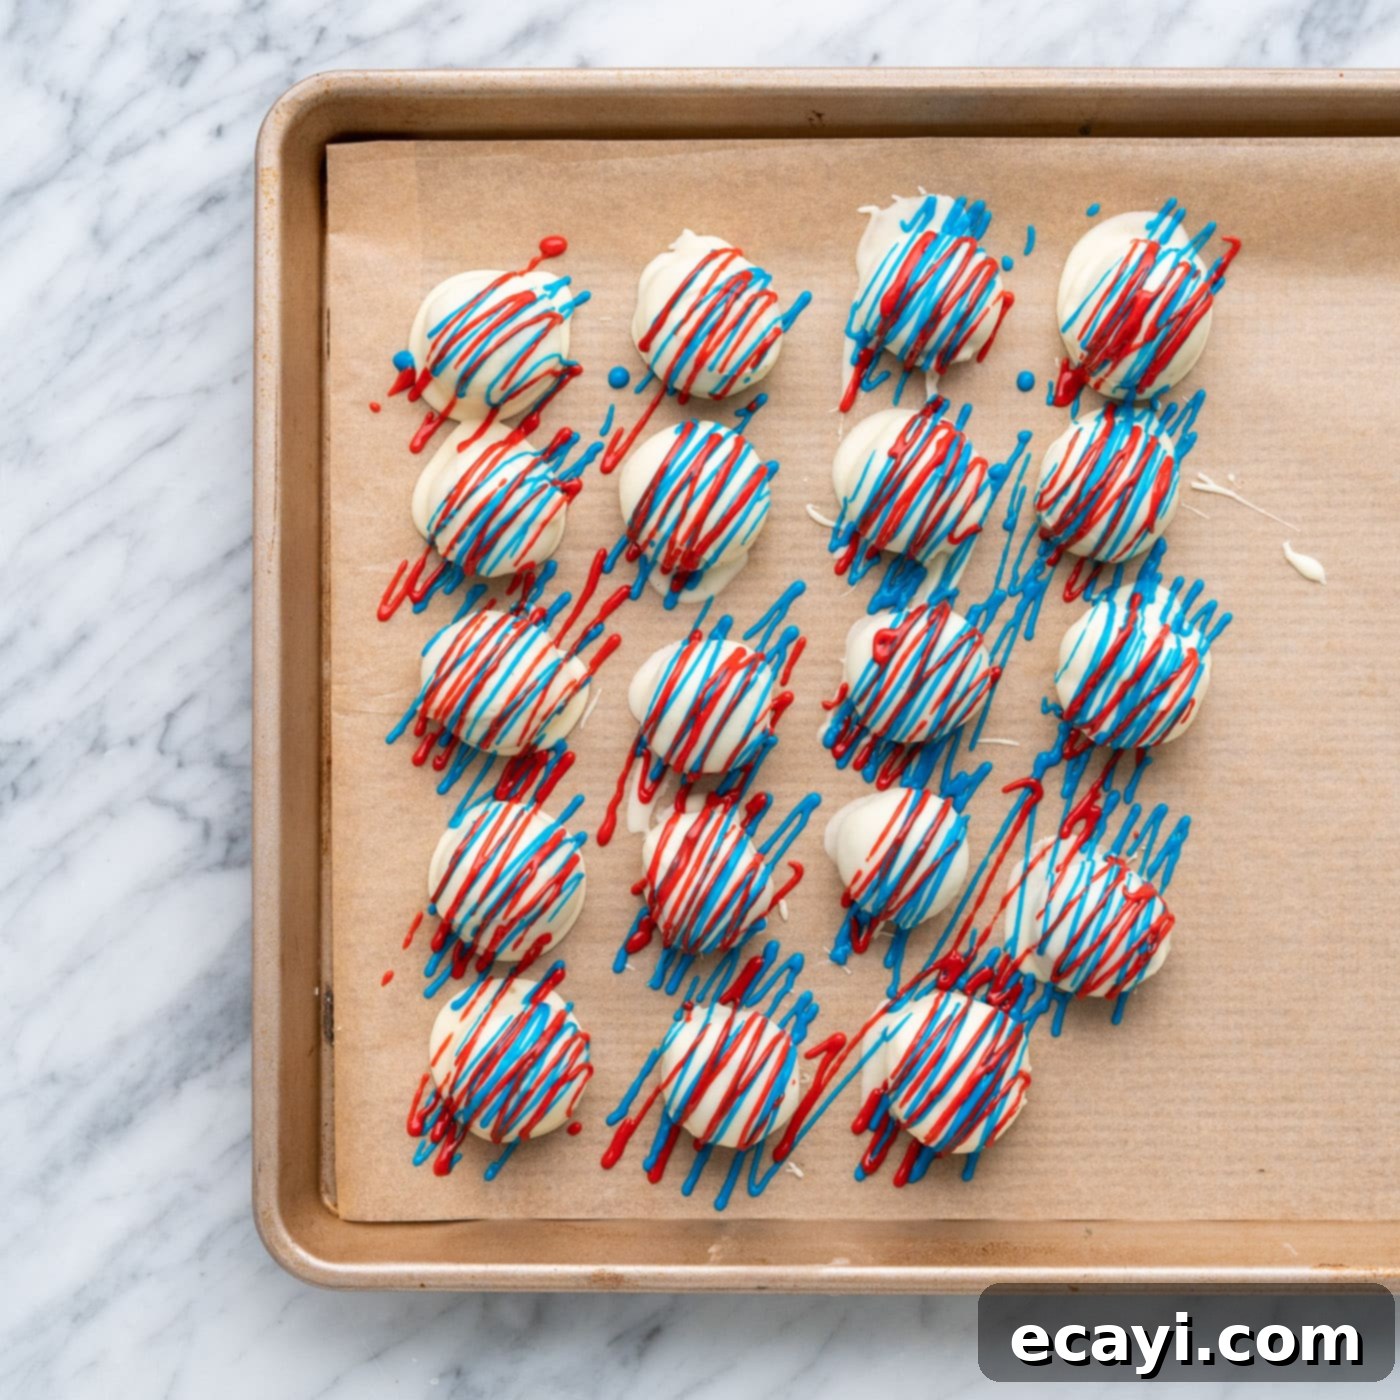
- Decorate with Red and Blue Drizzle (After Setting): For a decorative red and blue drizzle, wait until the initial white chocolate coating on your truffles has fully set and hardened. Melt the additional 4 ounces of almond bark or melting wafers according to package directions. Divide the melted candy into two small bowls. Add red gel food coloring to one bowl and blue gel food coloring to the other, stirring until you achieve your desired vibrant patriotic shades. Transfer each color of melted candy into its own small zip-top plastic bag. Snip off a tiny corner from each bag to create a small opening, then decoratively drizzle the red and blue chocolate over the set truffles. Allow the drizzles to set completely before handling or serving.


- Storage: Once the chocolate coating and any drizzles are completely set, store your festive Oreo truffles. Layer them between pieces of parchment paper in an airtight container and keep them in the refrigerator. They will stay fresh and delicious for up to 2 weeks. Remember, due to the cream cheese, refrigeration is a must!

Frequently Asked Questions & Expert Tips for Perfect Oreo Truffles
Achieving a smooth, even coating is crucial for beautiful truffles. The easiest and most effective method is to work with one truffle at a time. Submerge a chilled truffle completely in the melted chocolate. Use a fork (or a dedicated candy dipping tool) to scoop it out. Gently tap the fork a couple of times on the side of the bowl to allow as much excess chocolate as possible to drip off. This prevents a thick, clumpy bottom. Then, carefully slide the coated truffle off the fork onto your parchment-lined baking tray. Ensure your chocolate isn’t too hot, as this can melt the truffle underneath and make it harder to coat smoothly. Using melting wafers or almond bark designed for dipping also helps immensely.
Absolutely! These patriotic Oreo truffles are an ideal make-ahead dessert, perfect for busy party preparations. You can prepare them a day or even two days in advance. Once fully decorated and set, store them in an airtight container in the refrigerator until you’re ready to serve. This allows the flavors to meld beautifully and frees up your time on the day of your celebration.
Proper storage is essential because these truffles contain cream cheese. After the chocolate coating has completely set, arrange the patriotic Oreo truffles in an airtight container. If stacking them, place a piece of parchment paper between each layer to prevent sticking and preserve their decorative finish. Store them in the refrigerator, where they will remain fresh and delicious for up to 2 weeks. Always keep them chilled until serving.
Yes, Oreo truffles freeze exceptionally well, extending their shelf life to up to 3 months! You have two convenient options for freezing. Option 1 (without coating): After rolling the truffle balls but before dipping them in chocolate, place them on a baking sheet and flash-freeze them until solid (this prevents them from sticking together). Once firm, transfer them to a large zip-top freezer bag or an airtight container. When you’re ready to serve, thaw them slightly in the refrigerator, then dip and decorate as usual. Option 2 (with coating): If your truffles are already coated and decorated, ensure the chocolate coating is completely set. Then, transfer them to a large zip-top freezer bag or an airtight freezer-safe container, again using parchment paper between layers if necessary. Thaw them in the refrigerator overnight before serving. Both methods preserve their flavor and texture beautifully.
It’s a common frustration! When using food dye to color melted almond bark or melting wafers, especially if it’s liquid-based or introduces too much moisture, the chocolate can seize (harden and become lumpy or pasty). The good news is, this problem often has an easy fix. Stir in a small amount (start with half a teaspoon) of coconut oil or vegetable shortening. Continue adding tiny amounts and stirring until the mixture becomes smooth and workable again. Gel food coloring is always recommended over liquid coloring to minimize this risk.
For truffles that look professional and cook/chill evenly, consistency in size is key. Using a 1-tablespoon cookie scoop or a measuring spoon is your best friend here. Scoop out each portion, then roll it between your palms to smooth it into a perfect ball. This not only makes them visually appealing but also ensures each guest gets a consistent treat.
While the recipe specifies regular Oreos for optimal texture, you can experiment! Golden Oreos would make delicious vanilla truffles, and seasonal flavors like peppermint or pumpkin spice Oreos could be used for other holidays. Just remember that the filling-to-cookie ratio can vary, potentially affecting the final consistency, so you might need to slightly adjust the amount of cream cheese if the mixture seems too dry or too wet.
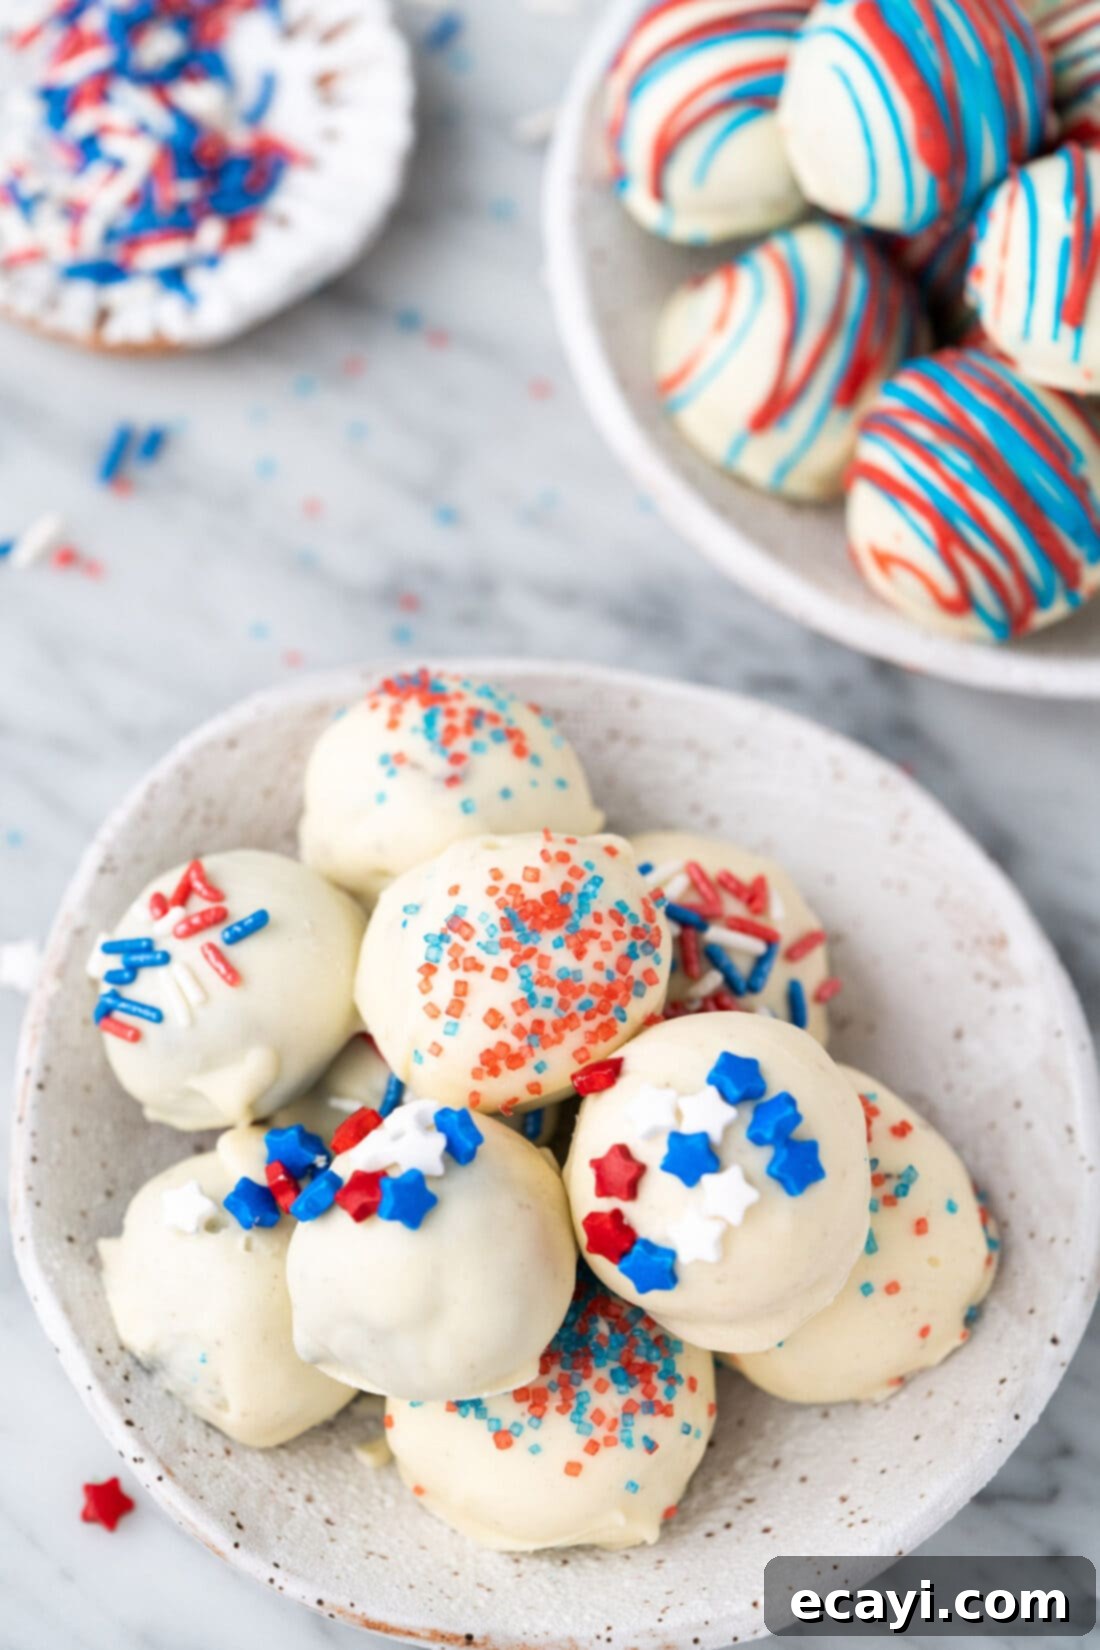
Creative Serving Suggestions for Your Patriotic Truffles
Once your red, white, and blue Oreo truffles are complete, the presentation is just as fun as the making! These delightful treats are incredibly versatile when it comes to serving. Drizzle, dip, and sprinkle these patriotic gems to your heart’s content, making each one a miniature work of art.
For an elegant touch and easy handling, consider serving each Oreo ball in mini cupcake liners. This not only makes them simple for guests to grab and enjoy but also adds to the festive display on your dessert table. The possibilities for decoration are truly endless, allowing you to customize them for any patriotic occasion. Here are a few creative ideas to inspire you:
- The Flag Arrangement: Create a stunning edible flag by dipping some truffles entirely in blue chocolate, others in red chocolate, and leaving some coated in white. Arrange them artfully on a rectangular platter to mimic the stars and stripes of the American flag.
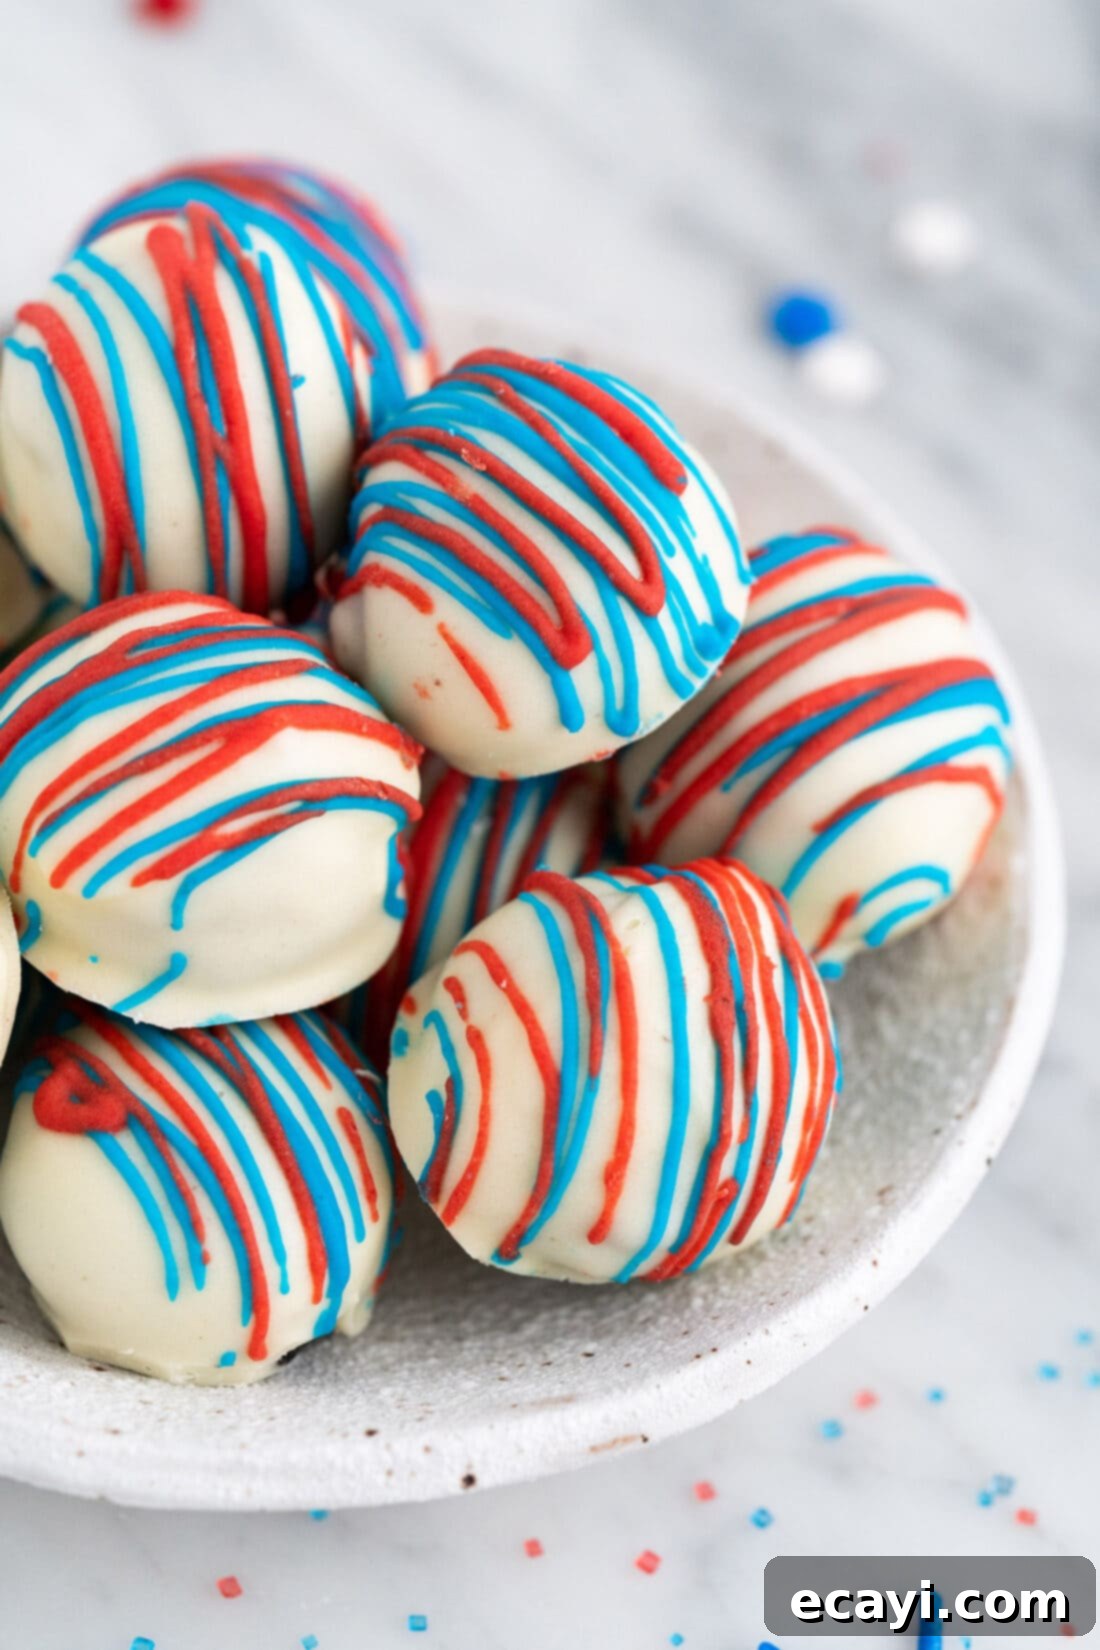
- Classic Drizzle: Use white chocolate as the base coating for all your truffles, then elegantly drizzle them with contrasting lines of melted red and blue chocolate. This simple method yields a sophisticated yet festive look.
- Star-Spangled Sparkle: Garnish your freshly dipped truffles with an assortment of star-shaped sprinkles, tiny nonpareils, or classic Jimmies sprinkles in red, white, and blue. The key is to apply them immediately after dipping while the chocolate is still wet.
- Sugary Crunch: For a delightful texture and shimmering finish, top some of your truffles with coarse red or blue sugar sprinkles. This adds a beautiful sparkle and a satisfying crunch with every bite.
- 3D Drizzle Effect: For an extra dimension, drizzle white chocolate over your set truffles, then immediately sprinkle red or blue sugar sprinkles directly onto the still-wet white drizzle. This creates a striking 3D effect that’s both visually appealing and delicious.
No matter how you choose to decorate and serve them, these Red, White, and Blue Oreo Truffles are guaranteed to be a hit at your next patriotic gathering!
More Festive Patriotic Dessert Recipes
If you’re looking for more ways to celebrate with delicious, themed treats, explore some of these other fantastic patriotic dessert recipes:
- Mini Shortcake Cups
- American Flag Cupcakes
- Patriotic Mini Cheesecakes
- Patriotic Ice Cream Cone Cupcakes
- Patriotic Chocolate Covered Strawberries
I love to bake and cook and share my kitchen experience with all of you! Remembering to come back each day can be tough, that’s why I offer a convenient newsletter every time a new recipe posts. Simply subscribe and start receiving your free daily recipes!
Red, White, and Blue Oreo Truffles Recipe
These red, white, and blue Oreo truffles are an incredibly easy and delightful no-bake dessert, perfect for all your patriotic celebrations like the 4th of July, Memorial Day, or Veterans Day. Made with just three main ingredients and endless decorating possibilities, they are a festive crowd-pleaser.
Serving Size: 28 truffles
Prep Time: 15 minutes
Chill Time: 1 hour 15 minutes (30 min freeze / 2 hour fridge)
Total Time: Approximately 1 hour 30 minutes
Ingredients for Oreo Truffles:
- 36 whole Oreo cookies (regular, not double stuffed)
- 8 ounces full-fat cream cheese (at room temperature, cut into cubes)
- 16 ounces vanilla almond bark or white candy melting wafers
To Decorate:
- 4 ounces vanilla almond bark or white candy melting wafers (for drizzle)
- Red gel food coloring
- Blue gel food coloring
- Red, white, and blue sprinkles
Equipment You’ll Need:
- Baking sheet
- Parchment paper
- Food processor
- 1-tablespoon scoop
- Mixing bowls (small, for colored chocolate)
- Piping bags or small zip-top plastic bags
Before You Begin – Important Tips:
- Use whole Oreo cookies (filling and all) as the filling provides essential moisture and flavor.
- Vanilla almond bark or melting wafers are recommended for coating due to their smooth melt and quick setting. Avoid chocolate chips as they can seize. Pre-colored candy melts are an excellent alternative for red and blue.
- If your colored chocolate seizes, stir in a small amount of coconut oil to smooth it out again.
- For best coating results, use a fork to dip truffles, tapping gently to remove excess chocolate before placing on parchment paper.
- These truffles can be made a day or two in advance and stored in an airtight container in the refrigerator.
- To freeze without coating: Flash-freeze balls on a baking sheet until solid, then transfer to a freezer bag for up to 3 months.
- To freeze with coating: Ensure chocolate is fully set, then transfer to an airtight container or freezer bag with parchment between layers for up to 3 months.
Instructions:
For the Oreo Truffles:
- Line a large baking tray with parchment paper.
- Add 36 whole Oreo cookies to a food processor. Pulse a few times, then process until they become fine crumbs.
- Add 8 ounces of cubed, room-temperature cream cheese to the food processor. Process until the mixture is well-combined and smooth, scraping down the sides as needed.
- Using a 1-tablespoon scoop, measure and roll the mixture into uniform balls. Place them on the prepared baking tray.
- Freeze the truffle balls for 30 minutes or refrigerate for 2 hours until firm.
To Decorate:
- Once the truffles are chilled, melt 16 ounces of vanilla almond bark or white candy melting wafers according to package directions. Ensure the coating is melted and smooth, but not too hot.
- Dip each chilled truffle into the melted candy coating using a fork. Let excess coating drip off, then place the truffle back on the lined baking tray to set.
- To add sprinkles: Immediately after dipping each truffle, sprinkle with red, white, and blue sprinkles before the coating sets.
- To add red and blue drizzle: Wait until the white coating on the truffles has fully set. Melt the additional 4 ounces of almond bark or melting wafers. Divide the melted candy between two small bowls. Add red gel food coloring to one bowl and blue gel food coloring to the other, mixing until desired colors are achieved.
- Transfer each colored chocolate into its own small zip-top plastic bag. Snip a tiny corner off each bag and decoratively drizzle over the set truffles. Allow the drizzles to set completely before serving.
- Once all coatings and decorations are set, store the truffles in an airtight container, layered with parchment paper, in the refrigerator for up to 2 weeks.
Nutrition Information:
Serving: 1 Oreo truffle | Calories: 216 cal | Carbohydrates: 26g | Protein: 1g | Fat: 12g | Saturated Fat: 8g | Polyunsaturated Fat: 1g | Monounsaturated Fat: 2g | Trans Fat: 0.01g | Cholesterol: 8mg | Sodium: 91mg | Potassium: 47mg | Fiber: 0.4g | Sugar: 21g | Vitamin A: 109IU | Calcium: 11mg | Iron: 2mg
The recipes on this blog are tested with a conventional gas oven and gas stovetop. It’s important to note that some ovens, especially as they age, can cook and bake inconsistently. Using an inexpensive oven thermometer can assure you that your oven is truly heating to the proper temperature. If you use a toaster oven or countertop oven, please keep in mind that they may not distribute heat the same as a conventional full sized oven and you may need to adjust your cooking/baking times. In the case of recipes made with a pressure cooker, air fryer, slow cooker, or other appliance, a link to the appliances we use is listed within each respective recipe. For baking recipes where measurements are given by weight, please note that results may not be the same if cups are used instead, and we can’t guarantee success with that method.
