Easy & Delicious Strawberry Slab Pie: The Ultimate Summer Dessert for a Crowd
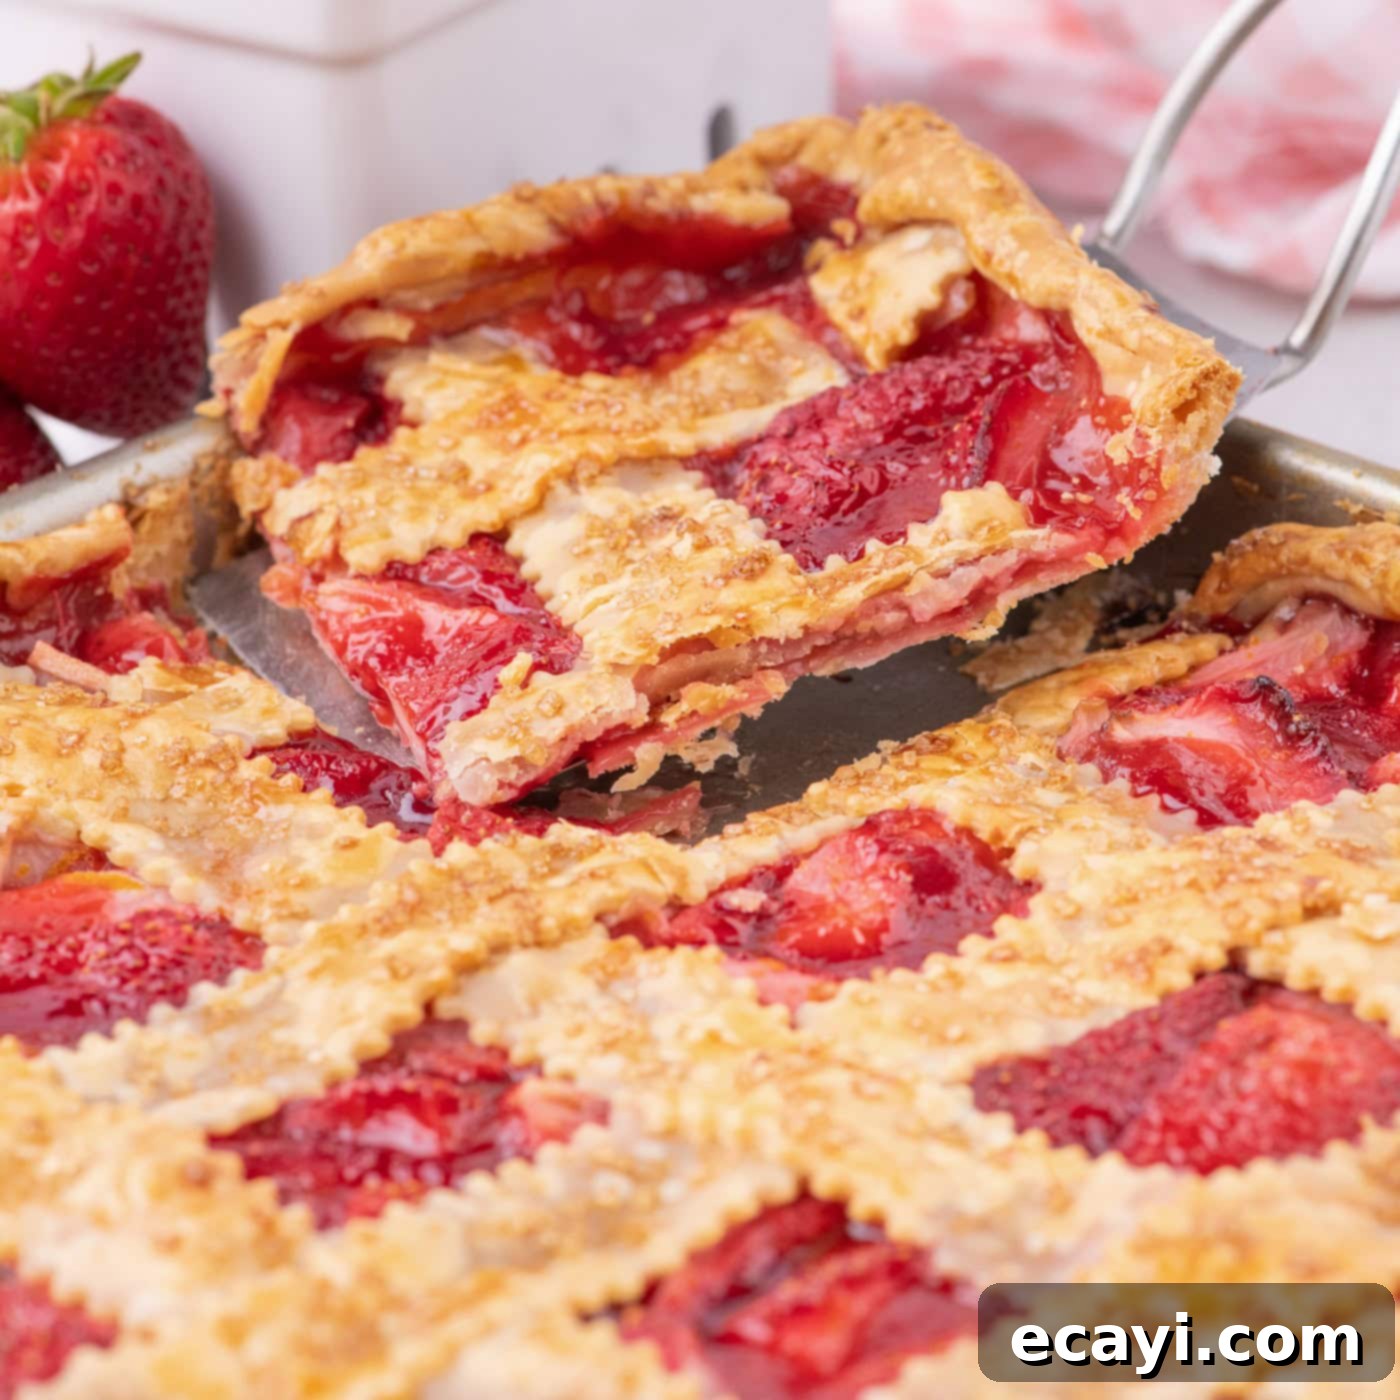
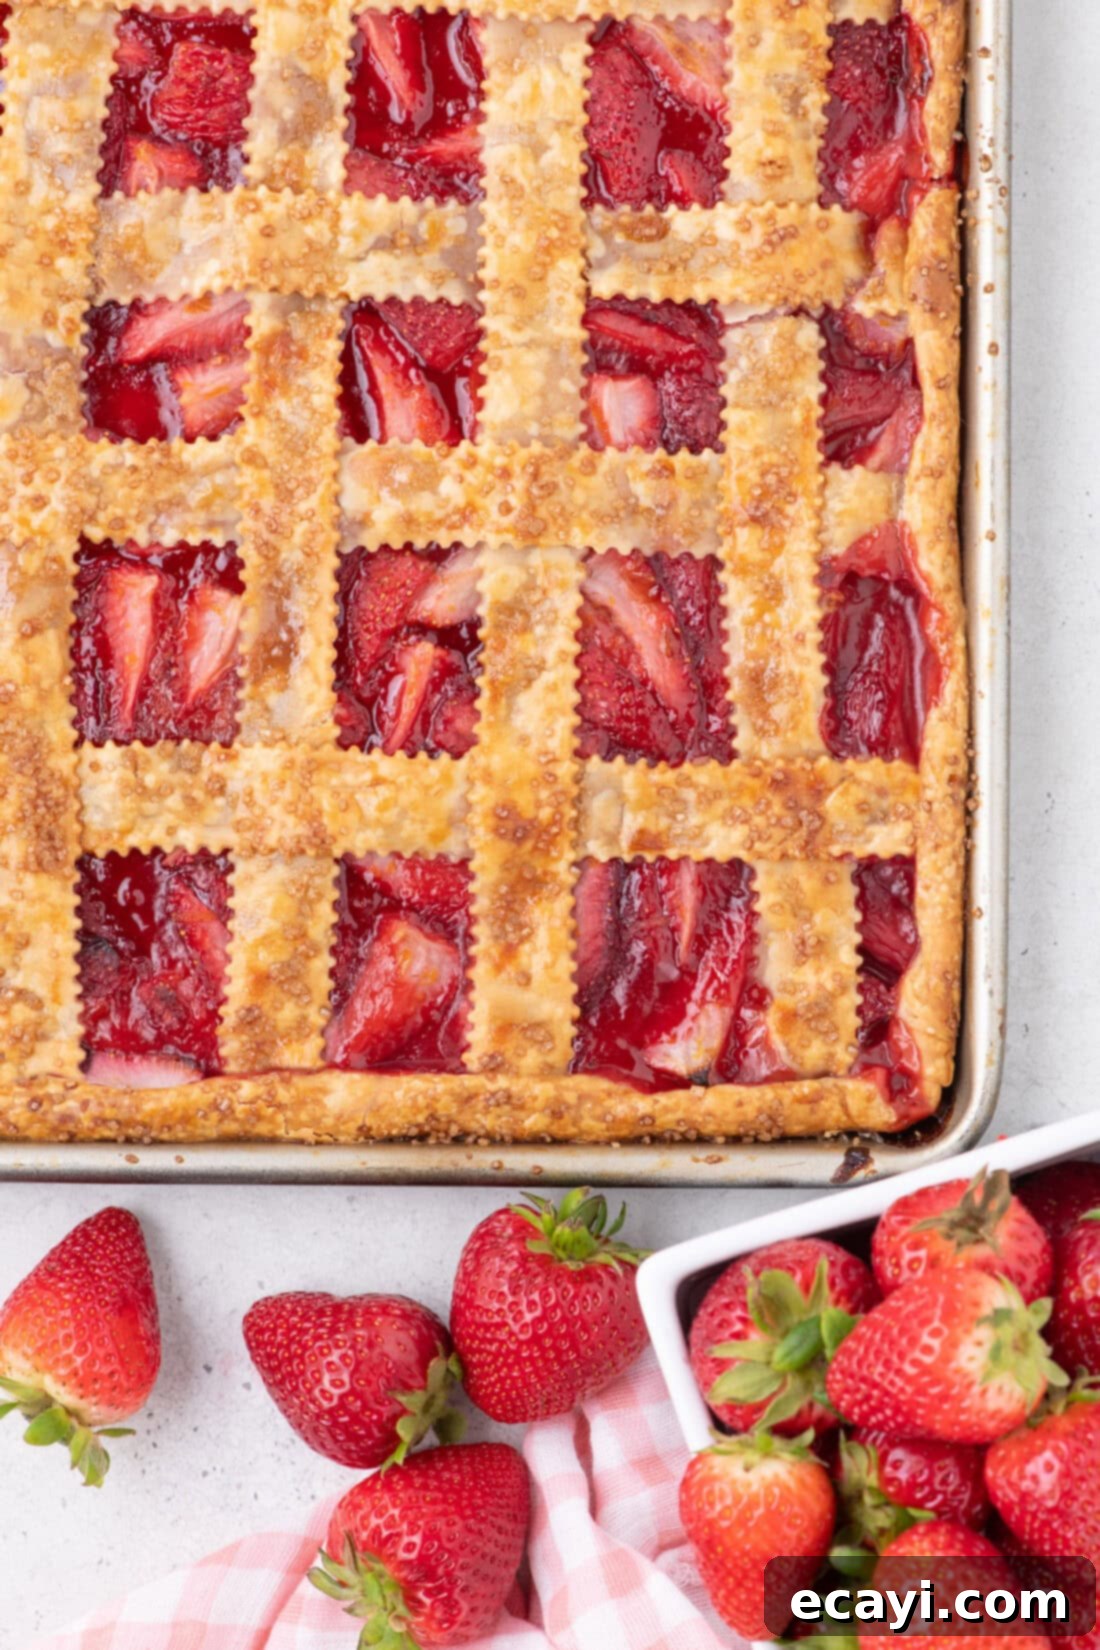
Prepare to impress with this stunning strawberry slab pie, a quintessential summer dessert that’s as easy to make as it is delightful to eat. Imagine a vibrant, fresh strawberry filling peeking through a beautifully woven, buttery, and flaky lattice top. This recipe simplifies the baking process by utilizing convenient premade pie crusts, making it the perfect choice for feeding a large gathering without spending hours in the kitchen.
Why This Strawberry Slab Pie Recipe is a Must-Try
Every bite of this strawberry slab pie delivers a burst of summer flavor, making it an irresistible addition to any backyard barbecue, picnic, or family get-together. You’ll adore the delicate, flaky texture of the golden-brown crust, which perfectly complements the sweet and juicy fresh strawberries. It’s a dessert that feels both fresh and light, boasting an ideal strawberry-to-crust ratio that satisfies without being overly heavy.
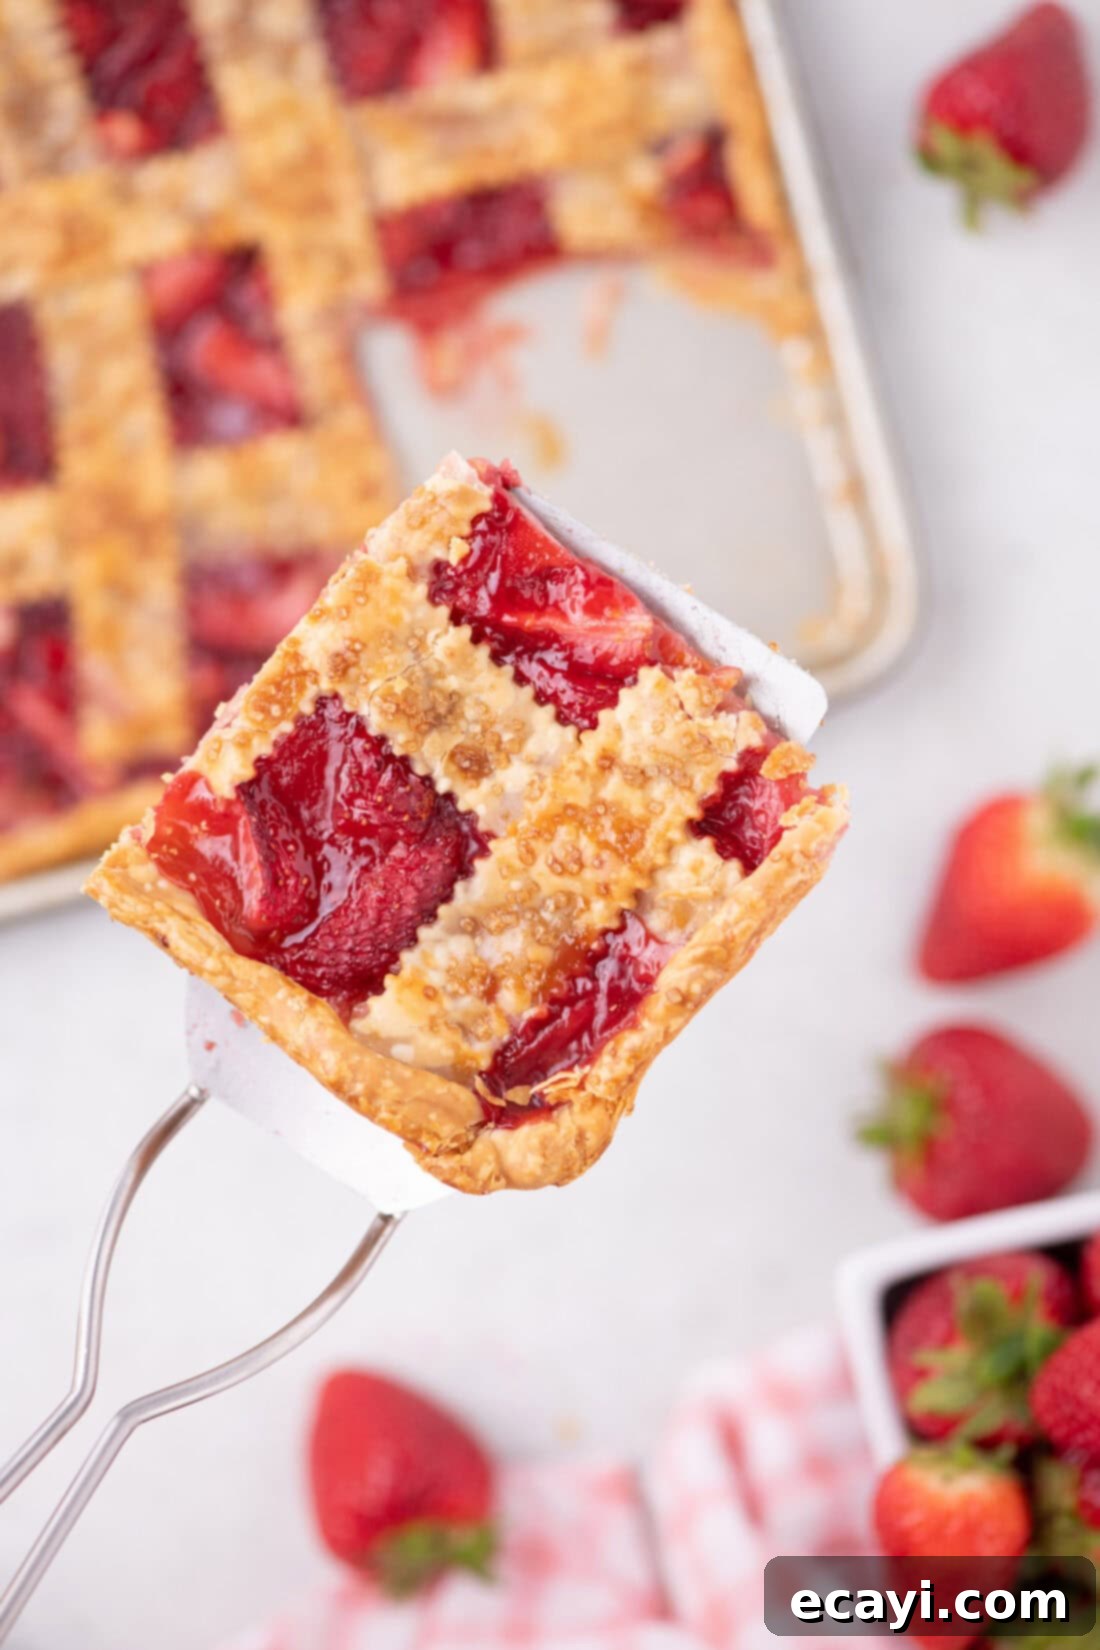
Slab pies are a fantastic alternative to traditional round pies, especially when you need to serve a larger group. They are incredibly easy to assemble, thanks to their rectangular shape that fits perfectly into a jelly roll pan. This design means you can effortlessly slice them into neat squares, allowing you to serve many people efficiently. Unlike preparing multiple individual pies, a single slab pie dramatically cuts down on preparation and baking time, leaving you more time to enjoy your guests.
Our strawberry slab pie, much like our popular cherry slab pie, has become a go-to summer dessert. Its convenience is unmatched, especially when using simple, accessible ingredients like premade pie crusts. This eliminates the need for extensive dough preparation, simplifying the baking process considerably. The generous size of a slab pie also ensures there’s plenty to go around, making it a stress-free dessert solution for entertaining.
Key Ingredients for Your Delicious Strawberry Slab Pie
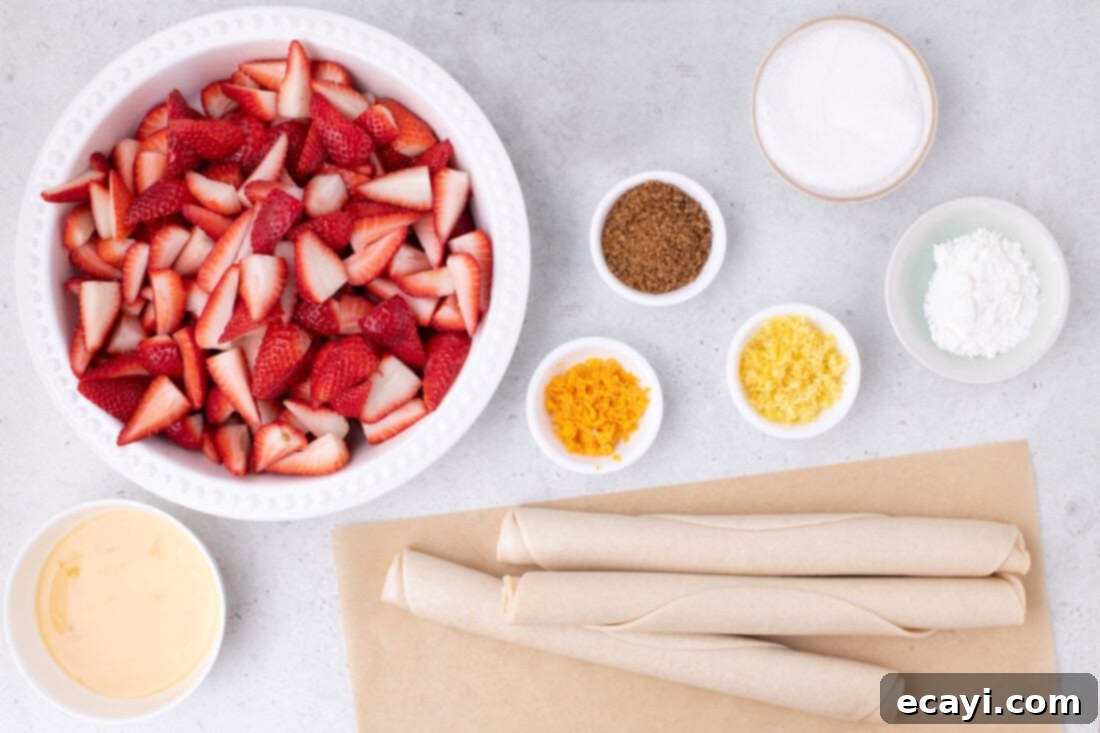
Crafting this delightful strawberry slab pie requires a handful of fresh, simple ingredients that come together to create an unforgettable flavor. While the full list of measurements, ingredients, and detailed instructions can be found in the printable recipe card at the end of this post, let’s highlight some of the stars of this recipe.
Ingredient Spotlight & Expert Substitution Tips
Understanding your ingredients and knowing when to make substitutions can elevate your baking experience and ensure perfect results every time.
STRAWBERRIES – For an truly exceptional strawberry slab pie, we highly recommend using fresh, ripe strawberries. Their vibrant flavor and natural sweetness are unmatched. A crucial tip: smaller, freshly picked strawberries tend to release less juice compared to larger, store-bought varieties. If you’re fortunate enough to be using hand-picked strawberries from a local farm or your garden, you can reduce the amount of cornstarch in the filling to 3 tablespoons. This adjustment helps prevent an overly thick or gummy filling, maintaining that perfect luscious texture. When selecting strawberries, look for bright red, firm berries with green caps.
PIE CRUST – To keep this recipe super convenient and accessible, we’ve opted for premade pie crusts. This choice significantly cuts down on prep time, allowing you to enjoy your delicious slab pie sooner. However, if you enjoy the process of making dough from scratch, feel free to use your favorite homemade pie crust recipe. When working with premade crusts, ensure they are thoroughly chilled to prevent sticking and maintain their flaky texture during handling. For homemade crusts, remember that cold butter and minimal handling are key to achieving that coveted flakiness.
LATTICE TOP – The lattice top is undeniably beautiful and adds a touch of rustic elegance to this slab pie. While it might look intricate, it’s a rewarding technique to master. If you find the idea of creating a lattice intimidating, or if you’re short on time, don’t worry! You can easily cover the pie with a regular, solid top crust. Just be sure to cut several slits into the top of the crust before baking. These vents are essential for allowing steam to escape during the baking process, preventing the crust from puffing up and ensuring an evenly baked pie with a perfectly set filling.
Step-by-Step Guide: How to Make Strawberry Slab Pie
These step-by-step photos and detailed instructions are designed to help you visualize each stage of making this delectable strawberry slab pie. For a quick reference, you can always Jump to Recipe to get the printable version of this recipe, complete with precise measurements and instructions at the bottom of the page.
- Preheat your oven to 375°F (190°C). Ensuring your oven is at the correct temperature from the start is crucial for proper baking and achieving that beautiful golden-brown crust.
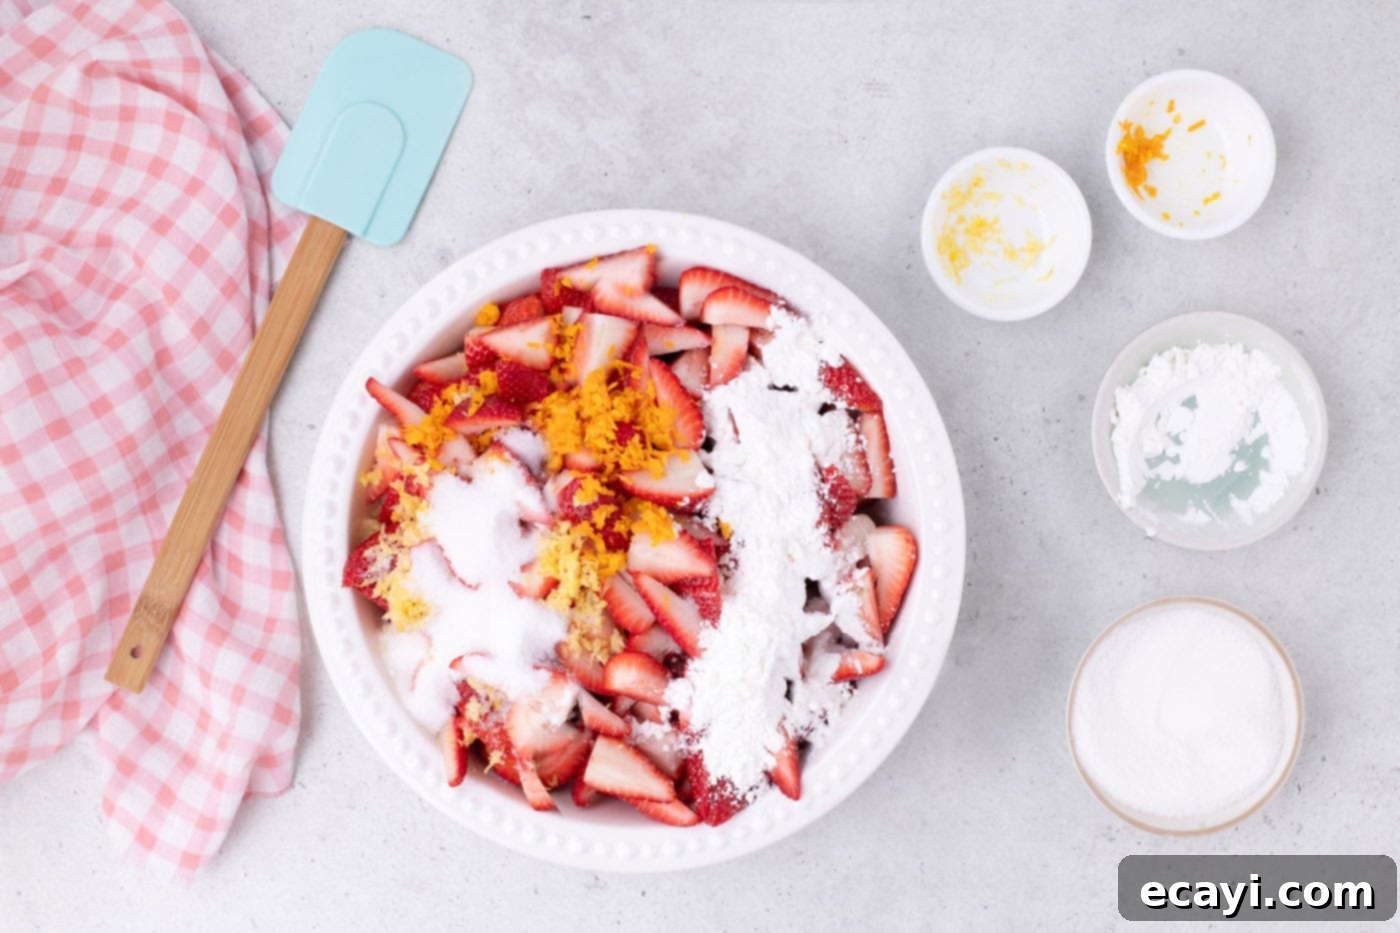
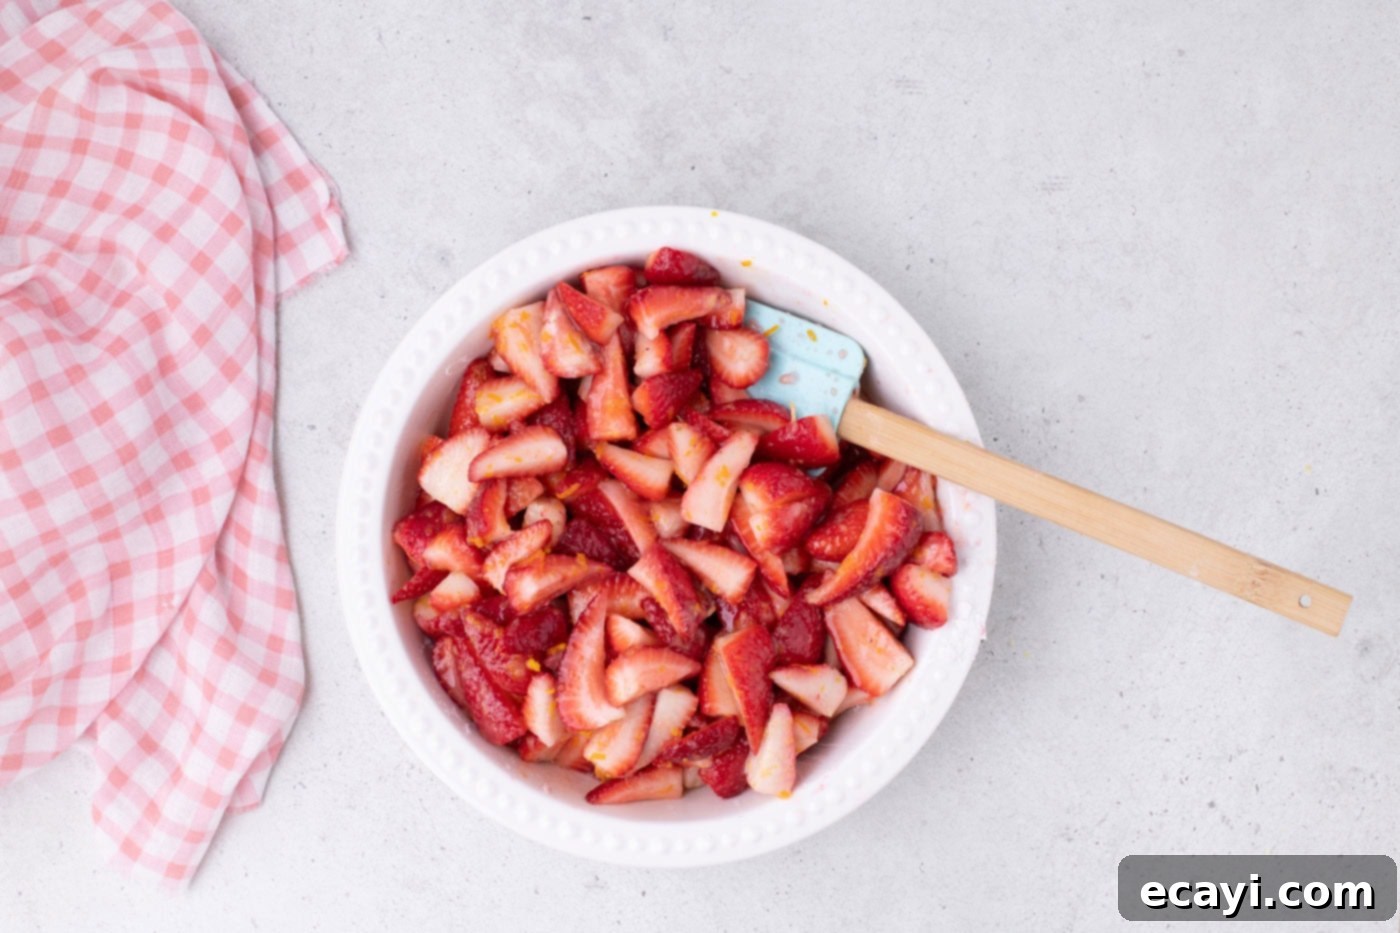
- In a spacious medium-sized bowl, combine your hulled and quartered strawberries with the granulated sugar, cornstarch, and finely grated orange and lemon zest. Gently stir these ingredients together using a soft silicone spatula until everything is thoroughly combined. The cornstarch acts as a thickener, preventing a watery filling, while the citrus zests brighten the strawberry flavor. Allow the strawberries to macerate and release their juices while you prepare the pie crust. This resting period is essential for developing the rich flavor of the filling.


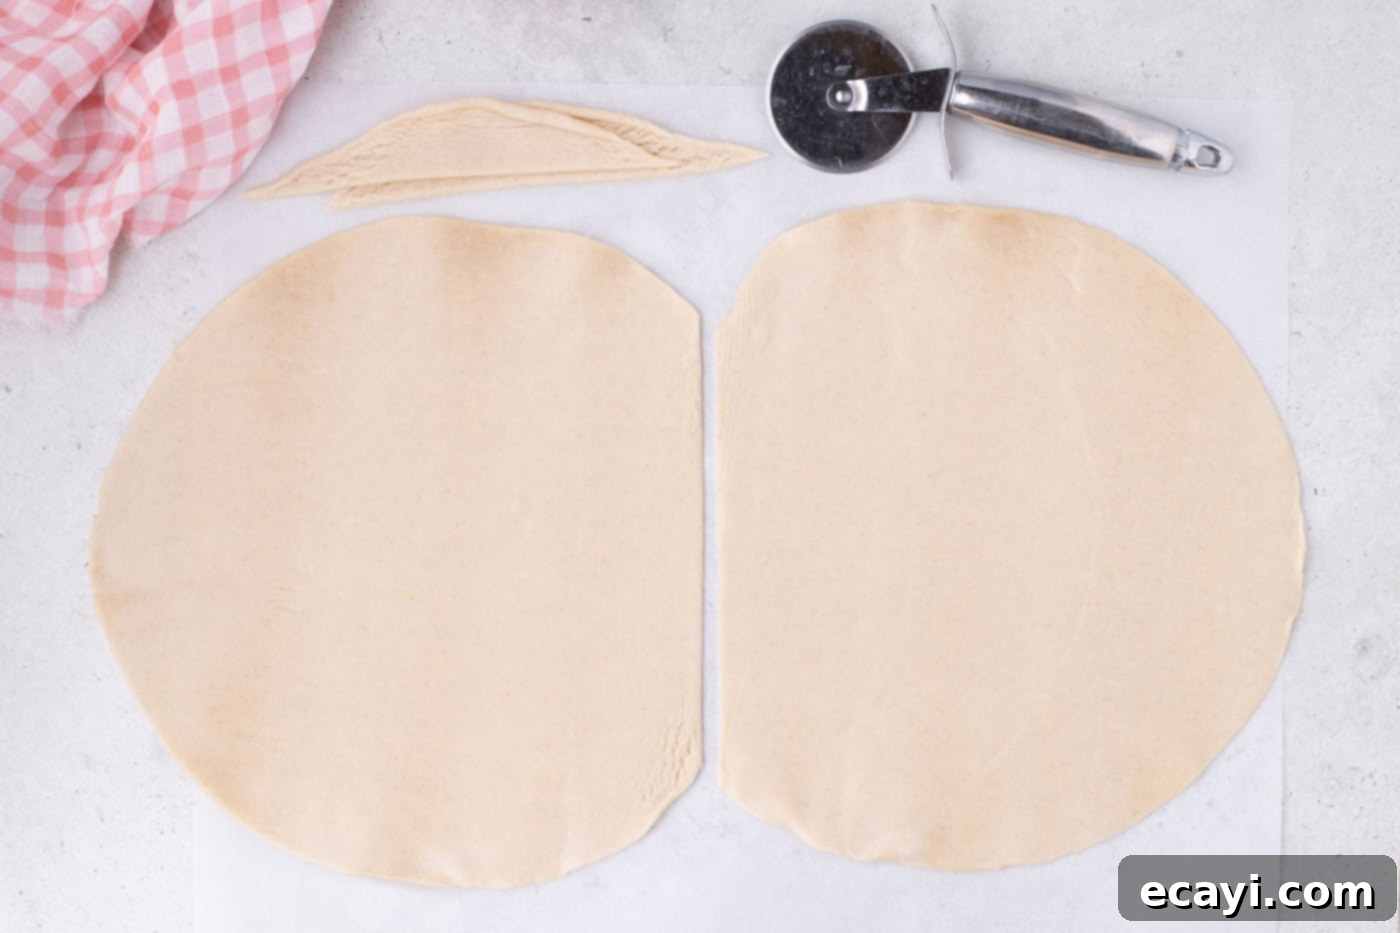
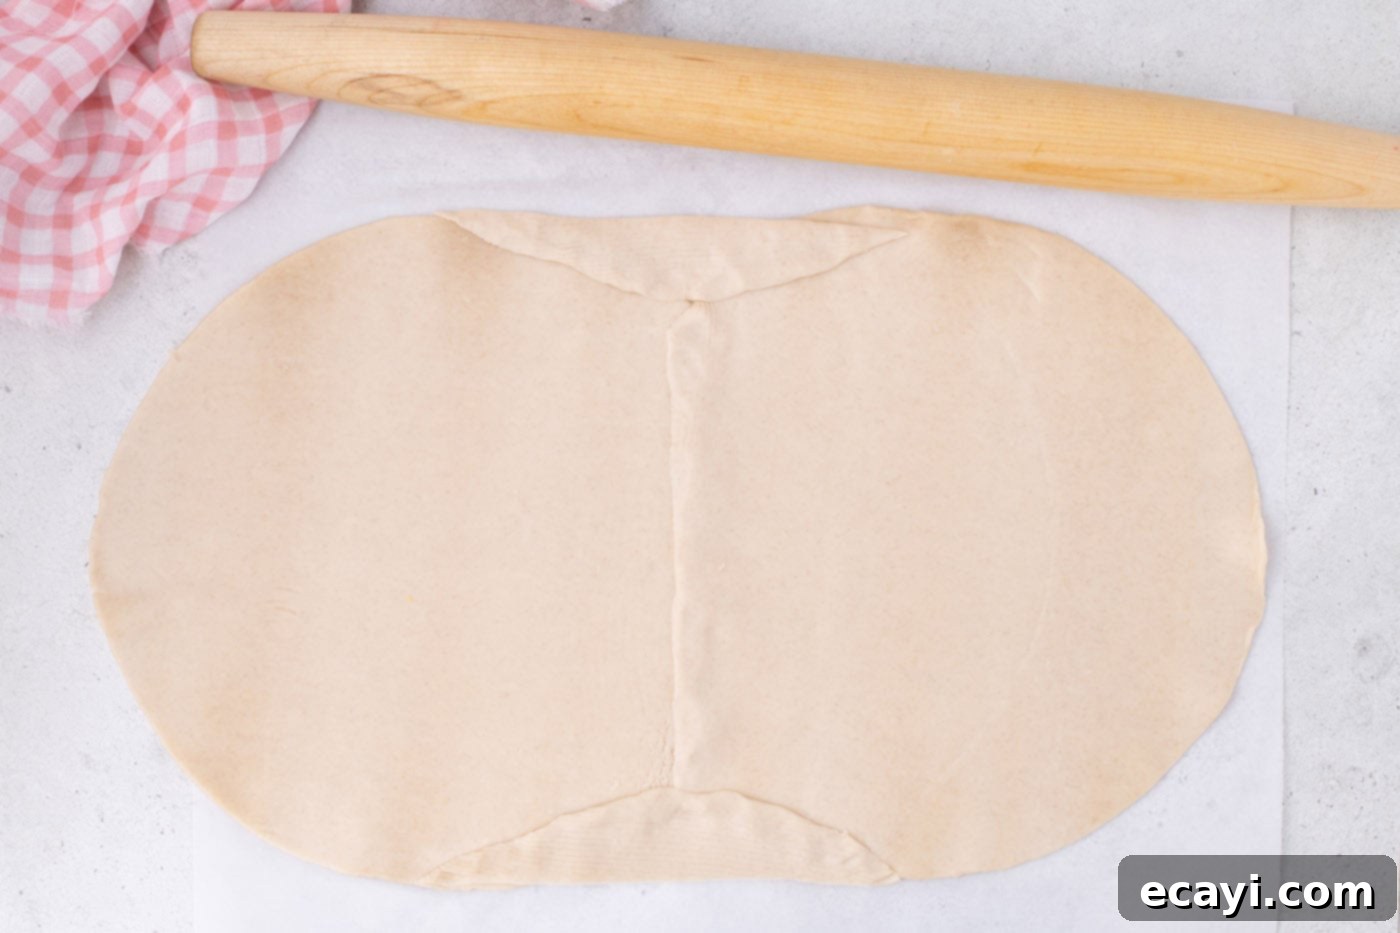
- Unroll two sheets of your premade pie crusts. Carefully lay them side by side on a clean, parchment-lined surface. This parchment paper will make transferring the dough much easier. Trim approximately 1 1/2 inches from the side of each pie crust and set these scraps aside; they will be used to help form the rectangular base. Using premade crusts simplifies this step immensely.

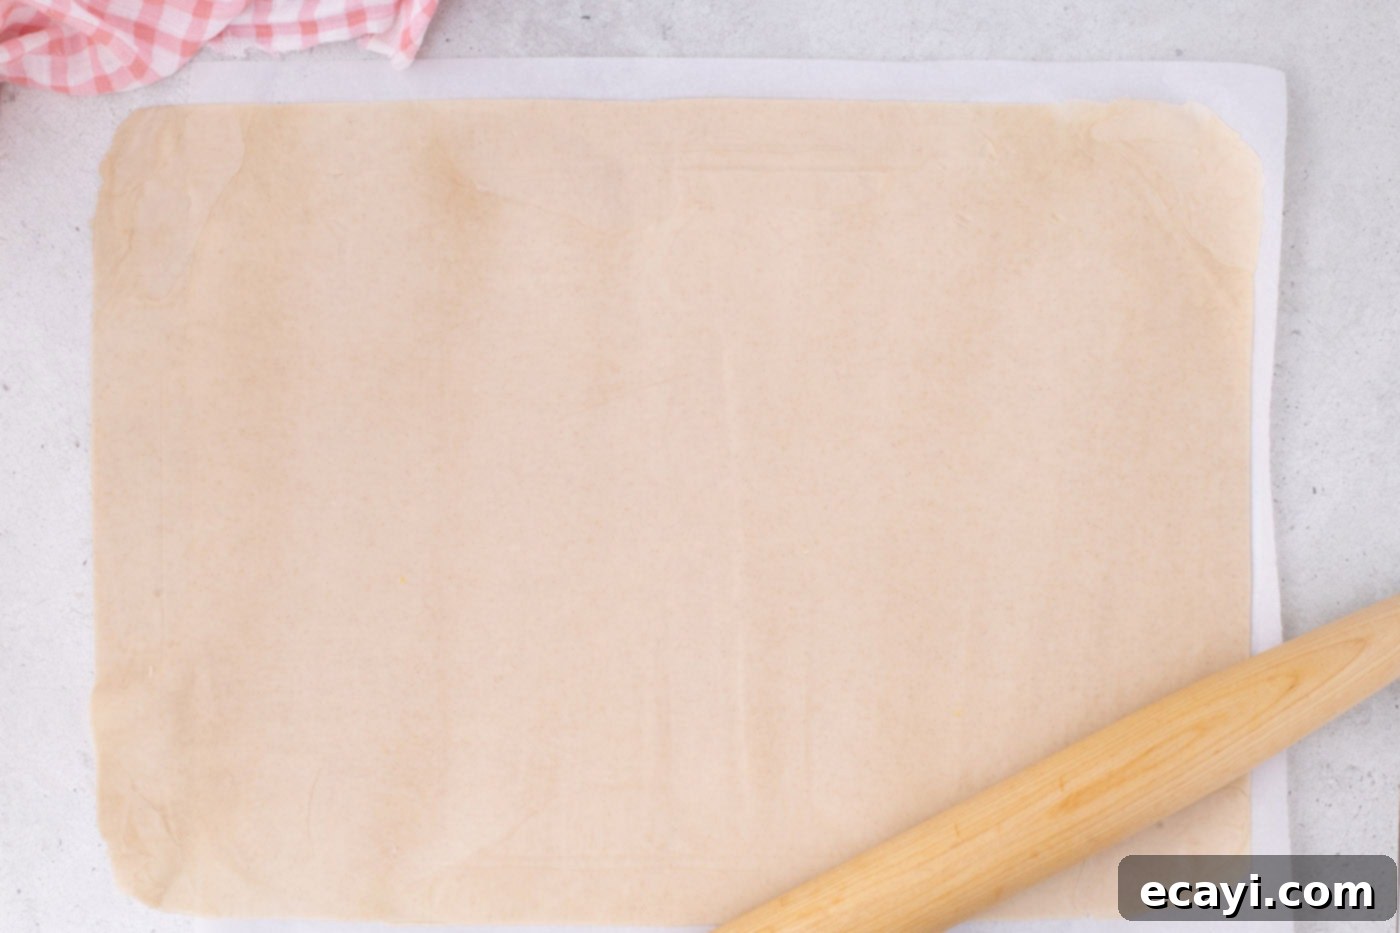
- To form a single, large rectangular base for your slab pie, slightly overlap the cut edges of the two pie crusts. Gently press and seal them together. Then, take the reserved scraps and strategically place them along the top and bottom gaps where the two circles meet, creating a more uniform rectangular shape. Use a rolling pin to carefully roll the dough out until it is approximately 1 ½ to 2 inches larger on all sides than your jelly roll pan. This extra margin is crucial for creating the crimped edges of your pie.


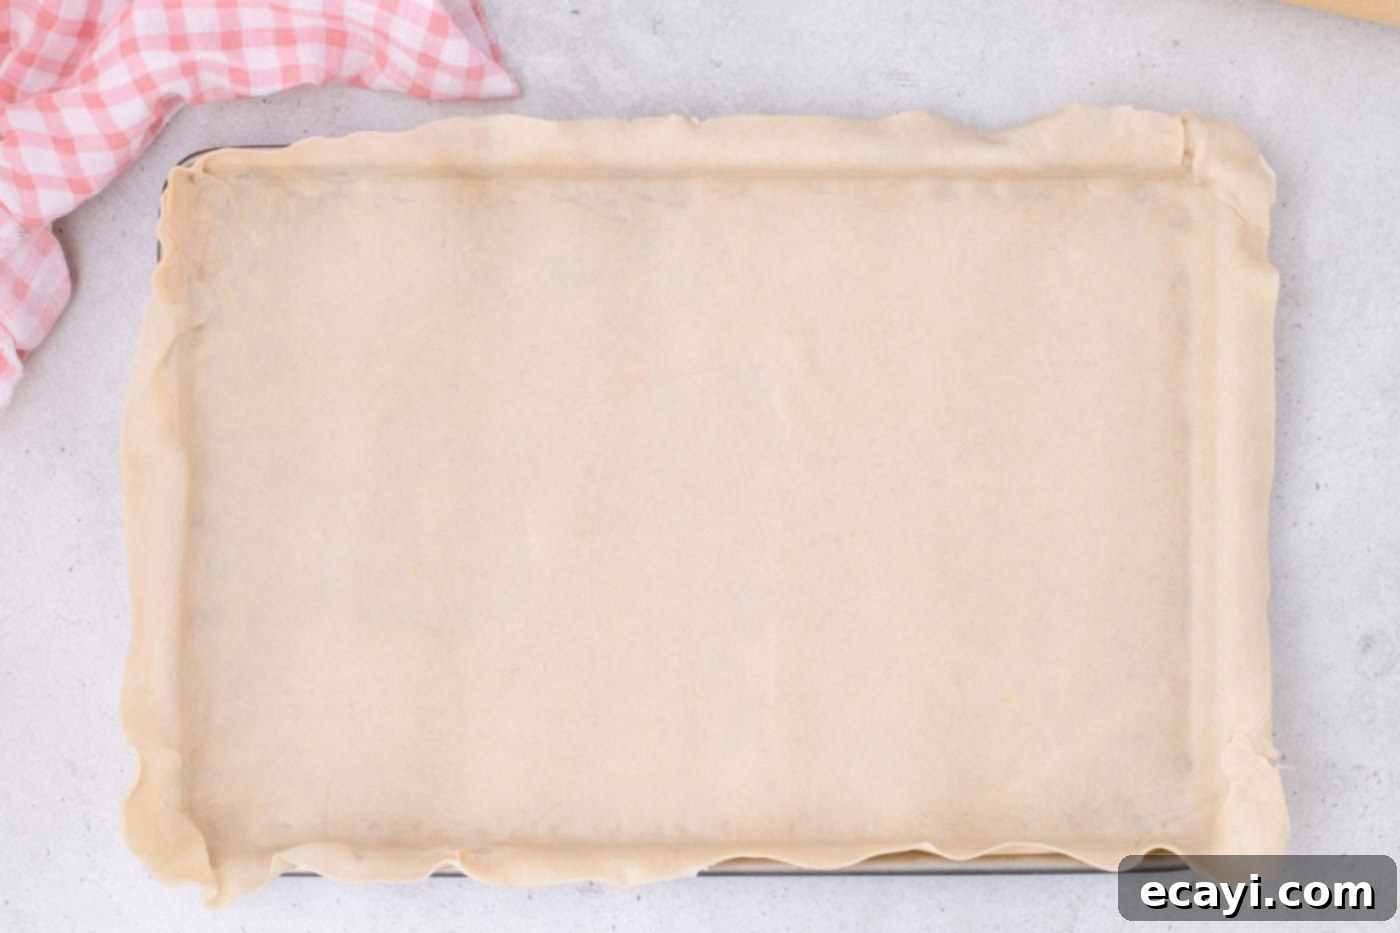
- Carefully drape the enlarged pie crust over your rolling pin. This technique helps you lift and transfer the delicate dough without tearing it. Gently unroll and place the crust into an ungreased 10×15-inch jelly roll pan. Once in the pan, take your time to carefully press the crust into all the corners and along the sides, ensuring there are no gaps or air pockets. This forms the perfect vessel for your delicious strawberry filling.

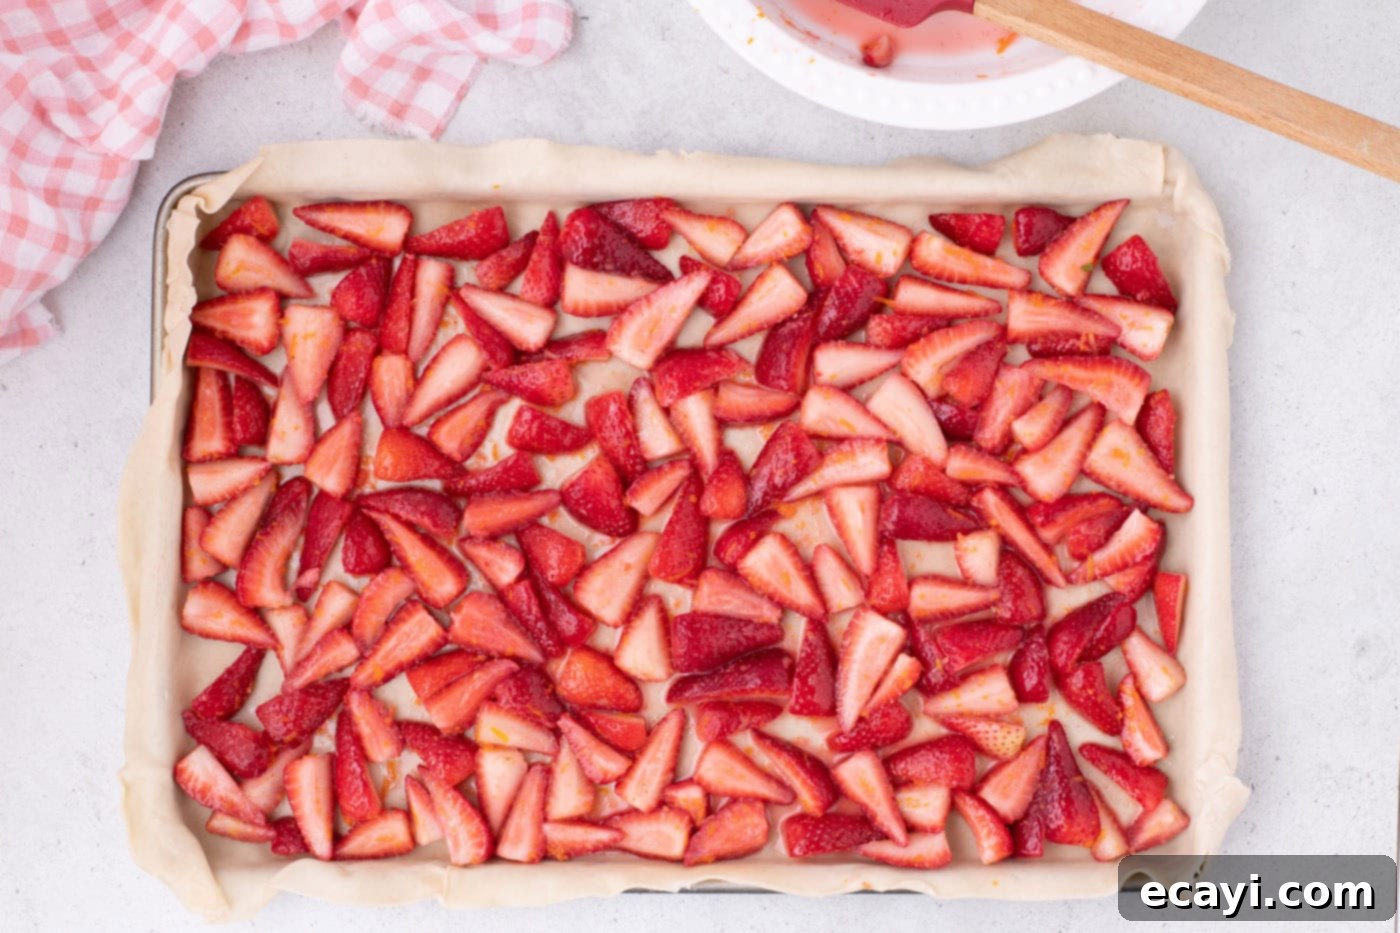
- Give your strawberry mixture one final gentle stir to ensure the sugar and cornstarch are evenly distributed, and to incorporate any accumulated juices. Evenly spread the strawberries (along with their flavorful juices) into the prepared pie crust. Distribute them from edge to edge for consistent filling in every slice.

- Place the entire pan with the filled pie crust into the refrigerator. This brief chilling period is important: it helps firm up the crust and prevents it from becoming too warm and difficult to work with while you prepare the lattice strips for the top.
Mastering the Lattice Weave for a Beautiful Top
Creating a beautiful lattice top might seem daunting, but with these clear steps, you’ll achieve a professional-looking pie every time.
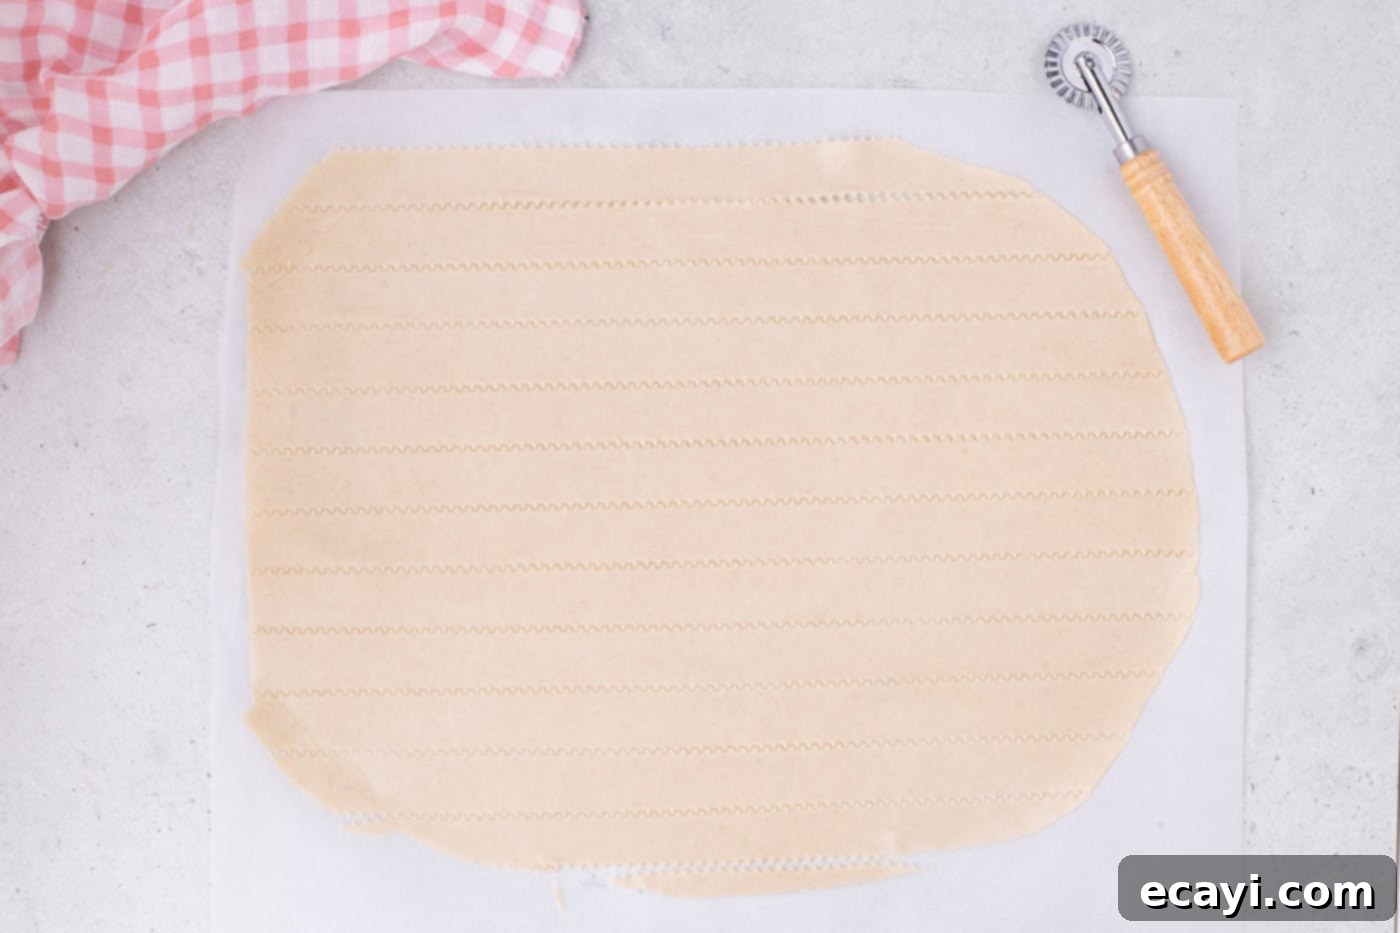
- Unroll a third sheet of pie crust and place it on your parchment-lined surface. Using a rolling pin, gently roll it into a rectangular shape, aiming for approximately 17 x 12 inches. Precision here will lead to more uniform strips. Next, using a pizza cutter (or a sharp pastry cutter) and a metal ruler for straight lines, cut 12 evenly sized 17-inch horizontal strips, each about 1 inch wide. From these, trim 7 of the strips to measure 12 inches in length. These varying lengths are essential for the weaving pattern.

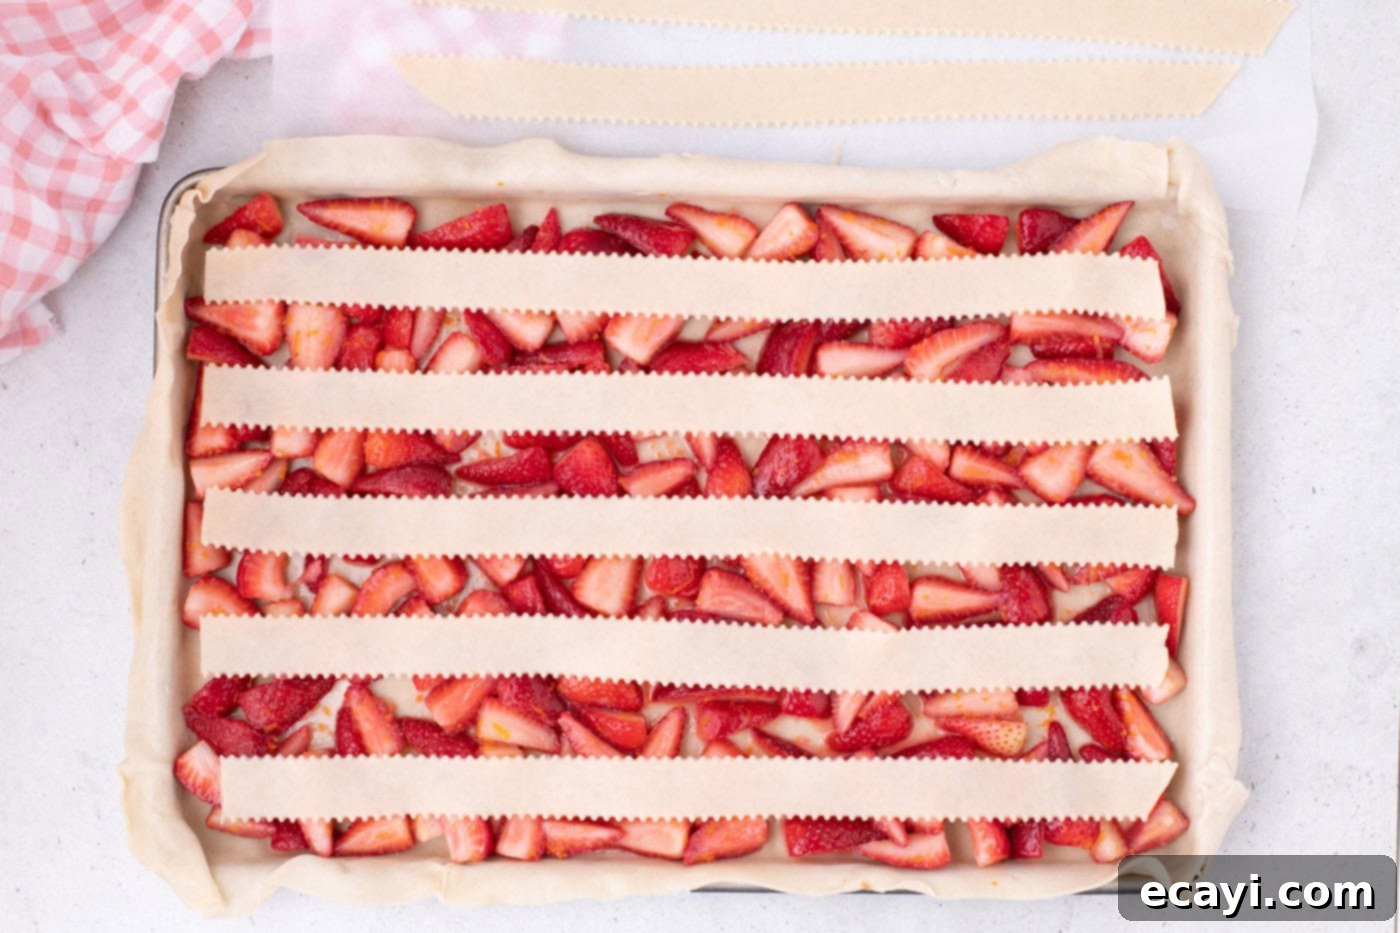
- Retrieve your chilled pie from the refrigerator. Take 5 of the longer strips (those measuring 17 inches) and carefully lay them horizontally across the strawberries. Ensure they are spaced approximately 1 inch apart, maintaining even gaps for your weave.

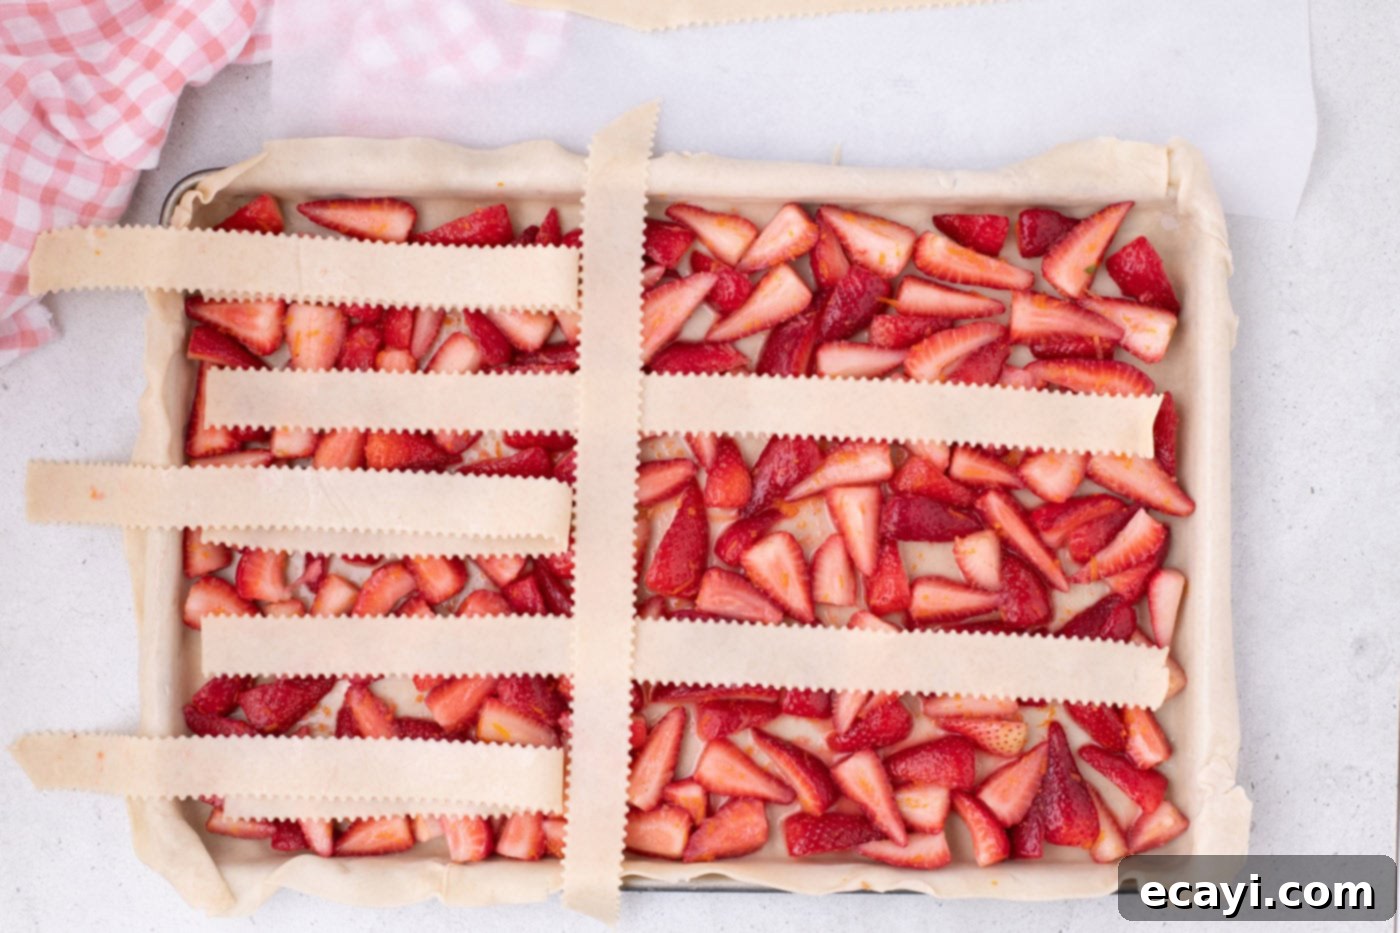
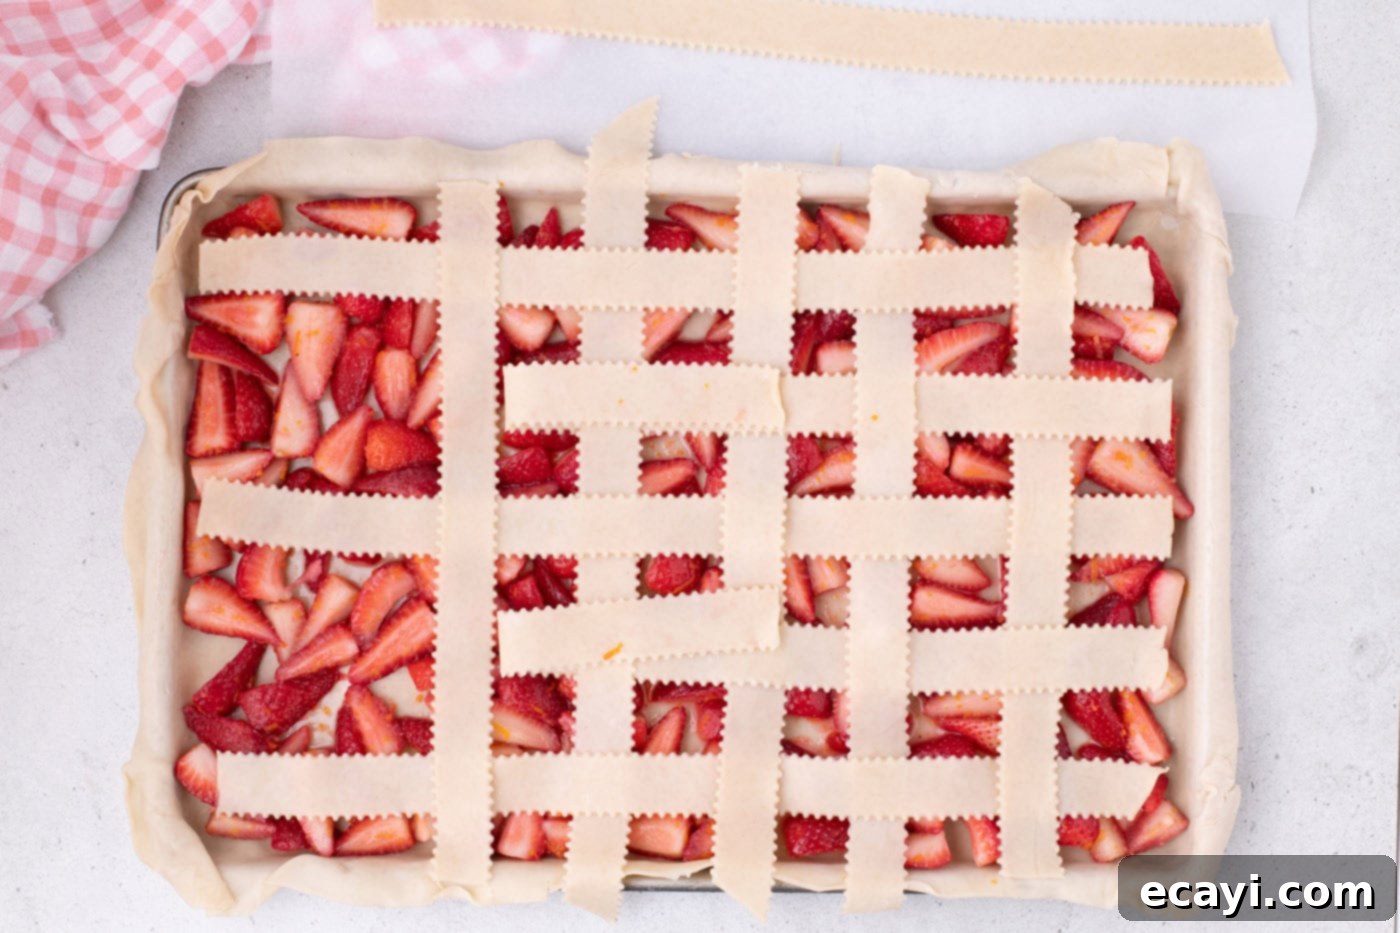
- Now, let’s begin the lattice weave. Starting from the top of the pie, gently fold every other horizontal strip (strips 1, 3, and 5) halfway back towards the left-hand side of the pan. Keep the other strips (2 and 4) flat.
- Carefully place one of the shorter strips (12 inches) 1 inch off-center, laying it perpendicularly over the flat horizontal strips. This is the start of your vertical weave.

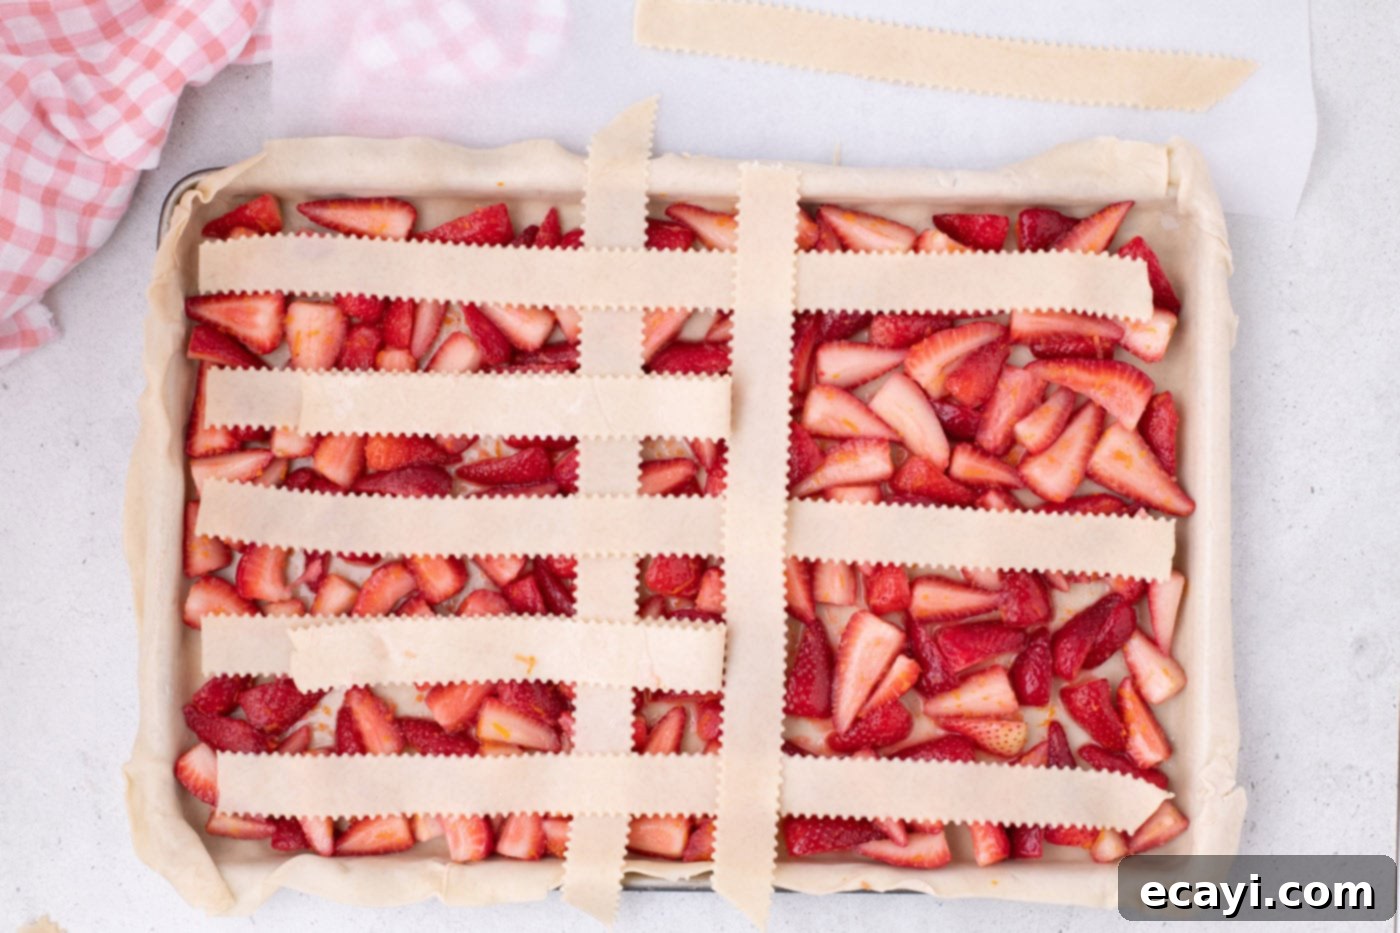
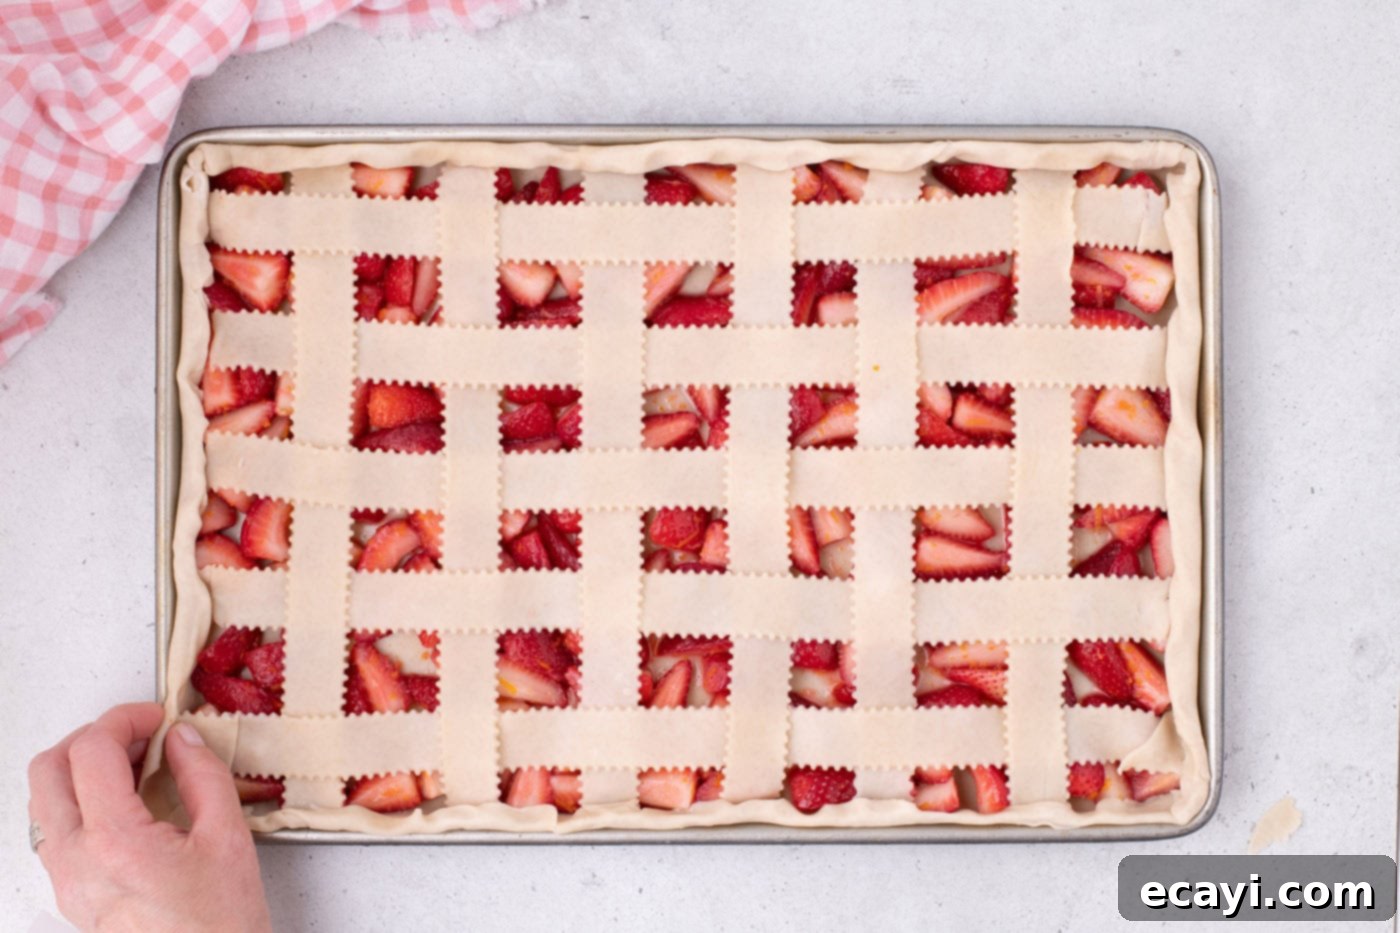
- Unfold strips 1, 3, and 5 back over the short vertical strip you just laid down. This secures the first part of your weave. To continue, fold back the alternating horizontal strips (now strips 2 and 4). Lay down a second short vertical strip, again 1 inch away from the first one. Then, unfold strips 2 and 4 back over this second vertical strip. Repeat this precise process until all your horizontal and vertical strips have been woven together, creating that beautiful crisscross pattern. Take your time to adjust strips for a neat, even look.


- Once the lattice is complete, carefully fold the bottom pie crust edges up and over the lattice strips. Gently pinch them together firmly to form a sealed, decorative crust edge. This not only looks appealing but also helps to contain the filling during baking.

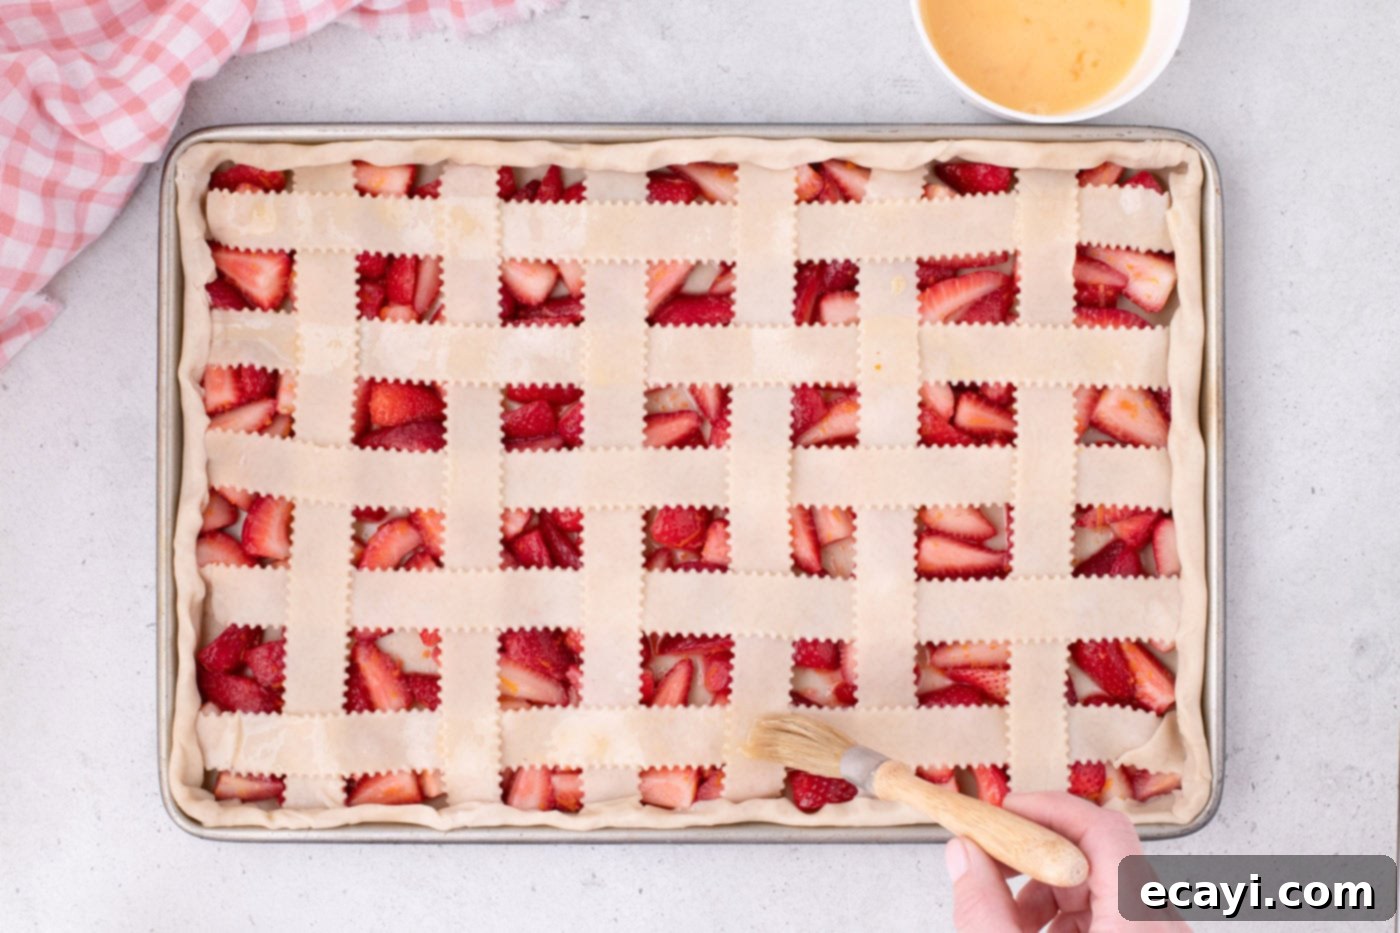
- In a small bowl, whisk together the large egg with 1 tablespoon of water to create an egg wash. Lightly brush this egg wash generously over the entire lattice top and the crimped edges of the pie crust. This step contributes to a beautiful golden-brown color and a slightly glossy finish. Finally, generously sprinkle the turbinado sugar over the egg-washed crust. The turbinado sugar adds a delightful coarse texture and a sparkling, sweet crunch.

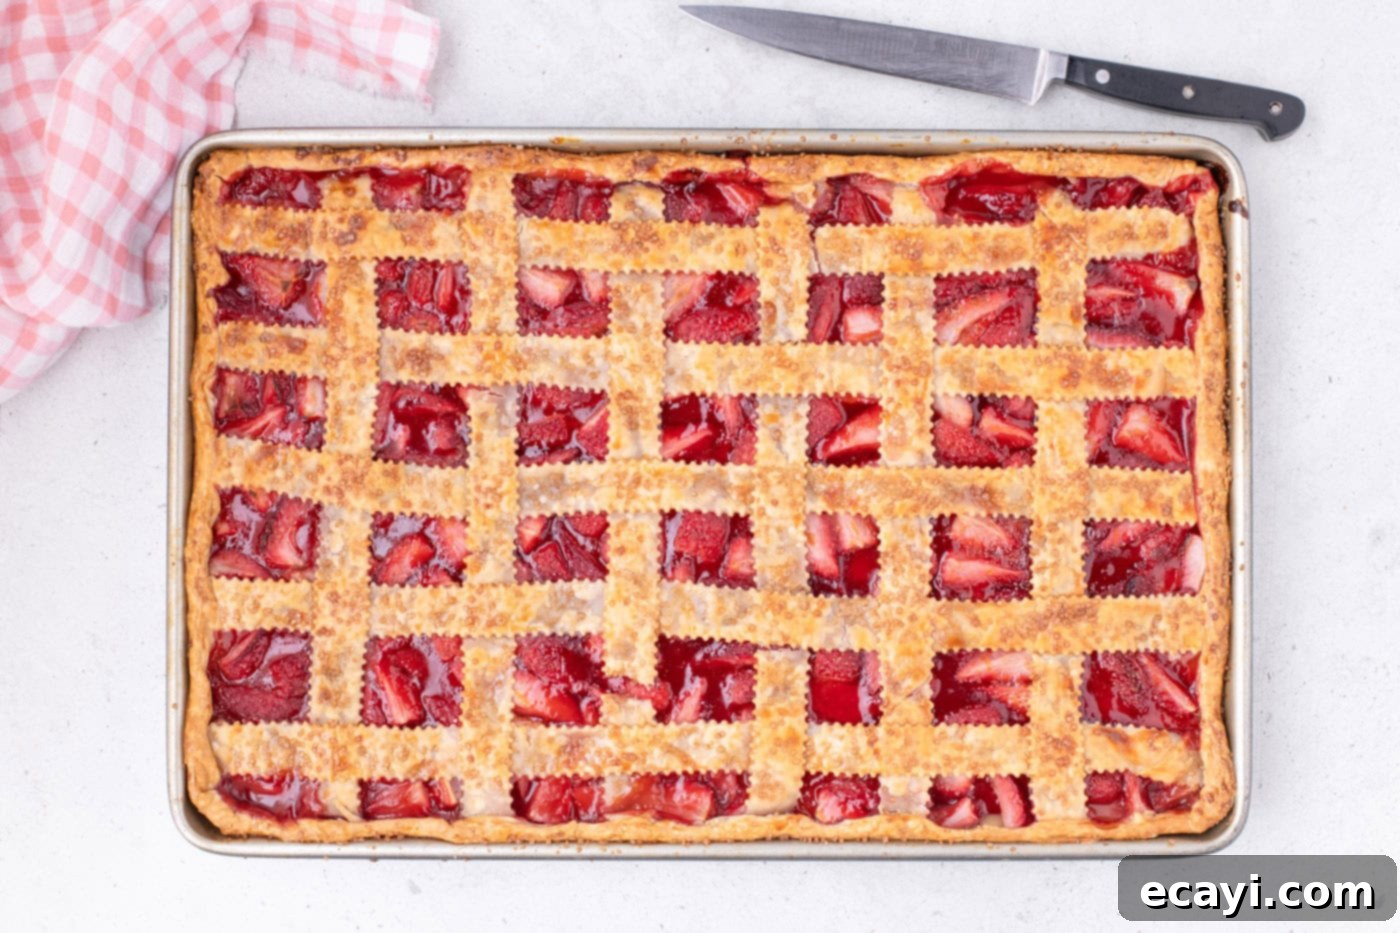
- Bake the strawberry slab pie for 40-45 minutes. You’ll know it’s ready when the crust achieves a beautiful golden-brown color and the fruit filling is visibly bubbling through the lattice openings. The bubbling indicates that the filling is hot and thick enough to set properly.

- Once baked, carefully remove the pan from the oven. This next step is critical for the integrity of your pie: allow the pie to cool completely on a wire rack for at least 1-2 hours before attempting to slice and serve. Cooling allows the fruit filling to fully set, preventing a runny mess when you cut into it. Patience here is key for a perfect slice!
Frequently Asked Questions & Expert Tips for the Best Strawberry Slab Pie
Here are some common questions and invaluable tips to help you achieve strawberry slab pie perfection:
While it might be tempting to use frozen berries for convenience, it is best to stick with fresh strawberries for this recipe. Frozen berries contain significantly more liquid, which can lead to a watery filling and a soggy pie crust, even with extra cornstarch. If fresh strawberries are absolutely unavailable, and you must use frozen, ensure they are completely thawed and thoroughly drained of all excess liquid before mixing them with the other filling ingredients. You might also consider increasing the cornstarch by another half tablespoon to account for any residual moisture.
Yes, absolutely! For an even quicker preparation, you can certainly substitute fresh strawberries with canned strawberry pie filling. We recommend using about 2 cans of standard pie filling, which typically amounts to around 40 ounces. Since canned filling is already cooked and thickened, you will need to reduce the baking time significantly. Keep a close eye on your pie in the oven, aiming for a bake time closer to 30-35 minutes, or until the crust is golden brown and the filling is gently bubbling. Even with premade filling, you can still enhance the flavor by grating fresh lemon and orange zest over the filling before adding your lattice top.
You can certainly get a head start on some components! The strawberry filling mixture (strawberries, sugar, cornstarch, zest) can be prepared a day in advance and stored in an airtight container in the refrigerator. However, the full assembly of the slab pie should ideally be done and baked on the same day you plan to serve it. Assembled but unbaked pie crusts, especially with a juicy fruit filling, tend to absorb moisture from the fruit, which can result in a soggy bottom crust if not baked immediately. For the best flaky crust and fresh taste, bake on the day of serving.
To keep your leftover strawberry slab pie fresh, store it in an airtight container. It will remain delicious in the refrigerator for up to 3 days. For longer storage, you can freeze individual slices or the entire cooled pie (tightly wrapped in plastic wrap and then foil) for up to 3 months. To reheat, simply warm slices in the oven at a low temperature (around 300°F/150°C) until heated through, or enjoy chilled or at room temperature.
Expert Tip: Preventing a Soggy Bottom – A common pie concern is a soggy bottom crust. To minimize this, ensure your pie crust is chilled before adding the filling. The quick chilling step after filling helps. Additionally, ensure your oven is fully preheated to the correct temperature, as a hot oven quickly sets the crust, creating a barrier against the juicy filling. You can also lightly brush the bottom crust with a thin layer of egg white before adding the filling and baking, which creates a slight seal.
Expert Tip: Perfecting Your Lattice – For a neater lattice, work with very cold dough. If your strips become too soft and sticky, pop them back into the refrigerator for 10-15 minutes to firm up. A pastry wheel with fluted edges can also add a charming decorative touch to your strips.
Delightful Serving Suggestions for Strawberry Slab Pie
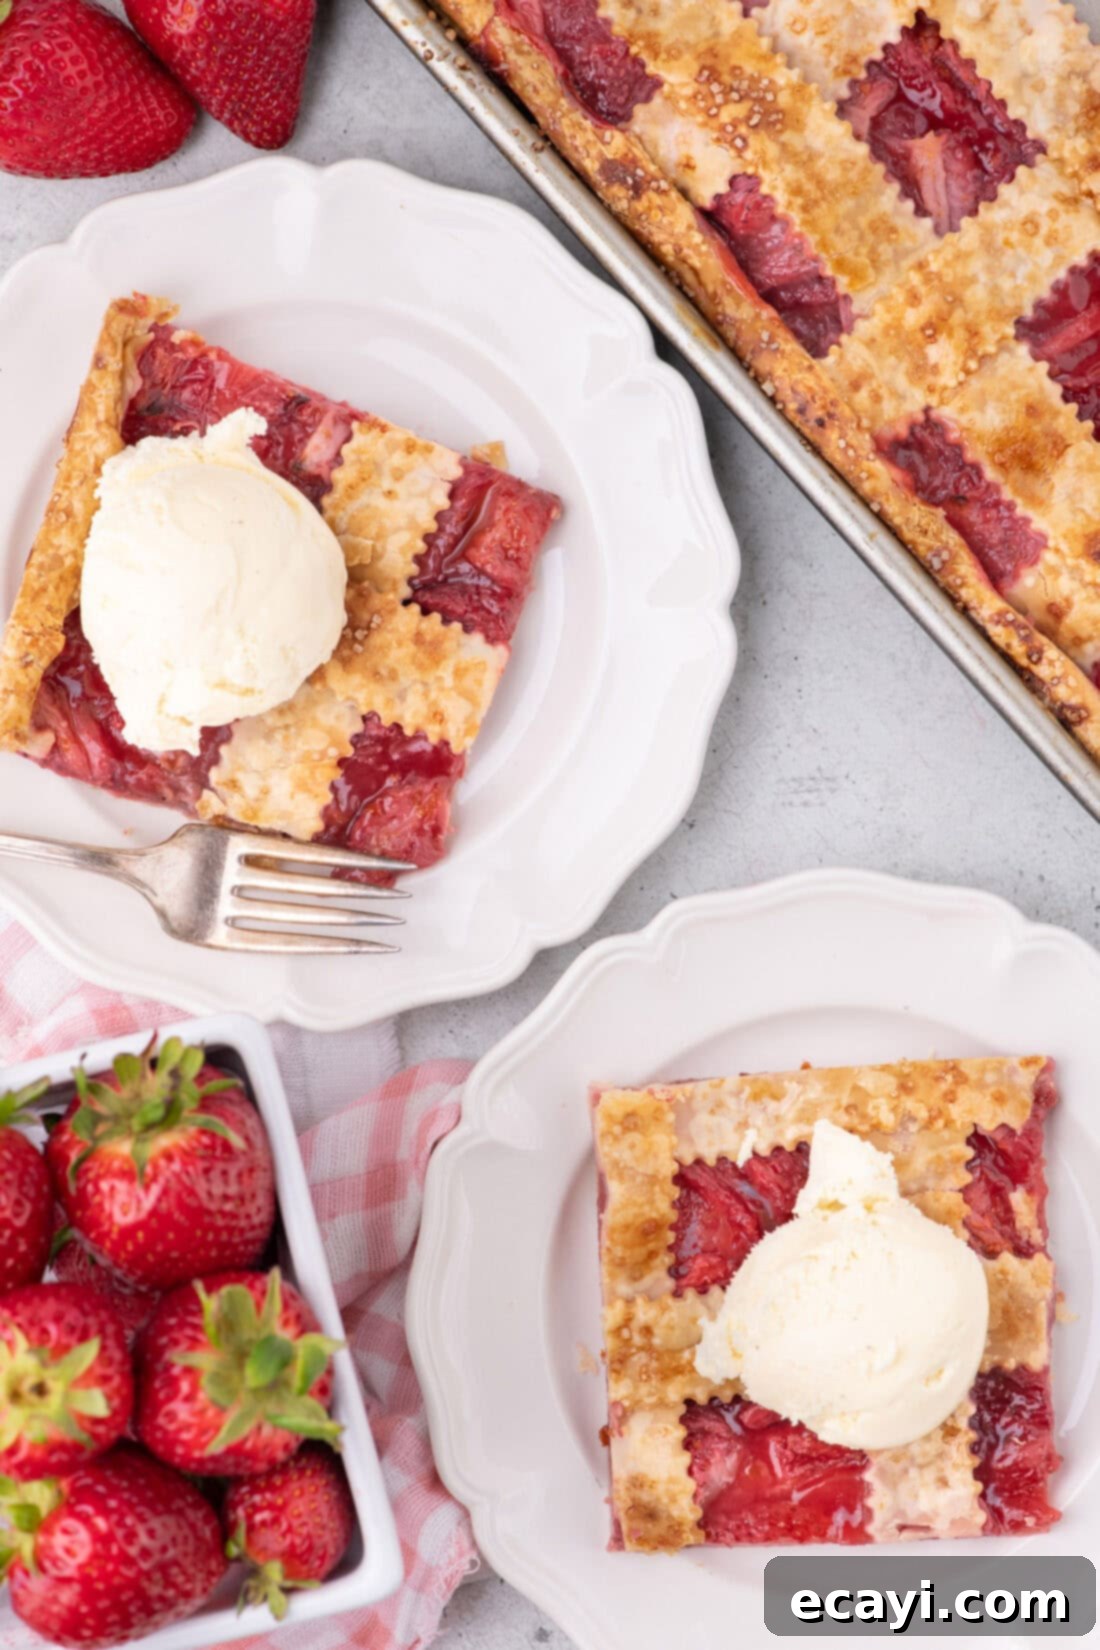
This strawberry slab pie is incredibly versatile and shines in many settings. It’s the ideal dessert for casual summer potlucks, lively barbecues, relaxed cookouts, or simply as a special treat for family dinner. For an elevated experience, serve a warm slice with a generous scoop of classic vanilla bean ice cream, allowing the cold creaminess to perfectly contrast the warm, fruity filling. Alternatively, a dollop of freshly whipped cream adds a light and airy touch that complements the strawberries beautifully. You can also sprinkle a few fresh mint leaves for a pop of color and freshness. Whether served warmed from the oven, refreshingly chilled, or simply at room temperature, this strawberry slab pie promises to be a crowd-pleaser. Enjoy every sweet, flaky, and fruity bite!
More Irresistible Related Recipes You’ll Love
If you’re a fan of our Strawberry Slab Pie, you’re in for a treat with these other delicious recipes perfect for summer entertaining:
- Cherry Slab Pie: Another crowd-pleasing slab pie featuring sweet and tangy cherries.
- Strawberry Icebox Cake: A no-bake, layered dessert that’s cool, creamy, and bursting with strawberry flavor.
- Strawberry Dream Dessert: A light, fluffy, and incredibly delightful strawberry concoction.
- Strawberry Shortcake Trifle: A beautiful and easy dessert layering cake, cream, and fresh strawberries.
- Apple Slab Pie: A comforting classic, scaled up to feed a crowd with warm apple goodness.
I love to bake and cook and share my kitchen experience with all of you! Remembering to come back each day can be tough, that’s why I offer a convenient newsletter every time a new recipe posts. Simply subscribe and start receiving your free daily recipes!
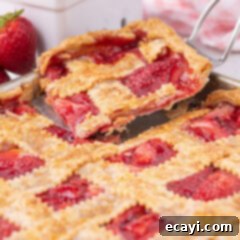
Strawberry Slab Pie
IMPORTANT – There are often Frequently Asked Questions within the blog post that you may find helpful. Simply scroll back up to read them!
Print It
Pin It
Rate It
Save ItSaved!
Ingredients
- 28.2 ounces premade pie crusts two 14.1 ounce boxes of Pillsbury pie crusts
- 2 pounds strawberries hulled and quartered, about 6 cups
- ¾ cup granulated sugar
- 4 Tablespoons cornstarch
- 1 teaspoon finely grated orange zest
- 1 teaspoon finely grated lemon zest
- 1 large egg
- 1 Tablespoon water
- 3 Tablespoons turbinado sugar
Things You’ll Need
-
Mixing bowls
-
15×10 jelly roll pan
-
Rolling pin
-
Pizza Cutter or pastry cutter
Before You Begin
- Smaller, freshly picked strawberries release less juice than store-bought strawberries. If you are using hand-picked strawberries, reduce the amount of cornstarch to 3 tablespoons.
- If you feel intimidated by creating the lattice top, you can cover the pie with a regular pie crust. Make sure you cut slits into the top of the crust to allow the steam to vent during baking.
- It is best to use fresh berries in this recipe as frozen berries hold too much liquid, which will make the whole pie soggy.
- Canned strawberry pie filling will work instead. I would suggest substituting with 2 cans of strawberry pie filling, or about 40 ounces. Because you are substituting with premade filling, you may need to reduce the bake time to closer to 30-35 minutes. Keep an eye on it in the oven, the filling should be bubbling and the crust should be golden brown. You can still top the pie filling with grated lemon and orange zest before adding the lattice top if desired.
Instructions
-
Preheat the oven to 375°F.
-
In a medium-sized bowl add the sugar, cornstarch, and zest to the strawberries and gently stir with a soft silicone spatula until well combined. Allow the strawberries to sit while you prepare the crust.
-
Unroll 2 sheets of pie crust and lay them side by side on a parchment-lined surface. Trim 1 1/2 inches from the side of each pie crust and set the scraps aside.
-
Slightly overlap the cut edges of the pie crusts and fill in the gaps along the top and bottom by placing the scraps where the two circles join to create a rectangular shape. Roll the dough out until it is 1 ½ to 2 inches larger on all sides than the jelly roll pan.
-
Drape the pie crust over the rolling pin and gently place it into an ungreased 10×15-inch jelly roll pan. Carefully press the crust into the corners to ensure there are no gaps.
-
Give the strawberries a final stir and add them (and any accumulated juices) to the pie crust.
-
Place the pan in the refrigerator while you prepare the lattice strips.
Making The Lattice Weave
-
Unroll a third sheet of pie crust and place it on a parchment-lined surface. Roll it into a rectangular shape measuring 17 x 12 inches. Using a pizza cutter (or pastry cutter) and a metal ruler, cut 12 evenly sized 17-inch horizontal strips (1 inch wide). Trim 7 of the strips to measure 12 inches.
-
Taking 5 of the long strips (those measuring 17 inches), place them horizontally across the strawberries, spacing them 1 inch apart.
-
To make the lattice weave: starting from the top, fold every other strip (strips 1, 3, and 5) halfway back towards the left-hand side of the pan.
-
Place one of the shorter strips 1 inch off-center so that it’s perpendicular to the horizontal strips.
-
Unfold strips 1, 3, and 5 over the short strip you just laid down. Continue the process by folding back the alternating strips (strips 2 and 4) and laying down a second strip 1 inch away from the first one. Unfold strips 2 and 4 over the second strip you laid down. Repeat this process until all your strips have been woven together.
-
Fold the bottom crust over the lattice strips and pinch them together to form a seal.
-
Brush the egg wash over the lattice and edges of the pie crust and generously sprinkle with the turbinado sugar.
-
Bake for 40-45 minutes, until the crust is golden brown, and the fruit is bubbling.
-
Remove the pan from the oven and let the pie cool for 1-2 hours before serving.
Expert Tips & FAQs
- Leftovers can be kept in an air-tight container for up to 3 days in the refrigerator or in the freezer for up to 3 months.
Nutrition
The recipes on this blog are tested with a conventional gas oven and gas stovetop. It’s important to note that some ovens, especially as they age, can cook and bake inconsistently. Using an inexpensive oven thermometer can assure you that your oven is truly heating to the proper temperature. If you use a toaster oven or countertop oven, please keep in mind that they may not distribute heat the same as a conventional full sized oven and you may need to adjust your cooking/baking times. In the case of recipes made with a pressure cooker, air fryer, slow cooker, or other appliance, a link to the appliances we use is listed within each respective recipe. For baking recipes where measurements are given by weight, please note that results may not be the same if cups are used instead, and we can’t guarantee success with that method.
